- VMware
- 23 October 2024 at 13:00 UTC
-

- 1/15

StarWind Virtual SAN is a storage solution available in particular in the form of a virtual appliance for VMware vSphere.
However, its deployment requires several prerequisites.
In this tutorial, you will see how to configure its prerequisites, how to deploy this StarWind Virtual SAN virtual appliance and how to configure it.
- Configure the network of your VMware ESXi hosts
- Download and deploy the StarWind Virtual SAN virtual appliance for VMware vSphere
- Download StarWind Virtual SAN for VMware vSphere
- Deploy StarWind Virtual SAN for vSphere on your 1st VMware ESXi host
- Deploy StarWind Virtual SAN for vSphere on your 2nd VMware ESXi host
- Configure automatic startup and shutdown of StarWind VMs
- Configure the 1st StarWindVSA vSphere VM
- Configure the 2nd StarWindVSA vSphere VM
- Install and configure the StarWind Management Console
- Add the 2nd StarWind server in the Management Console
- Configure StarWind storage
- Create an iSCSI disk on StarWind Virtual SAN
- Configure StarWind Virtual SAN data replication
- Create a 2nd iSCSI disk on StarWind Virtual SAN
- Configure the software iSCSI controller for VMware ESXi hosts
- Create datastores on your StarWind Virtual SAN storage
- Automatic storage rescan
- Create a VMware cluster
- Start StarWind virtual machines
1. Configure the network of your VMware ESXi hosts
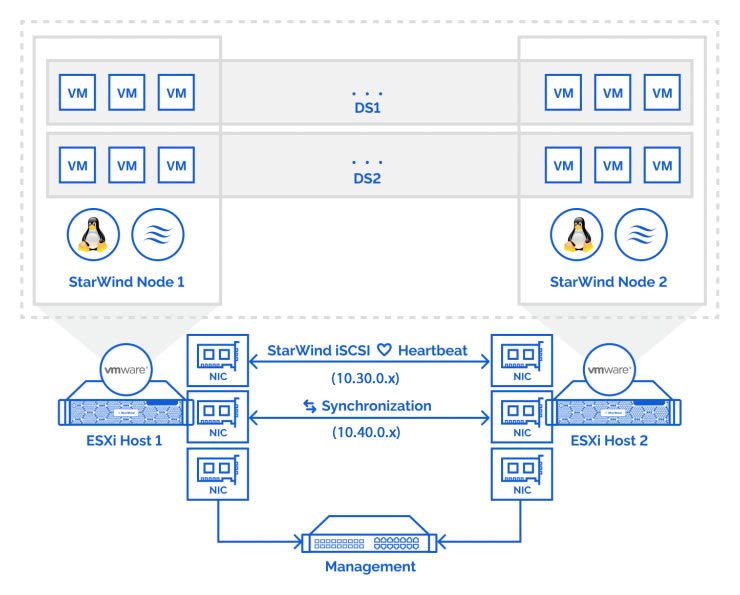
1.1. Configuration diagram for StarWind Virtual SAN solution
As you can see on the StarWind diagram (on which we have just changed the network IDs used), 2 datastores (DS1 and DS2) will be created on your StarWind Virtual SAN servers to store virtual machines.
These 2 StarWind Virtual SAN servers will be deployed on your VMware ESXi hosts and data replication will be carried out between your 2 StarWind servers to ensure the high availability of your storage (which will be accessible via the iSCSI protocol).
Before deploying your 2 StarWind Virtual SAN servers, you will need 3 different networks:
- an internal network for StarWind Virtual SAN iSCSI/Heartbeat traffic.
In our case, this is the "10.30.x.x" subnet. - an internal network for StarWind Virtual SAN synchronization traffic.
In our case, this is the "10.40.x.x" subnet. - a management network. So, generally, your company's usual network through which you will be able to access the web interface of this virtual appliance.
In our case, this will be the "VM Network" network available by default on VMware vSphere (as is also the case in the official StarWind documentation).
Note that, by default, your StarWindVSA vSphere virtual machines will be deployed with 3 virtual network cards (one per network mentioned above).
However, you will be able to duplicate the network cards for the "iSCSI / Heartbeat" network and the "Synchronization" network if you wish (which will be the case in this tutorial).
In our case, we also added 4 network cards to each of our VMware ESXi hosts. 2 for the internal "iSCSI / Heartbeat" network connecting our 2 hosts and 2 network cards for the "Synchronization" network.
Source: StarWind Virtual SAN - Best Practices.
1.2. Create the virtual network for StarWind Virtual SAN iSCSI/HeartBeat traffic
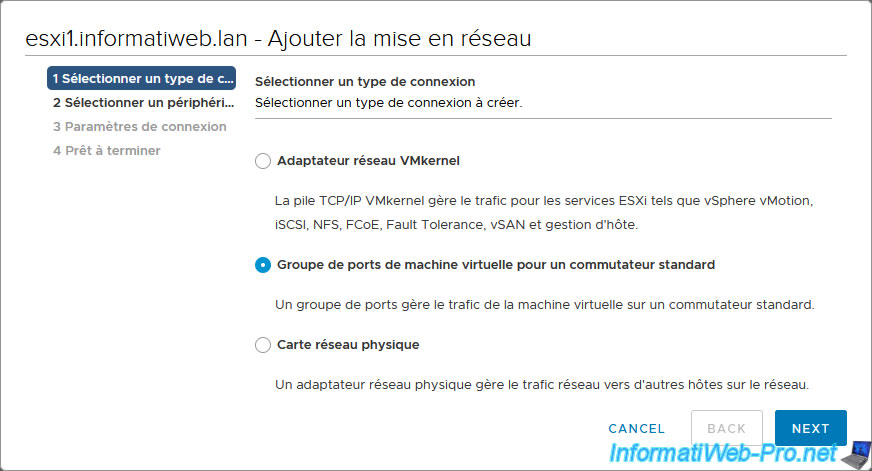
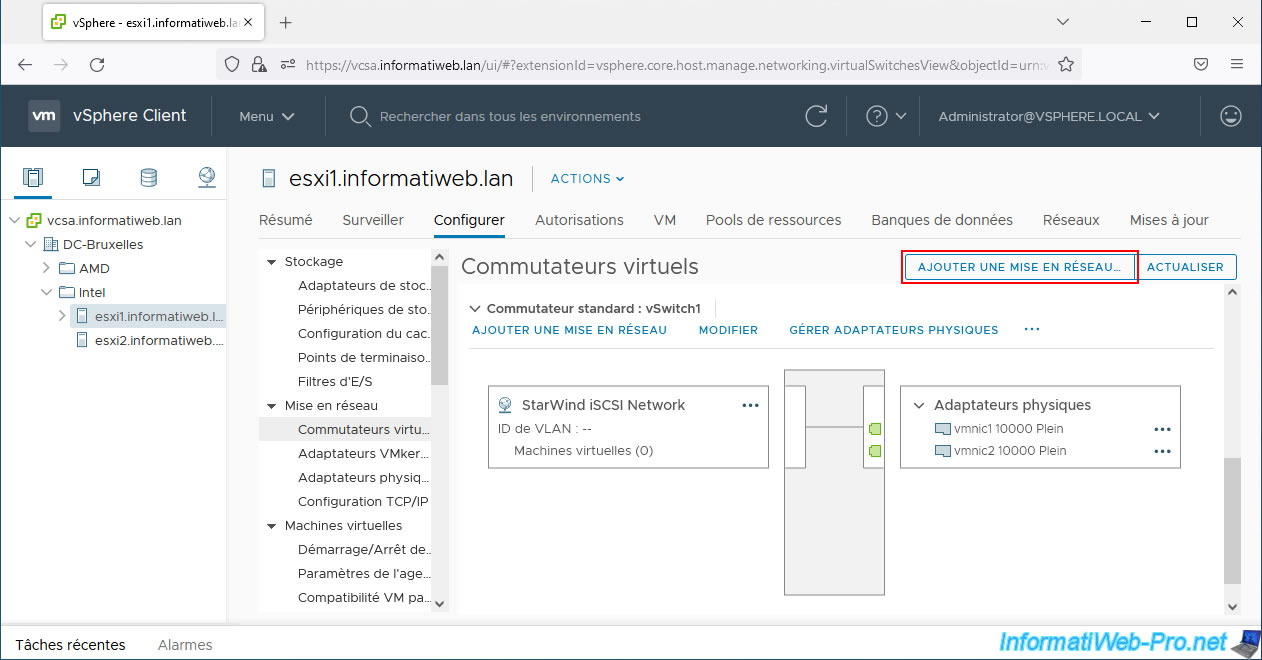
To get started, select your 1st host and go to: Configure -> Networking -> Virtual switches.
Then click: Add Networking.
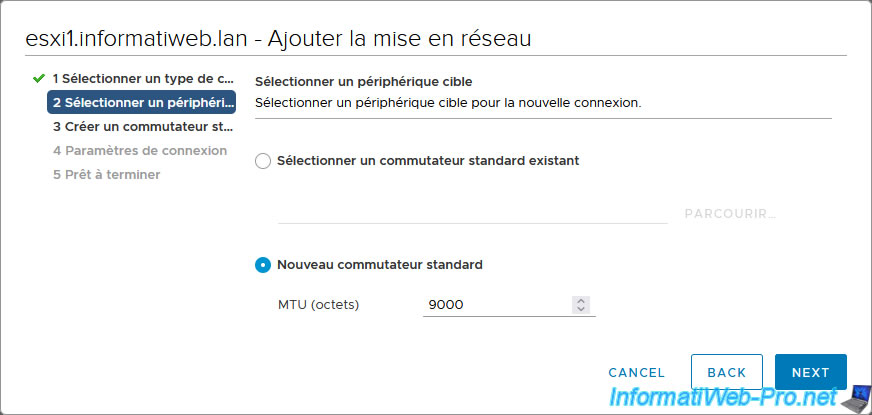
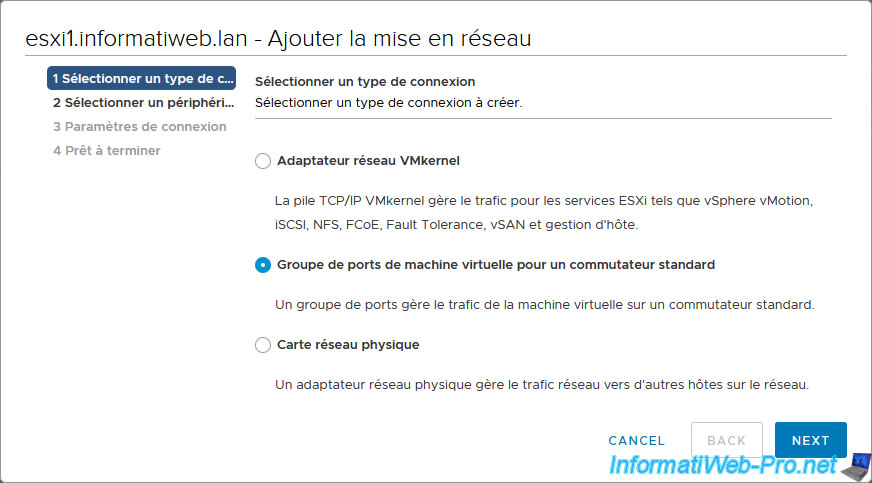
In the "Add Networking" wizard that appears, select "Virtual Machine Port Group for a Standard Switch" and click Next.
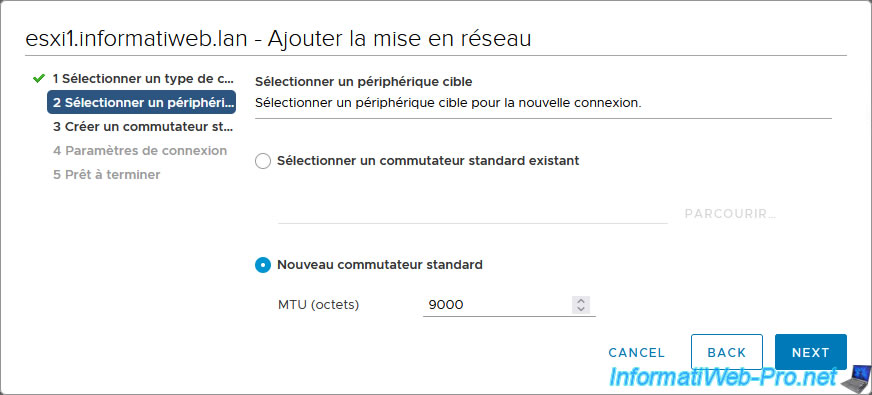
Select "New standard switch", specify an MTU of 9000 bytes (as per StarWind Virtual SAN documentation) and click Next.
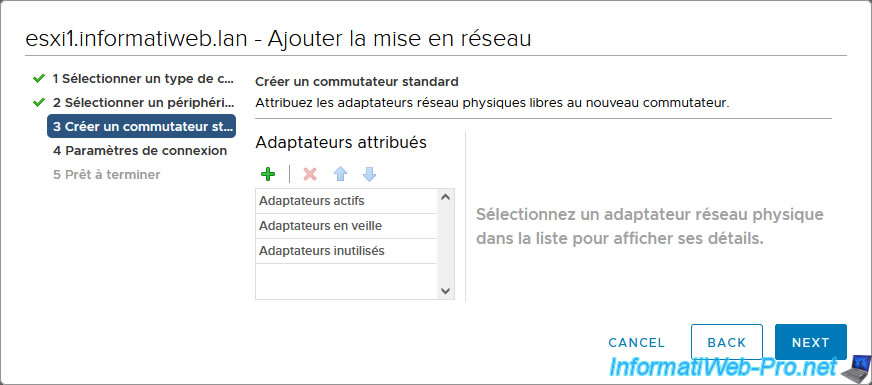
In the "Create a Standard Switch" step, click on the "+" icon.
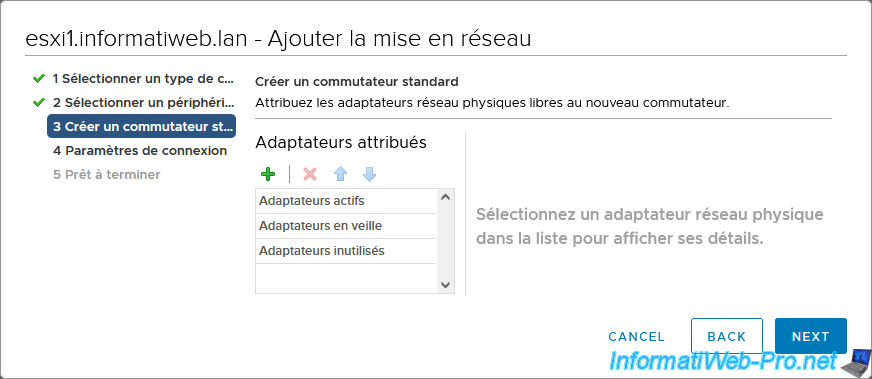
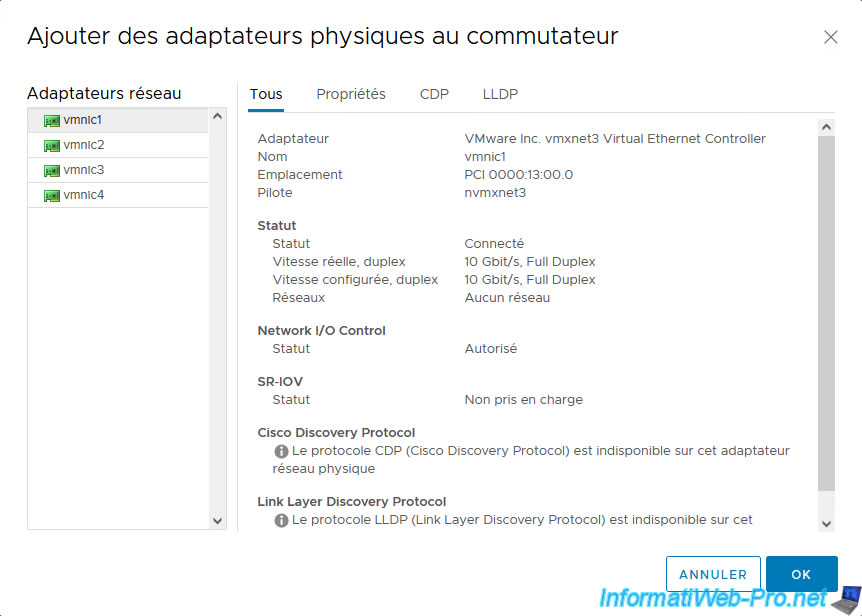
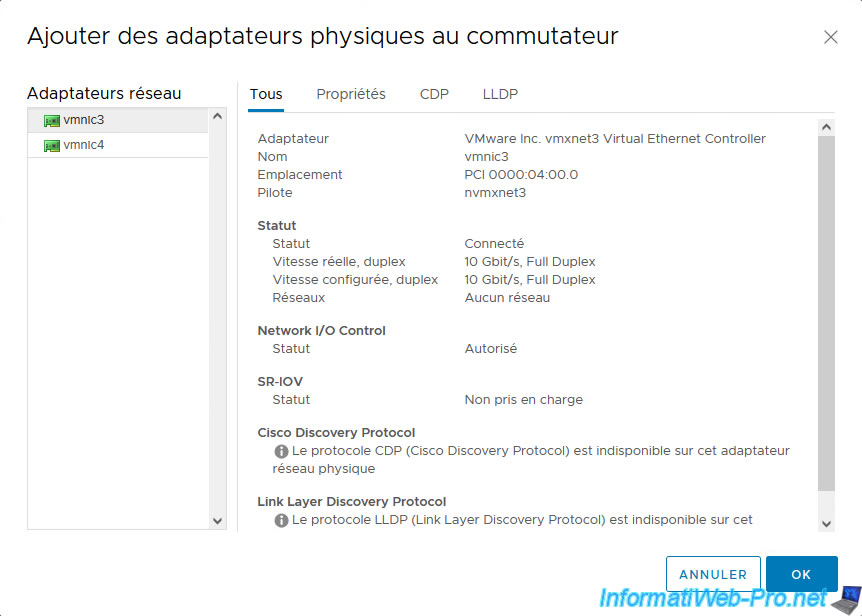
Add at least one NIC from your host to this new standard switch.
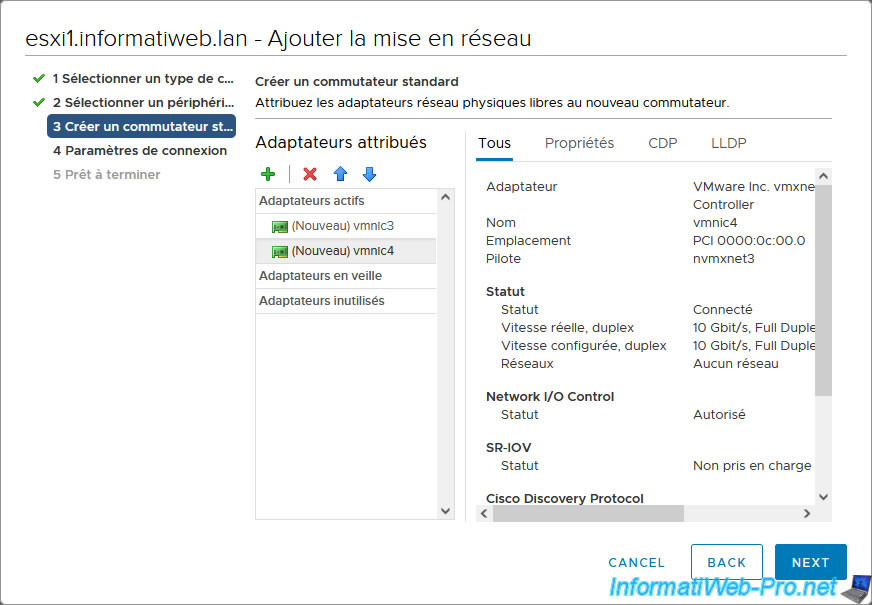
In our case, we added 4 network cards to our host. 2 network cards for the "iSCSI / Heartbeat" network and 2 network cards for the "Synchronization" network.
Once you have added the physical network adapter(s) to your standard switch, click Next.

Specify "StarWind iSCSI Network" for the network label (port group name) and click Next.
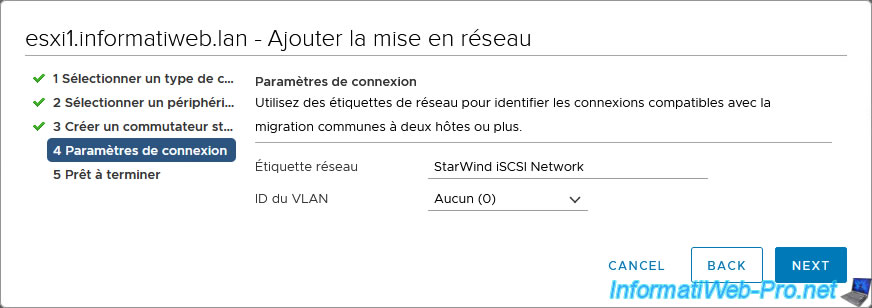
A summary of the configuration of your new virtual network appears.
Click Finish.
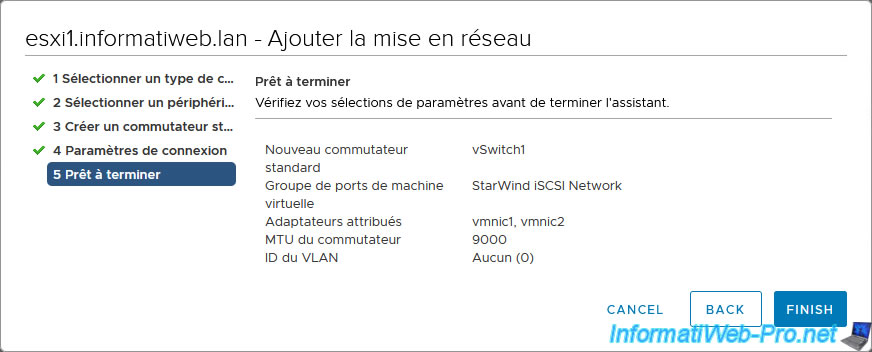
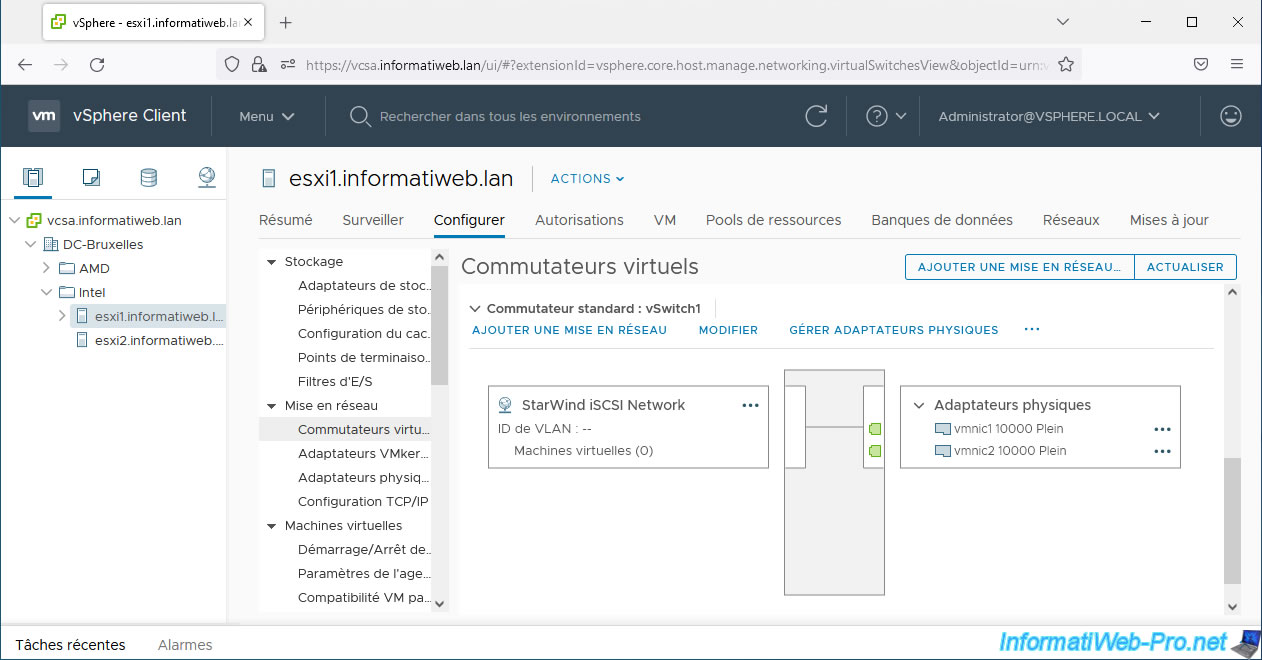
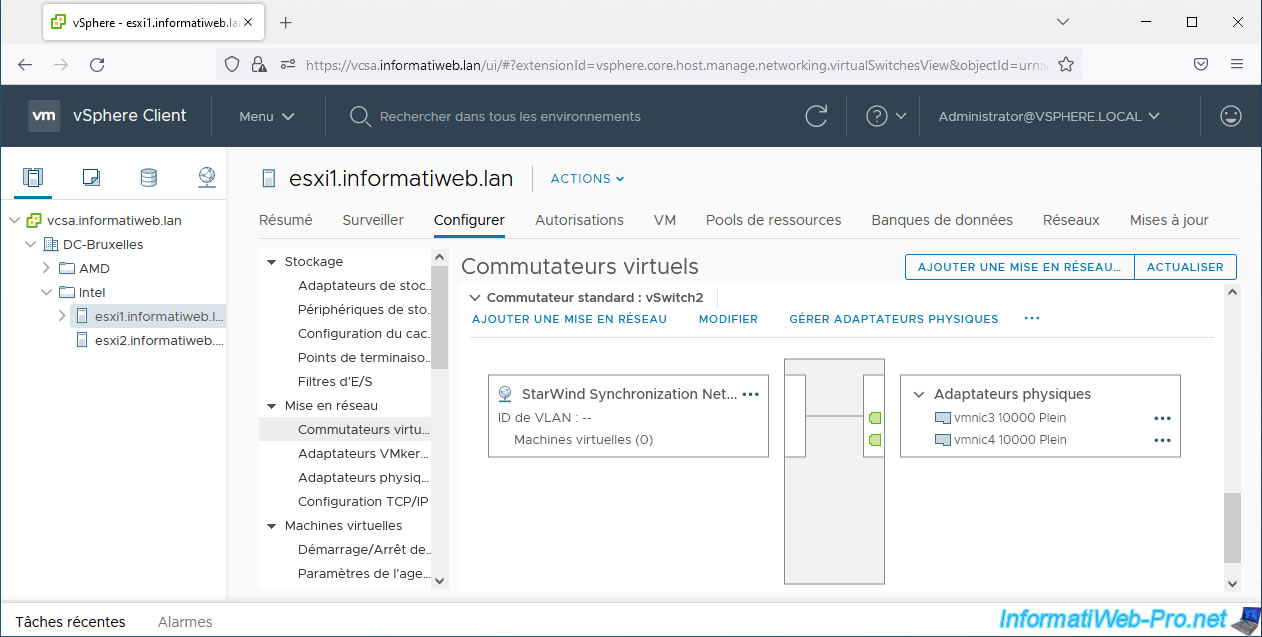
Your new standard switch (vSwitch1 in our case) appears with:
- its virtual network "StarWind iSCSI Network"
- its physical adapters
1.3. Create the virtual network for StarWind Virtual SAN synchronization traffic
Add a new network in the same way, but for the StarWind Virtual SAN sync network.
Select “Virtual Machine Port Group for a Standard Switch” again and click Next.
Select "New standard switch" again and specify an MTU of 9000 bytes.
Click the "+" icon.
Again, add one or more physical adapters (for redundancy) to this new virtual standard switch.
After adding the physical adapter(s) to this standard switch, click Next.
This time, specify "StarWind Synchronization Network" for the network label.

A summary of the configuration of your new virtual network appears.
Click Finish.
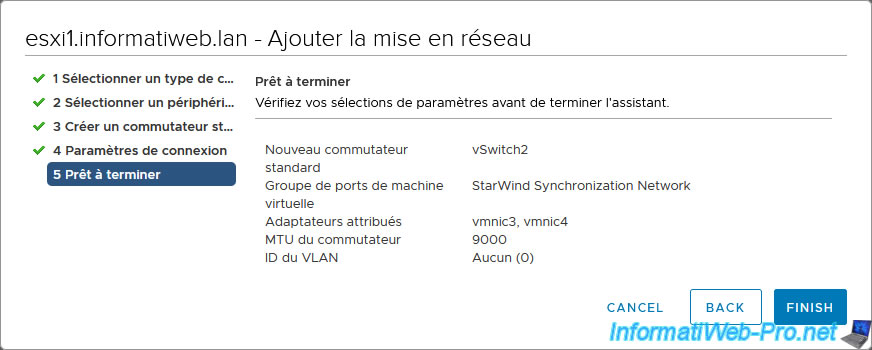
Your second standard switch appears with its virtual network (StarWind Synchronization Network) and its physical adapters.
Share this tutorial
To see also
-

VMware 5/15/2024
VMware vSphere 6.7 - Add a physical disk to host
-

VMware 9/27/2024
VMware vSphere 6.7 - Array integration APIs (VAAI)
-

VMware 9/6/2024
VMware vSphere 6.7 - Configure port binding (iSCSI traffic)
-

VMware 6/13/2024
VMware vSphere 6.7 - Configure Virtual Flash (SSD cache)
You must be logged in to post a comment