Deploy the StarWind Virtual SAN virtual appliance on VMware vSphere 6.7
- VMware
- 23 October 2024 at 13:00 UTC
-

- 8/15

3. Configure StarWind storage
3.1. Configure storage on the 1st StarWindVSA vSphere virtual machine
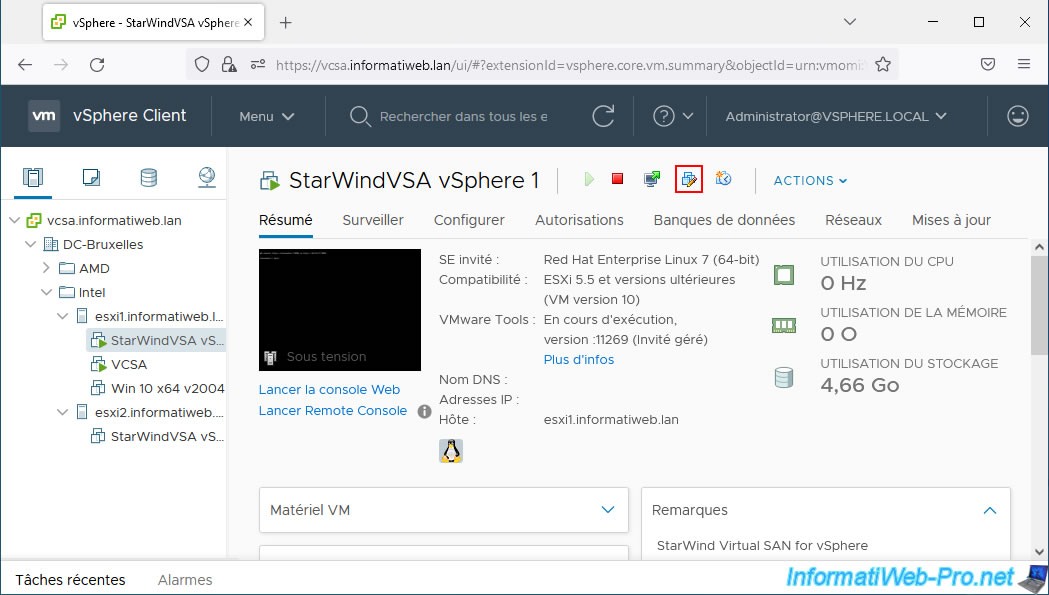
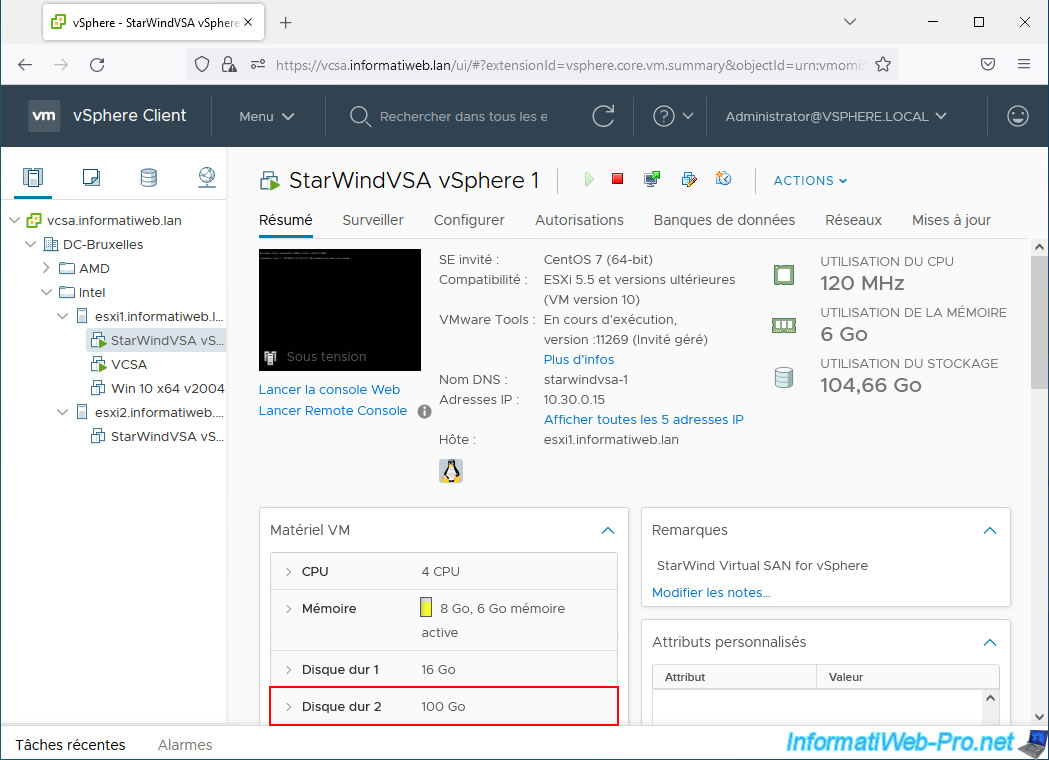
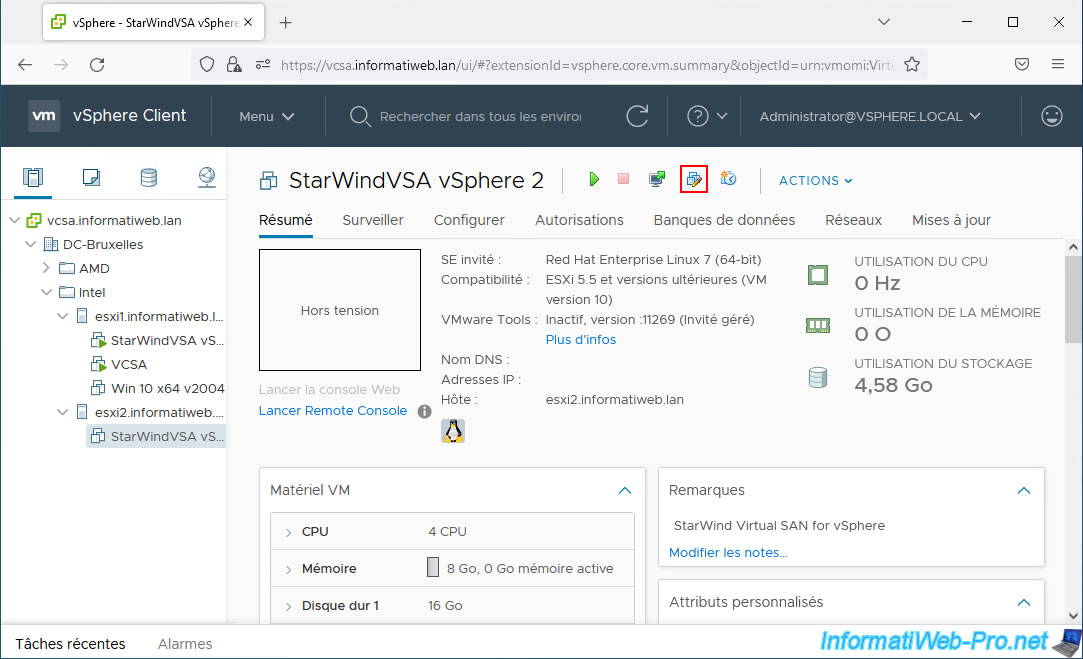
To configure your StarWind storage, select your 1st StarWindVSA vSphere virtual machine and click on the icon to modify its settings.
In the "Edit Settings" window that appears, click: Add New Device -> Hard Disk.
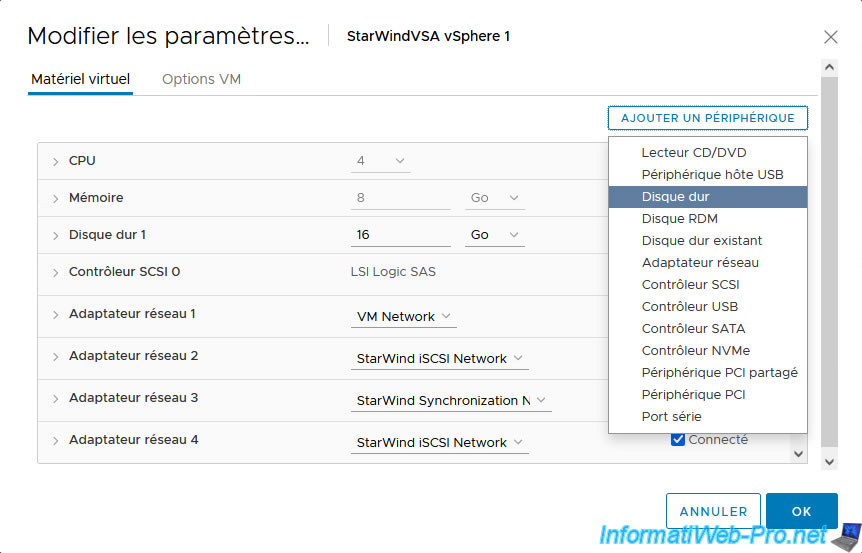
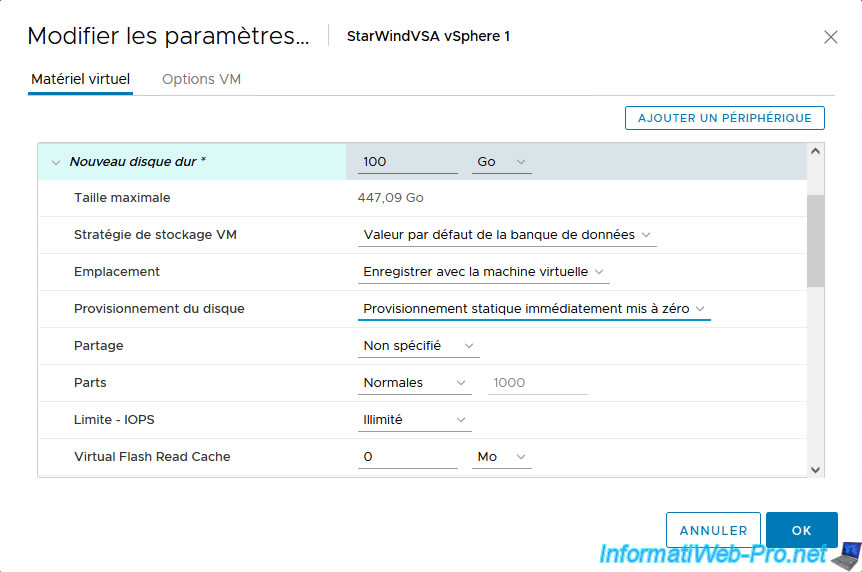
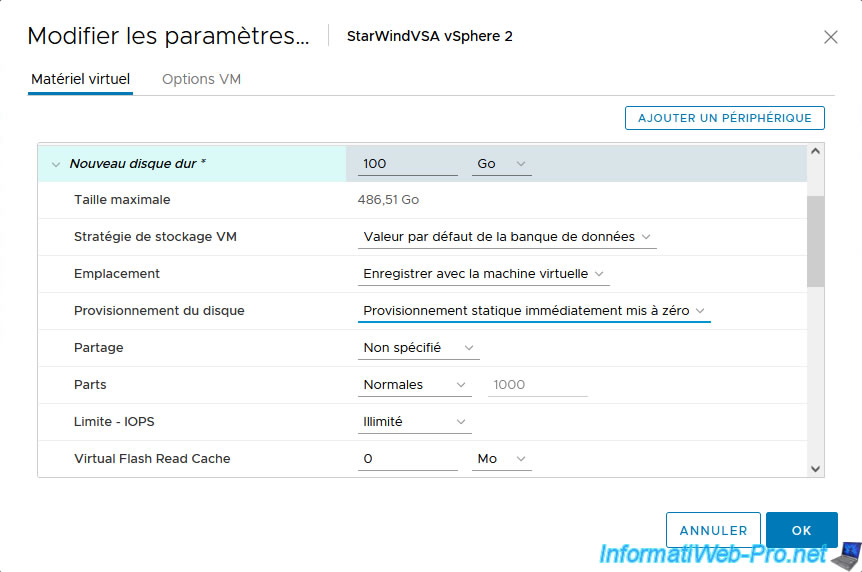
Indicate the size you want for the new virtual hard disk that will be added and use a "Thick Provision Eager Zeroed" to respect
Note that this should preferably be stored on RAID storage (to benefit from fault tolerance in the event of a physical disk failure).
The size should be sufficient to store the virtual machines you want to create later on your StarWind storage.
Note: in the StarWind Virtual SAN documentation, you will also see that you can pass physical disks to this VM (thanks to the option "Add a device -> RDM disk") or directly pass a RAID controller from your VMware ESXi host to this VM using DirectPath I/O.
If you used static provisioning for the virtual hard disk you just added, the "Reconfigure Virtual Machine" task will take some time.
This time will depend on the size of the virtual hard disk created and the performance of your VMware ESXi host.
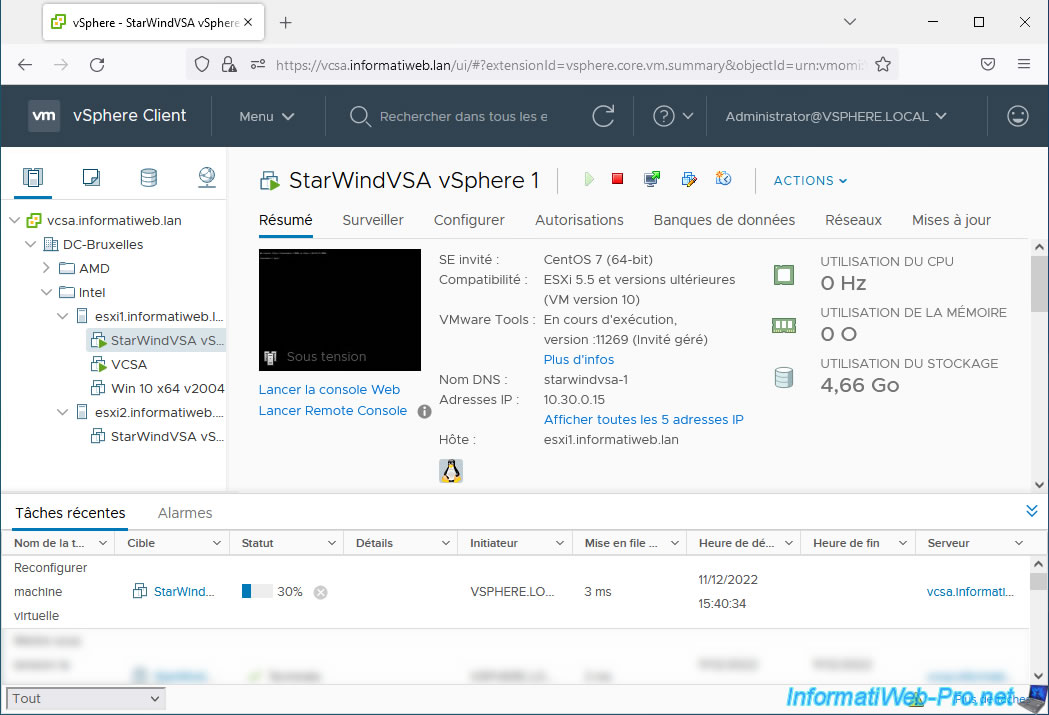
Once this "Reconfigure Virtual Machine" task is completed, the new hot-added virtual hard disk will appear in the StarWind VM hardware.
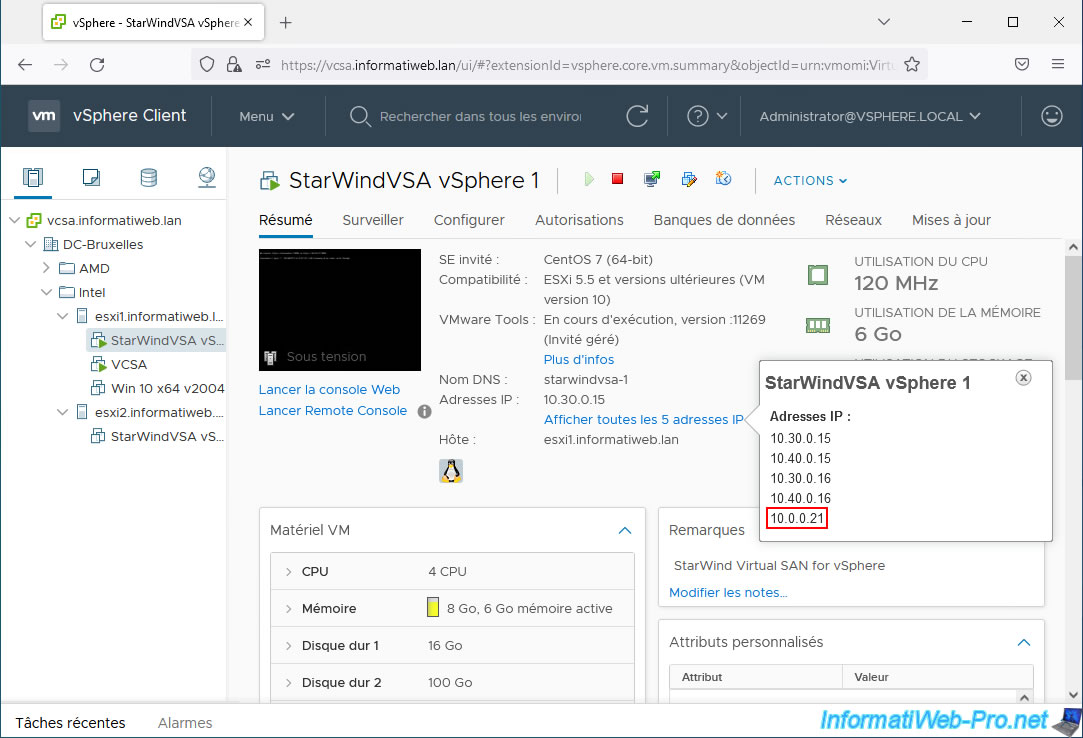
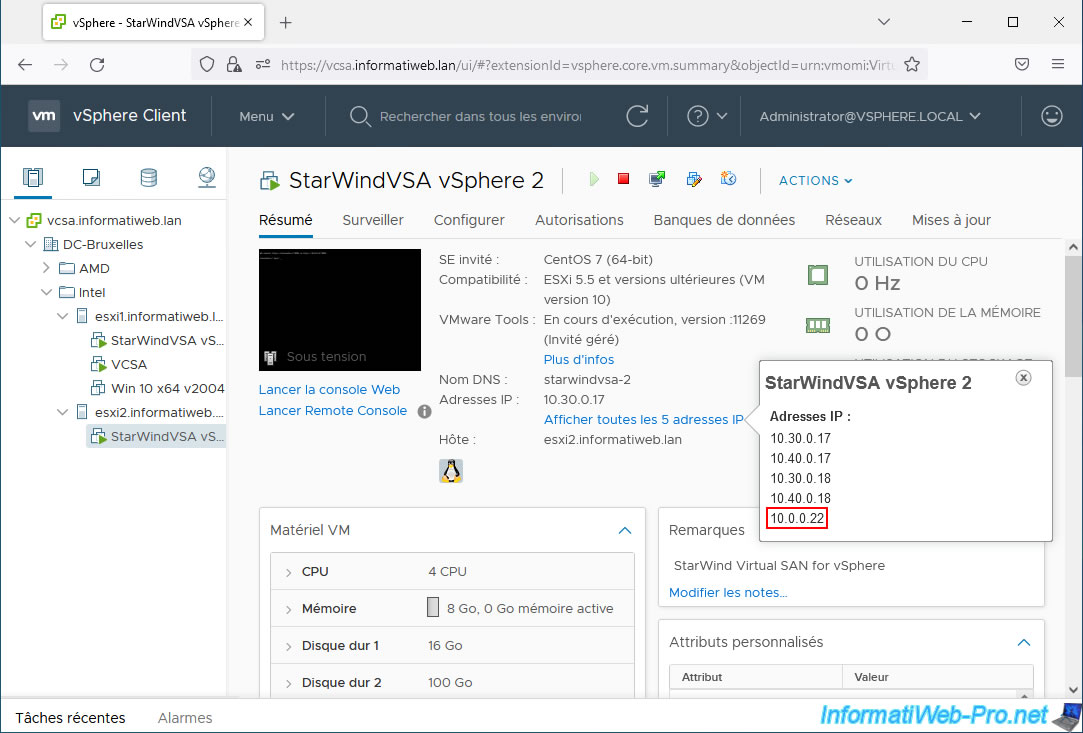
Note that the IP address displayed by default by the VMware vSphere Client may not be the one intended for management.
To see it, click on the "View all x IP addresses" link.
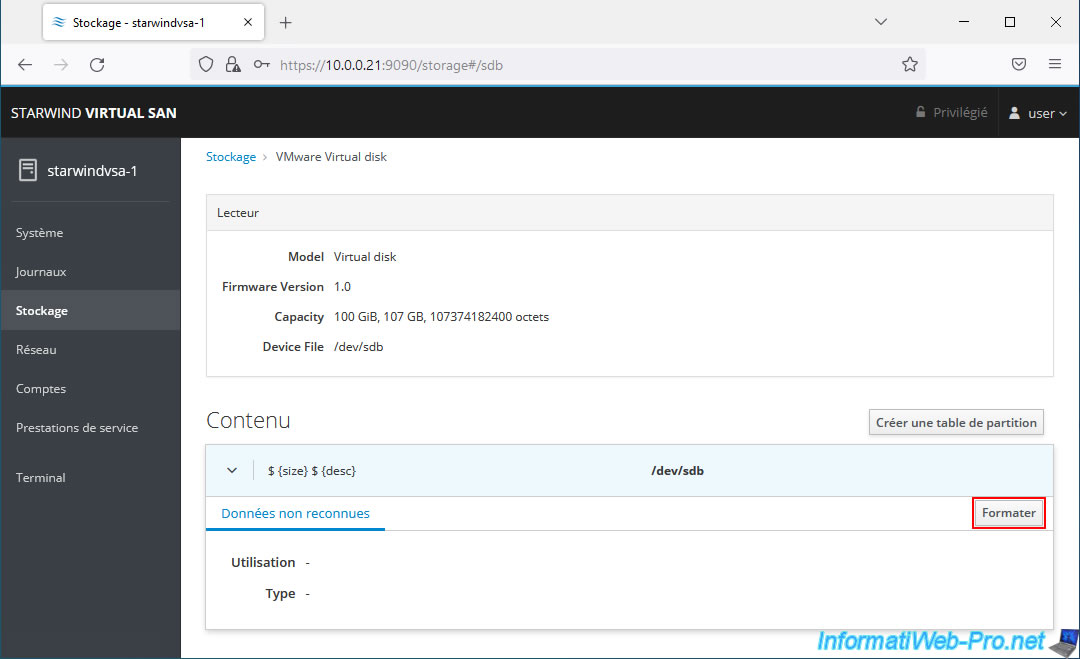
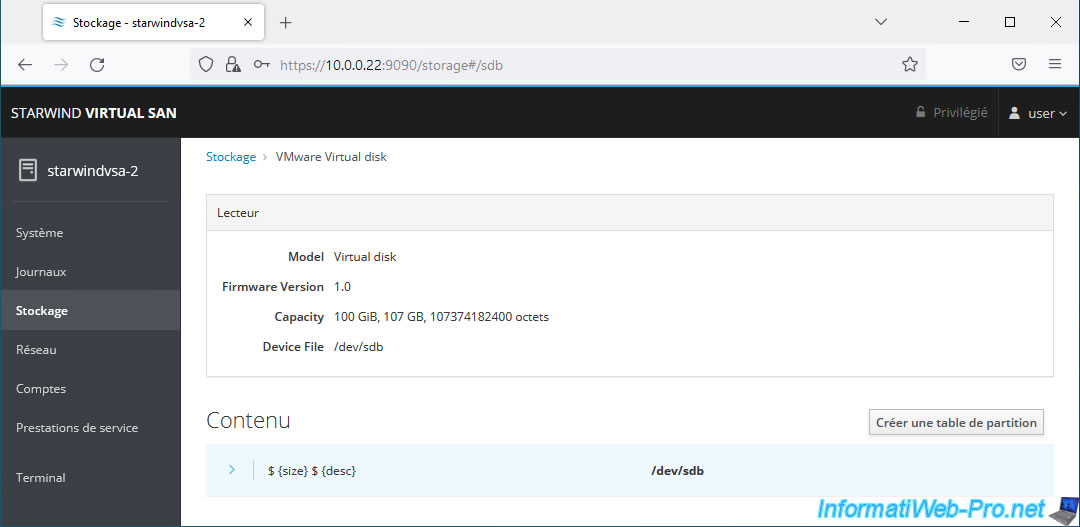
Go to the "Storage" section of your StarWind server's web interface and you will see your new VMware Virtual disk appear.
Click on this one.

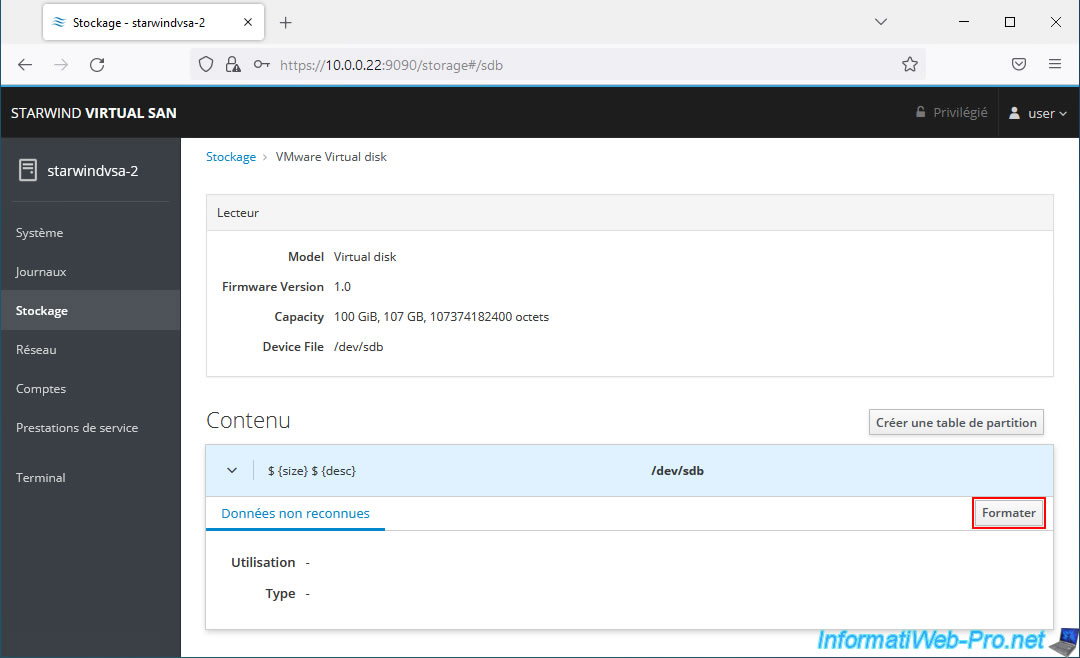
Then, click on its content.

Click the "Format" button.
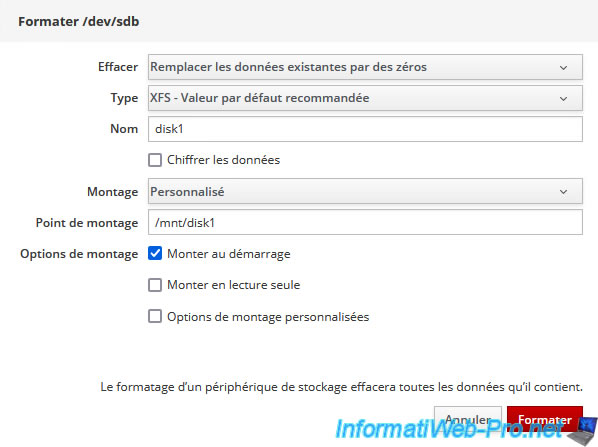
Format this disk by specifying this:
- Erase: Overwrite existing data with zeros.
- Type: XFS - Recommended default.
- Name: disk1 (this name will need to be changed for other disks that you wish to add later, if necessary).
- Mounting: Custom.
- Mount Point: /mnt/disk1 (aka "/mnt/[disk name]").
- Mount Options: Mount at boot.
Then click "Format".
Note: this is information presented in the StarWind documentation.

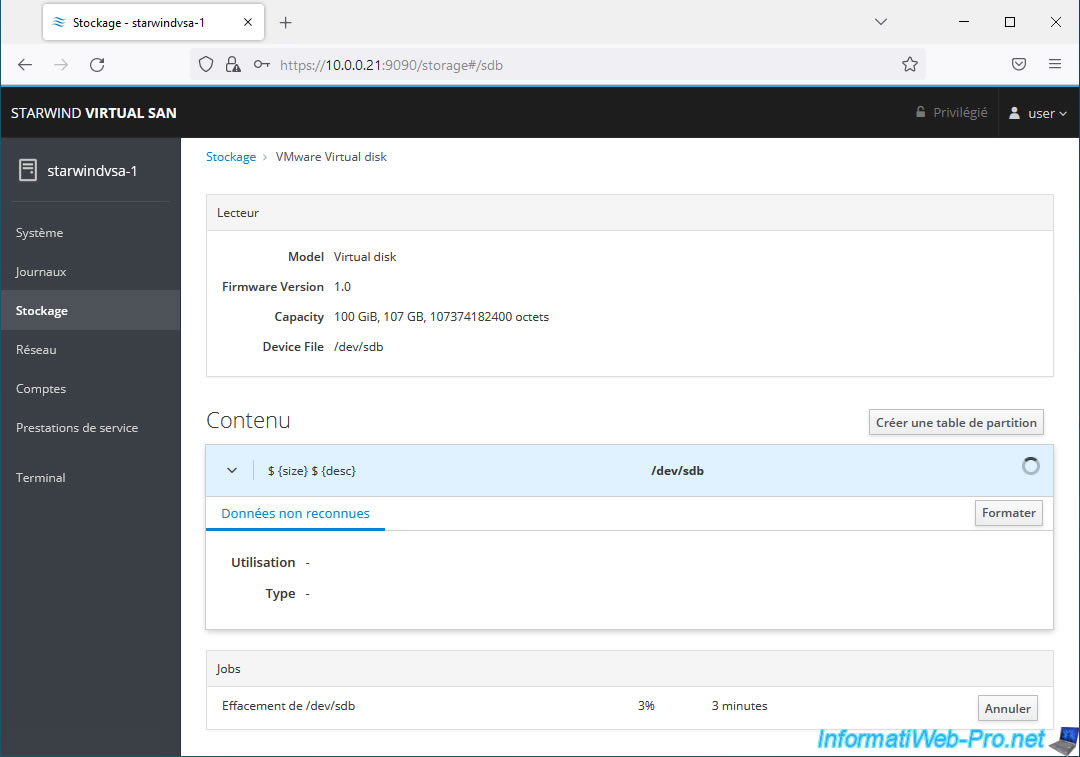
Wait while this disk is erased.
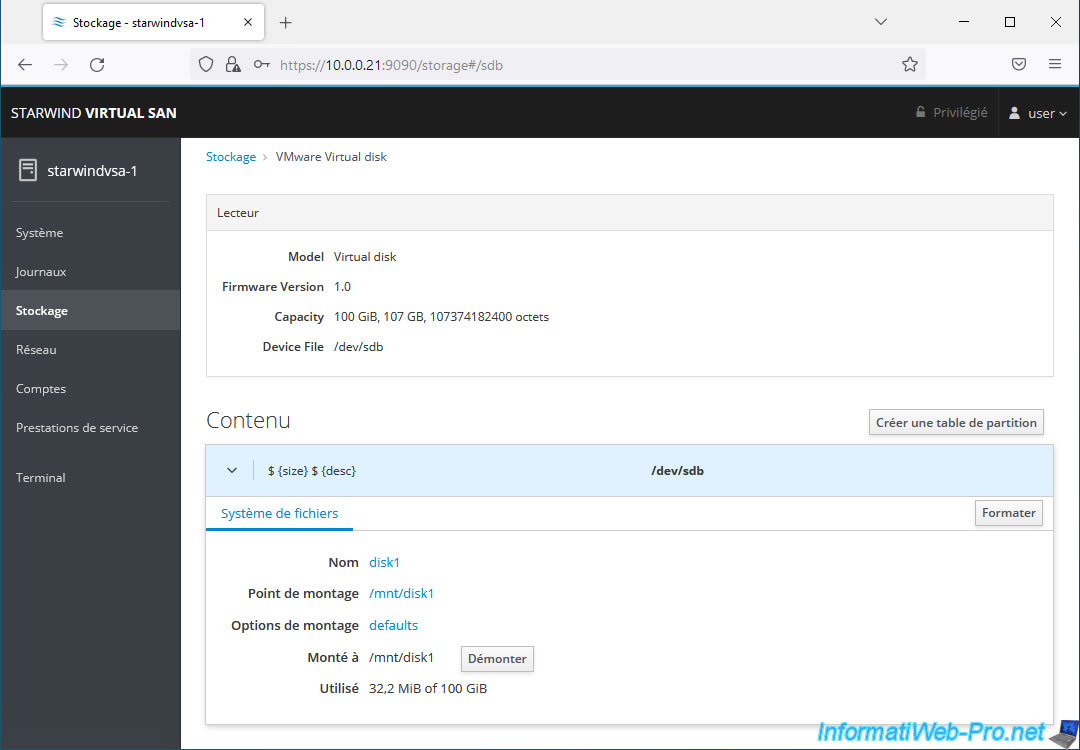
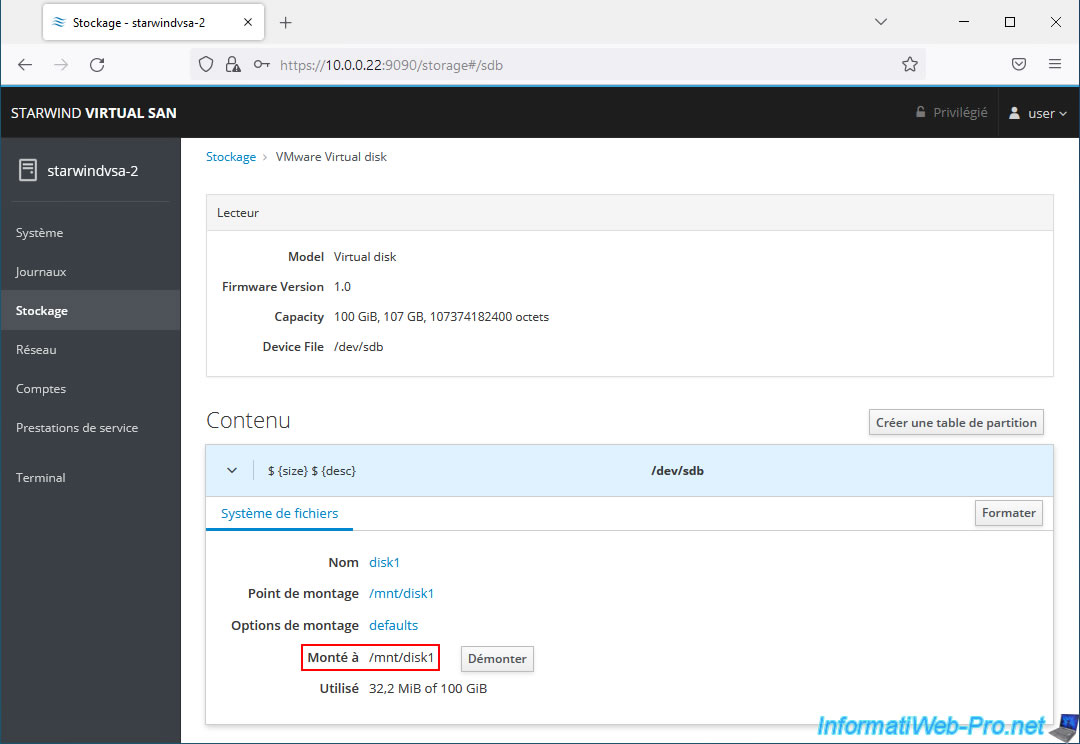
Once the disk formatting is complete, click on the "Mount" button that will appear.
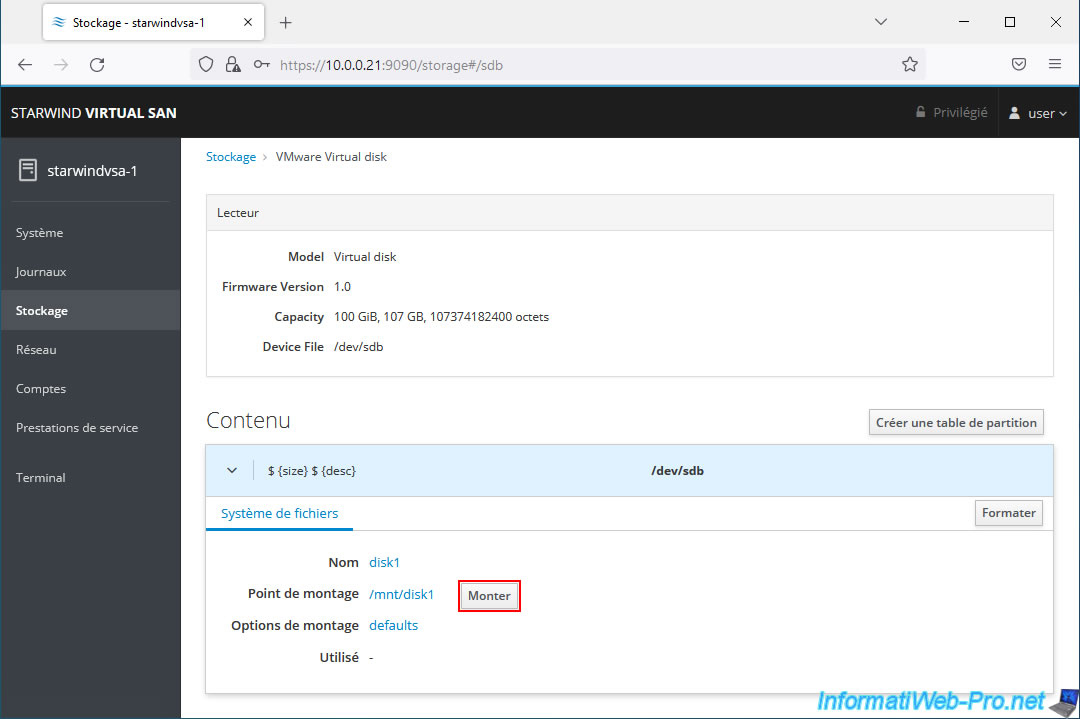
The disk is mounted at "/mnt/[disk name]" and is now usable by StarWind Virtual SAN.
3.2. Configure storage on the 2nd StarWindVSA vSphere virtual machine
Do the same on your 2nd StarWind virtual machine.
Edit the settings for this virtual machine.
Add a new disk (preferably the same size so that data replication can work smoothly later).
Again, StarWind recommends using "Thick Provision Eager Zeroed" if you are adding VMware virtual hard disks rather than physical disks (RDM disk) or a physical RAID controller.
Click on the "View all x IP addresses" link if necessary to find out the IP address of your StarWind VM.
Go to the "Storage" section of its web interface and click on the VMware virtual hard drive you just added there.

Click on its content.
Click the button: Format.
Again, use the settings shown in the image below.
After the disk formatting is completed, click "Mount".
Share this tutorial
To see also
-

VMware 5/15/2024
VMware vSphere 6.7 - Add a physical disk to host
-

VMware 9/27/2024
VMware vSphere 6.7 - Array integration APIs (VAAI)
-

VMware 9/6/2024
VMware vSphere 6.7 - Configure port binding (iSCSI traffic)
-

VMware 6/13/2024
VMware vSphere 6.7 - Configure Virtual Flash (SSD cache)
No comment