Deploy the StarWind Virtual SAN virtual appliance on VMware vSphere 6.7
- VMware
- 23 October 2024 at 13:00 UTC
-

- 11/15

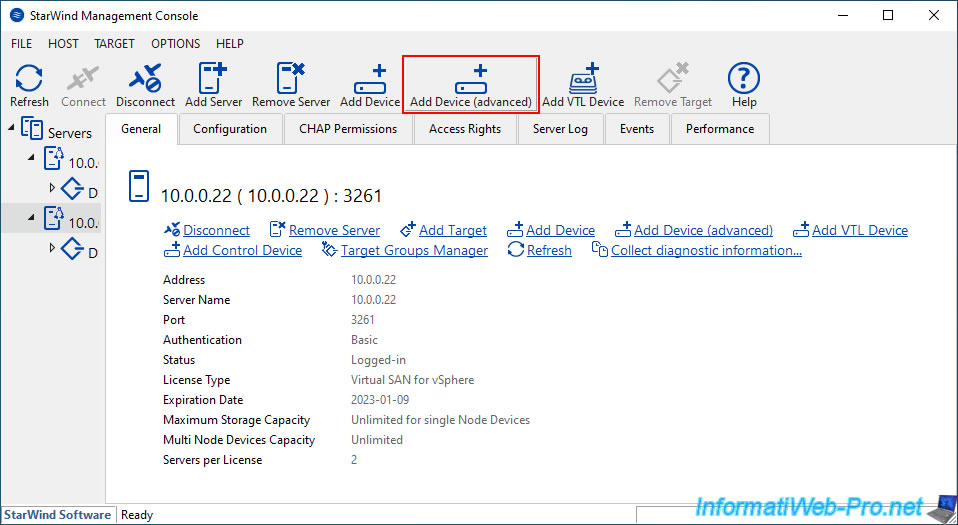
6. Create a 2nd iSCSI disk on StarWind Virtual SAN
Select your 2nd StarWind server and click: Add Device (advanced).
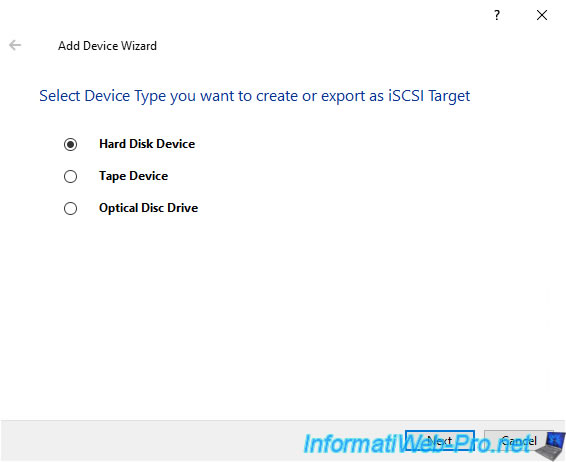
Select "Hard Disk Device" again.
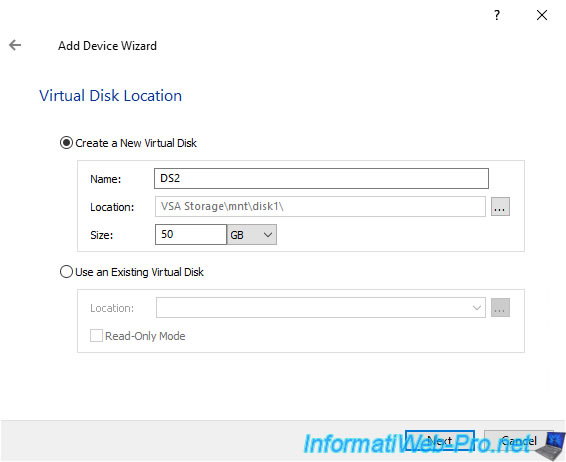
This time, name this disk "DS2" and indicate the size you want.
Then click on the "..." button and select again where you want to store it (in our case: VSA Storage\mnt\disk1).
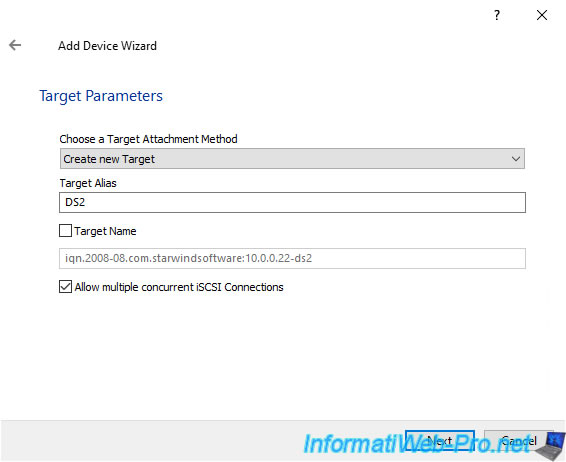
Specify the disk name as the target name again (although it may be different) and click Next.
Note that you have the choice to use different targets or not.
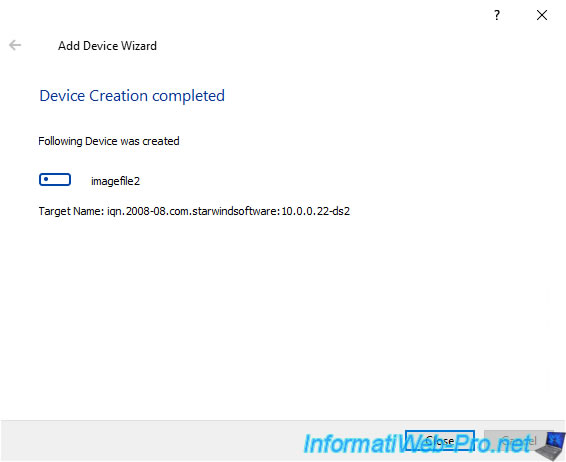
The 2nd disk is created.
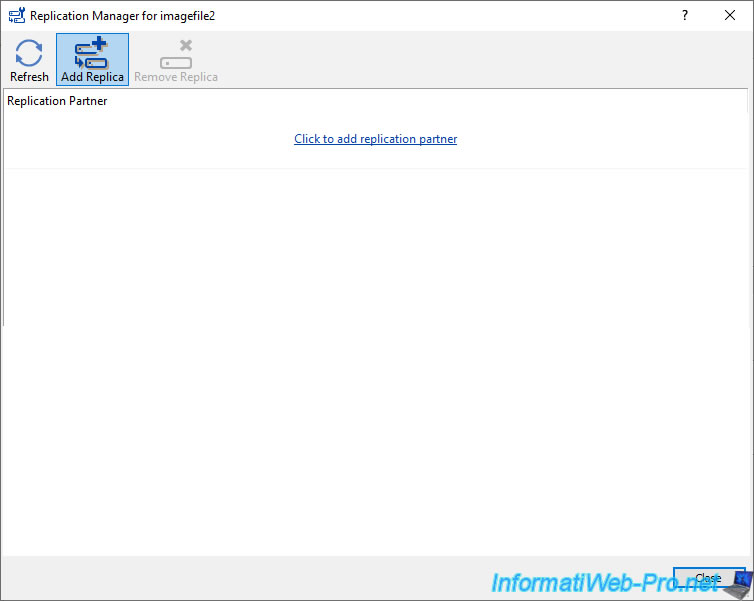
Right click "Replication Manager" on this disk "imagefile2".
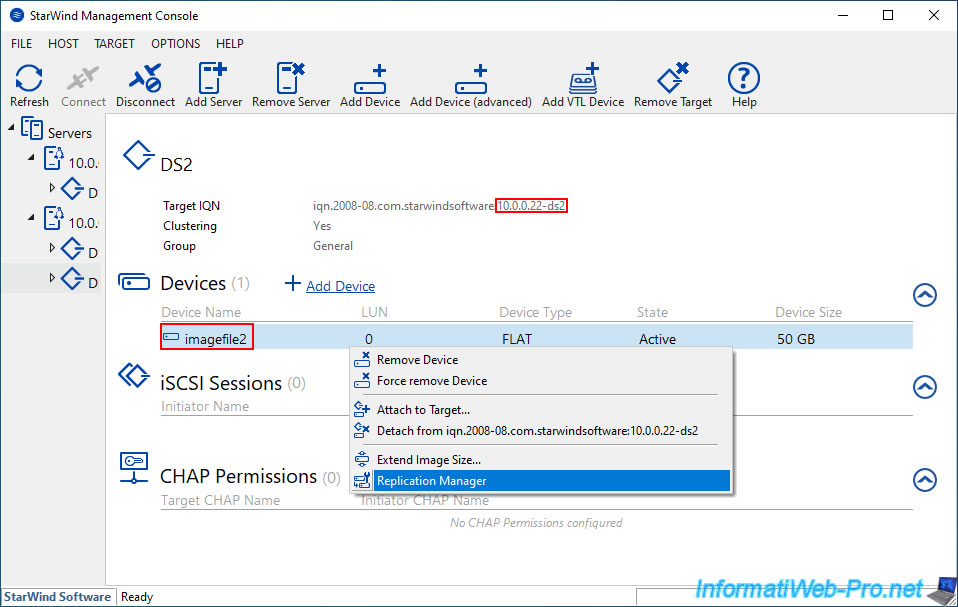
Click "Add Replica".
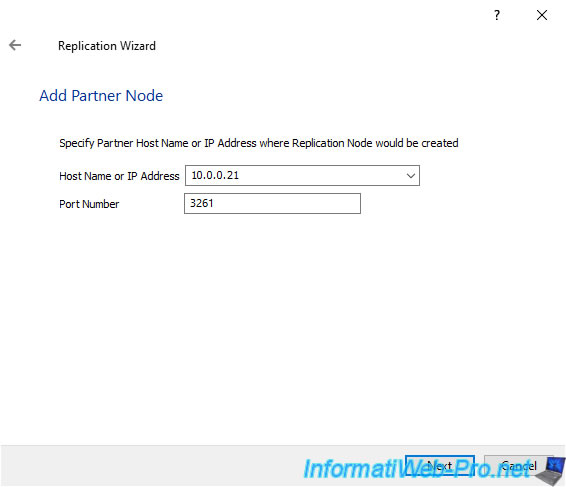
Indicate the IP address of your 1st StarWind server to which the data from this disk will be replicated.
Click "..." to select the location where you want to store the copy of this disk.
In our case, the disk "disk1" of this StarWind server.

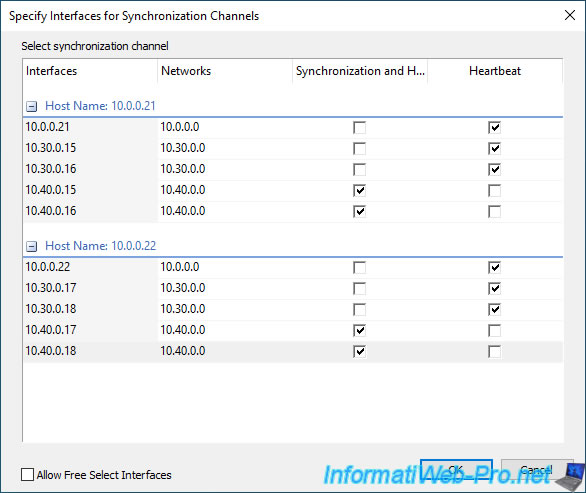
Re-select the networks to use for sync and heartbeat traffic.
Knowing that the management network (in our case: 10.0.0.x) must also be selected for Heartbeat traffic.
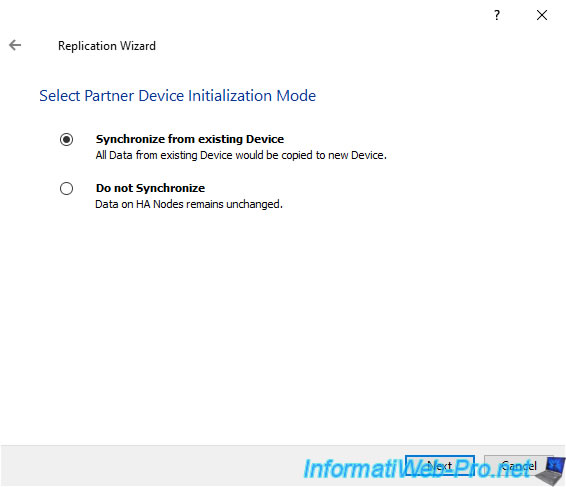
Select "Synchronize from existing Device".
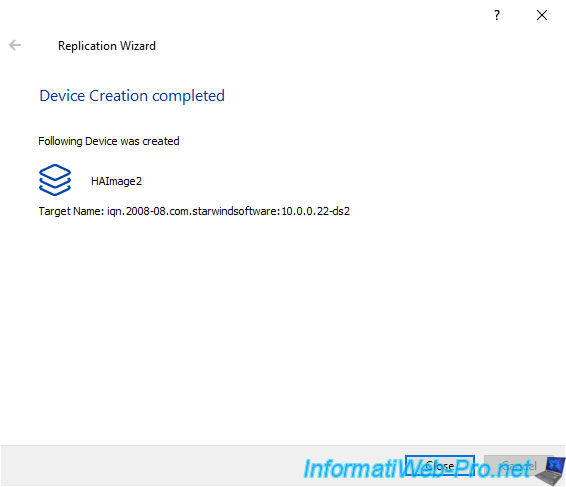
Your "HAImage2" disk has been created.
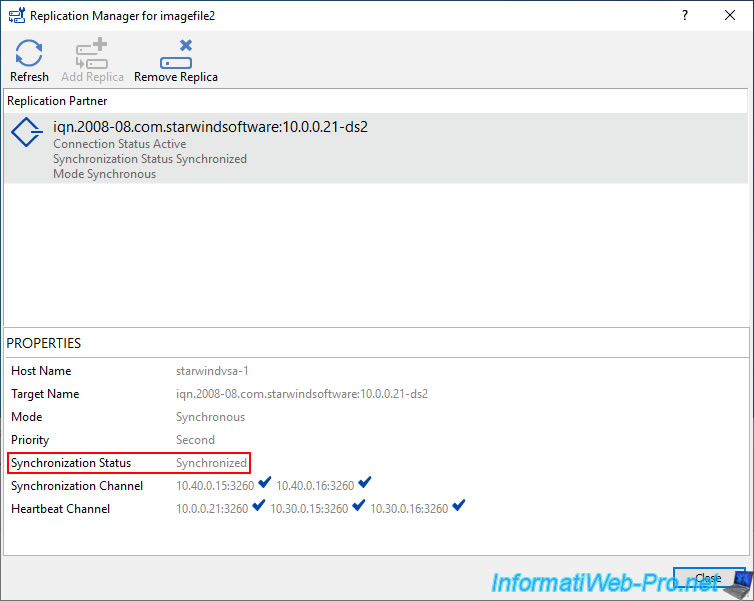
Wait while data from this disk is synchronized to the partner server.
Once the "Synchronized" status appears, click Close.
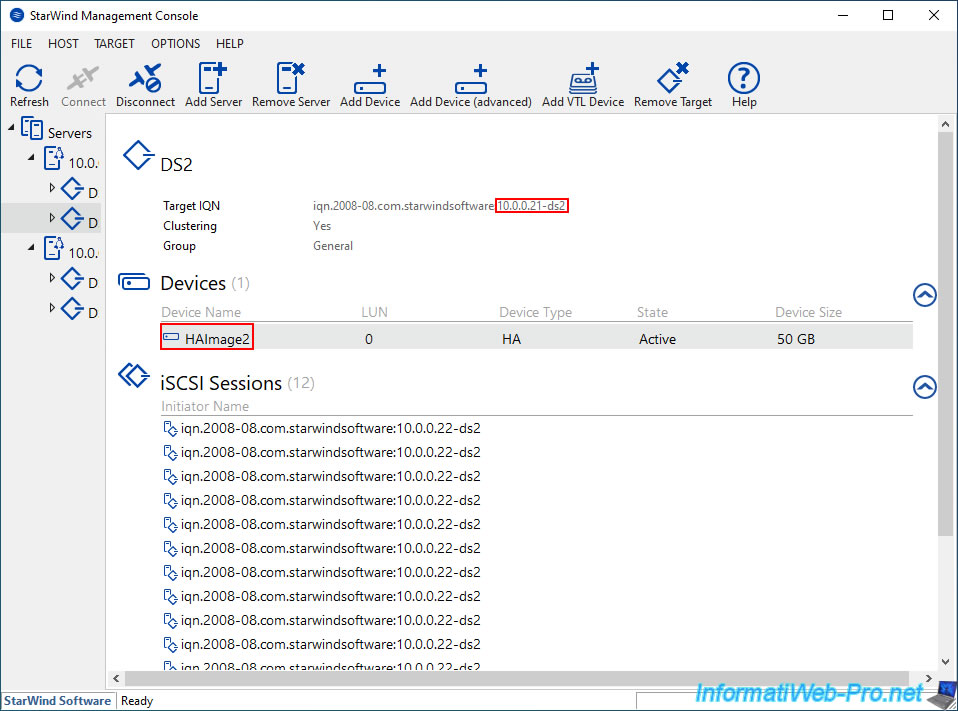
As expected, the iSCSI target "DS2" and disk "HAImage2" have been created on your 2nd StarWind server.
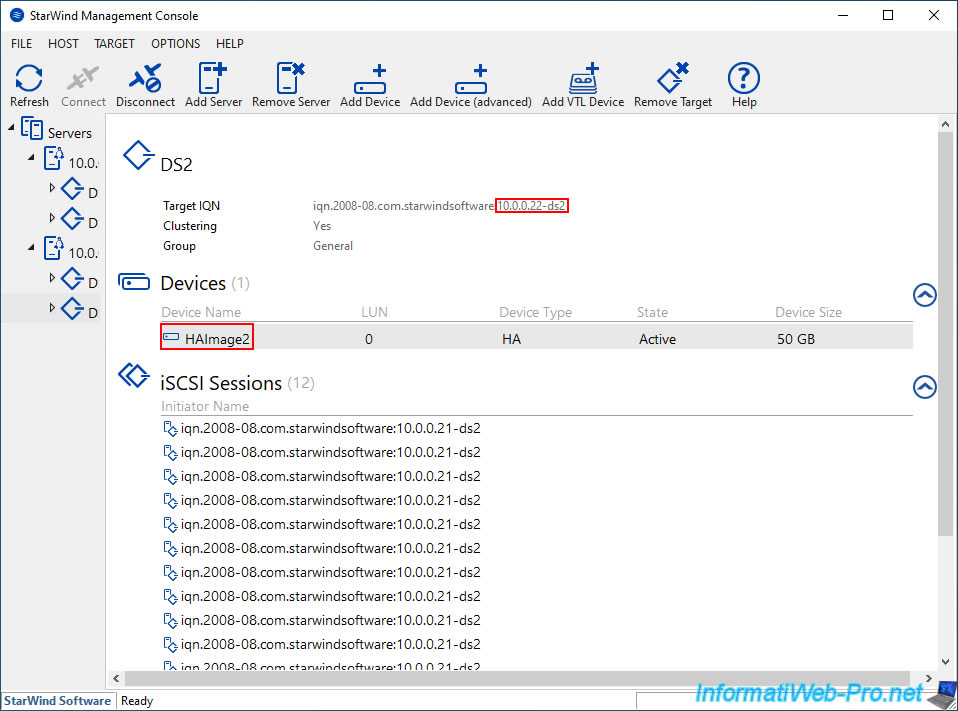
On your 1st StarWind server, you will also find this iSCSI target "DS2" and its disk "HAImage2".
7. Configure the software iSCSI controller for VMware ESXi hosts
7.1. Configure the software iSCSI controller of your 1st VMware ESXi host
Now that your iSCSI targets and iSCSI virtual disks are created on your StarWind servers, you need to configure your VMware ESXi hosts so that they can access them.
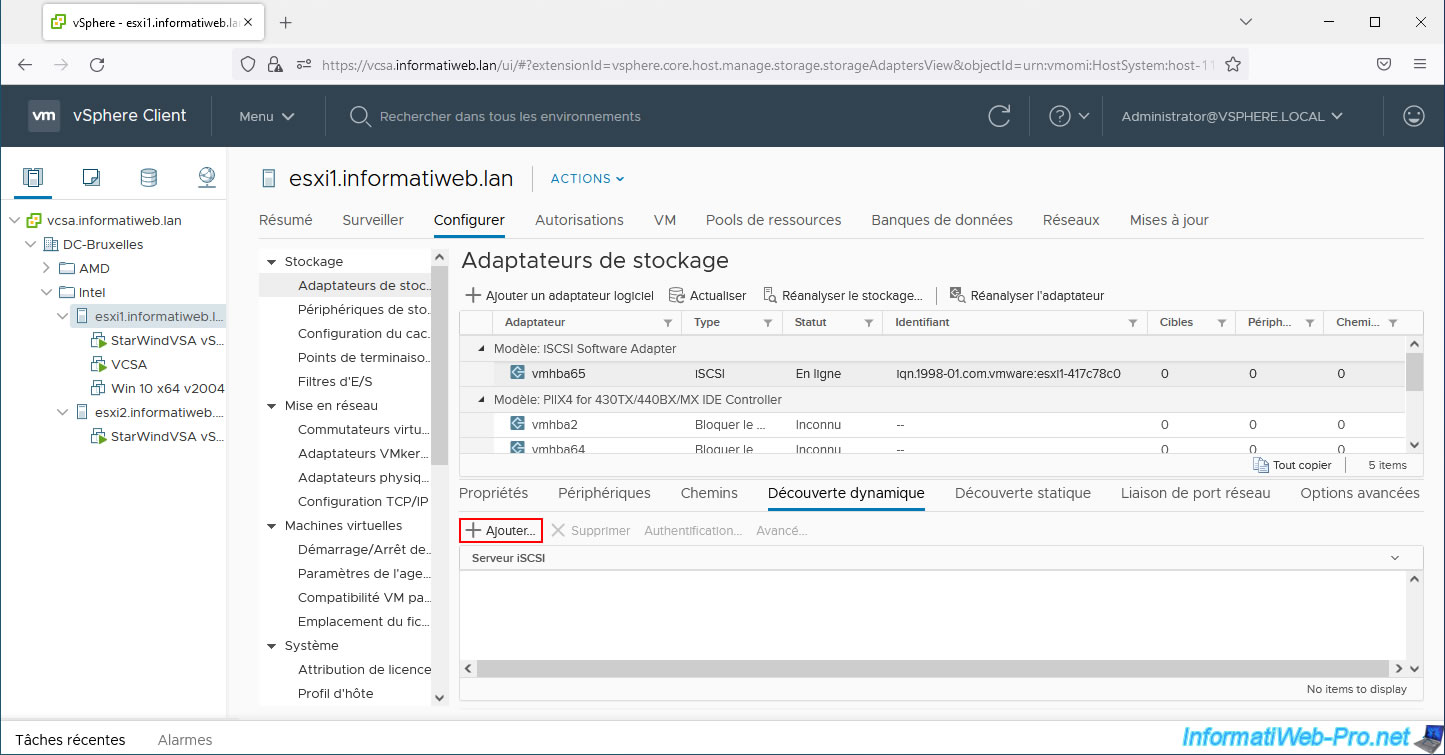
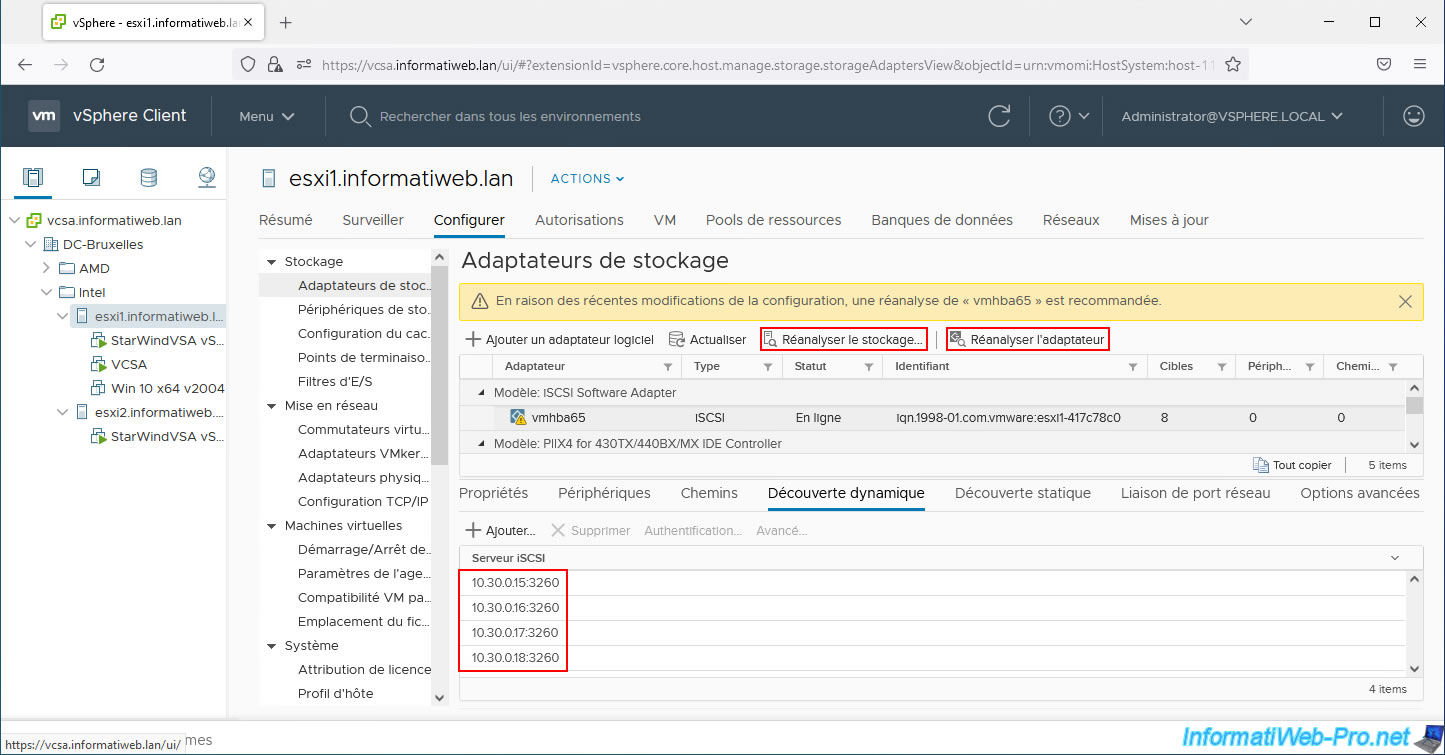
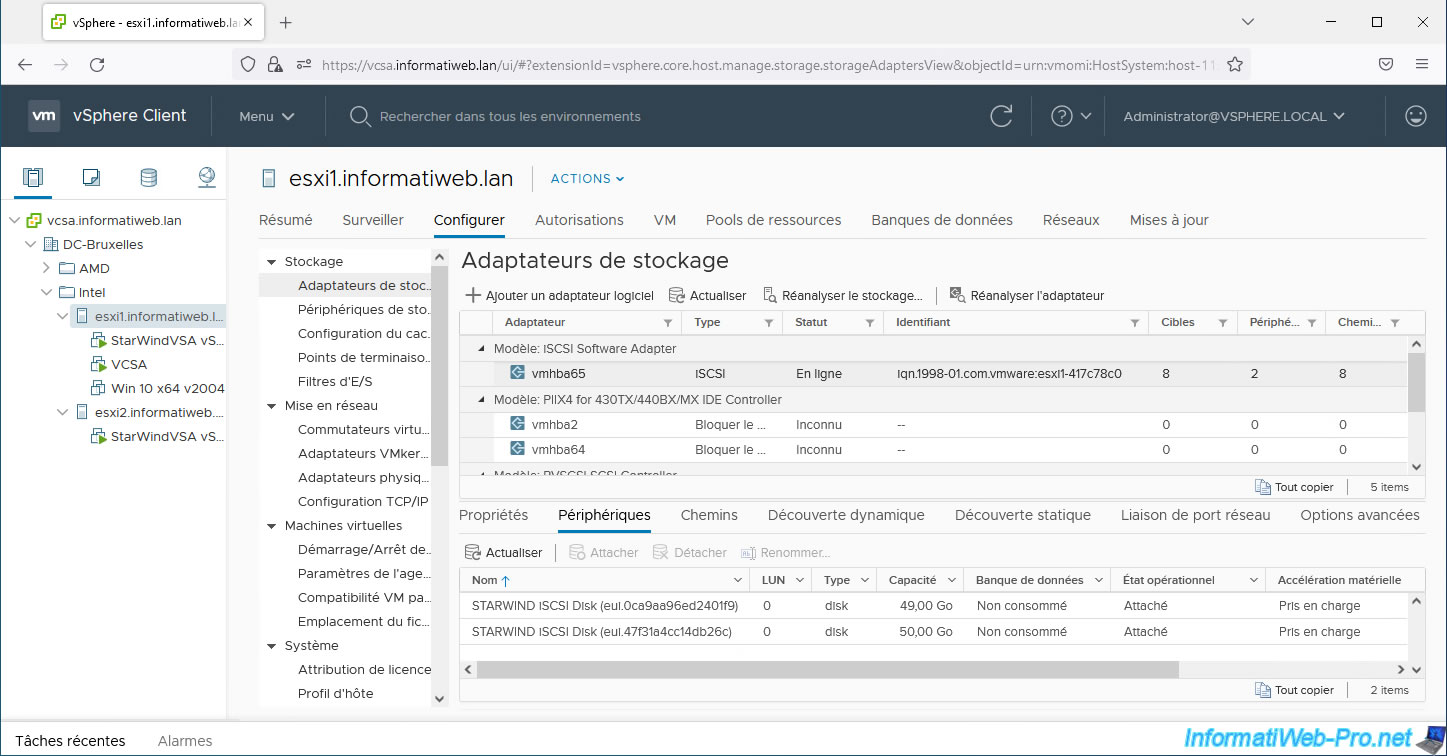
To do this, start by selecting your first VMware ESXi host and go to: Configure -> Storage -> Storage Adapters.
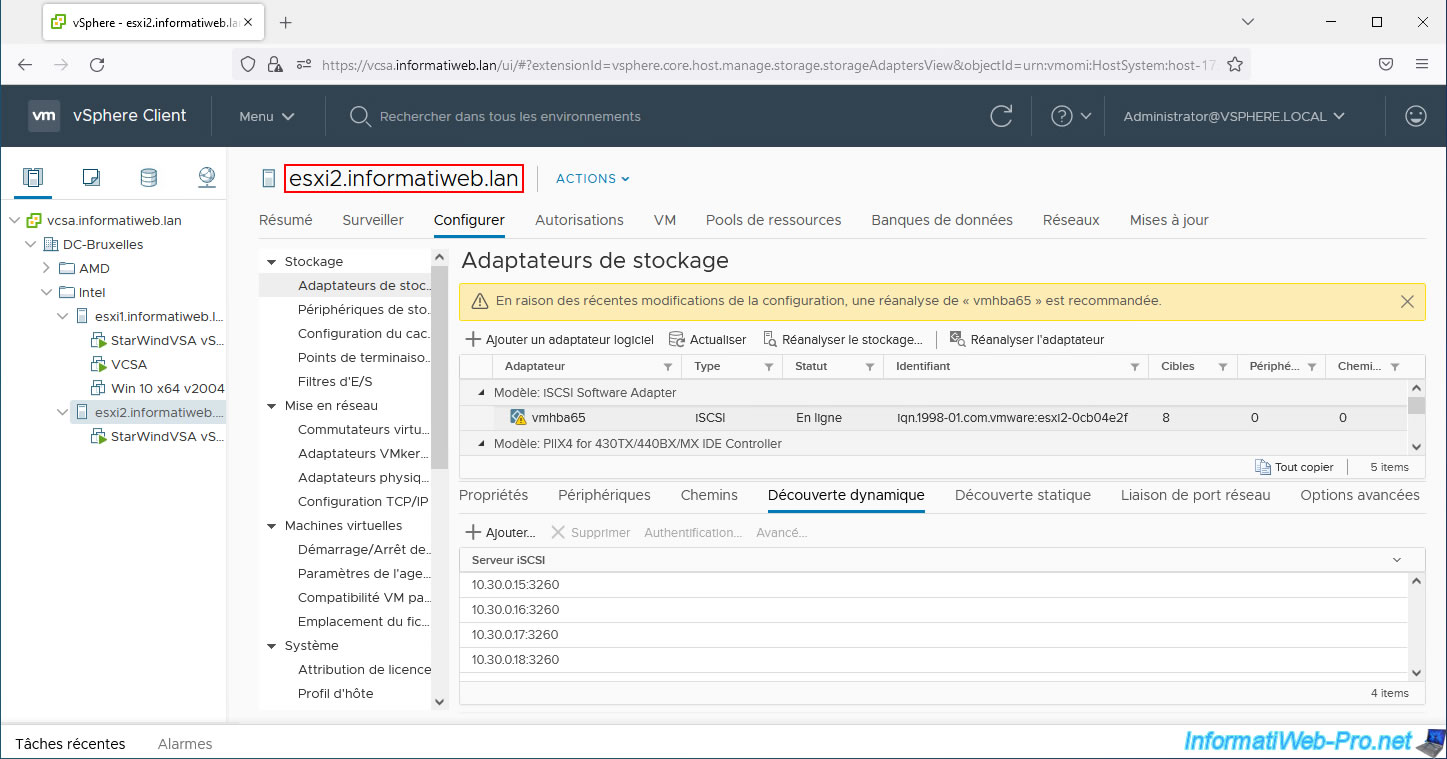
Next, select the "iSCSI Software Adapter", go to the "Dynamic Discovery" tab and click "Add".
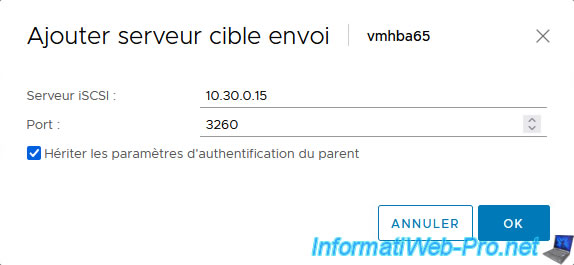
Provide an IP address of your 1st StarWind server for iSCSI traffic and click OK.
Then, click "Add" again to provide all other addresses of your 2 StarWind servers for iSCSI traffic.
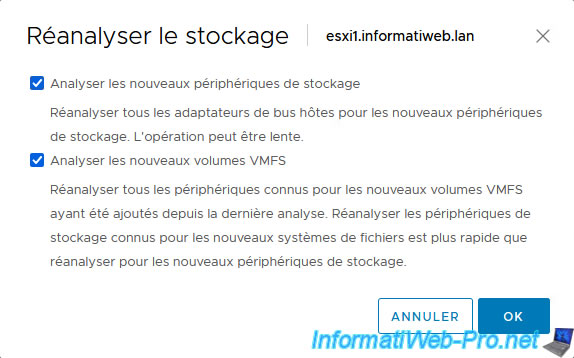
Once all these IP addresses are added, click "Rescan Adapter", then click "Rescan Storage".
Leave the 2 boxes checked and click OK.
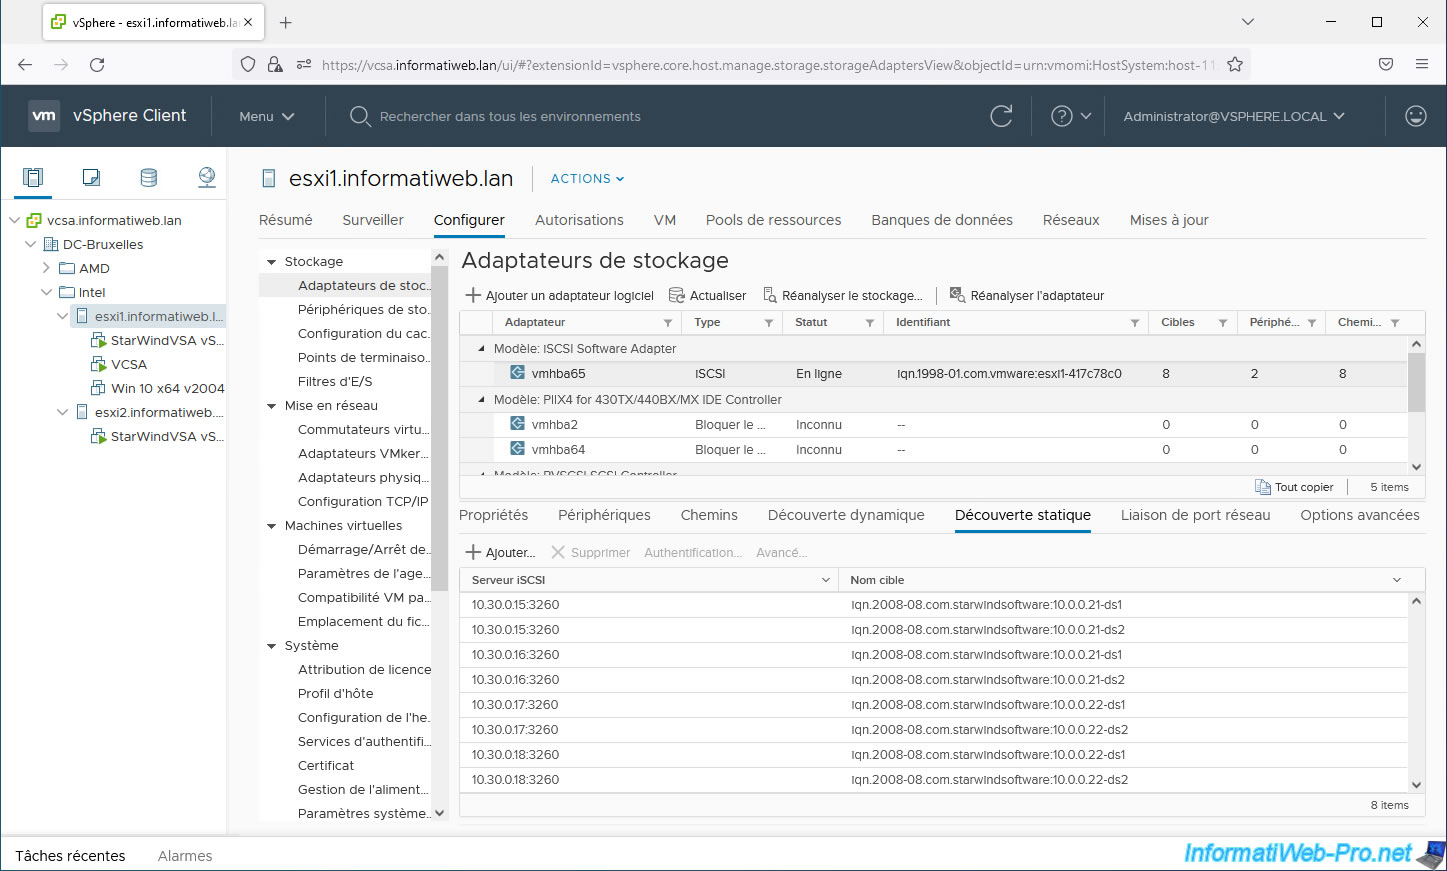
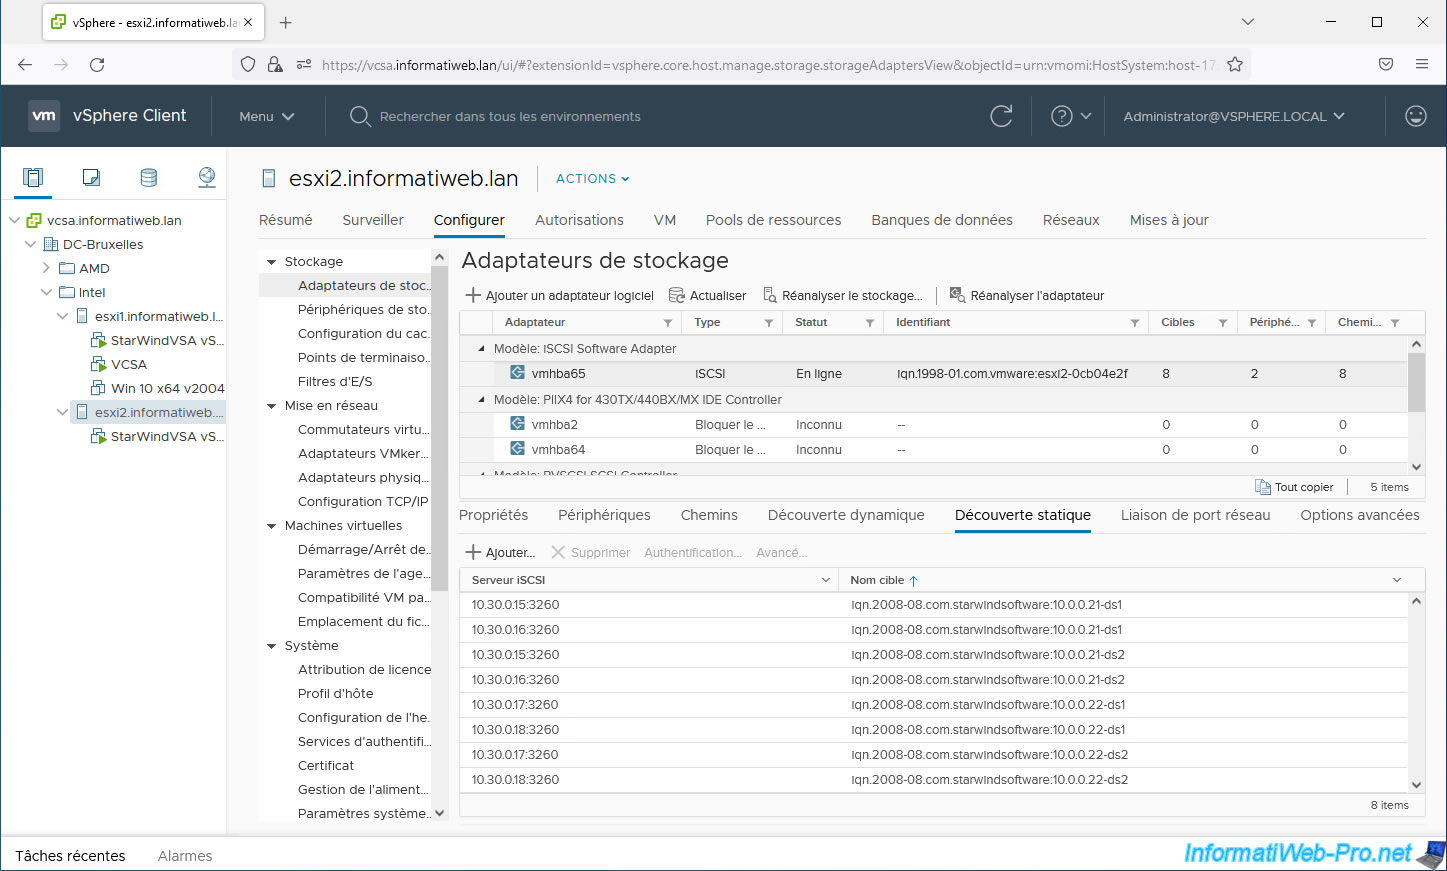
In the "Static Discovery" tab, you will see 2 iSCSI targets appear per StarWind server.
Note that there will be one line per IP address used.
Important : in this case, iSCSI targets appear because no CHAP authentication has been configured.
However, in business, we recommend that you enable CHAP authentication on your StarWind servers.
In this case, you will need to specify the VMware ESXi connection information by clicking: Dynamic Discovery -> Authentication.
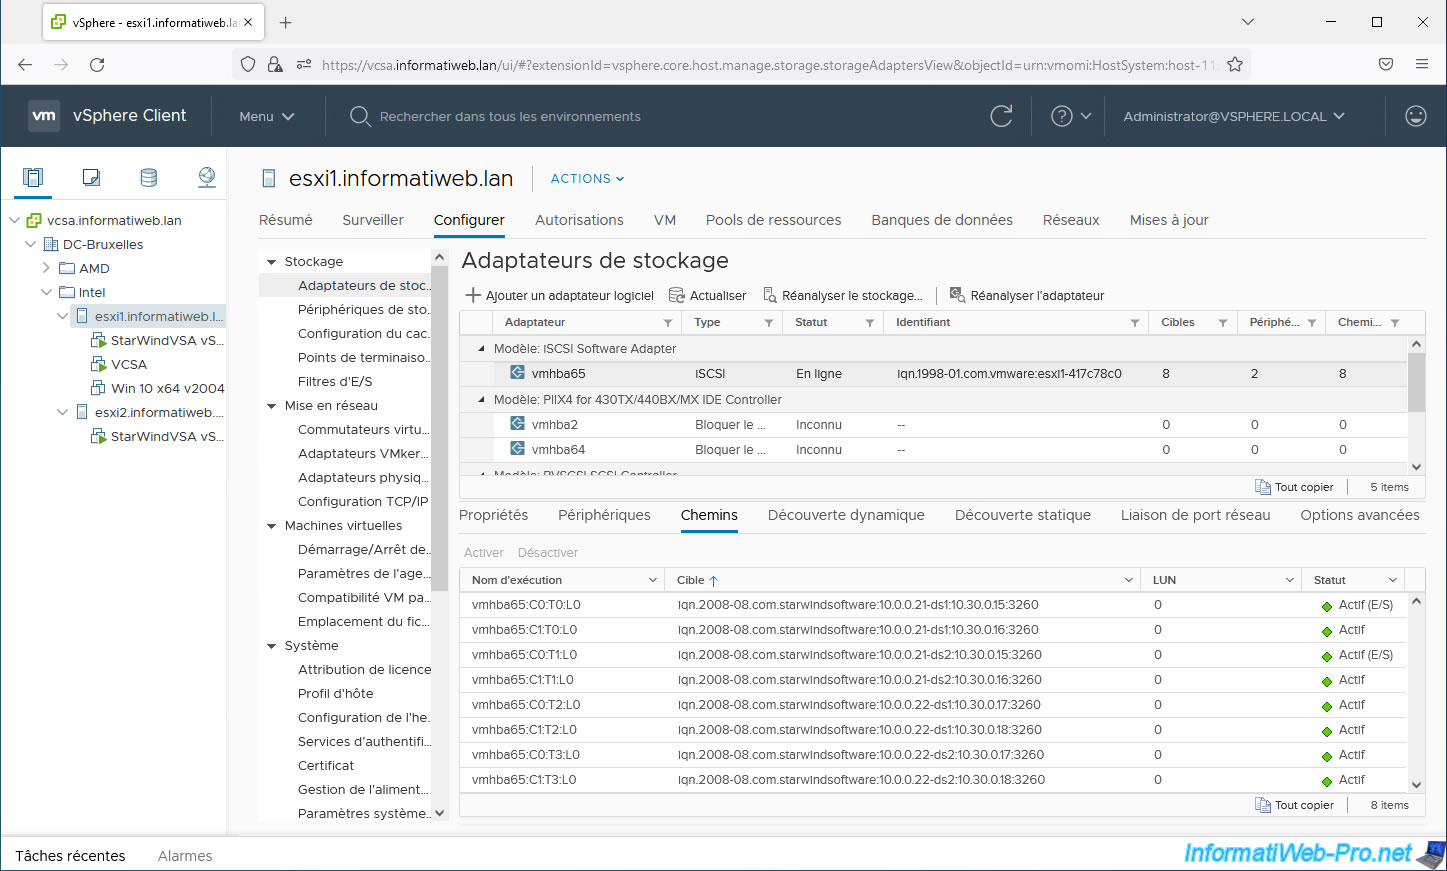
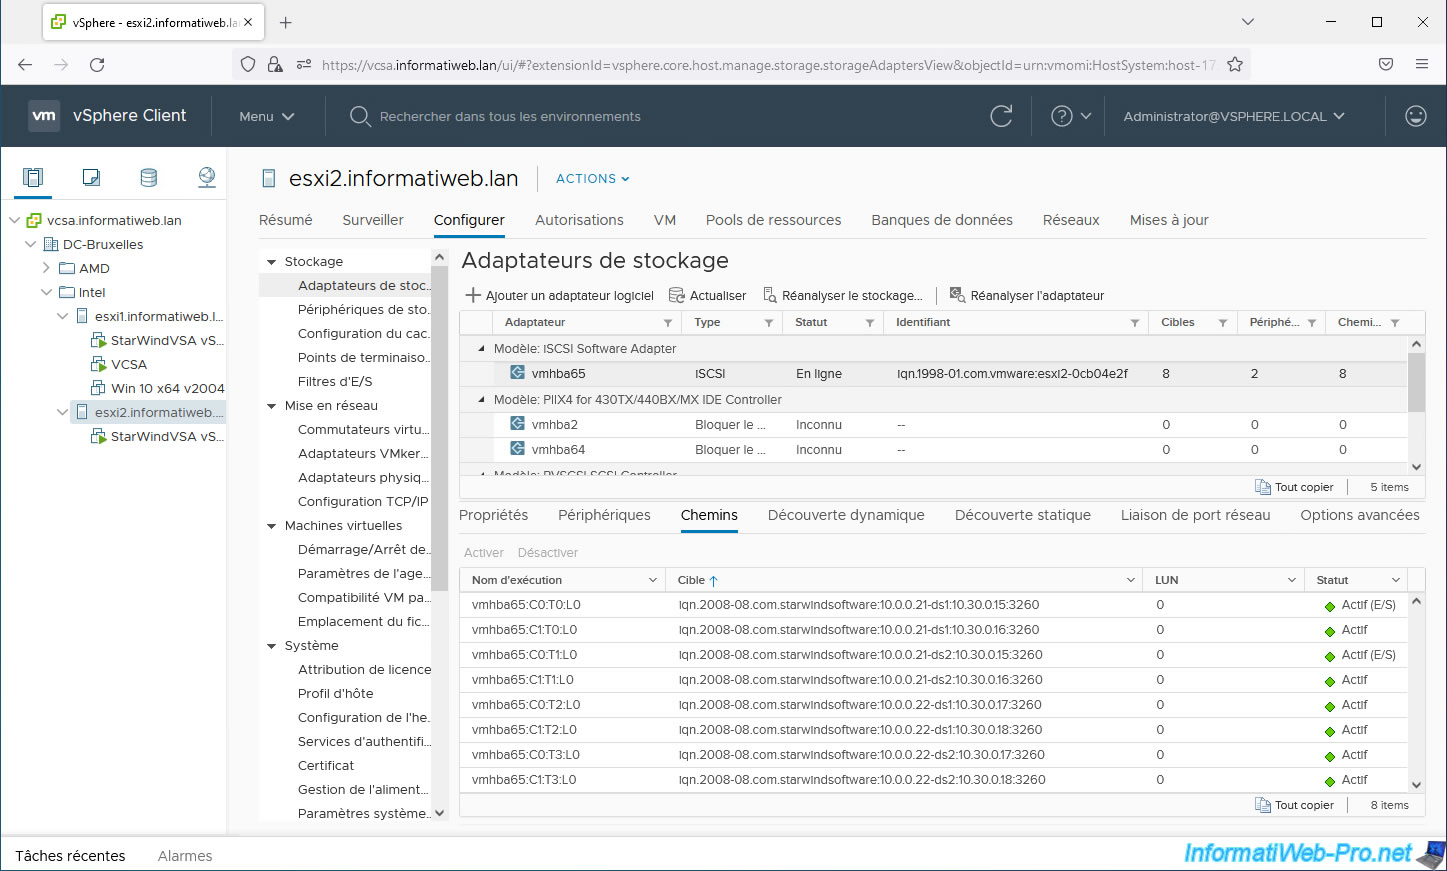
In the "Paths" tab, you will see all the existing iSCSI paths for accessing your iSCSI targets.
In the "Devices" tab, you will see your 2 iSCSI disks appear.
7.2. Configure the software iSCSI controller of your 2nd VMware ESXi host
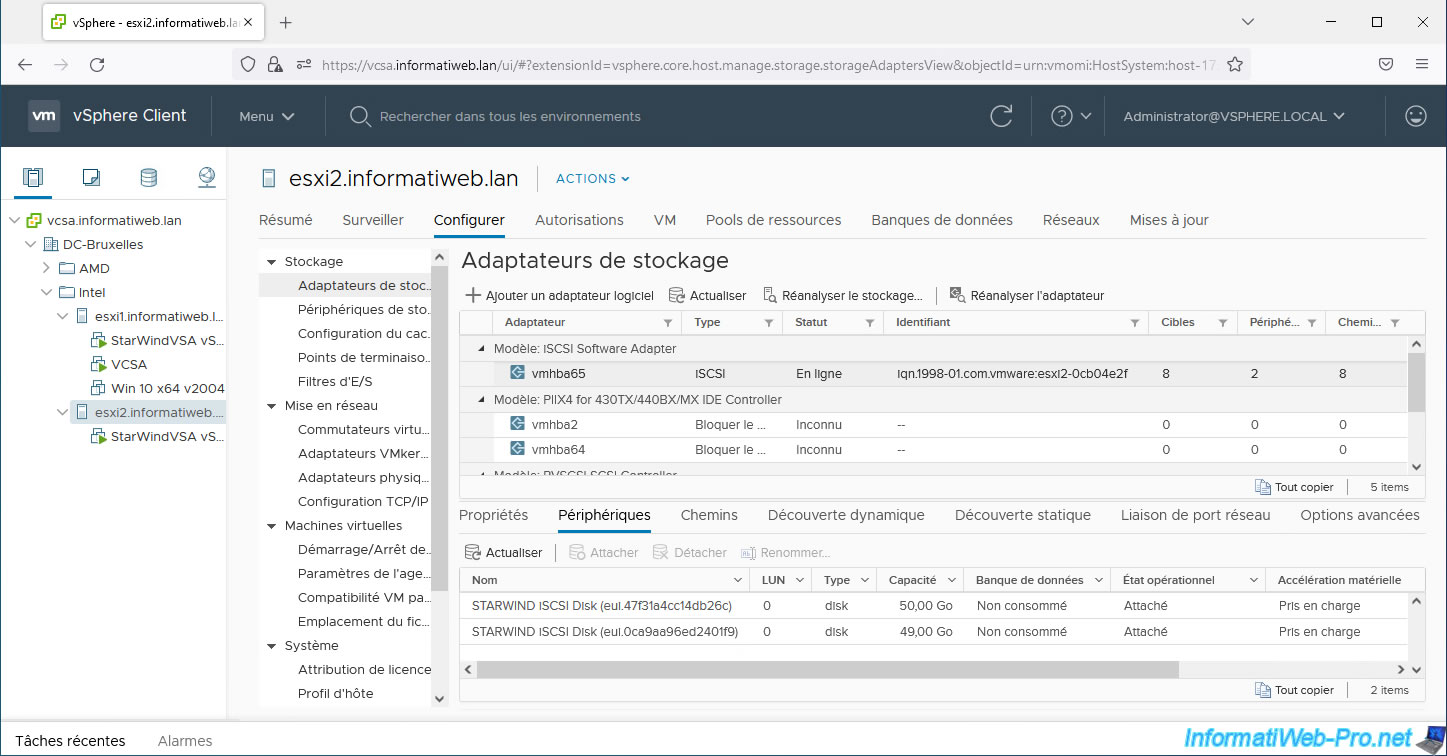
On your 2nd VMware ESXi host, do the same.
Add the different IP addresses of your StarWind servers for iSCSI traffic via the "Dynamic Discovery" tab.
Then, click "Rescan Adapter", then "Rescan Storage".
Your iSCSI targets will appear in the "Static Discovery" tab.
In the "Devices" tab, you will again see your 2 iSCSI disks "STARWIND iSCSI Disk" appear.
In the "Paths" tab, you will again see all detected iSCSI paths for access to your iSCSI targets.
Share this tutorial
To see also
-

VMware 5/15/2024
VMware vSphere 6.7 - Add a physical disk to host
-

VMware 9/27/2024
VMware vSphere 6.7 - Array integration APIs (VAAI)
-

VMware 9/6/2024
VMware vSphere 6.7 - Configure port binding (iSCSI traffic)
-

VMware 6/13/2024
VMware vSphere 6.7 - Configure Virtual Flash (SSD cache)
No comment