Deploy the StarWind Virtual SAN virtual appliance on VMware vSphere 6.7
- VMware
- 23 October 2024 at 13:00 UTC
-

- 9/15

4. Create an iSCSI disk on StarWind Virtual SAN
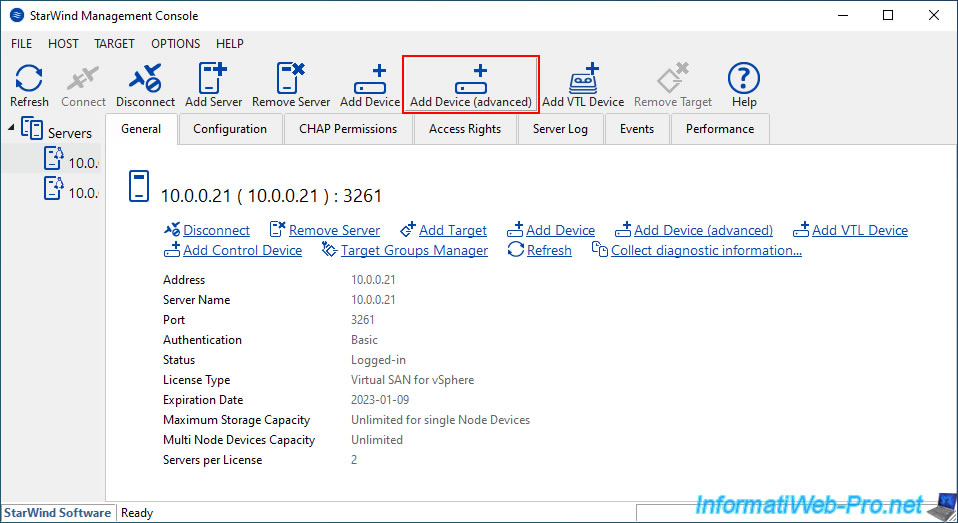
Now that you have added disks to your StarWind virtual machines, you can create an iSCSI disk on your 1st StarWind server.
To do this, select your first StarWind server (in the left column), then click: Add Device (advanced).
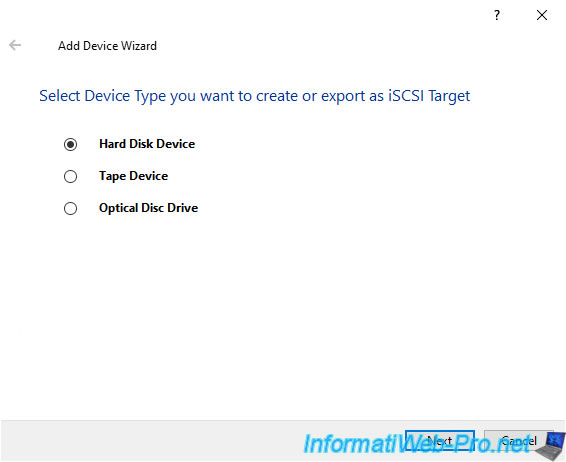
In the "Add Device Wizard" window that appears, select "Hard Disk Device" and click Next.
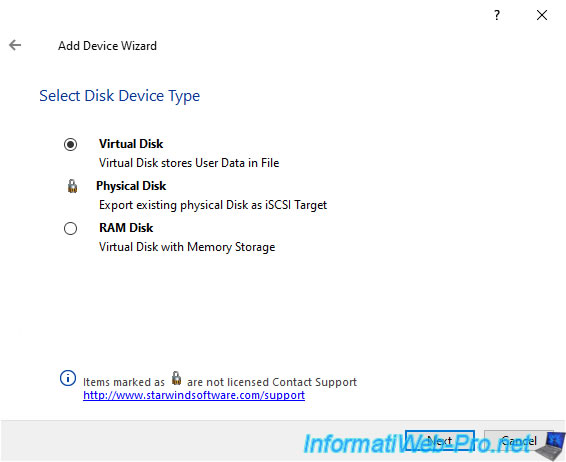
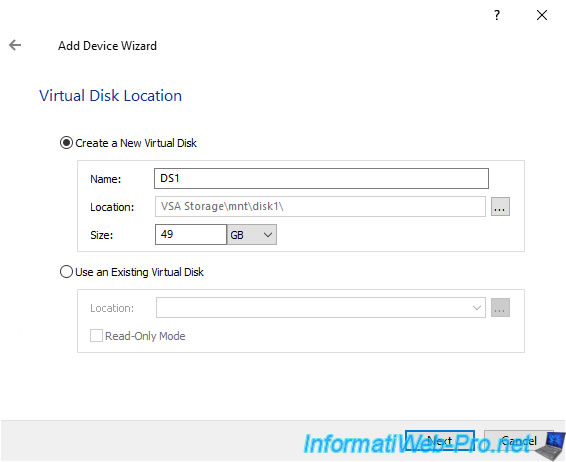
Select "Virtual Disk" to create a virtual disk that will be accessible via the iSCSI protocol.
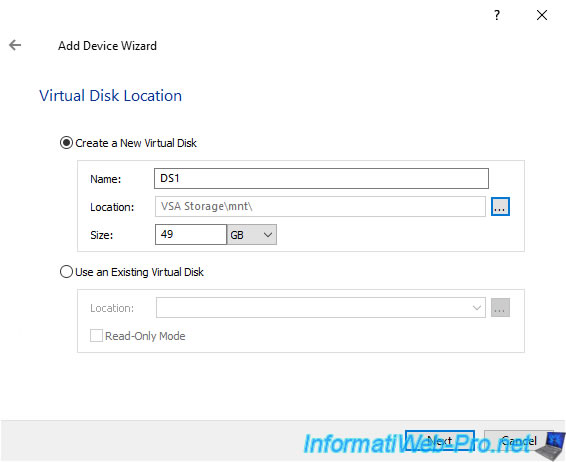
Provide a name and size for this virtual disk, then click the "..." button.
Select the "mnt" folder in the left column, then double-click on your disk name displayed on the right.
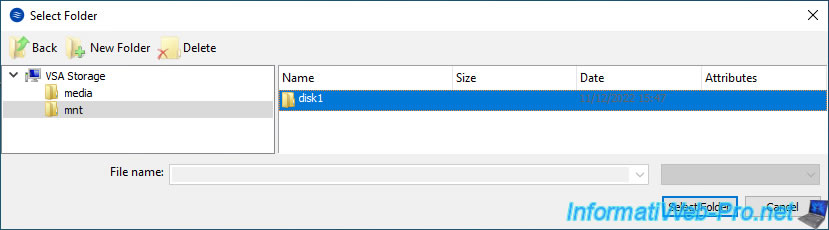
Next, click "Select Folder".
The location (Location) where this new virtual disk will be created appears.
Click Next.
Leave the default settings.
The 1st cannot be changed in this case.
The block size to use depends on the guest operating system.
In the case of a Linux-based operating system (e.g. VMware ESXi), you must use a block size of 512 bytes.
In the case of Windows, you will use a block size of 4096 bytes.
Source: StarWind Virtual SAN documentation.
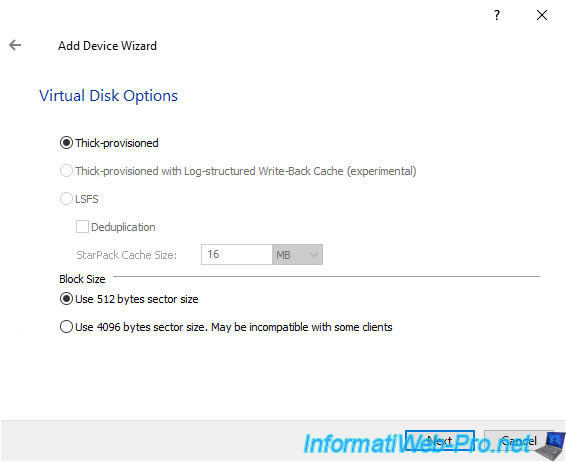
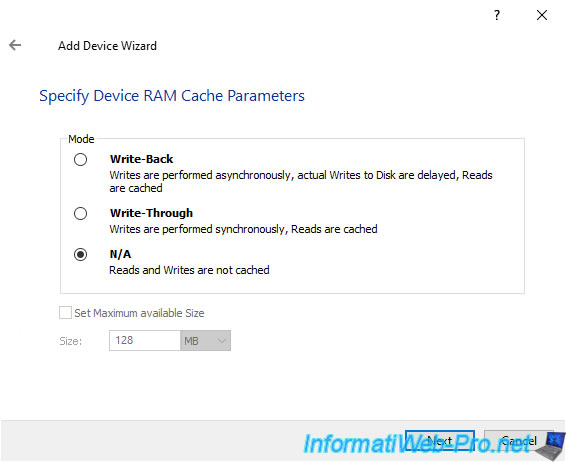
Ignore StarWind's caching system as this is optional.
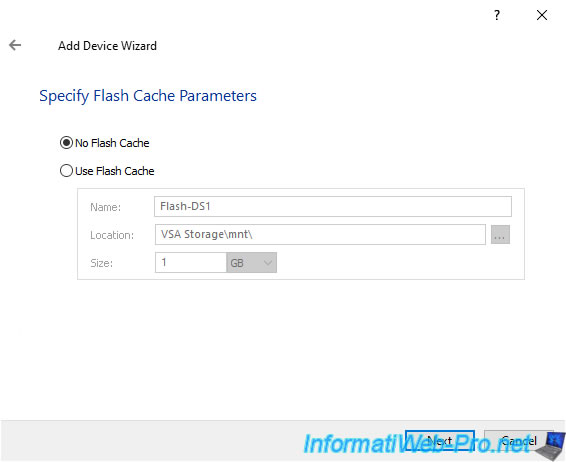
Also ignore the flash cache system.
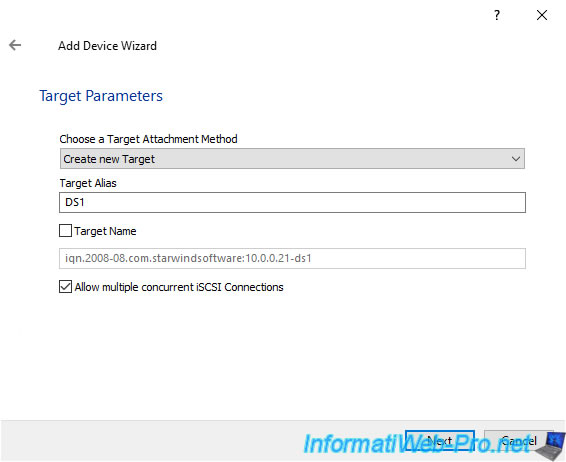
Before a client can access an iSCSI disk, you must attach it to an iSCSI target.
You must therefore create an iSCSI target the first time you create an iSCSI disk.
To do this, configure the target parameters like this:
- Choose a Target Attachment Method: Create new Target
- Target Alias: name of the iSCSI target that will be created.
In our case "DS1" (for Datastore 1). - Target Name: leave the box unchecked so that the iSCSI target name is automatically generated by StarWind.
- Allow multiple concurrent iSCSI Connections: allows multiple paths to be used to access the same iSCSI target.
In other words, this is the equivalent of MPIO on Windows Server.
Click Create.
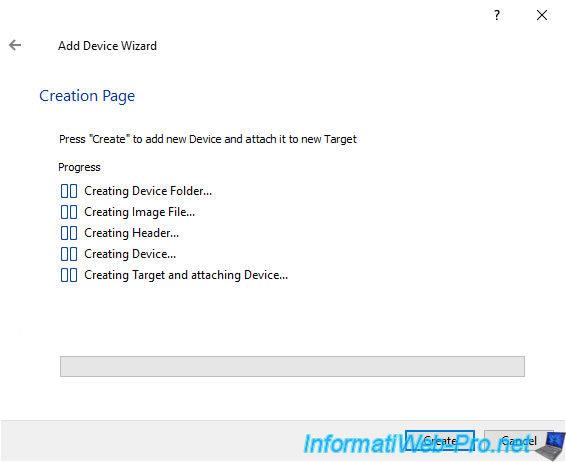
The virtual disk has been created and is named "imagefile1" by default.
Click Close.
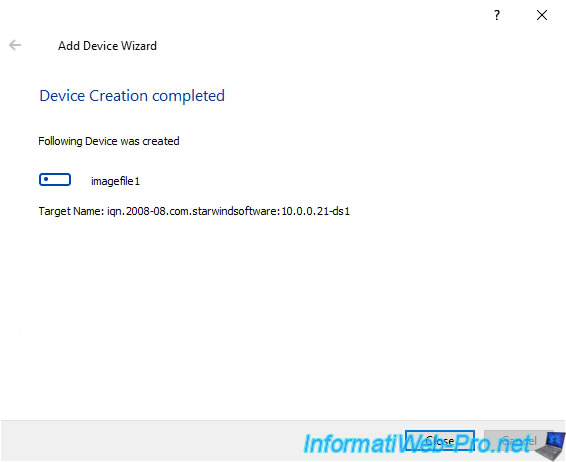
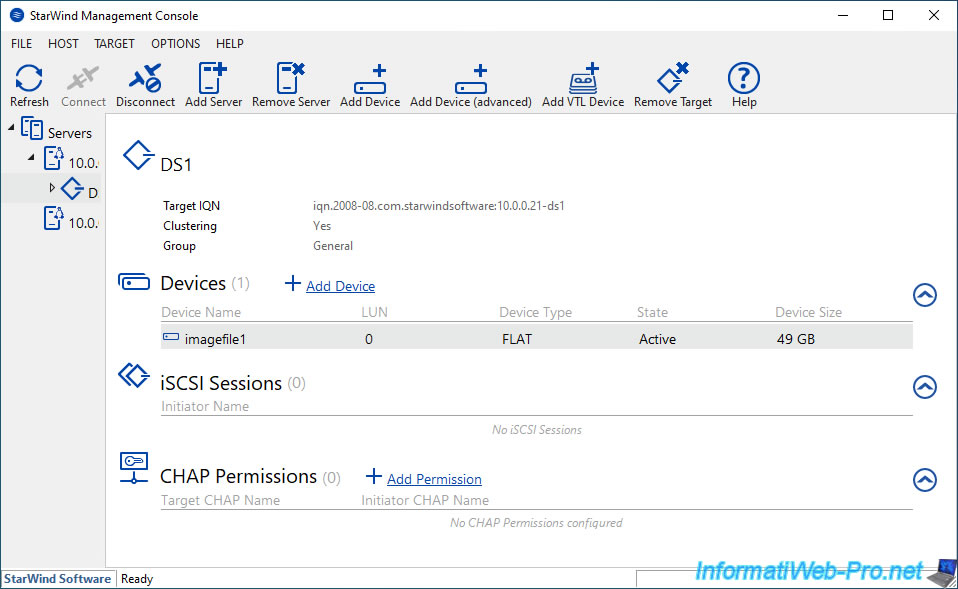
The new iSCSI target ("DS1" in our case) appears, as well as your new virtual disk "imagefile1".
Share this tutorial
To see also
-

VMware 5/15/2024
VMware vSphere 6.7 - Add a physical disk to host
-

VMware 9/27/2024
VMware vSphere 6.7 - Array integration APIs (VAAI)
-

VMware 9/6/2024
VMware vSphere 6.7 - Configure port binding (iSCSI traffic)
-

VMware 6/13/2024
VMware vSphere 6.7 - Configure Virtual Flash (SSD cache)
No comment