Deploy the StarWind Virtual SAN virtual appliance on VMware vSphere 6.7
- VMware
- 23 October 2024 at 13:00 UTC
-

- 2/15

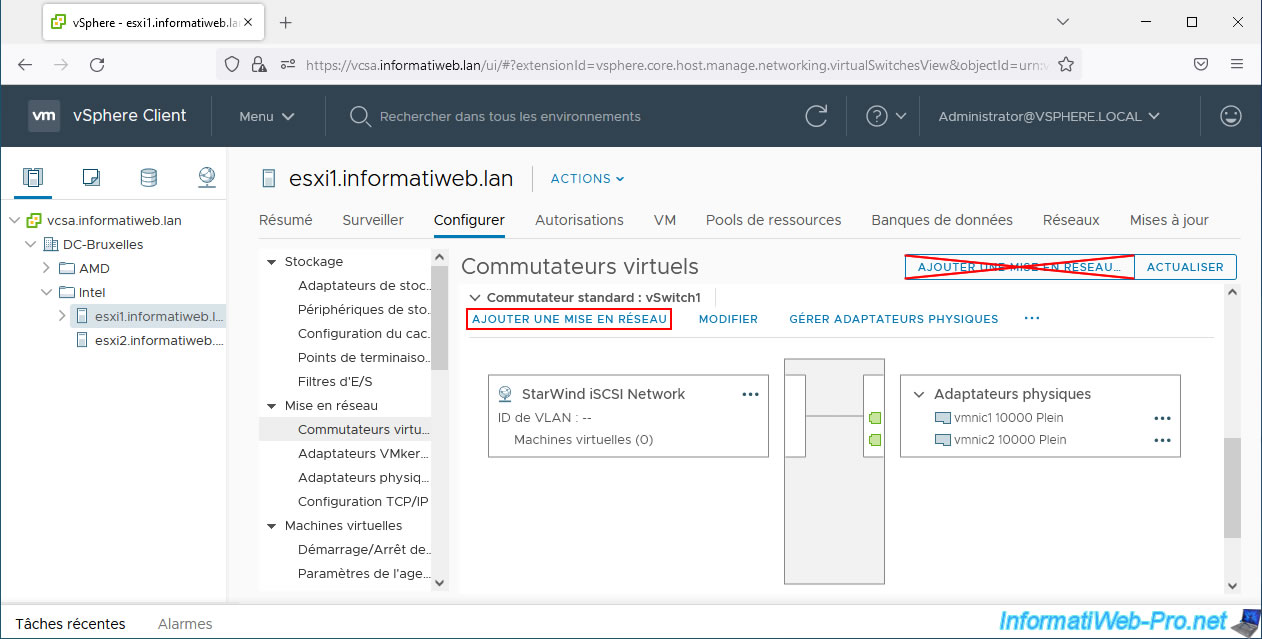
1.4. Add a VMkernel interface for iSCSI traffic
As noted in the official StarWind Virtual SAN documentation, you will need to add a VMkernel port (VMkernel adapter) for iSCSI traffic.
To do this, click on the "Add Networking" link on your standard switch corresponding to the iSCSI network.
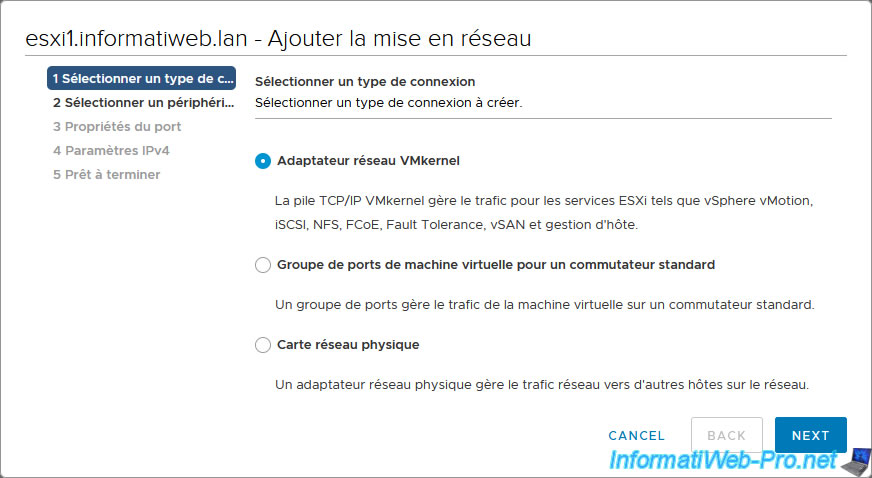
This time, select “VMkernel Network Adapter” and click Next.
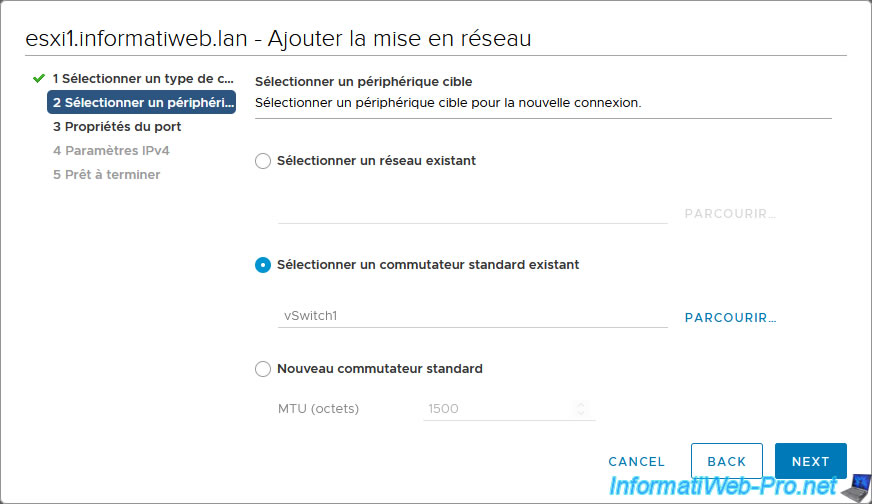
Select "Select an existing standard switch".
Note: if you have correctly clicked on the "Add Networking" link on your standard switch dedicated to iSCSI networking, it is already selected here.
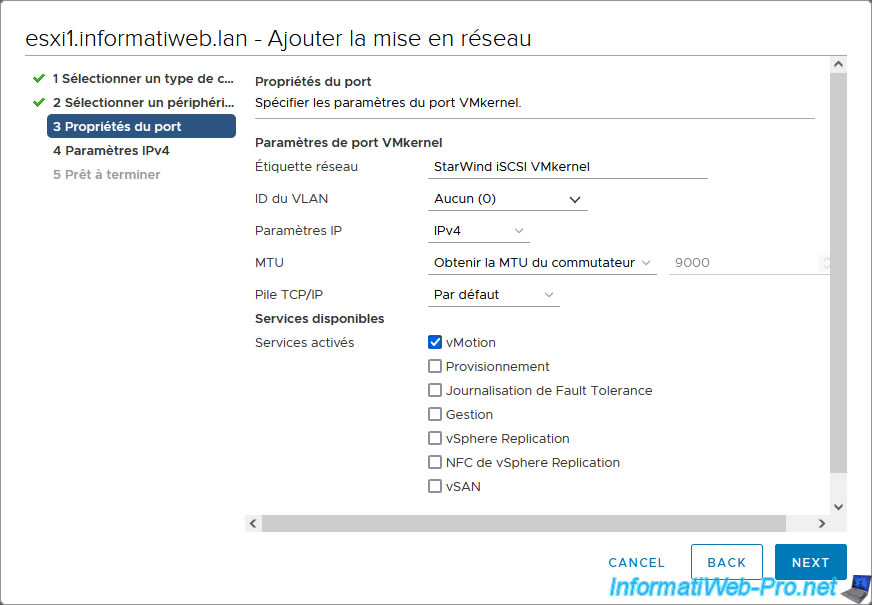
For VMkernel port settings, specify:
- Network label: StarWind iSCSI VMkernel.
- MTU: get the MTU of the switch. Which will show an MTU of 9000.
If not, check the MTU of your standard switch. - Enabled services: StarWind specifies that you can enable vMotion on this VMkernel port (although this is optional).
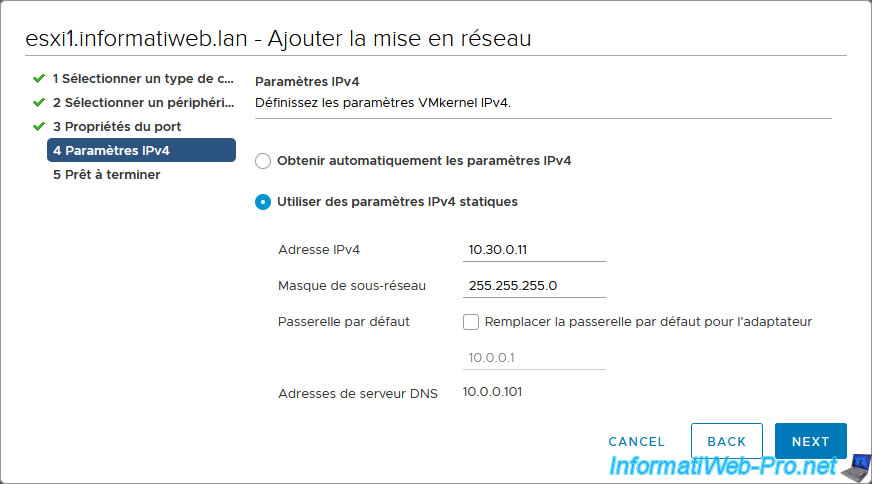
For IPv4 settings, select "Use static IPv4 settings" and specify:
- IPv4 address: the IPv4 address to set for this VMkernel port on the iSCSI network.
In our case, we will use the IP address "10.30.0.11" (which corresponds to the "10.30.0.x" network mentioned previously in the diagram presented at the beginning of this tutorial). - Subnet mask: the subnet mask to use.
In our case, we will use the subnet "255.255.255.0". Which means that the network used in our case will be: “10.30.0.x”.
A summary of your VMkernel port configuration appears.
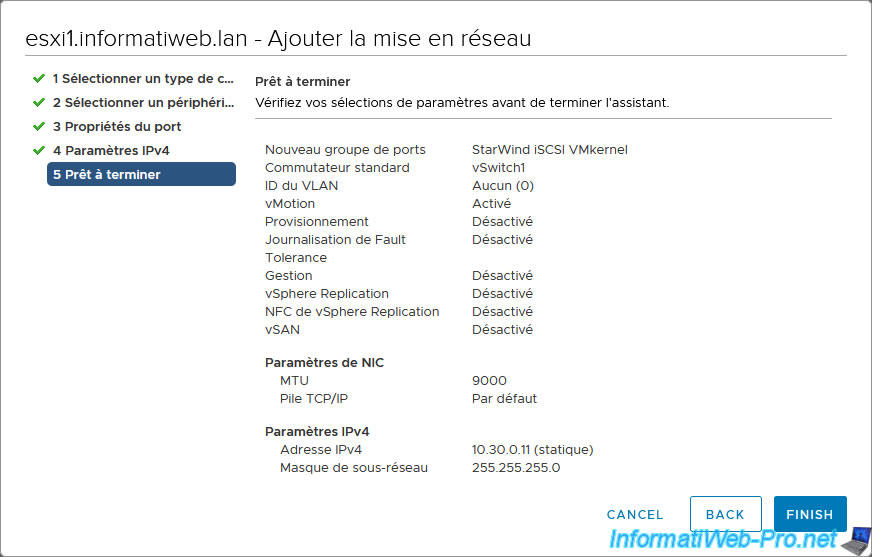
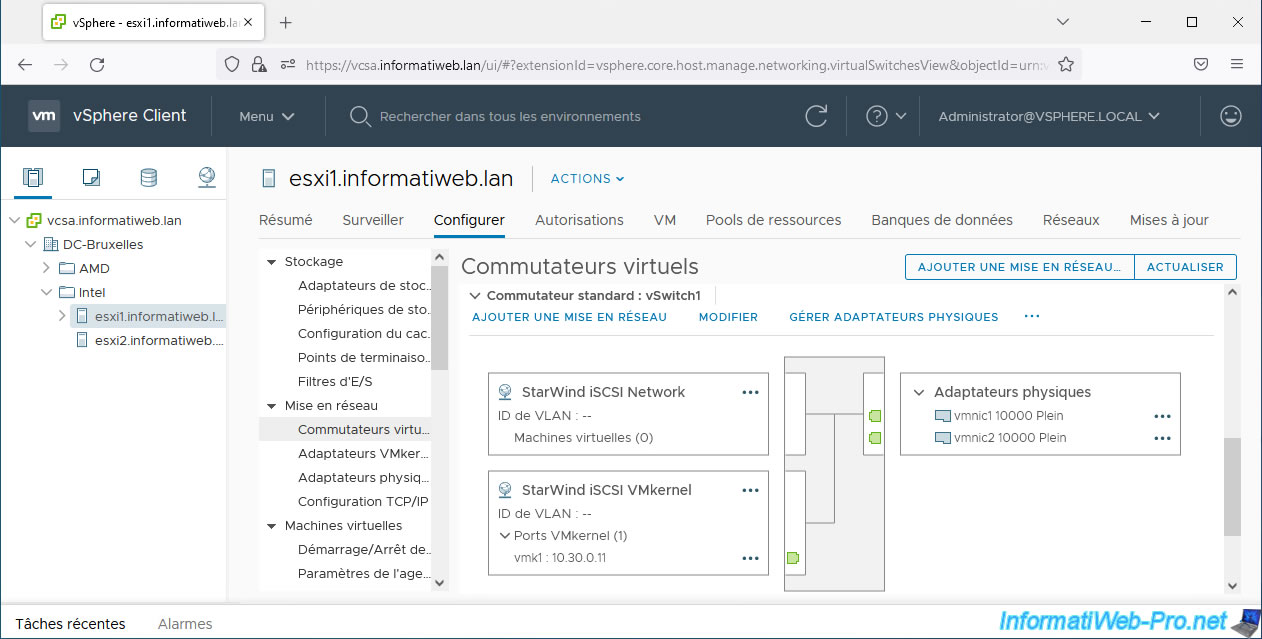
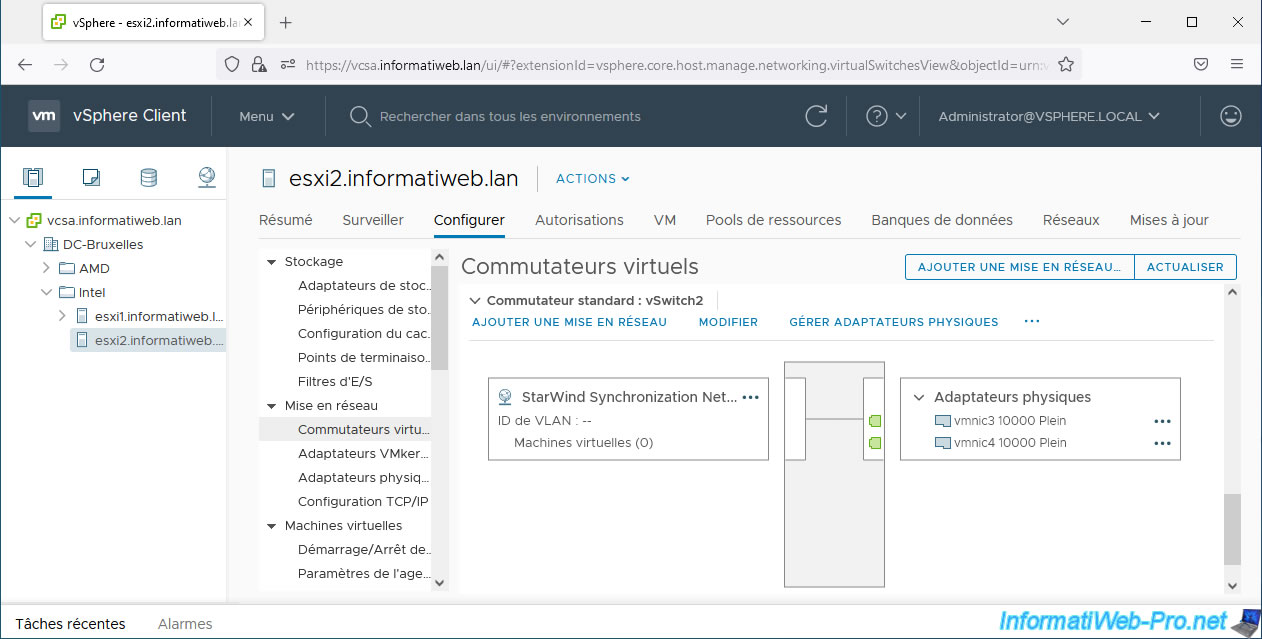
The created VMkernel port appears.
In our case, this is named "vmk1".
1.5. Configure the network on your 2nd VMware ESXi host
On your 2nd host, create a new switch for the iSCSI network with physical adapters connected to the same physical network as your 1st host's iSCSI network.
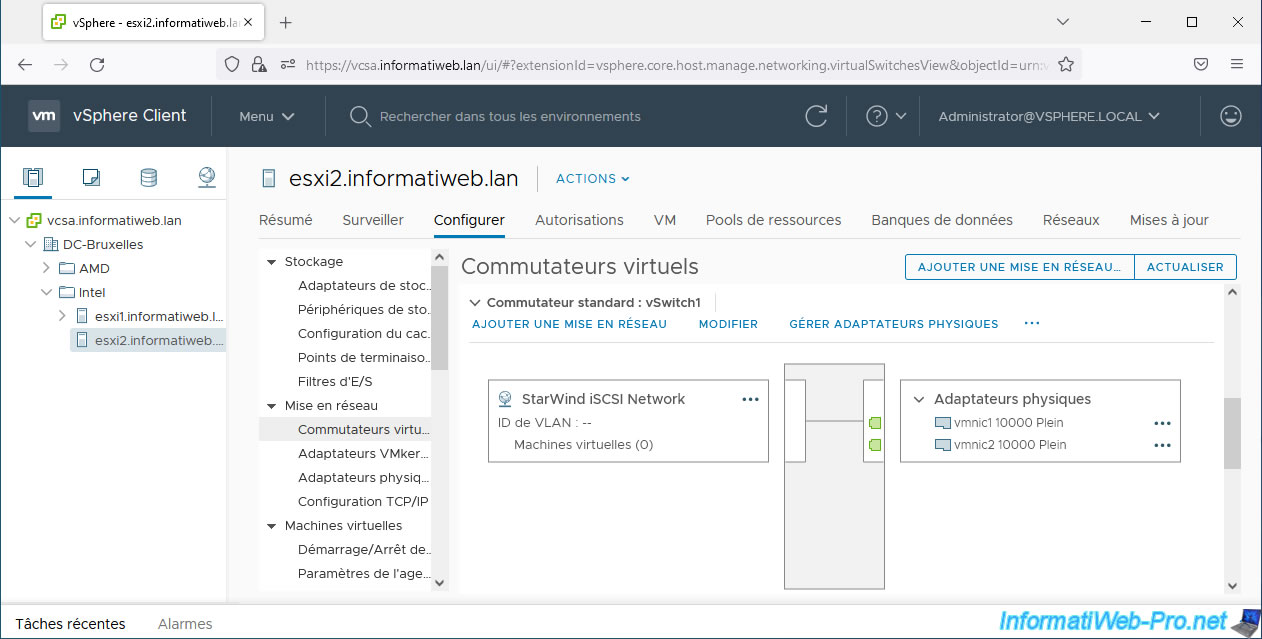
Also create the synchronization network on this 2nd host as explained previously by choosing the right physical adapters again.
And finally, don't forget to add a VMkernel port for the iSCSI network.
However, don't forget to set a slightly different IP address (in our case "10.30.0.12" instead of "10.30.0.11"), but which is in the same subnet (10.30.0.x in our case).

2. Download and deploy the StarWind Virtual SAN virtual appliance for VMware vSphere
2.1. Download StarWind Virtual SAN for VMware vSphere
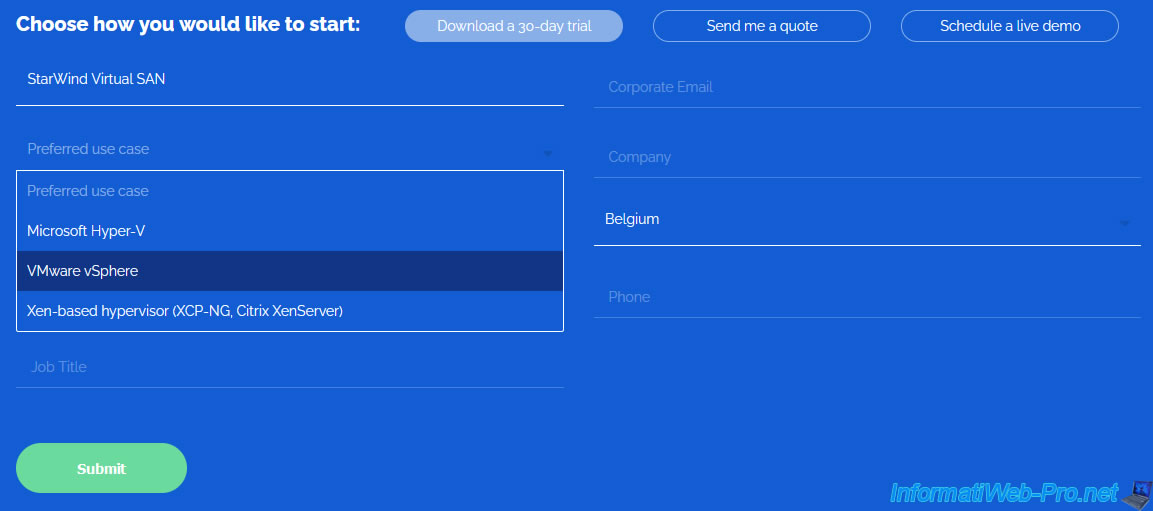
To download the StarWind Virtual SAN virtual appliance for VMware vSphere, go to the StarWind Virtual SAN download page and choose "VMware vSphere" from the form provided.
Important : provide a real email address in this form, as an evaluation license (valid for 2 StarWind Virtual SAN servers) will be sent automatically to this address.
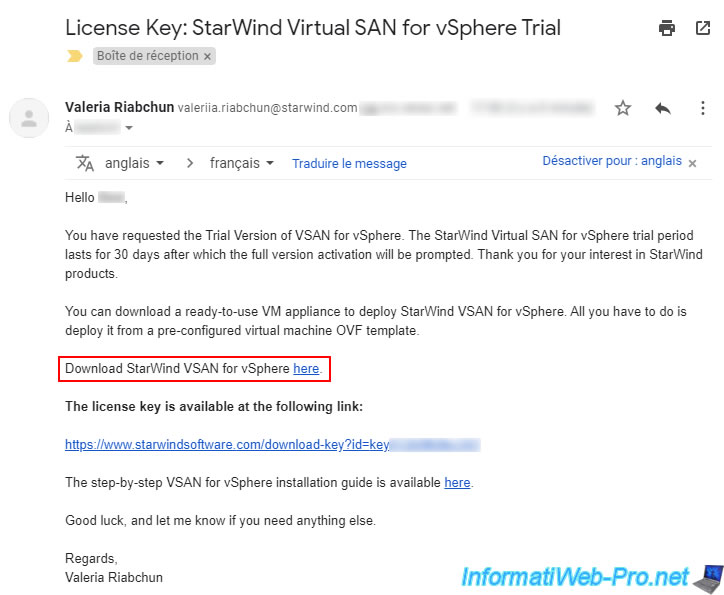
As shown on the next page, the StarWind Virtual SAN for vSphere download link and license key have been emailed to you.

Click the download link provided in this email to download StarWind Virtual SAN for vSphere.
The corresponding evaluation license is available via the download link provided just below.
You will get a "StarWindVSAN_vSphere.zip" file corresponding to the latest version of StarWind VirtualSAN for vSphere.
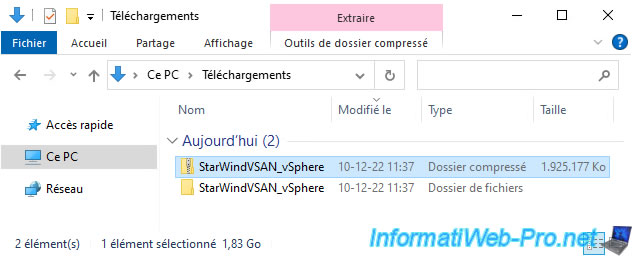
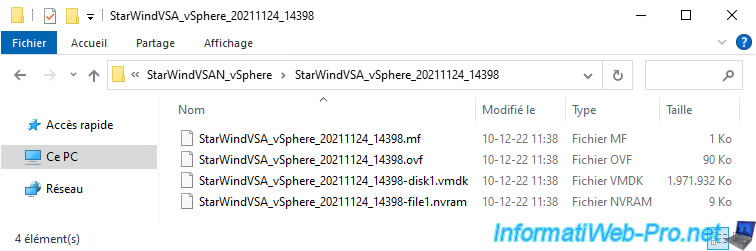
In this "StarWindVSAN_vSphere" folder, you will find another folder with the files making up this virtual appliance: its manifest file, its configuration file, its virtual hard disk and the current state of its BIOS / firmware.
Share this tutorial
To see also
-

VMware 5/15/2024
VMware vSphere 6.7 - Add a physical disk to host
-

VMware 9/27/2024
VMware vSphere 6.7 - Array integration APIs (VAAI)
-

VMware 9/6/2024
VMware vSphere 6.7 - Configure port binding (iSCSI traffic)
-

VMware 6/13/2024
VMware vSphere 6.7 - Configure Virtual Flash (SSD cache)
No comment