- NAS
- Unraid
- 02 September 2026 at 07:39 UTC
-

- 1/7


Previously, we explained how to create a gaming virtual machine on Unraid.
However, this method required a dedicated monitor, mouse, and keyboard for your gaming VM.
In this new tutorial, you will be able to use your gaming VM from your regular computer using the free software "Parsec" (a remote desktop system optimized for gaming).
Note that you will need a professional edition (or higher) of Windows to enable Windows Remote Desktop (which you will use temporarily or as a fallback if there are any issues with Parsec).
If you have a home edition of Windows for your VM, you can use the VNC protocol by installing a VNC server on your VM and the corresponding VNC client on your computer.
For this, please refer to this tutorial: Control a PC remotely via VNC protocol.
Important : before following this tutorial, please complete the first four steps of our tutorial "Unraid 6.9.2 - VMs - Create a gaming virtual machine" as the prerequisites for graphics cards and virtualization are the same.
Warning : it's necessary to have a monitor connected to the graphics card that you intend to use with your virtual machine, so that the Parsec software can function correctly and allow you to achieve an optimal screen resolution for gaming. Otherwise, which will likely be the case, you can purchase an HDMI dongle (preferably the one recommended by Parsec: CompuLab fit-Headless (GS)), which costs only $10 on Amazon.
- Enable the ACS setting in the BIOS/UEFI firmware of your motherboard
- Configure the virtual machine manager
- Free up the graphics card by assigning it to VFIO
- How to create a gaming virtual machine on Unraid
- Install Windows 10 on your virtual machine
- Install the drivers for your virtual machine on Windows 10
- Partition the second virtual hard disk of your virtual machine
- Physical processor as seen by the virtual machine
- Enable remote desktop
- Change the VNC graphics card of your VM to use your Nvidia graphics card
- Connecting to your gaming virtual machine via Remote Desktop (RDP)
- Download and install the latest driver available for your Nvidia graphics card
- Download and install Parsec (a remote desktop optimized for gaming)
- Install Parsec on the client PC
- Install Steam and then install your favorite game
- Playing Shadow of Tomb Raider on your Windows 10 virtual machine via Parsec
1. Enable the ACS setting in the BIOS/UEFI firmware of your motherboard
To ensure your gaming virtual machine can use your physical graphics card, it is recommended to enable the ACS option in your motherboard's BIOS/UEFI firmware (if this option is available).
This setting allows you to separate all the devices on your physical computer into different IOMMU groups.
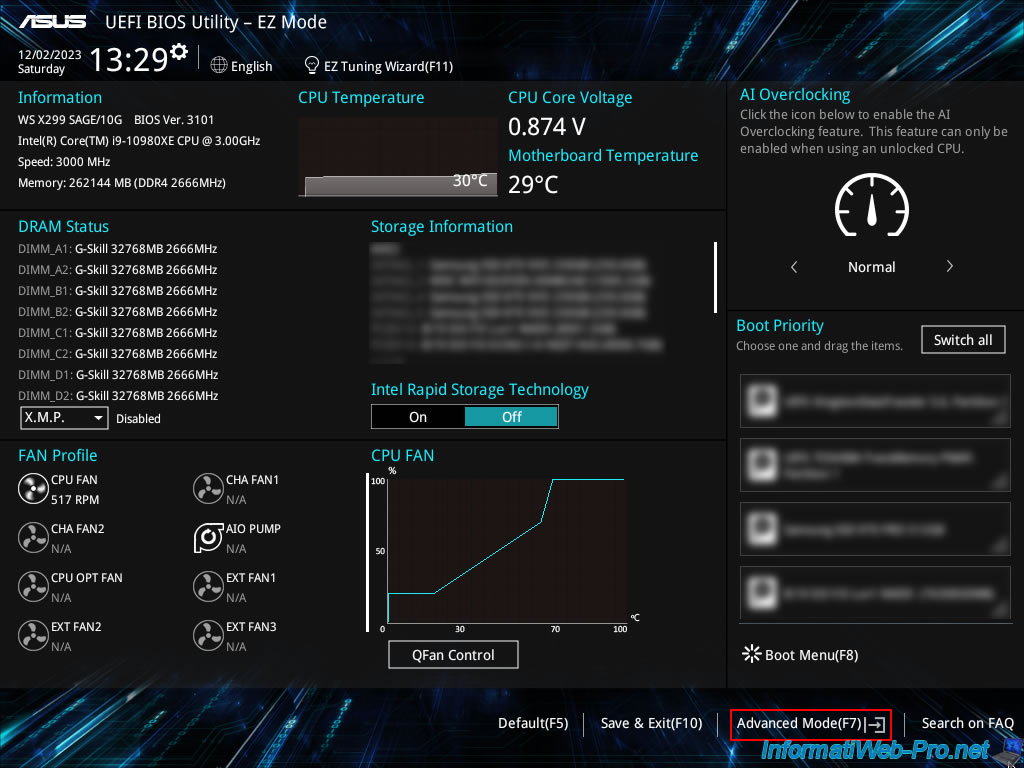
Here's an example using the Asus WS X299 SAGE/10G motherboard used in this tutorial.
When your computer starts, press the "Delete" key several times to access the BIOS of your Asus motherboard.
Then, click on "Advanced Mode (F7)".
Important : the "ACS" setting is not necessary if your graphics card is already in its own IOMMU group (as defined by your motherboard's hardware).
If your motherboard doesn't have the "ACS" setting and your graphics card is in the same IOMMU group as other devices on your physical computer, you will need to enable the "PCIe ACS override" setting to separate all the devices into different IOMMU groups.
This will resolve the GPU passthrough issue, but this setting also poses a security risk, as the virtual machine accessing the graphics card could potentially access other hardware on your physical computer through a specific attack. Therefore, it is preferable to use the "ACS" setting on your motherboard if available to avoid this security vulnerability.
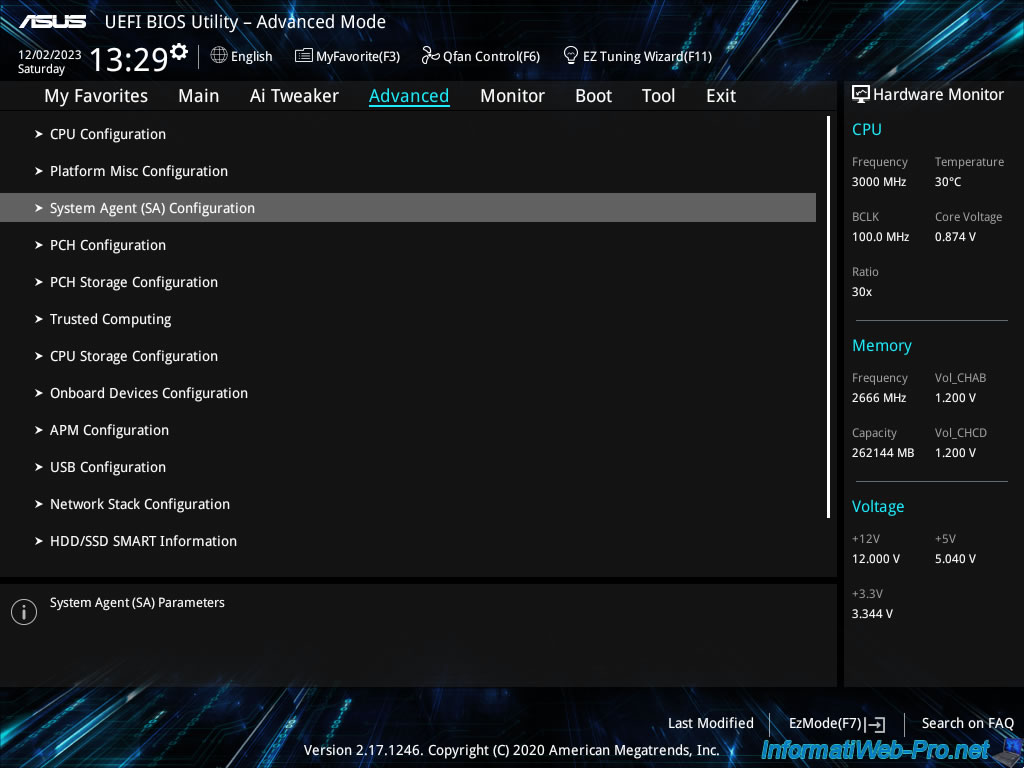
In the "Advanced" tab, go to: System Agent (SA) Configuration.
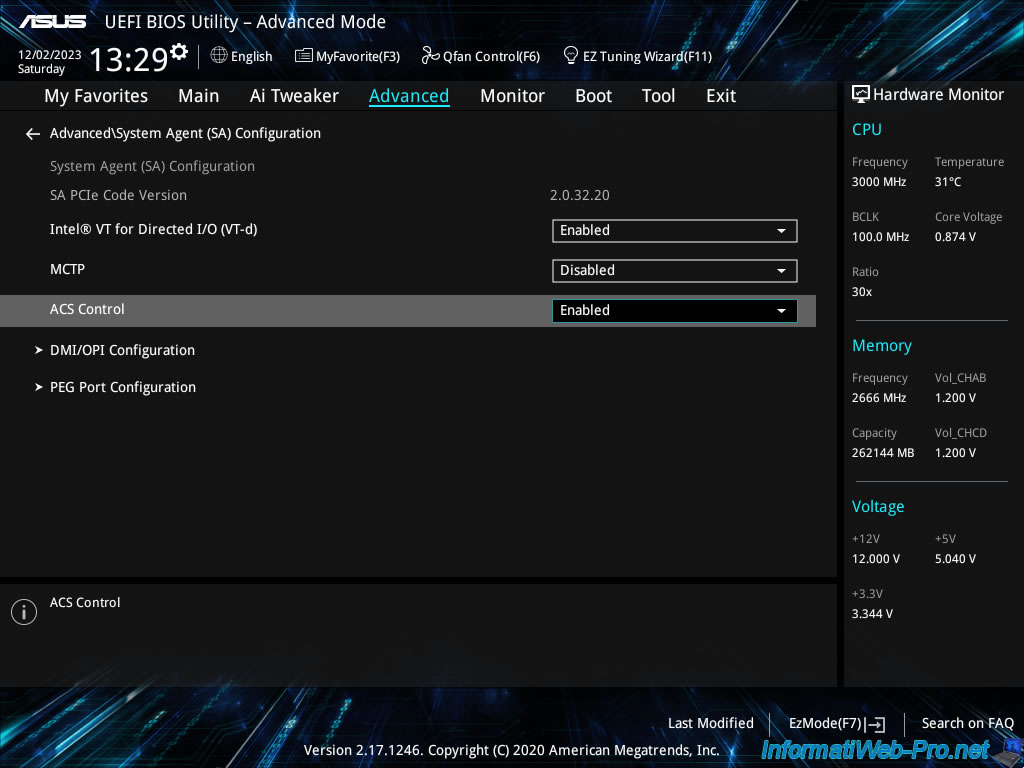
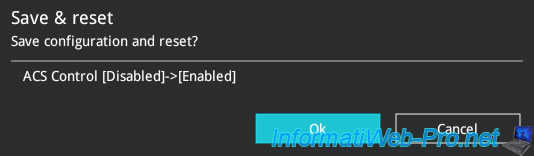
Enable the "ACS Control" setting by selecting "Enabled".
As explained in our previous tutorial (mentioned above), your computer will, by default, initialize the graphics card located in the first PCIe slot.
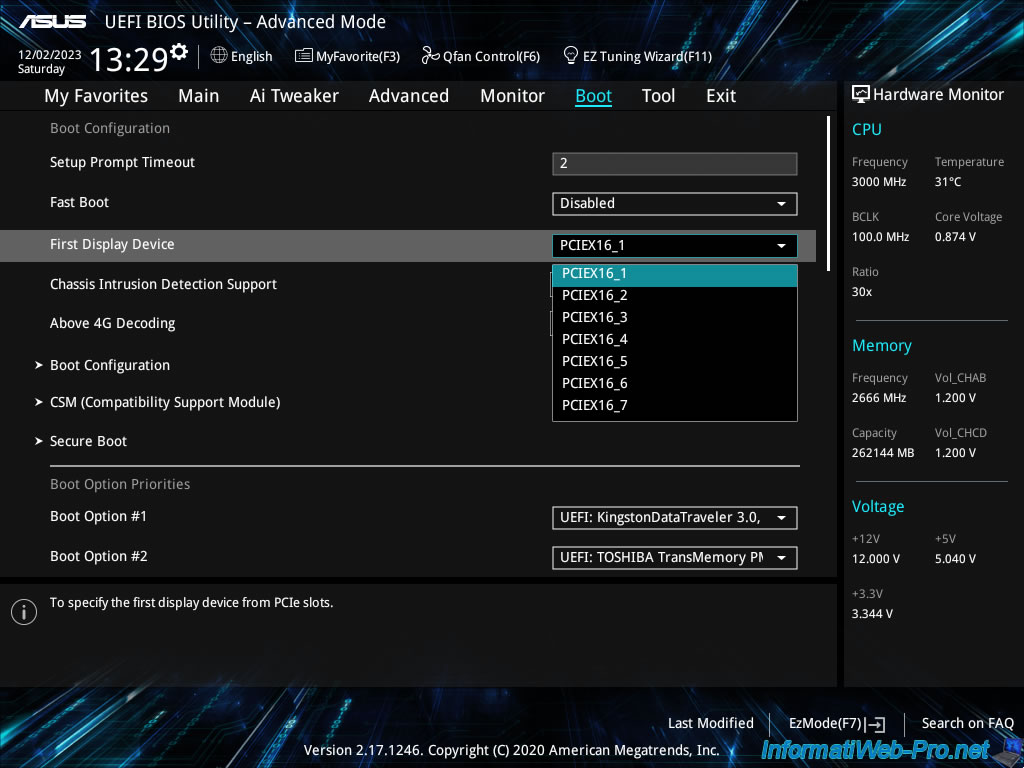
With Asus motherboards, you may find a "First Display Device" setting in the "Boot" tab of the BIOS/UEFI firmware.
As you can see, by default, the first PCIe slot is selected. In our case: PCIEX16_1.
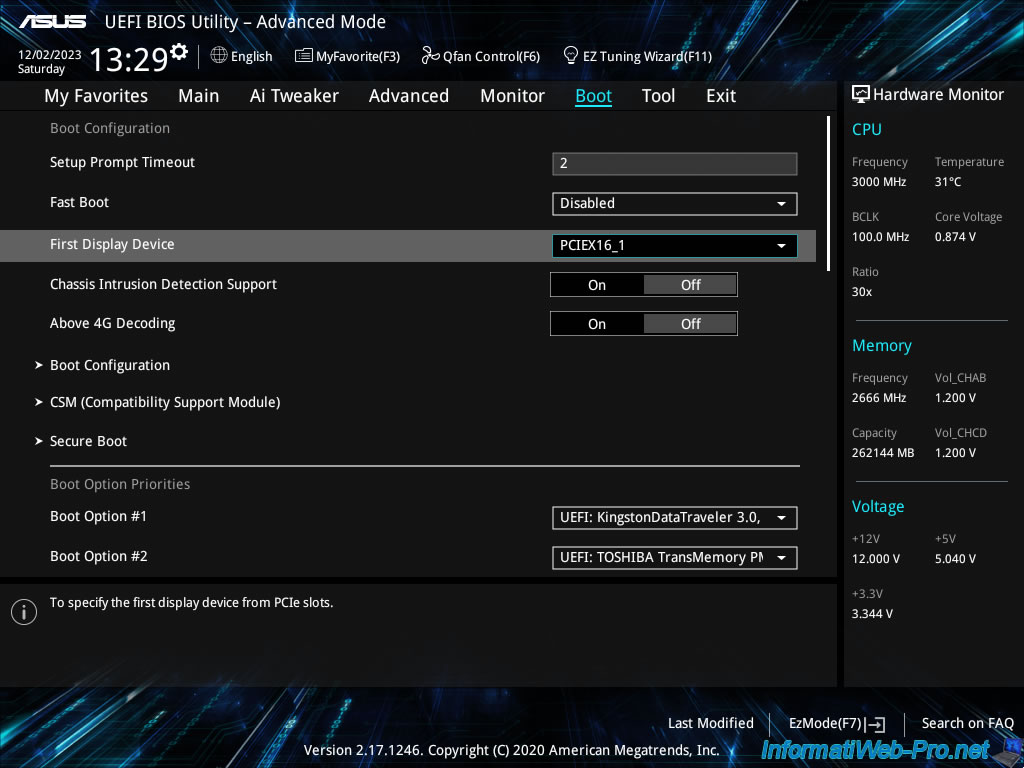
If necessary, select the PCIe slot where the graphics card is located that you want to use exclusively for the Unraid server console.
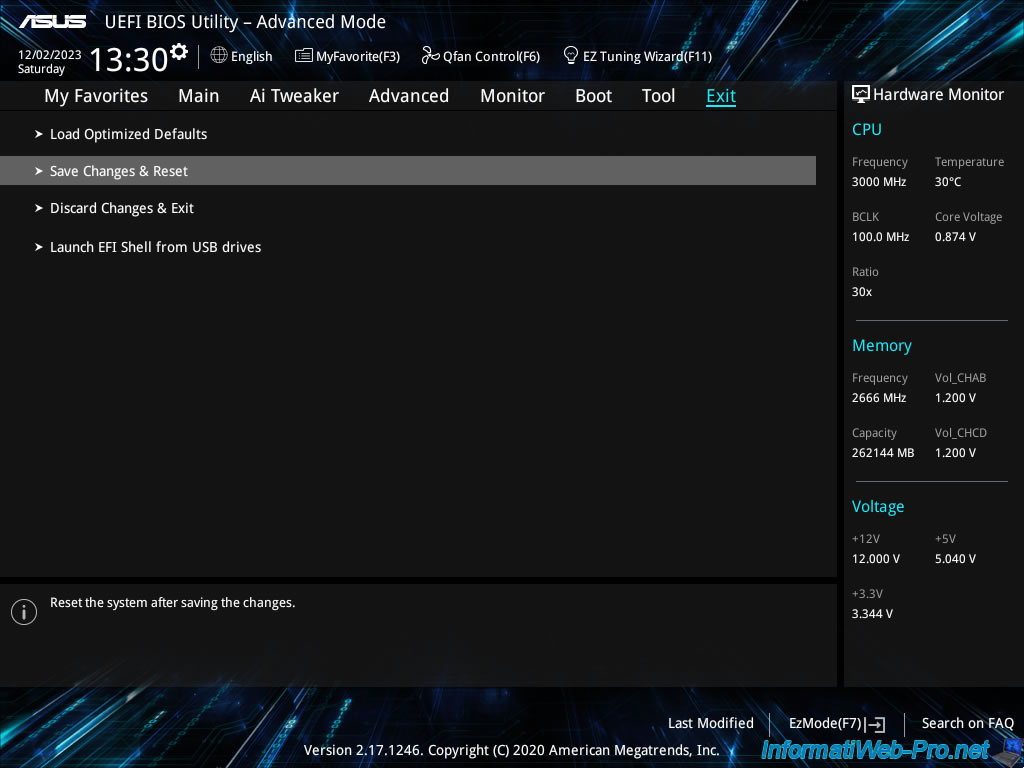
Finally, go to the "Exit" tab and click on: Save Changes & Reset.
Confirm that you want to save this change by clicking OK.
2. Configure the virtual machine manager
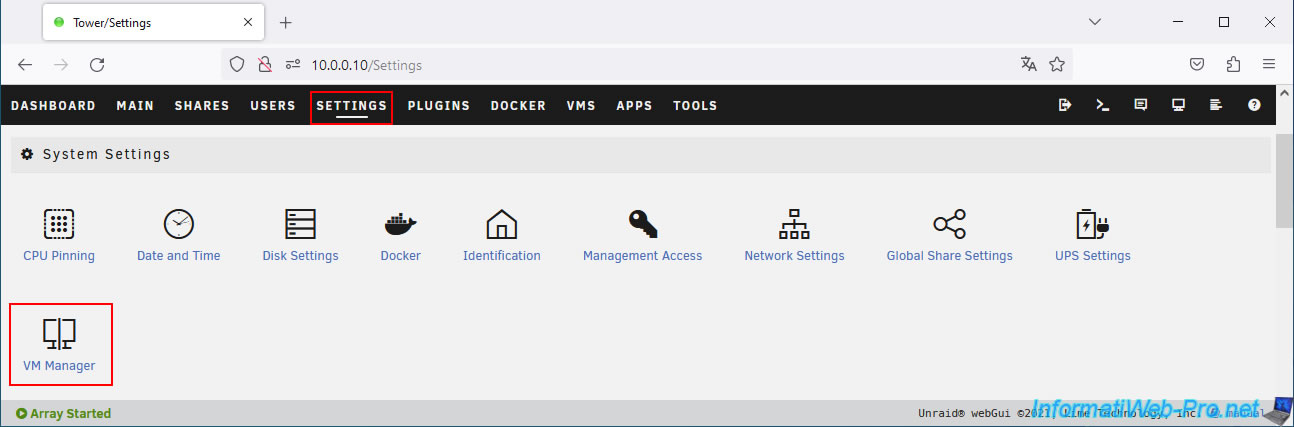
To begin, go to: Settings -> System Settings -> VM Manager.
As you can see, the last two settings are disabled by default.
Important : these default values (Disabled/No) are recommended, as they provide greater security and functionality, especially if the graphics card you intend to use with your virtual machine is in a separate IOMMU group.
Warning : if this graphics card is in the same IOMMU group as other devices on your physical computer, enable the "ACS" setting in your motherboard BIOS (if available).
If your motherboard BIOS does not have an "ACS" setting, then enable both settings below as explained here.
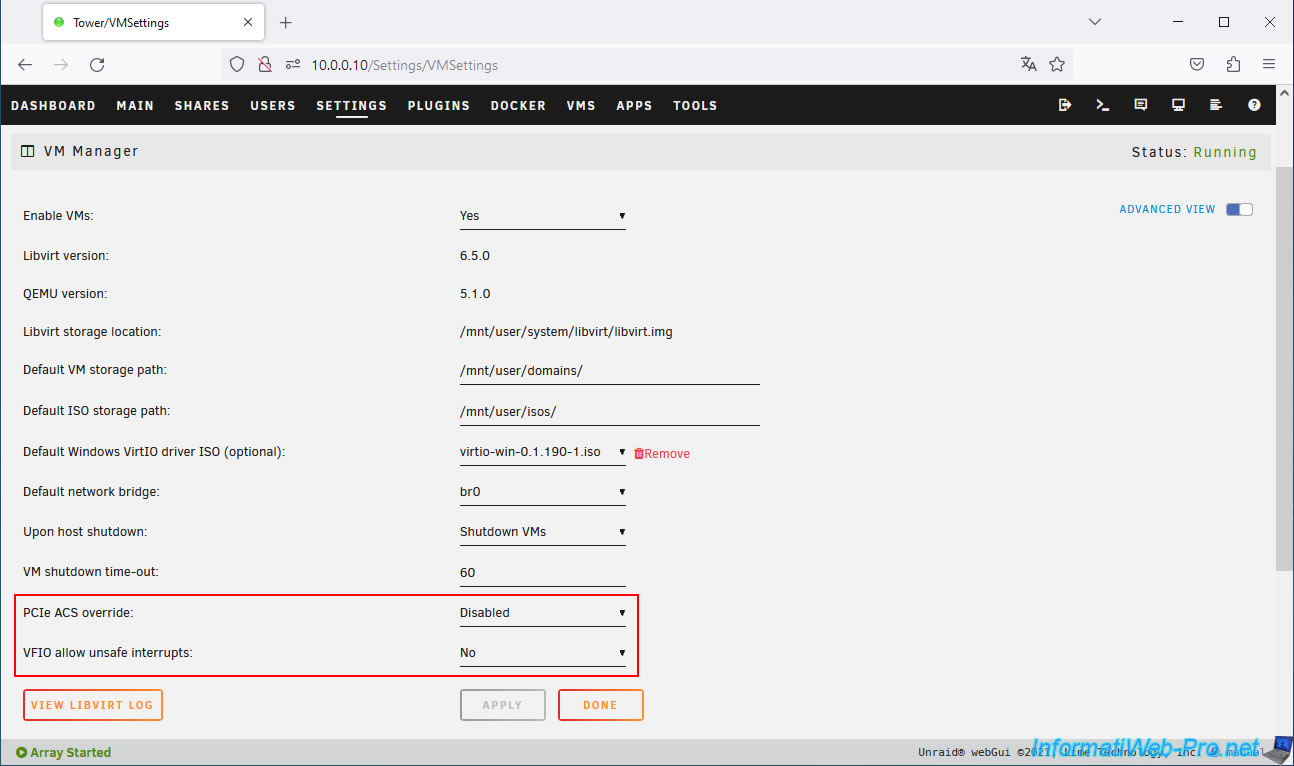
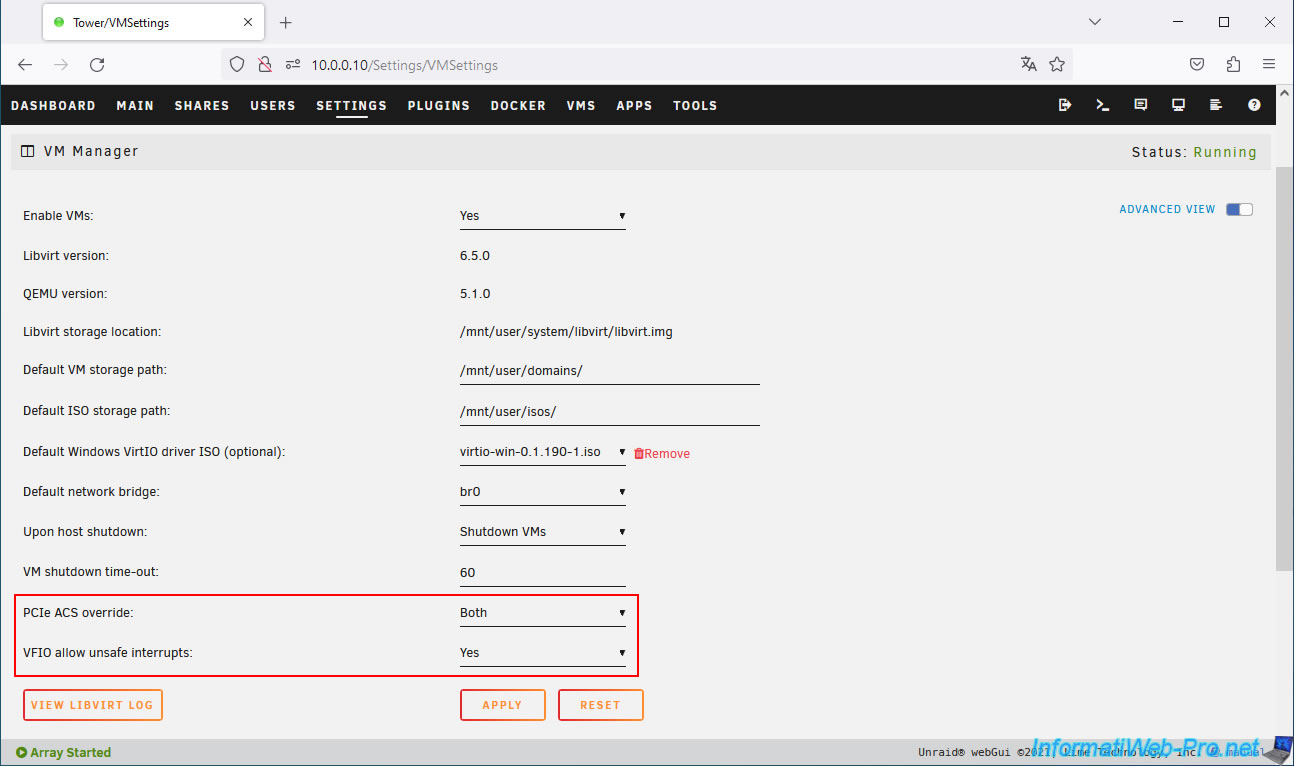
Enable these last two settings as shown so that the graphics card can be placed in a separate IOMMU group, allowing it to function correctly in your future virtual machine without causing any issues on your Unraid server:
- PCIe ACS override: Both.
- VFIO allow unsafe interrupts: Yes.
Next, click on: Apply.
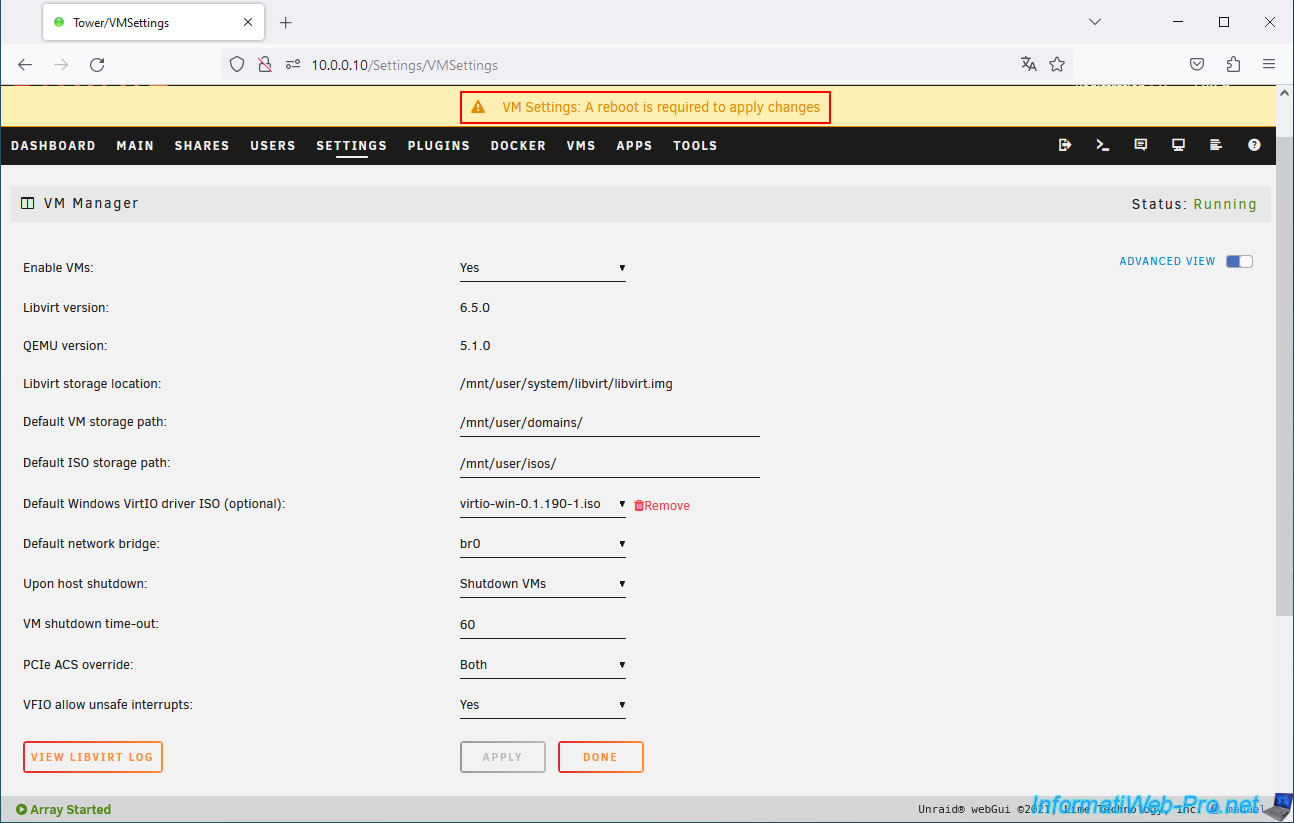
At the top of the page, you will see a warning message appear.
Plain Text
VM Settings: A reboot is required to apply changes
Warning : do not restart immediately; another change also requires a restart.
3. Free up the graphics card by assigning it to VFIO
To use your graphics card from within your virtual machine, it must not be used by Unraid.
To do this, you need to release it by assigning it to VFIO.
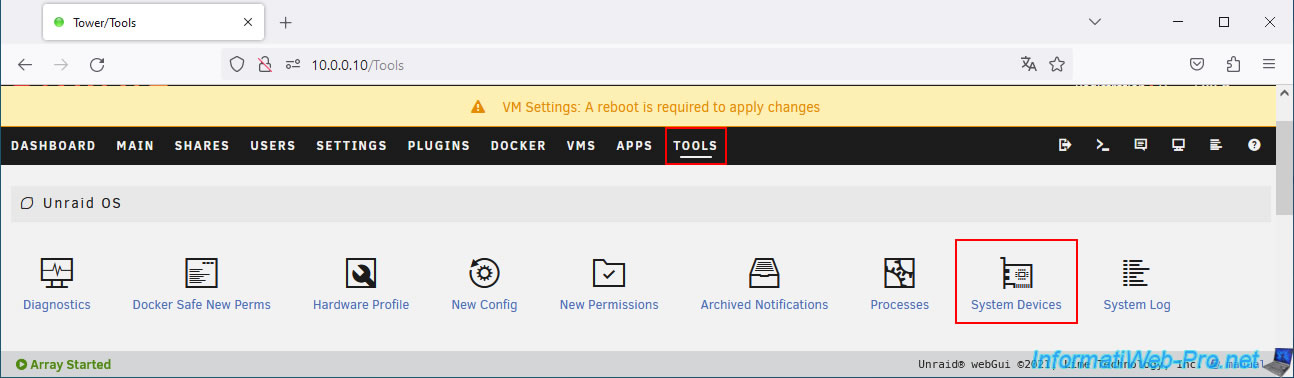
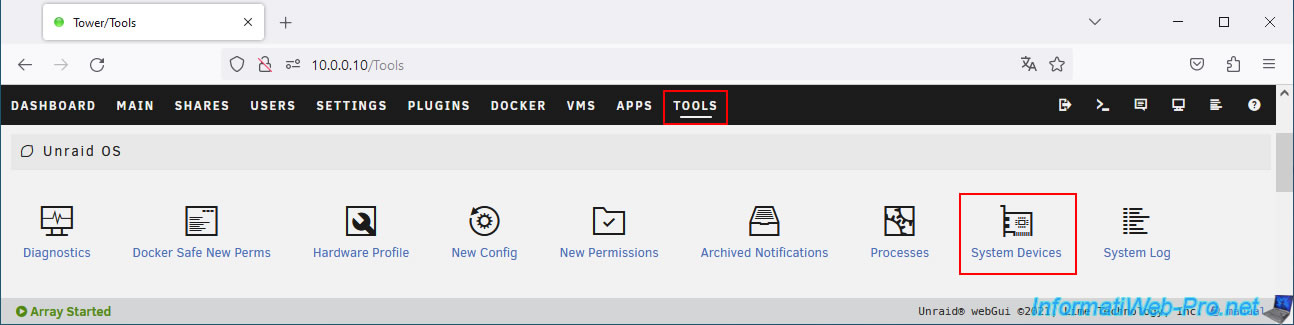
Go to: Tools -> Unraid OS -> System Devices.
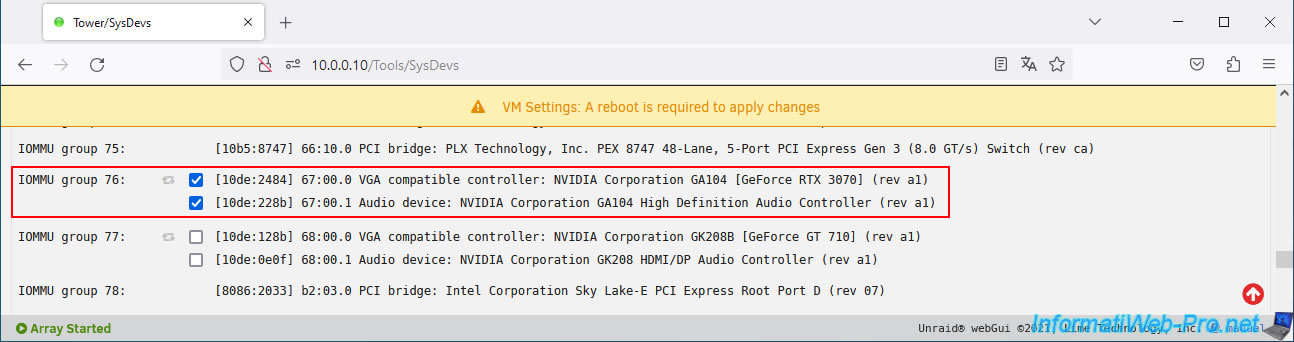
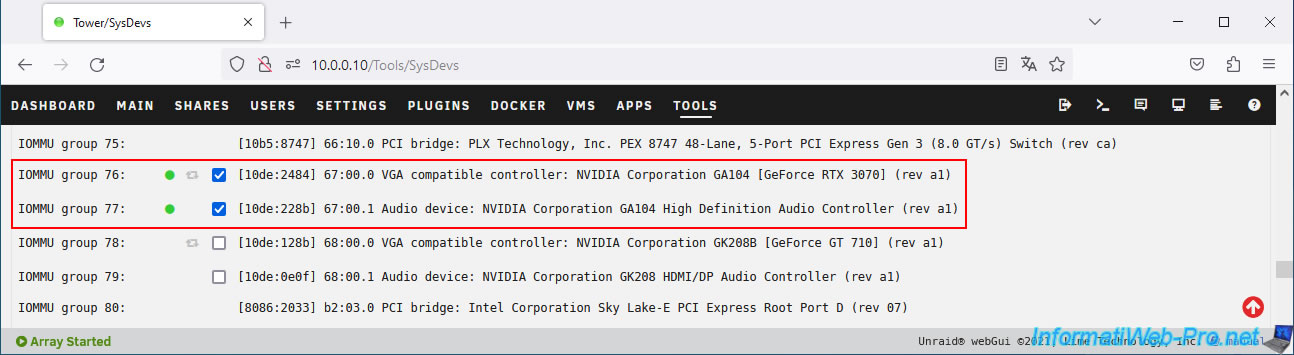
In the list, check the boxes corresponding to the graphics card you want to use with your virtual machine.
In our case, we will use our "NVIDIA GeForce RTX 3070" graphics card with our gaming virtual machine.
Note: in our case, the "NVIDIA GeForce GT 710" graphics card is used only for the Unraid server console.
Important : as you can see, in our case, our "NVIDIA GeForce RTX 3070" graphics card is in a separate IOMMU group (IOMMU group 76).
If this is not the case, enable "ACS" in your motherboard BIOS or enable the "PCIe ACS override" setting in Unraid if the first option is not available.
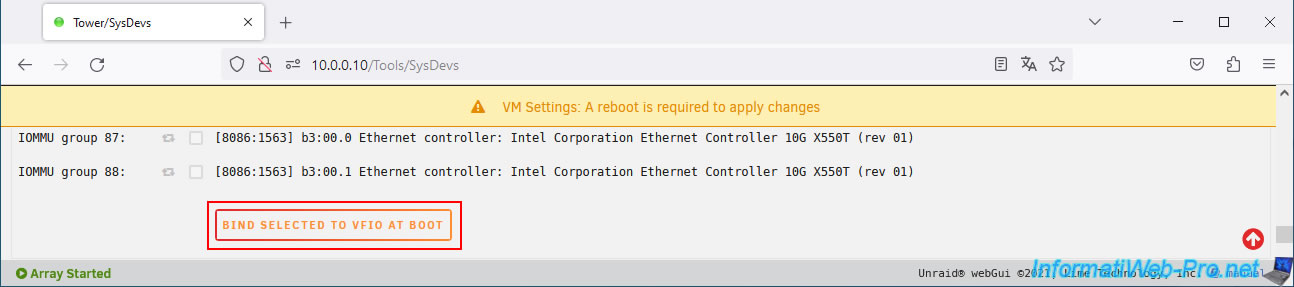
At the bottom of the page, click the "Bind selected to VFIO at boot" button.
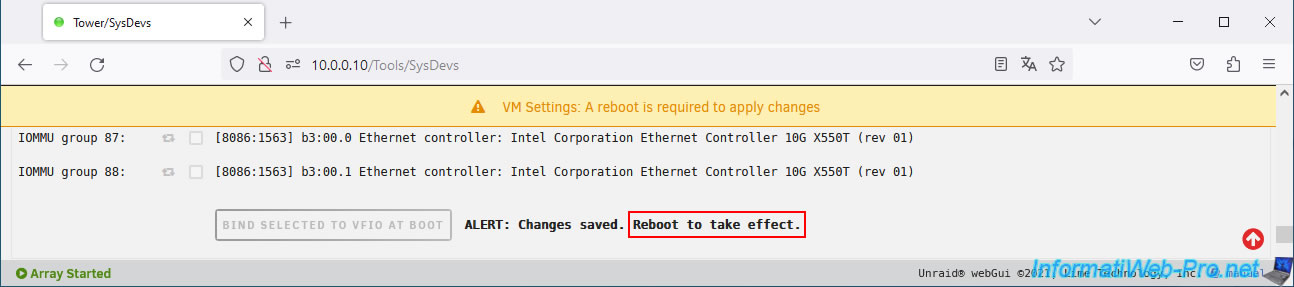
As you can see, this change also requires a restart.
Plain Text
ALERT: Changes saved. Reboot to take effect.
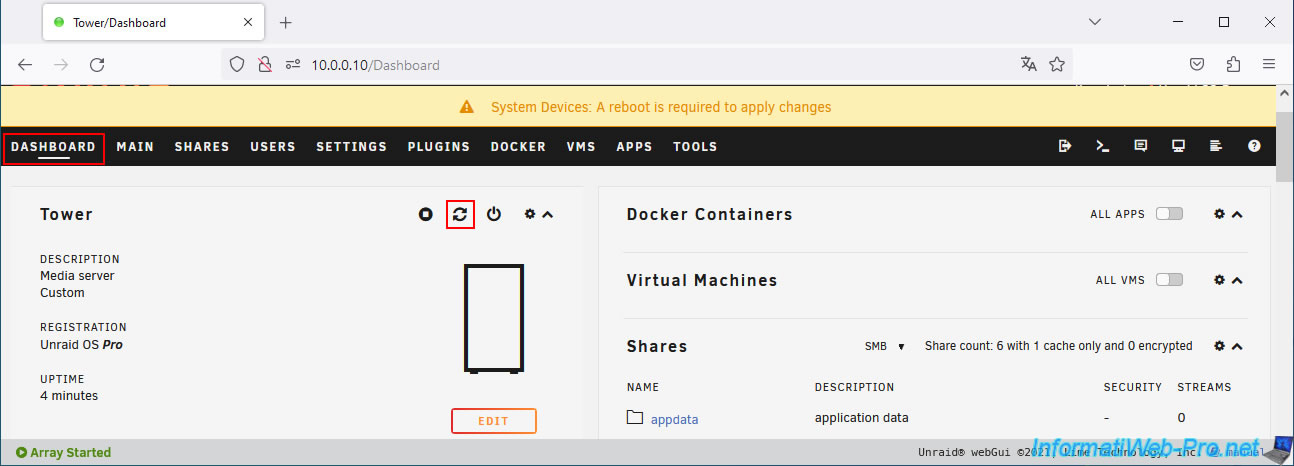
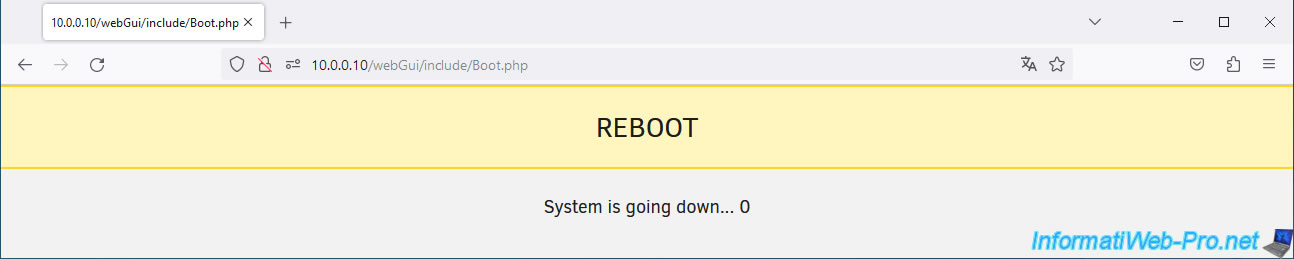
This time, restart your Unraid server by going to the "Dashboard" tab, and then click on the 2nd icon.
Confirm the restart of your Unraid server by clicking on Proceed.

Your Unraid server is restarting.
Once your Unraid server has restarted, go back to: Tools -> Unraid OS -> System Devices.
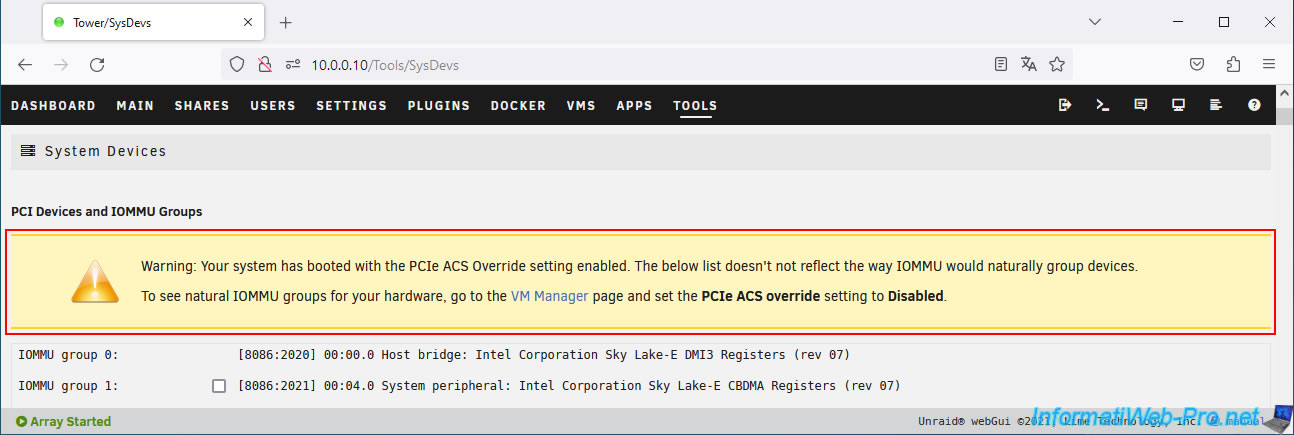
If you have enabled the "PCIe ACS Override" option on your Unraid server, after a restart, you will see a warning message at the top of the "System Devices" page indicating that this option is enabled and that the displayed IOMMU groups may not appear as they normally would.
Plain Text
Warning: Your system has booted with the PCIe ACS Override setting enabled. The below list doesn't not reflect the way IOMMU would naturally group devices.
To see natural IOMMU groups for your hardware, go to the VM Manager page and set the PCIe ACS override setting to Disabled.
In the list, you will see green dots next to the entries corresponding to the graphics card you want to use with your future gaming virtual machine.
As you can see, this "PCIe ACS Override" patch allows you to separate all devices into different IOMMU groups.
This makes it easy to assign a device to a virtual machine.
Warning : by using this "PCIe ACS Override" patch, a virtual machine using your graphics card (or any other PCI device assigned to it) could potentially access the rest of your UnRAID server's hardware via that assigned PCI or GPU passthrough device.
4. How to create a gaming virtual machine on Unraid
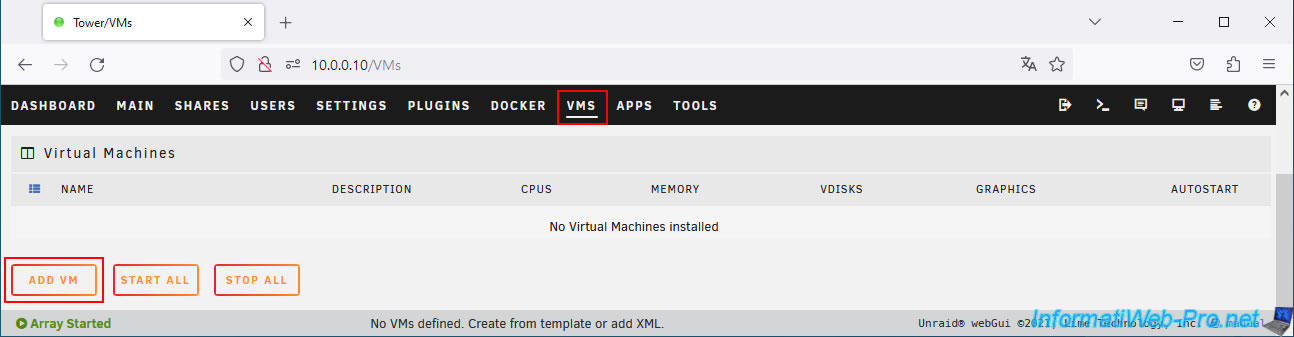
To create your gaming virtual machine on Unraid, go to the "VMS" tab and click the "Add VM" button.
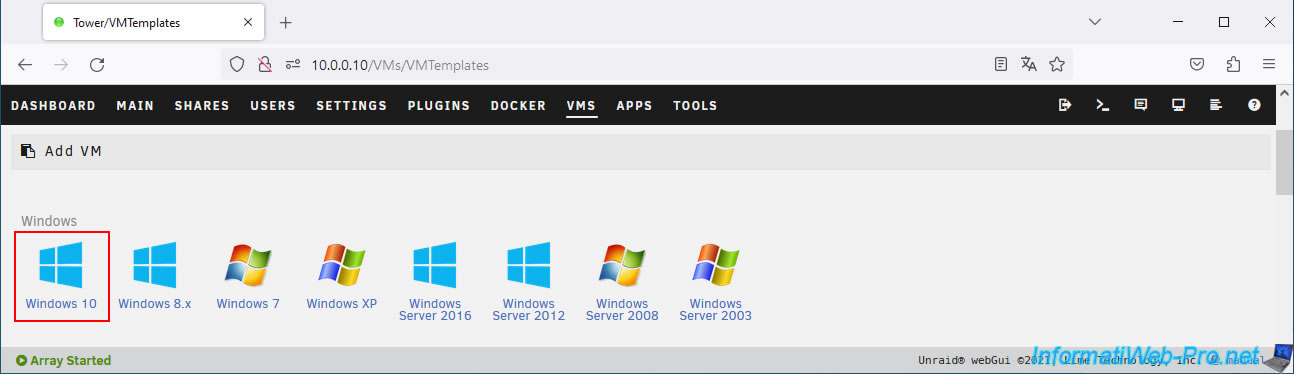
Select your preferred operating system.
In our case: Windows 10.
This is because this operating system is part of the recommended system requirements for the game we plan to install later.
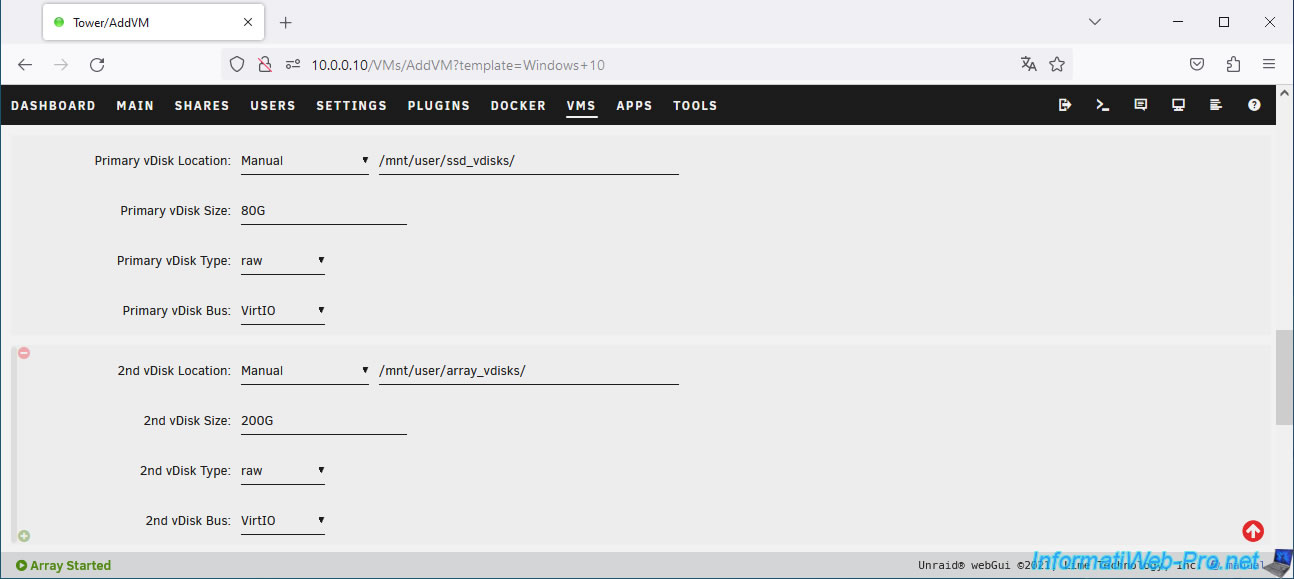
Create the virtual machine as described in step "6. Creating a gaming virtual machine on Unraid" of our previous tutorial, up to the step about virtual hard disks.
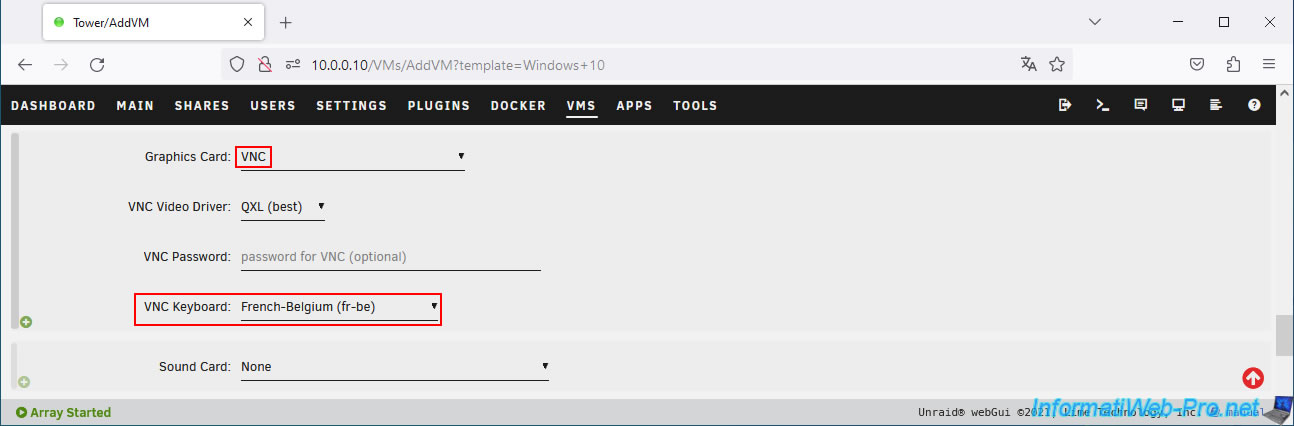
However, leave the "VNC" graphics card setting as is for now.
Just select your language and country for the "VNC Keyboard" setting.
Note that no sound card is selected at this time.
Next, at the bottom of the page, click on: Create.
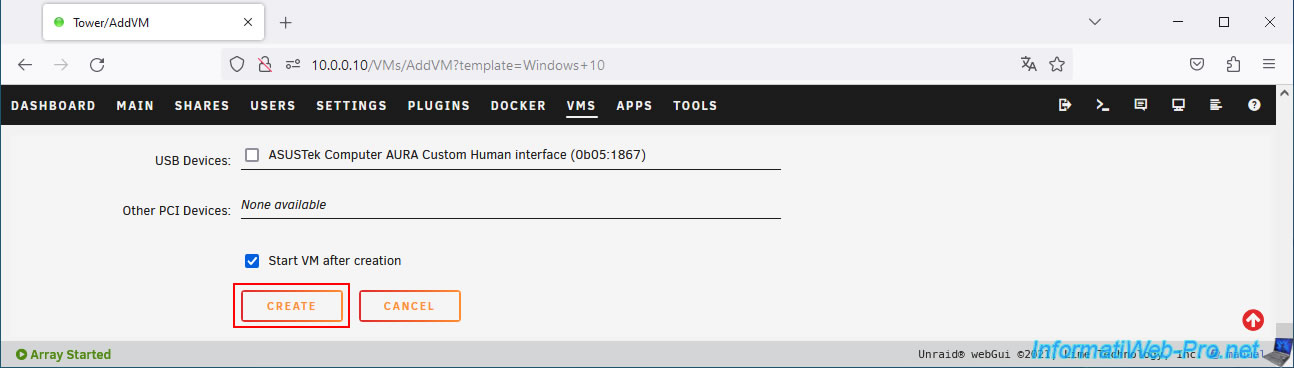
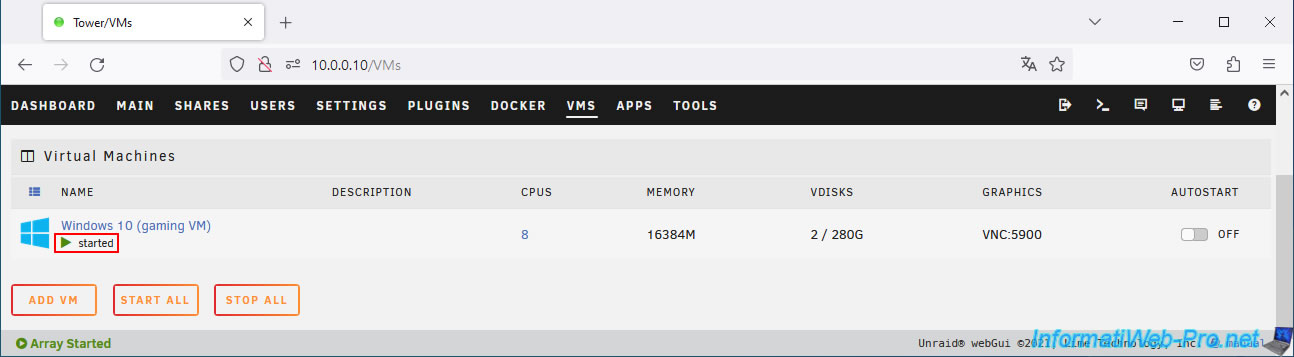
Your virtual machine "Windows 10 (gaming VM)" appears and has started.
Share this tutorial
To see also
-

NAS 1/15/2026
Unraid 6.9.2 - Change the parity disk
-

NAS 11/26/2025
Unraid 6.9.2 - Manually install Unraid 6.9.2
-

NAS 9/9/2026
Unraid 6.9.2 - VMs - Create a gaming virtual machine (without ACS support)
-
NAS 9/16/2026
Unraid 6.9.2 - VMs - Hotplug USB devices (Libvirt Hotplug USB plugin)
You must be logged in to post a comment