- NAS
- Unraid
- 01 October 2026 at 10:13 UTC
-

- 1/5

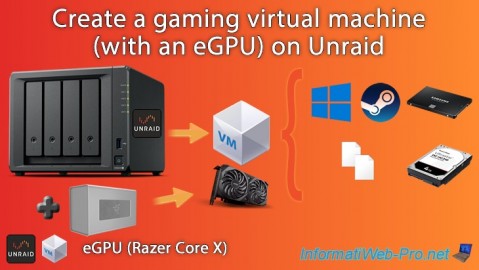
With Unraid, you can create a gaming VM by upgrading it to a physical graphics card.
However, you'll probably notice that this isn't as simple with a motherboard intended for home users.
Important : a gaming VM using a physical graphics card is stable, whether with Unraid or Proxmox (if your server is configured correctly).
However, this isn't true with an eGPU; sometimes your game crashes after more than an hour due to a stability issue.
But you can simply restart your game and continue playing.
In our case, it's possible to play for more than an hour before the game sometimes crashes randomly if you follow the instructions in this tutorial precisely.
- Why use an eGPU to create a gaming virtual machine and requirements?
- Razer Core X eGPU case and Nvidia graphics card used
- Configure your motherboard BIOS to use an eGPU on Unraid
- Check the prerequisites for creating a gaming virtual machine
- Create shares for your virtual machines
- Free up physical devices by assigning them to VFIO
- Create a gaming virtual machine on Unraid
- Install Windows 10 in your virtual machine
- Install your virtual machine drivers on Windows 10
- Partition the second virtual hard disk of your virtual machine
- Download and install the latest driver available for your Nvidia graphics card
- Use power mode: High performance
- Install DirectX
- Install Steam and install your favorite game
- Disable power management (ASPM) on Unraid
- Enable NVIDIA driver debug mode
- Play Shadow of Tomb Raider in your Windows 10 virtual machine
- Use a physical KVM to control your gaming virtual machine
- Known bugs with gaming VMs using an eGPU
1. Why use an eGPU to create a gaming virtual machine and requirements?
If you have a consumer-grade motherboard, you'll notice that your physical graphics card will be in the same IOMMU group as other devices, and you won't be able to pass it to your gaming VM.
To do this, you can easily and freely use the "ACS overrides" patch, as we explained in the "Unraid 6.9.2 - VMs - Create a gaming virtual machine (without ACS support)" tutorial.
However, applying this patch will create a security vulnerability on your Unraid server that could allow a hacker to attack your Unraid server hardware from your gaming VM.
If you have a consumer-grade motherboard and don't want to compromise your Unraid server or hardware, you should try using an eGPU (like the Razer Core X, for example).
Warning : while this solution works with the Razer Core X, it may not work with other eGPUs. Indeed, if you do some research on the internet, you'll see that some have successfully used an eGPU with a gaming VM (because the graphics card inserted into the eGPU ended up in a different IOMMU group), but that this isn't always the case (sometimes, the graphics card inserted into the eGPU doesn't end up in a different IOMMU group).
If you already have an eGPU, you can test it. But if not, be aware that it may not work in your case.
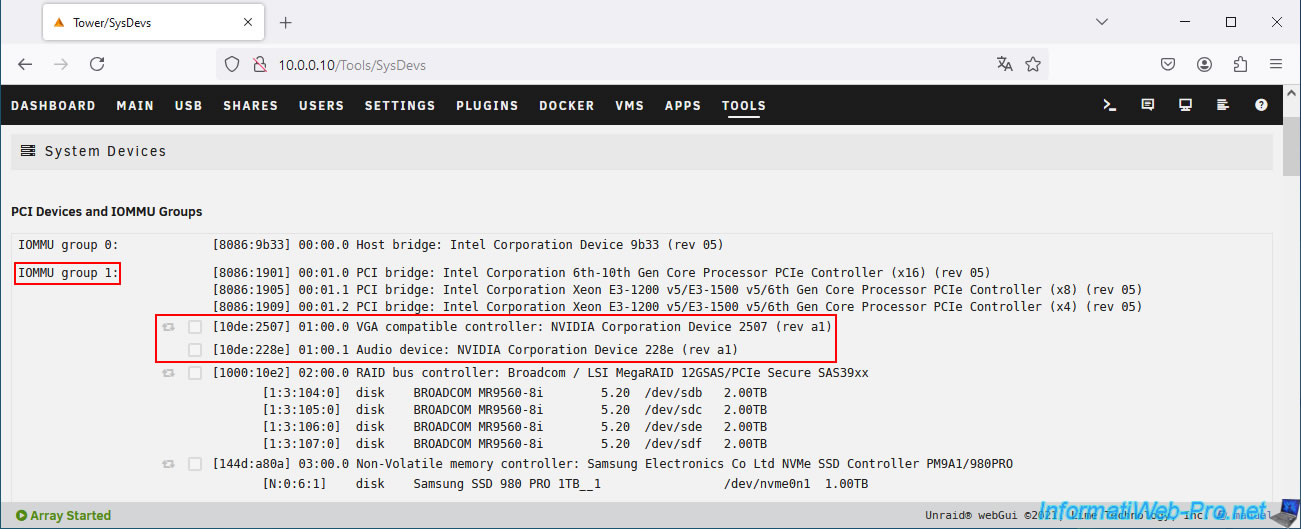
Important : eGPUs are not officially supported by Unraid.
However, since Unraid uses a Linux kernel and Linux is able to recognize your eGPU and the physical graphics card inside, you can pass this physical graphics card to your gaming VM (if it is isolated in an IOMMU group).
For more information on eGPU requirements, refer to step "1. Requirements for using an eGPU (including the Razer Core X)" in our article introducing the "Razer Core X" eGPU used in this tutorial.
2. Razer Core X eGPU case and Nvidia graphics card used
Dans notre cas, nous avons utilisé un boitier eGPU Razer Core X avec une carte graphique "MSI GeForce RTX 3050 VENTUS 2X 8G OC LHR".
Important : your eGPU must always be powered on first (i.e., before starting your Unraid server).
Otherwise, Unraid will not detect the graphics card inside.
In this case: turn off the eGPU and your Unraid server, turn on the eGPU enclosure again, wait 8 seconds, then start your Unraid server.
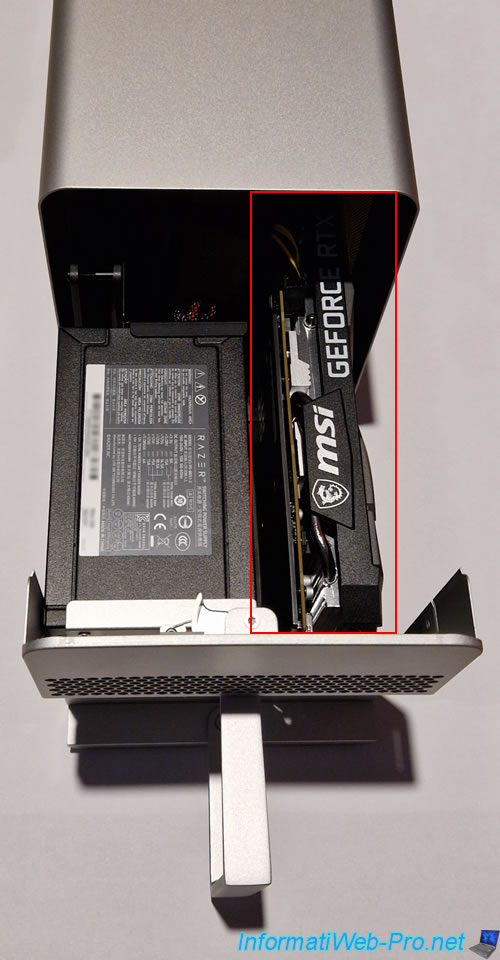
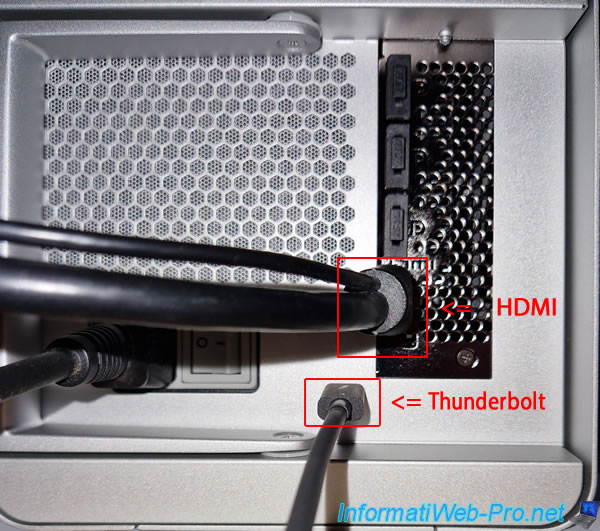
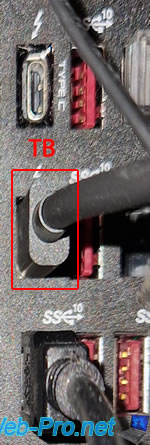
As you can see, to use your eGPU you will need to connect:
- an HDMI cable between your second display and your eGPU.
- the included Thunderbolt cable between your eGPU and your computer.
In our case, there is a small lightning bolt above the Thunderbolt ports on our motherboard.
3. Configure your motherboard BIOS to use an eGPU on Unraid
Before you can use an eGPU with Unraid to create a gaming VM, you'll first need to configure several settings in your motherboard's BIOS/UEFI firmware.
Some of these settings concern VM creation, passing physical peripherals to that VM, and finally, the Thunderbolt settings required for the eGPU to work.
3.1. Disable power management (ASPM) in BIOS
When you want to create a gaming virtual machine using an eGPU, it's important to disable power management (ASPM) in your motherboard's BIOS/UEFI firmware.
Otherwise, your gaming virtual machine will crash very quickly (after a few minutes). You'll have to turn it off and then back on again.
Note that this issue is caused by the use of an eGPU and is therefore not specific to Unraid. The same problem would also occur if you use Proxmox instead of Unraid to create a gaming VM.
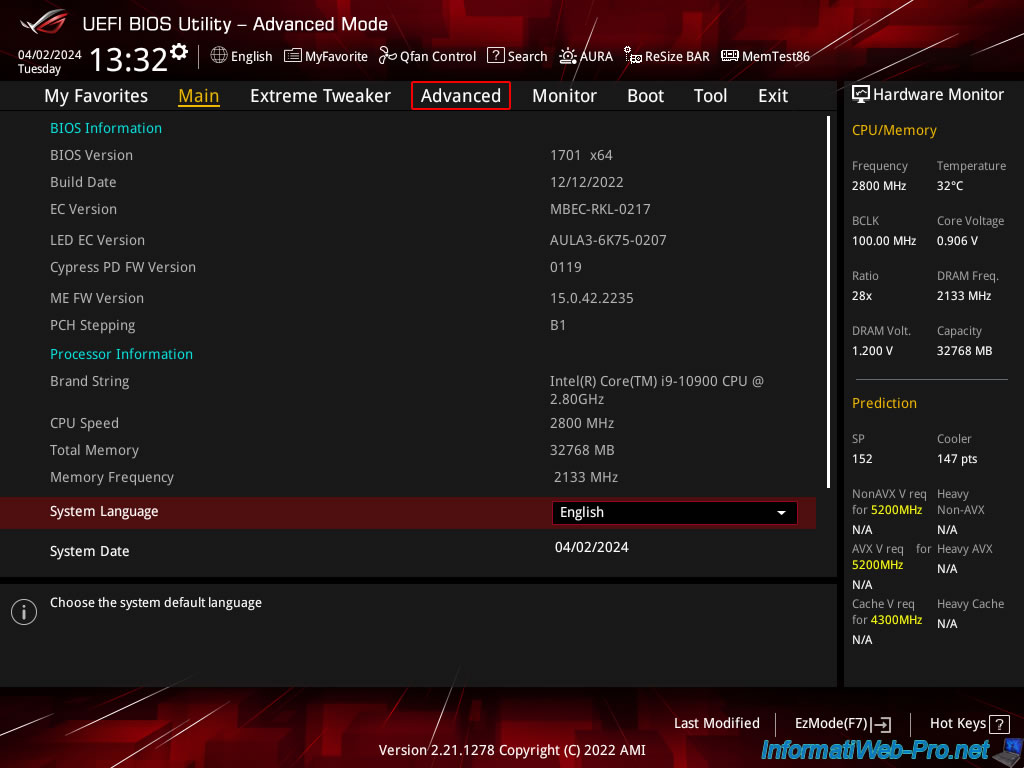
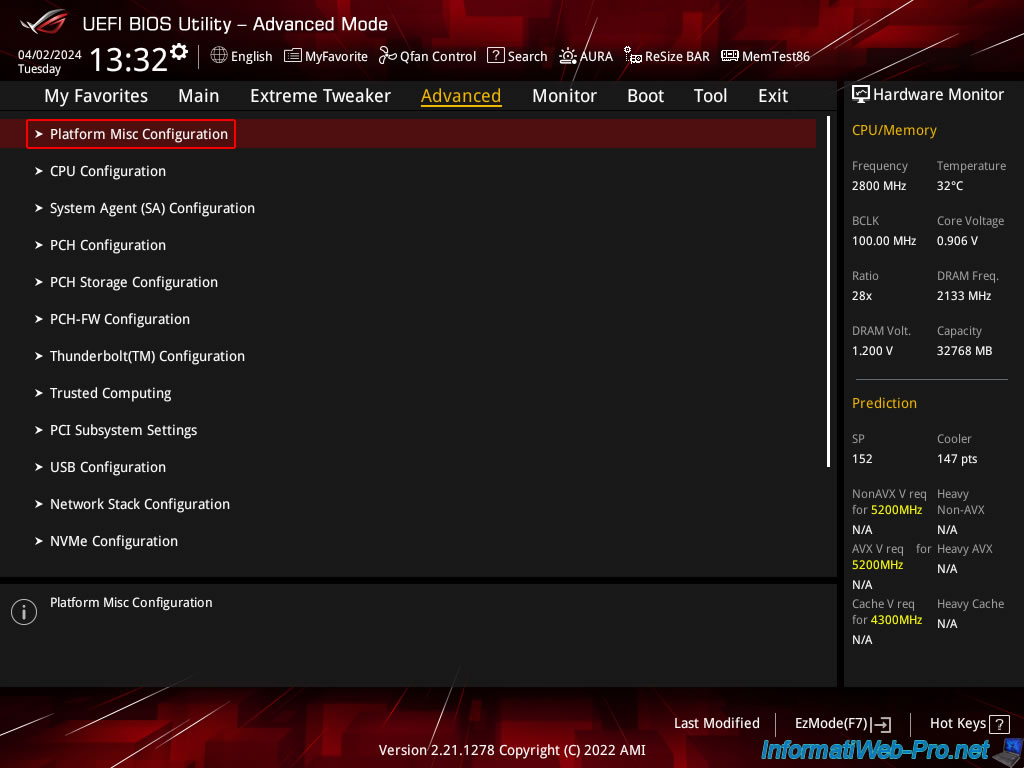
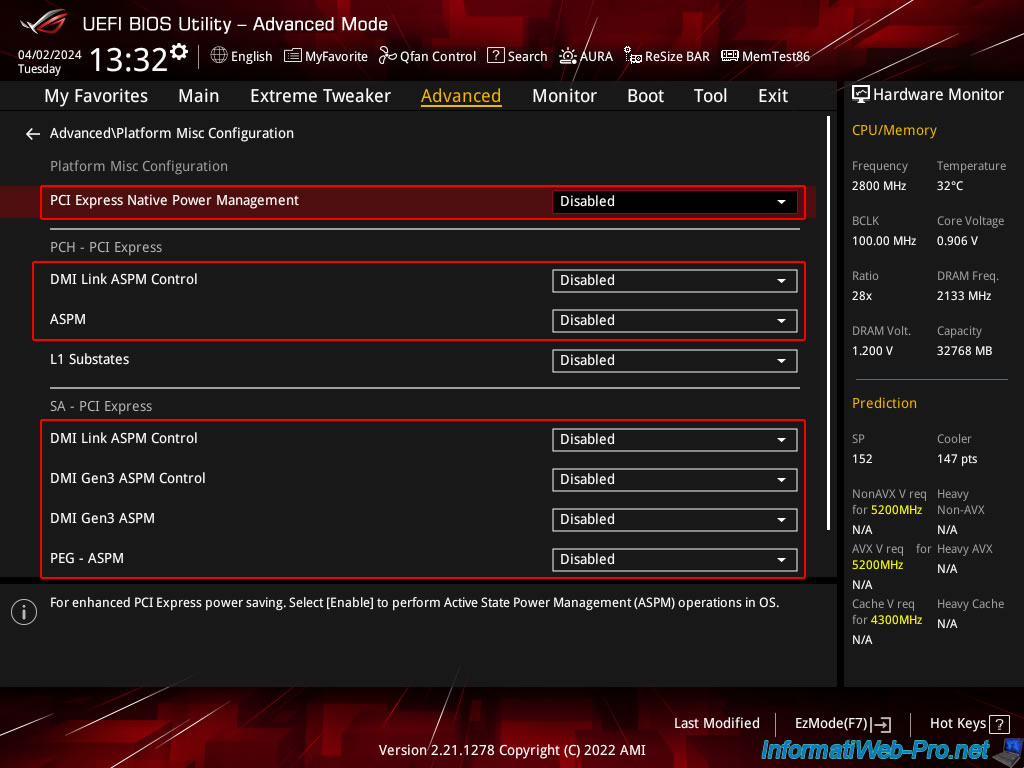
To do this, in the "Advanced" tab, go to the "Platform Misc Configuration" section.
Note: in the rest of this tutorial, you'll see that we'll also be using the "pcie_aspm=off" parameter, which allows Unraid to do the same thing in software.
However, we recommend also disabling ASPM directly on your motherboard to maximize your chances of success.
In this "Advanced\Plaform Misc Configuration" section, select the value "Disabled" for the "Native ASPM" parameter.
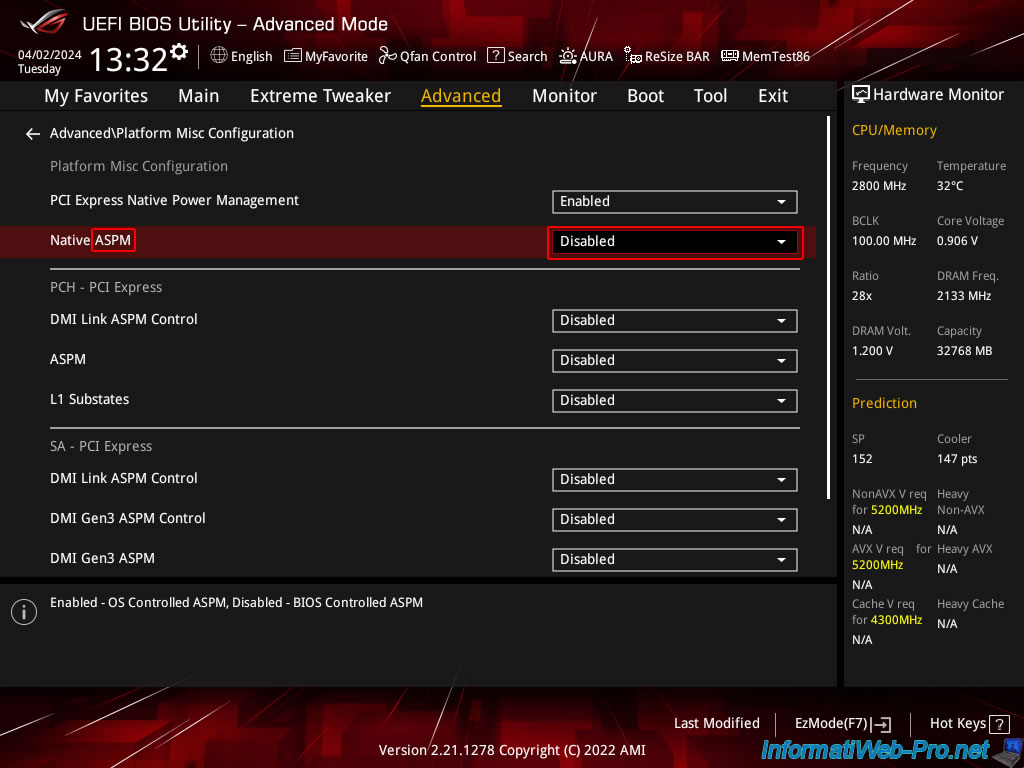
Next, disable the "PCI Express Native Power Management" setting by also selecting the "Disabled" value.
Finally, disable all other settings with the keyword "ASPM" (which stands for "Active State Power Management").
3.2. Enable CPU virtualization in BIOS
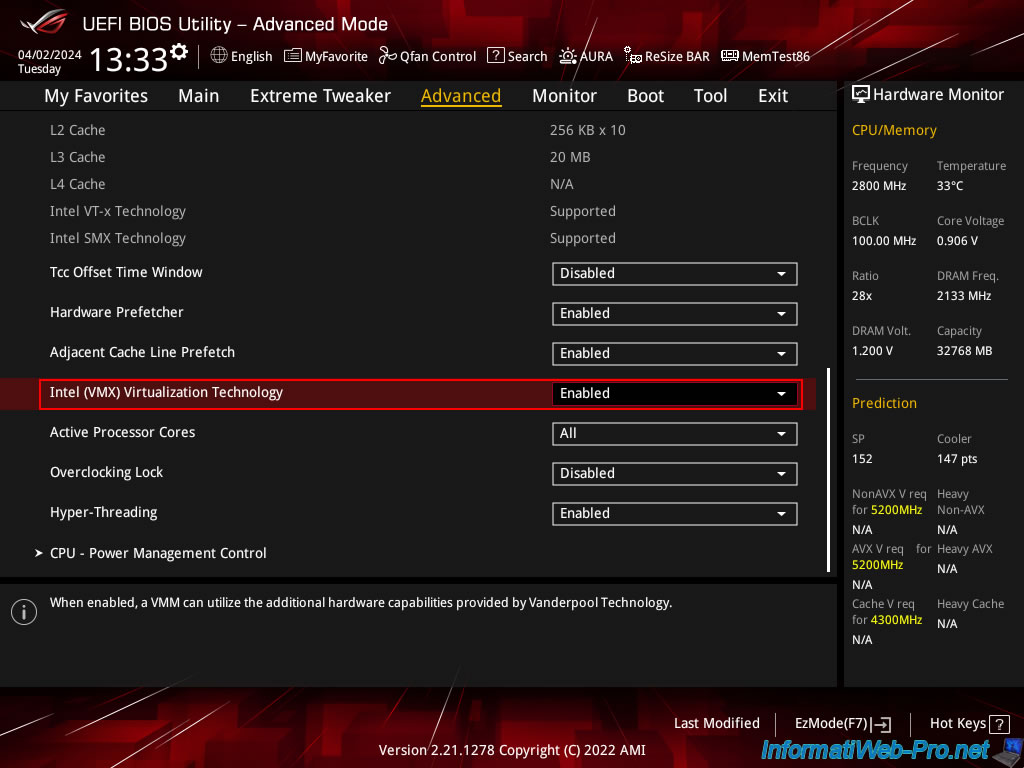
To create a virtual machine in Unraid, you'll need to enable CPU virtualization.
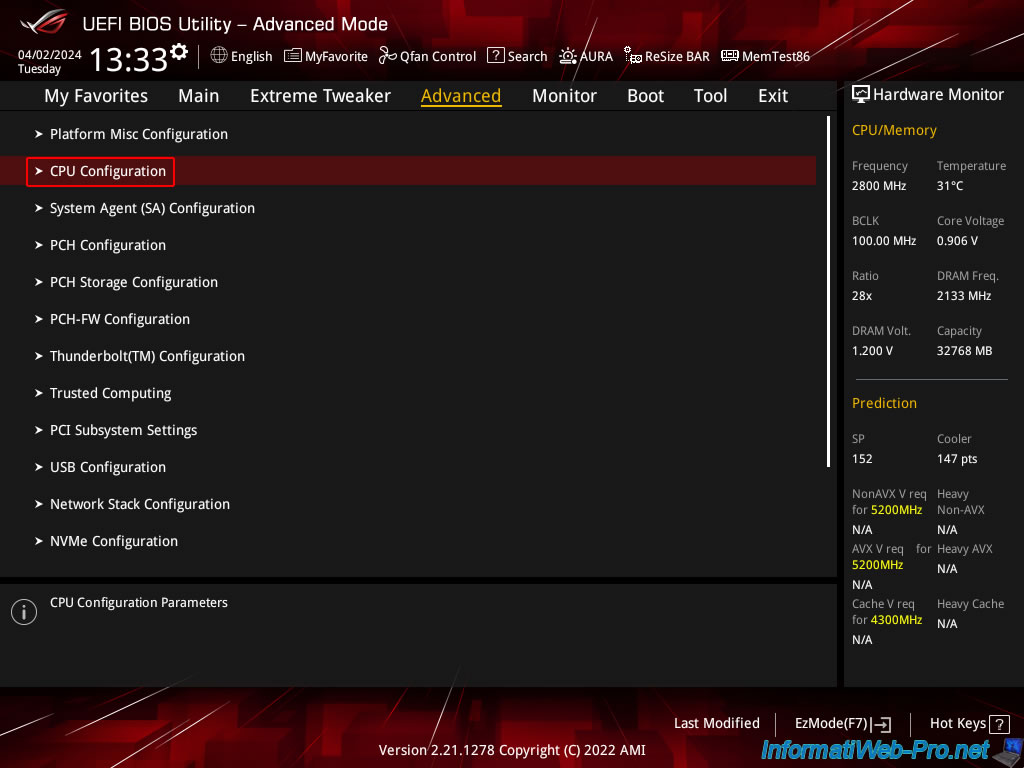
To do this, go to the "Advanced\CPU Configuration" section.
In our case, the setting to enable is called "Intel (VMX) Virtualization Technology".
If your motherboard's BIOS/UEFI firmware is different, refer to our tutorial: Enable virtualization (Intel VT-x / AMD-V).
3.3. Enable I/O virtualization in BIOS
When you want to create a gaming virtual machine, you must pass a graphics card to your VM.
Therefore, your motherboard's BIOS/UEFI firmware must support passing a physical device to a virtual machine and the corresponding setting must be enabled in that BIOS/UEFI firmware.
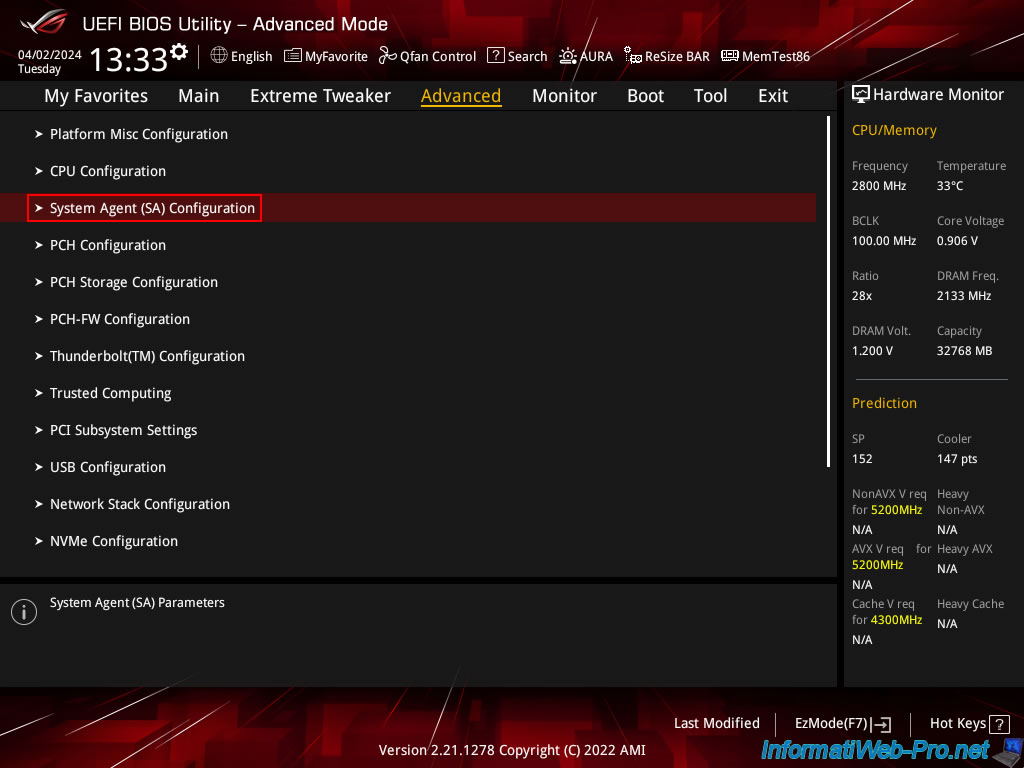
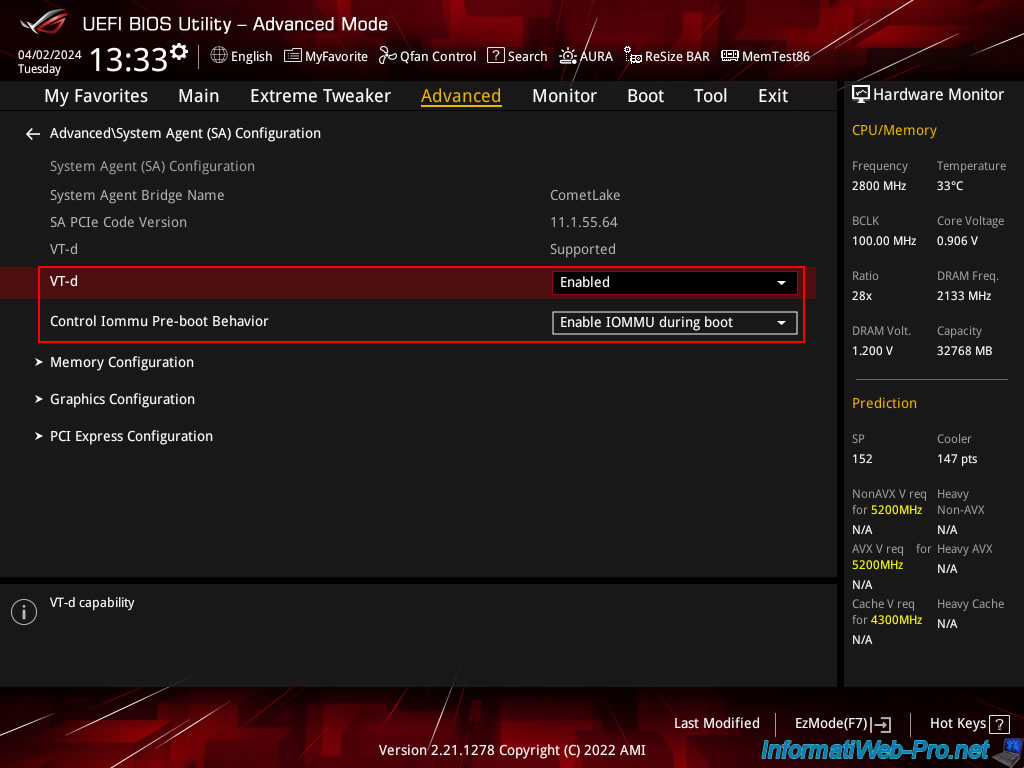
To do this, you'll need to go to the "Advanced\System Agent (SA) Configuration" section to enable input/output (I/O) virtualization.
In our case, we need to enable the "VT-d" setting.
If your BIOS/UEFI firmware is different, refer to our tutorial: Enable IOMMU or VT-d in your BIOS.
Note that enabling the "Control Iommu Pre-boot Behavior" setting may also be required to support the DMA protection feature (as specified in the "Advanced -> Thunderbolt(TM) Configuration -> Discrete Thunderbolt(TM) Support" setting description).
Therefore, we selected the value "Enable IOMMU during boot" for the "Control Iommu Pre-boot Behavior" setting.
Share this tutorial
To see also
-

NAS 2/18/2026
Unraid 6.9.2 - Change temperature thresholds
-

NAS 1/15/2026
Unraid 6.9.2 - Change the parity disk
-

NAS 3/4/2026
Unraid 6.9.2 - Install the "Community Applications" plugin (old version)
-
NAS 7/29/2026
Unraid 6.9.2 - VMs - Backing up a VM automatically
You must be logged in to post a comment