- NAS
- Unraid
- 26 August 2026 at 13:14 UTC
-

- 1/5

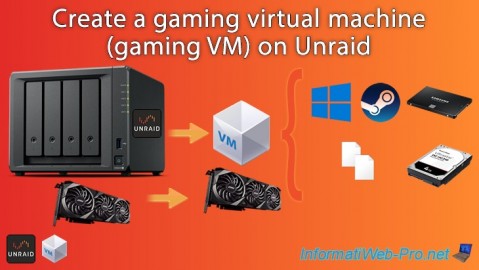
With Unraid, you can create a high-performance virtual machine to play games (including the latest ones) by adding a physical graphics card.
The advantage of Unraid is that you can use a graphics card intended for home users (such as Nvidia RTX graphics cards to benefit from ray tracing and DLSS for lighting effects, water reflections, window reflections, etc.).
This is not possible with other virtualization solutions, such as VMware ESXi or Citrix XenServer, where you will always encounter error code 43.
Indeed, professional virtualization solutions (VMware/Citrix) require the use of professional graphics cards (e.g., NVIDIA GRID).
- Connecting graphics cards
- Prerequisites for creating a virtual machine
- Enable the creation of virtual machines on Unraid
- Create shares for your virtual machines
- Free up physical devices by assigning them to VFIO
- Create a gaming virtual machine on Unraid
- Fix black screen issue (if applicable)
- Install Windows 10 in your virtual machine
- Install your virtual machine drivers in Windows 10
- Partition the second virtual hard disk of your virtual machine
- Physical processor seen by the virtual machine
- Download and install the latest driver available for your Nvidia graphics card
- Install Steam and install your favorite game
- Play Shadow of Tomb Raider in your Windows 10 virtual machine
1. Connecting graphics cards
To be able to transfer a graphics card to a virtual machine, it must not be used by Unraid.
There are two options for this.
If your processor has a graphics card (in Intel's case: Intel HD Graphics), you must configure your motherboard's BIOS to initialize the internal graphics card (i.e., Intel HD Graphics) first.
This way, you'll see the Unraid console by connecting your monitor to your motherboard's graphics port (VGA/HDMI/DVI/...).
The physical graphics card connected via PCIe will therefore not be used and can be fully utilized by your virtual machine.
You will therefore need to connect a second monitor to this graphics card to see the virtual machine's screen.
The other option is to use two physical graphics cards (if your processor doesn't have a graphics card).
In this case, purchase a low-end graphics card for the Unraid console and keep the larger graphics card for the virtual machine.
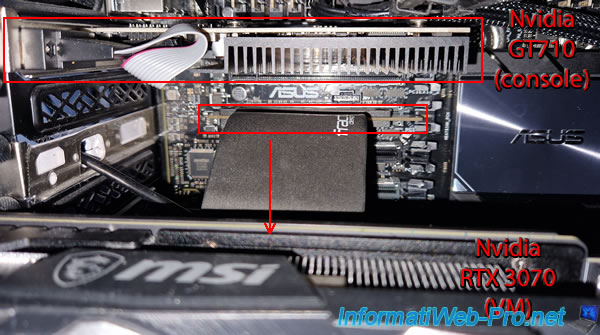
Warning : if you're using two graphics cards (as shown in the image below), it's essential to connect the (low-end) graphics card for the Unraid console to the first PCIe port (at the top) on your motherboard.
This way, your motherboard will initialize it, and your larger graphics card won't be used. It will therefore be free and can be used for your virtual machine later.
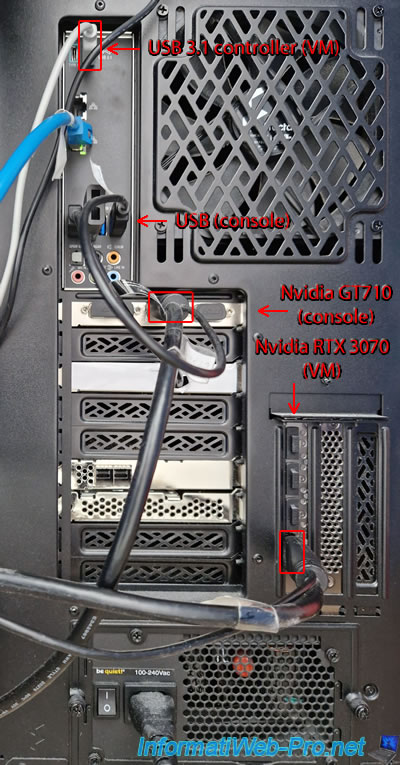
Note: In our case, we connected the small "Nvidia GT710" graphics card to the first PCIe port on our motherboard.
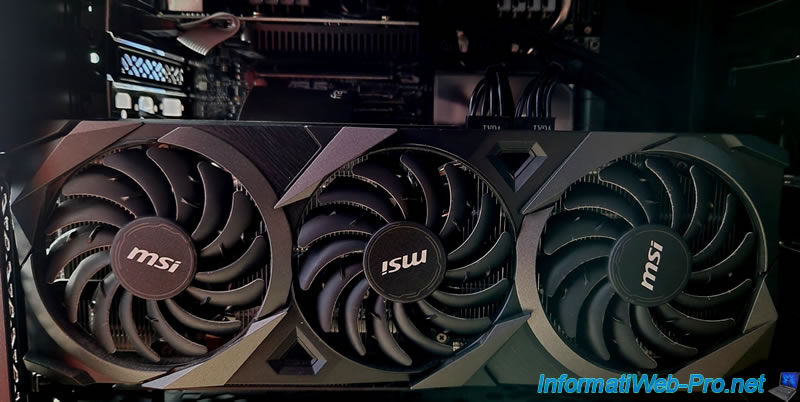
We then connected our large "Nvidia RTX 3070" graphics card to the third PCIe port on our motherboard.
In our case, it is mounted vertically. Hence the PCIe cable plugged into the third PCIe port.
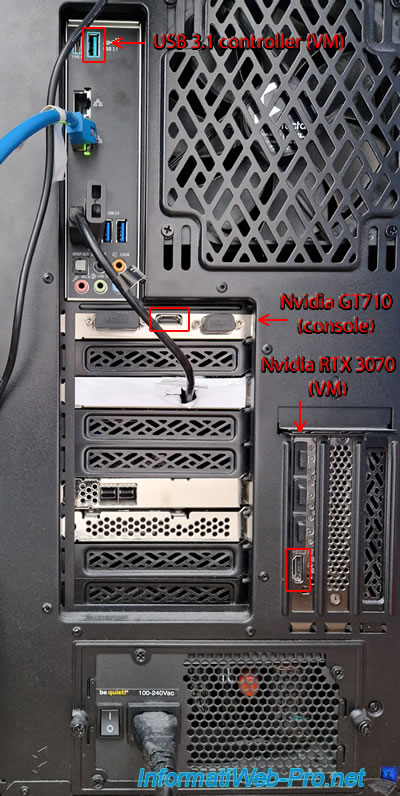
On the back end of our Unraid server, we will be using:
- the USB 3.1 port located at the top (which we previously identified and which we can easily pass to a virtual machine to automatically connect USB devices).
However, if you use traditional USB devices, Unraid will allow you to pass the desired USB devices, rather than directly passing a USB controller on the motherboard. That said, in our case, since we're using a KVM to control multiple computers with the same monitor, mouse, and keyboard, we're required to pass the USB controller corresponding to this USB port on our motherboard. - the HDMI port of our small "Nvidia GT710" graphics card to view the console of our Unraid server.
- the HDMI port of our large "Nvidia RTX 3070" graphics card for the display of our future virtual machine.
The installed games will therefore use this graphics card directly. This allows you to run the latest games without slowdown and benefit from Ray Tracing in the case of Nvidia RTX 2000, 3000, 4000, ... graphics cards.
For this tutorial, you will need:
- a client PC to access your Unraid server's web interface.
- a monitor, mouse, and keyboard to view and use (if necessary) the Unraid console (on a black background).
- another monitor, mouse, and keyboard to use your virtual machine using the display managed by the graphics card you'll be transferring to your virtual machine.
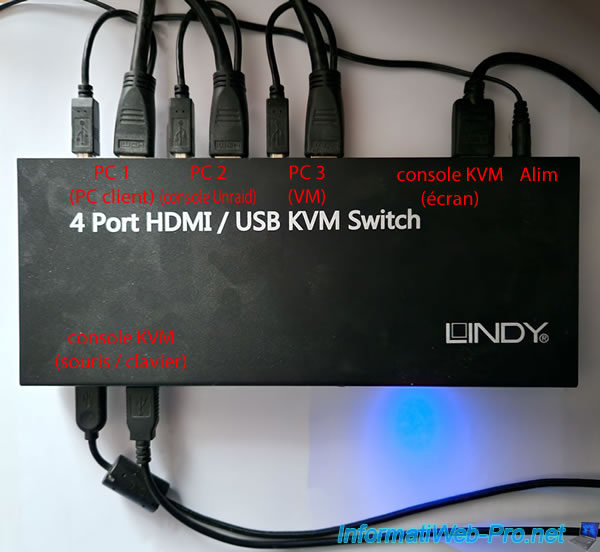
To simplify this, we're using a KVM to control our desktop PC, our Unraid server, and the future virtual machine.
Important : the term "KVM" used here has no connection to the hypervisor of the same name used in the background by Unraid.
In this case, a KVM is a physical device that allows you to control multiple computers with the same peripherals (monitor, keyboard, and mouse) by switching from one PC to another via a remote control or via the physical button on the front of the device (in our case).
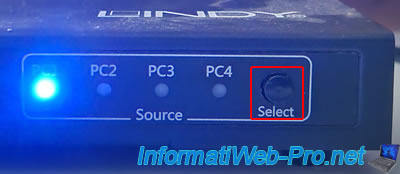
To switch from one PC (or VM) to another, we simply use the "Select" button on the front of our KVM.
In the case of our KVM box, we have two cables to connect per PC to be controlled: an HDMI cable for the display (and sound, since HDMI carries both video and sound) and a USB cable for the mouse and keyboard.
Therefore, there are:
- a KVM cable connected to the Nvidia GT710 graphics card and to a random USB 3.0 port on our motherboard for the Unraid console.
- a KVM cable connected to the Nvidia RTX 3070 graphics card and to the USB 3.1 port (identified previously) on our motherboard for the future virtual machine.
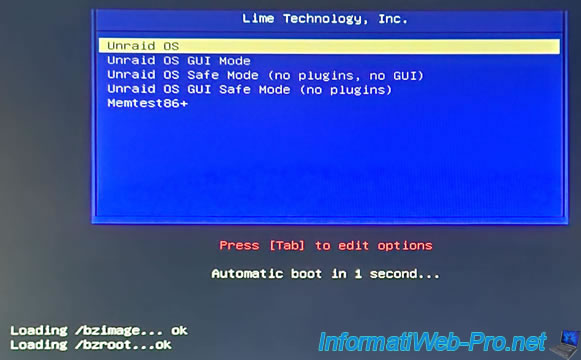
Once the connections are made, start your Unraid server and you will see the Unraid console appear on the screen connected to the graphics port of the motherboard (if your processor has a graphics part) or to the port of your 1st graphics card (in our case: Nvidia GT710) if you used 2 physical graphics cards.
2. Prerequisites for creating a virtual machine
To create a virtual machine on your Unraid server, CPU virtualization and Input/Output (I/O) virtualization must be supported and enabled.
To verify this, click the screen icon in the top right corner.
If you have never installed Unraid, refer to our tutorial: Unraid 6.9.2 - Install and configure Unraid 6.9.2.
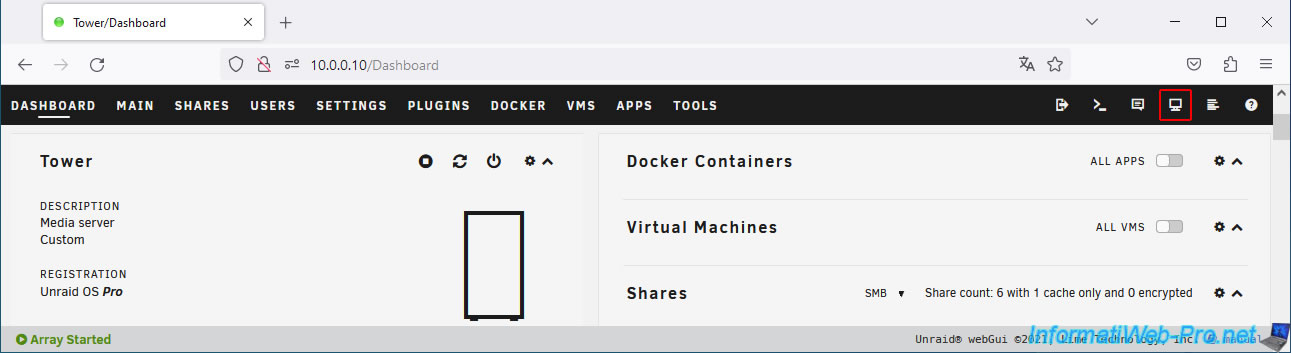
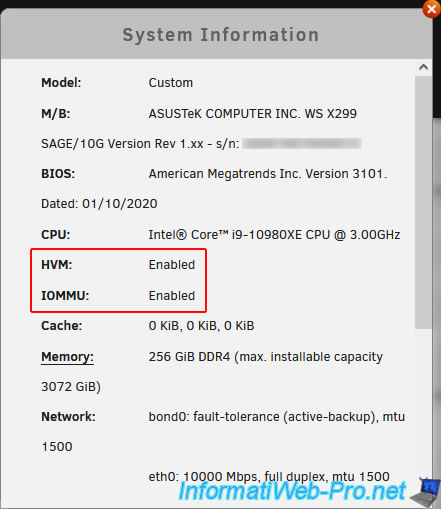
In the "System Information" window that appears, check that these options are enabled:
- HVM: if CPU virtualization is supported and enabled in your motherboard BIOS, you will see the value "Enabled".
Otherwise, enable this option by referring to our tutorial: Enable virtualization (Intel VT-x / AMD-V).
CPU virtualization is required to run virtual machines on your Unraid server. - IOMMU: if I/O virtualization is supported and enabled in your motherboard BIOS, you will see the value "Enabled".
Otherwise, enable this option by referring to our tutorial: Enable IOMMU or VT-d in your BIOS.
Input/output (I/O) virtualization is required to pass PCI devices (PCI passthrough) and graphics cards (GPU passthrough) into a virtual machine.
3. Enable the creation of virtual machines on Unraid
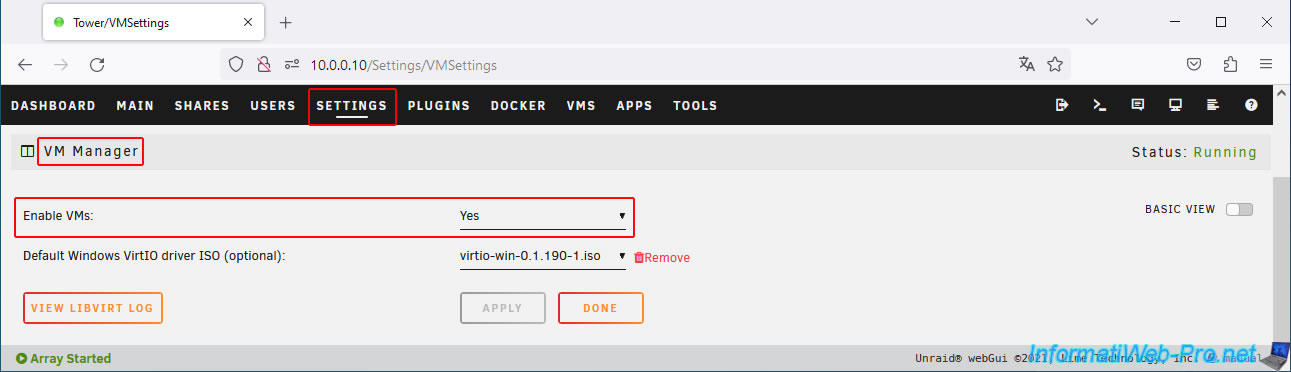
To create virtual machines (and see the "VMS" tab at the top of the page), you must first enable Unraid's Virtual Machine Manager.
To do this, go to "Settings -> VM Manager" and select "Enable VMs: Yes".
Then, click Apply.
If you haven't already, click the "Download" link to the right of the "Default Windows VirtIO driver ISO (optional)" option to download the latest version of the VirtIO driver CD, which you'll need once Windows is installed in your virtual machine.
Note: for more information on creating virtual machines, refer to our tutorial: Unraid 6.9.2 - VMs - Create a virtual machine.
4. Create shares for your virtual machines
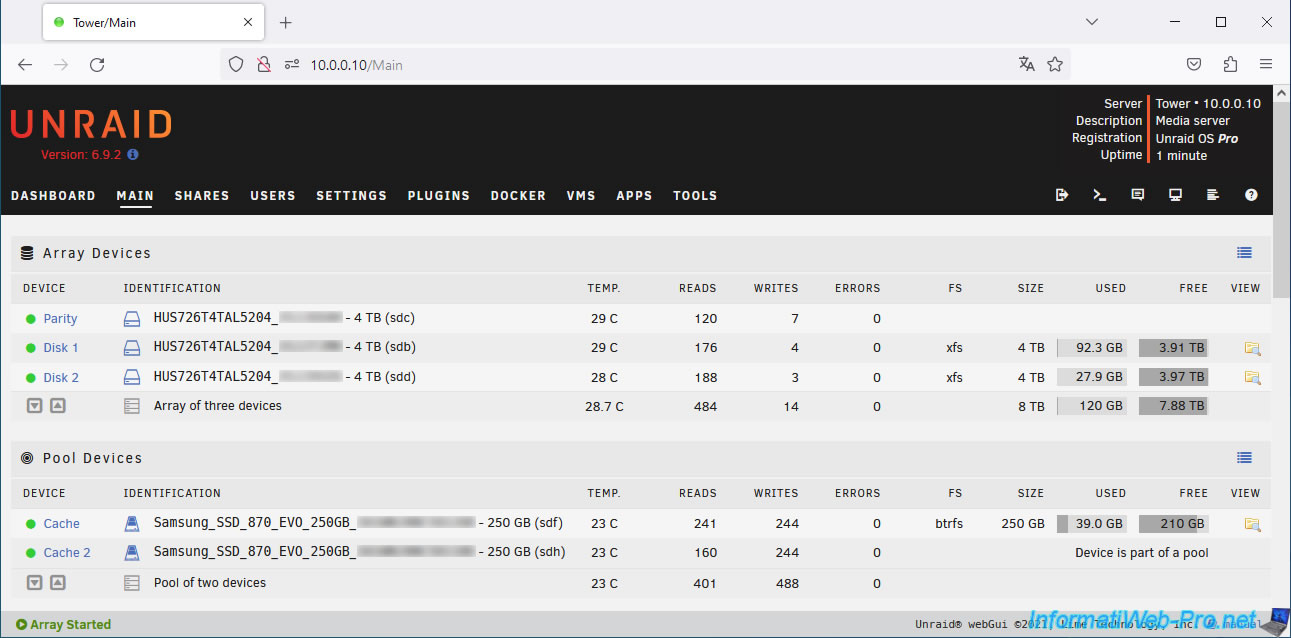
As you can see, we have an Unraid server with:
- three 4TB SAS hard drives (HUS726T4TAL5204) that are members of our array.
- two 250GB SSDs (Samsung SSD 870 EVO) used for cache.
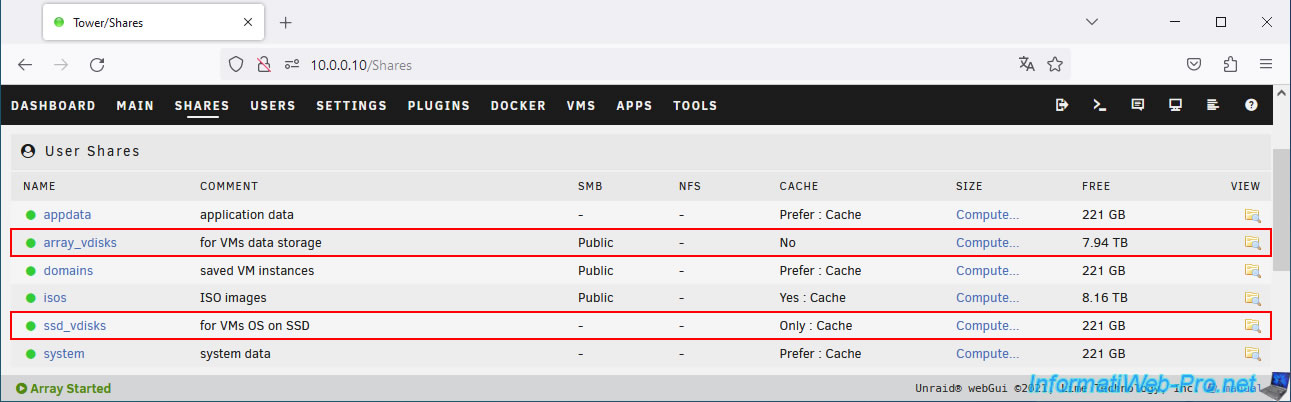
To improve the performance of our virtual machines, we will therefore create 2 shares on Unraid to install the OS on the SSDs and store the game files (which are increasingly large) on our hard drives.
To create the "array_vdisks" and "ssd_vdisks" shares shown in the image below, refer to our tutorial: Unraid 6.9.2 - VMs - Create a high-performance virtual machine (SSD).
In summary:
- the "array_vdisks" share only uses the disks in the array, and therefore NOT the cache.
- the "ssd_vidks" share only uses the SSDs in the cache. Therefore, only the cache.
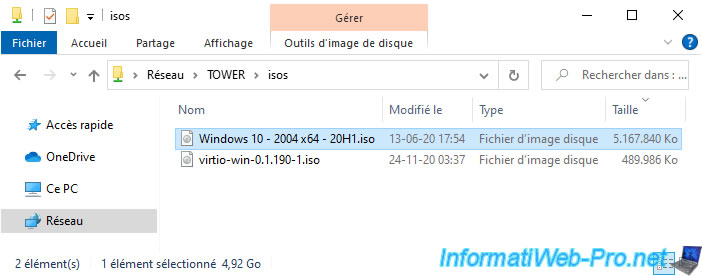
We also stored the Windows 10 ISO file in the "isos" share of our Unraid server.
Note that by default, this "isos" share is not accessible from the network.
You must change the "Export" setting for this share to "Yes" to make it accessible from other computers on the network.
5. Free up physical devices by assigning them to VFIO
To transfer a physical device from your Unraid server to a virtual machine, it must not be in use by your server.
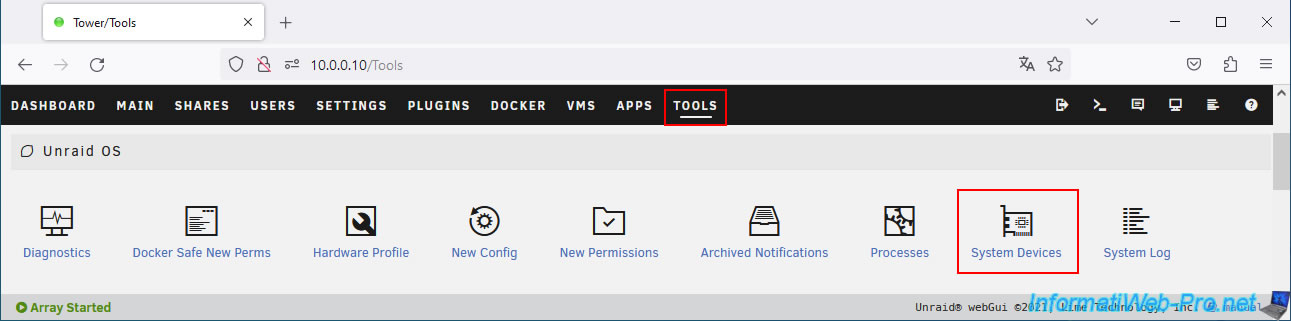
To resolve this issue, go to: Tools -> Unraid OS -> System Devices.
The "System Devices" page appears with a list of devices that are part of your Unraid server's physical hardware.
What begins with "00:" is internal to your motherboard, and what follows is connected to it.
Plain Text
PCI Devices and IOMMU Groups.
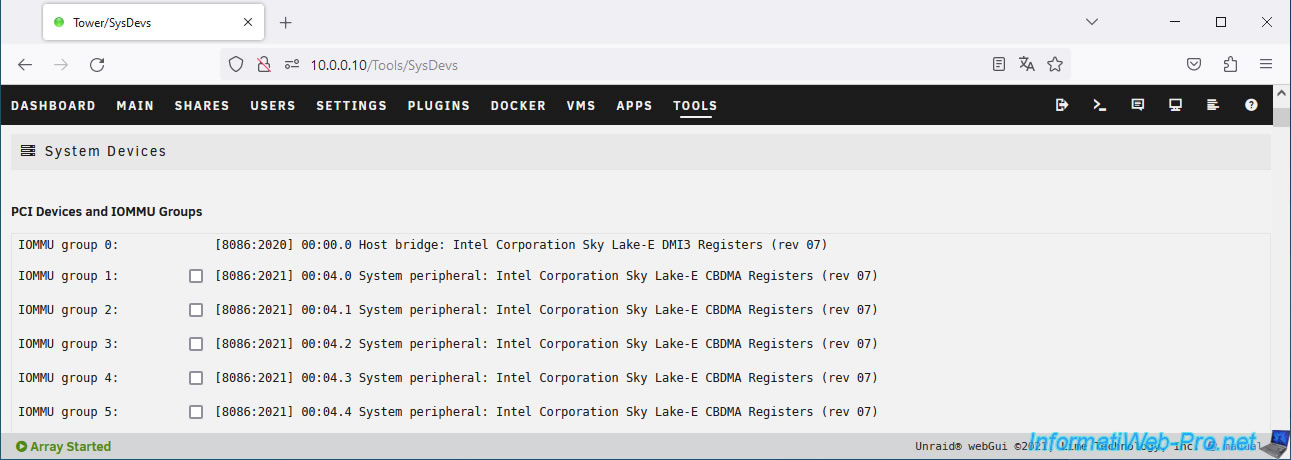
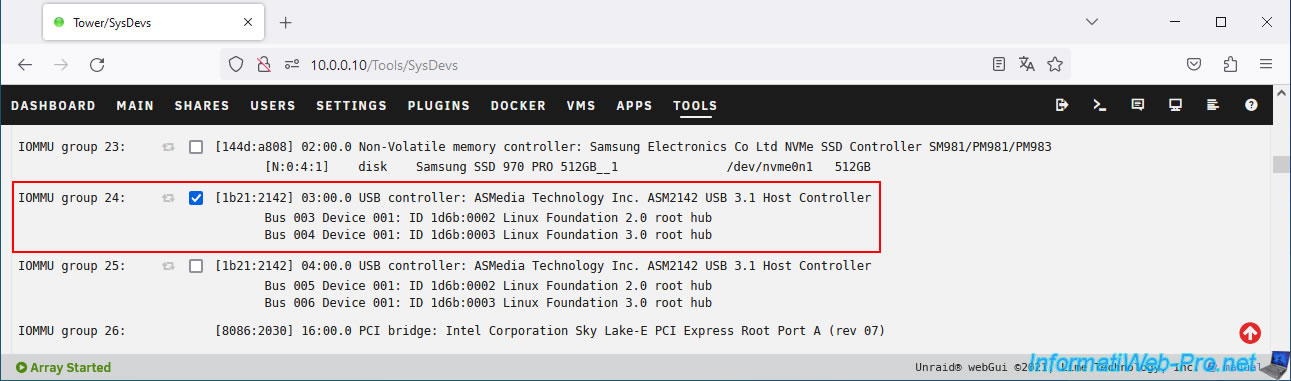
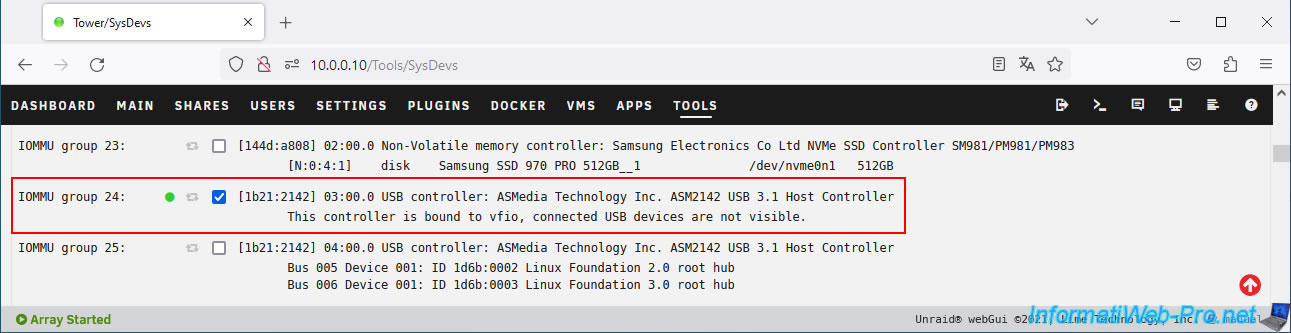
In this list of devices, we find, in our case, the "USB controller: ASMedia Technology Inc. ASM2142 USB 3.1 Host Controller," which corresponds to the USB 3.1 port previously identified in the top right corner of the back of our motherboard.
To determine which device corresponds to which, use its name and, if necessary, perform some tests by passing a device to a virtual machine and see if it works or not.
In our case, we had performed some tests before starting this tutorial. We therefore know which of these two ASMedia USB controllers corresponds to the USB 3.1 port at the top of our motherboard.
As a reminder, if you use standard USB devices, you can redirect them directly via your virtual machine's configuration page.
In our case, with our physical KVM, we are required to pass our motherboard's USB controller so that the keyboard and mouse are connected to the virtual machine.
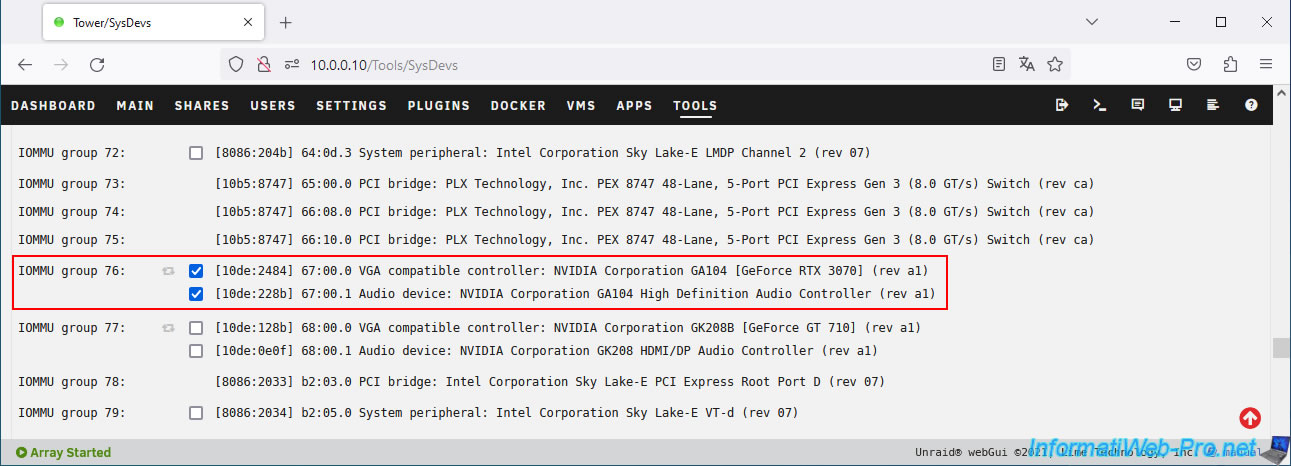
In the displayed device list, you'll find your graphics card(s).
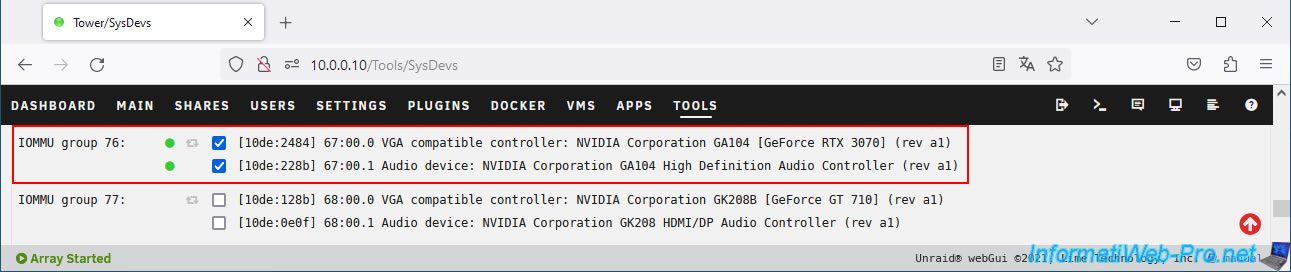
In our case, we want to transfer our "Nvdia RTX 3070" graphics card to our virtual machine, so we check the two boxes that apply to it:
- its graphics part: [10de:2484] 67:00.0 VGA compatible controller: NVIDIA Corporation GA104 [GeForce RTX 3070] (rev a1).
- its audio part: [10de:228b] 67:00.1 Audio device: NVIDIA Corporation GA104 High Definition Audio Controller (rev a1).
As you've probably noticed, these two sub-devices (67:00.0 and 67:00.1) are part of the same physical device (67:00.x).
Warning : it's important to pass the entire graphics card (including its graphics, audio, and USB ports, if applicable).
Otherwise, the operating system (in this case, Windows) will notify you that the device has stopped working, and a code 43 will occur.
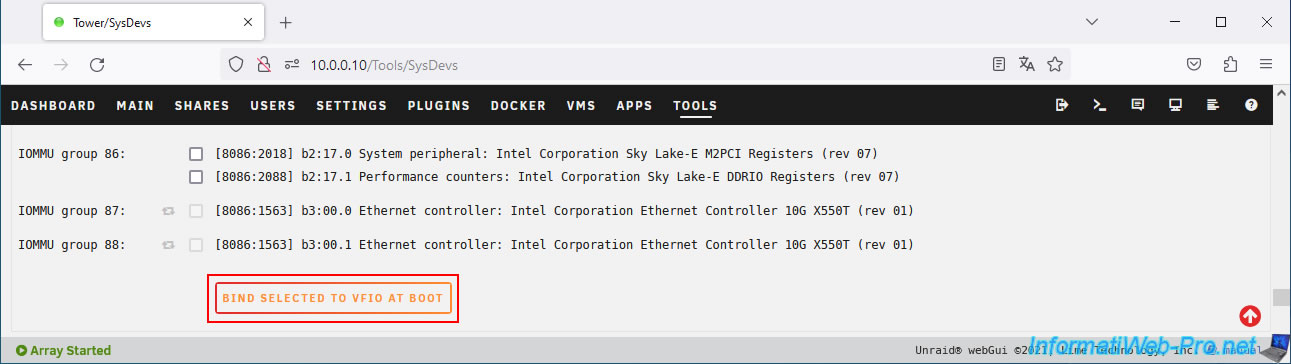
At the bottom of the page, click the "Bind selected to VFIO at boot" button.
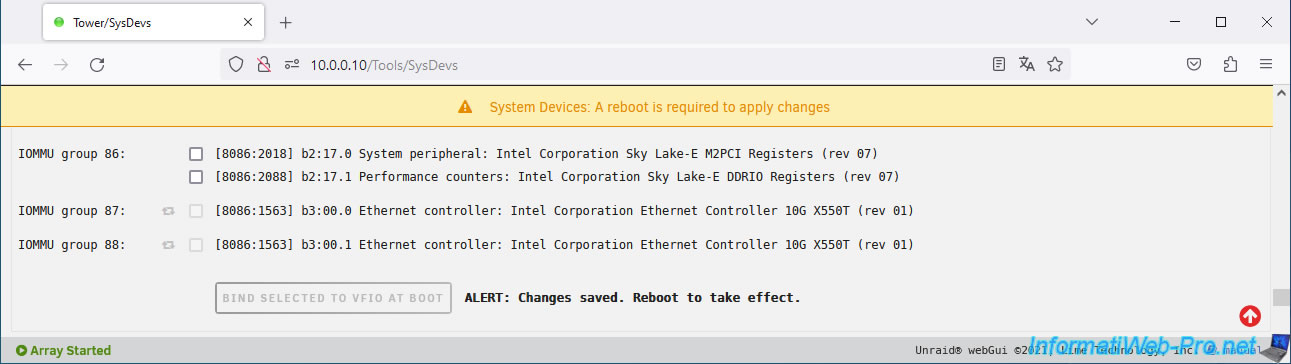
Unraid will tell you that a reboot is required to apply the changes.
Plain Text
System Devices: A reboot is required to apply changes.
ALERT: Changes saved. Reboot to take effect.
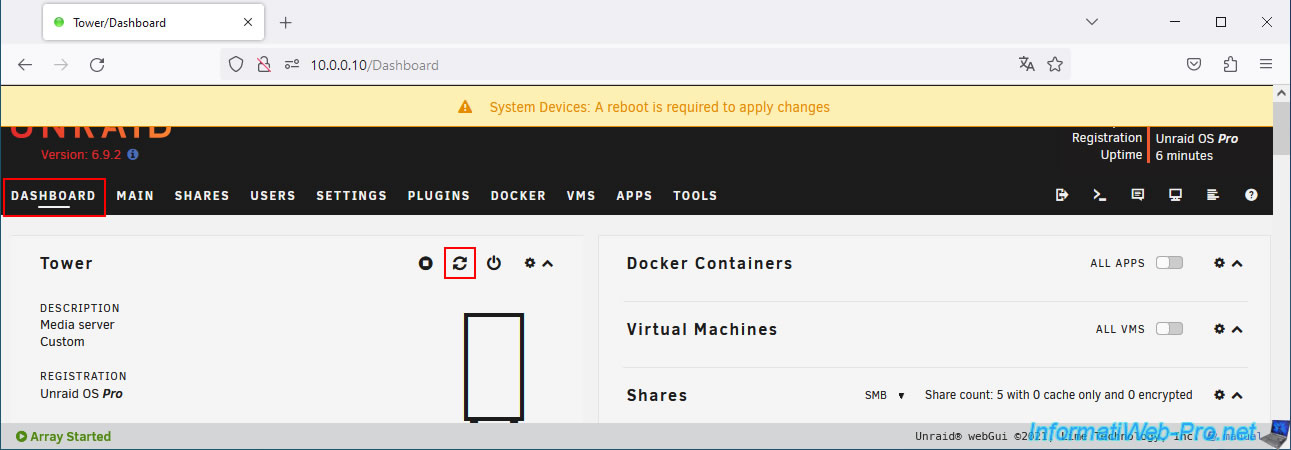
In the "Dashboard" tab, click on the 2nd icon to restart your Unraid server.
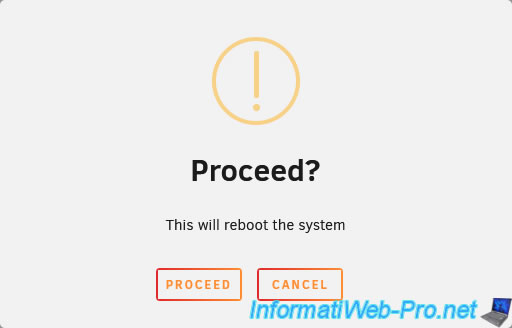
Confirm the restart by clicking Proceed.
Your Unraid server is restarting.

Once the reboot is complete, return to "Tools -> Unraid OS -> System Devices" and you'll see that the desired devices (including your graphics card) are assigned to vfio and are therefore no longer visible (usable by Unraid).
Note that these devices remain available via PCI passthrough (for PCI and other devices) and GPU passthrough (for graphics cards) for your virtual machines.
Plain Text
This controller is bound to vfio, connected USB devices are not visible.
Share this tutorial
To see also
-
NAS 4/1/2026
Unraid 6.9.2 - Docker - Install a file explorer (CloudCommander)
-

NAS 11/21/2025
Unraid 6.9.2 - Install and configure Unraid 6.9.2
-

NAS 8/19/2026
Unraid 6.9.2 - VMs - Create a high-performance virtual machine (SSD)
-
NAS 8/13/2026
Unraid 6.9.2 - VMs - Guest not initialized display (solution)
You must be logged in to post a comment