Create a gaming virtual machine (accessible via Parsec) on Unraid 6.9.2
- NAS
- Unraid
- 02 September 2026 at 07:39 UTC
-

- 3/7

9. Enable remote desktop
For Parsec to use your physical graphics card (which you will later assign to your VM), it is necessary to remove the virtual "VNC" graphics card currently used by your virtual machine.
Therefore, you must use another remote desktop solution that allows you to assign only the physical graphics card to your virtual machine.
On Windows, the easiest way to do this is to enable Remote Desktop Protocol (RDP).
Warning : the Windows RDP server requires:
- a professional edition of Windows is required at a minimum.
- a user account with a password is necessary.
If the user account is not password-protected, the connection will fail, indicating that the password is incorrect. - sleep mode must be disabled to prevent the remote computer (in this case, the virtual machine) from becoming inaccessible.
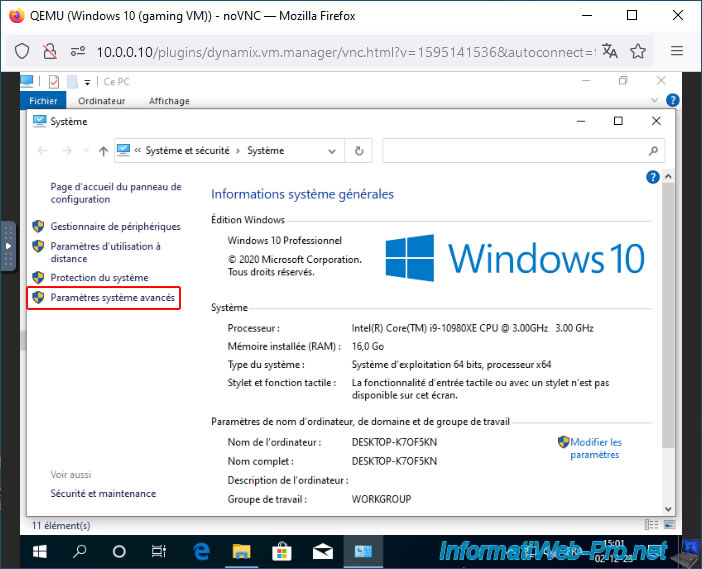
To enable Remote Desktop (RDP) in Windows 10 Pro, click on the "Advanced system settings" link.
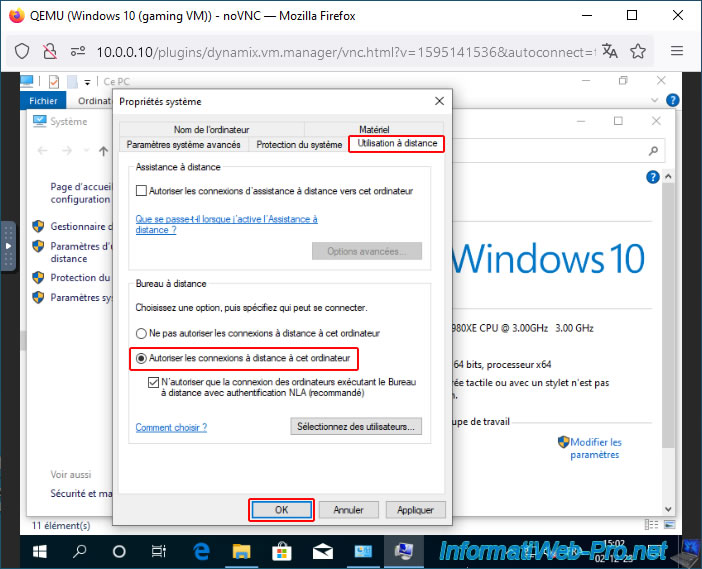
In the "System Properties" window that appears, go to the "Remote Access" tab and select the option "Allow remote connections to this computer".
Then, click OK.
By default, the user you are currently logged in as will already have access to this remote desktop.
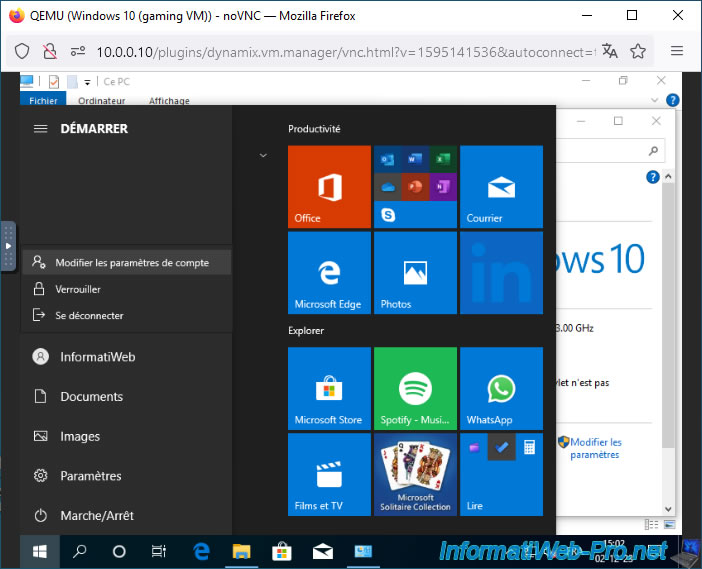
To protect your Windows user account with a password, go to the Start menu and click on your username.
Then, click on: Change account settings.
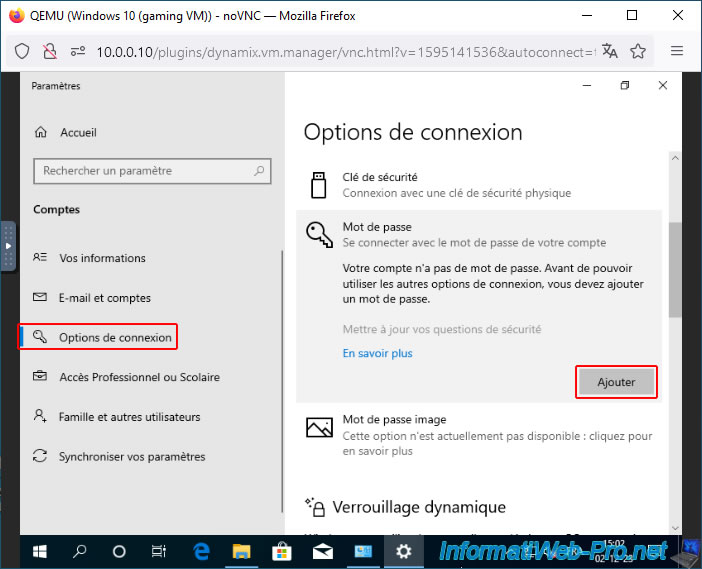
In the "Settings" app that appears, go to the "Login Options" section and add a password.
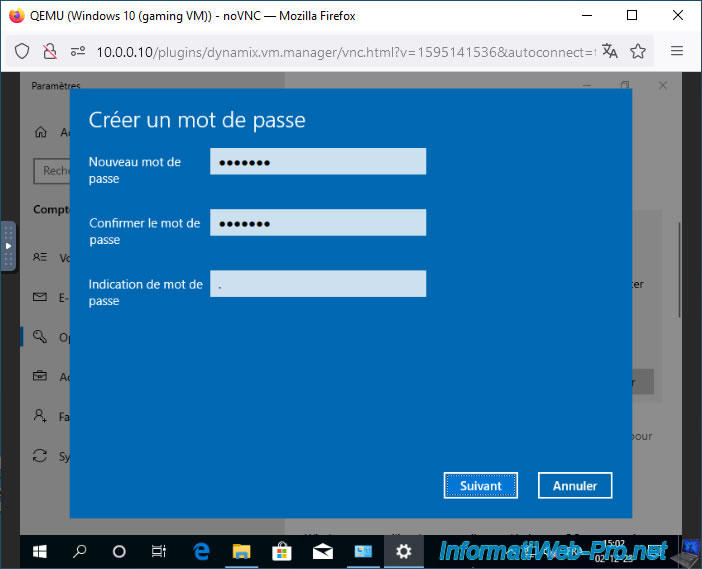
Enter a password to protect your Windows user account, then click Next.
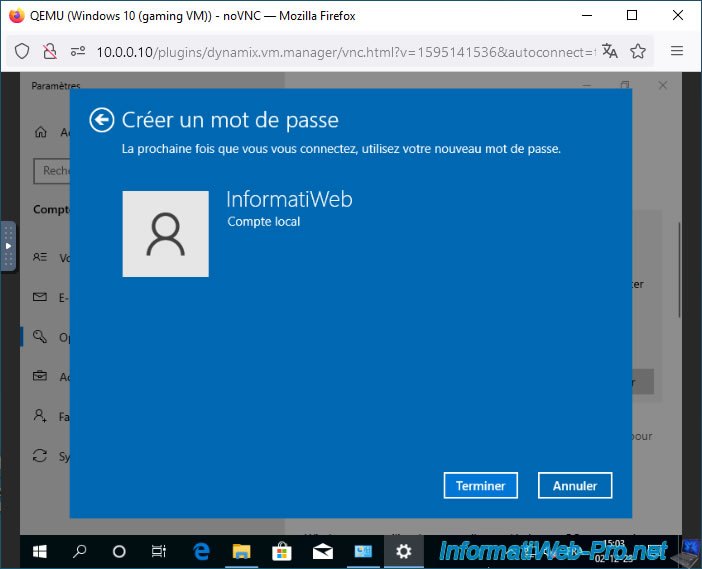
Click on Finish.
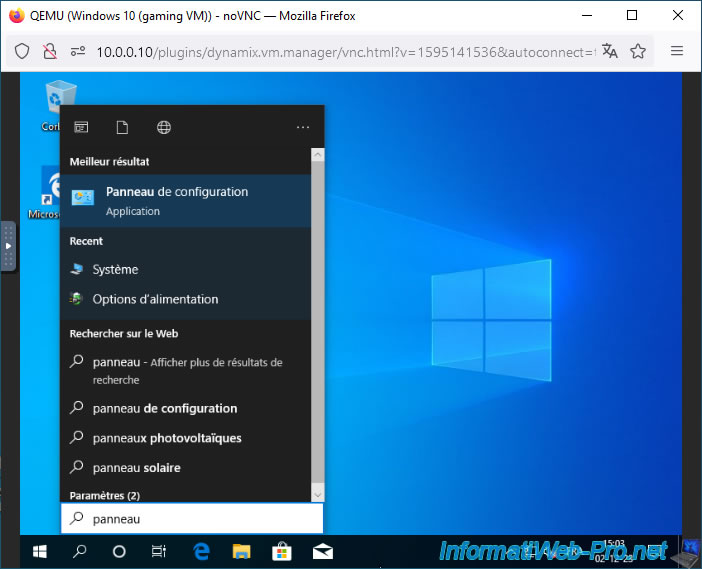
Open the Start menu, type "control panel" and launch the Control Panel.
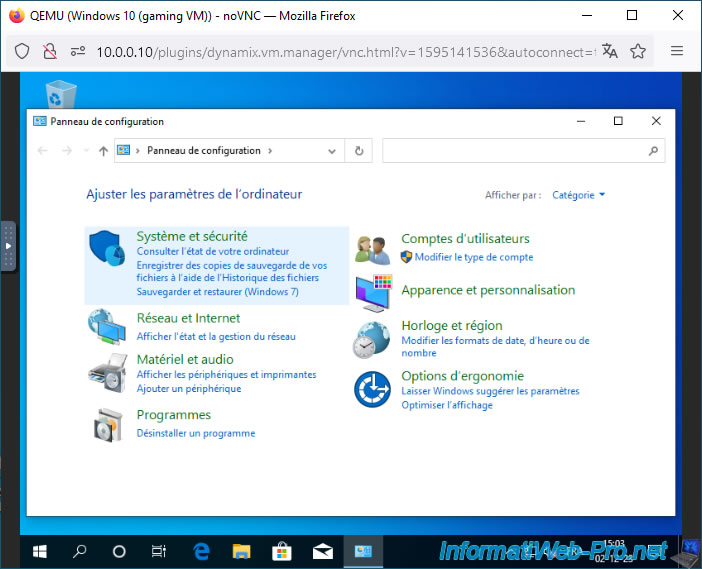
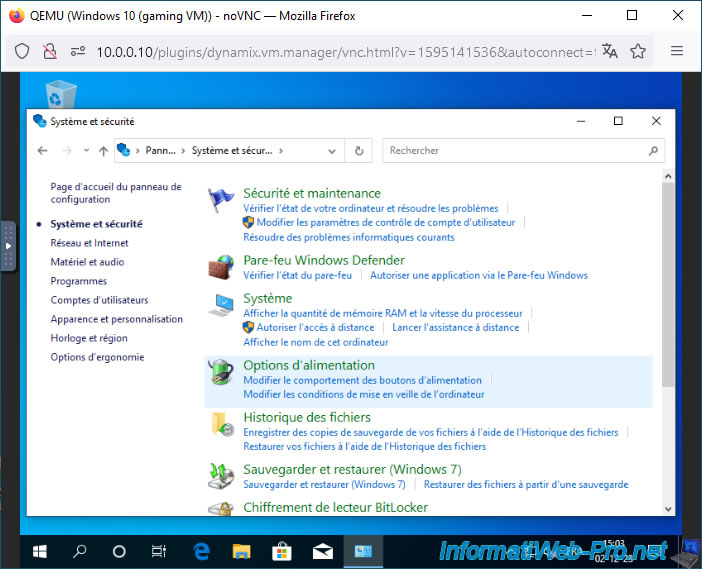
In the control panel that appears, go to: System and Security.
Next, go to: Power options.
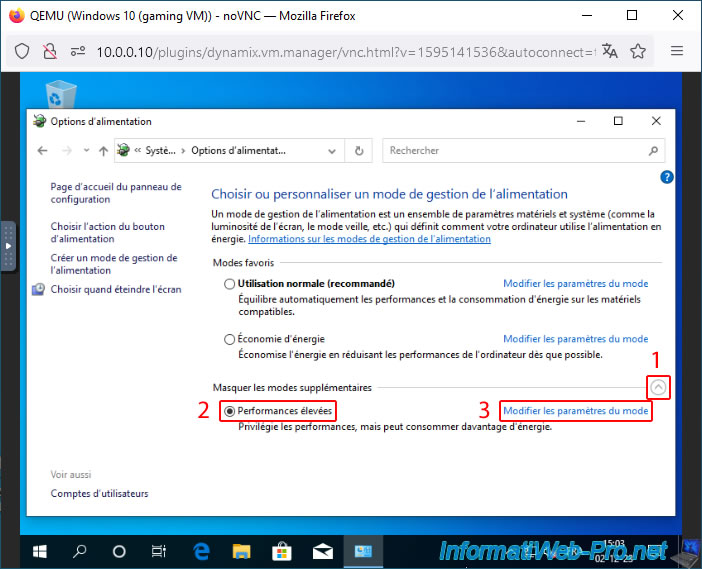
In the power options that appear, expand the "Show additional plans" section by clicking the arrow on the right, then select the "High performance" power plan.
Once this power plan is selected, click "Change advanced power settings."
Note: this is recommended for better performance, but not mandatory.
However, disabling sleep mode by clicking the "Change advanced power settings" link is strongly recommended to prevent your virtual machine from automatically entering sleep mode and becoming inaccessible over the network.
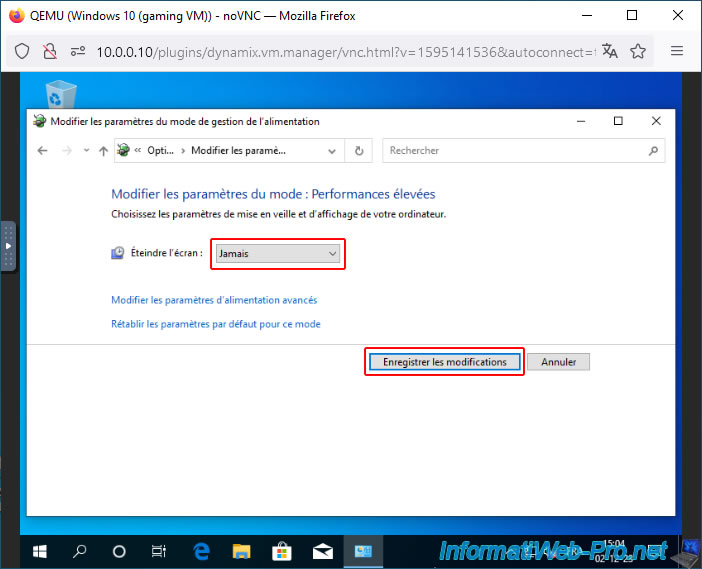
Select the "Never" option for each of the choices listed here.
- Turn off screen: Never.
If you see another option (such as: Put the computer to sleep), select "Never" again.
Then, click "Save changes".
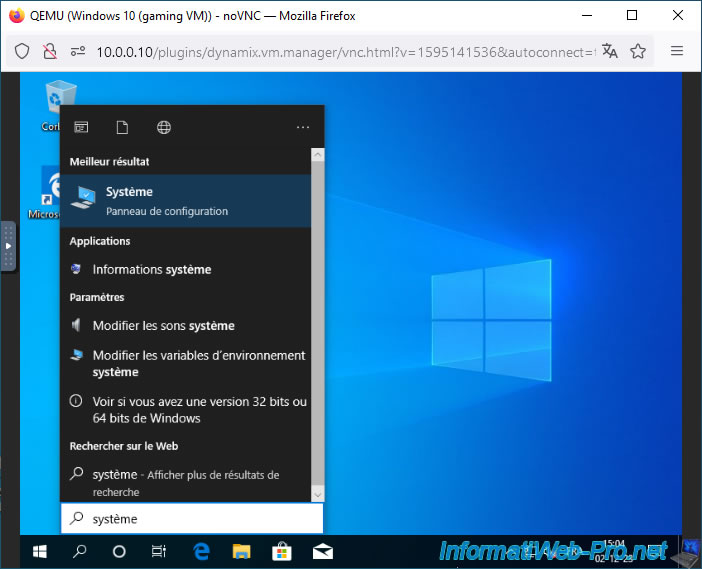
Finally, open Windows 10's system properties.
Note: you can also access it by opening file explorer, then right-clicking "Properties" on "This PC".
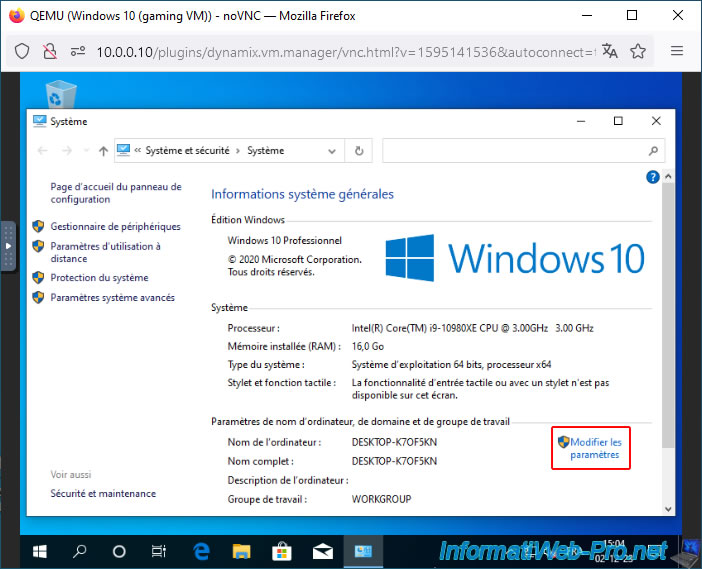
In the "System" window that appears, click on: Change settings.
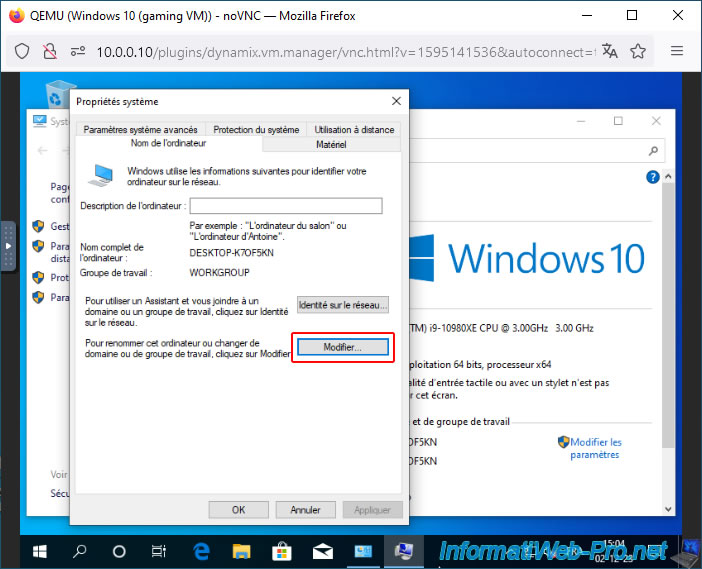
In the "System Properties" window, click the button: Modify.
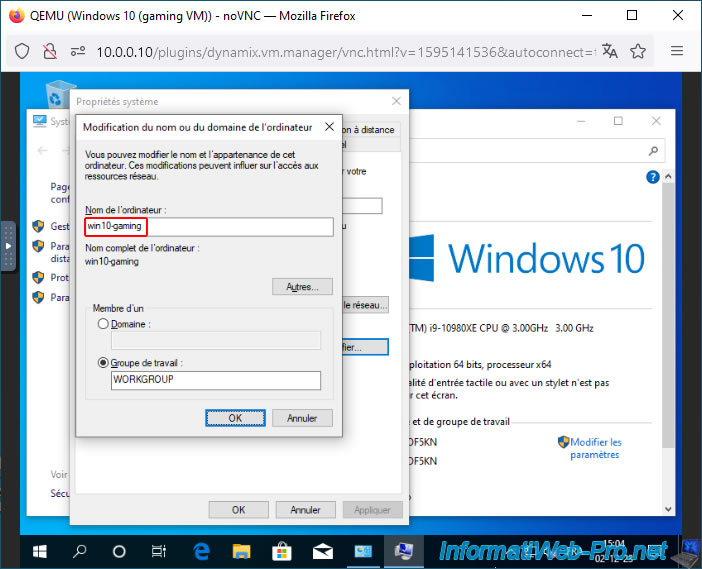
Change the computer name to something easier to remember, then click OK.
Warning : avoid keywords referring to virtual machines (VMs) to prevent the Nvidia driver from disabling itself, producing an error code 43 in Device Manager.
This is because, regardless of the virtualization solution used, the Nvidia driver tends to detect that it's running in a virtual machine and crash because of it (which causes error 43 in Device Manager).
Unraid is the only solution, to our knowledge, that allows you to easily create a gaming virtual machine without any problems with Nvidia graphics cards intended for consumers.
Click OK.
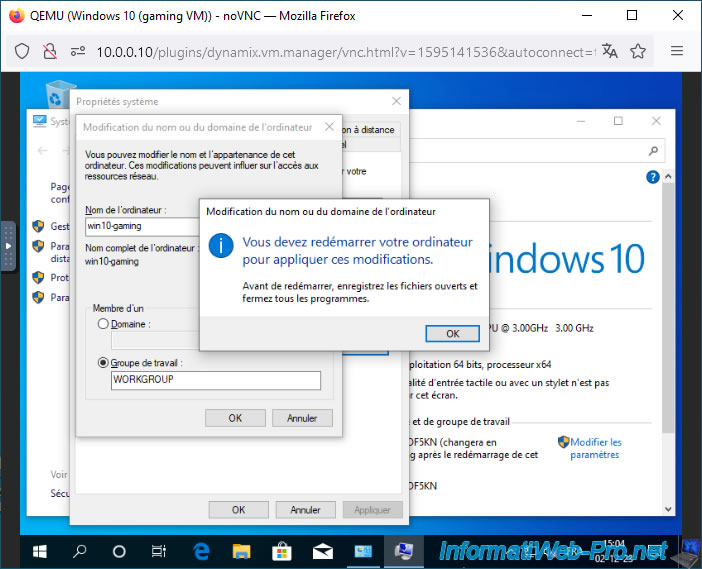
Close the "System Properties" window.
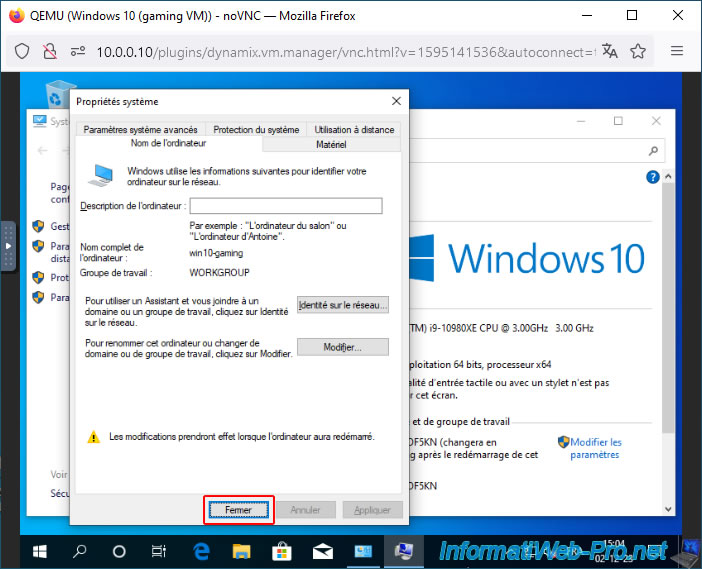
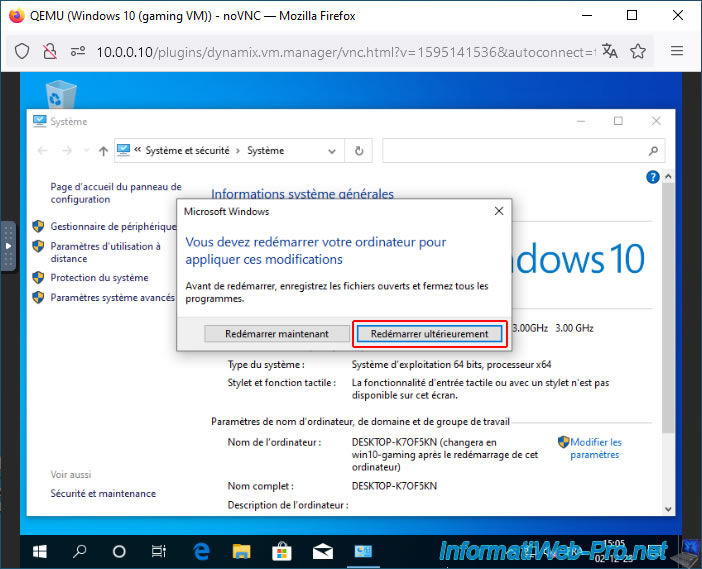
Windows will prompt you to restart your virtual machine.
Warning : click "Restart Later" as this will allow you to change the graphics card used by your VM before restarting it.
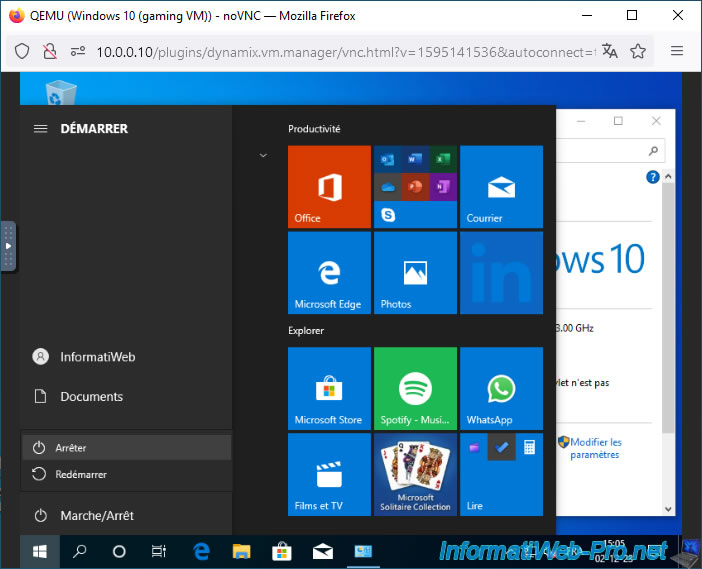
Open the start menu and click on: Shut down.
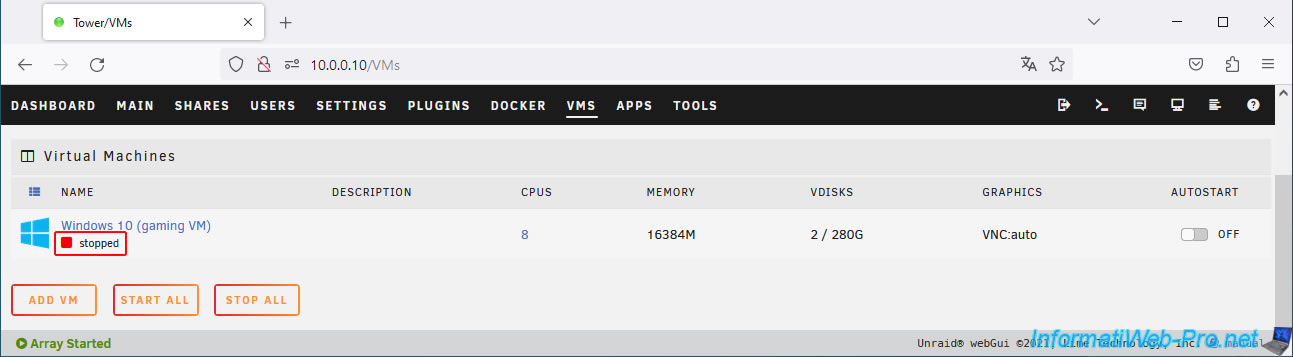
Once your virtual machine is stopped, you'll see the "stopped" status displayed in the Unraid web interface.
If necessary, refresh the page several times until this status appears.
Share this tutorial
To see also
-
NAS 7/8/2026
Unraid 6.9.2 - Docker - Install a password manager (Vaultwarden)
-
NAS 2/25/2026
Unraid 6.9.2 - Install the "Community Applications" (CA) plugin
-
NAS 7/1/2026
Unraid 6.9.2 - SWAG - Use a personal domain with a dynamic WAN IP
-
NAS 10/14/2026
Unraid 6.9.2 - VMs - Virtualize Hyper-V (nested virtualization)
No comment