- NAS
- Unraid
- 19 August 2026 at 07:48 UTC
-

- 1/2


Previously, we explained how to create virtual machines in Unraid.
In this tutorial, you'll see how to create virtual machines by placing the operating system (OS) on SSDs and large data on your hard drives.
- Create shares for virtual disks
- Create a virtual machine by placing the OS on an SSD
- Install guest operating system (Windows 10)
- Install VirtIO drivers on Windows 10
- Partition the disk for data
1. Create shares for virtual disks
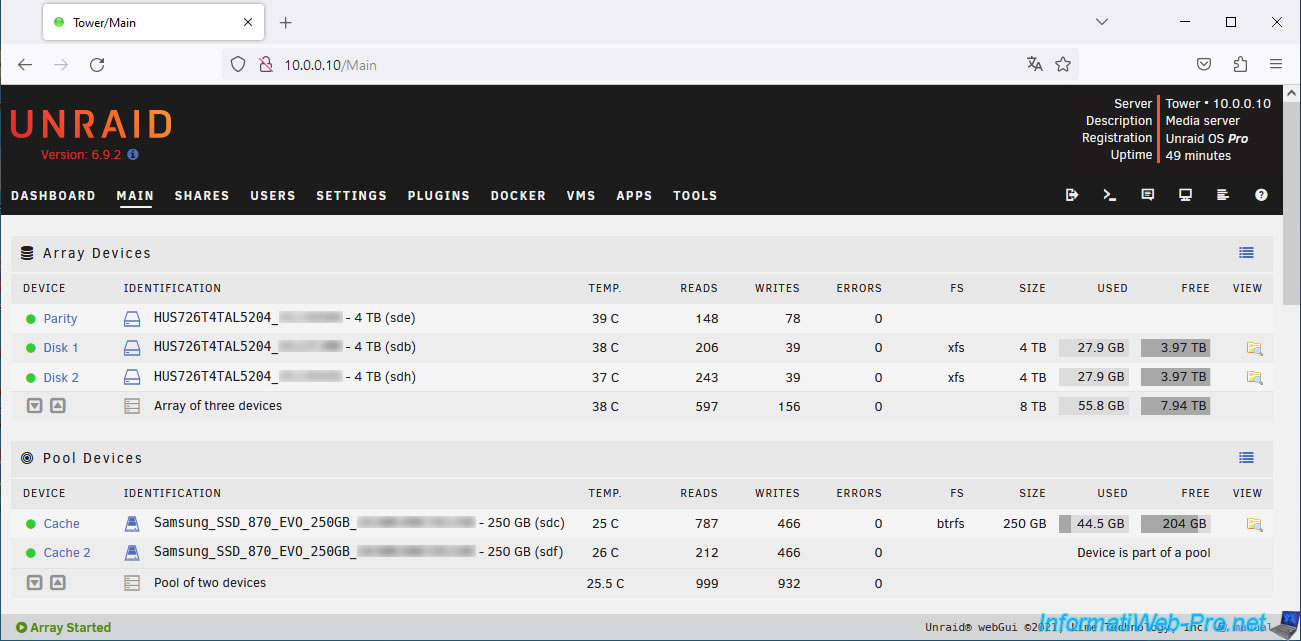
In our case, we have an Unraid server with:
- a array of three "HUS726T4TAL5204" SAS hard drives, each with a capacity of 4 TB.
- a pool (cache) of two "Samsung SSD 870 EVO" SSDs, each with a capacity of 250 GB.
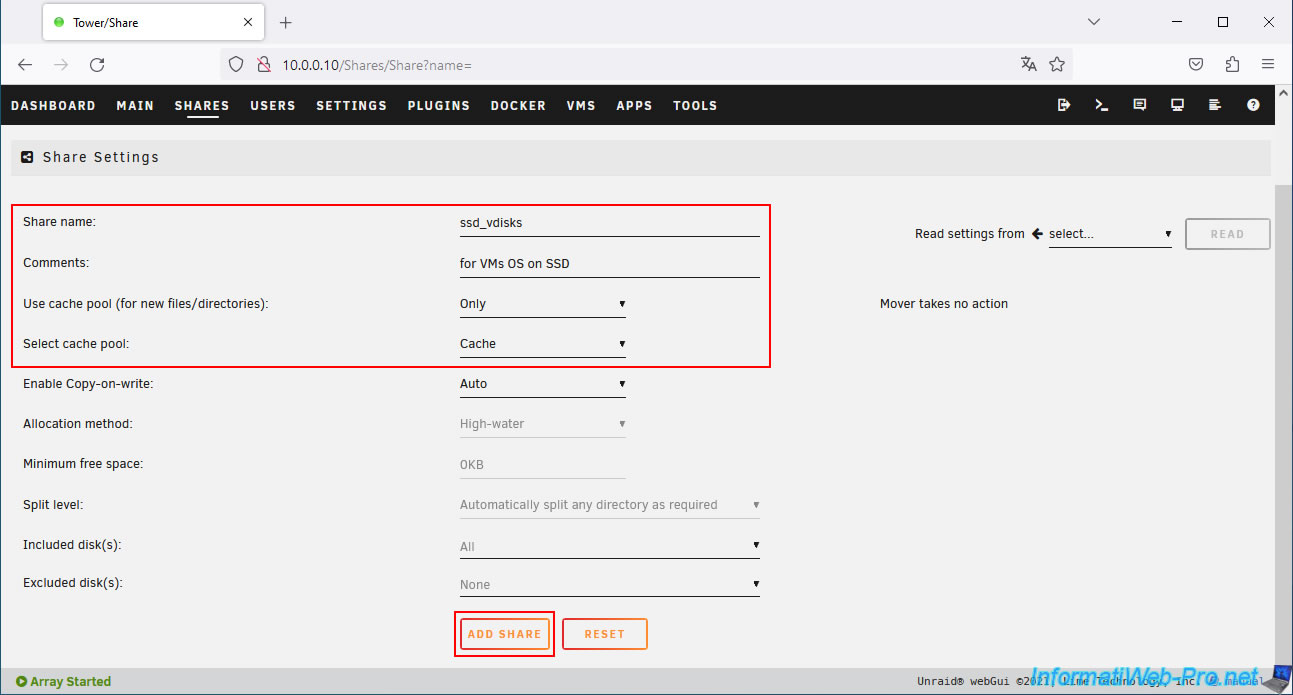
In the "Shares" tab, click "Add share."
Configure this first share as follows:
- Share name: ssd_vdisks.
- Comments: for VMs OS on SSD.
- Use cache pool (for new files/directories): Only. This means that only the cache (i.e., the SSDs) will be used.
- Select cache pool: Cache (which refers to the "Cache" device visible in the "Main" tab).
Then, click on: Add share.
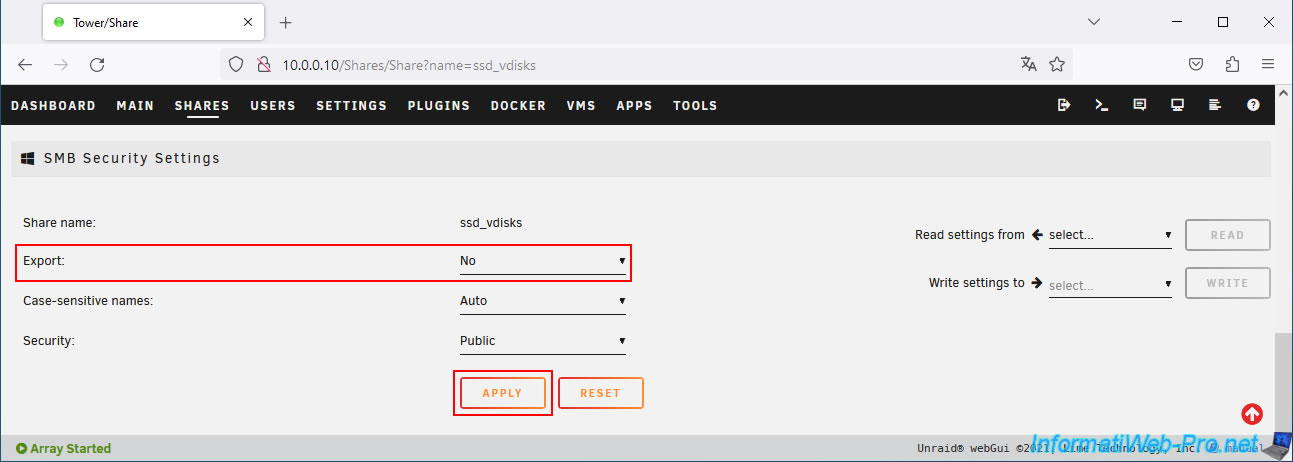
At the bottom of the page, change the "Export" value to "No" so that this share is not accessible from another computer on the network.
In fact, this share (or "mount point" in Unraid) will only be accessible by Unraid (including "libvirt," which is used to run your virtual machines).
Then, click Apply.
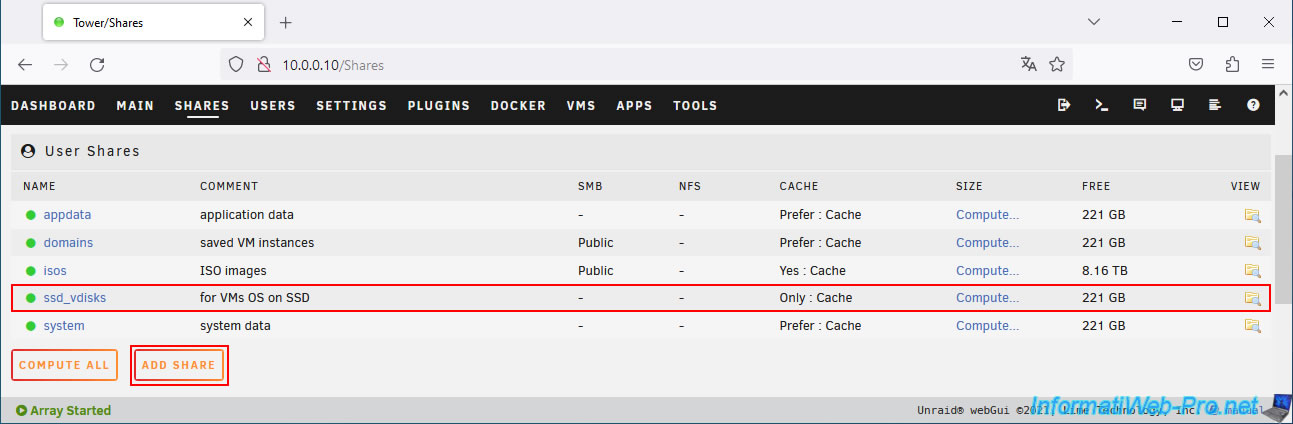
The "ssd_vdisks" share has been created.
Click "Add share" again to add the second share.
Configure this second share like this:
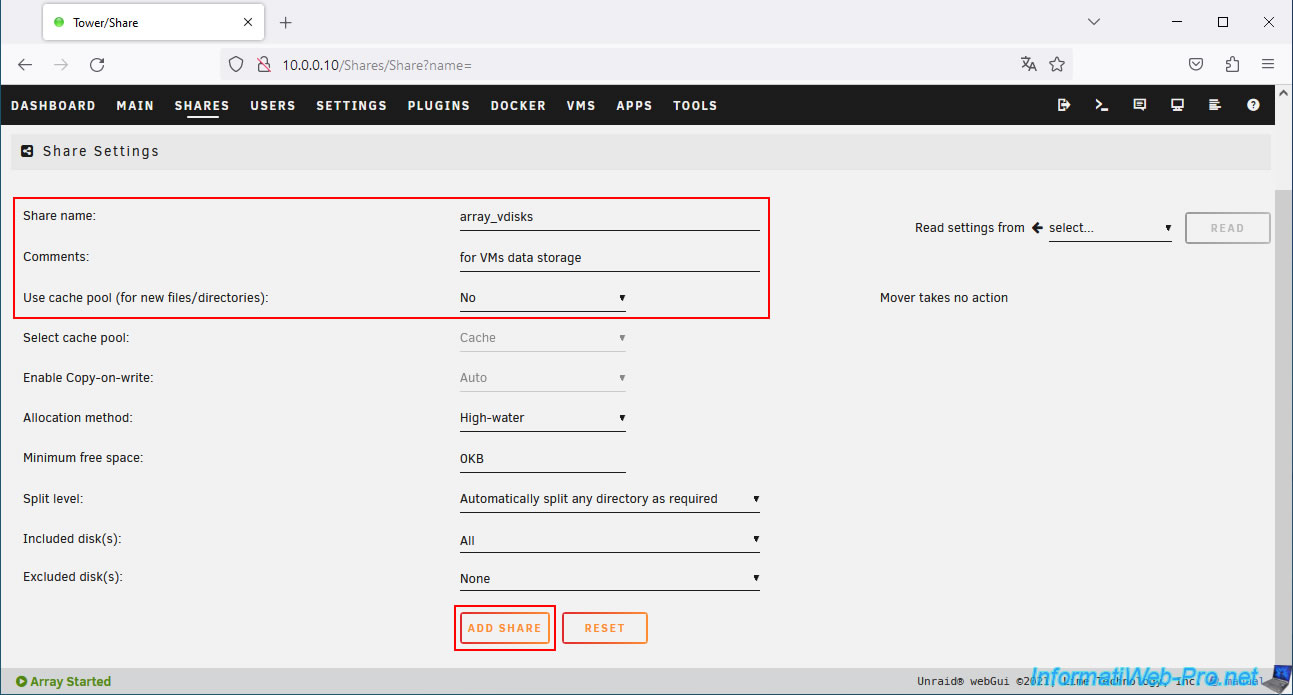
- Share name: array_vdisks.
- Comments: for VM data storage.
- Use cache pool (for new files/directories): No. This means that only the disks in the array (i.e., hard drives) will be used.
Then, click on: Add share.
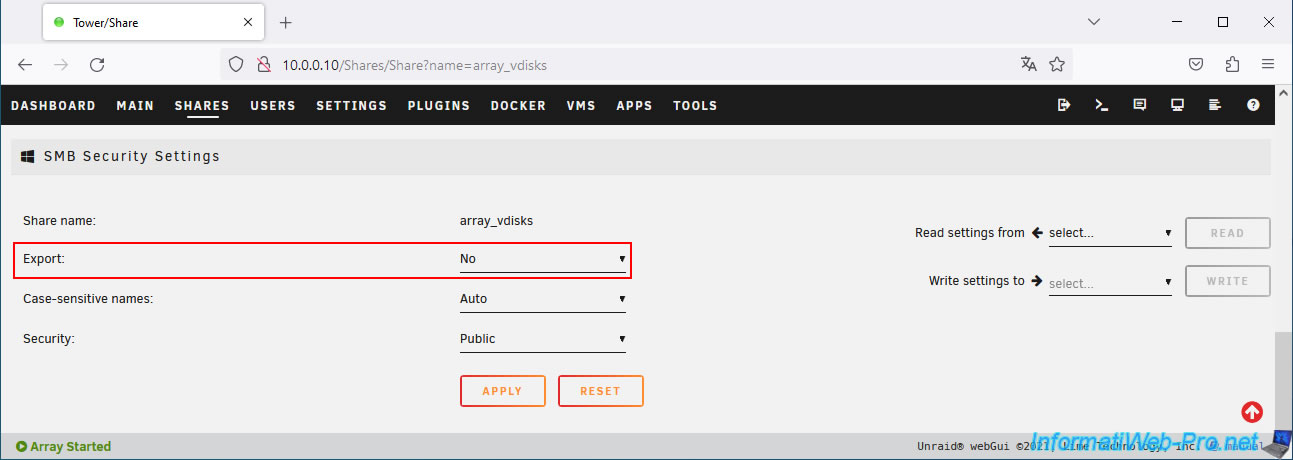
At the bottom of the page, select "Export: no" to prevent this share from being accessible via the network, then click: Apply.
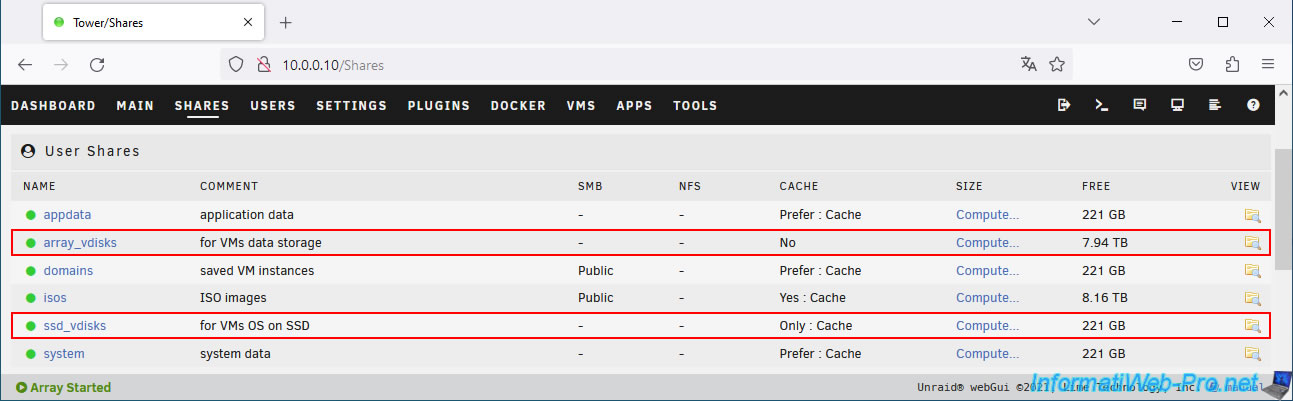
The shares have been created.
2. Create a virtual machine by placing the OS on an SSD
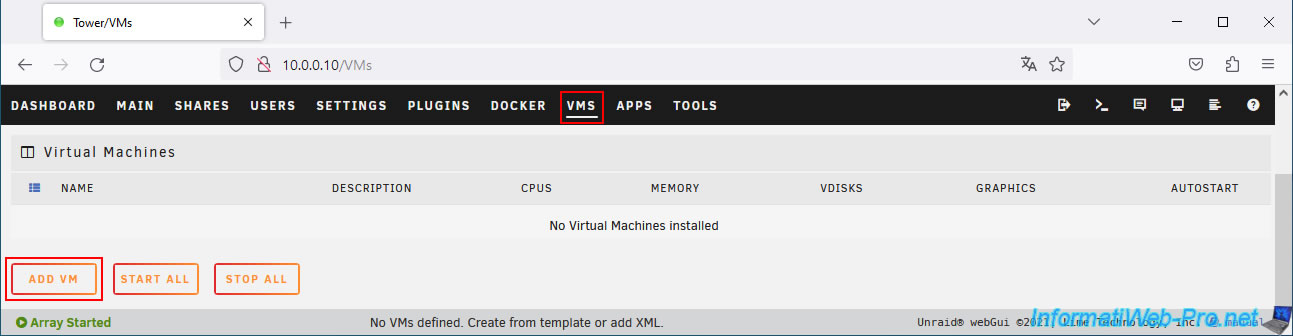
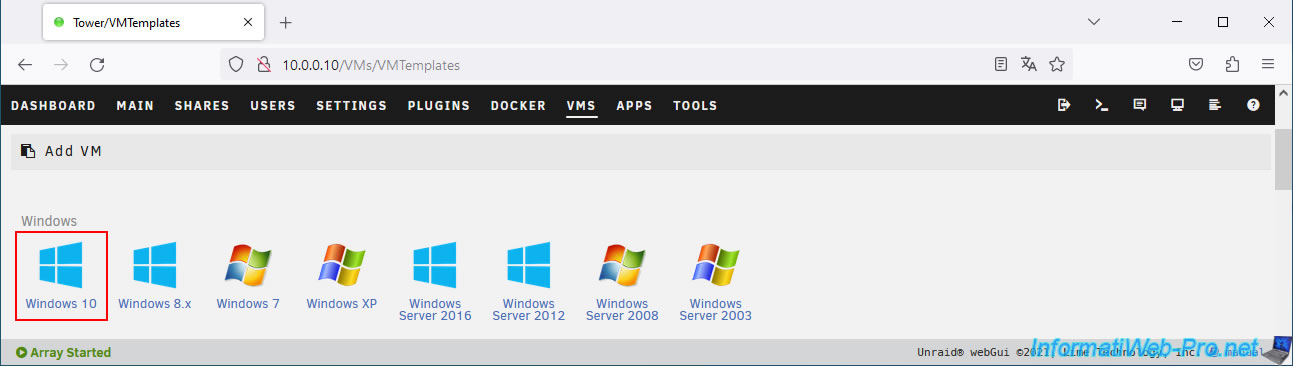
To create a virtual machine on Unraid, go to the "VMS" tab, then click on: Add VM.
Choose the operating system you want to install.
In our case: Windows 10.
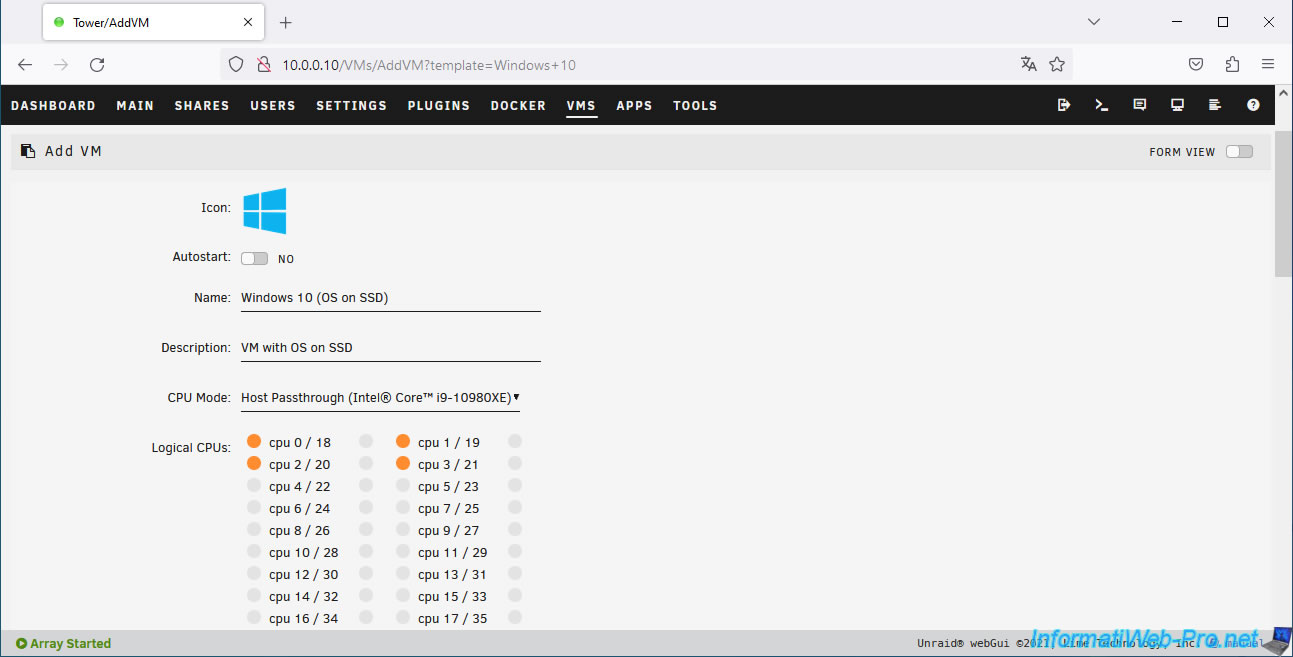
In our case, we indicated:
- Name : Windows 10 (OS on SSD).
- Description : VM with OS on SSD.
Note: to learn more about the different parameters offered by Unraid, refer to our tutorial "Unraid 6.9.2 - VMs - Create a virtual machine".
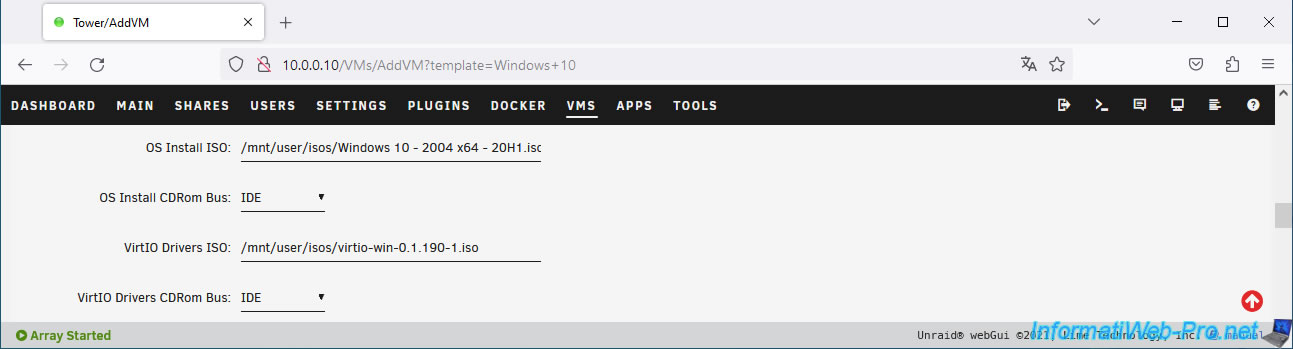
As usual, select the ISO file of the operating system you want to install in the "OS Install ISO" box.
Make sure the VirtIO Drivers ISO file is entered. If not, refer to the tutorial above.
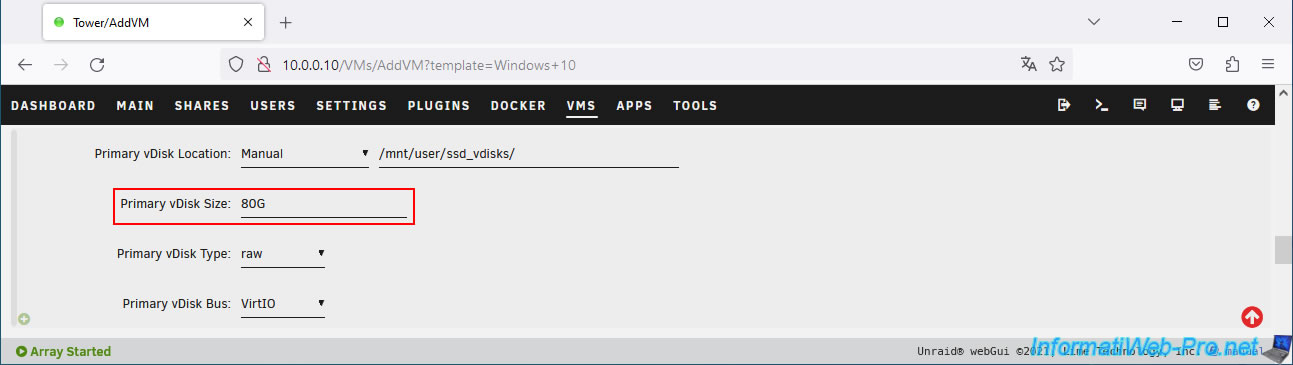
For the 1st virtual disk (Primary vDisk Location), select "Manual", then select the mount point (share) "/mnt/user/ssd_vdisks/" created previously.
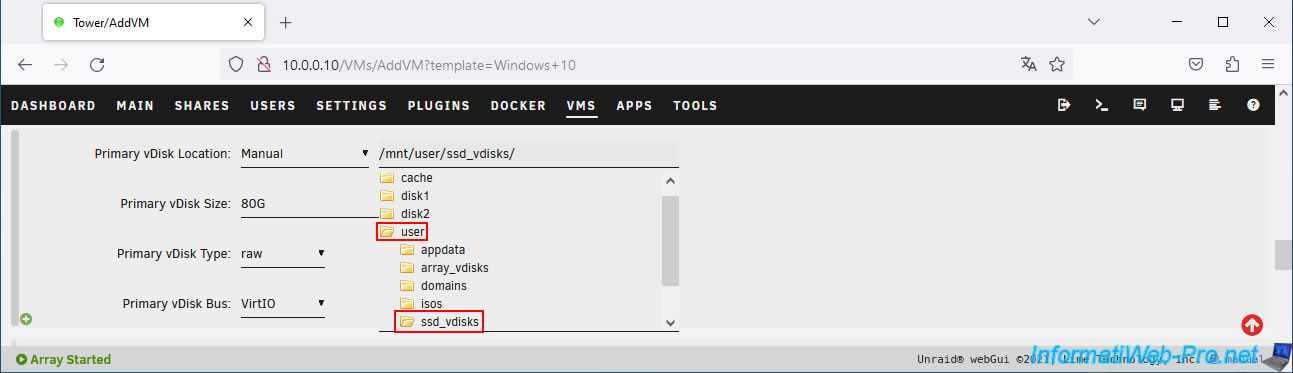
For this virtual disk, we've specified a size of 80 GB.
However, this depends on the operating system you want to install on it.
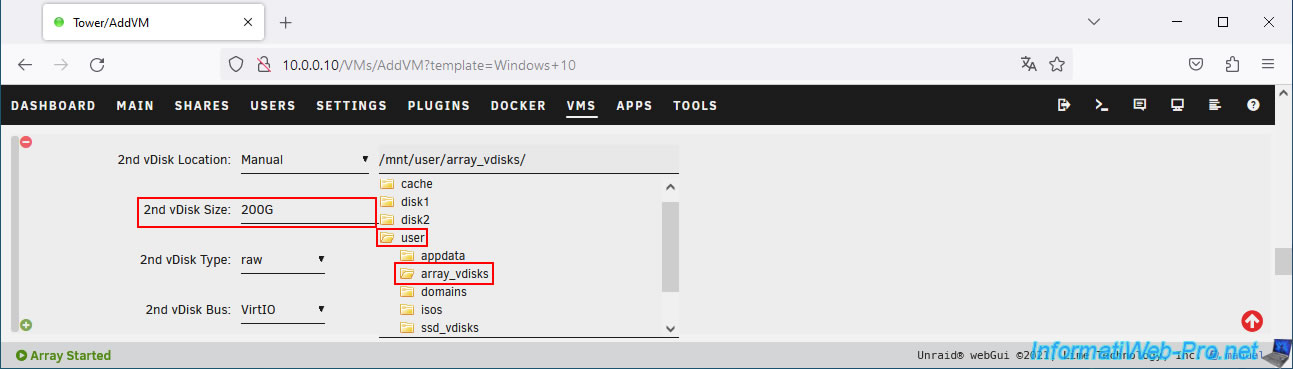
Next, click the "+" icon in the bottom left corner of the "Primary vDisk..." settings.
Again, select "Manual" for the location, but select the mount point (share) "/mnt/user/array_vdisks".
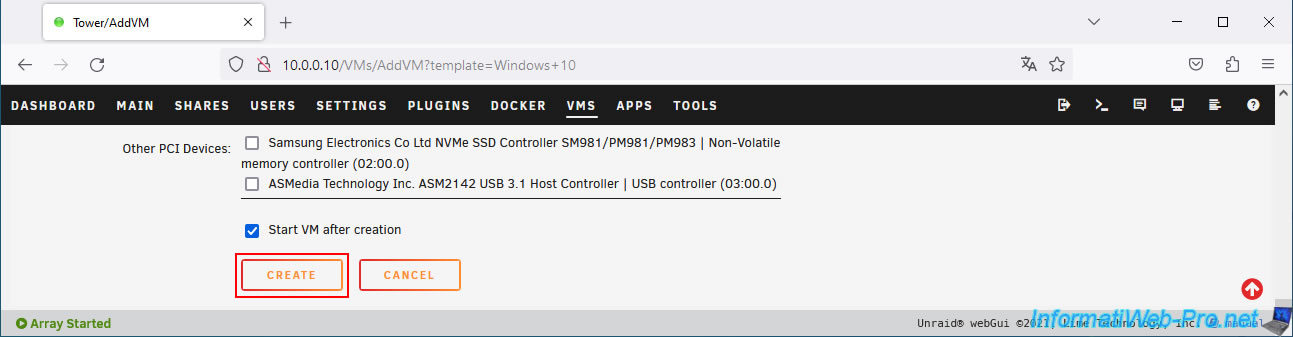
Configure the other settings as desired by referring (if necessary) to our previously mentioned tutorial, then click on "Create" at the bottom of the page.
3. Install guest operating system (Windows 10)
The Windows 10 installation wizard (in our case) appears.
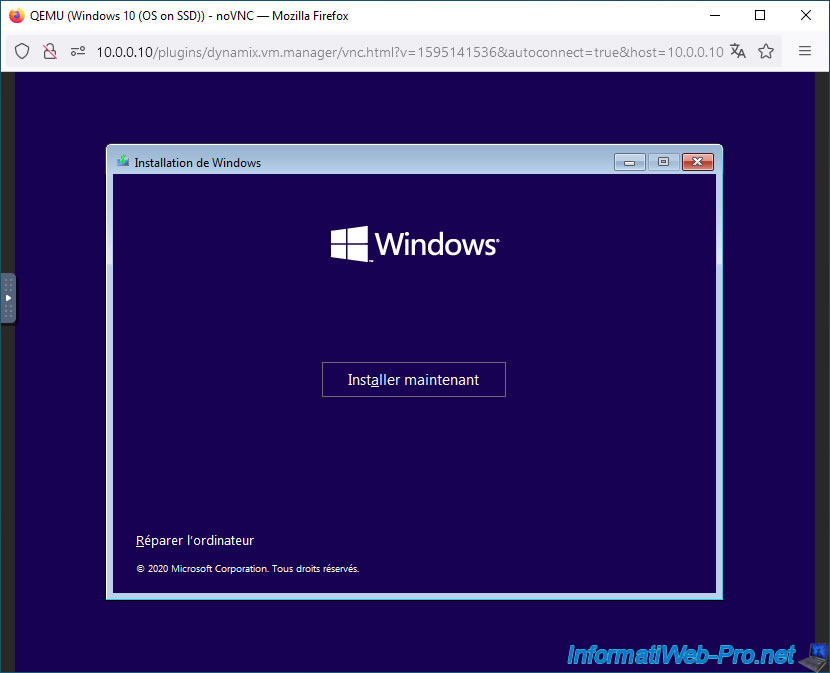
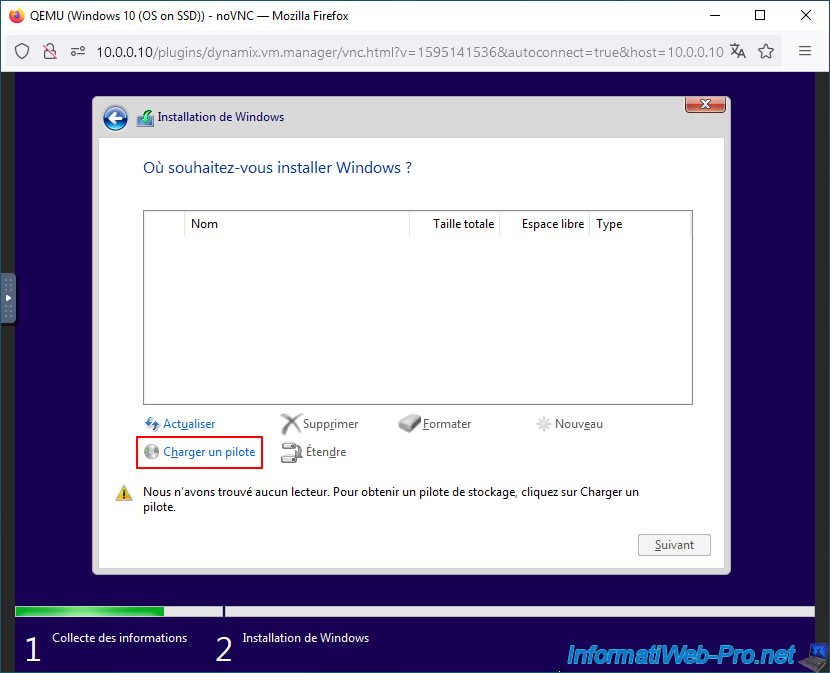
As usual, if the "VirtIO" storage controller is used for your virtual hard drives (which is the default), the Windows installation wizard will not detect them.
To fix this, click "Load Driver", then "Browse".
Plain Text
We couldn't find any drives. To get a storage driver, click Load driver.
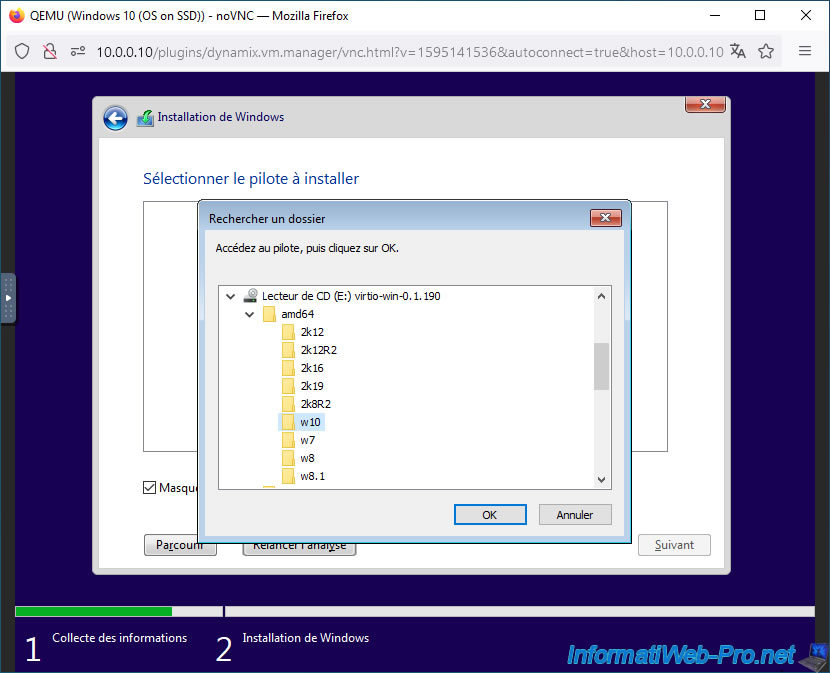
Select the folder corresponding to your version of Windows in the virtual CD "virtio-win-x.x.xx", then click OK.
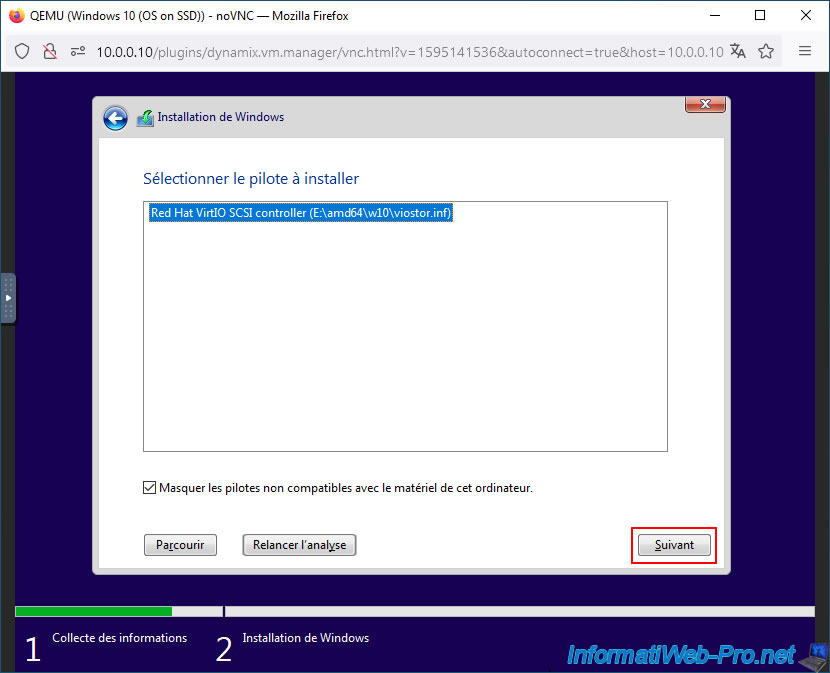
Select the "Red Hat VirtIO SCSI controller" driver, then click Next.
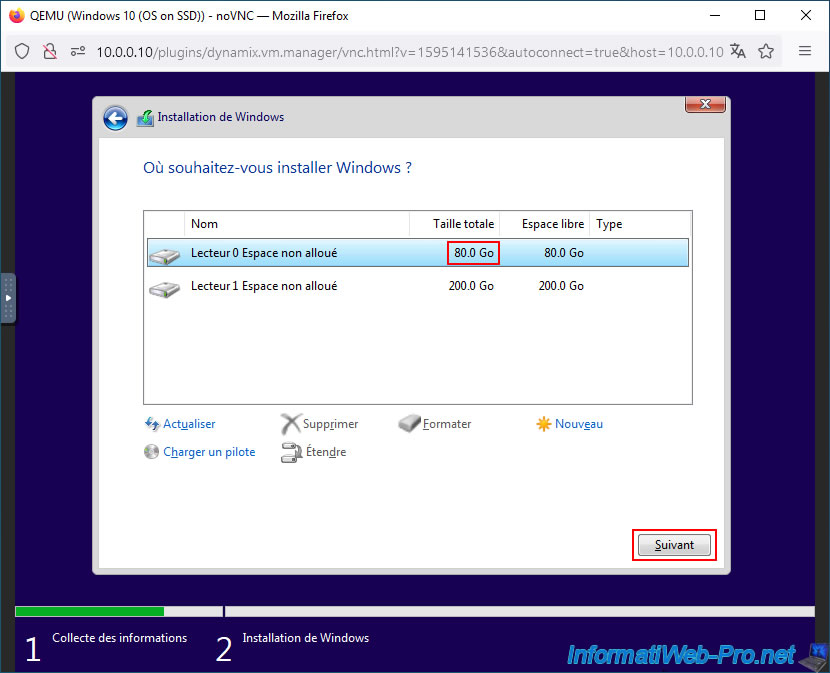
Now, your 2 virtual hard drives appear:
- the first (Primary vDisk) of 80 GB (in our case) where we will install Windows 10.
This virtual hard drive is stored in the Unraid cache, i.e., on your physical SSDs. - the second (2nd vDisk) of 200 GB (in our case) where you can store large amounts of data, if you wish.
This is stored in your Unraid array, i.e., on your physical hard drives.
Select the 1st virtual hard disk and click Next.
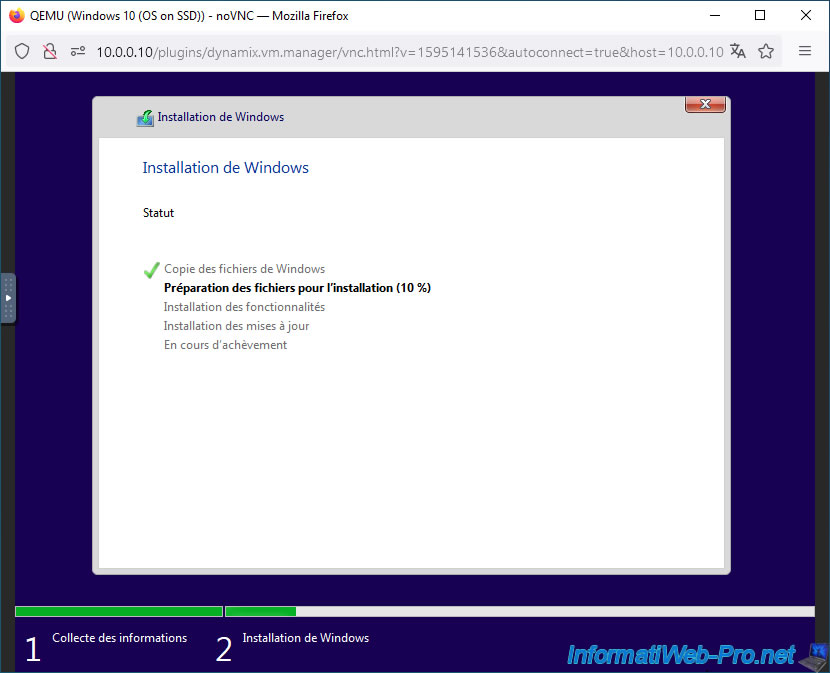
Please wait while Windows 10 installs.
Share this tutorial
To see also
-

NAS 11/26/2025
Unraid 6.9.2 - Manually install Unraid 6.9.2
-

NAS 5/27/2026
Unraid 6.9.2 - SWAG - Use a DDNS client (Duck DNS)
-

NAS 9/2/2026
Unraid 6.9.2 - VMs - Create a gaming virtual machine (accessible via Parsec)
-

NAS 9/23/2026
Unraid 6.9.2 - VMs - Hotplug USB devices (USB Manager plugin)
You must be logged in to post a comment