- NAS
- Unraid
- 11 March 2026 at 17:13 UTC
-

- 1/4


In the Unraid dashboard, you can view some basic information about your hardware (motherboard, processor, RAM, network cards, ...).
You can also perform certain actions and/or obtain different information by going to different locations in the Unraid web interface.
However, thanks to the plugins in the "Dynamix" repository, you can obtain very detailed information about your hardware and access the most common information and actions much more easily.
Important : to add the "Apps" tab to your Unraid server, allowing you to easily install the plugins available for Unraid, you must install the "Community Applications" plugin referenced on the official Unraid website.
To do this, refer to our tutorial: Unraid 6.9.2 - Install the "Community Applications" (CA) plugin.
- Dynamix System Stats (system resource usage statistics)
- Dynamix S3 Sleep (sleep in S3 mode)
- Dynamix System Info (system information)
- Install the Dynamix System Info plugin
- View information about your system
- System Overview (Summary of your system)
- BIOS (Information about your motherboard BIOS)
- Motherboard (Information about your motherboard)
- Processor (Information about your processor)
- Cache Memory (Information about your processor's cache memory)
- Memory Summary (Summary of your system's RAM)
- Memory Devices (Informations concernant vos barrettes de RAM)
- Ethernet (Information about your wired network cards)
- Dynamix System Temp (temperature probe information)
- Dynamix System Buttons (add buttons for common system actions)
1. Dynamix System Stats (system resource usage statistics)
To begin, go to the "Apps" tab and search for "Dynamix System Stats".
Click the "Dynamix System Stats" plugin download icon that appears.
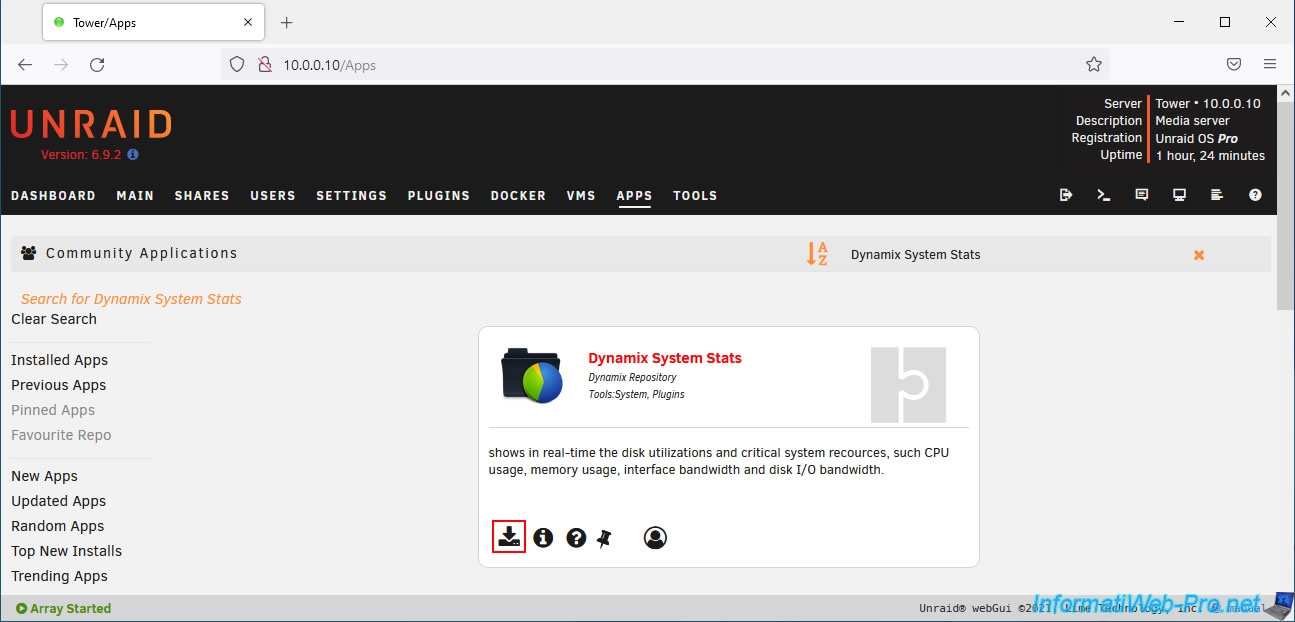
Wait while the "Dynamix System Stats" plugin is downloaded and installed, then click the "Done" button when it appears.

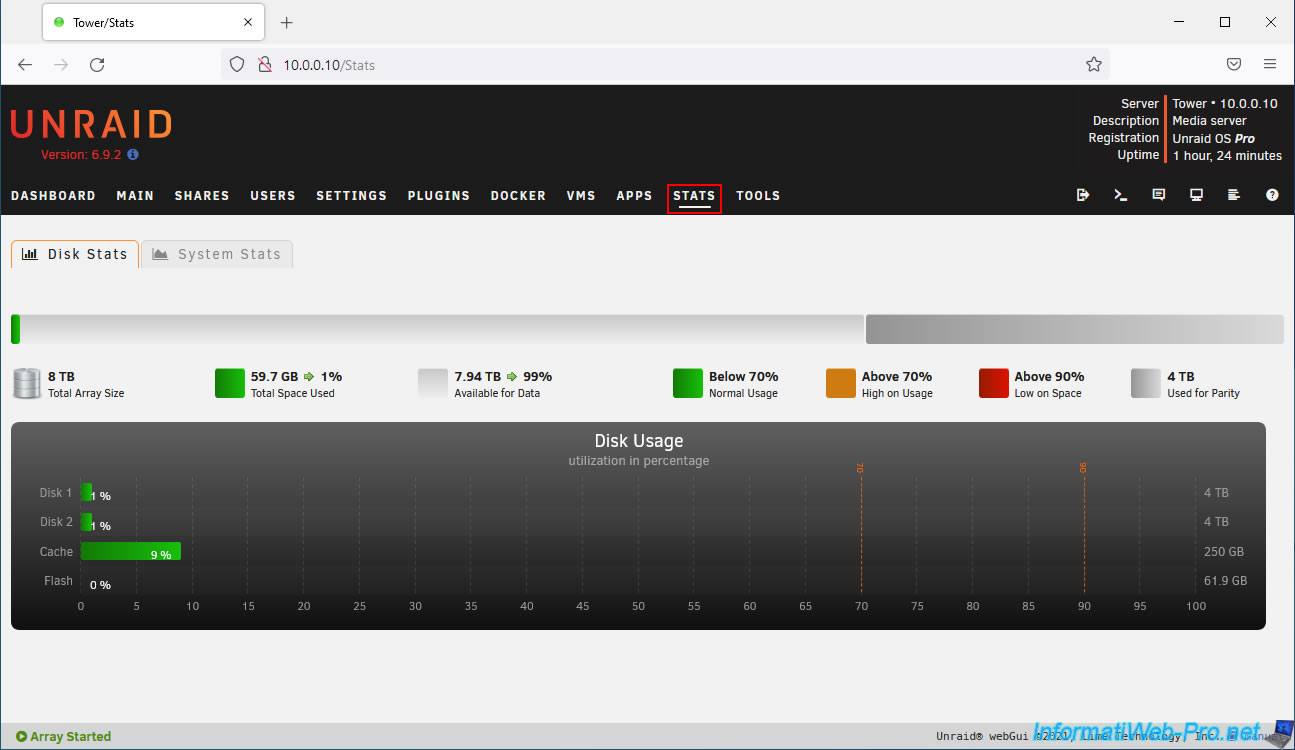
Installing the "Dynamix System Stats" plugin will add a new "Stats" tab.
In this tab, you will find:
- Disk Stats: Your Unraid server's storage usage statistics.
- System Stats: System resource usage statistics (CPU, RAM, network, and storage)
In the "Disk Stats" tab, you will easily monitor the usage rate of:
- Disk 1, Disk 2, ...: storage disks that are part of your array.
- Cache: cache disk or pool. These are part of one or more pools and are therefore not part of the array.
- Flash: bootable USB key where Unraid is installed.
In the "System Stats" tab, you will find real-time graphs regarding:
- Processor: CPU usage by the system and the user.
- Memory: used, free, and cached RAM.
- Network: receive and transmit bandwidth usage.
- Storage: current read and write speeds in storage.

2. Dynamix S3 Sleep (sleep in S3 mode)
2.1. Dynamix S3 Sleep (sleep in S3 mode)
S3 power mode is a special mode that allows you to put your server into sleep mode so that it consumes almost no power.
Then, when you need your server, you simply wake it up by pressing the power button once or by sending it a magic packet over the network (WOL).
However, be aware that this S3 mode is not officially supported by Lime Technology, as its implementation varies from hardware to hardware, and some components may not be compatible with it.
Additionally, it may require configuring your motherboard's BIOS before it works properly.
If your hardware supports this S3 power mode, then search for and install the "Dynamix S3 Sleep" plugin.

Please wait while it downloads and installs.

2.2. Manually put your server to sleep in S3 power mode
Once this "Dynamix S3 Sleep" plugin is installed, you will find a new "Sleep" button in the "Main" section of Unraid.

2.3. Automatically put your server to sleep in S3 power mode
If you go to the "Plugins" section, you'll see this new "Dynamix S3 Sleep" plugin appear.
Note that you can also schedule your Unraid server to sleep or shut down by clicking on this plugin's icon.

As you can see, the default status is Stopped.
This means that your server has not yet been scheduled to sleep or shut down automatically. However, this is optional.

If you want to use this feature as well, then change the value of "Execute function" to:
- Sleep: to schedule your Unraid server to automatically go to sleep (in S3 mode).
- Shutdown: to schedule your server to automatically shut down.

Then, you can choose which days you do not want the server to sleep using the "Excluded days" setting.

For example, you could exclude the weekend, or in other words, Saturday and Sunday, to prevent your server from automatically sleeping or shutting down during the weekend.
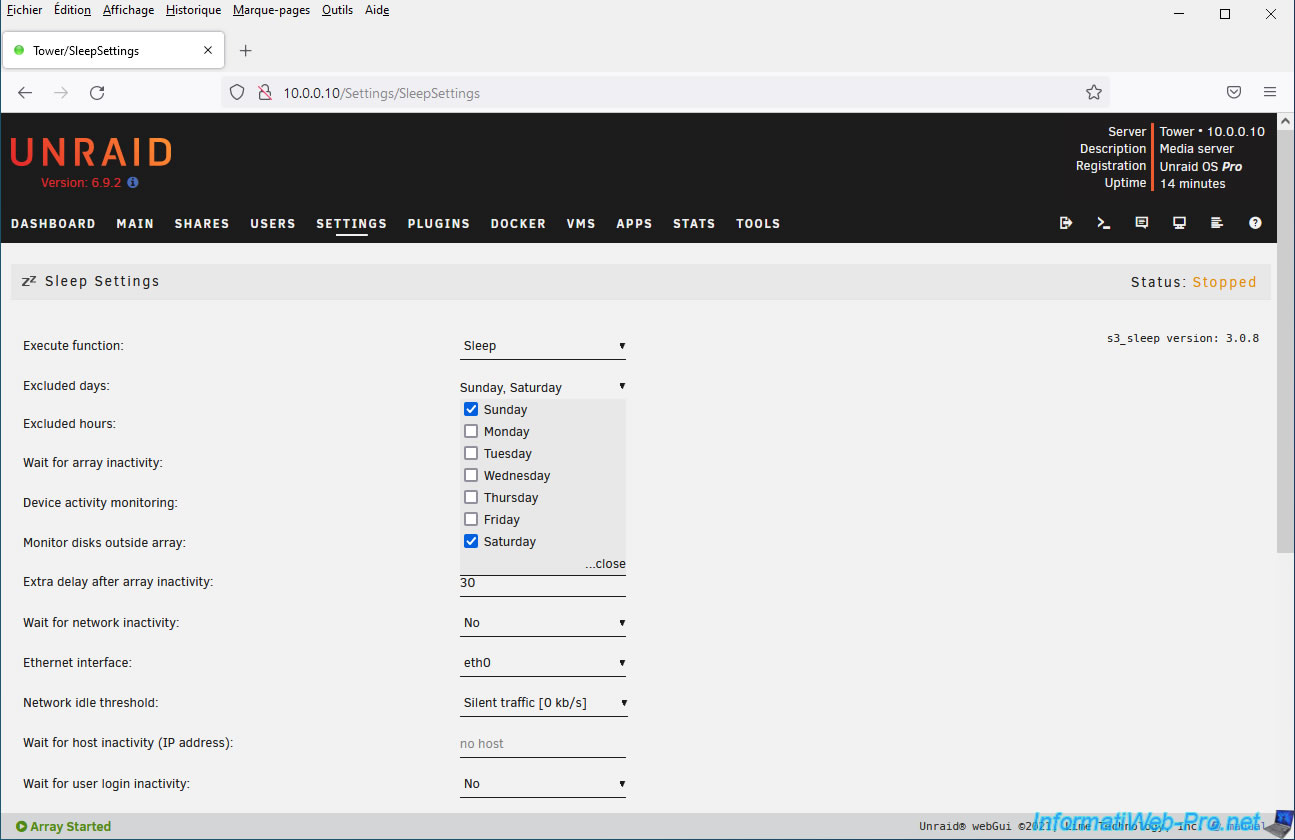
You can also exclude different time slots using the "Excluded hours" setting.
For example, if you get up around 8:00 a.m. and go to sleep around 11:00 p.m., you would select the "8:00 - 9:00 a.m." to "11:00 p.m. - 12:00 a.m." options.
This ensures that your server will never go into standby or shut down between 8:00 a.m. and midnight (24 hours). This can happen after midnight.

Note that you can also define other conditions using the various parameters offered:
- Wait for array inactivity: allows you to wait until the array is no longer in use (inactive). Cache disks can be excluded from this condition by selecting "Yes, exclude Cache" instead of "Yes".
- Device activity monitoring: allows you to monitor the device's hardware status and/or its read/write counter.
- Monitor disks outside array: allows you to also monitor unassigned disks (which are therefore not part of the array).
- Extra delay after array inactivity: allows you to specify a waiting time after the array is inactive to avoid putting the server to sleep too quickly (too early).
- Wait for network inactivity: allows you to wait until the network is not in use.
- Ethernet interface: if the previous setting is enabled, this allows you to specify which network card to monitor.
- Network idle threshold: allows you to specify the minimum network throughput at which the network can be considered no longer in use. Note that even if you're not using your server, it's possible that it's receiving network packets or sending some. Network throughput will therefore never be 0, but a little higher depending on the case.
Hence the presence of this parameter. - Wait for host inactivity (IP address): allows you to specify the IP address of a server or computer, which will ensure that the server is never suspended or shut down as long as Unraid is able to ping the server or computer specified here.
- Wait for user login inactivity: allows you to specify whether the user must be inactive (either locally and/or remotely via telnet or SSH) to suspend or shut down the server.
- Set WOL options before sleep: allows you to specify WOL (Wake-On-Lan) options for S3 sleep support.
- Custom commands before sleep: allows you to specify a command to run before your server goes to sleep.
- Custom commands after wake-up: allows you to specify a command to run when your server wakes up.
- Force gigabit speed after wake-up: by default, this option is disabled and should only be enabled if your network card does not restart properly after waking from sleep.
- DHCP renewal after wake-up: same as the previous setting, but for requesting an IP address from a DHCP server in case of a problem.
- Enable DEBUG mode: allows you to obtain additional information in case of a problem with this S3 mode.

Once you have configured the desired settings, click: Apply.

Now, the status displayed is: Running.

Share this tutorial
To see also
-

NAS 3/25/2026
Unraid 6.9.2 - Change web interface ports
-

NAS 4/1/2026
Unraid 6.9.2 - Docker - Install a file explorer (CloudCommander)
-

NAS 7/8/2026
Unraid 6.9.2 - Docker - Install a password manager (Vaultwarden)
-

NAS 6/10/2026
Unraid 6.9.2 - SWAG - Access Jellyfin via reverse proxy and personal domain
You must be logged in to post a comment