- NAS
- Unraid
- 08 July 2026 at 07:44 UTC
-

- 1/6

On your Unraid server, you have the option to deploy an open-source password manager called Vaultwarden to store your passwords on your own server.
Vaultwarden (formerly bitwarden_rs) is a container that allows you to deploy your own Bitwarden server to maintain control over your password storage.
In addition, you'll also benefit from free applications created by Bitwarden for your computers (Windows, Linux, and Mac), as well as for your web browsers (Firefox, Chrome, Opera, etc.) and your smartphone (Android or iOS).
Important : before you begin, please note that registration on Vaultwarden only works if access is secure (via HTTPS).
This requires a valid certificate. This is possible using the "SWAG" reverse proxy.
However, to be able to use the Android app on your smartphone (which may be at home or away depending on the network used (Wi-Fi or 3G)), it's important that the reverse proxy (SWAG in this case) be accessible locally, as well as from outside the app using the exact same address.
To do this, first follow our tutorial: Unraid 6.9.2 - SWAG - Locally access the reverse proxy (SWAG).
- Install Vaultwarden on Unraid
- 1st Vaultwarden setup (secure admin password)
- HTTPS protocol required for registration on Vaultwarden
- Configure your domain name (at OVH)
- Use the same virtual network as the reverse proxy (SWAG)
- Add configuration for Vaultwarden on reverse proxy (swag)
- Add the subdomain for Vaultwarden in the certificate generated via the swag container
- Remotely access Vaultwarden via swag reverse proxy
- Configure your local DNS server and local access to Vaultwarden
- Create an account on your own Vaultwarden server
- Vaultwarden reports
- Create a new item in your Vaultwarden vault
- Block future registrations on your Vaultwarden server
- Install and use the Bitwarden application for Windows with your Vaultwarden server
- Download, install and configure Bitwarden extensions to connect to your Vaultwarden server
- Download the Bitwarden extension for Mozilla Firefox and connect to Vaultwarden
- Download the Bitwarden extension for Google Chrome and connect to Vaultwarden
- Download the Bitwarden extension for Opera and connect to Vaultwarden
- Download the Bitwarden extension for Microsoft Edge and connect to Vaultwarden
- Use the Bitwarden app on your smartphone to connect to your Vaultwarden server (on Android)
1. Install Vaultwarden on Unraid
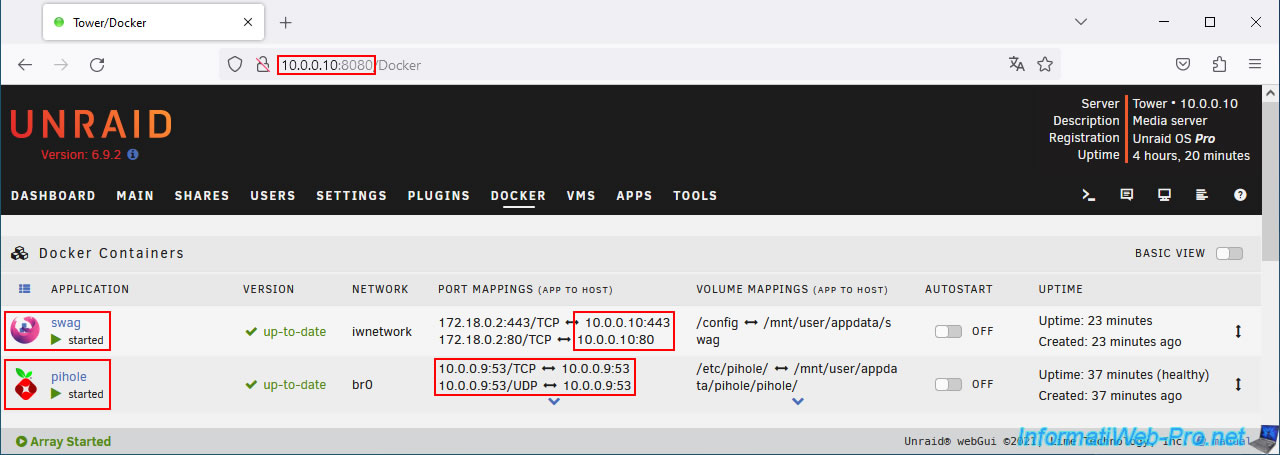
Before installing Vaultwarden, here's our current setup (which you'll get after following the tutorial above).
As you can see:
- the Unraid web interface uses port 8080 for HTTP access.
- the reverse proxy (SWAG) uses ports 80 (HTTP) and 443 (HTTPS).
- the "pihole" container is the local DNS server used to perform split DNS (returning Unraid's local IP address when you are at home to hide the external (WAN) IP address, which is only visible on the Internet).
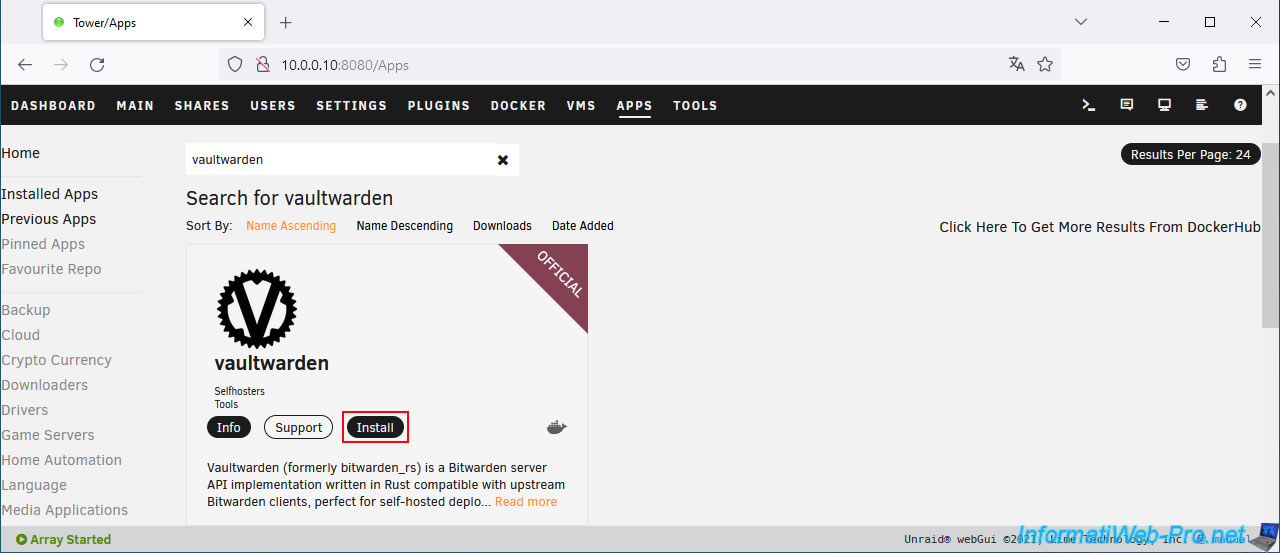
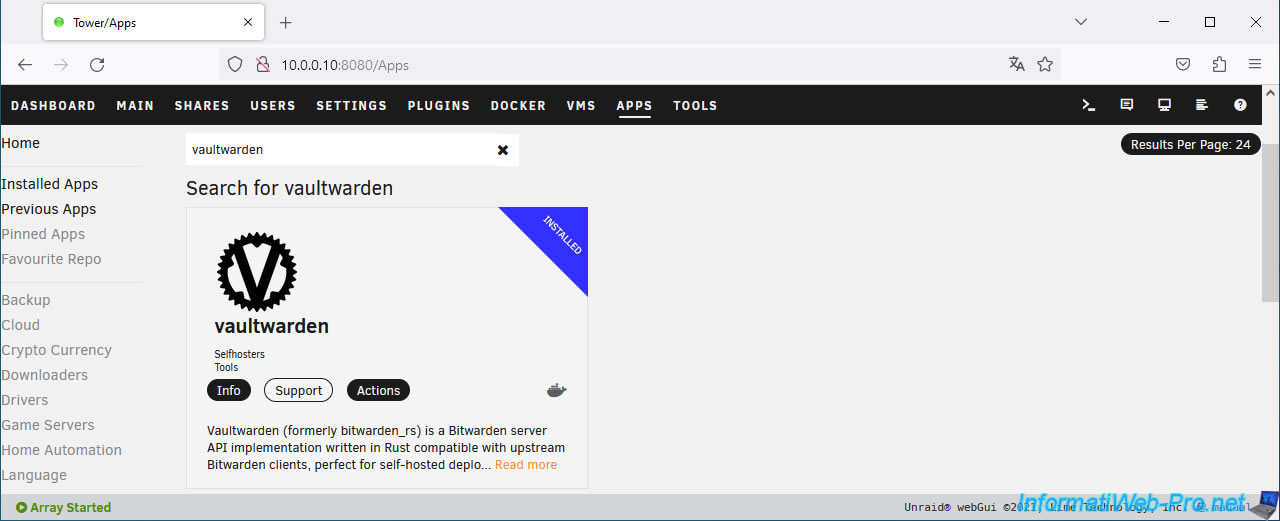
Go to the "Apps" tab and search for "vaultwarden".
Then, click "Install".
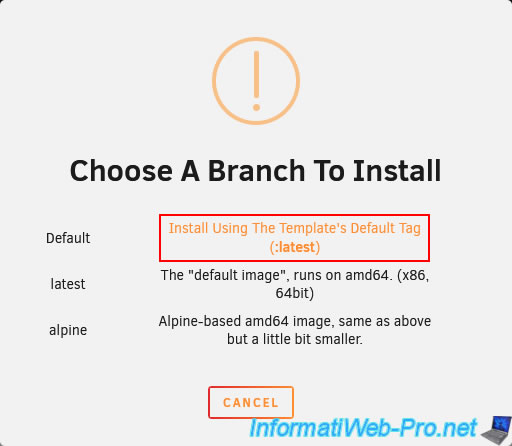
Choose the "Default" branch.
As with most services you want to access via the reverse proxy (SWAG), you must connect it to the same network as the "swag" container.
Select the same "Custom" network as your "swag" container. In our case, "Custom: iwnetwork".
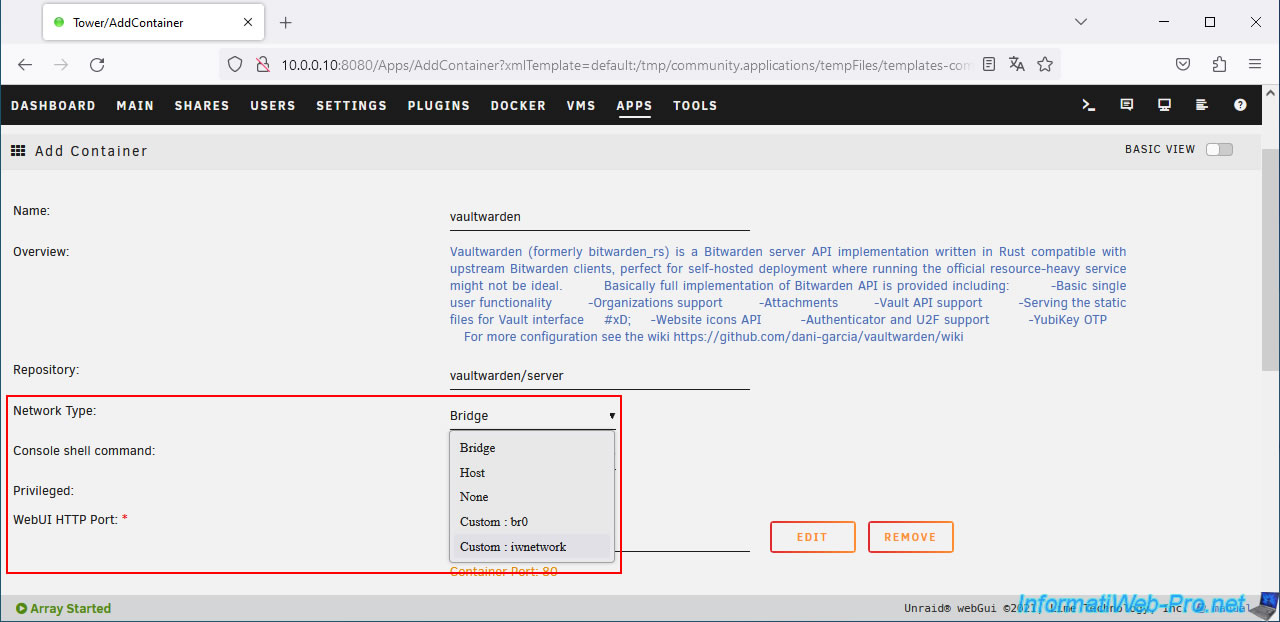
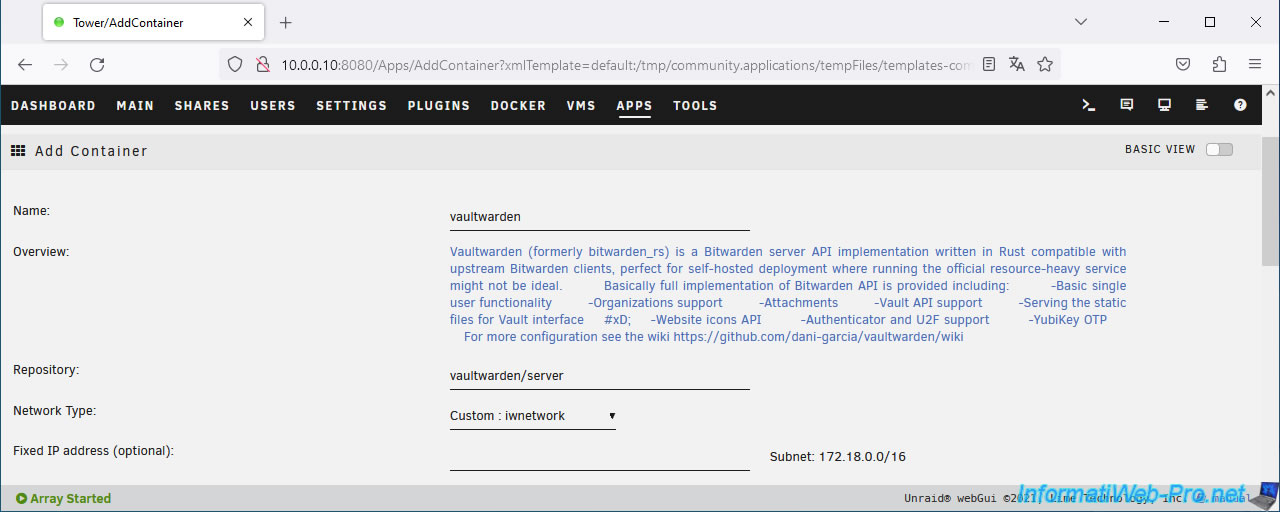
By default, both (public) registrations and registrations via invitation are allowed:
- SIGNUPS_ALLOWED : true.
- INVITATIONS_ALLOWED : true
Specify a password of at least 8 characters to protect the Vaultwarden administration interface in the "ADMIN_TOKEN" field.
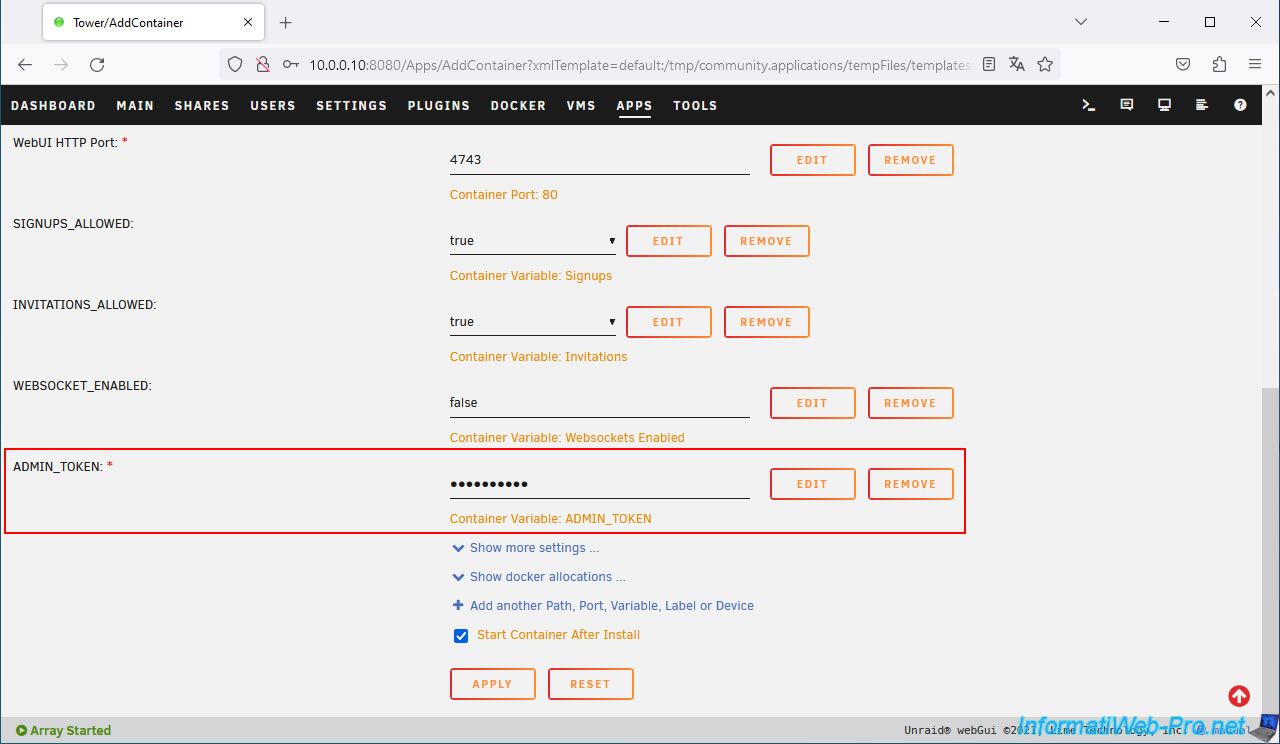
Once Vaultwarden has finished downloading and installing, click "Done".
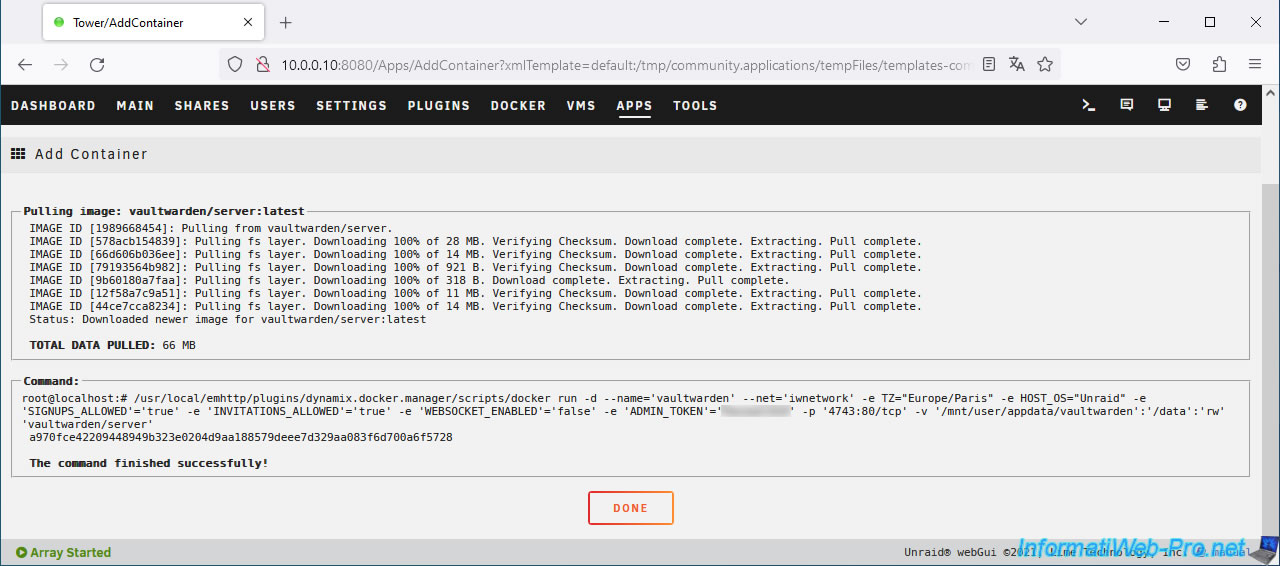
Vaultwarden is installed.
2. 1st Vaultwarden setup (secure admin password)
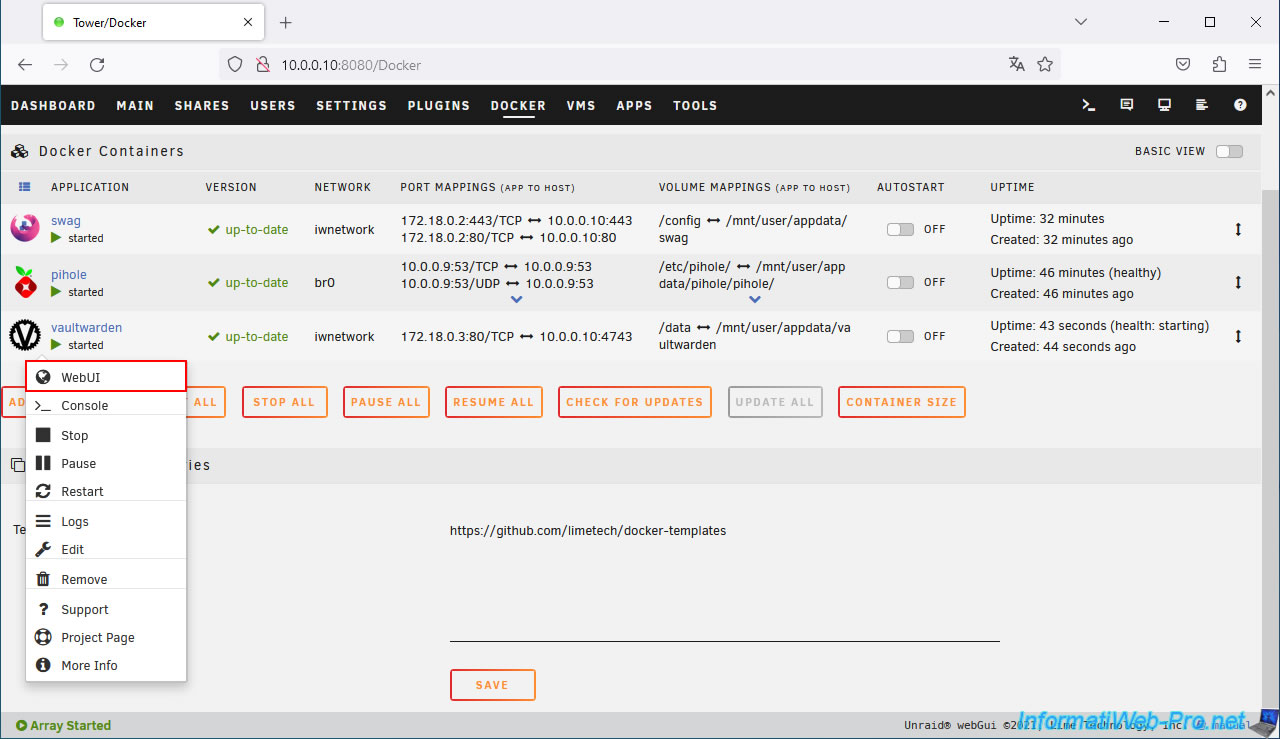
To get started, in the "Docker" tab, click on the Vaultwarden icon, then on: WebUI.
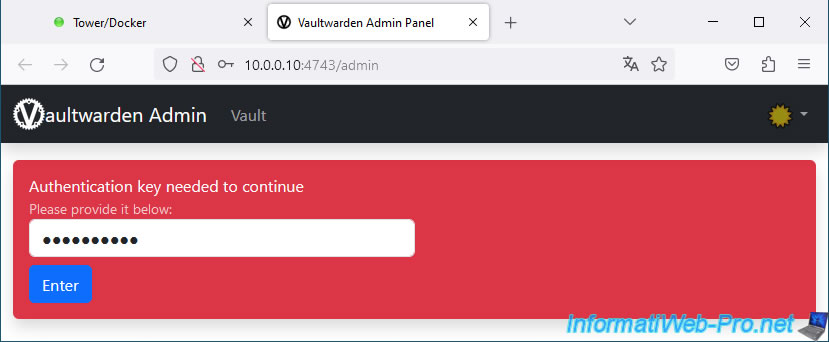
Enter the admin password (ADMIN_TOKEN) and click Enter.
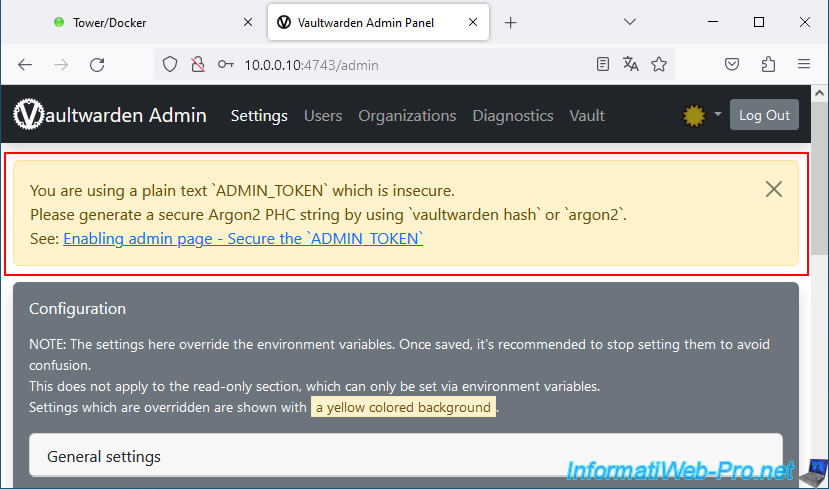
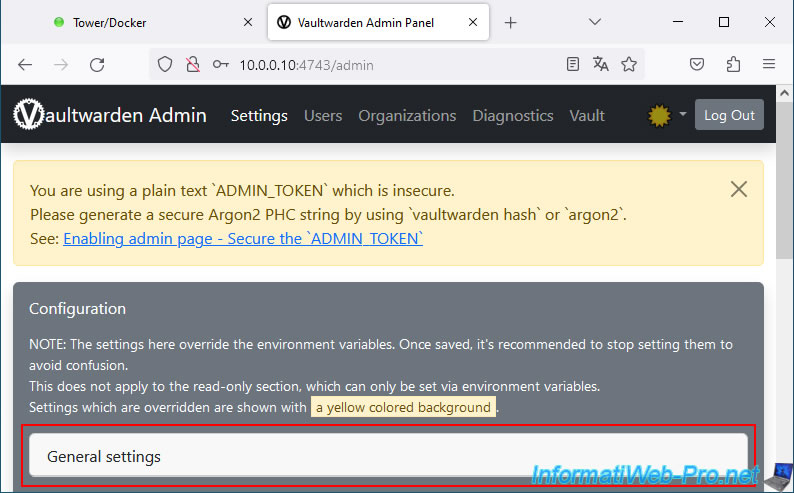
As you can see, by default, a warning appears at the top of the page (since Vaultwarden version 1.28.0):
Plain Text
You are using a plain text 'ADMIN_TOKEN' which is insecure.
Please generate a secure Argon2 PHC string by using 'vaultwarden hash' or 'argon2'.
See: Enabling admin page - Secure the 'ADMIN_TOKEN'.
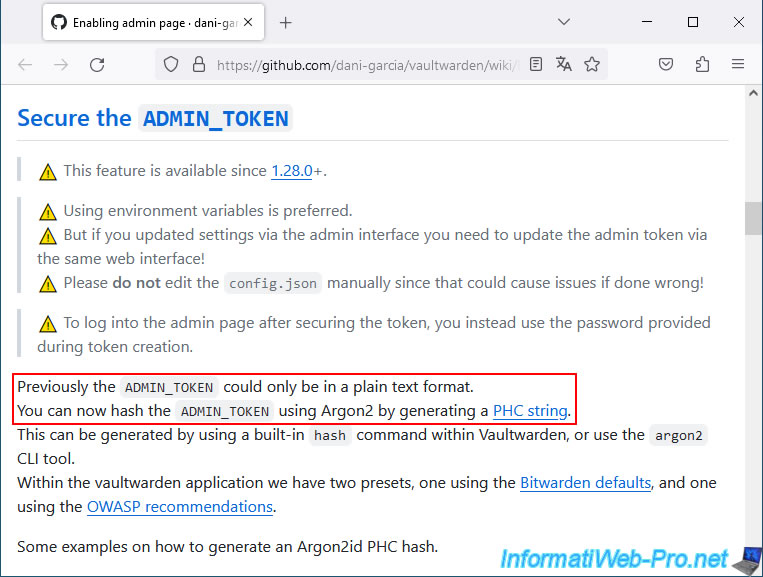
On this page, you will arrive at a section "Secure the ADMIN_TOKEN" explaining that the admin password was previously stored in clear text (which is not secure) and that you can now generate a hash of this admin password using "Argon2".
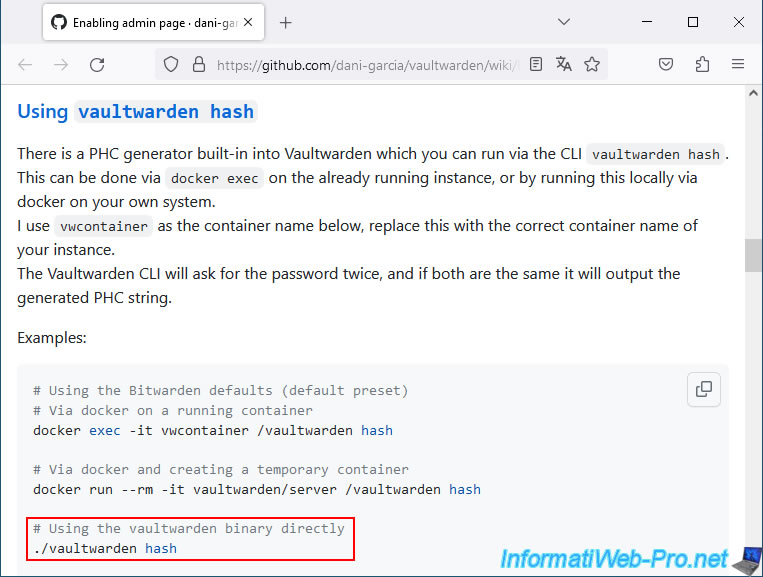
To do this, a little further down, you'll find a section titled "Using vaultwarden hash" with several examples for generating the hash you need.
Each example performs the same thing. The only differences are the syntax and where you can run this command.
For Unraid, choose the command below:
Bash
./vaultwarden hash
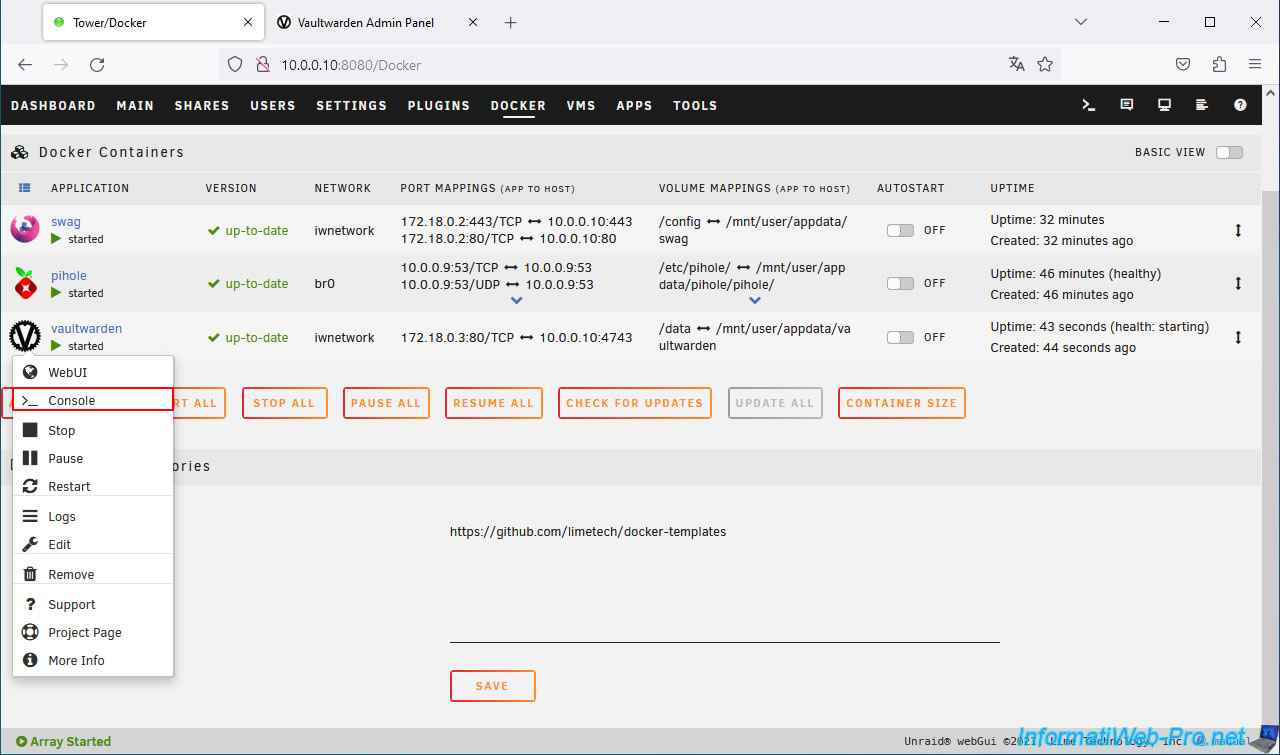
In the Unraid web interface, click the Vaultwarden icon, then click: Console.
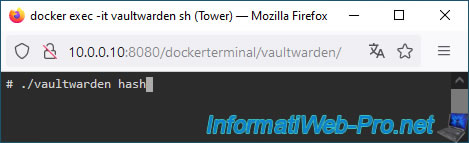
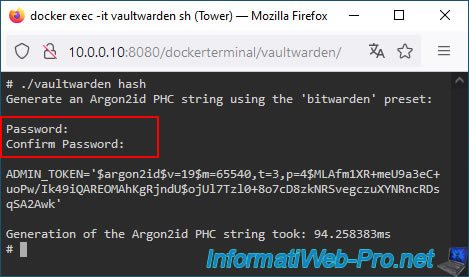
In the terminal that appears, type the command below.
Bash
./vaultwarden hash
Type the new admin password twice to protect the Vaultwarden administration interface.
Note: you can reuse the same password as before if you wish, as long as it is at least 8 characters long.
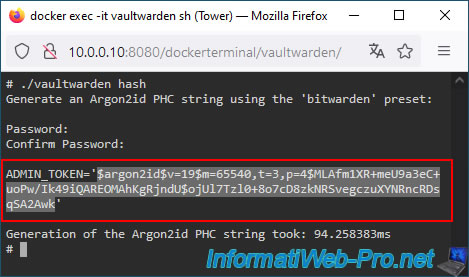
Copy the generated value between the apostrophes (' ').
On the "Vaultwarden Admin" page, go to the "General Settings" section.
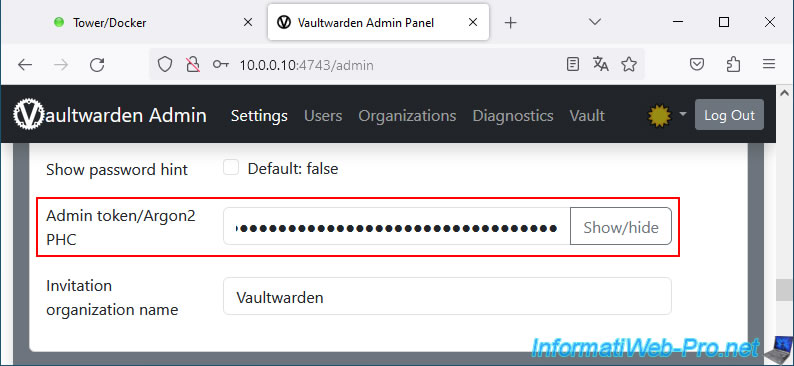
Paste the previously generated "$argon2id$...xy" value into the "Admin token/Argon2 PHC" box.
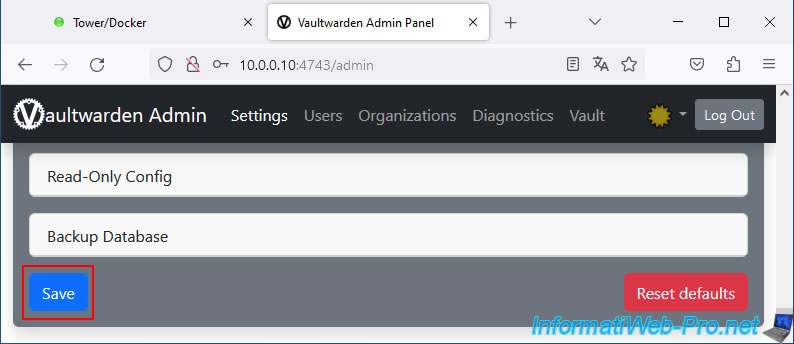
At the bottom of the page, click "Save".
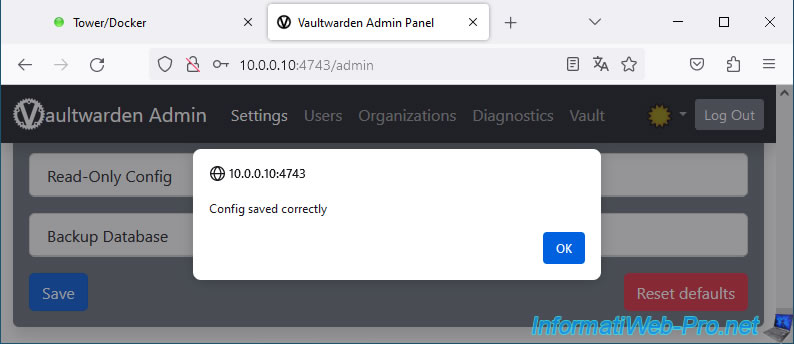
The message "Config saved correctly" appears.
Click OK.
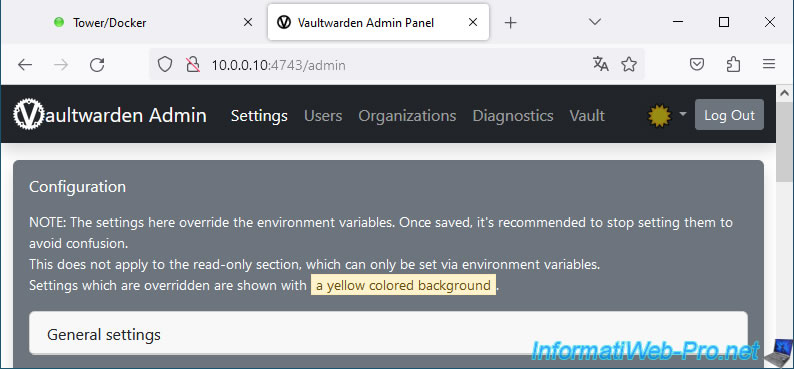
The warning at the top of the page has disappeared.
3. HTTPS protocol required for registration on Vaultwarden
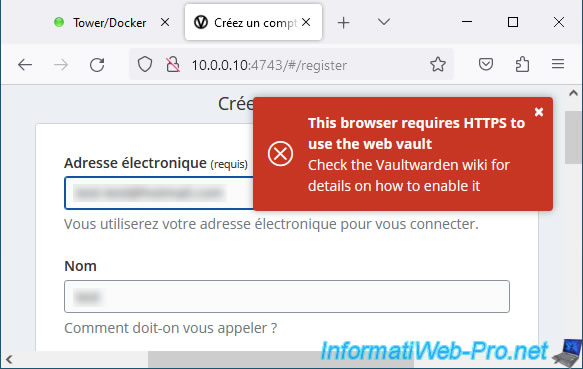
If you try to create an account on your Vaultwarden server (using HTTP), you'll notice that it doesn't work.
In fact, this error will appear.
Plain Text
This browser requires HTTPS to use the web vault.
4. Configure your domain name (at OVH)
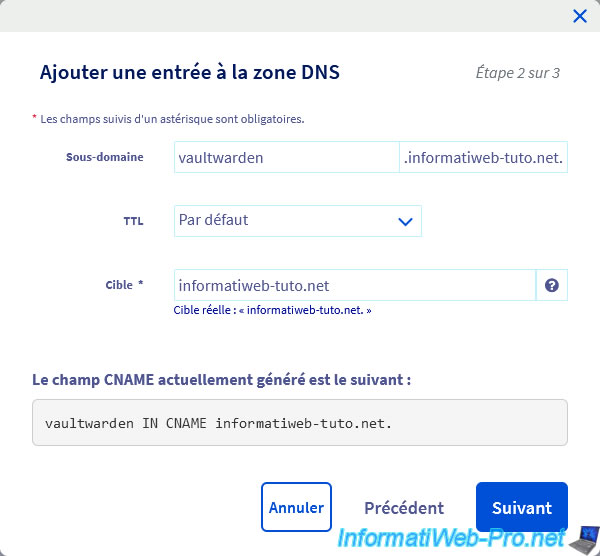
At your hosting provider, add a DNS A or CNAME record to create a "vaultwarden" subdomain.
If you choose a DNS A record, enter your external (WAN) IPv4 address provided by your ISP.
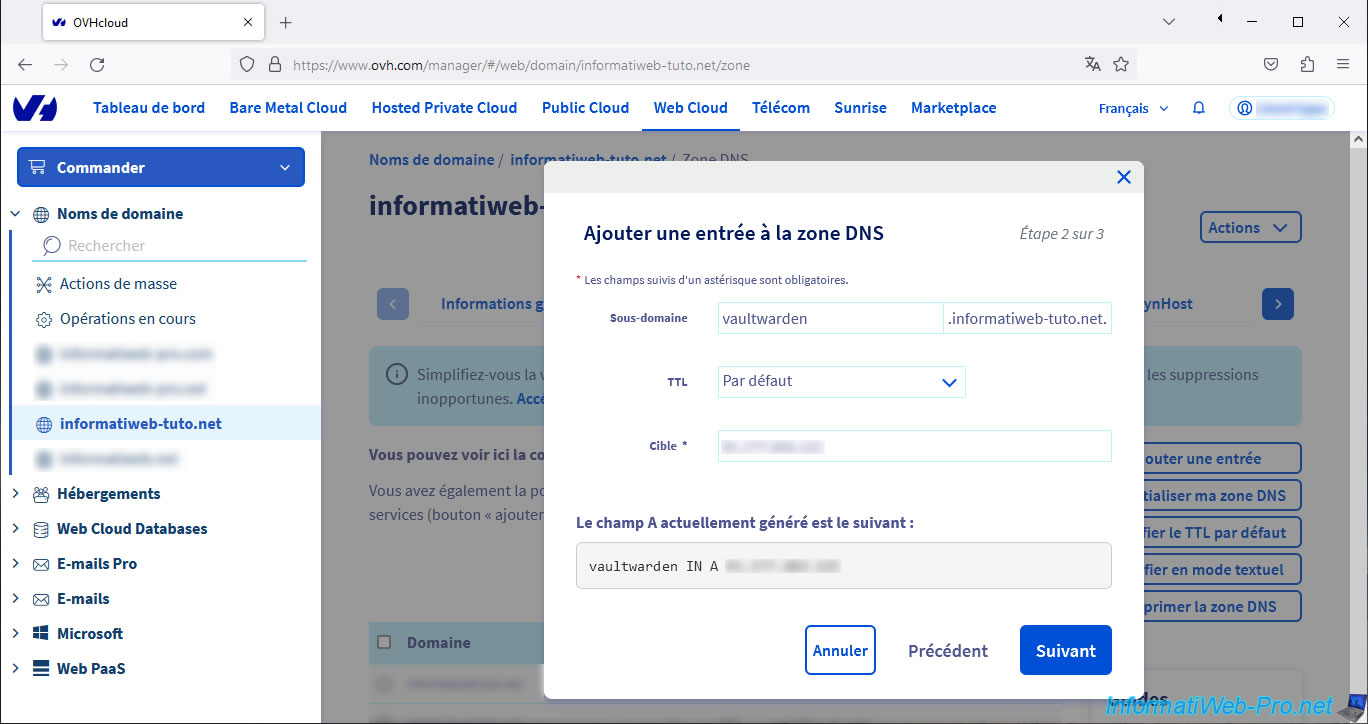
If you create a CNAME record, specify your root domain (already pointing to your public IP address) used in your reverse proxy configuration (SWAG).
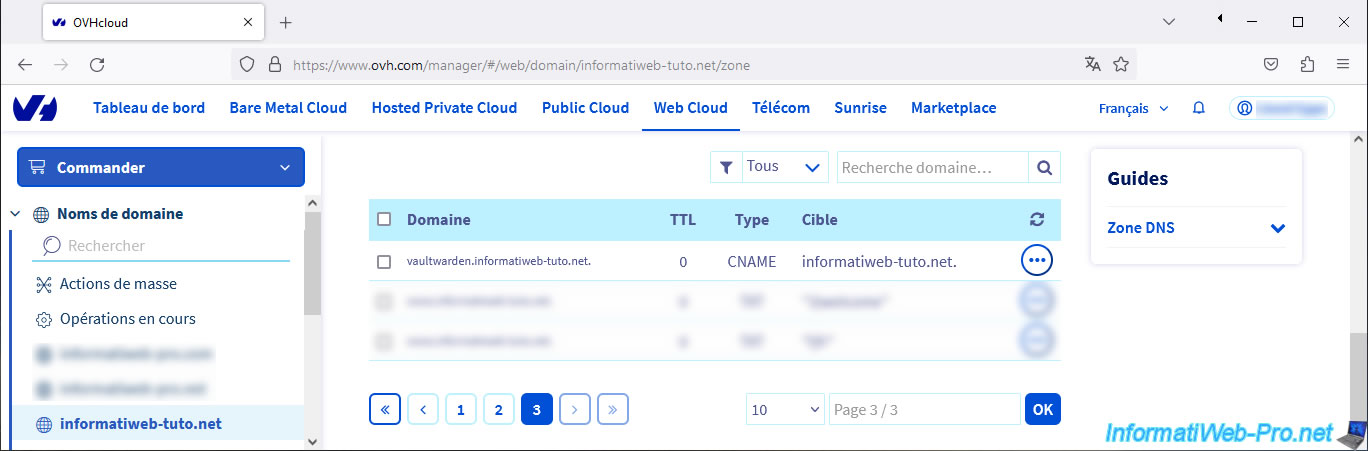
The subdomain "vaultwarden" is created.
Share this tutorial
To see also
-
NAS 2/18/2026
Unraid 6.9.2 - Change temperature thresholds
-
NAS 6/10/2026
Unraid 6.9.2 - SWAG - Access Jellyfin via reverse proxy and personal domain
-
NAS 9/16/2026
Unraid 6.9.2 - VMs - Hotplug USB devices (Libvirt Hotplug USB plugin)
-
NAS 9/23/2026
Unraid 6.9.2 - VMs - Hotplug USB devices (USB Manager plugin)
You must be logged in to post a comment