- VMware
- 10 December 2021 at 12:21 UTC
-

- 1/2


Using VMware vCenter Converter Standalone, you can convert virtual machines created in Virtual PC to VMware virtual machines that can be used with VMware Workstation Pro.
This will also allow you to recover the current state of XP mode that you would have installed on Windows 7.
Note that importing XP mode directly from VMware Workstation Pro, as we described in our tutorial "VMware Workstation 10 - Import Windows XP Mode of Microsoft" only imported the base virtual hard disk from XP mode.
Changes and data created in this "Windows XP Mode" virtual machine were therefore not transferred to the new virtual machine created in VMware Workstation Pro.
In the tutorial below, you will find your "Windows XP Mode" virtual machine in the same state as it's in Windows Virtual PC.
Your data will therefore also be transferred to your VMware virtual machine. Which was not the case with the tutorial mentioned above.
Note that the tutorial below works with all virtual machines created with Windows Virtual PC.
However, we took the "Windows XP Mode" virtual mahine as an example, because it adds additional interest to this tutorial.
Warning : this is only possible with version 6.0.0 of VMware vCenter Converter Standalone.
Indeed, this feature has been removed in subsequent versions of this VMware converter.
To download this old version, see our "VMware vCenter Converter Standalone" review.
The name of the file to download is "VMware-converter-en-6.0.0-2716716.exe".
Important : Virtual PC is only available up to Windows 7 and VMware Workstation 16 requires at least Windows 8.
Hence the use of VMware Workstation 15.5.5 in this tutorial performed on Windows 7.
- Shut down the virtual machine from Windows Virtual PC
- Install VMware vCenter Converter Standalone
- Convert the virtual machine (Virtual PC) to a VMware virtual machine
- Install VMware Tools
- Upgrade virtual machine virtual hardware
1. Shut down the virtual machine from Windows Virtual PC
To be able to convert a virtual machine to a VMware virtual machine, you must first shut down the virtual machine.
However, by default, closing a virtual machine window puts the virtual machine into hibernation instead of shutting it down.
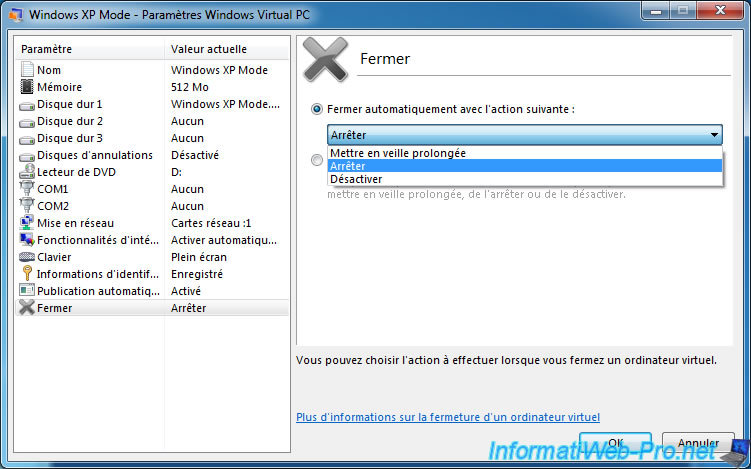
To change the default action of closing a virtual machine, open your virtual machine and go to the "Tools -> Settings" menu.
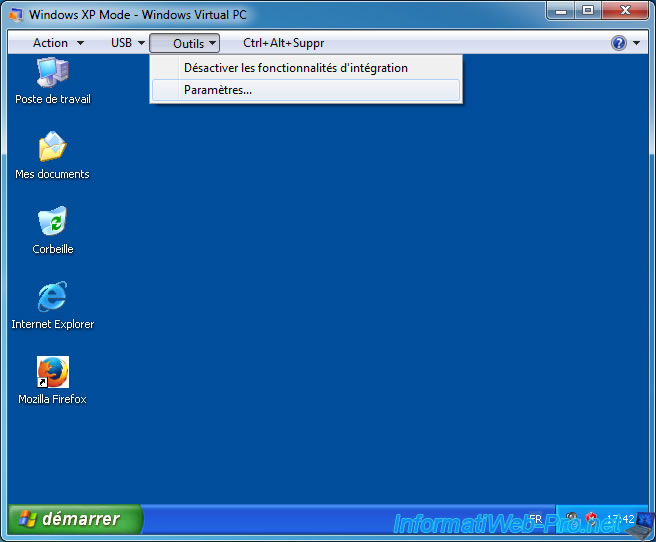
Select the "Close" setting in the list on the left, then select "Automatically close with the following action: Shut down" in the right part of the window.
Then, click on OK.
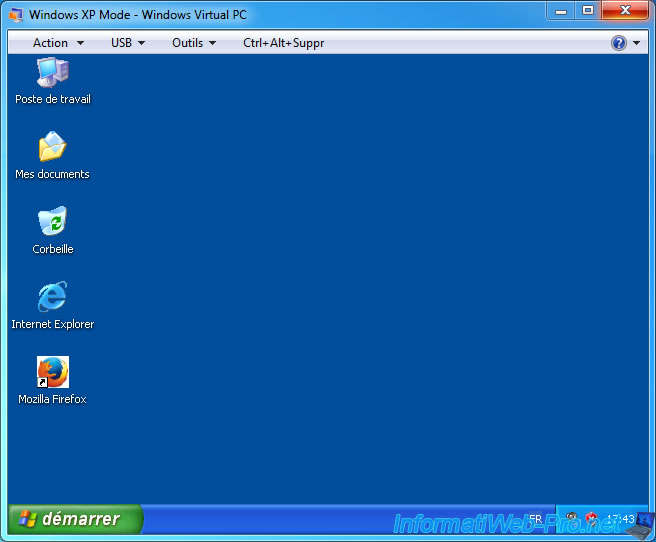
Now, close the window of this virtual machine to shut it down completely.
Windows shuts down (instead of hibernating).
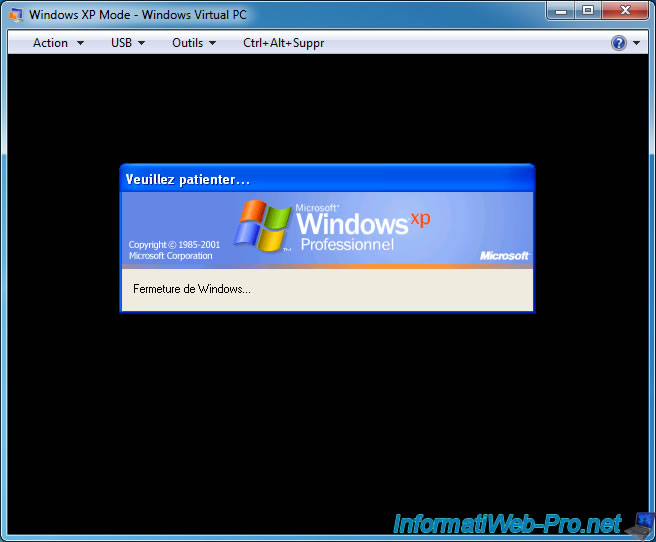
Then, the virtual machine will shut down.

2. Install VMware vCenter Converter Standalone
Download the version 6.0.0 of VMware vCenter Converter Standalone, whose link is present at the beginning of this tutorial.
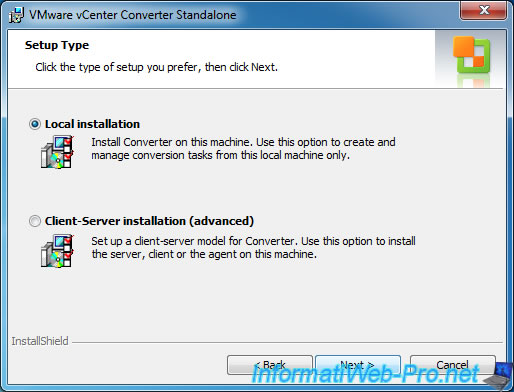
Once this file has been downloaded, install "VMware vCenter Converter Standalone" by selecting the "Local installation" option in the installation wizard.
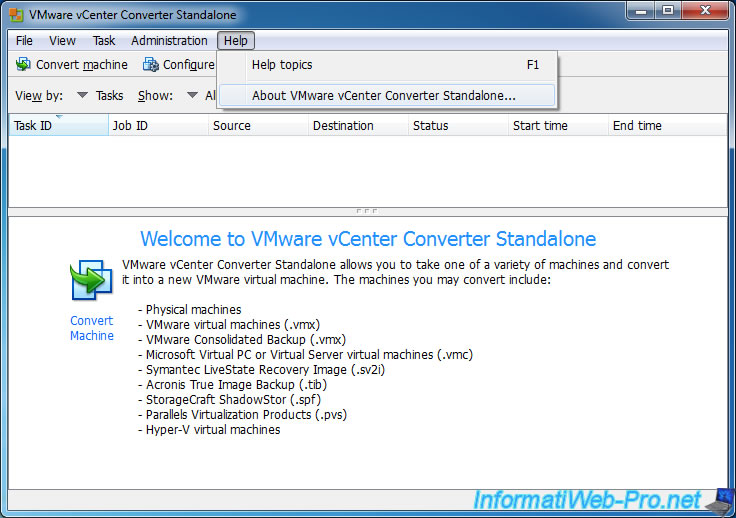
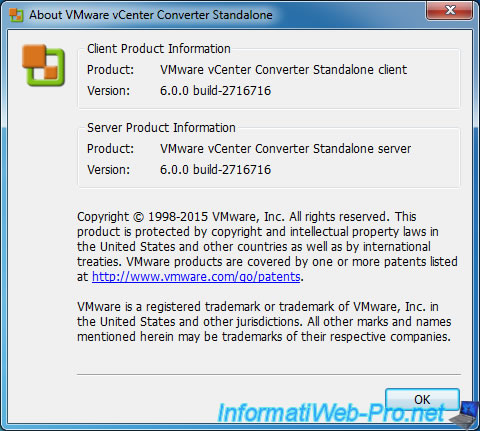
Launch VMware vCenter Converter Standalone as administrator (preferably), then go to the menu "Help -> About VMware vCenter Converter Standalone" if you want to check the version you are using.
As you can see, version 6.0.0 of VMware vCenter Converter Standalone allows you to convert :
- Physical machines: in other words, to do P2V.
- VMware virtual machines (.vmx) : VMware virtual machines
- Microsoft Virtual PC or Virtual Server virtual machines (.vmc) : virtual machines created on Windows Virtual PC
- and more
This is no longer the case in more recent versions of VMware vCenter Converter Standalone.
As you can see, we used version 6.0.0 of this program.
3. Convert the virtual machine (Virtual PC) to a VMware virtual machine
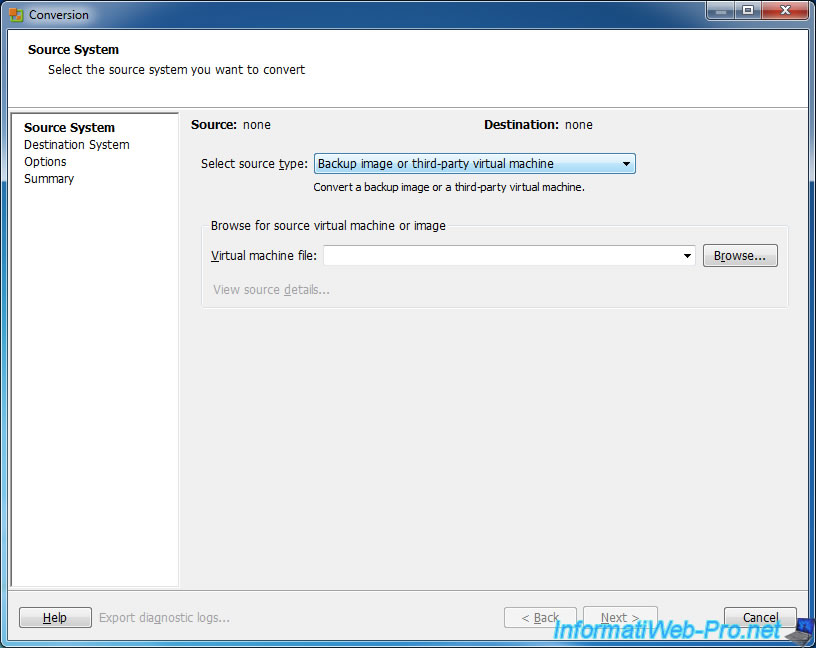
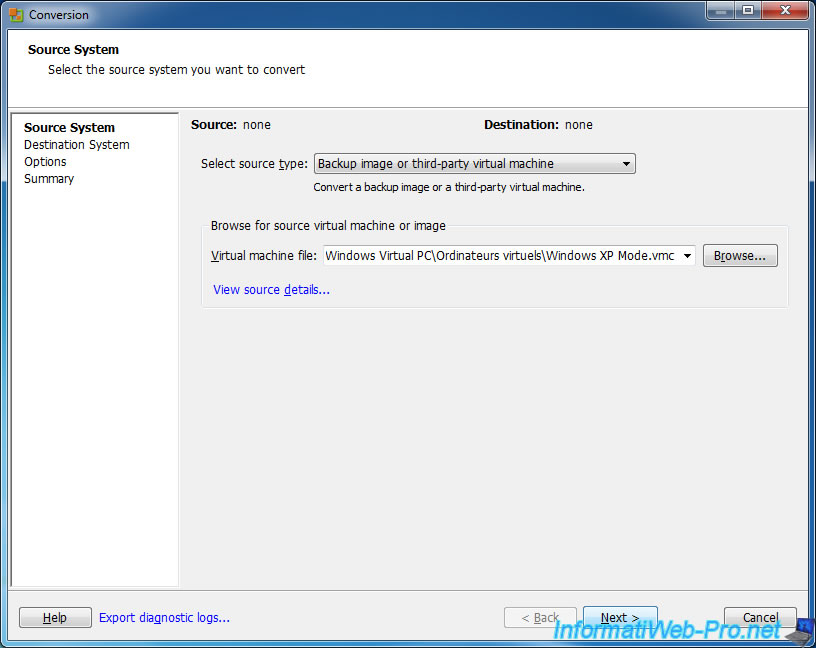
To convert your virtual machine to a VMware virtual machine, click : Convert machine.
Select "Backup image or third-party virtual machine" as the source type, then click the "Browse" button to select the desired virtual machine configuration file.
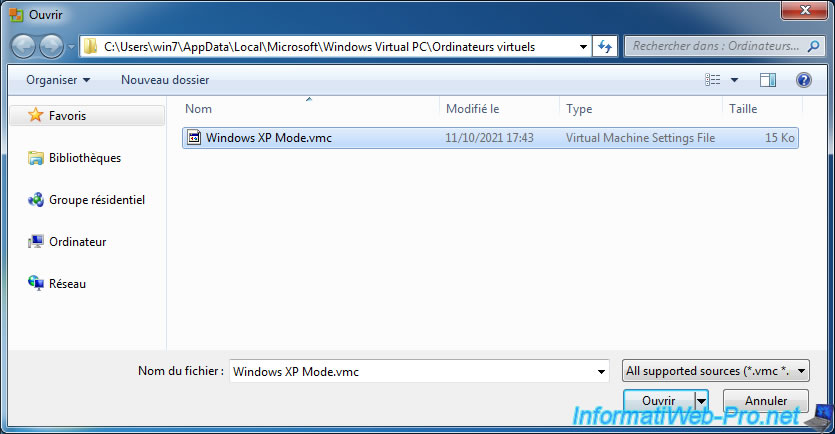
By default, your virtual machine configuration files are located in the folder: C:\[user name]\lionel\AppData\Local\Microsoft\Windows Virtual PC\Virtual Machines.
You can also access it more quickly thanks to the environment variable "LOCALAPPDATA": %LOCALAPPDATA%\Microsoft\Windows Virtual PC\Virtual Machines.
In this folder, select the configuration file (.vmc) corresponding to the virtual machine you want to convert and click Open.
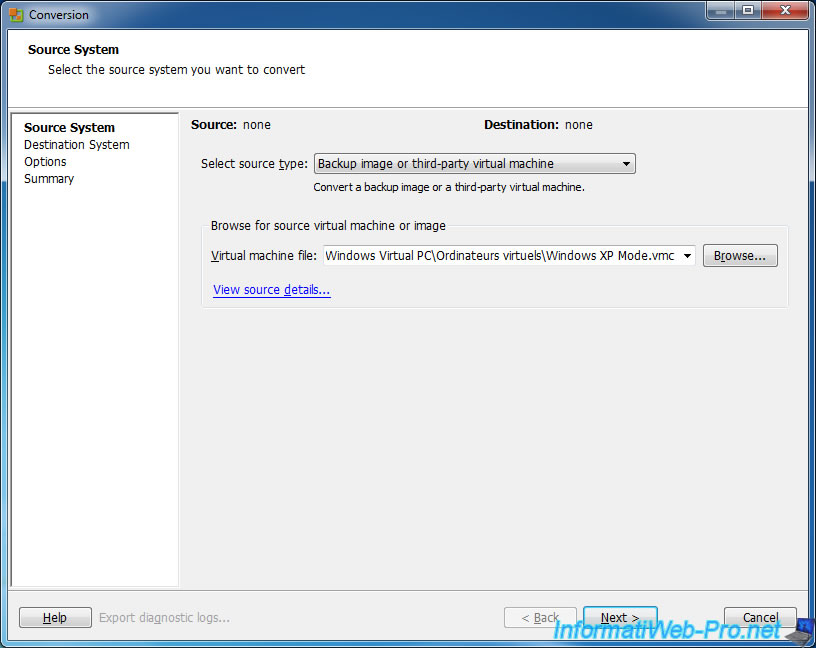
To obtain information about this virtual machine, click on the "View source details" link.
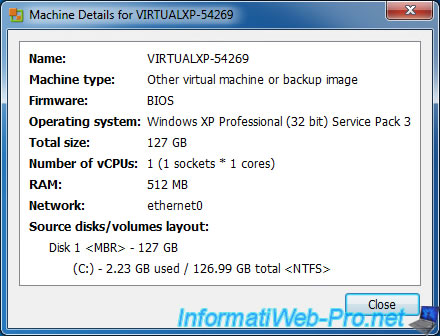
A "Machine Details for [name of the source virtual machine]" window will appear with :
- Name : the name defined in the operating system installed in this Virtual PC virtual machine.
- Machine type : in the case of virtual machines created on Windows Virtual PC, the machine type will be "Other virtual machine or backup image".
- Firmware : indicates that a BIOS is used.
- Operating system : guest operating system installed in this virtual machine.
- Total size : maximum size of this virtual machine based on the maximum size of its virtual hard disk.
- Number of vCPUs : number of processor cores and number of virtual processors used by this virtual machine.
- RAM : amount of random access memory (RAM) that this computer can use.
- Network : name of the network adapter used
- Source disks/volumes layout : information about the virtual hard disk and its partitions.
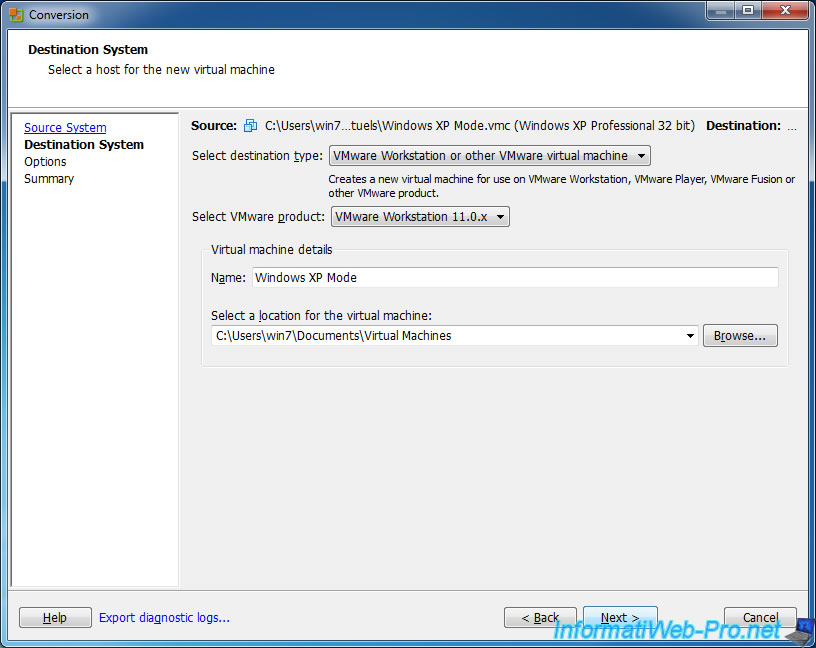
Then, click on Next.
Select "VMware Workstation or other VMware virtual machine" as the destination type.
For VMware product selection, you will see that the most recent version available for VMware vCenter Converter Standalone version 6.0.0 is : VMware Workstation 11.0.x.
This means that version 11.x virtual hardware will be used for the VMware virtual machine that will be created. However, you will only need to upgrade it from VMware Workstation Pro after the conversion is complete.
Then, specify under which name the virtual machine should be created in VMware format (.vmx) and click on the "Browse" button to select the location where you want to store it.
In the list of options available, click the option : Data to copy.
Note : you can ignore the yellow triangles displayed for the "Advanced options" section.
This relates to customizing the guest operating system using sysprep which is not always included with VMware vCenter Converter Standalone.
In addition, personalization is not enabled by default.
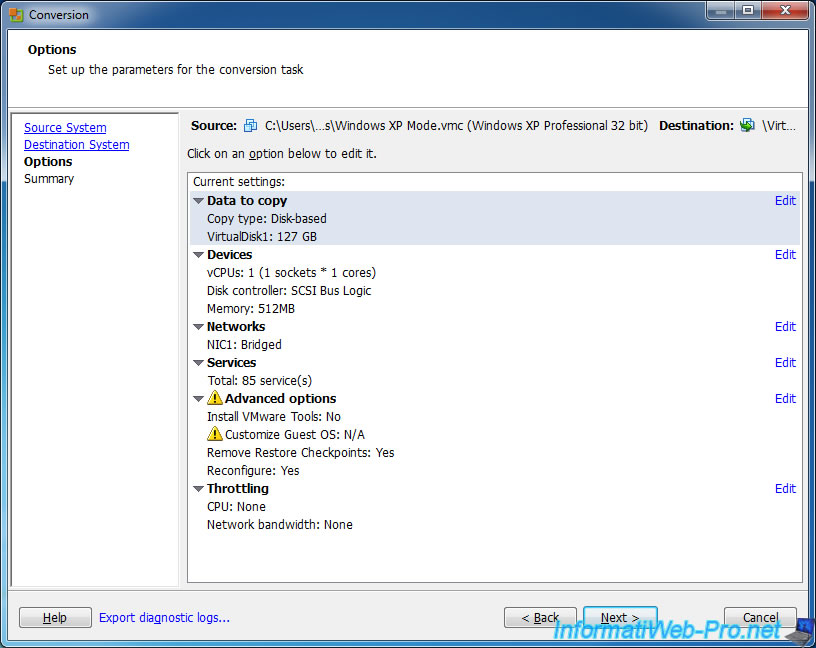
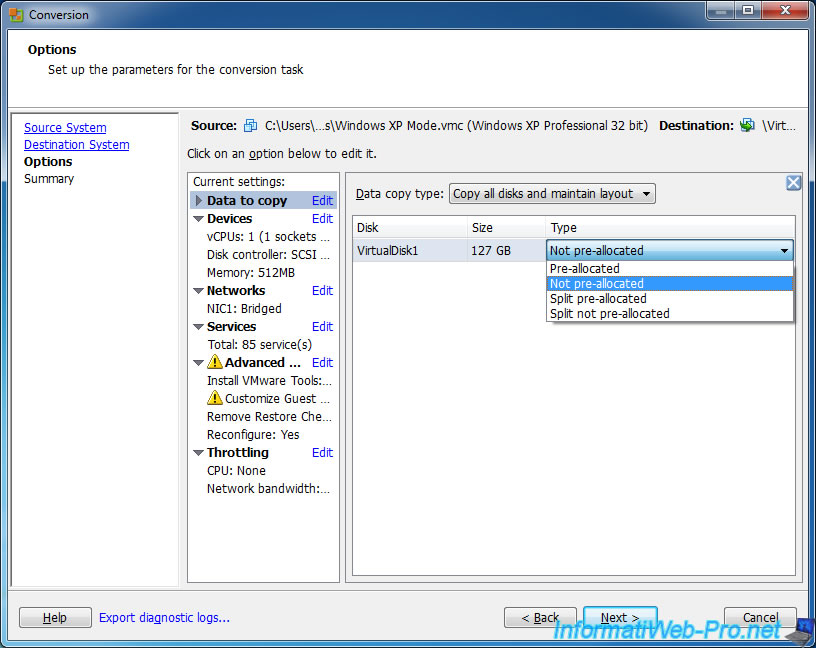
Here, you will have the option to choose the type of provisioning to use :
- Pre-allocated : static provisioning. So, the space will be pre-allocated.
- Not pre-allocated : dynamic provisioning. So, the space will not be pre-allocated.
This allows you to use only the space needed for data storage that is in the virtual hard disk. - Split pre-allocated : same as "Pre-allocated", except that the virtual hard disk will be split into several files of 2 GB or 2 TB (if the hard disk is more than 2 TB).
- Split not pre-allocated : same as "Not pre-allocated", except that the virtual hard disk will be split into several ".vmdk" files (as explained for the previous option).
A summary of the conversion parameters appears.
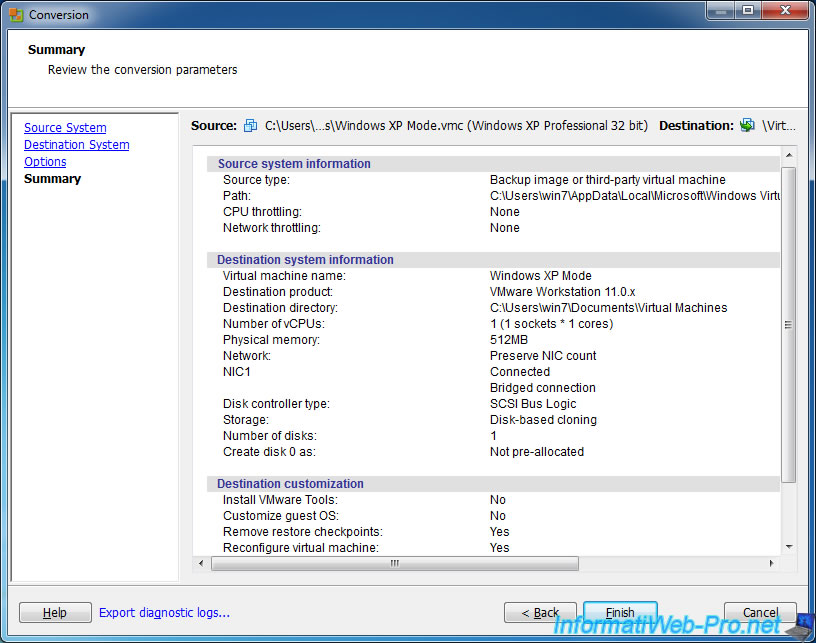
VMware vCenter Converter Standalone begins to convert your virtual machine (Virtual PC) to a virtual machine for VMware Workstation.
Then, it will copy the virtual hard disk referenced in your virtual machine configuration file.
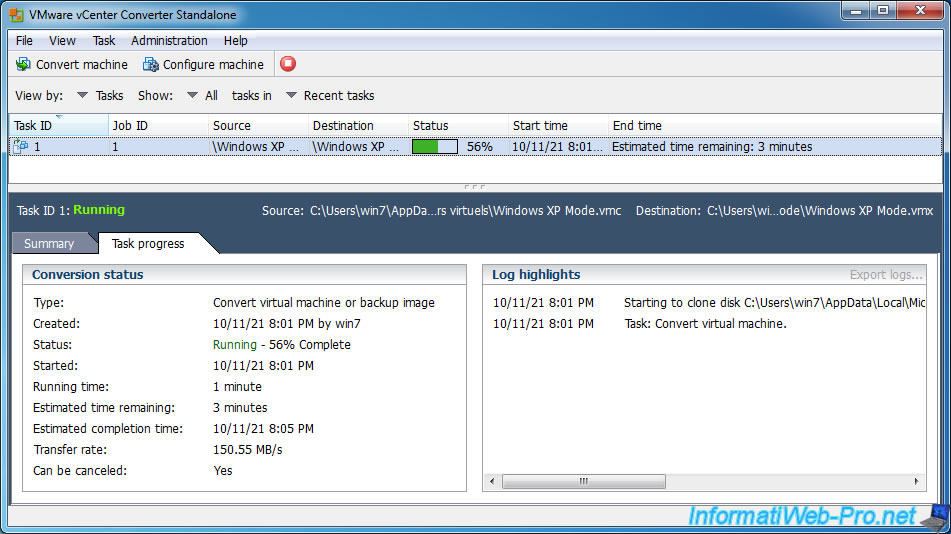
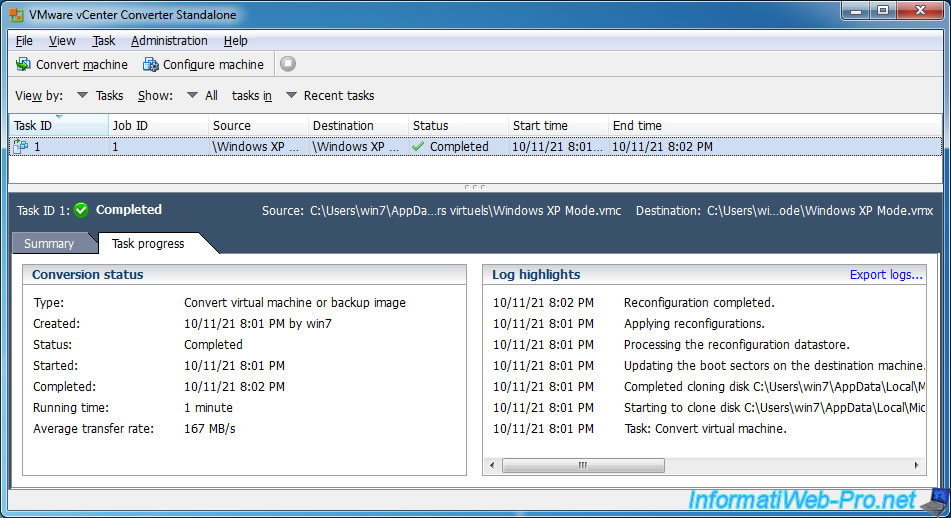
When the virtual hard disk copy is complete, VMware vCenter Converter Standalone will perform the usual reconfigurations, then the task will end with a "Completed" status.
Share this tutorial
To see also
-

VMware 3/16/2013
VMware Workstation - Boot a VM on the BIOS / EFI firmware
-

VMware 2/7/2020
VMware Workstation 15 - Installation on Linux
-

VMware 12/24/2021
VMware Workstation 15 - Slice the virtual hard disk of a VM
-
VMware 11/20/2020
VMware Workstation 15.5.5 / 15.5.6 - Installation on Windows 7
You must be logged in to post a comment