- VMware
- 17 December 2021 at 20:05 UTC
-

- 1/3

With VMware vCenter Converter Standalone, you can easily convert virtual machines from your Hyper-V server to VMware virtual machines for use with VMware Workstation.
In this tutorial, we will be using a computer on Windows 10 where the "Hyper-V" feature is enabled and where VMware Workstation Pro 16 is installed.
Tutorial made with VMware vCenter Converter Standalone 6.2.0 and also tested with the new version 6.3.0 of this VMware converter.
- Information about the computer and the virtual machine being used
- Install VMware vCenter Converter Standalone
- Enable the administrator account
- Create the destination shared folder
- Convert a Hyper-V virtual machine to VMware Workstation format
- Install VMware Tools in the virtual machine
- Solution for Generation 2 imported virtual machines
- Upgrade virtual machine virtual hardware
1. Information about the computer and the virtual machine being used
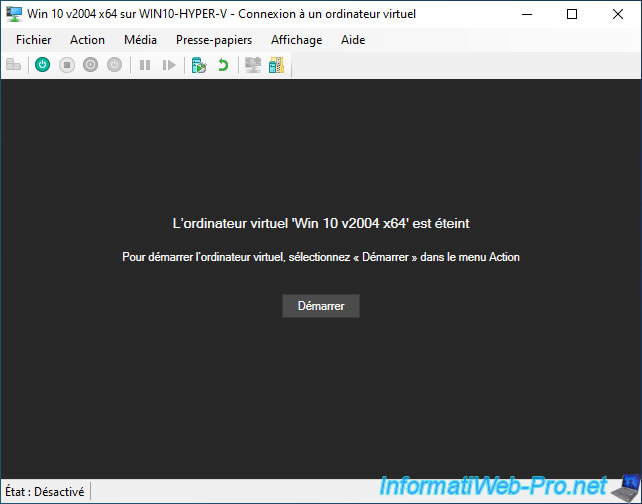
The physical computer is on Windows 10 v2004 x64.
Same for the virtual machine running on the Hyper-V hypervisor installed on the physical computer.
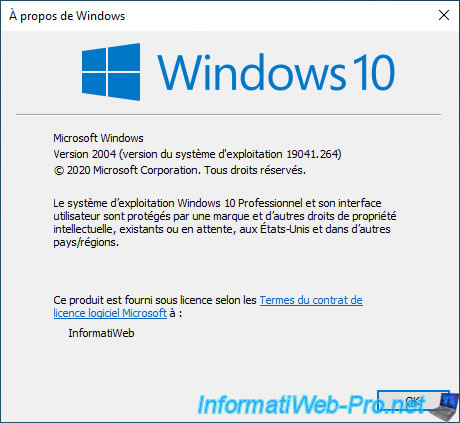
As you can see, the virtual machine is called "Win 10 v2004 x64" in Hyper-V Manager and its NETBIOS name (defined in guest operating system) is : win10-vm.

Note that to convert a virtual machine from a Hyper-V server, that virtual machine must be powered off.
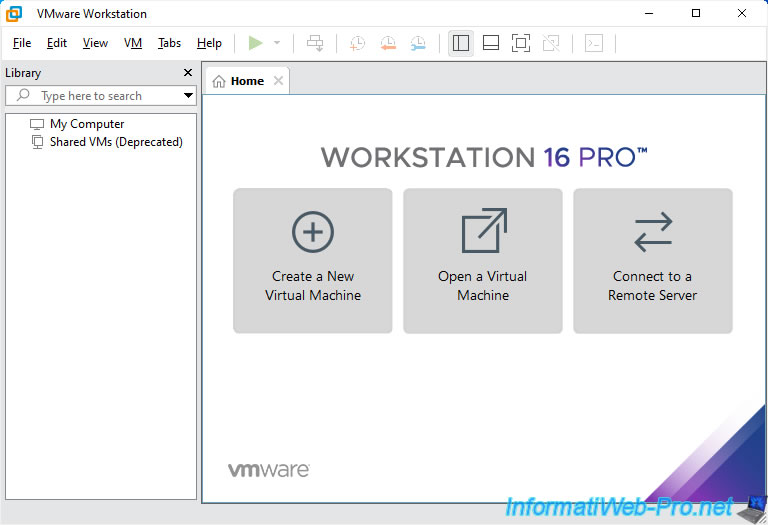
For VMware Workstation Pro, this is version 16.
2. Install VMware vCenter Converter Standalone
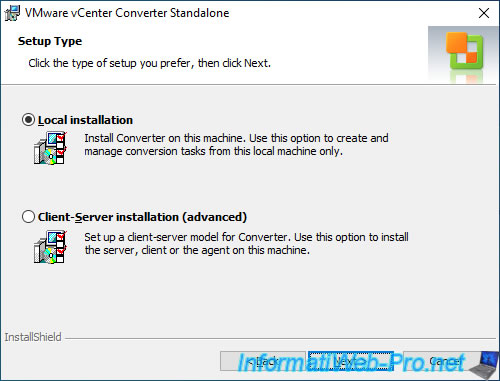
Download "VMware vCenter Converter Standalone" for free and install it on the computer where Hyper-V is present.
When installing it, select "Local installation".
3. Enable the administrator account
To be able to convert the desired virtual machine on your Hyper-V server, VMware vCenter Converter Standalone needs administrator rights on your computer.
However, launching VMware vCenter Converter Standalone as administrator may not be sufficient and disabling User Account Control (UAC) didn't work in our case either.
The only functional solution in our case was to enable the Administrator account present by default on Windows and to define a password for it to be able to use it from VMware vCenter Converter Standalone.
Note that you will not need to log in with this account on Windows. All you have to do is enter the login credentials for this Administrator account in the VMware vCenter Converter Standalone conversion wizard.
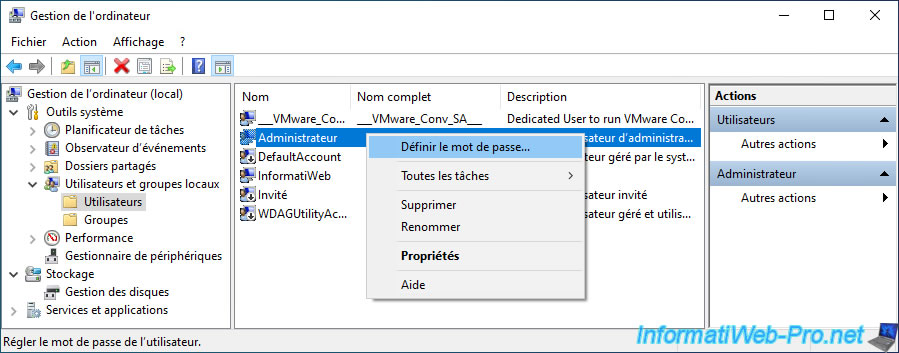
To enable the Administrator account on Windows 7 to 10, open the "Computer management" console.
To do this, open the file explorer and right-click "Manage" on "This PC" (or "Computer").
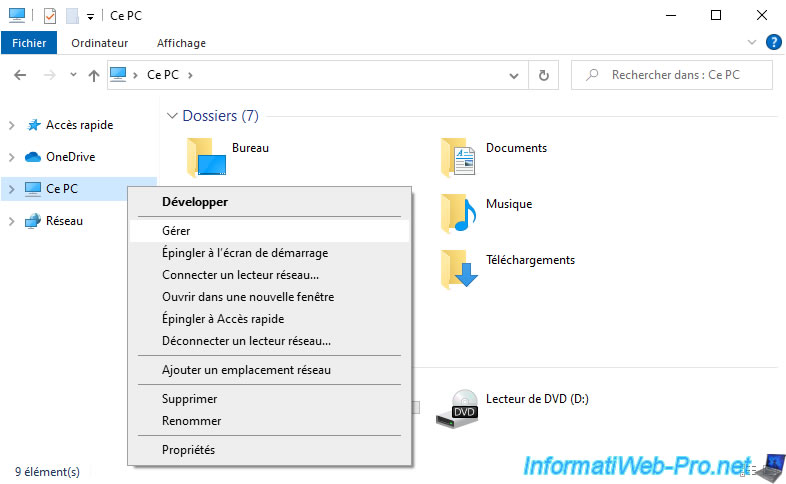
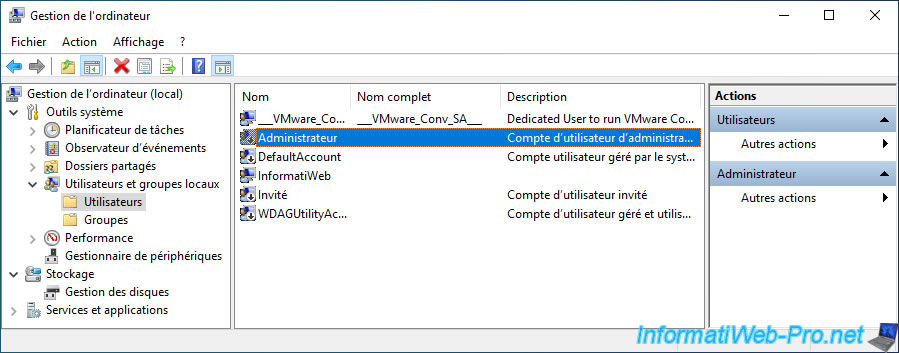
In the "Computer Management" window that appears, go to : Local Users and Groups -> Users.
Then, double click (or right click "Properties") on the Administrator account.
Uncheck the "Account is disabled" box to enable this built-in Windows Administrator account and click OK.
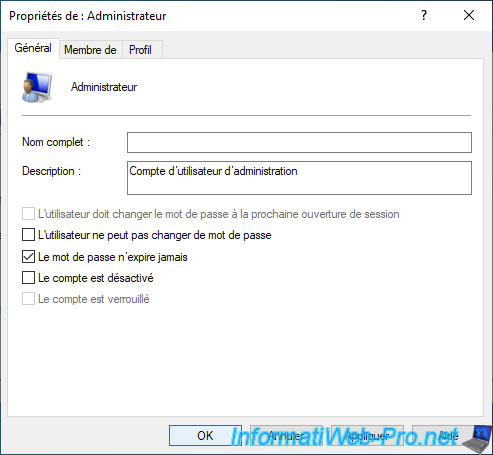
Then, protect this "Administrator" account with a password by right-clicking "Set Password" on it.
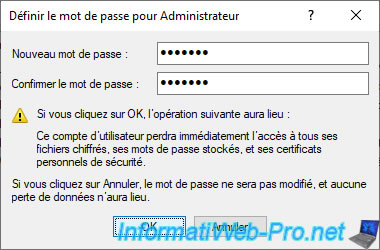
Note : the use of a password is required by VMware vCenter Converter Standalone.
In the "Set Password for Administrator " window that appears, click Continue.

Enter the desired password and click OK.
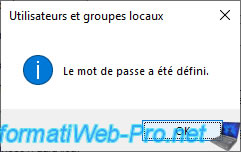
The password has been set.
4. Create the destination shared folder
When you want to convert a virtual machine through VMware vCenter Converter Standalone and you select "VMware Workstation or other VMware virtual machine" as the destination, the wizard will ask you to specify a network path to the folder where you want to store the virtual machine in the VMware format.
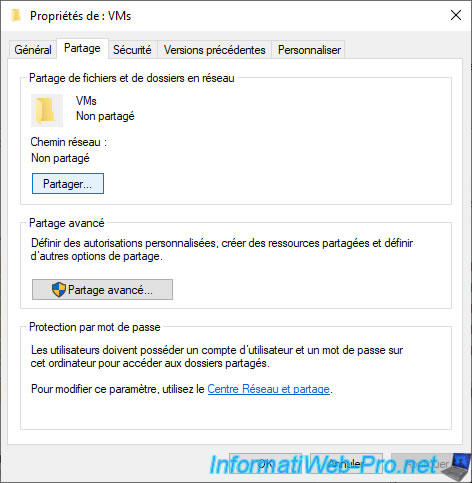
So, you need to create a folder on the computer where VMware Workstation is located and share it so that the desired user can access it.
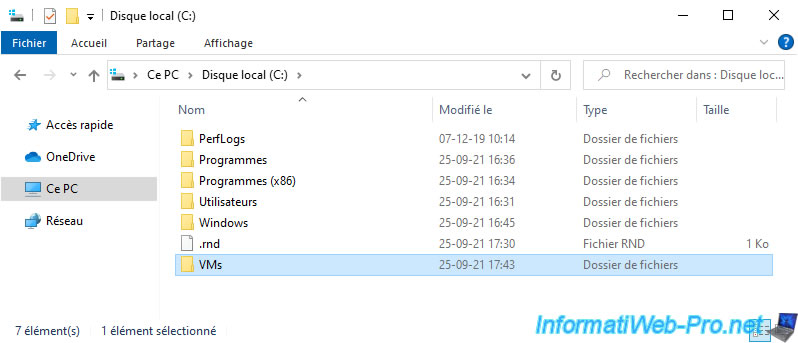
For the tutorial, we are going to create this folder at the root of the "C" partition of our computer.
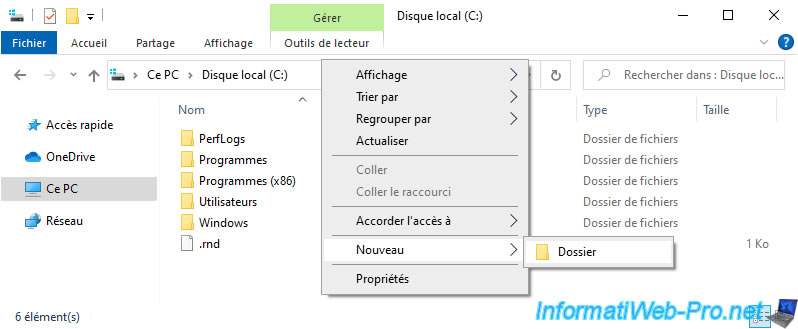
We named this folder "VMs" (but that doesn't matter).
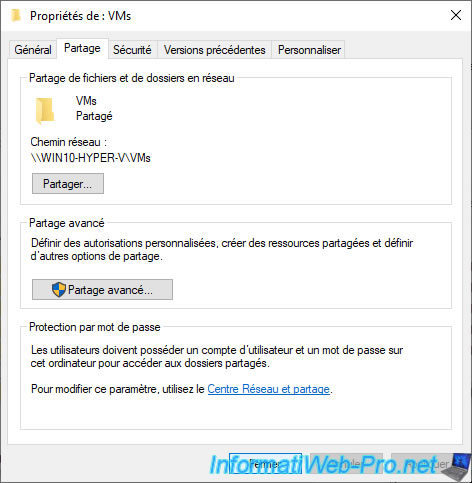
Then, right click "Properties" on it, go to the "Sharing" tab and click the "Share" button.
To learn more about sharing folders in Windows, refer to one of our tutorials :
- Simple, advanced, hidden and secure file sharing on Windows 7, 8 and 8.1
- Simple, advanced, hidden and secure file sharing on Windows 10
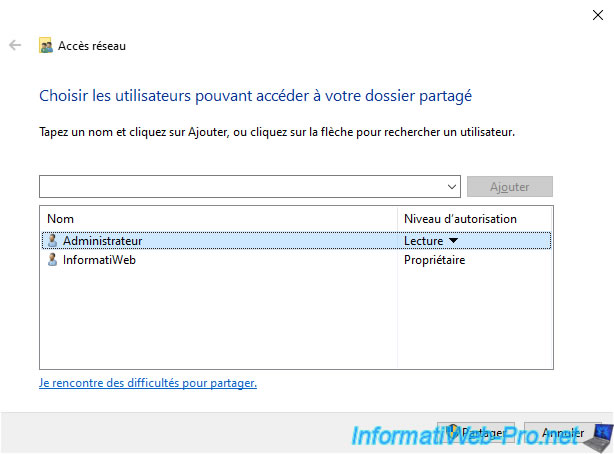
Select the desired user from the list.
To avoid having rights problems, we chose the Administrator account integrated into Windows.
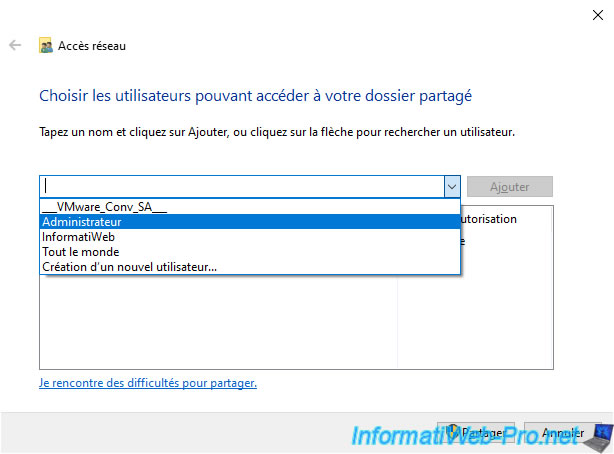
Then, click on "Add".
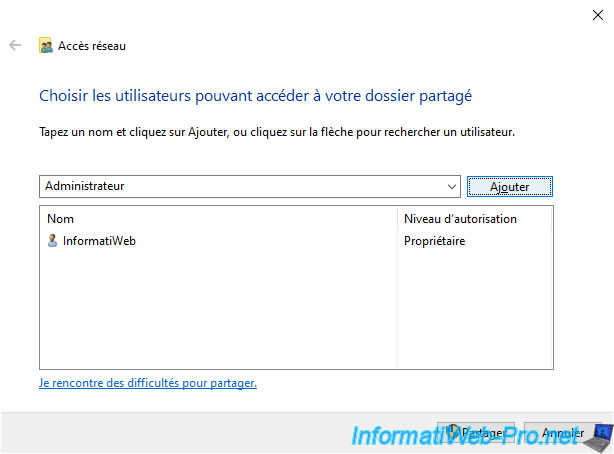
The desired user appears in the list, but this user only has read rights by default.
Change its permission level to : Read/Write.
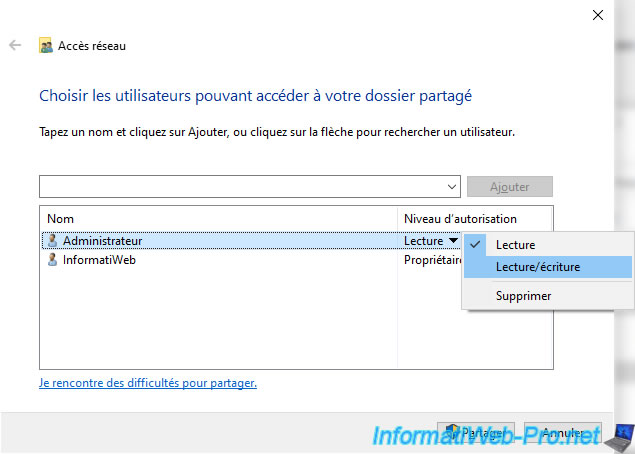
Now, click on : Share.

As stated by Windows, shared items can't be accessed if the computer is asleep.
To disable automatic standby, refer to the tutorials mentioned above regarding file sharing.
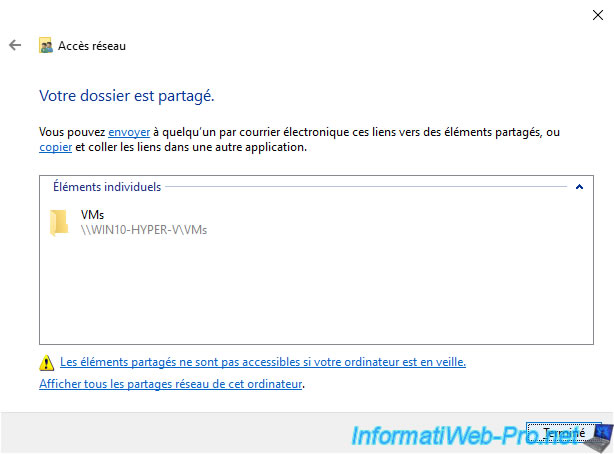
Once the folder is shared, the network path of this folder will appear.
Share this tutorial
To see also
-

VMware 3/16/2013
VMware Workstation - Boot a VM on the BIOS / EFI firmware
-

VMware 2/7/2020
VMware Workstation 15 - Installation on Linux
-

VMware 12/24/2021
VMware Workstation 15 - Slice the virtual hard disk of a VM
-

VMware 12/10/2021
VMware Workstation 15.5 - Convert a Virtual PC virtual machine to a VMware VM
You must be logged in to post a comment