- VMware
- 27 December 2024 at 08:55 UTC
-

- 1/7


On a VMware ESXi host, network access to the virtual machines and the host is through a virtual standard switch (vSS) created on the specific host.
However, in large virtual infrastructures with many VMware ESXi hosts, it is essential to be able to manage their network configuration centrally.
To do this, you will need to create a virtual distributed switch (vDS) and migrate your VMware ESXi hosts to it.
So, when you change a setting on the virtual distributed switch (vDS), that of the hidden vSwitch on each VMware ESXi host will be updated automatically.
To learn more about how the Virtual Distributed Switch (vDS) works and features, refer to our article: VMware vSphere 6.7 - Virtual Distributed Switches (vDS).
- Migrate the VCSA VM to another VMware ESXi host
- Current configuration of virtual standard switches (vSS)
- Create a Virtual Distributed Switch (vDS)
- Create a distributed port group
- Add a VMware ESXi host to a virtual distributed switch (vDS)
- Lost physical adapter (physical network adapter) associations
- Manage association and failover of physical adapters across distributed port groups
- Migrate the VMware ESXi host where the "vcsa" VM is located to the Virtual Distributed Switch (vDS)
- VMware ESXi Hosts migrated to Virtual Distributed Switch (vDS)
- Remove legacy virtual standard switches (vSS)
- Rename the Uplinks of a vDS
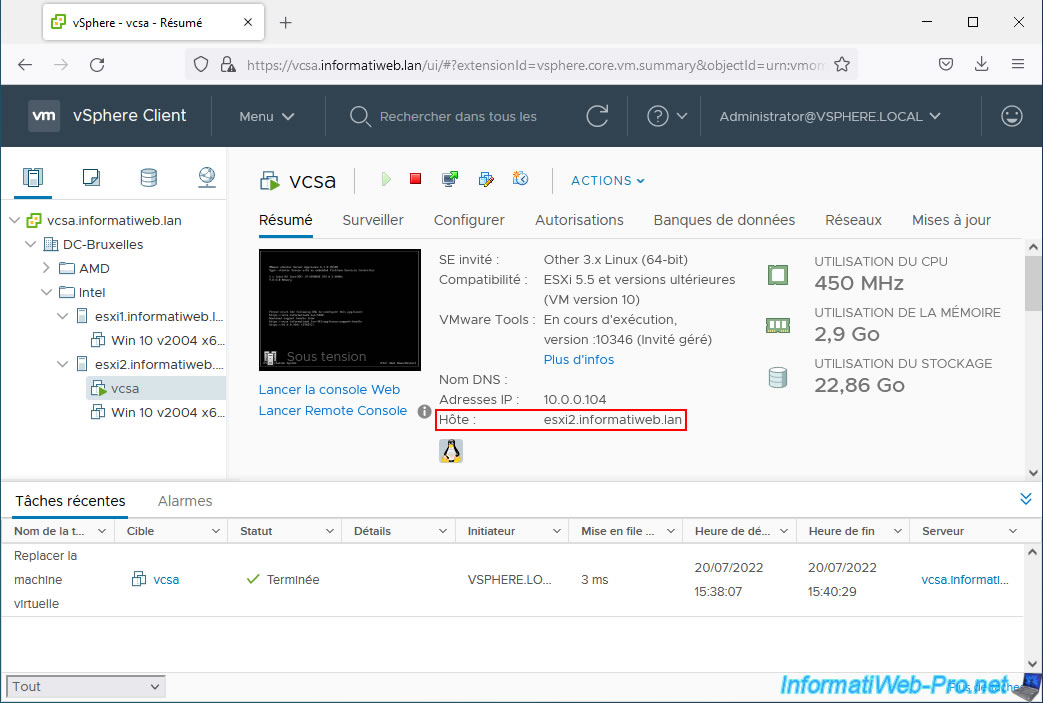
1. Migrate the VCSA VM to another VMware ESXi host
When you want to migrate a VMware ESXi host from a standard virtual switch (vSS) to a distributed virtual switch (vDS), it is important that the "vcsa" VM (which corresponds to the "VMware vCenter Server Appliance") is not on the 1st host you want to migrate.
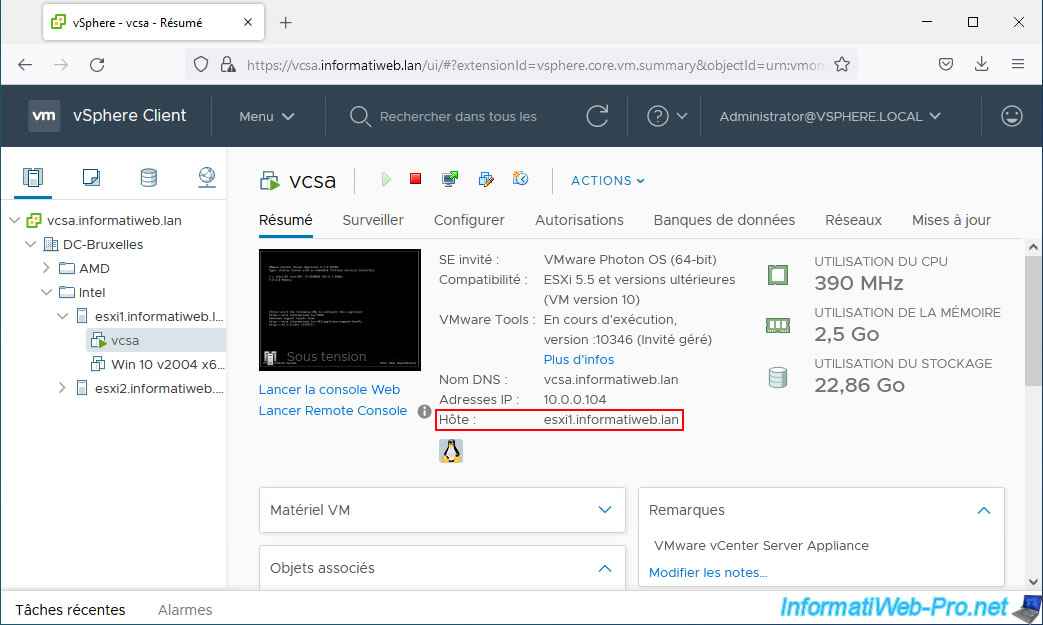
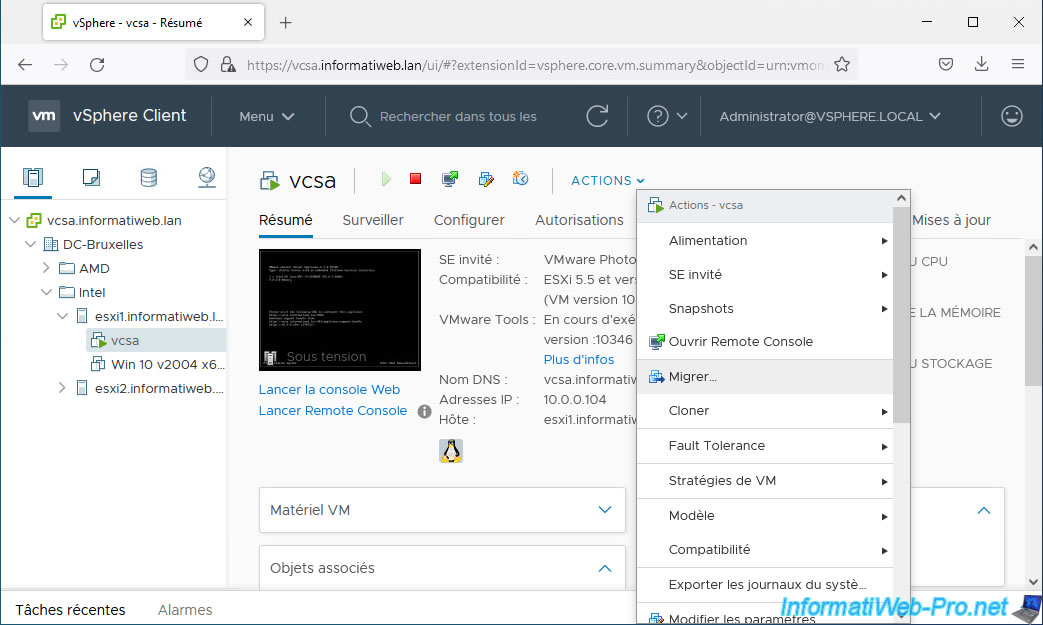
To do this, we will migrate our "vcsa" VM to our 2nd host (esxi2).
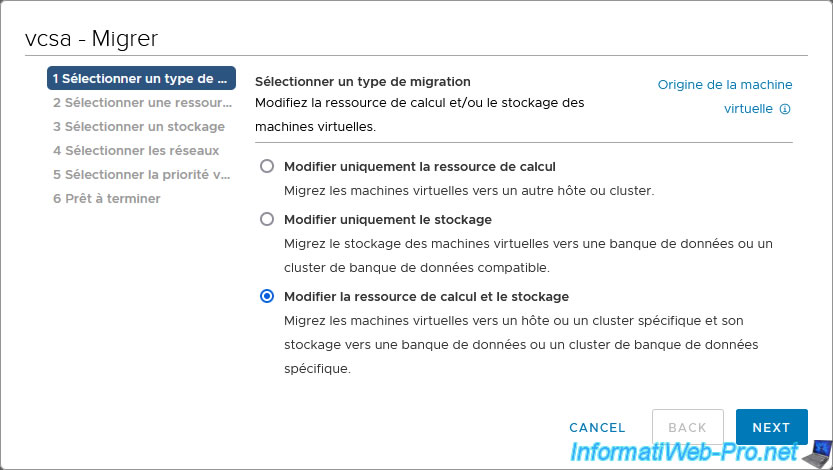
Select "Change both compute resource and storage" to migrate the virtual machine execution and its files.
Note: in our case, this is located in the local storage (local datastore) of our host. Hence the need to migrate both at the same time.
Wait while your "vcsa" VM is migrated.
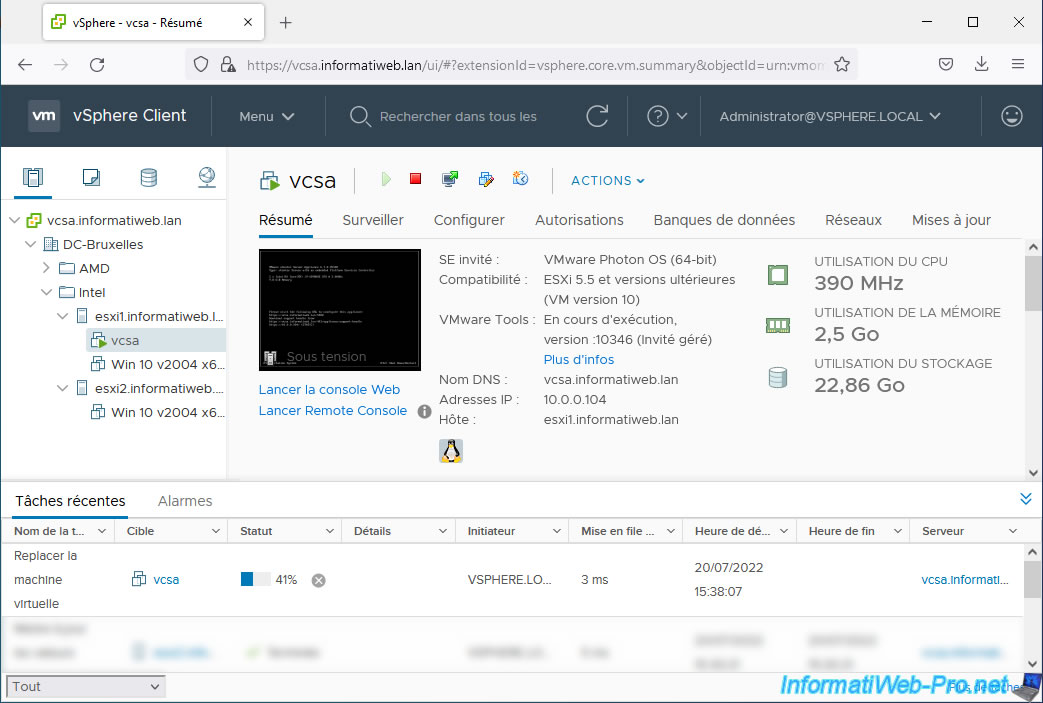
The "vcsa" VM has been migrated.
2. Current configuration of virtual standard switches (vSS)
For this tutorial, we use a VMware virtual infrastructure configured to allow the migration of virtual machines via a dedicated network to meet VMware prerequisites.
If you want to create this VMware virtual infrastructure to more easily follow this vDS tutorial, refer to our tutorial: VMware vSphere 6.7 - Migrate VMs via vMotion.
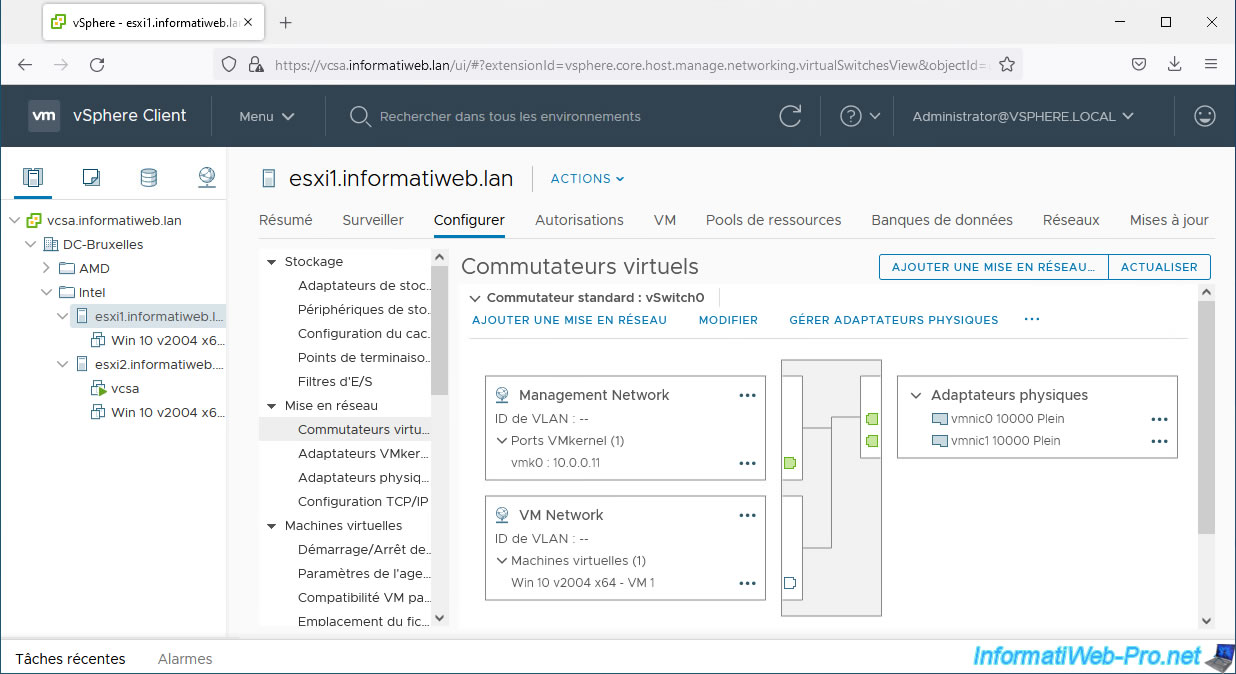
As you can see, each VMware ESXi host has:
- a standard switch "vSwitch0" with:
- a "Management Network" port group with a "vmk0" VMkernel adapter (dedicated to host management).
- a "VM Network" port group with one or more virtual machines.
- 2 physical adapters: vmnic0 and vmnic1 in this case.
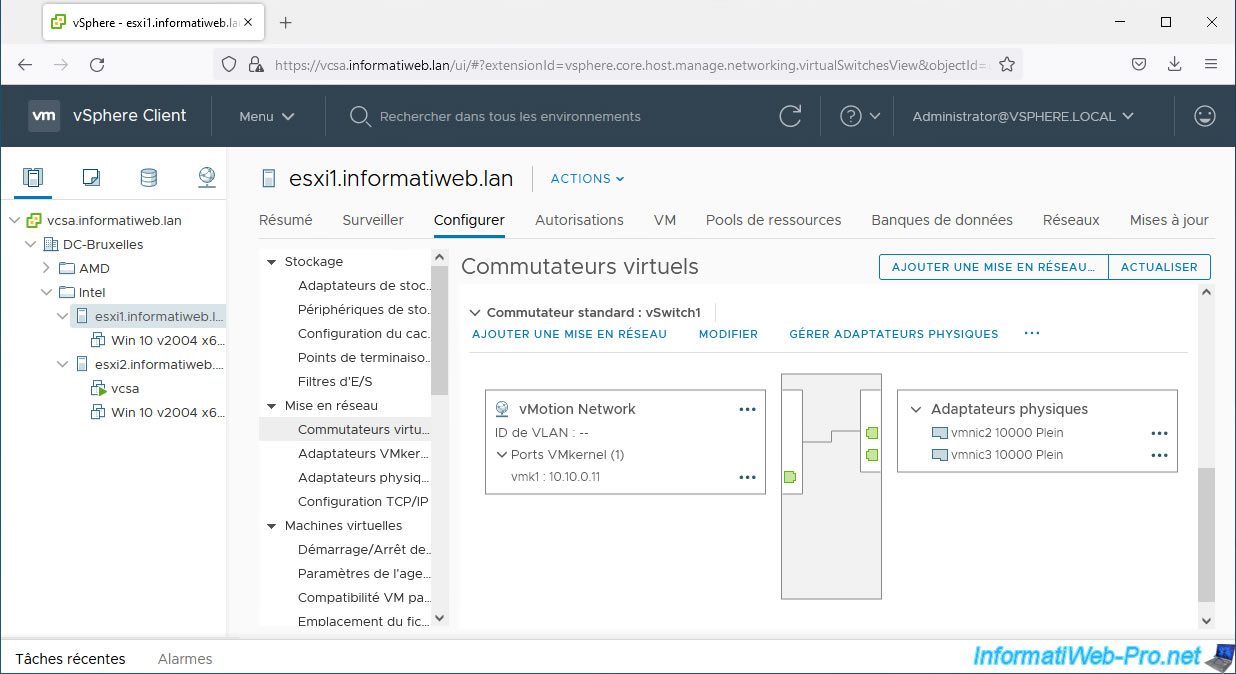
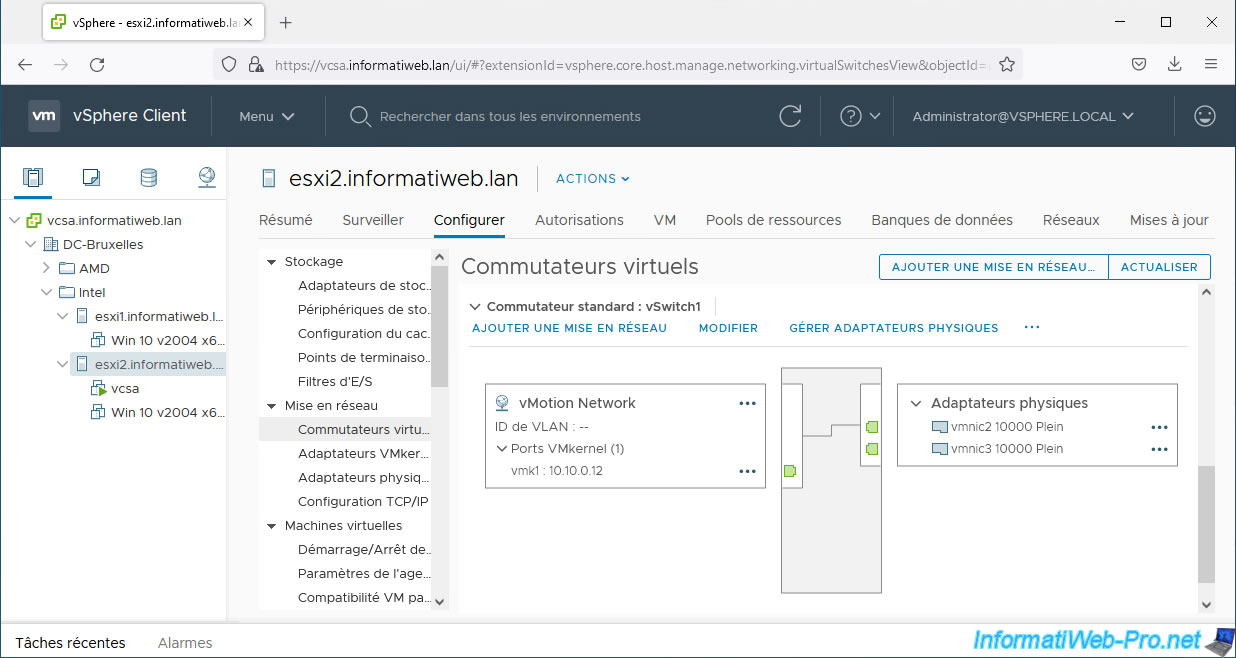
- a standard switch "vSwitch1" with:
- a "vMotion Network" port group with a "vmk1" VMkernel adapter (dedicated to vMotion traffic).
- 2 physical adapters: vmnic2 and vmnic3 in this case.
Warning : if you first follow our vMotion tutorial, be aware that there is a slight difference in our case.
Indeed, the name of the physical adapters (vmnic0, vmnic1, ...) is not the same (between here and the tutorial concerning vMotion).
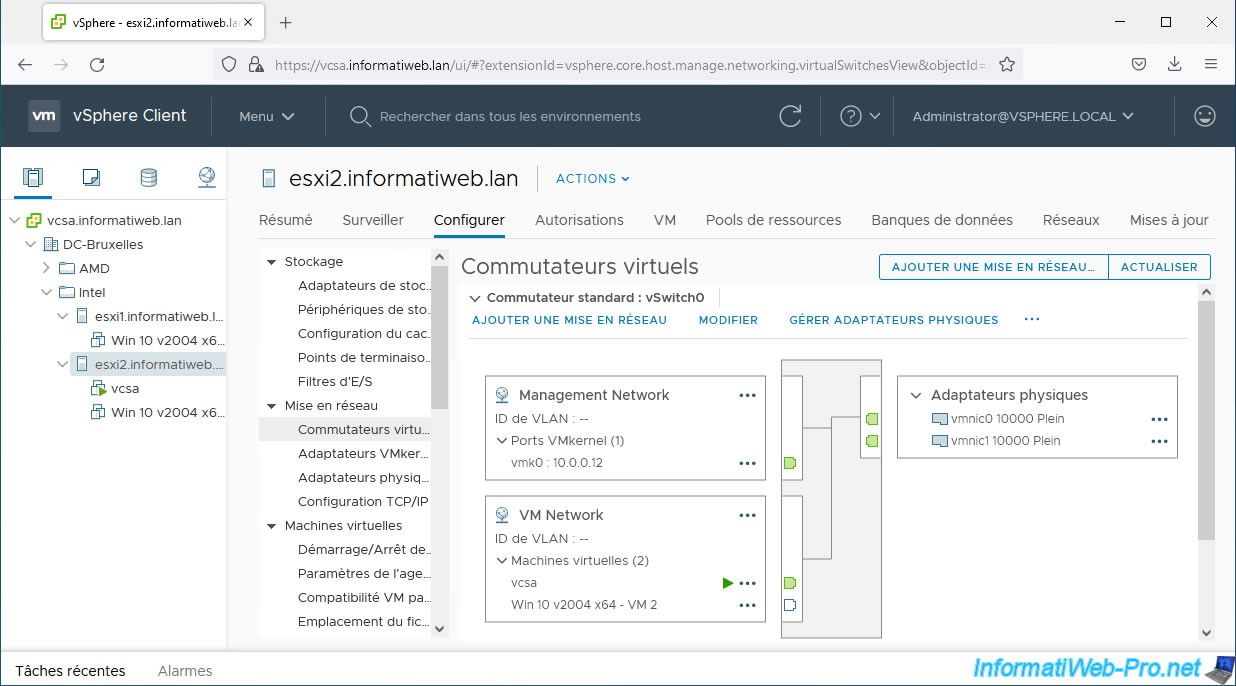
On the 2nd host, the configuration is the same. Apart from the IP addresses changing for the VMkernel ports.
But, as you will have understood, in the case of standard virtual switches, you must configure each virtual switch individually and if you want to update a setting, you must do it on the other hosts as well.
Which will no longer be necessary with vDS.
3. Create a Virtual Distributed Switch (vDS)
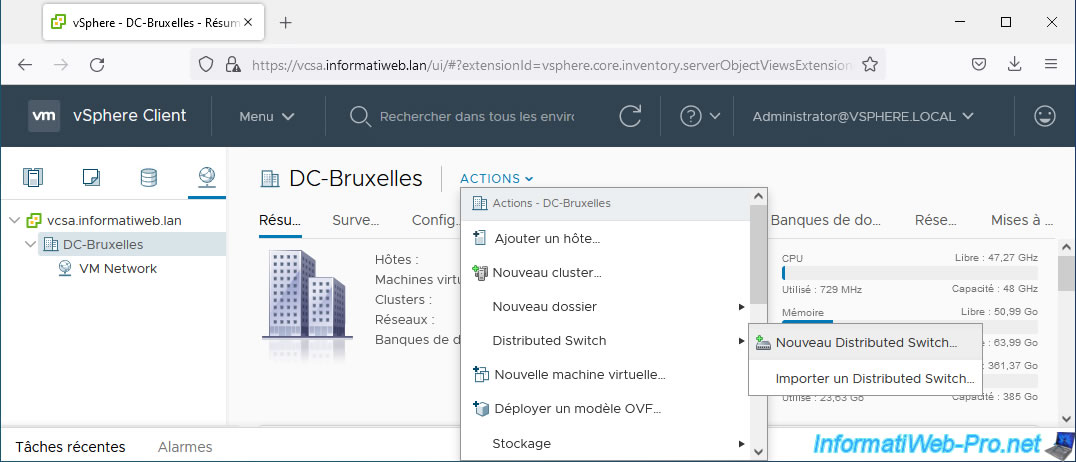
To create a virtual distributed switch (vDS) from the VMware vSphere Client of your VMware vCenter Server (VCSA), go to the menu and click "Networking".
Next, select the data center (DC) where you want to create your virtual distributed switch (vDS) and click: Actions -> Distributed Switch -> New Distributed Switch.
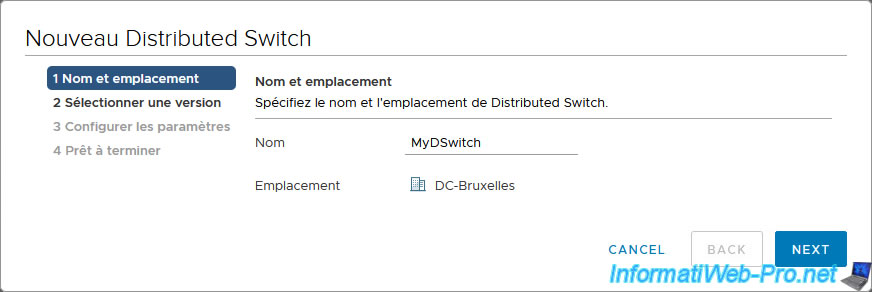
In the "New Distributed Switch" wizard that appears, provide a name for your new virtual distributed switch (vDS) and click Next.
The location shown is the one from which you opened this wizard. In our case: DC-Brussels.
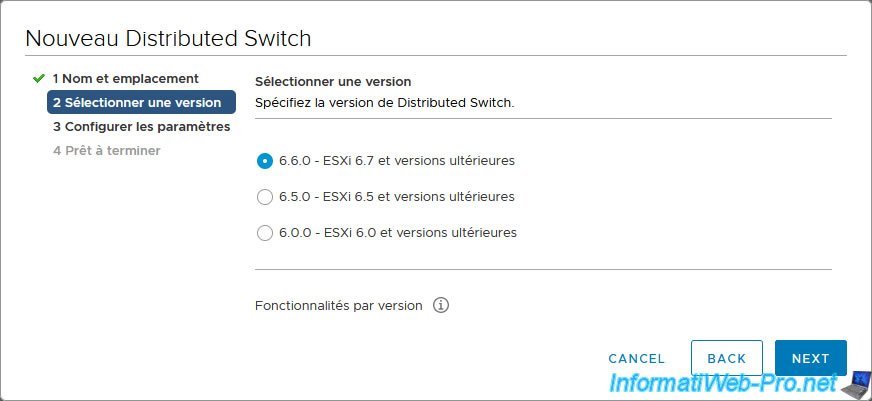
When you create a virtual distributed switch (vDS), you must select which version of it you want to use:
- 6.6.0 : supports hosts running VMware ESXi 6.7 or later.
- 6.5.0 : supports hosts running VMware ESXi 6.5 or later.
- 6.0.0 : supports hosts running VMware ESXi 6.0 or later.
If you do not have older VMware ESXi hosts, select the most recent version to benefit from the full features of your VMware vSphere infrastructure.
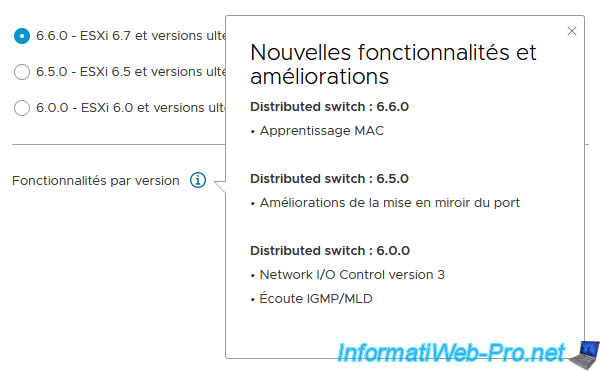
To find out about the new features offered by these different versions of vDS, click on the little "i" next to "Features per version".
As you can see :
- vDS version 6.6.0 brings MAC learning: allows you to provide network connectivity and virtual machines that use multiple MAC addresses behind a single virtual network card. This is particularly the case for nested virtual machines which would be created on a virtualized hypervisor. When MAC learning is enabled, the virtual switch learns MAC addresses by looking at the source MAC address of each packet that comes from the VM's virtual NIC.
Without this MAC learning, nested virtual machines would not have network connectivity. - vDS version 6.5.0 provides port mirroring improvements.
Port mirroring allows you to send a copy of network packets from one port of the virtual switch to another port to analyze the network traffic of a VM from another machine using a sniffer, for example. In particular thanks to the SPAN, RSPAN and ERSPAN protocols (as explained in our article concerning vDS). - vDS version 6.0.0 provides support for:
- Network I/O Control version 3 (NIOC): allows you to manage bandwidth allocation to favor and/or limit certain virtual machines. This ensures that a virtual machine cannot saturate your network and also ensures that your services will always be accessible.
- IGMP/MLD Listening: Enables multicast listening on the virtual switch to transfer data using Internet Group Management Protocol (IGMP) or Multicast Listener Discovery (MLD).
This is particularly useful for deploying Windows from a WDS server, for example.
Sources :
- MAC Learning Policy - VMware Docs
- Enable Multicast Snooping on a vSphere Distributed Switch - VMware Docs
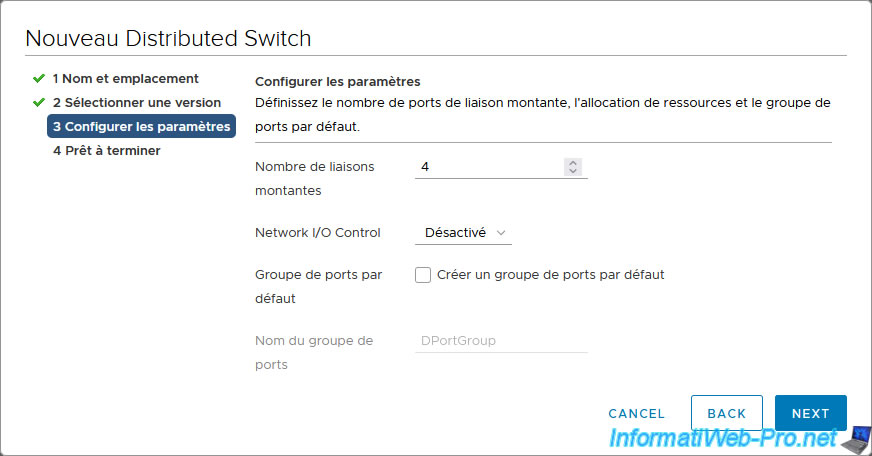
In the "Configure settings" step, you will need to configure the following options:
- Number of uplinks: number of physical adapters PER VMware ESXi host that will need to be mapped as uplinks on your virtual distributed switch (vDS).
In our case, each of our VMware ESXi hosts has 4 physical adapters (vmnicX). 2 for host management and 2 others for vMotion traffic (VM migration). - Network I/O Control: allows you to enable or not network bandwidth management.
However, you will see this in another tutorial. - Default port group: if desired, you can create a 1 distributed port group on your new virtual distributed switch (vDS) by checking the "Create a default port group" box.
However, in our case, we will create this later to be able to explain to you the different settings available (which are not visible here). - Port group name: if you checked the box above, you can specify the name of the distributed port group that will be created on your virtual switch.
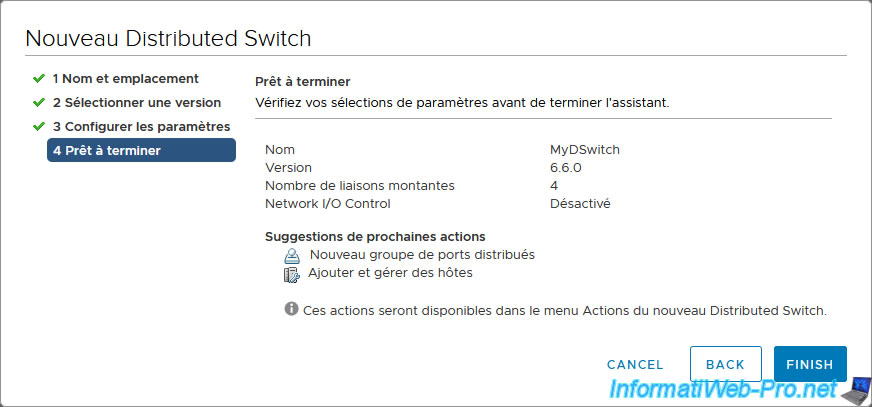
A summary of the configuration of your new distributed virtual switch "DSwitch" appears.
Click Finish.
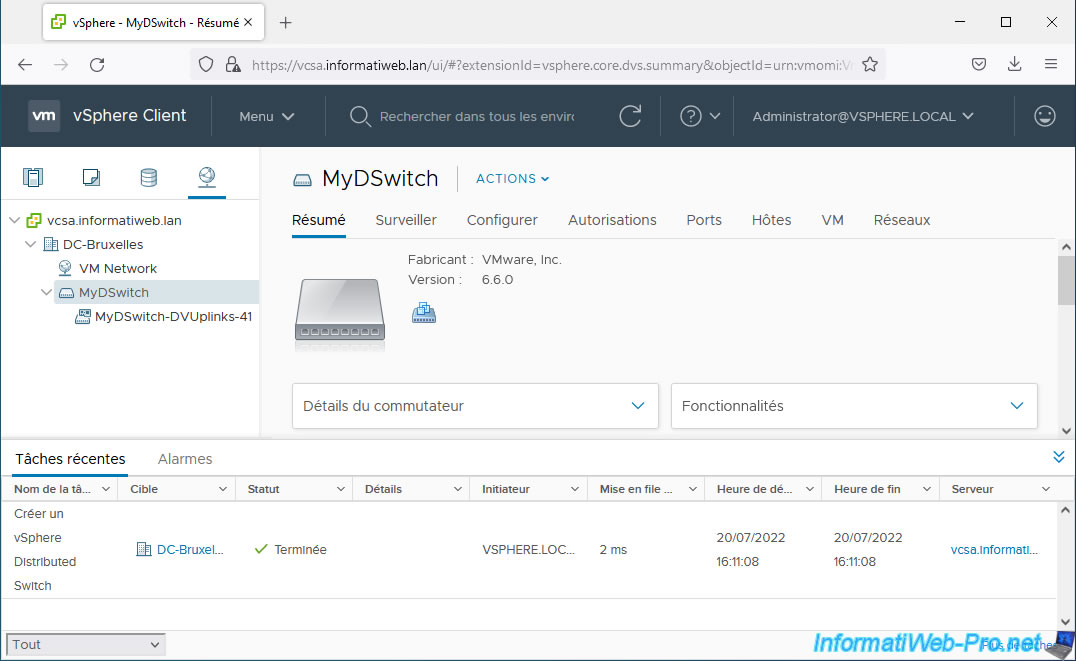
Your new distributed virtual switch (in our case: MyDSwitch) appears and you will see the "Create a vSphere Distributed Switch" task appear in the recent tasks.
As expected, it is a virtual switch created by "VMware, Inc" and its version is "6.6.0 (in our case)". This supports hosts running VMware ESXi 6.7 or later.
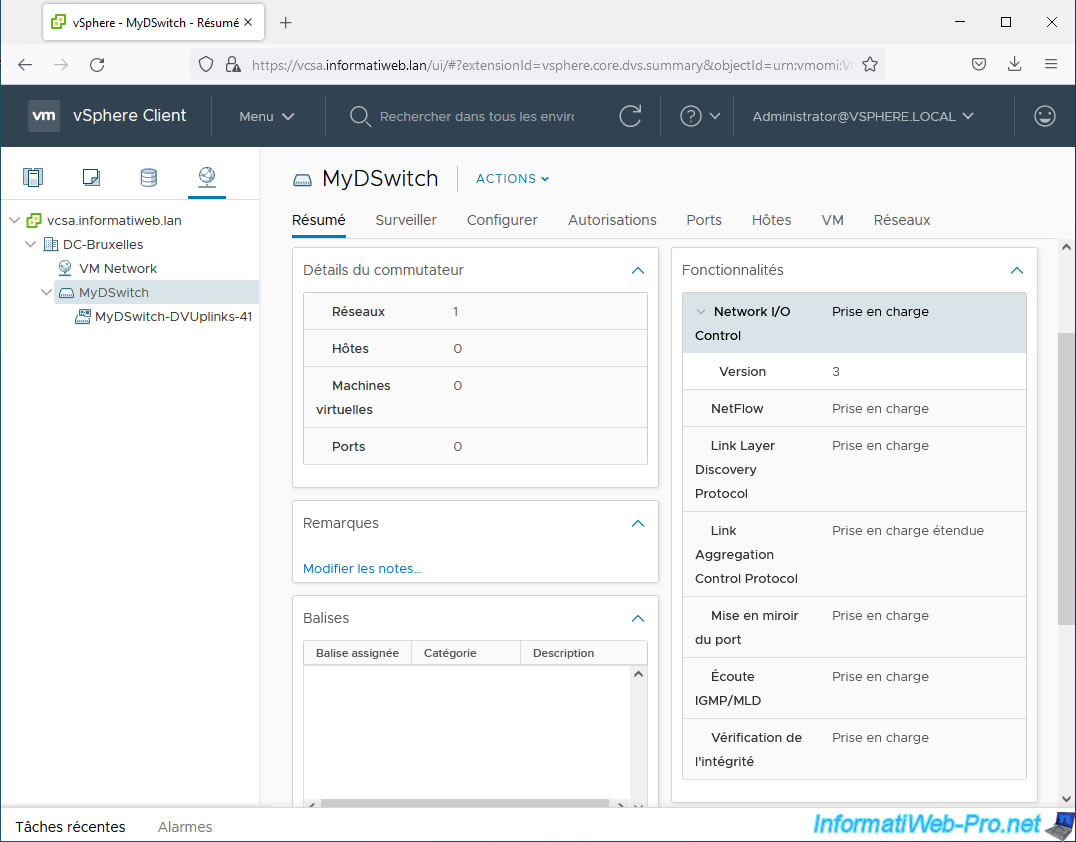
If you select your new distributed virtual switch (DSwitch), you will be able to see the switch details:
- Networks: number of networks present on your virtual distributed switch (vDS).
This includes the number of distributed port groups (for network traffic from VMs and VMkernel adapters) and the number of uplink port groups (for the uplinks to which you will map the physical adapters (physical network cards) of your different VMware ESXi hosts).
At the moment you have 1 network (the uplink port group "MyDSwitch-DVUplink-xx" in our case). - Hosts: the number of VMware ESXi hosts added to this virtual distributed switch (vDS) and whose hidden vSwitch (host proxy switch) is therefore centrally managed from your VMware vCenter Server (VCSA).
- Virtual machines: the number of virtual machines connected to this virtual distributed switch (vDS) through distributed port groups (which you will create a little later).
- Ports: the number of ports available on this virtual distributed switch (vDS).
Default: 0 since you have not yet created distributed port groups.
In the "Features" section, you will see that virtual distributed switches (vDS) support:
- Network I/O Control (NIOC) in version 3: network bandwidth management.
- NetFlow: redirection of network traffic to facilitate its analysis.
- Link Layer Discovery Protocol: a network discovery protocol that allows the vSphere administrator to obtain information about the physical switch.
- Link Aggregation Control Protocol: association of network cards.
- Port Mirroring: allows you to copy network traffic from one port on the virtual switch to another port on that switch to monitor that network traffic from another virtual machine.
- IGMP/MLD snooping: allows you to enable multicast listening on the virtual switch (as explained previously).
- Health check: allows you to check the integrity of VLANs, MTUs, teaming, and failover of NICs.
This ensures that a VLAN ID is configured correctly on all physical switches to which your VMware ESXi hosts are connected, for example. To avoid a possible problem which would only appear in the event of migration of a VM, for example.
For more information about these features, refer to our article: VMware vSphere 6.7 - Virtual Distributed Switches (vDS).
As with other VMware virtual switches, you can see the network topology of your virtual distributed switch (vDS) by going to the "Configure" tab of it, then going to: Settings -> Topology.
As you can see, at the moment your Virtual Distributed Switch (vDS) only has an uplink port group "MyDSwitch-DVUplinks-xx" that currently has no physical adapter (physical NIC) assigned to it.

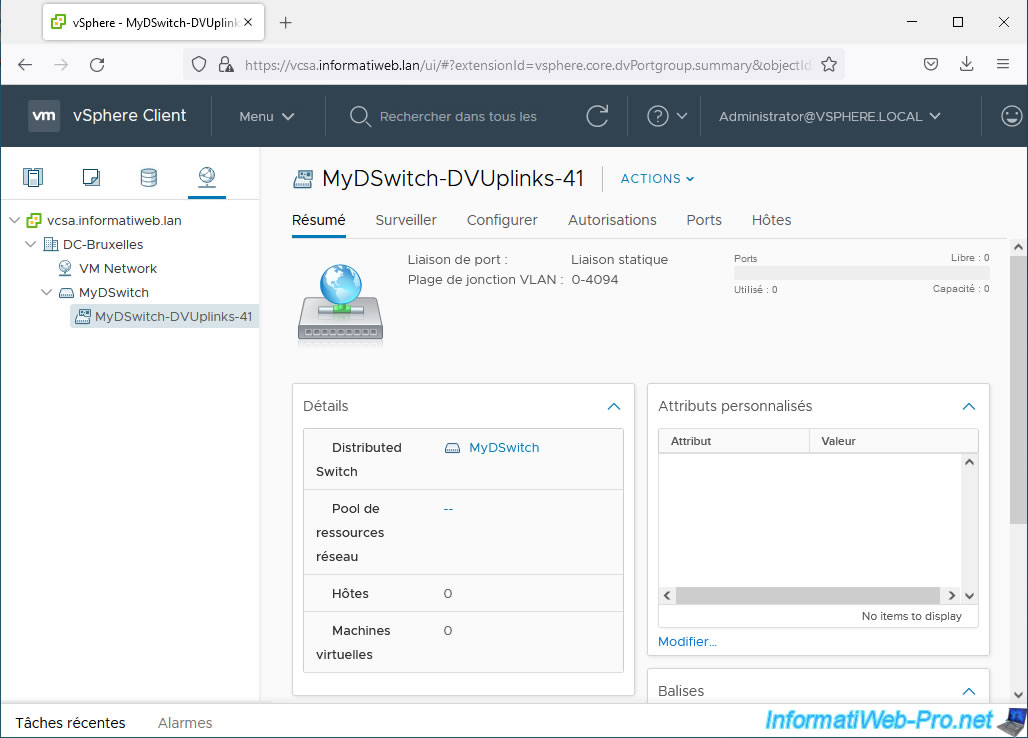
If you select your uplink port group "MyDSwitch-DVUplinks-xx", you will see:
- Ports: this one does not have any ports at the moment.
This is because no VMware ESXi hosts have been added to your Virtual Distributed Switch (vDS) and therefore no physical NICs have been assigned to it. - Distributed Switch: name of the virtual distributed switch (vDS) of which it is a part. In our case: MyDSwitch.
- Network resource pool: the network resource pool used (if applicable). These allow you to manage the network bandwidth of your virtual machines by defining reservations.
- Hosts: the number of VMware ESXi hosts whose physical network adapters are mapped to the Uplinks of this uplink port group.
- Virtual machines: in the case of an uplink port group, this value will always be "0".
This is because this type of port group is only used to map the physical NICs of your VMware ESXi hosts to the uplinks of your distributed virtual switch.
Note: the number shown at the end of this uplink port group name is a random number added by VMware vSphere that has no meaning.
The goal is simply to create groups of uplink ports with unique names.
Source : Create a Network Resource Pool - VMware Docs.
Share this tutorial
To see also
-
VMware 8/21/2024
VMware vSphere 6.7 - Add a VMkernel interface
-
VMware 8/2/2024
VMware vSphere 6.7 - Collect logs with SexiLog
-
VMware 8/9/2024
VMware vSphere 6.7 - Collect logs with VMware Aria Operations for Logs
-
VMware 1/10/2025
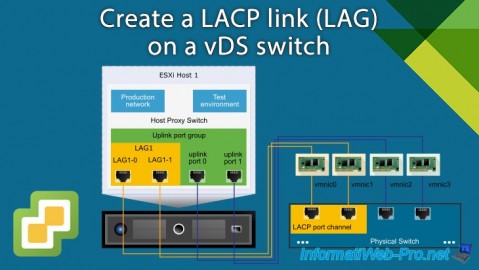
VMware vSphere 6.7 - Create a LACP link (LAG)
You must be logged in to post a comment