Create a Virtual Distributed Switch (vDS) on VMware vSphere 6.7 and migrate hosts and VCSAs to it
- VMware
- 27 December 2024 at 08:55 UTC
-

- 2/7

4. Create a distributed port group
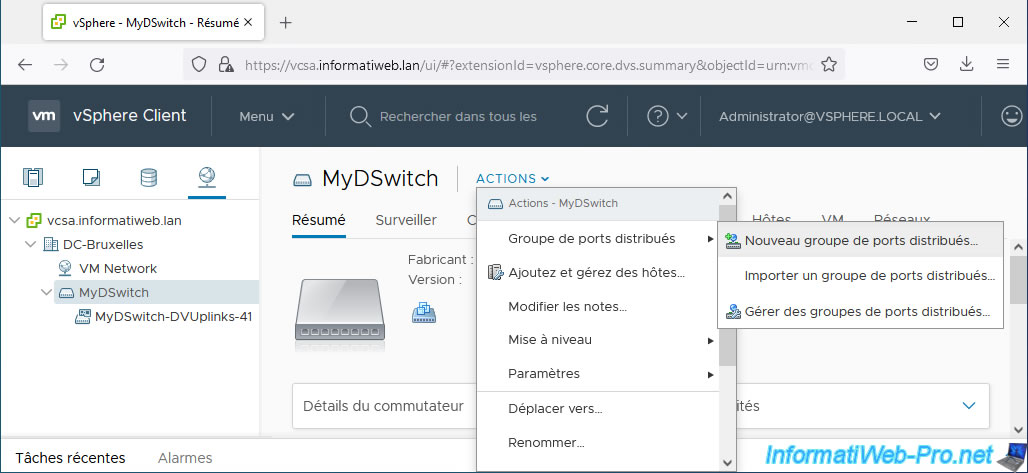
To create a distributed port group, select your distributed virtual switch (in our case: MyDSwitch) and click: Actions -> Distributed Port Group -> New Distributed Port Group.
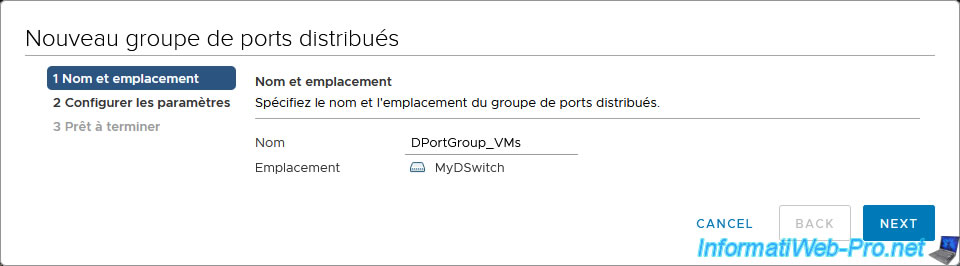
In the "New Distributed Port Group" wizard that appears, specify a name for it.
For example: DPortGroup_VMs. This one will be used by our virtual machines and we will create 2 others later for host management and VM migration via vMotion.
Note: the location corresponds to the previously selected virtual distributed switch.
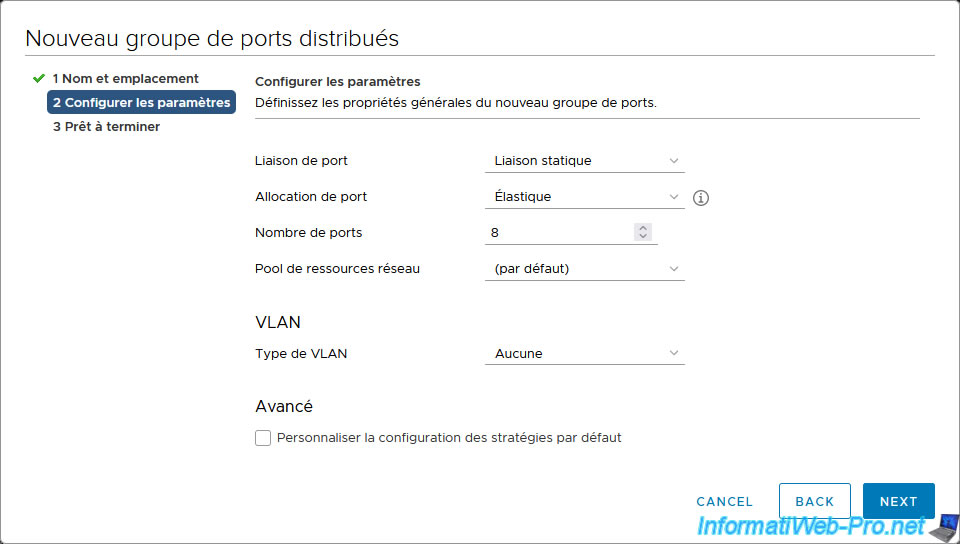
When you create a distributed port group, several settings are offered:
- Port binding: allows you to choose whether ports are assigned statically or dynamically (ephemeral) to your virtual machines.
- Static binding: allows you to automatically assign and reserve a port to a virtual machine when you connect it to this distributed port group.
This ensures that it will be able to access the network at any time.
The assigned/reserved port will only be disconnected if you remove the virtual machine from this distributed port group.
This setting is the default, as this is the port allocation method you will use most of the time.
Also, since the port is assigned/reserved when you set this distributed port group on the desired VM, that VM will always use the same port. Even if you restart it or turn it off in the meantime. - Ephemeral - no binding: allows you to dynamically create and assign a port to a virtual machine when it starts or its network card connects to the network (network card set to "connected" status).
The created port will then be unassigned and deleted when you shut down this virtual machine.
This option is rarely used because it consumes more resources since ports are created/deleted and assigned/unassigned dynamically when starting and stopping virtual machines connected to this distributed port group.
Additionally, this also means that the virtual machine will change ports. This makes it difficult to debug in the event of a problem or to analyze network traffic, for example.
- Static binding: allows you to automatically assign and reserve a port to a virtual machine when you connect it to this distributed port group.
- Port allocation: allows you to choose whether the number of ports should be fixed or not (elastic).
- Elastic: allows you to automatically add or remove ports on this group of distributed ports (and by dependency also on your virtual distributed switch (vDS)). By default, 8 ports are created. Once these ports have been assigned, 8 additional ports will be added automatically each time.
This avoids too many unnecessary ports for performance reasons and limits.
Indeed, the more ports there are on a virtual switch, the more system resources your server will use to manage them.
In addition, you should also know that you can create a maximum of 60,000 ports per virtual distributed switch (vDS) and per vCenter. - Fixed: allows you to create a port group with a fixed size of X ports (number defined by the parameter below).
In this case, a port will be assigned to a virtual machine when you connect it to this distributed port group and the port will only be unassigned when you remove this virtual machine from this port group.
Warning: as previously stated, there is a maximum of 60,000 ports per distributed virtual switch (vDS) and per vCenter.
So, avoid creating distributed virtual switches with too high a fixed size, because you might run out of ports one day. Even if you have a lot of unused ports.
- Elastic: allows you to automatically add or remove ports on this group of distributed ports (and by dependency also on your virtual distributed switch (vDS)). By default, 8 ports are created. Once these ports have been assigned, 8 additional ports will be added automatically each time.
- Number of ports: number of ports to create by default on this distributed port group. Default: 8 ports.
If you have chosen "elastic" port allocation, this defines the number of ports that will be created by default. But, 8 additional ports will then be created automatically later when you need them.
If you chose a "fixed" port allocation, this only defines the number of ports that will be created by default.
Once all ports are assigned, you will no longer be able to connect other virtual machines to it unless you first remove one. - Network Resource Pool: allows you to choose a network resource pool to use on this distributed port group.
As noted previously, these network resource pools help manage network bandwidth by setting reservations for certain virtual machines.
For now, leave the "(default)" option selected. - VLAN - VLAN type: allows you to choose whether you want to use the concept of VLAN or not and what type of VLAN.
Using different VLANs on different distributed port groups allows you to isolate network traffic from different VMs on the same virtual switch.- None: do not use VLANs or use VLAN tagging through an external switch.
- VLAN: allows you to specify the VLAN ID to use. The value must be between 1 and 4096.
- VLAN trunk: allows you to specify multiple VLAN IDs to allow on this port group.
You can specify multiple VLAN IDs by separating them with commas (ex: 30,40,50), specify a range of VLANs using a hyphen (ex: 10-15) or combine the two (ex: 10-15, 30,40,50).
All virtual machines will be able to receive network traffic for the desired VLANs and it is their guest operating system that will need to be configured to handle these packets. - Private VLAN: allows you to create sub-VLANs within an existing parent VLAN.
Which can be practical for a host (such as OVH) to offer private Clouds to its customers, for example.
- Customize default policies configuration: allows you to configure directly the security options, traffic shaping, etc. for this group of distributed ports.
However, you can configure these options later when you have assigned the physical network cards of your hosts to the uplinks of your uplink port group (MyDSwitch-DVUplinks-xx)
Sources :
- Static (non-ephemeral) or ephemeral port binding on a vSphere Distributed Switch
- vSphere 6.7 Configuration Limits - VMware Configuration Maximums (section : ESXi Host Maximums (Networking Maximums))
- Add a Distributed Port Group - VMware Docs
- vlan trunking on distributed switch - VMware Communities
- OVH.com est désormais fournisseur de services vCloud Datacentre - OVHcloud (via Google Translate)
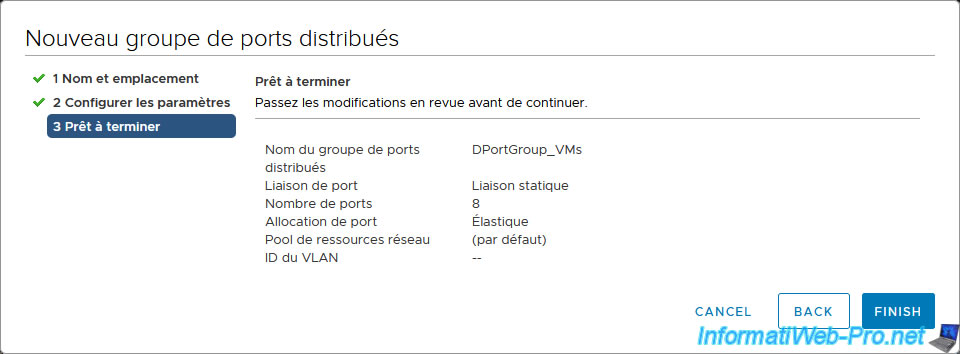
A summary of the configuration of the distributed port group to create appears.
Click Finish.
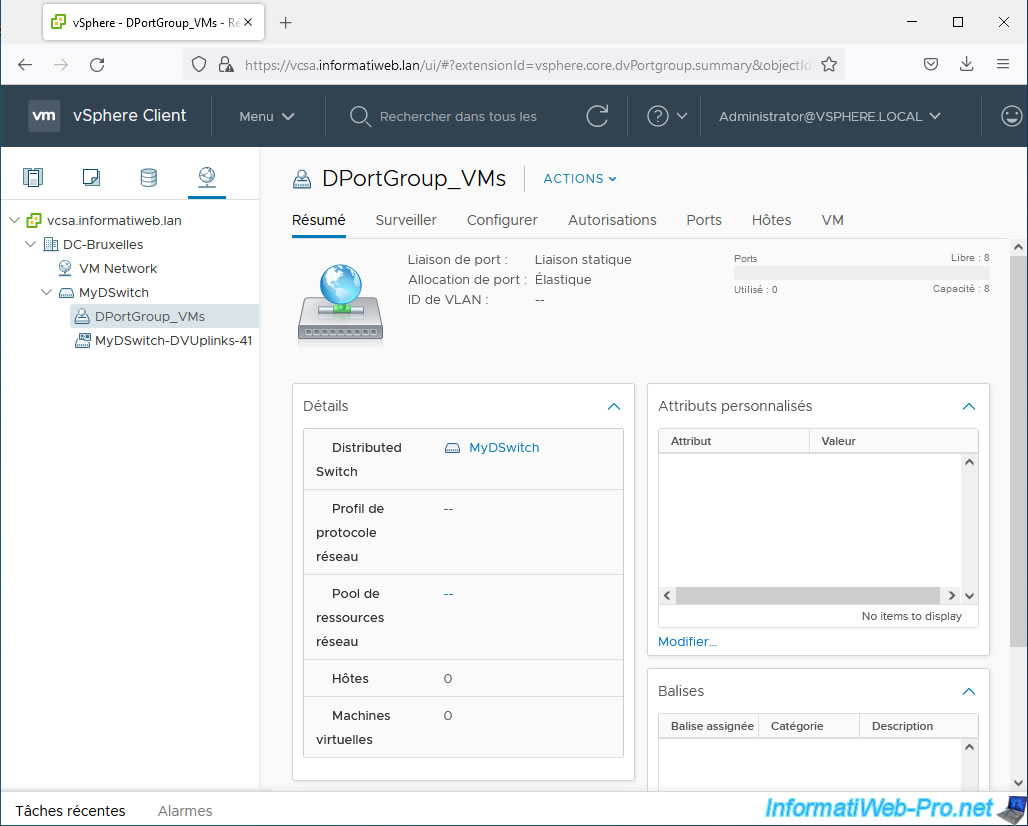
The created distributed port group appears.
In the "Details" section you will see:
- Distributed switch: the name of the distributed virtual switch on which this distributed port group was created.
- Network protocol profile: allows you to choose the network protocol profile to use on this distributed port group.
Creating a network protocol profile allows you to define an IPv4 and/or IPv6 address range, as well as configure other network settings (e.g. default gateway IP address, DNS server address, ...). .). - Network resource pool: as explained previously, network resource pools allow you to manage network bandwidth by setting reservations.
- Hosts: number of hosts linked to this port group (either because one of its virtual machines uses it, or because this host has a VMkernel adapter (VMkernel interface) which is assigned to this distributed port group).
- Virtual machines: number of virtual machines assigned to this distributed port group.
Source : Use a Network Protocol Profile to Allocate IP Addresses to a Virtual Machine or vApp - VMware Docs.
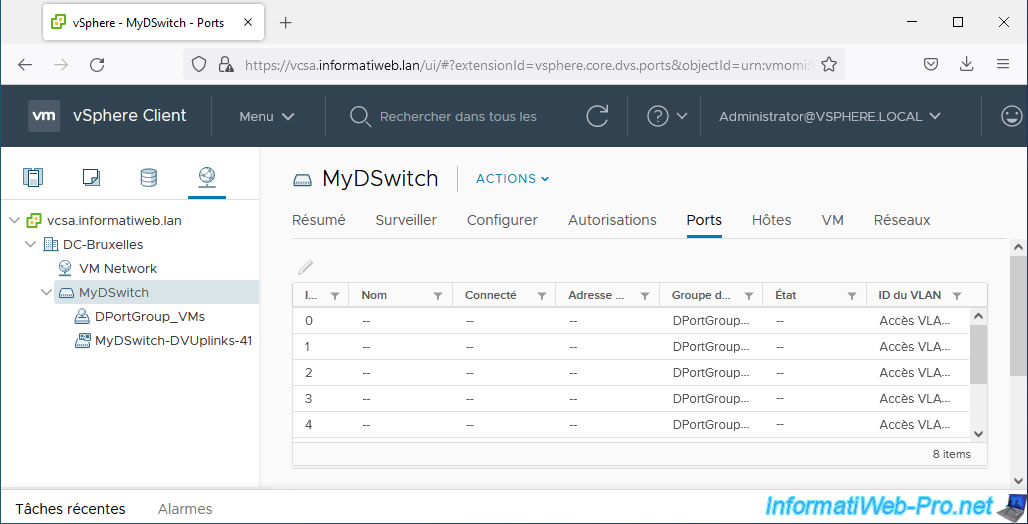
If you go to the "Ports" tab of your distributed port group (in our case: DPortGroup_VMs), you will be able to see the ports that have been created.
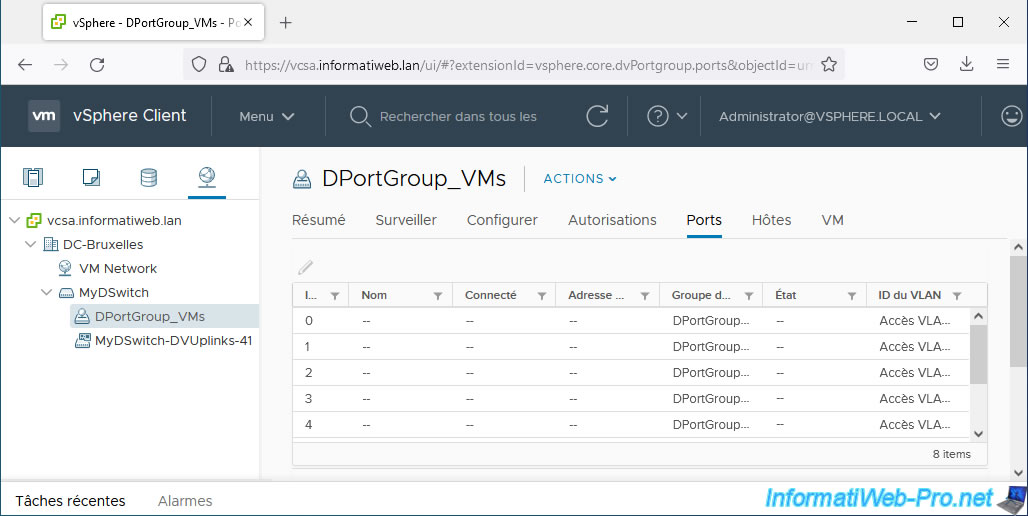
Obviously, given that this group of distributed ports (DPortGroup_VMs) was created on your distributed virtual switch (MyDSwitch), these ports are also visible from the "Ports" tab of this distributed virtual switch.
However, when you have several distributed port groups (DPortGroup...), it will be more interesting to go to the "Ports" tab of the desired distributed port group to filter the display of available ports.
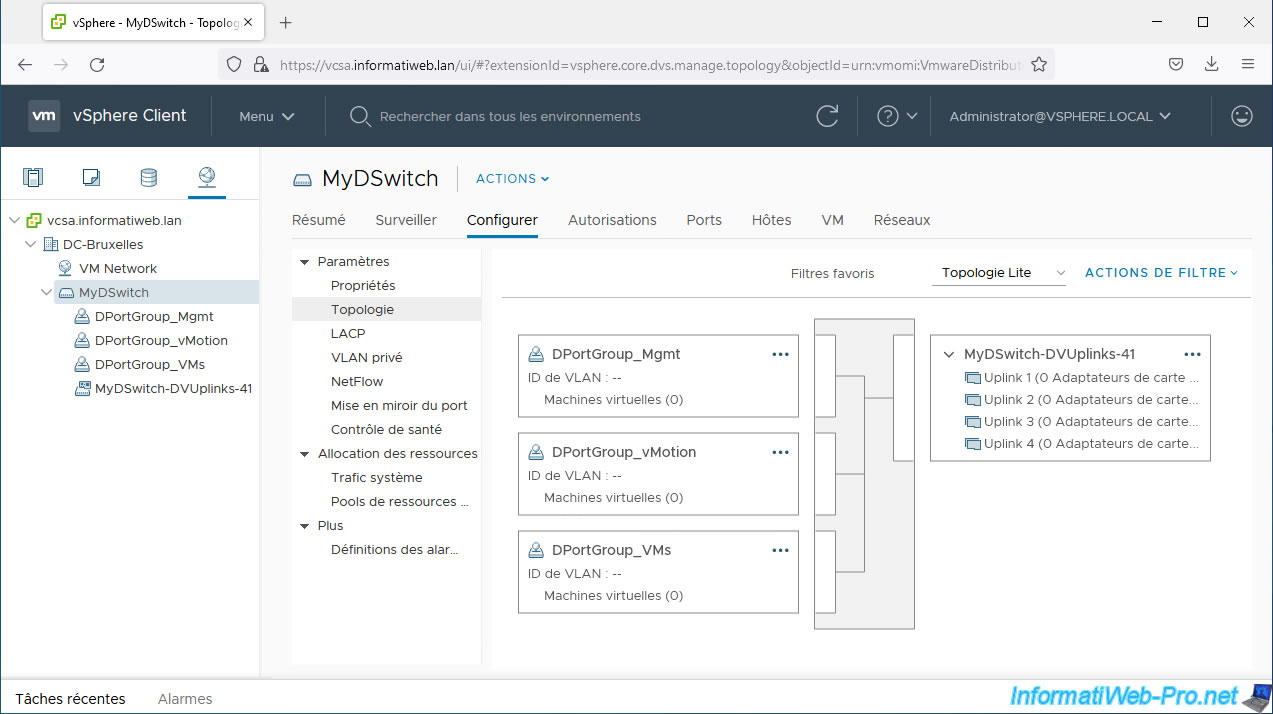
Select your distributed virtual switch "MyDSwitch" and go to the "Configure" tab.
Then go to: Settings -> Topology.
As you can see, your distributed virtual switch now has:
- 3 distributed port groups: 1 for host management (DPortGroup_Mgmt), 1 for VM migration via vMotion (DPortGroup_vMotion) and 1 for network access to your VMs (DPortGroup_VMs).
- 1 uplink group (which already existed before) which does not contain a physical adapter (physical network card) at the moment.
5. Add a VMware ESXi host to a virtual distributed switch (vDS)
Now that your distributed virtual switch (DSwitch), uplink port group (DSwitch-DVUplinks-xx), and distributed port groups (DPortGroup_...) are created, you can add your hosts on your distributed virtual switch (DSwitch).
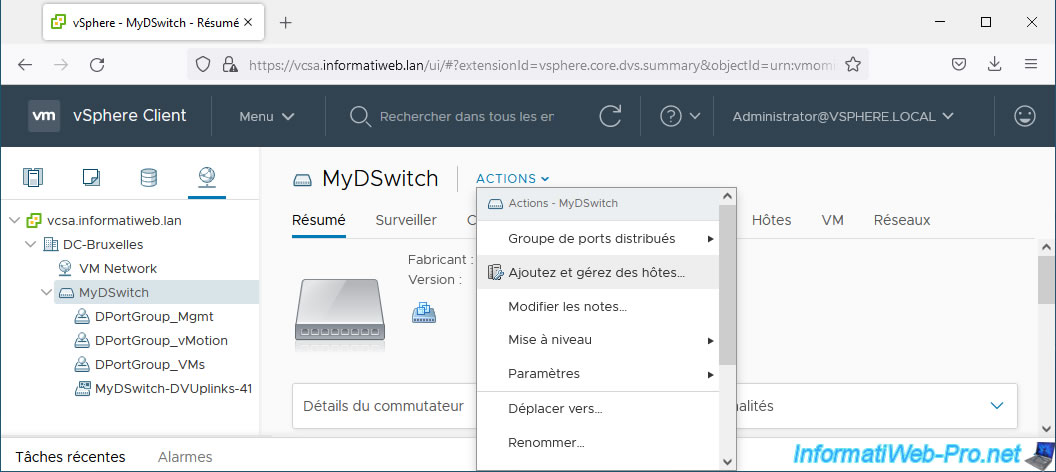
To do this, select this virtual switch and click: Actions -> Add and Manage Hosts.
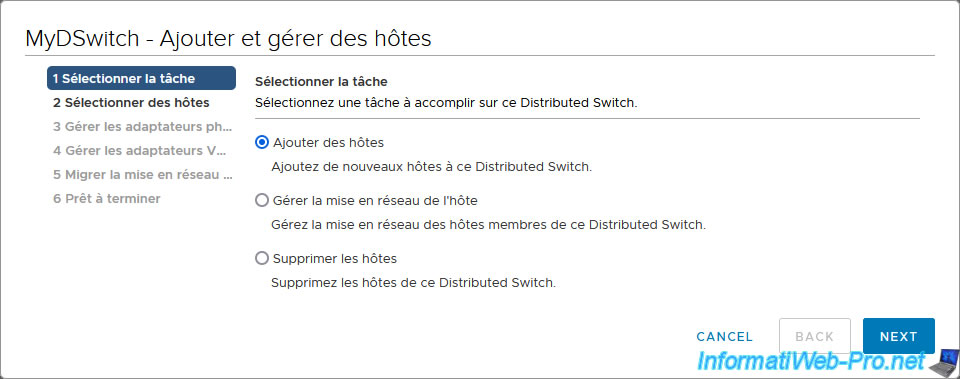
In the "MyDSwitch - Add and Manage Hosts" wizard that appears, select: Add hosts.
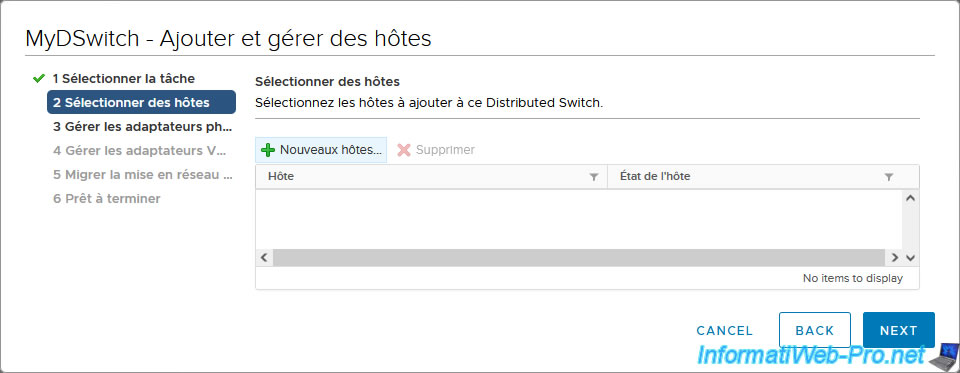
Click: New hosts.
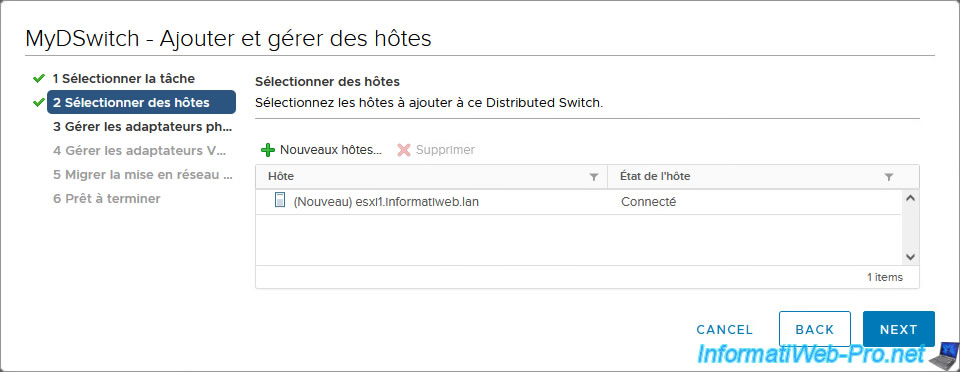
Select your 1st VMware ESXi host and click OK.
Important : add only one VMware ESXi host to start and avoid the one where your "vcsa" virtual machine is located.
Indeed, migrating the host where the "vcsa" VM is running requires several steps that you will see a little later in this tutorial.

The selected host appears.
Click Next.
As a reminder, in our case:
- physical adapters (physical network cards) "vmnic0" and "vmnic1" were connected on vSwitch0 (as you can check below) and were used for host management and for VM network traffic.
- physical adapters (physical network cards) "vmnic2" and "vmnic3" were connected on vSwitch1 (as you can check below) and were used only for migrating VMs via vMotion.
Select your 1st physical adapter (vmnic0) and click: Assign uplink.
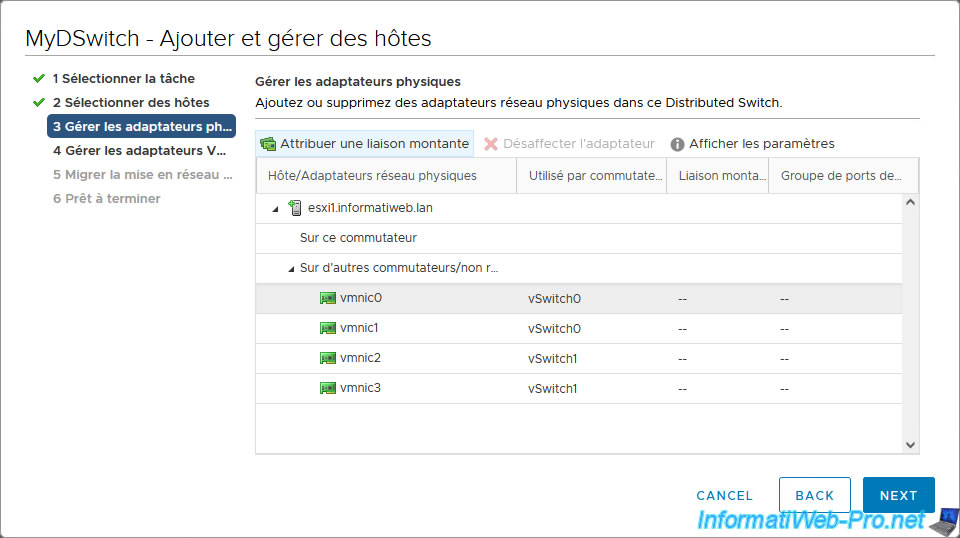
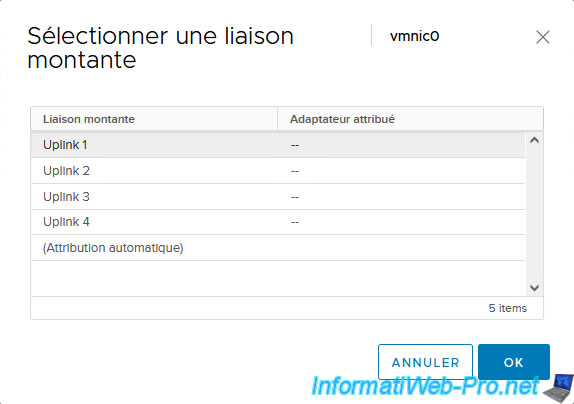
As you can see in the "Select an Uplink" window that appears, there are 4 Uplinks available.
Which corresponds to the "Number of uplinks" defined when creating your distributed virtual switch at the very beginning of the tutorial.
Select "Uplink 1" to map the physical adapter (physical network card) of the host being added to this "Uplink 1" uplink.
Note: in general, you will map the physical adapter "vmnic0" of all your VMware ESXi hosts to the uplink "Uplink 1", vmnic1 to Uplink 2, ...
Select the physical adapter "vmnic1" and click: Assign uplink.

Map this physical adapter "vmnic1" to the uplink "Uplink 2".
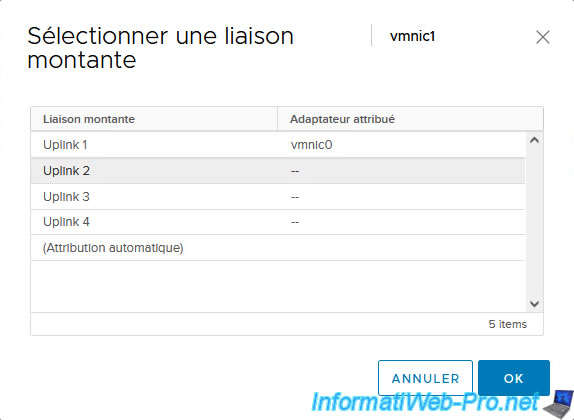
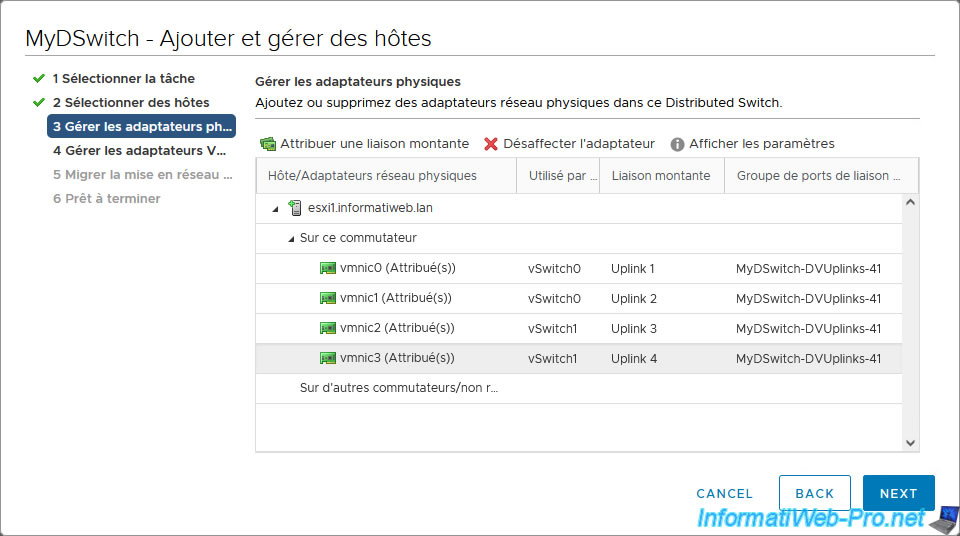
Continue this by mapping physical adapter "vmnic2" to uplink "Uplink 3" and physical adapter "vmnic3" to uplink "Uplink 4".
As you can see, these will be part of the "MyDSwitch-DVUplinks-xx" uplink port group.
Click Next.
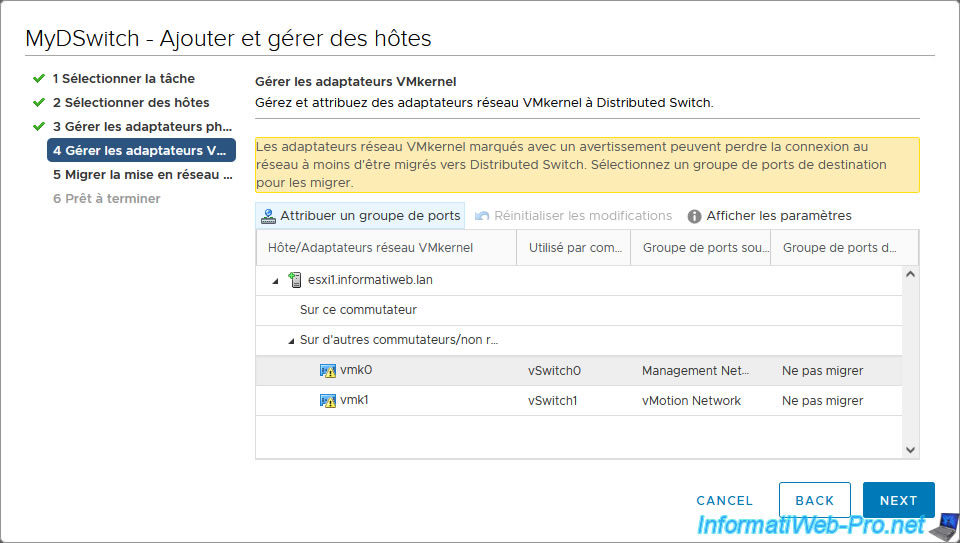
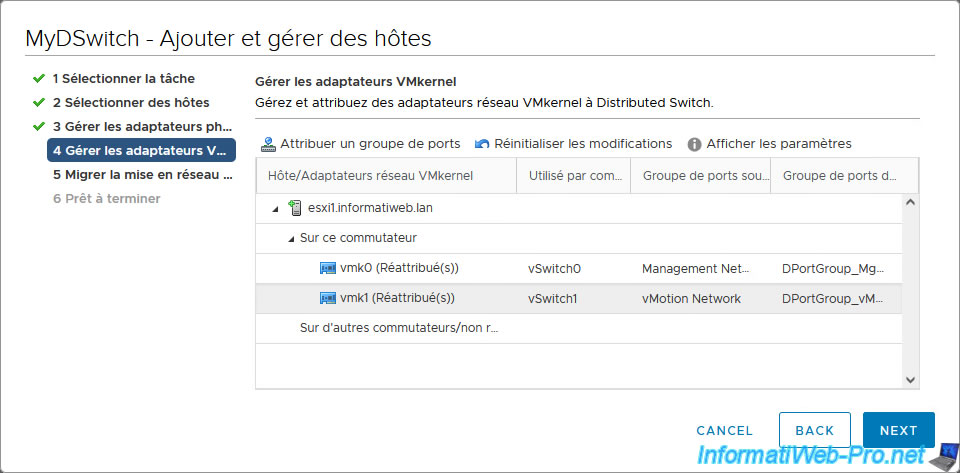
When you add a host on a virtual distributed switch (vDS) and you have chosen (in the previous step) to migrate all of its physical adapters (physical NICs), it is important to also migrate its VMkernel network adapters.
Indeed, otherwise, the network connection of these VMkernel network adapters would be lost given that they are currently connected to a vSwitch (vSS) of the host whose physical adapters you have decided to migrate to the new switch virtual distributed (vDS).
Choose the VMkernel adapter "vmk0" and click "Assign port group".
Note: as you can see in the image below, our VMkernel network adapter "vmk0" is used for managing the host (Management Network) and "vmk1" is used for migrating virtual machines via vMotion (vMotion Network).
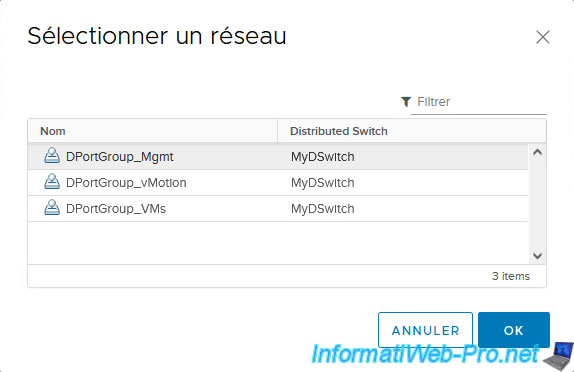
In the "Select Network" window that appears, select the desired distributed port group.
In our case, we will connect the VMkernel network adapter "vmk0" to the distributed port group "DPortGroup_Mgmt".
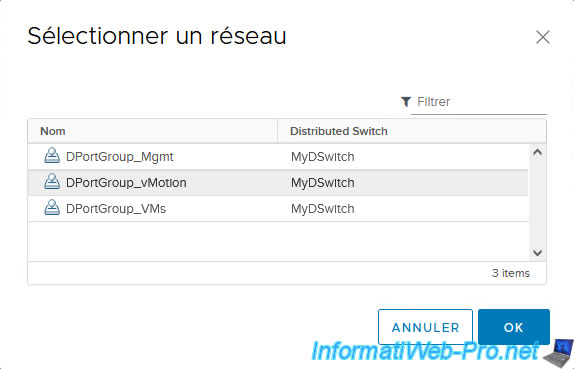
Select the second VMkernel network adapter (in our case: vmk1) and click: Assign port group.
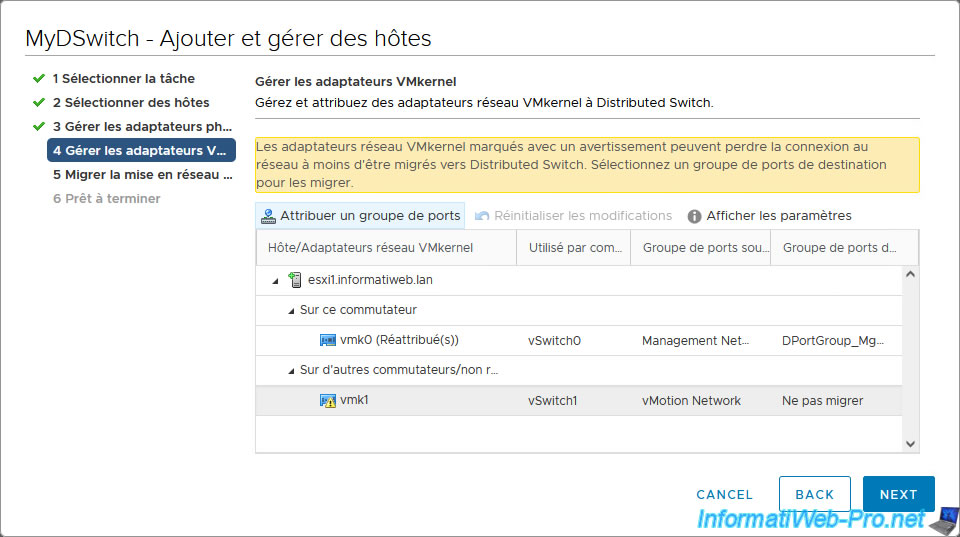
In our case, we will connect the VMkernel network adapter "vmk1" to the distributed port group "DPortGroup_vMotion".
As you may have noticed, VMkernel network adapters are added to distributed port groups (DPortGroup_...) and not uplink groups as was the case for physical adapter mapping.
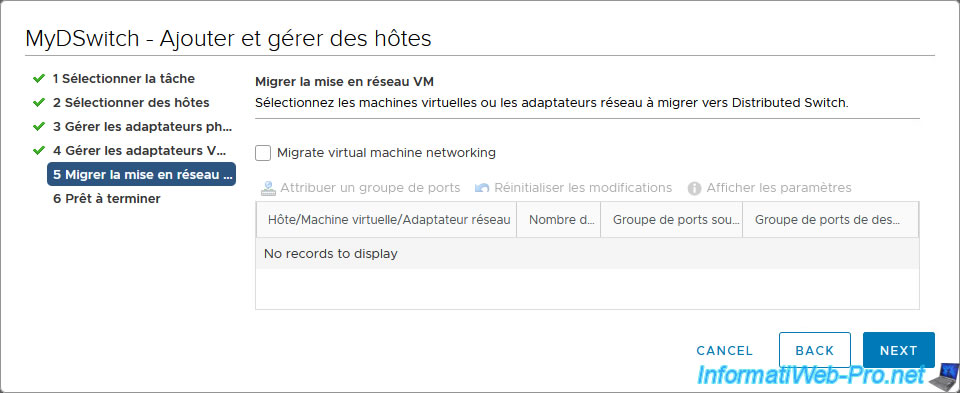
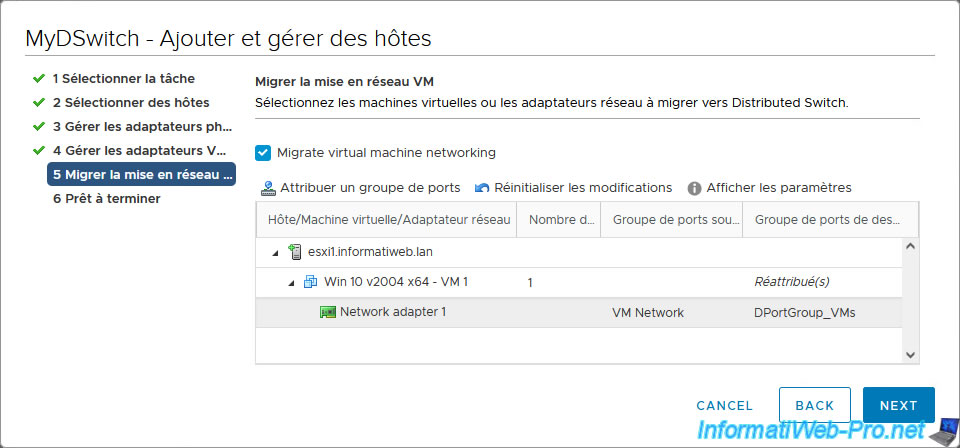
Finally, you can migrate the networking of the virtual machines present on the host that you are adding to this virtual switch.
However, for the list of virtual machines on this host to appear, you must first check the "Migrate virtual machine networking" box.
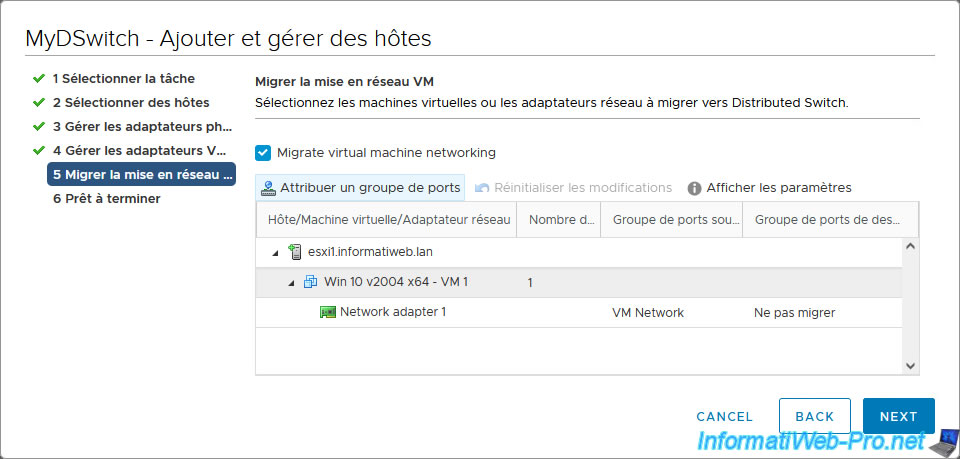
Warning : as you can see, currently we have a virtual machine (Win 10 v2004 x64 - VM 1) on this VMware ESXi host which is currently connected to the "VM Network" port group.
However, this port group is on virtual standard switch (vSS) "vSwitch0" which will no longer have access to our host's physical adapters (physical NICs) once this wizard is completed.
In fact, you have planned to migrate them in the 3rd step of this wizard.
It is therefore essential to migrate your virtual machines to a distributed port group of your new virtual distributed switch (vDS) so that they can continue to function correctly.
Select your virtual machines and click: Assign port group.
Select the desired distributed port group. In our case: DPortGroup_VMs.
Note: you can connect virtual machines, as well as VMkernel adapters on distributed port groups. Just like you would with a typical port group on a virtual standard switch (vSS).
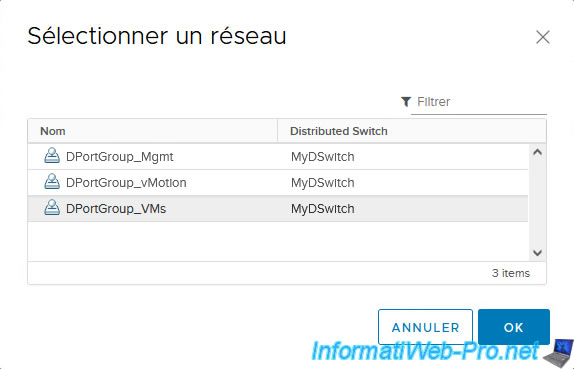
As expected, our virtual machine "Win 10 v2004 x64 - VM 1" will be migrated from the "VM Network" port group of our vSwitch0 (vSS) to the distributed port group "DPortGroup_VMs" of our new distributed virtual switch "MyDSwitch" .
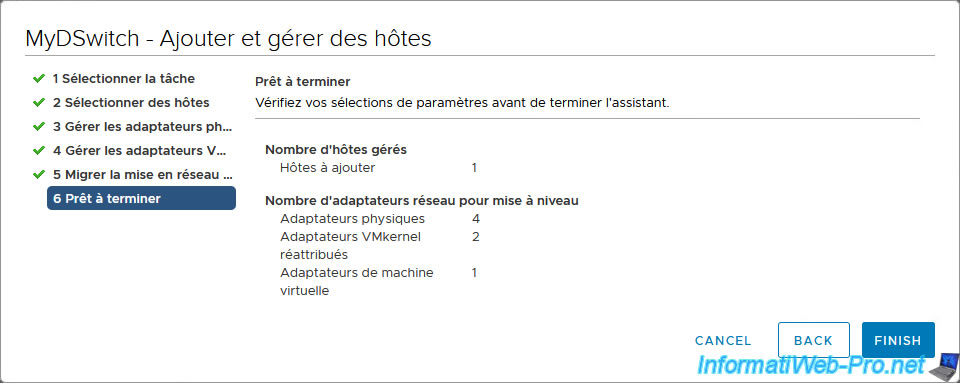
A summary of the addition of the host and the migration of the different adapters (physical adapters, VMkernel adapters and virtual machine adapters) appears.
Click on: Finish.
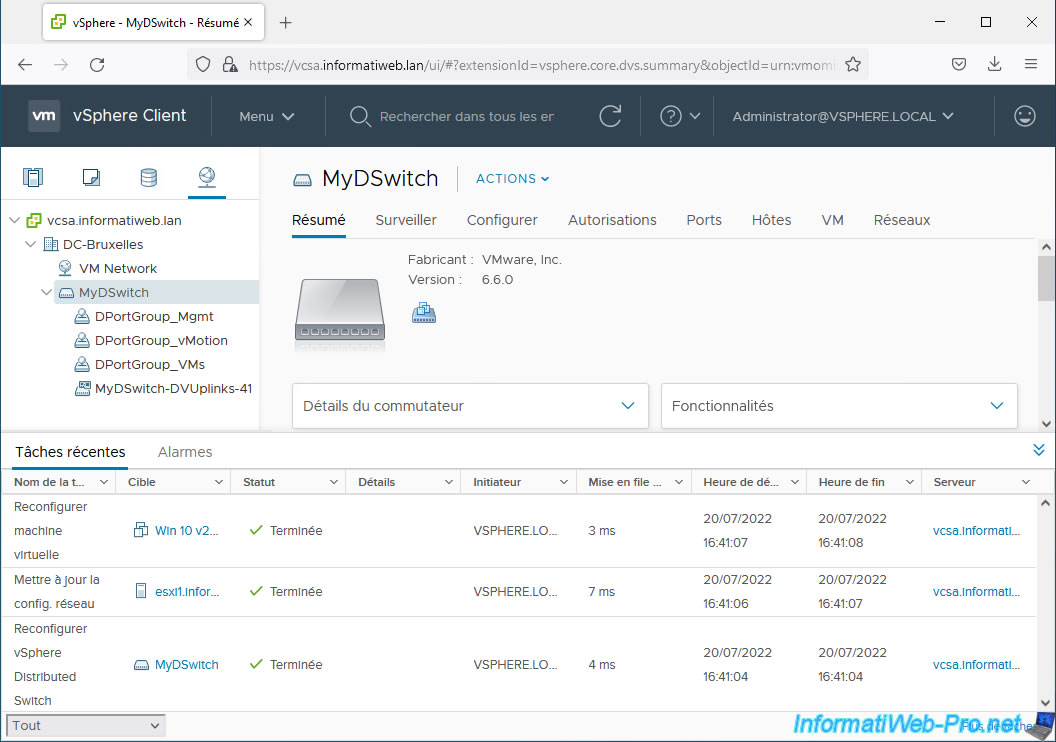
In recent tasks, you will see the tasks appear:
- Reconfigure virtual machine: concerns changing the port group to which each virtual machine on the host you are adding is connected.
- Update config. network: the target is the host that you just migrated from a standard virtual switch (vSS) to your virtual distributed switch (vDS).
- Reconfigure vSphere Distributed Switch: the target is the virtual distributed switch (vDS) where you just added your VMware ESXi host.
Share this tutorial
To see also
-
VMware 8/21/2024
VMware vSphere 6.7 - Add a VMkernel interface
-
VMware 8/2/2024
VMware vSphere 6.7 - Collect logs with SexiLog
-
VMware 8/9/2024
VMware vSphere 6.7 - Collect logs with VMware Aria Operations for Logs
-
VMware 1/10/2025
VMware vSphere 6.7 - Create a LACP link (LAG)
No comment