- VMware
- 13 July 2022 at 09:05 UTC
-

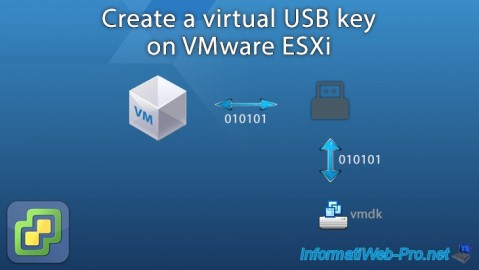
Although you can plug a physical USB key into your VMware ESXi server and then pass it to a virtual machine, you can also create a virtual one to avoid damaging it during various tests.
This will allow you to speed up your tests (given that a virtual USB key will always perform better than a physical USB key) and it will prevent you from unnecessarily reducing the life of your USB keys by dint of writing and erasing data on them.
Warning : although this technique works without problems with VMware ESXi 6.7, 7.0, 7.0U3 and 8.0 (whether your VM uses a USB 2.0 or 3.0/3.1 controller), it no longer works on VMware ESXi 8.0U2.
- Create a virtual hard disk on VMware ESXi
- Attach the virtual disk as a virtual USB key to a VM
- Virtual USB key visible in the virtual machine
- Create a bootable virtual USB key
- Automatic change of the virtual USB key identifier (ID)
1. Create a virtual hard disk on VMware ESXi
To create a virtual hard disk on VMware ESXi with the possibility of choosing the name of the ".vmdk" file, you will have to use the "vmkfstools" program from the command line (via SSH).
However, the SSH protocol is not enabled by default.
To enable it, go to "Host -> Manage -> Services", select the "TSM-SSH" service and click "Start".
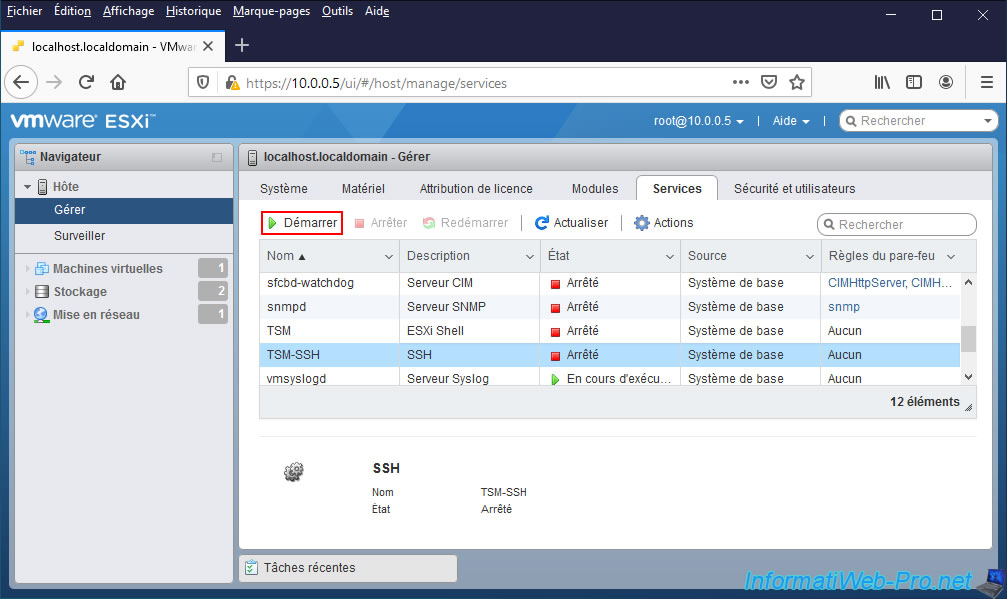
Once SSH is enabled, locate the location of your virtual machine on your VMware ESXi hypervisor.
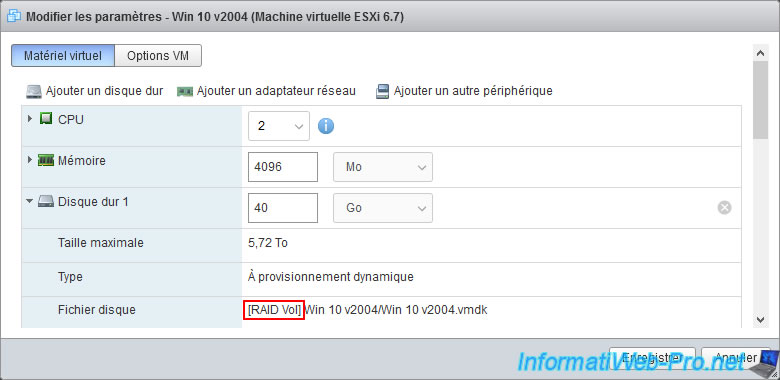
To do this, you can for example select it in the web interface of VMware ESXi and click on "Edit".
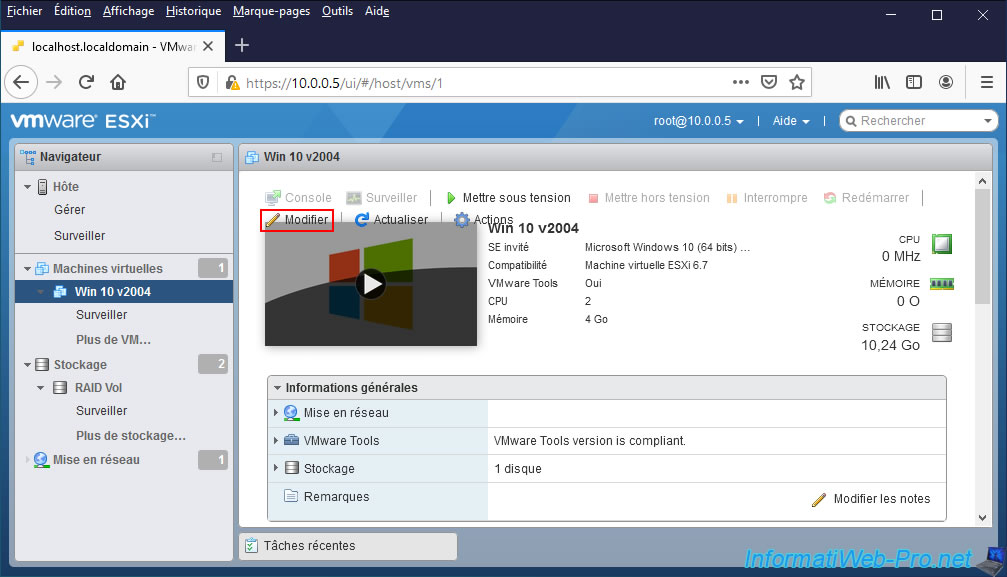
As you can see, the 1st virtual hard disk of our virtual machine is in the "Win 10 v2004" folder of our "RAID Vol" datastore.
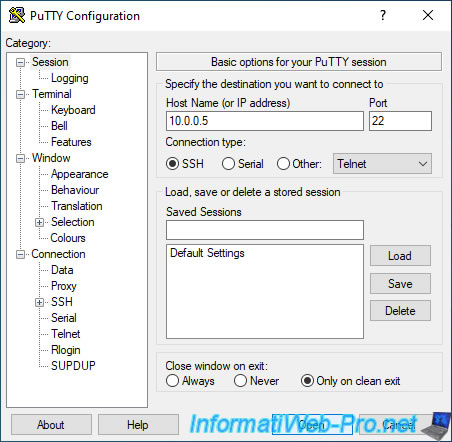
To connect in SSH to your VMware ESXi server, you can for example use the PuTTY program on Windows.
Simply enter the IP address of your VMware ESXi server and click the "Open" button at the bottom.
If the SSH protocol is enabled on your VMware ESXi server, it will ask you to connect :
Plain Text
login as:
Keyboard-interactive authentication prompts from server:
Password:
Log in as root.
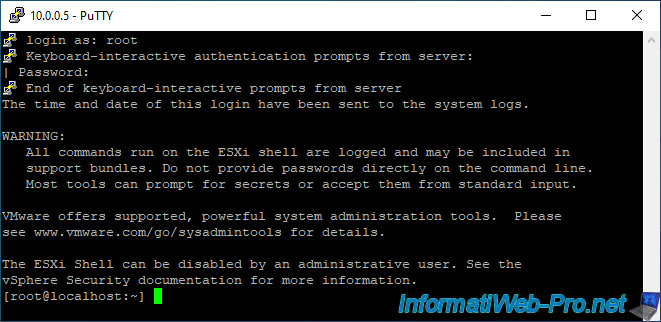
Go to the folder of your virtual machine using the "cd" command available on Linux.
Note that the datastores are located in the "/vmfs/volumes" folder of the VMware ESXi server and that you must escape the space characters by preceding them with the "\" character.
Batch
cd /vmfs/volumes/RAID\ Vol/Win\ 10\ v2004/
Then, create for example a virtual hard disk of 16 GB (so that it corresponds to a standard size of an USB key).
- -c 16G : allows you to create a 16 GB virtual disk
- -d thin : allows you to create a virtual disk whose space will be dynamically allocated. Which means that the virtual disk will grow larger depending on the data stored inside.
- virt-usb-key.vmdk : indicates under which name this virtual disk will be created.
Sources :
Batch
vmkfstools -c 16G -d thin virt-usb-key.vmdk
Plain Text
Create: 100% done.
View the contents of the folder.
ls
As you can see, VMware ESXi also created a file with the "-flat.vmdk" suffix.
In our case, this command therefore created 2 files : virt-usb-key.vmdk and virt-usb-key-flat.vmdk.
So, you need these 2 files if you want to move or copy this virtual disk somewhere else.
Plain Text
virt-usb-key-flat.vmdk
virt-usb-key.vmdk
2. Attach the virtual disk as a virtual USB key to a VM
To connect your virtual USB key to your virtual machine, you need to know whether the virtual machine uses an USB 3.0 / 3.1 controller (XHCI) or an USB 2.0 controller (EHCI).
As you can see, in our case, we have a virtual machine on Windows 10.
This therefore uses an USB version 3.0 / 3.1 controller.
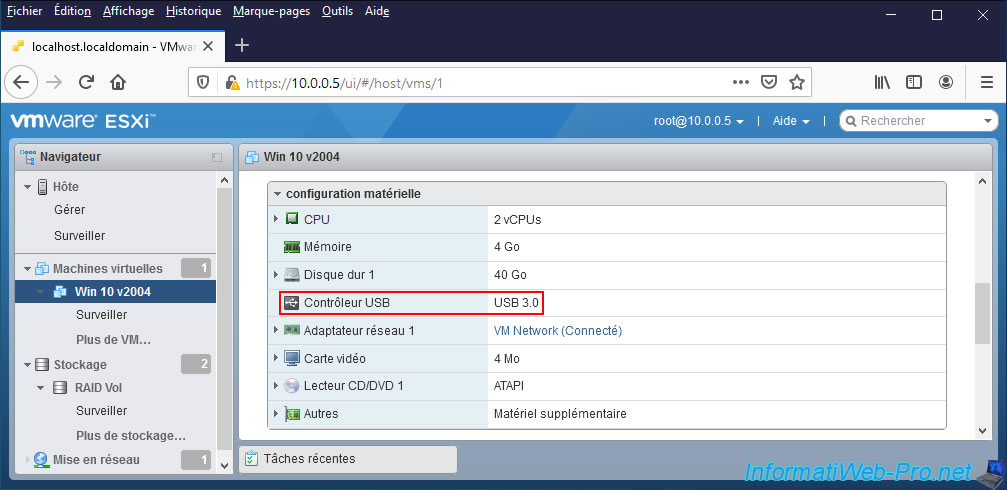
Click on "Edit", then go to : VM Options -> Advanced.
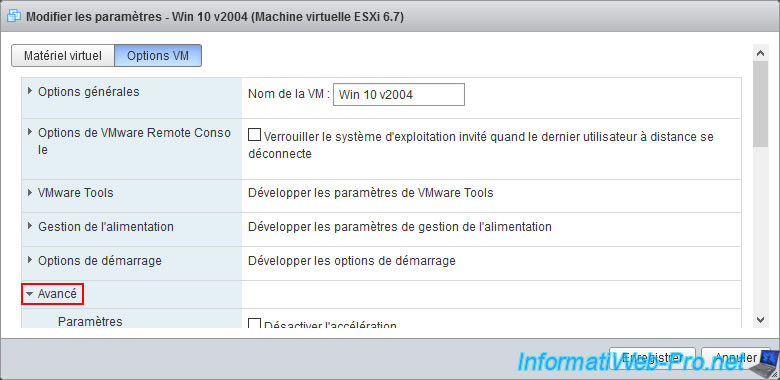
Then, click on : Edit configuration.
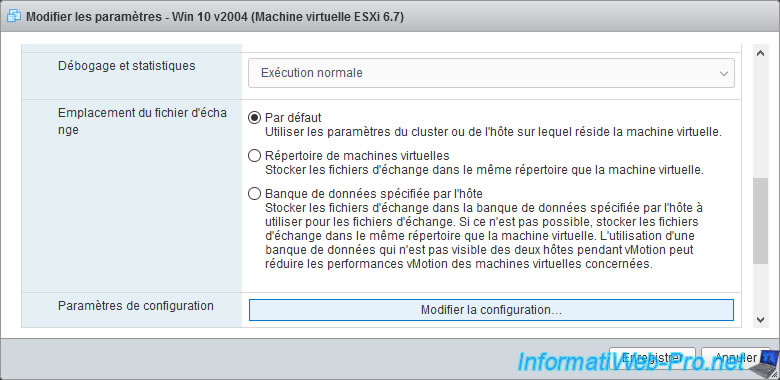
In the "Configuration Parameters" window, enter the keyword "xhci" (if your VM uses an USB 3.0 / 3.1 controller) or "ehci" (if your VM uses an USB 2.0 controller).
If you entered the correct keyword, you should see the "usb_xhci.pciSlotNumber" (USB 3.0 / 3.1) or "ehci.pciSlotNumber" (USB 2.0) key.
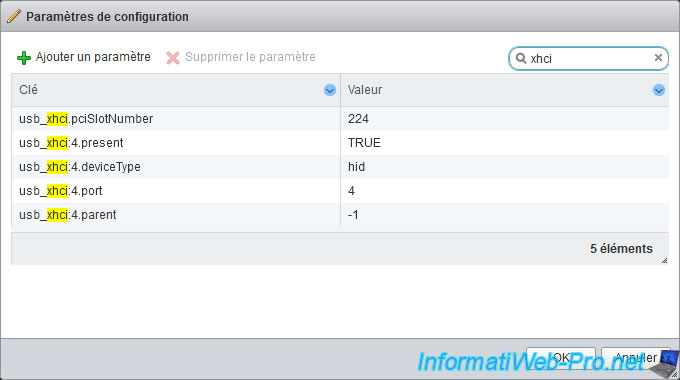
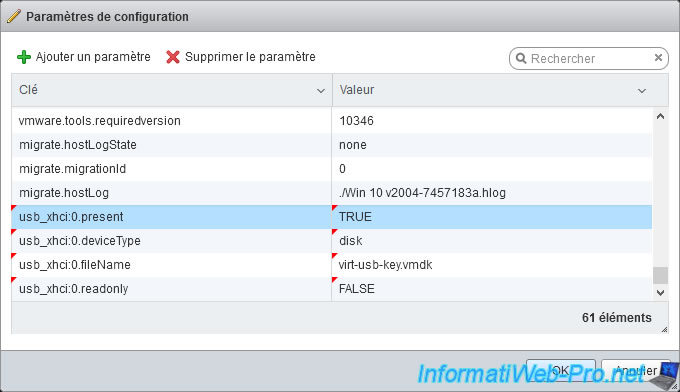
Once you've spotted whether you should use the "usb_xhci" or "ehci" keyword, clear the contents of the search box so that the entire list reappears, then add the corresponding lines below.
In the case of USB 3.0 / 3.1, add these lines :
Plain Text
usb_xhci:0.present			TRUE
usb_xhci:0.deviceType		disk
usb_xhci:0.fileName		virt-usb-key.vmdk
usb_xhci:0.readonly		FALSE
In the case of USB 2.0, add this :
Plain Text
ehci:0.present			TRUE
ehci:0.deviceType		disk
ehci:0.fileName		virt-usb-key.vmdk
ehci:0.readonly		FALSE
Then, click on OK
Warning : as indicated at the start of this tutorial, this no longer works on VMware ESXi 8.0U2.
Indeed, on VMware ESXi 8.0U2, these settings (except the "ehci:0.readonly" setting) will be lost when saving the configuration of your VM.
Which means that your virtual USB key will never appear in your VM's guest OS if your hypervisor is VMware ESXi 8.0U2.
On the other hand, the technique works correctly on VMware ESXi 6.7, 7.0, 7.0U3 and 8.0.
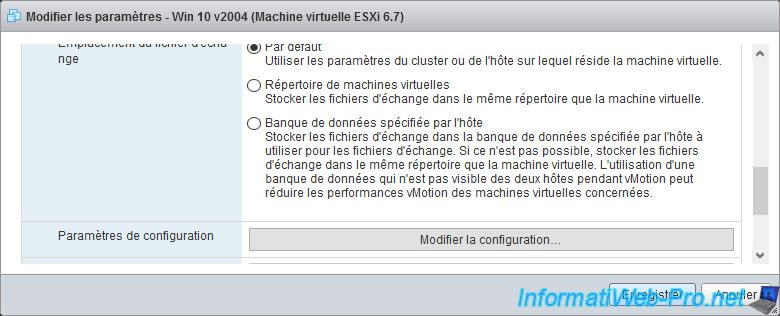
Click on : Save.
3. Virtual USB key visible in the virtual machine
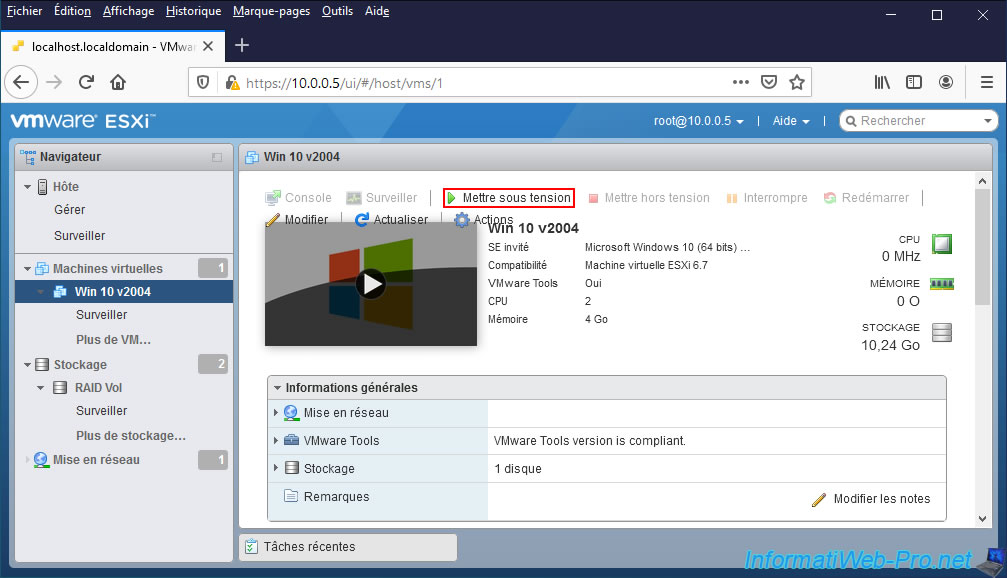
Start the virtual machine by clicking on "Power on".
Once the guest operating system (in this case : Windows 10) starts up, you will see your virtual USB key appear.
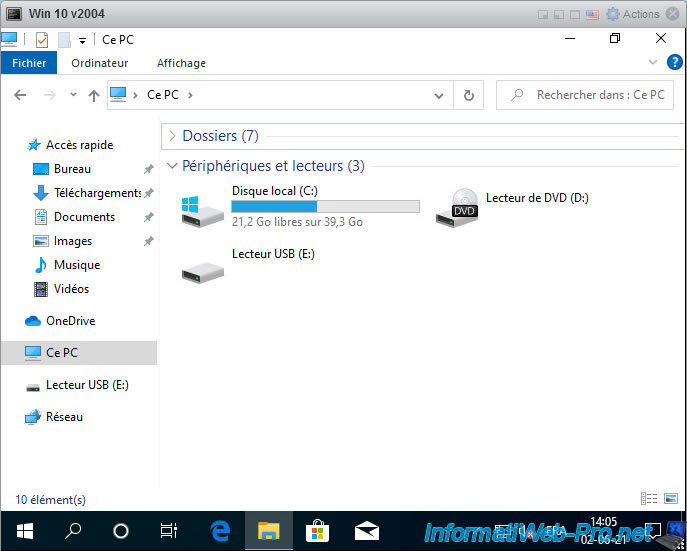
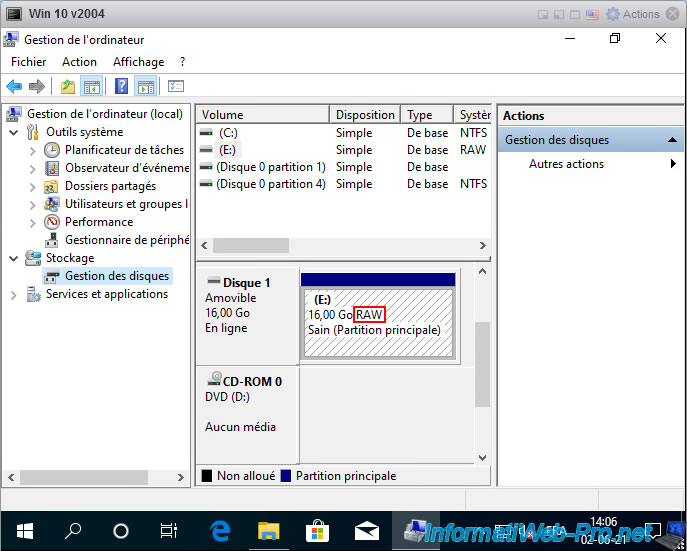
However, it's not yet usable since no file system has been created on it.
Hence the RAW keyword displayed on Windows.
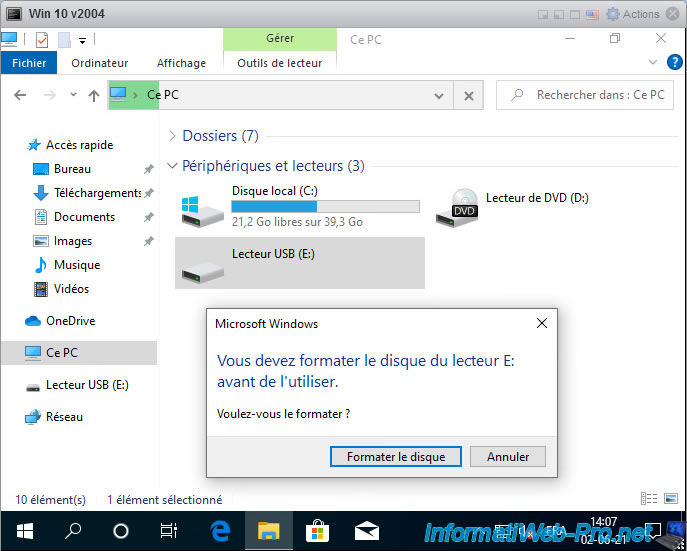
To format it, double-click on it, then click "Format disk".
Or right click "Format" on it.
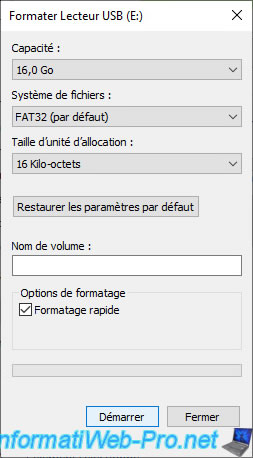
In the "Format USB Drive" window that appears, click on : Start.
Confirm the formatting of this virtual USB key by clicking OK.

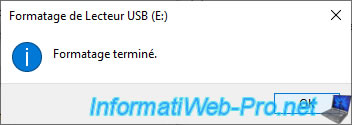
The "Format Complete" message appears.
Now that the USB drive (USB key) has been formatted, you can see that Windows tells you that there is free space available on it.
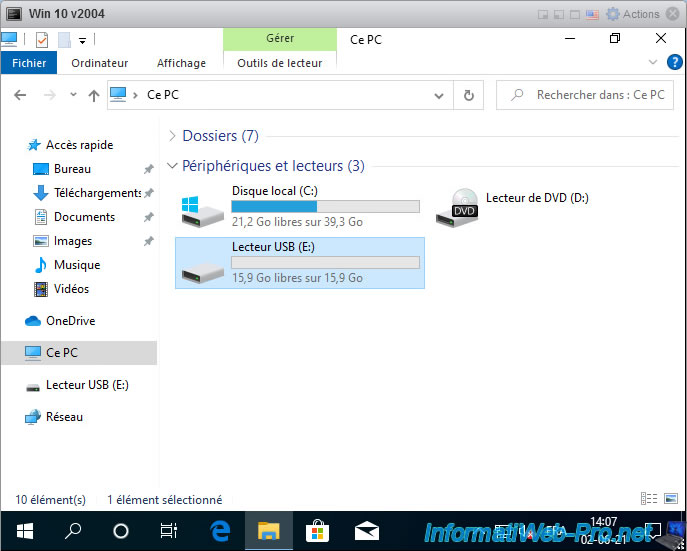
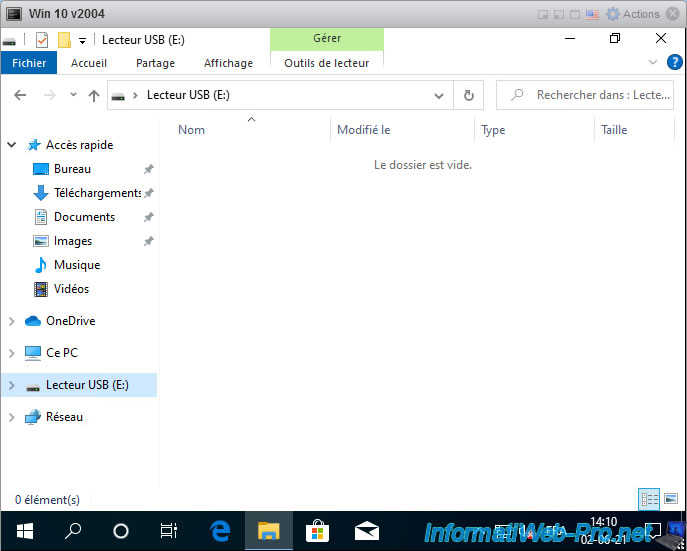
And this one is usable.
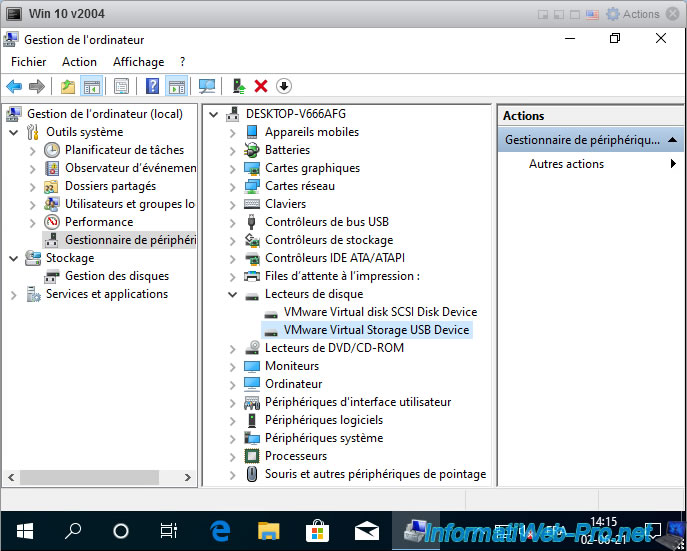
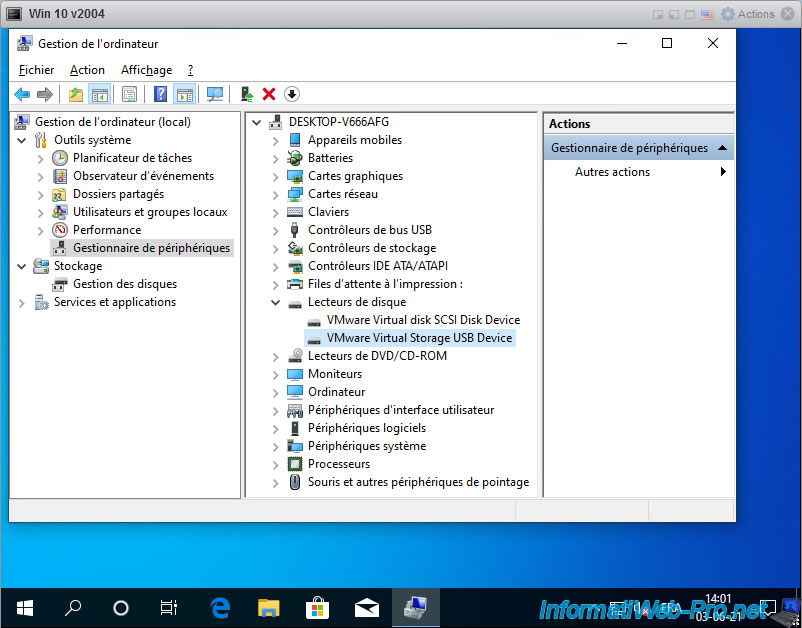
If you go to the "Disk drives" section of Device Manager, you will see that a new "VMware Virtual Storage USB Device" device has appeared.
Which corresponds to your virtual USB key.
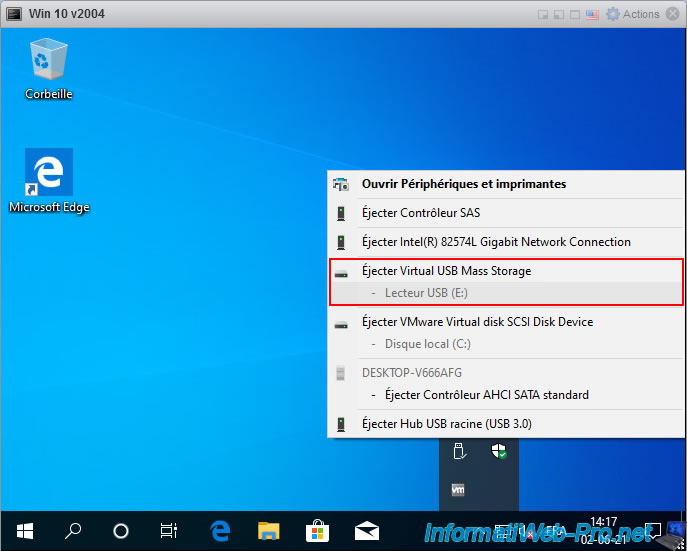
Like any USB key, you can eject it from the Windows taskbar.
Note that this will appear under the name "Virtual USB Mass Storage".
4. Create a bootable virtual USB key
Like any USB key, you can also make it bootable.
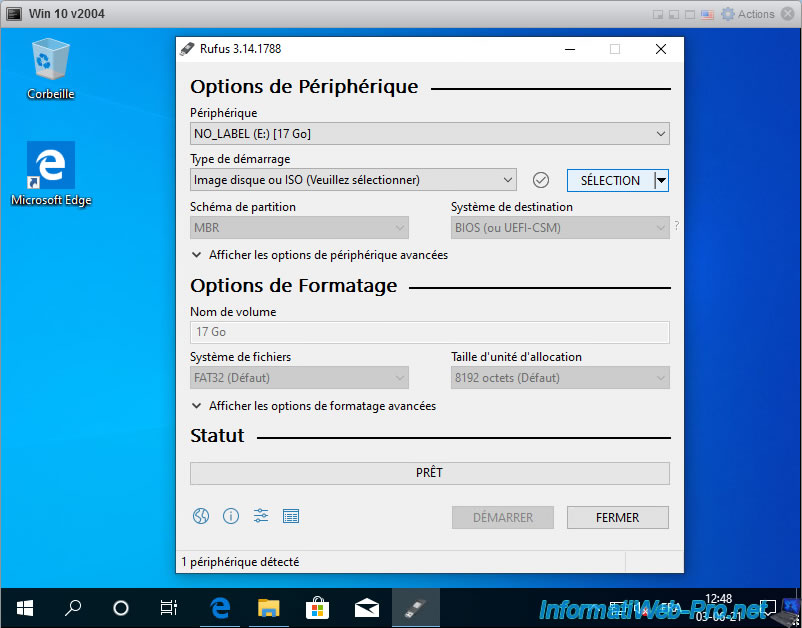
For the example, we are going to create a bootable UBCD USB key using the free program "Rufus".
In the "Device" list, select your virtual USB key, then click on : SELECT.
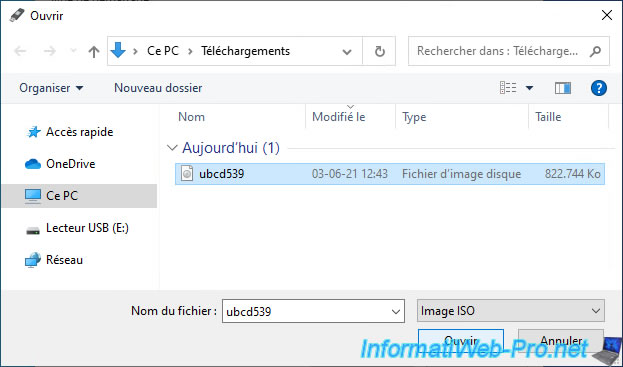
For the example, we select the iso file of UBCD.
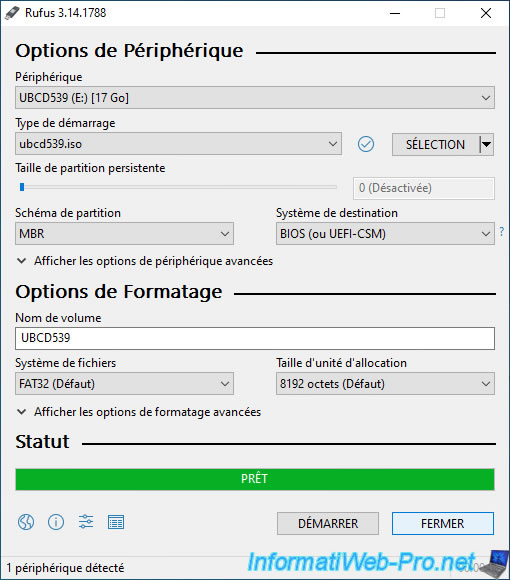
Then, we click on start.
As expected, Rufus turns our virtual USB key into a bootable virtual USB key.
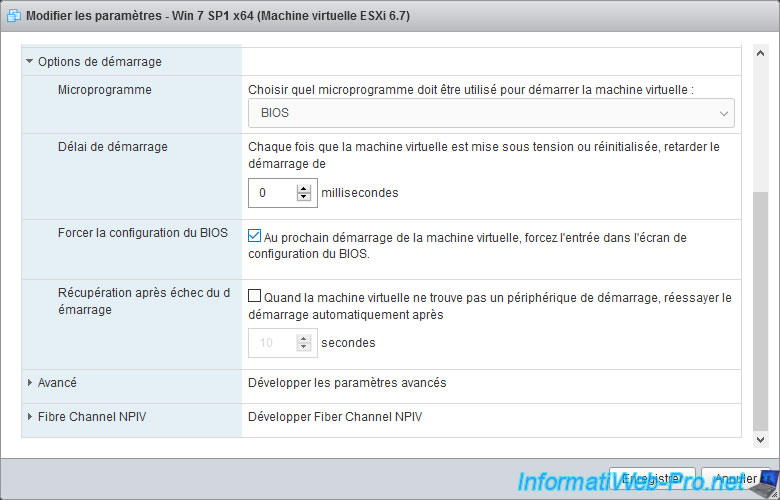
Power off the virtual machine and check the "The next time the virtual machine boots, force entry into the BIOS setup screen" box.
Note that in our case, our virtual machine uses a BIOS and not an EFI firmware. This is important because the boot manager that we are going to use is only compatible with BIOS.
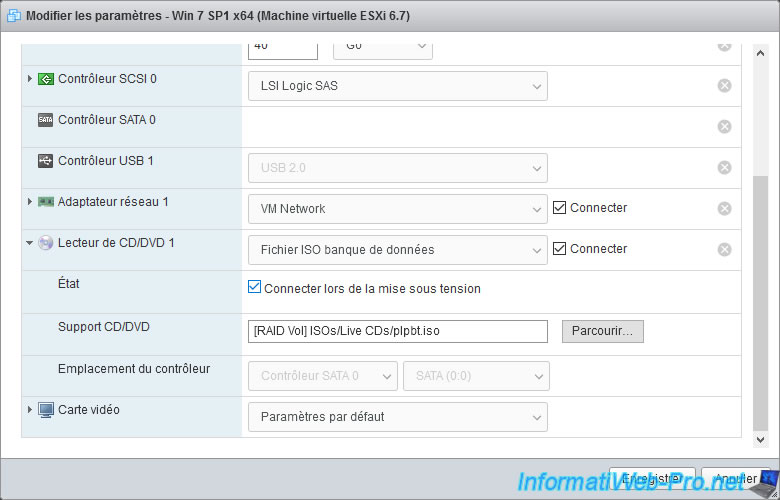
Download "Plop Boot Manager 5", unzip the downloaded zip file and store the "plpbt.iso" file which is there in one of your datastores.
Then, select this ISO file for your virtual machine's CD/DVD drive and make sure the "Connect" and "Connect at power on" boxes are checked.
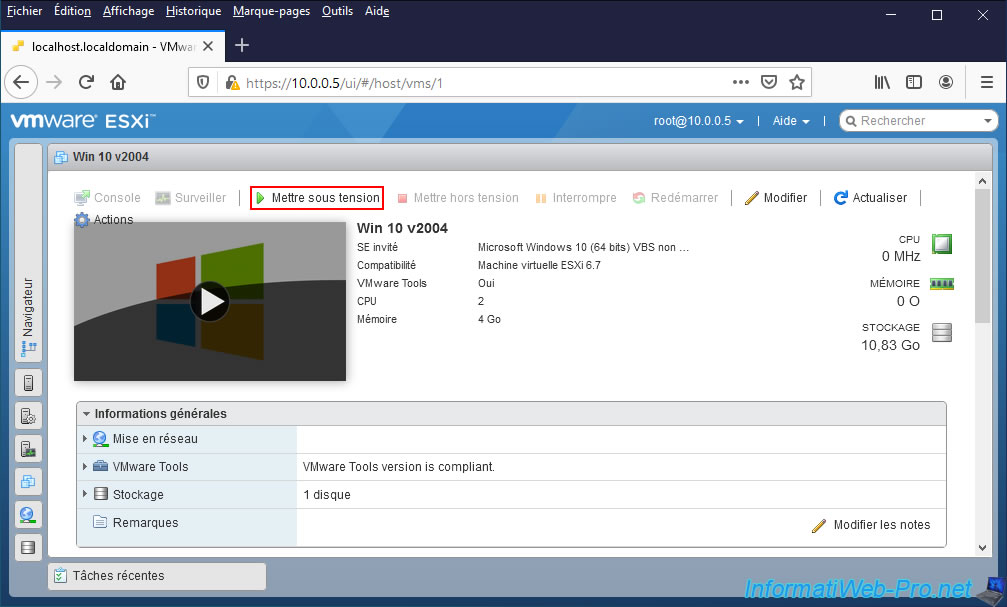
Now, start your virtual machine by clicking on "Power on".
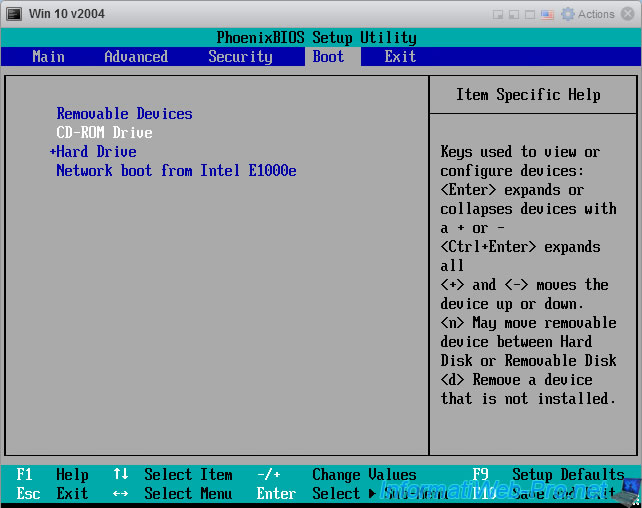
As expected, the BIOS (PhoenixBIOS) of your virtual machine appears.
In the "Boot" tab, select the "CD-ROM Drive" device and press + to move it to the top of the list.
Then, press "F10" to save changes and exit BIOS (as shown at the bottom of the screen).
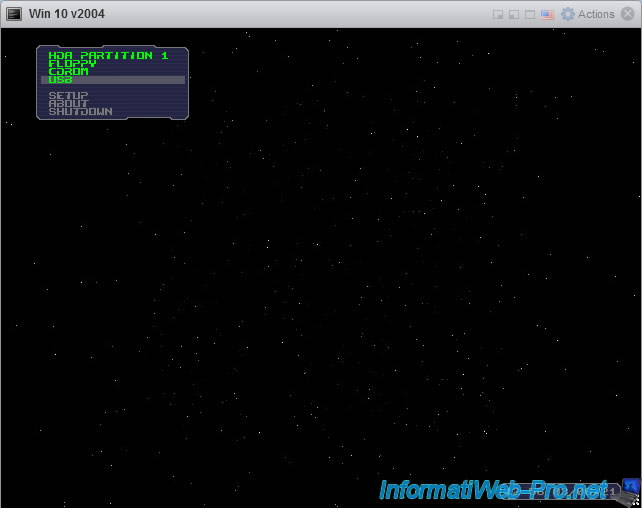
Then, your virtual machine will automatically start on the "Plop Boot Manager" boot manager thanks to the "plpbt.iso" file inserted in the CD/DVD drive of the virtual machine.
Select the "USB" boot option with the arrow keys and press Enter to boot from it.
Note : if an error appears, make sure your virtual machine is using an USB 2.0 controller. Indeed, USB 3.0 / 3.1 is not supported by this boot manager.
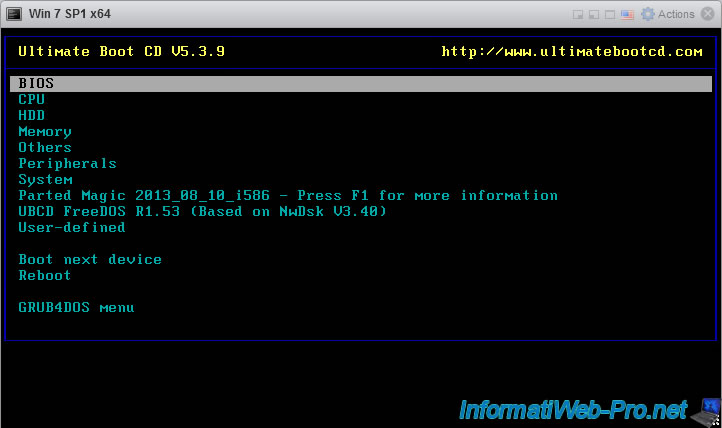
As expected, our virtual machine starts up on Ultimate Boot CD which is on our virtual USB key.
5. Automatic change of the virtual USB key identifier (ID)
Although this trick can be handy in several cases, it has a very slight flaw.
This virtual USB key has an identifier (ID) which is not fixed. In other words, its unique identifier will change each time the virtual machine is started.
This can be a problem if you use a program that targets a specific device using this identifier (which must be very rare).
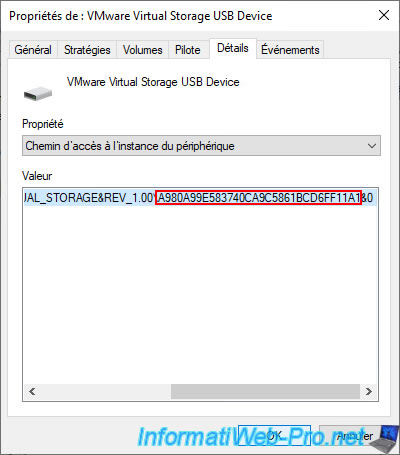
To check it, select the "VMware Virtual Storage USB Device" device in the device manager and right click "Properties" on it.
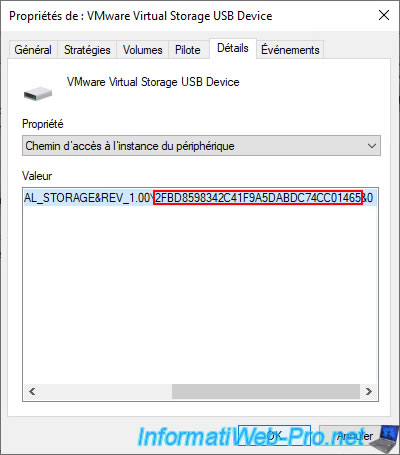
Go to the "Details" tab and select "Device instance path".
At the end of the value, you can see an identifier in hexadecimal format.
Shut down the virtual machine, and then after the virtual machine is powered off, start it again.
Go back to the same place using the device manager and you will see that the displayed identifier has changed.
Share this tutorial
To see also
-
VMware 4/14/2023
VMware ESXi 6.7 - Best practices for creating a VM
-
VMware 2/17/2023
VMware ESXi 6.7 - Configure your virtual machines settings
-
VMware 6/2/2023
VMware ESXi 6.7 - Connect a smart card reader to a VM
-
VMware 10/19/2022
VMware ESXi 6.7 - DirectPath I/O (PCI passthrough)

You must be logged in to post a comment