- RAID
- 29 April 2022 at 11:35 UTC
-

- 1/3

The RAID technology allows you to increase the performance of your storage server and/or your computer (for the storage), but also to benefit from the fault tolerance.
This varies depending on the RAID level you have chosen.
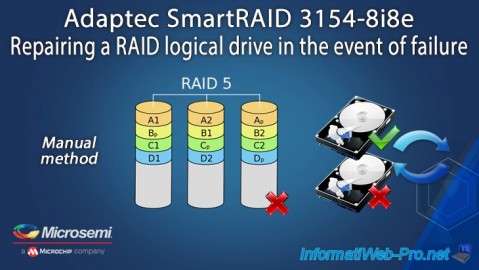
Info : we used the RAID 5 (Array) volume that we created in our tutorial : Adaptec SmartRAID 3154-8i8e - Create a RAID volume (from ACU).
- Failed hard drive
- Faulty hard drive status in Microsemi Adaptec configuration tool
- Change the logical drive state to : degraded
- Logical device status in the Microsemi SmartRAID configuration tool
- Errors displayed in maxView Storage Manager when a physical device fails
- Replacing the physical device
- Changes visible in the configuration tool of your Microsemi Adaptec SmartRAID controller
- Correct the boot order of your computer
- Starting Windows
- Reconstruction visible in maxView Storage Manager
- Background parity initialization
1. Failed hard drive
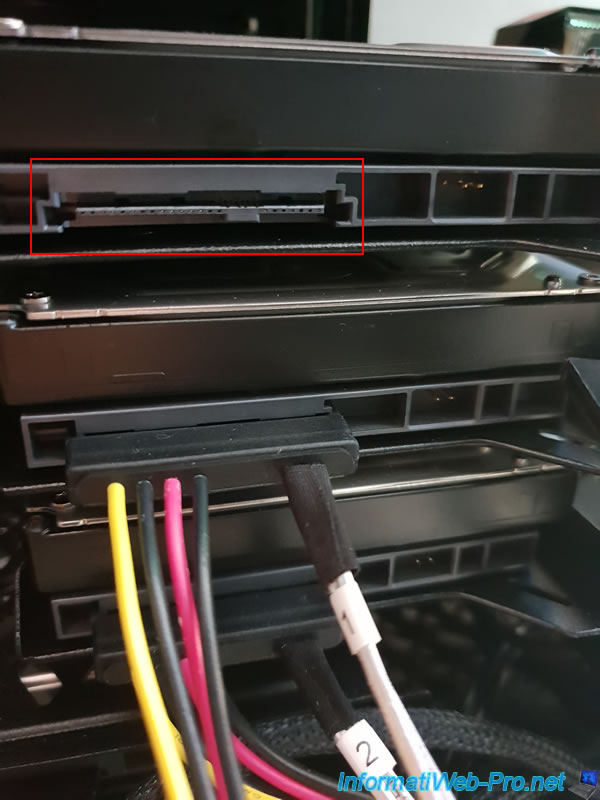
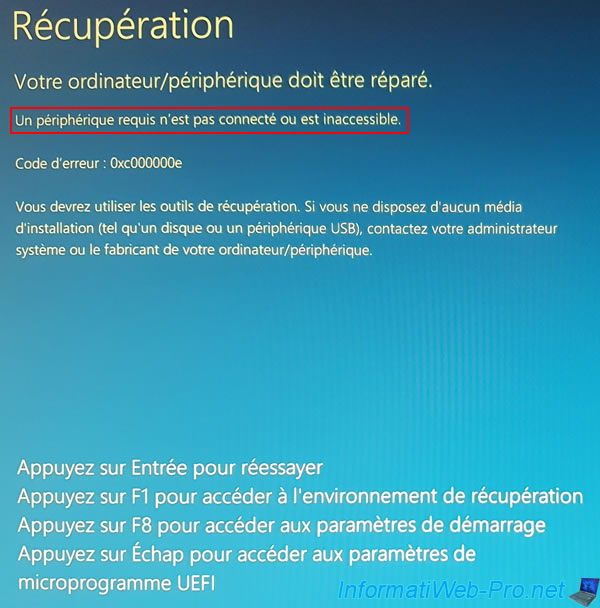
For the tutorial, we simulated a failure of a hard drive in our array by unplugging one of the hard drives.
Precisely, it's the hard drive that was connected with cable number 0.
When starting the computer / server, this message will appear :
Plain Text
Press <Ctrl><H> to change LD(s) of LOOSE CABLE state to DEGRADED state.
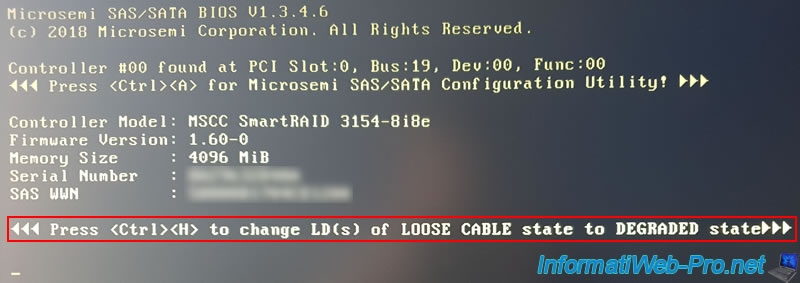
A few seconds later, the rest will be displayed.
If you have not pressed these keys, the affected logical device(s) will not be available and the status displayed will be : Drive Improperly Connected.
Additionally, this will be displayed :
Plain Text
No Int 13 Drives to support.
BIOS not installed!
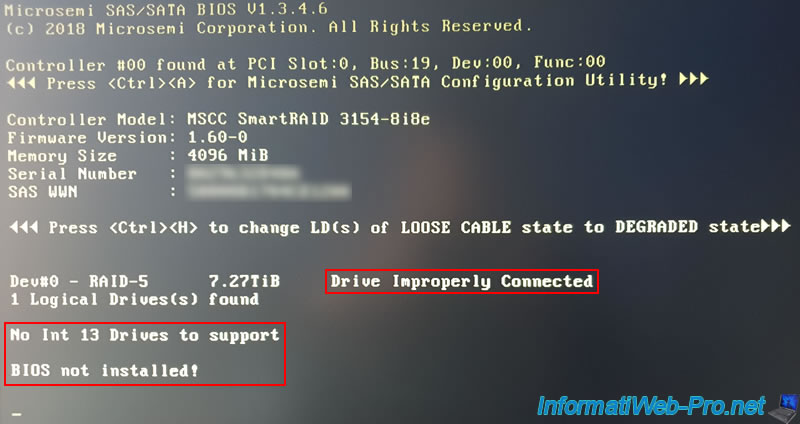
In this case, the logical device concerned will therefore not be available.
Since, in our case, Windows is installed on our logical device, our computer therefore can't start at the moment.
2. Faulty hard drive status in Microsemi Adaptec configuration tool
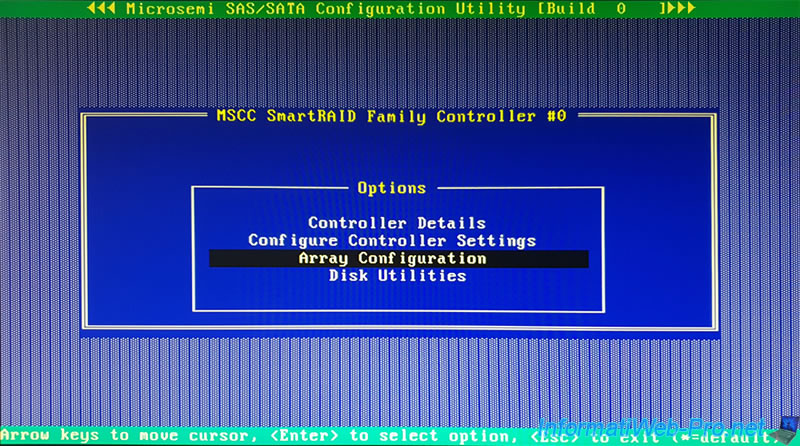
When your computer starts up, press the "CTRL + A" keys (on a QWERTY keyboard) or "CTRL + Q" (on an AZERTY keyboard) to enter the configuration tool of your Microsemi Adaptec SmartRAID controller.
Once in this Microsemi configuration tool, go to : Array Configuration.
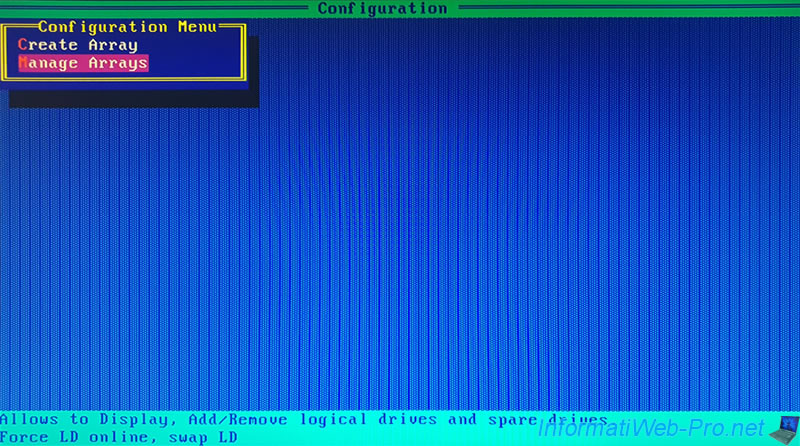
Select "Manage Arrays" and press Enter.
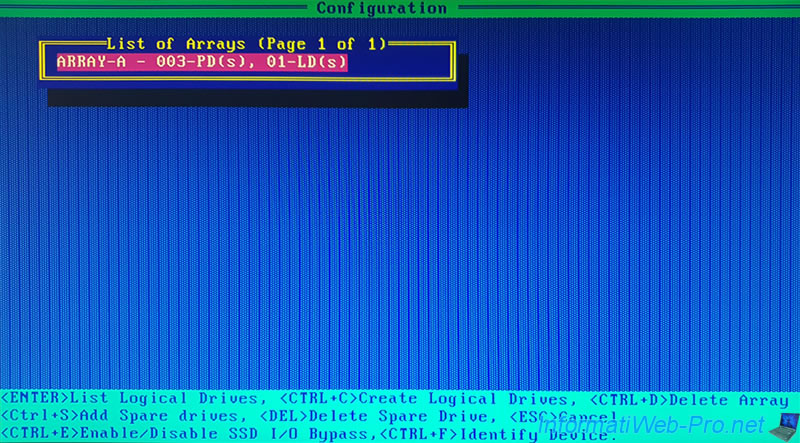
Select the Array where your "damaged" logical drive is located and press Enter.
Select your "damaged" logical drive and press Enter.
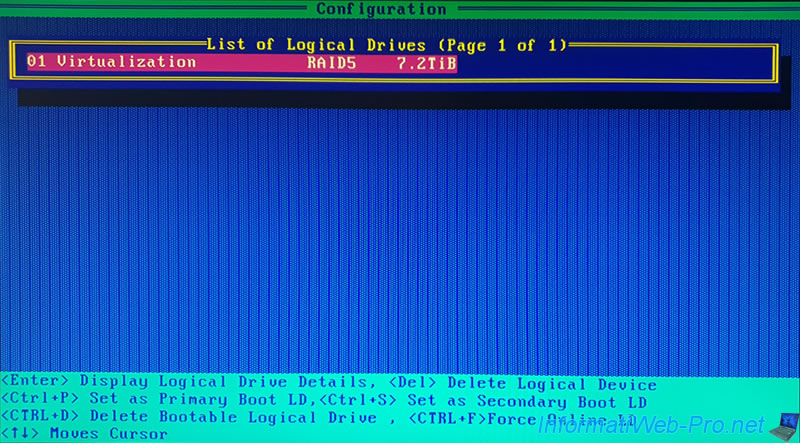
As you can see, at the moment, the status of this logical drive is : Drive Improperly Connected.
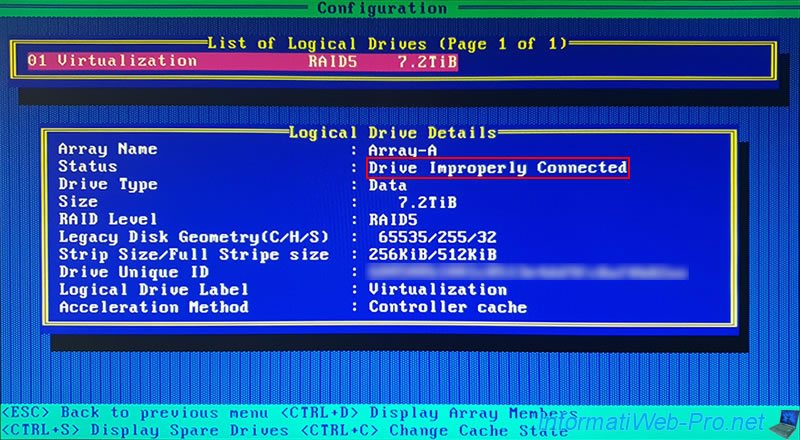
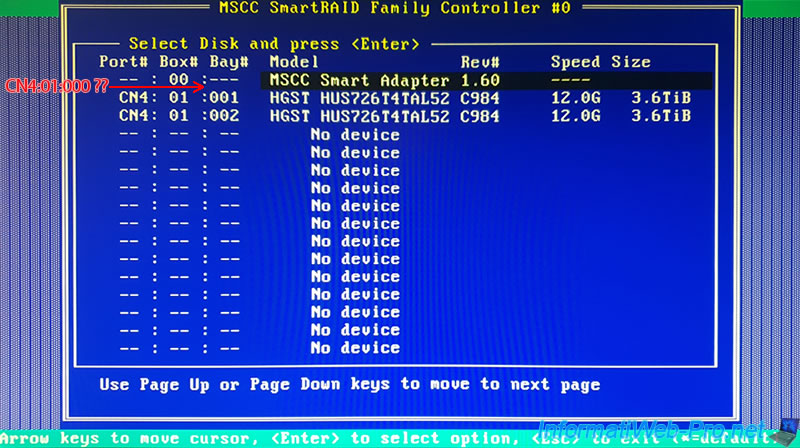
If you press the "CTRL + D" keys (as shown at the bottom of the screen), you will be able to display the list of affected hard drives.
As you can see, the physical disk connected to location "CN4:01:00" is faulty (Failed) and is therefore no longer recognized by your Microsemi Adaptec controller.
For information :
- the 1st part of the location (CN4) corresponds to the number of the physical port on your Microsemi Adaptec controller
- the 3rd part of the location (00) corresponds to the number indicated physically on the cable on the side of the hard drive concerned
Note : to hide this block, press the "Esc" (Escape) key once.

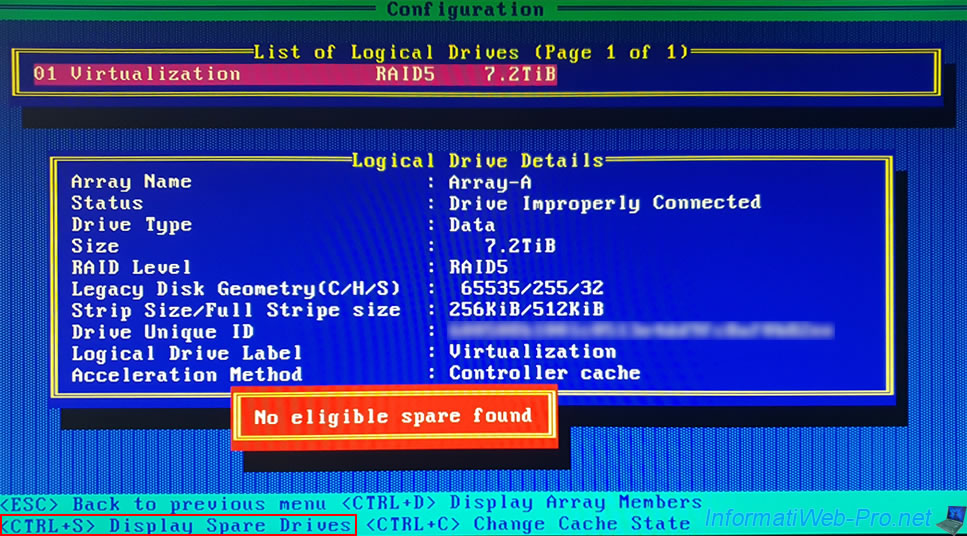
Just for information : you can also display the list of hard disks defined as Spare for this array by pressing the "CTRL + S" keys.
However, in our case, there is none. This therefore produces this "Drive Improperly Connected" status instead of an automatic reconstruction thanks to a physical disk configured as Spare.
Return to the main menu of this Microsemi SmartRAID configuration tool by repeatedly pressing the "Esc" key, then go to : Disk Utilities.
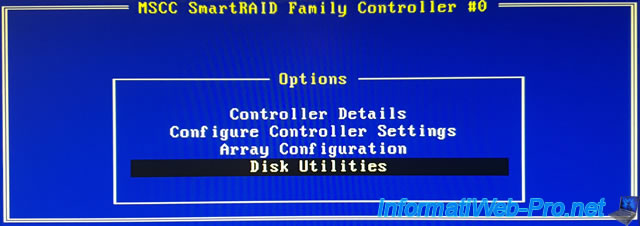
As you can see, the list contains :
- our MSCC Smart Adapter controller
- 2 hard disks "HGST HUS726T4TAL52" of 3,6 TiB
The failed hard disk which was connected to location "CN4:01:000" is therefore not displayed.
3. Change the logical drive state to : degraded
So that the logical drive present on your array is visible by your computer, you must change the state of the logical drive concerned to "Degraded".
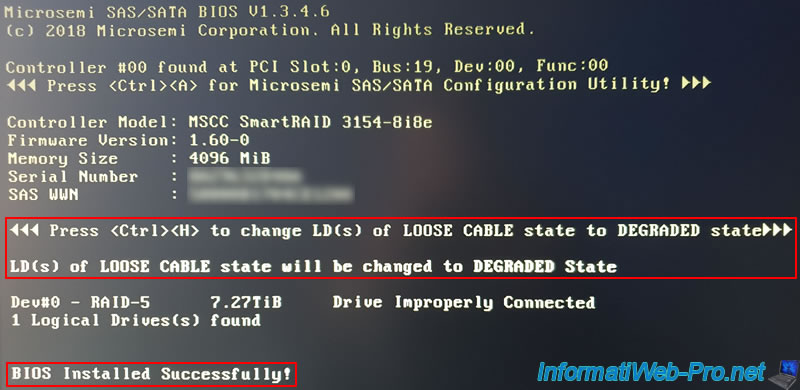
To do this, when starting your computer / server, press the "CTRL + H" keys when this message asks you :
Plain Text
Press <Ctrl><H> to change LD(s) of LOOSE CABLE state to DEGRADED state.
Once you have pressed these 2 keys, this message will appear :
Plain Text
LD(s) of LOOSE CABLE state will be changed to DEGRADED State
In addition, the BIOS of the RAID controller will be installed again when the computer starts up.
This means that you will be able to start your computer again on your logical drive IF it contains an operating system (as is our case).
Note : don't pay attention to the "Drive Improperly Connected" status which continues to display despite pressing the "CTRL + H" keys. This status will be updated here from the next start.
In our case, the operating system on this logical drive starts up without any problem.
Note : if necessary, go back to the BIOS of your motherboard (not that of the Microsemi controller) and adapt the boot order of the latter to boot on your logical drive (if applicable).
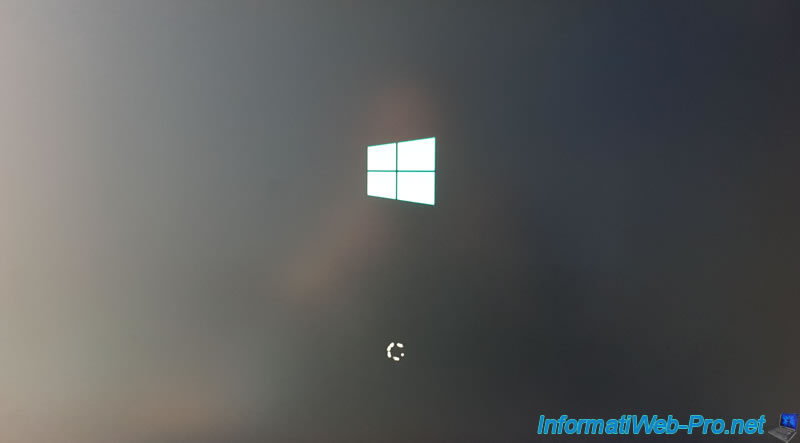
And we come to Windows as expected.

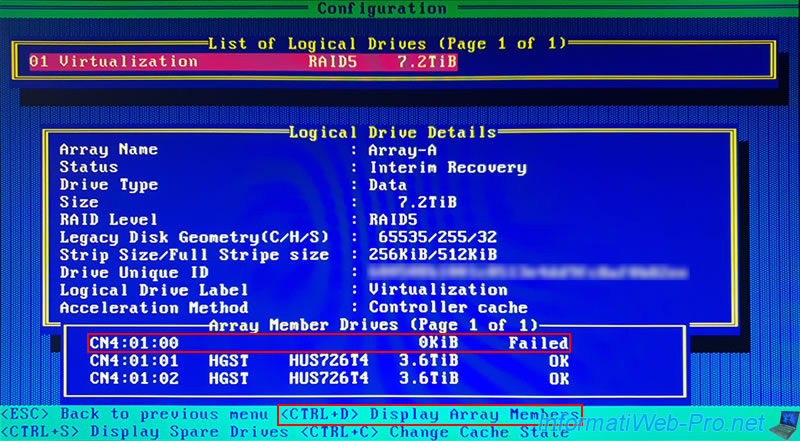
4. Logical device status in the Microsemi SmartRAID configuration tool
If you go back to "Array Configuration -> Manage Arrays -> [Array Name] -> [Logical Drive name]", you will see that the status is now "Interim Recovery".
This means that your logical drive is usable, but performance will be poorer than normal and you may lose your data if the fault tolerance of the chosen RAID level is no longer sufficient for you.
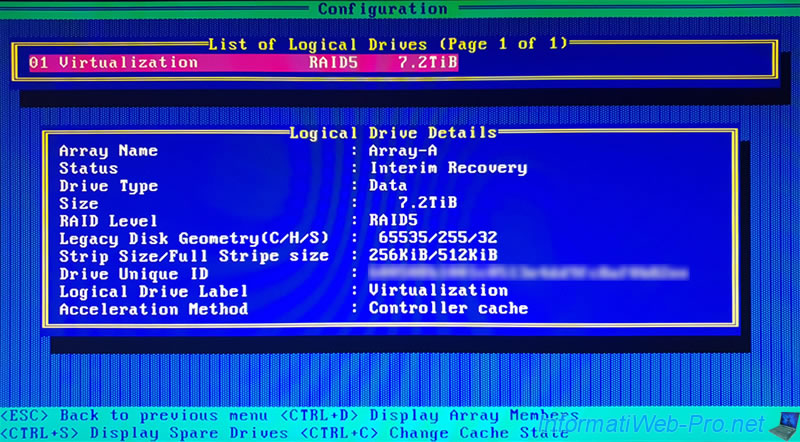
In our case, it's a RAID 5 on 3 hard disks, including 1 which is faulty.
So, we haven't lost any data yet, but losing a second physical drive will cause permanent data loss.
It's therefore not recommended to stay with an "Interim Recovery" status.
Share this tutorial
To see also
-

RAID 4/20/2022
Adaptec maxView Storage Manager v3 - Create a RAID volume
-

RAID 4/8/2022
Adaptec maxView Storage Manager v3 - Download and boot on USB version
-

RAID 4/13/2022
Adaptec maxView Storage Manager v3 - Installation on Linux
-

RAID 4/15/2022
Adaptec maxView Storage Manager v3 - Manage an Adaptec SmartRAID controller on VMware ESXi 6.7
You must be logged in to post a comment