- RAID
- 06 May 2022 at 17:00 UTC
-

- 1/2

When you create a RAID array, you can protect it from failure by setting one or more Spares to it.
When you add a Spare to an array, you can add it as "Dedicated Spare" (as we did in our "Adaptec SmartRAID 3154-8i8e - Automatic reconstruction with a dedicated Hot Spare (Dedicated Spare)" tutorial), but you can also add it as "Auto replace Spare" (which reduces the total time required for rebuilding and calculating parity in the event of a failure of a hard drive in the array).
- Hot Spares System Information
- Adding a physical disk and configuring the activation mode
- Define a physical disk as Spare (via ACU)
- Define a physical disk as Spare (via maxView Storage Manager)
- Display the Spares configured on an array (via ACU)
- Display the Spares configured on an array (via maxView Storage Manager)
- Physical disk associated with an array (Array)
- Informations visible in the web interface : maxView Storage Manager
- Hard disk failure
- Rebuilding the logical drive (visible in ACU)
- Rebuilding the physical disk using the Spare (in case of failure or predicted failure)
- Parity initialization
- Waiting for a replacement of the failed physical disk
- Replacing the failed physical disk
- Spare again available
1. Hot Spares System Information
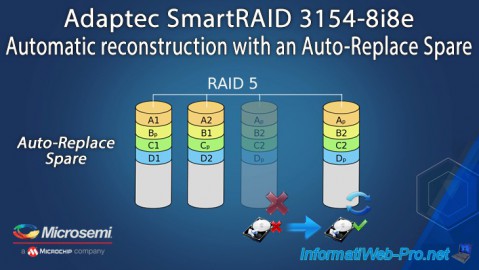
As explained previously, Hot Spares can be defined as "Dedicated Spare" or "Auto-Replace Spare".
In the case of this tutorial, we will configure it as "Auto-Replace Spare", which means that :
- this Hot Spare can protect any logical disk present on the array to which it's linked
- this Hot Spare will be used to rebuild the defective physical disk of the affected array
- when a physical disk in the array to which it's linked fails, the controller will replace the failed physical disk with the Spare.
The defective disk will therefore be configured as a Spare and the Spare will simply become a permanent member of your array. - the rebuilding of the defective disk will therefore be carried out on the disk that you added as Spare, but which became a permanent member of the array when the failure was detected by your controller

In summary, the limitations of Hot Spares are :
- Hot Spares can protect any redundant logical drive (= all RAID levels, except RAID 0 which is not redundant)
- the physical disk you want to use as Spare must be free (not used by an array or other)
- its size must be equal to or greater than that of the smallest of the array you want to protect
- the interface (SAS / SATA) of the physical disk you want to use as a Hot Spare must be the same as that of the cluster to be protected
- and more
For more information about these limitations, refer to our previous tutorial : Adaptec SmartRAID 3154-8i8e - Automatic reconstruction with a dedicated Hot Spare (Dedicated Spare).
2. Adding a physical disk and configuring the activation mode
The procedure is identical to the one we used for "Dedicated Spare" type Spares.
So, refer to steps 2 to 5 included.
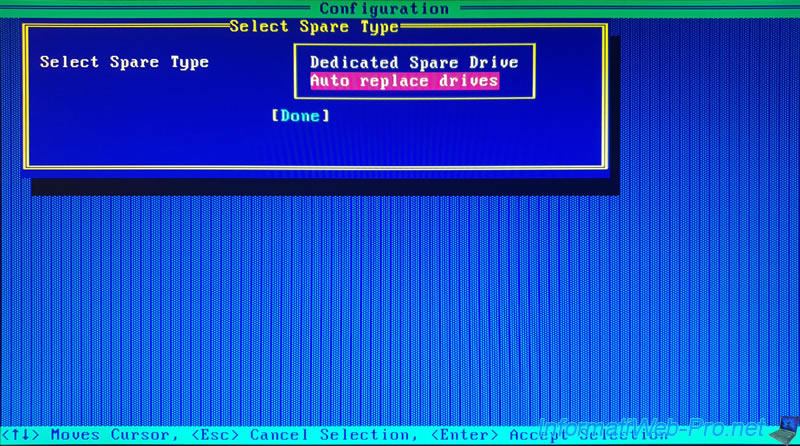
3. Define a physical disk as Spare (via ACU)
To add a physical disk as an "Auto-Replace Spare", the procedure is identical to step 6 of our previous tutorial, except that you will need to select "Auto-Replace Spare" after selecting the desired physical disk(s).
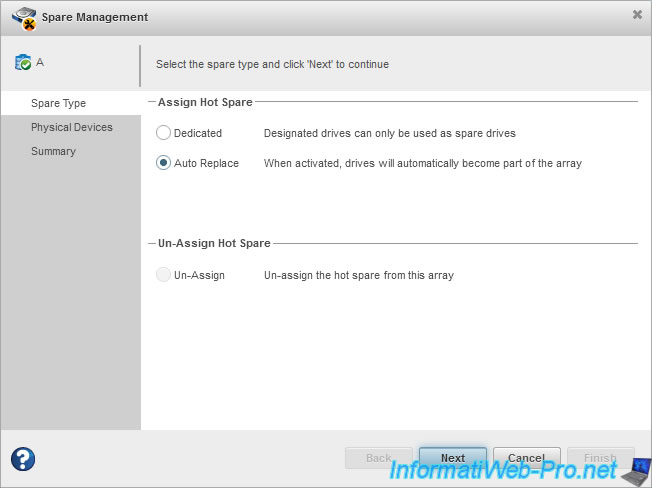
4. Define a physical disk as Spare (via maxView Storage Manager)
To define a physical disk as Auto Replace Spare via the maxView Storage Manager web interface, the procedure is identical to step 7 of our previous tutorial, except that you will have to select "Auto Replace".
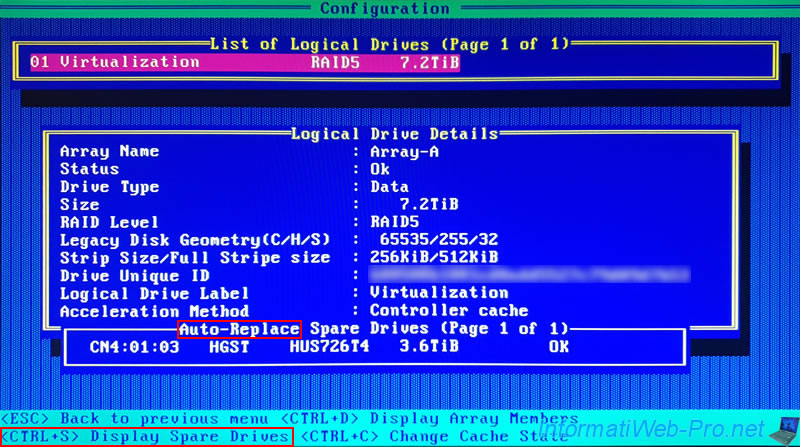
5. Display the Spares configured on an array (via ACU)
To find out which Spares have been added to your cluster, go to "Array Configuration -> Manage Arrays -> [Array name] -> [Logical drive name]".
Press the "CTRL + S" keys and you will see the list of "Auto-Replace Spare Drives" displayed.
6. Display the Spares configured on an array (via maxView Storage Manager)
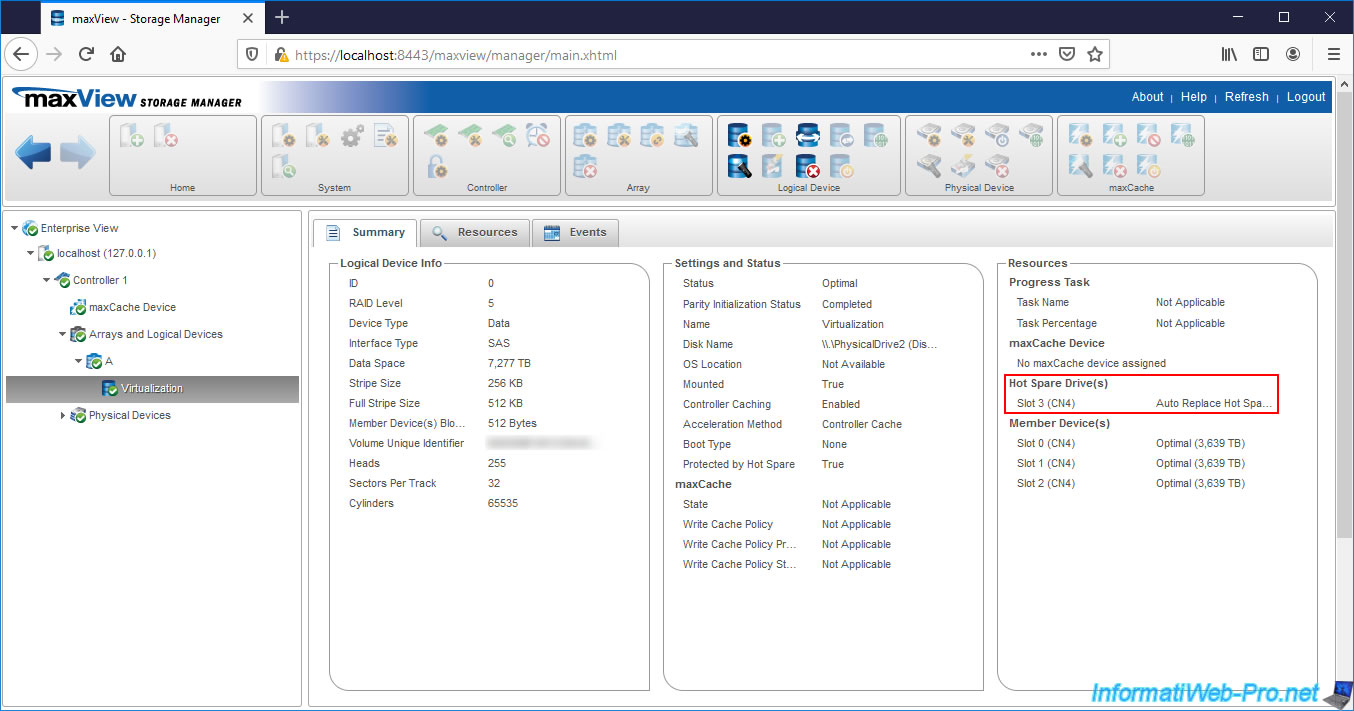
If you want to verify that your array is protected by your Spare using the "maxView Storage Manager" web interface, select your logical drive and you will see it appear in the "Hot Spare Drive(s)" section as "Auto Replace Spare".
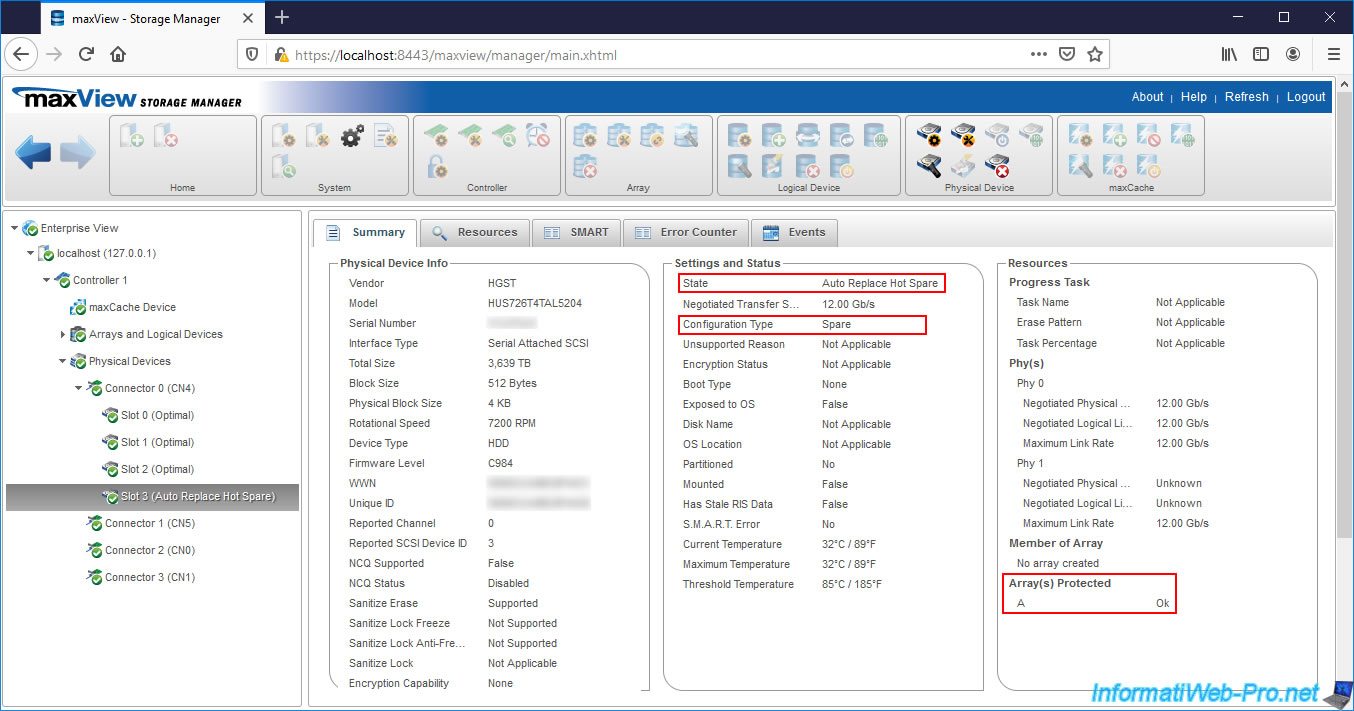
If you select the physical disk defined as Spare, you will see that its status is "Auto Replace Hot Spare", that its configuration type is "Spare" and that it protects your array "A".
7. Physical disk associated with an array (Array)
If you look in the "Disk Utilities" section of ACU, you will see that the physical disk defined as Spare belongs to your array.
As described in step 10 of our previous tutorial.
8. Informations visible in the web interface : maxView Storage Manager
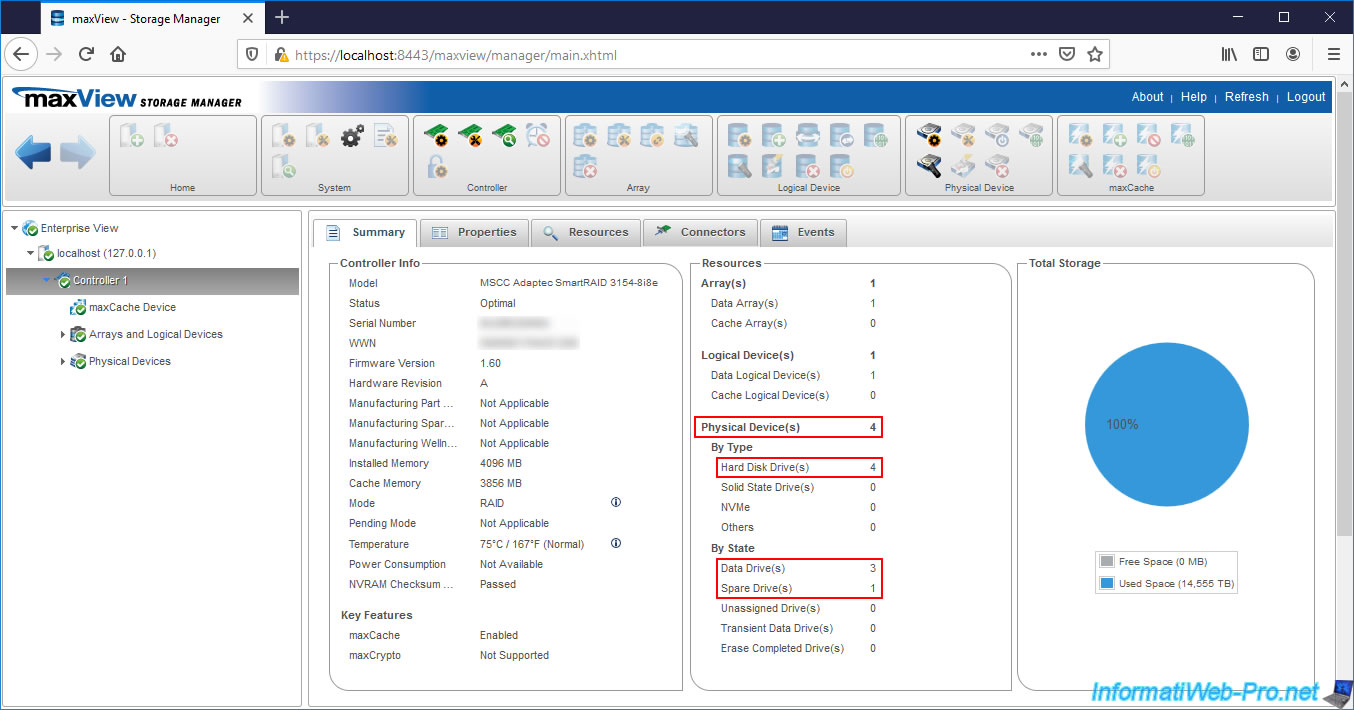
If you select your Microsemi Adaptec SmartRAID controller on the left, you will see that it has : 4 hard disk drives, 3 of which are for storage (Data) and another as Spare.
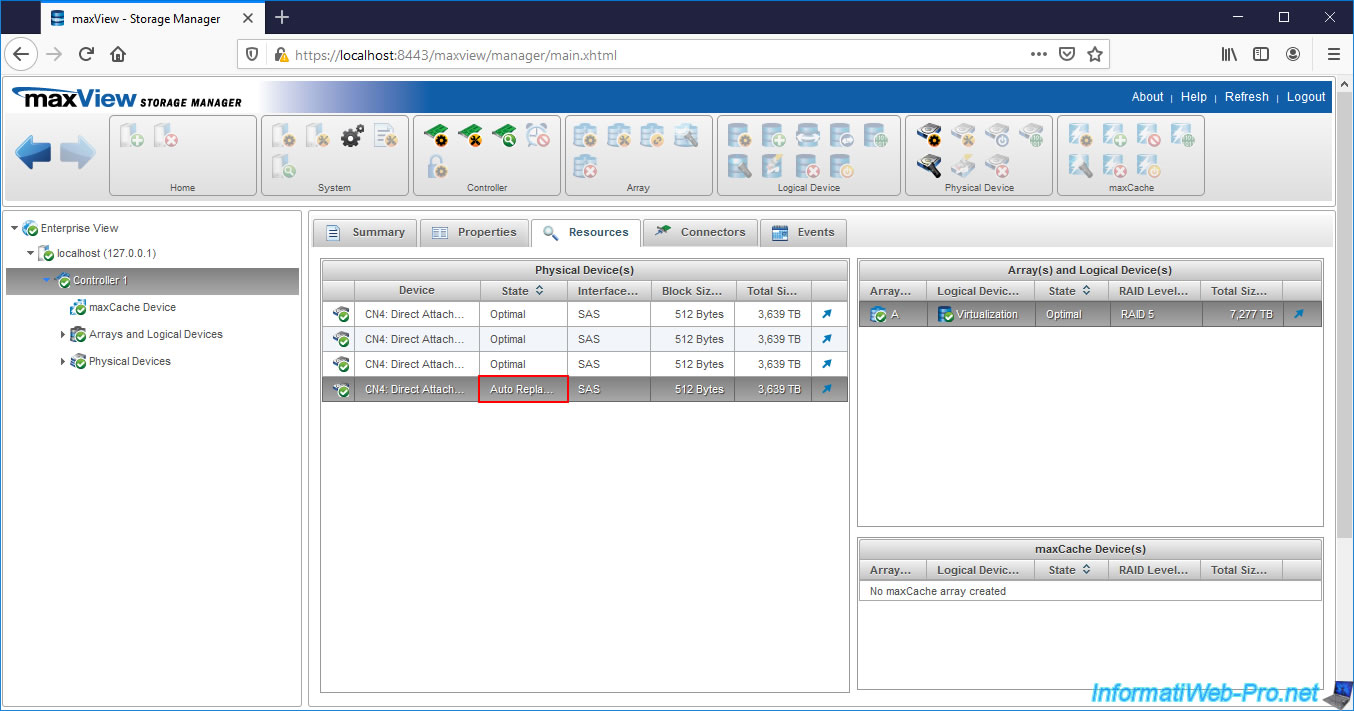
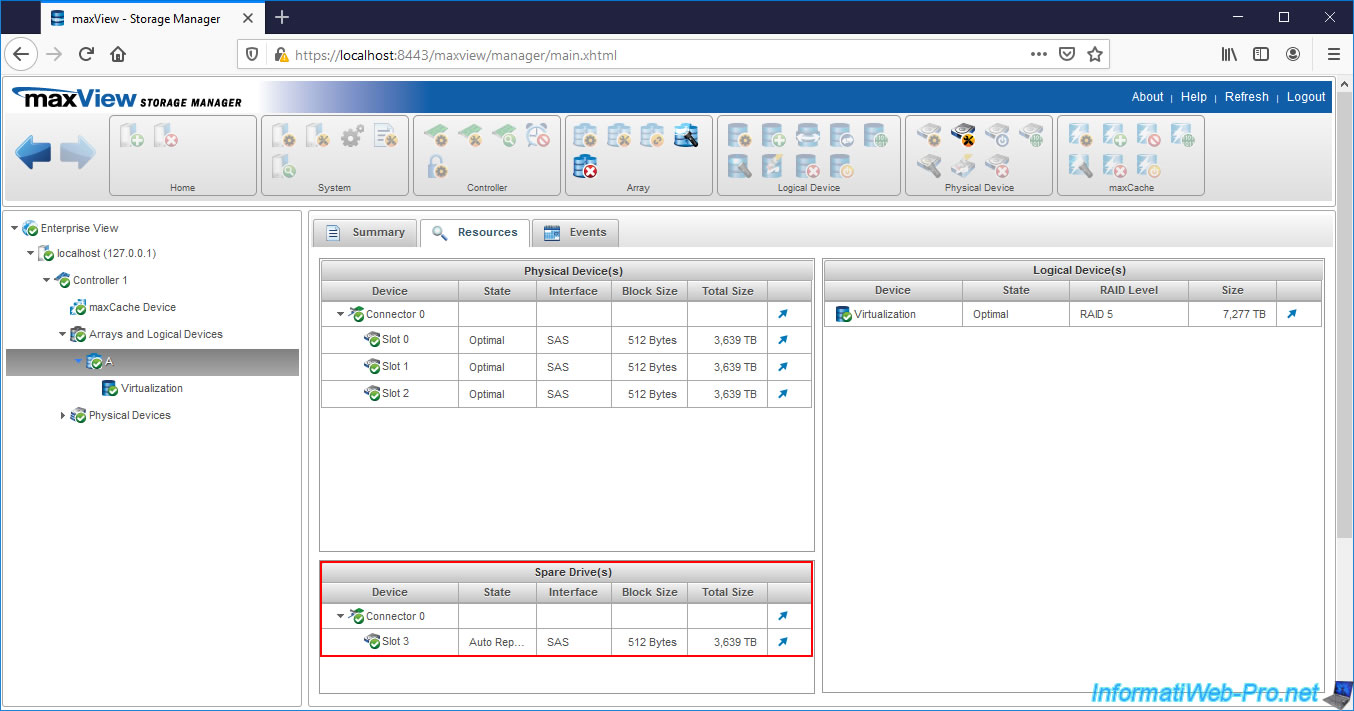
If you look in the "Resources" tab of your Microsemi Adaptec SmartRAID controller, you will see that the status of the disk is set as Spare is "Auto Replace Spare".
If you select the array protected by this Spare, you will see that the Spare Rebuild Mode is : Auto Replace.
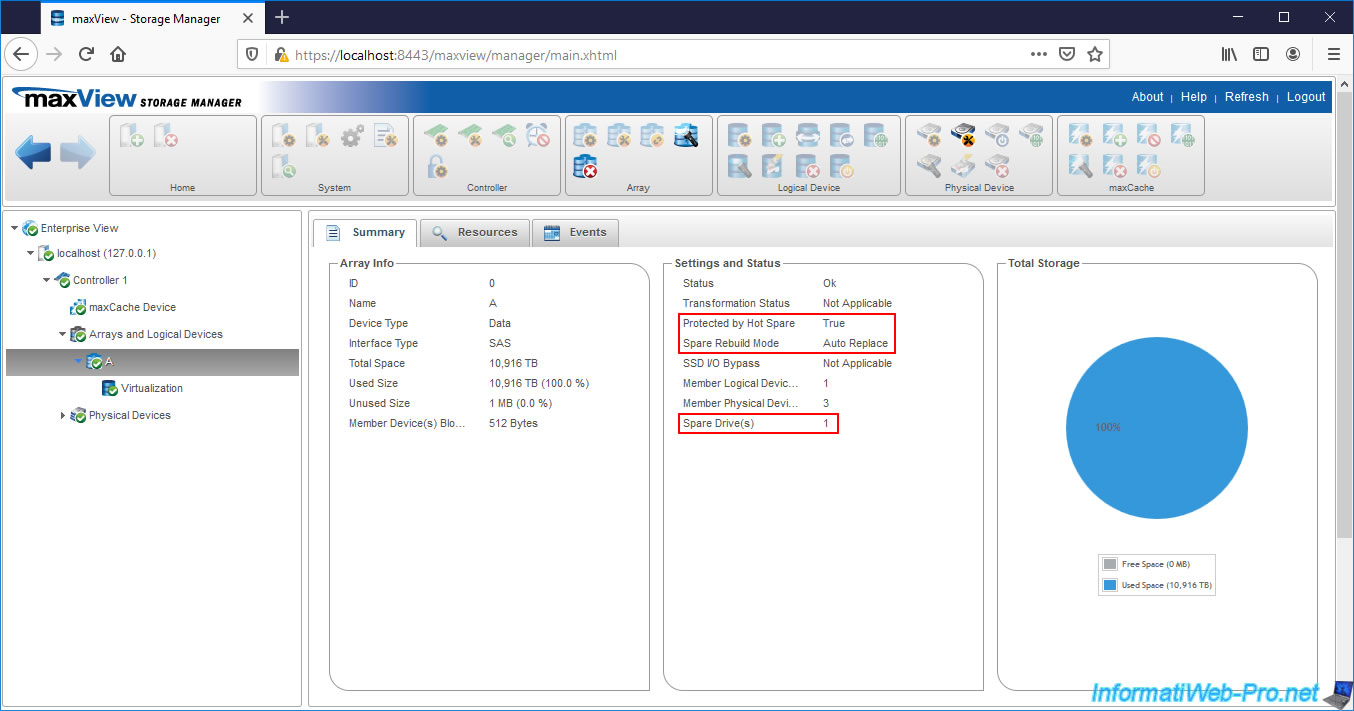
If you look in the "Resources" tab of your array, you will find your Spare in the "Spare Drive(s)" list.
This indicates that it's configured as a Spare for this cluster, but is on standby since all members (physical disks) of your array are in optimal state.
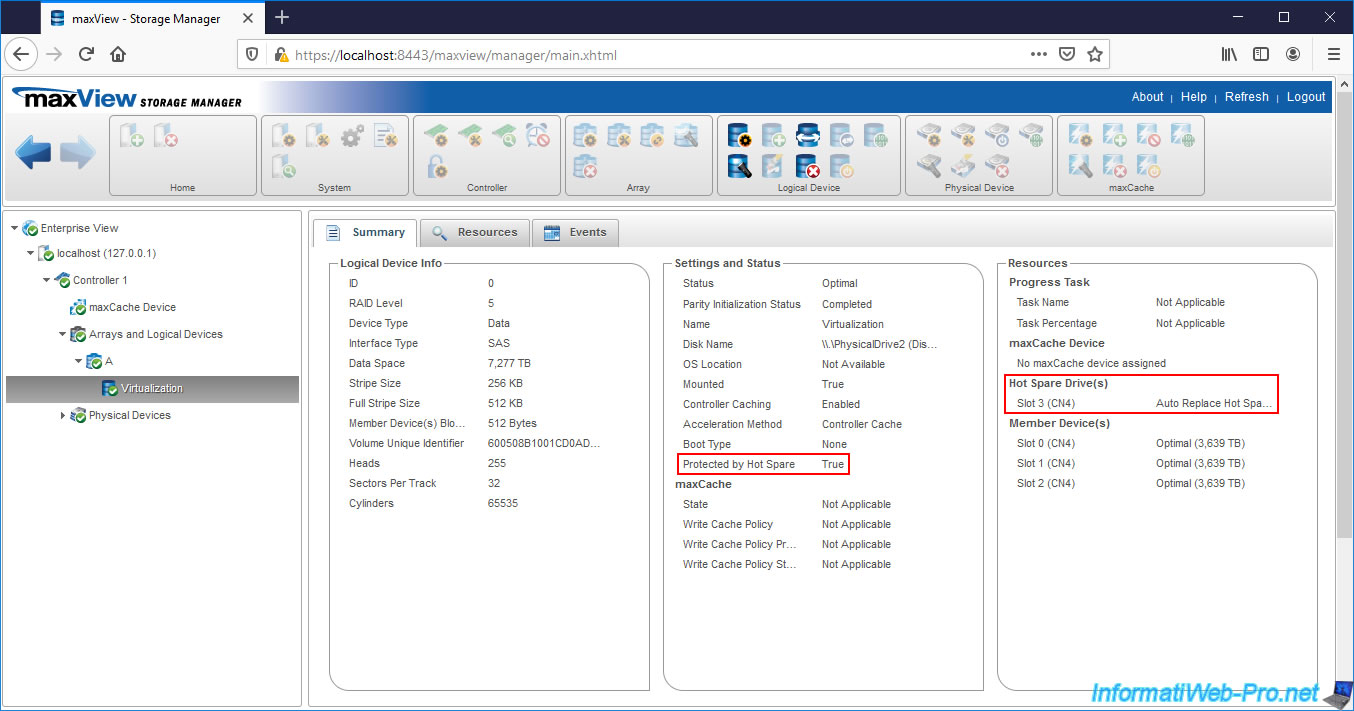
If you select a logical drive of the array protected by your Spare, you will see that it's protected by a Hot Spare.
In the right column, you will also see on which port it's connected (in our case : Slot 3 - CN4) and what type of Hot Spare it is : Auto Replace Hot Spare.
9. Hard disk failure
In the event of a hard drive failure, the error message (Drive Improperly Connected) will be identical to that displayed with a Dedicated Spare.
When you start your computer, an error message will appear asking you to press CTRL + H to set your logical drive status to "degraded".
Once you have pressed these 2 keys, the status will automatically be : Rebuilding.
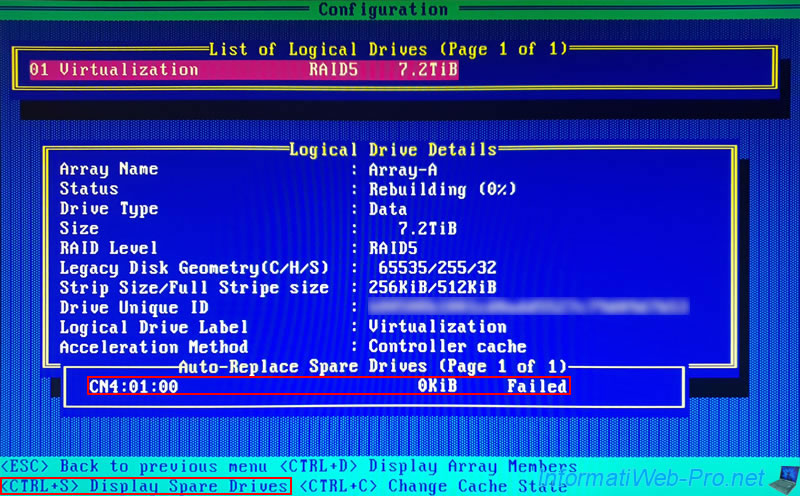
10. Rebuilding the logical drive (visible in ACU)
If you go to the configuration tool of your Microsemi Adaptec SmartRAID controller when starting your computer / server, you will see that your logical drive is being rebuilt (Rebuilding) and that your controller will have replaced the failed physical drive with your Spare (and vice versa).
Our "Auto Replace Spare" connected to the "CN4:01:03" port has therefore become a permanent member of our array and is being rebuilt (Rebuild).

And our failed disk therefore became the "Auto Replace Spare".
Share this tutorial
To see also
-

RAID 4/20/2022
Adaptec maxView Storage Manager v3 - Create a RAID volume
-

RAID 4/8/2022
Adaptec maxView Storage Manager v3 - Download and boot on USB version
-

RAID 4/13/2022
Adaptec maxView Storage Manager v3 - Installation on Linux
-

RAID 4/15/2022
Adaptec maxView Storage Manager v3 - Manage an Adaptec SmartRAID controller on VMware ESXi 6.7
You must be logged in to post a comment