Repairing a RAID logical drive in the event of failure with an Adaptec SmartRAID 3154-8i8e controller
- RAID
- 29 April 2022 at 11:35 UTC
-

- 2/3
5. Errors displayed in maxView Storage Manager when a physical device fails
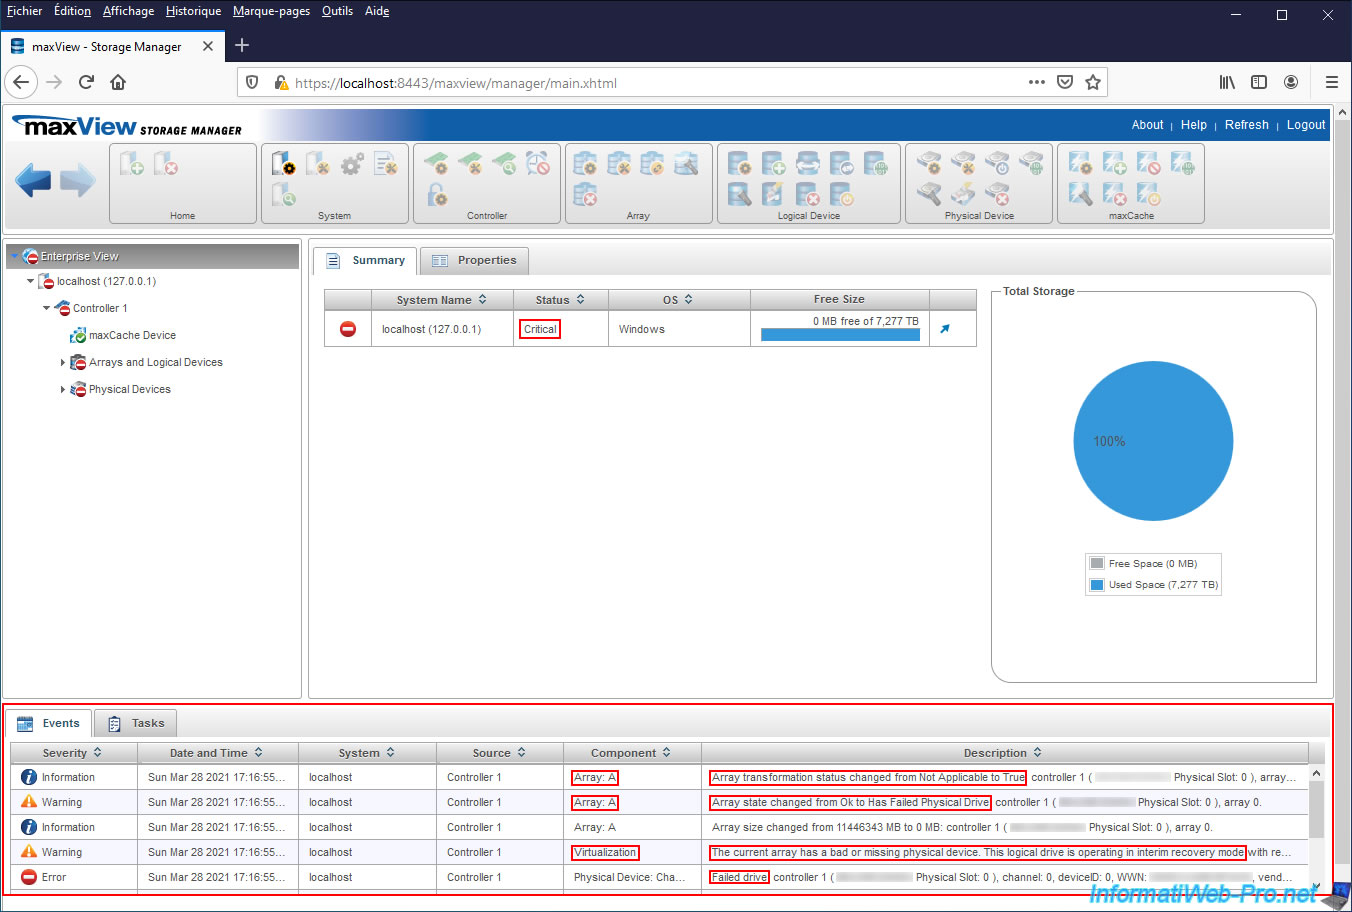
If you log into your "maxView Storage Manager" web interface, you will see that the computer / server where your Microsemi SmartRAID controller is located is in Critical status.
Additionally, at the bottom of the page, you will also see a series of events :
- Array: A - Array transformation status changed from Not Applicable to True : following the loss of a physical disk, the array is considered to be under transformation.
Simply because there has notably been a change in its members (hard drives / SSDs). - Array: A - Array state changed from Ok to Has Failed Physical Drive : indicates that the affected Array (eg Array-A) contains a failed hard drive / SSD
- Virtualization - The current array has a bad or missing physical device. This logical drive is operating in interim recovery mode with reduced performance : indicates that the affected array contains a failed physical device (or that one is missing) and that the specified logical drive (Virtualization) is currently operating in "Interim Recovery" mode and that its performance is therefore reduced.
- Failed drive : indicates that the specified hard disk drive / SSD has failed
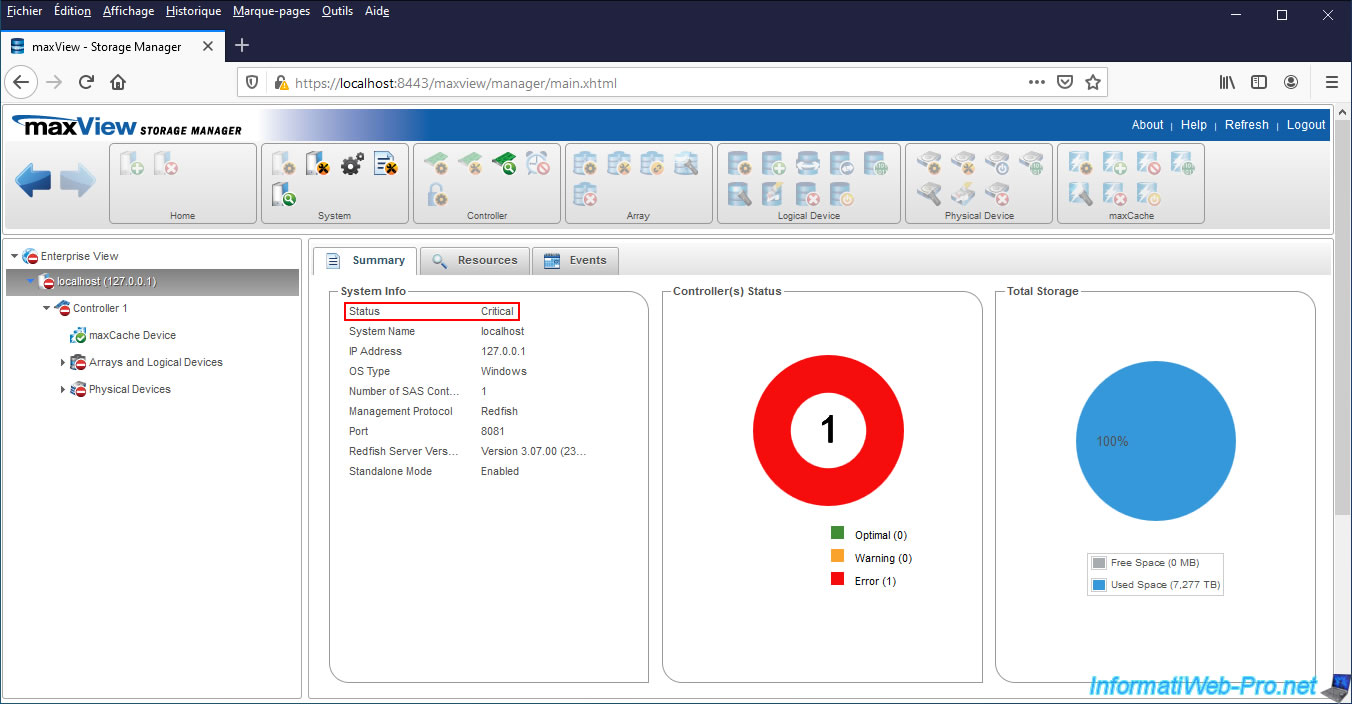
If you select the name of your computer / server (or "localhost" if maxView is installed in standalone mode), you will again see that the status is Critical.
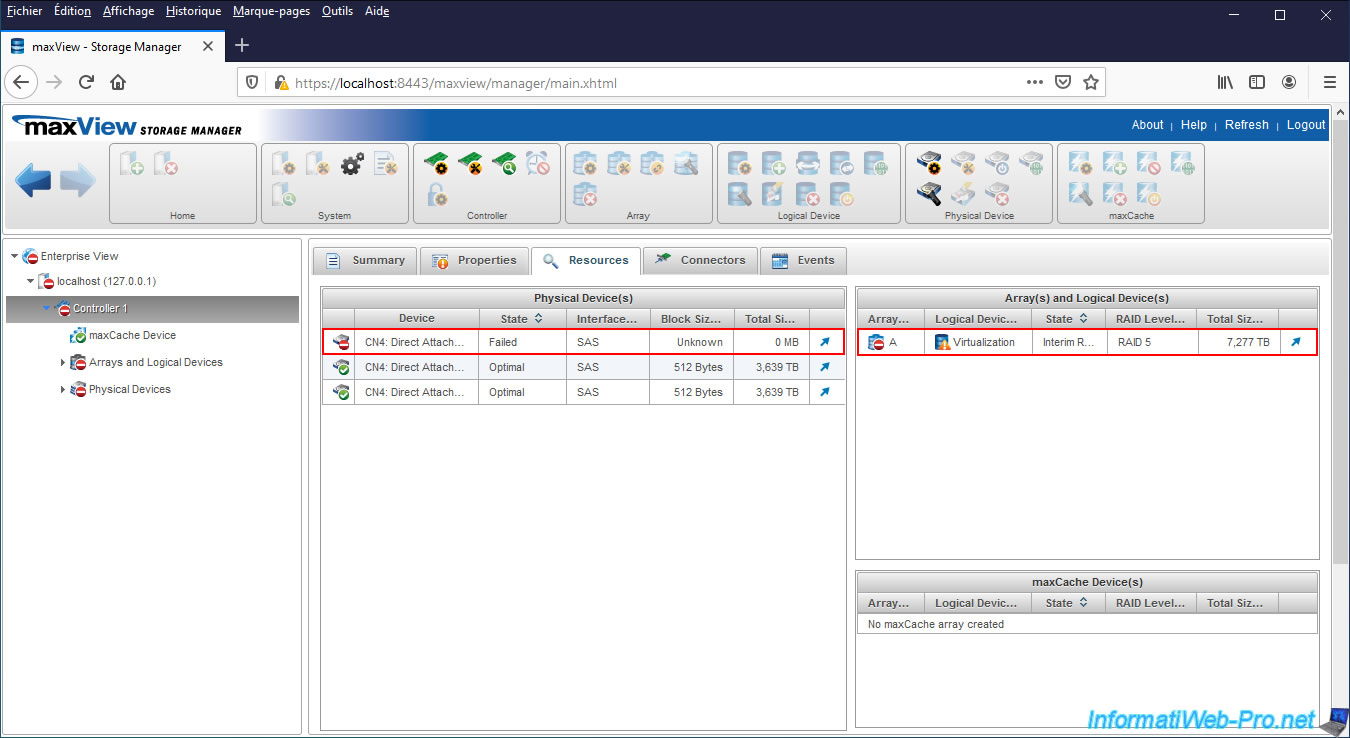
If you have multiple Microsemi SmartRAID controllers in the same computer / server, you can easily spot the one where the problem was found by looking in the "Resources" tab.
Indeed, it will be displayed with a red icon (representing a prohibited direction).
![]()
Once you have located the relevant Microsemi SmartRAID controller, select it and go to the "Resources" tab.
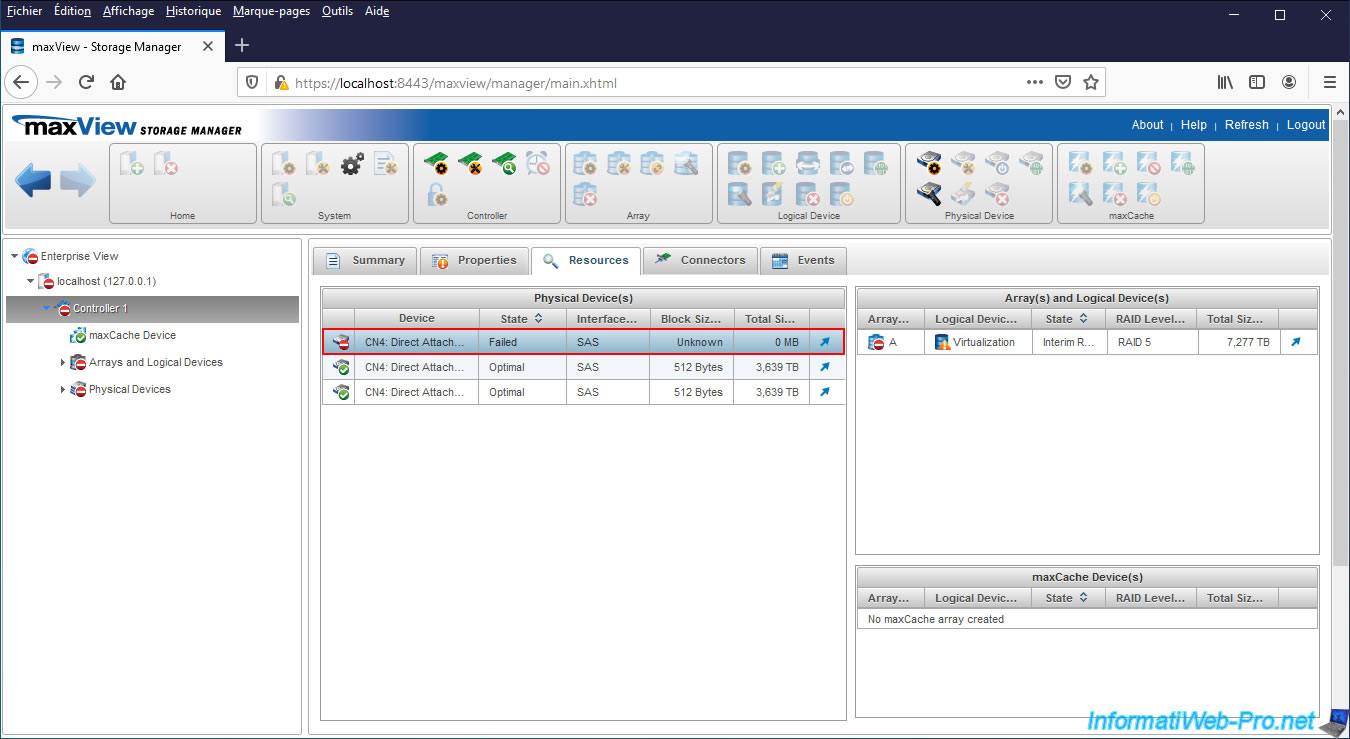
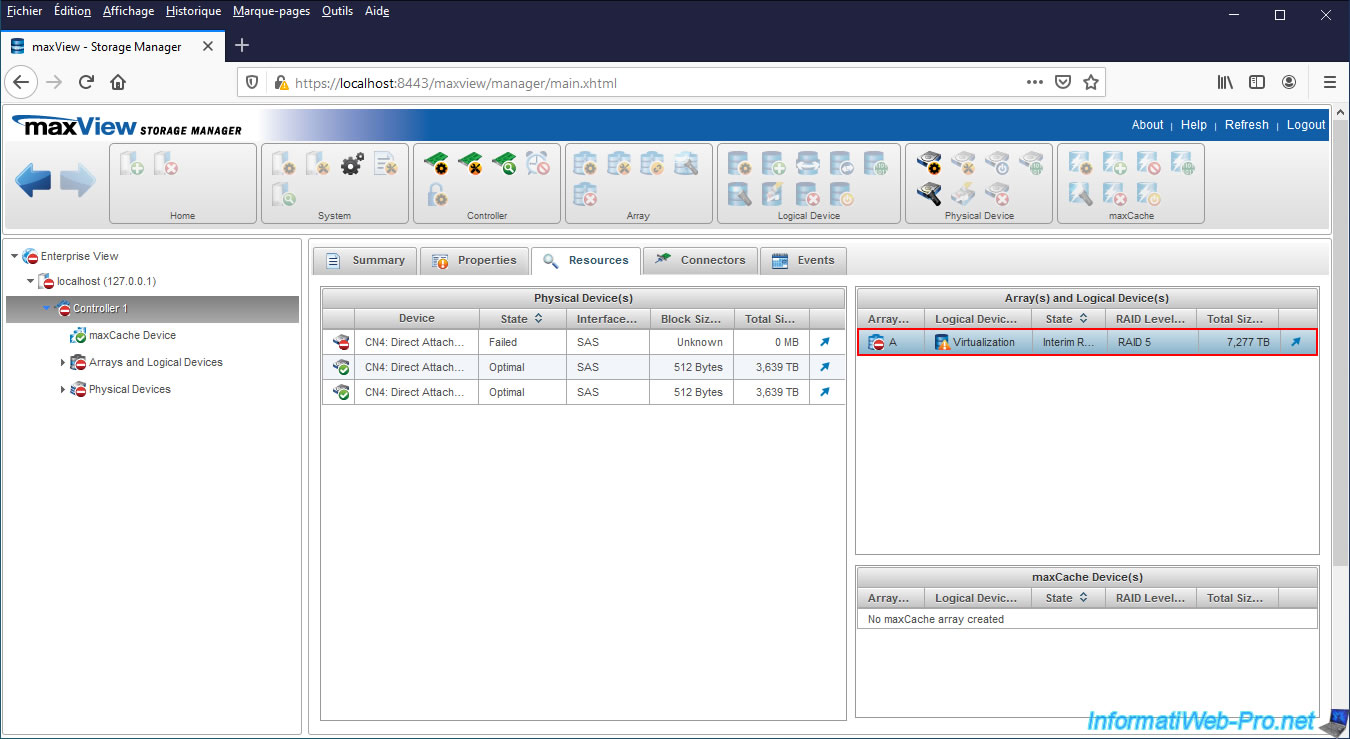
In this tab, maxView Storage Manager will show you which physical device (HDD / SSD) has failed, as well as the logical device(s) affected by this failed physical device.
As you can see, in our case, our 1st SAS hard drive failed and this forces our "Virtualization" logical drive to operate in "Interim Recovery" mode with reduced performance.
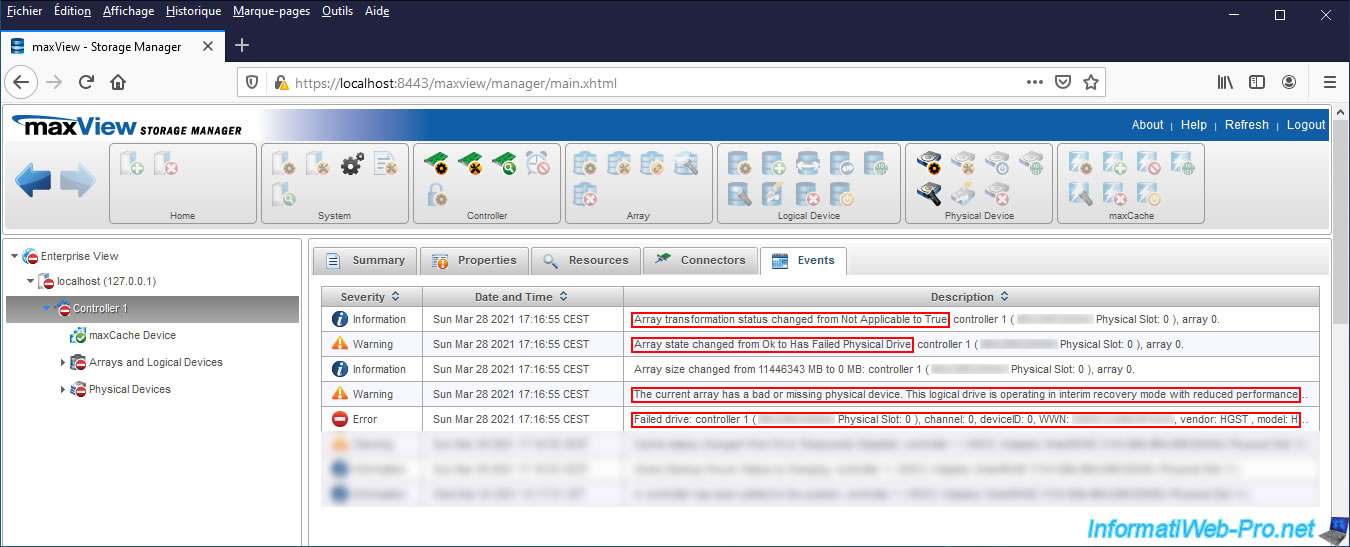
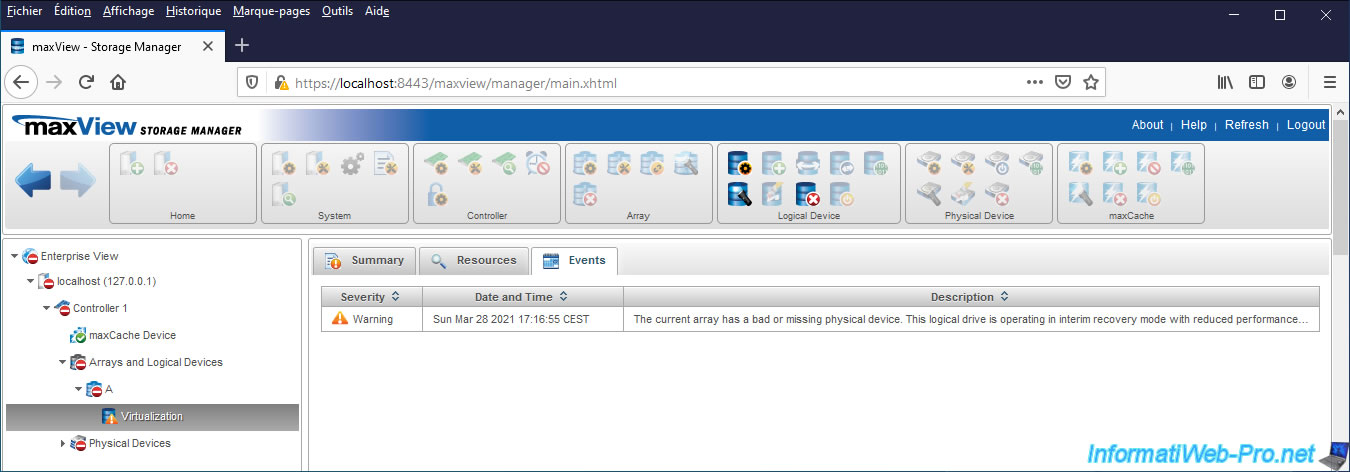
If you look in the "Events" tab of your Microsemi SmartRAID controller, you will find the same events as those displayed at the very bottom of each page.
To obtain information about the failed physical device, click on the small blue up arrow located in the last column of the "Physical Device(s)" table.
The page for the failed physical device is displayed.
Since this one is down, most of the information is unavailable, but you will see these informations :
- State : Failed. Which means this physical drive has failed.
- Member of Array - Array A : Has Failed Physical Drive. This tells you which RAID arrays this physical device is a member of and which arrays are therefore affected by this failure.
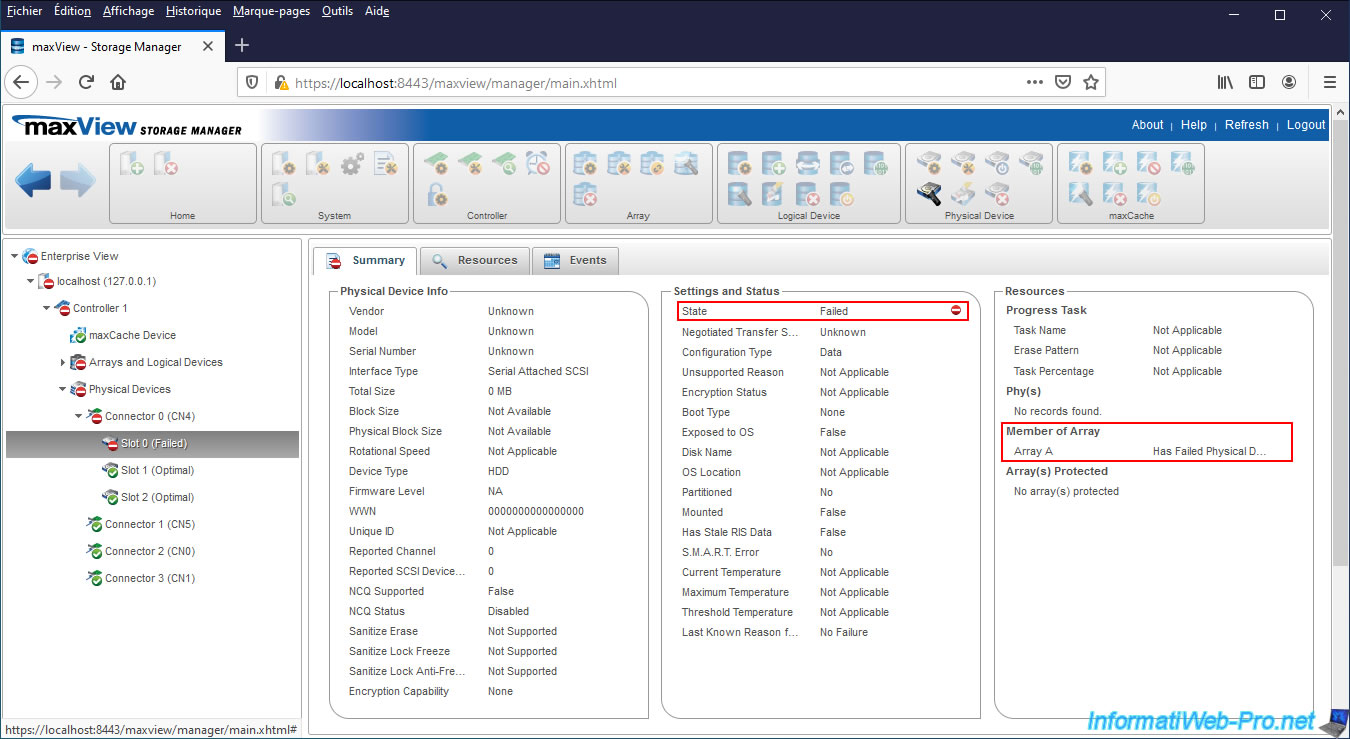
To obtain information concerning the array affected by this failed physical device, click on the small blue up arrow located in the last column of the "Arrays(s) and Logical Device(s)" table.
The page of the array concerned is displayed.
As you can see, this one works in "Interim Recovery" mode and that the failed physical device is a member of this array.
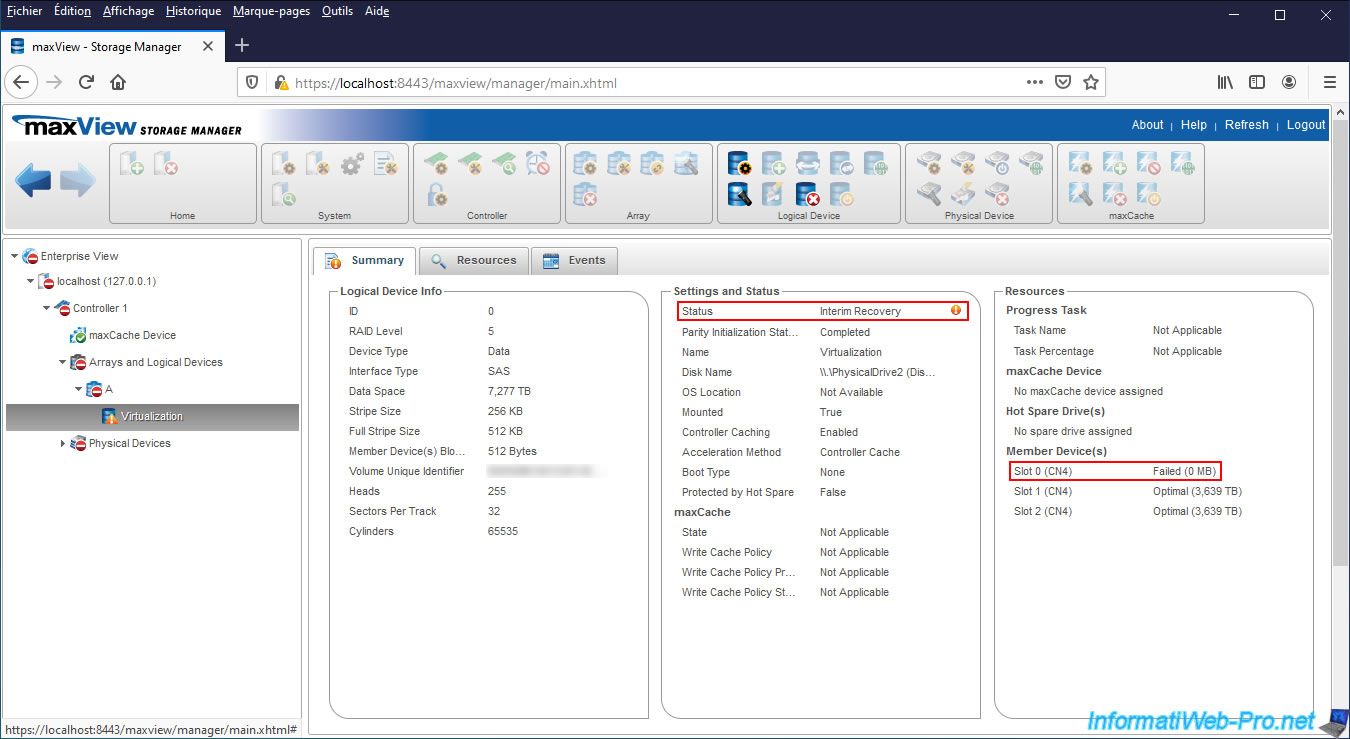
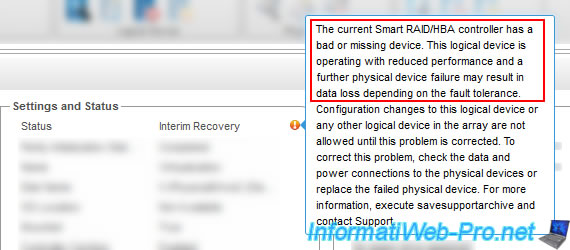
If you click on the orange icon next to the "Interim Recovery" status, maxView will tell you :
Plain Text
The current Smart RAID/HBA controller has a bad or missing device. This logical device is operating with reduced performance and a further physical device failure may result in data loss depending on the fault tolerance.
Which means that :
- your controller has at least 1 physical device (HDD / SSD) faulty or missing
- the selected logical device is currently operating with reduced performance
- the failure of a future physical disk may result in data loss (depending on the RAID level used for it and the number of physical devices remaining)
In the "Events" tab of your logical drive, you will see this event (which means the same thing as explained above) :
Plain Text
The current array has a bad or missing physical device. This logical drive is operating in interim recovery mode with reduced performance ...
6. Replacing the physical device
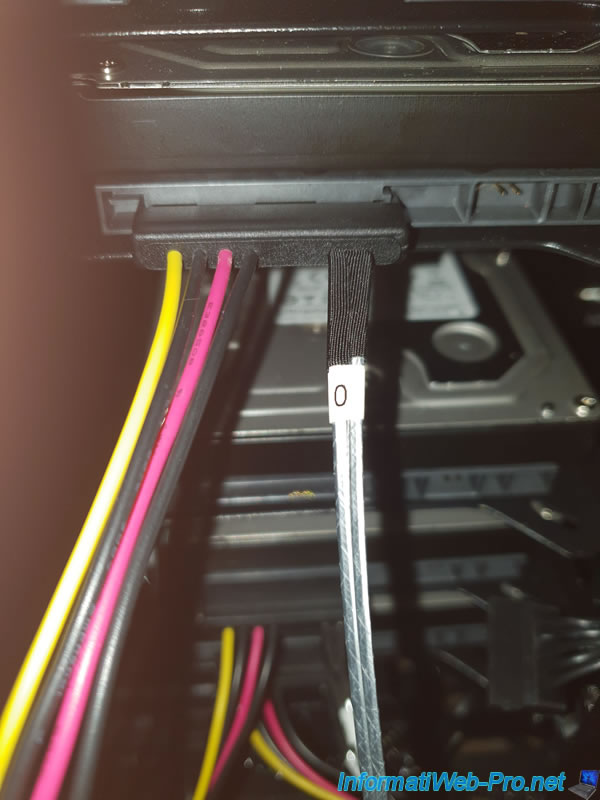
For your Microsemi Adaptec SmartRAID controller to automatically rebuild the failed physical drive, you must plug in the new physical drive using the cable from the failed one.
If you look at the image below, you see :
- a hard drive at the top plugged in with cable # 0. This physical drive is new and blank.
- a slightly lower hard drive that is NOT plugged in. It's the physical disk which is "failed" and which we thus unplugged.
- the 2 hard disks at the bottom are the 2 remaining physical disks of our array in RAID 5 and which are in Optimal state.
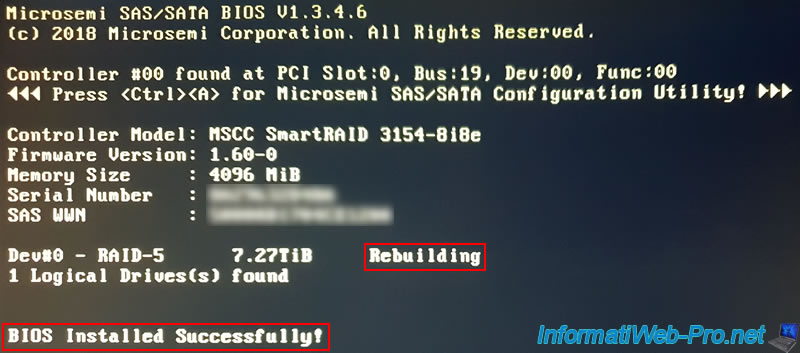
Start your computer / server and you will see that your array is displayed with a "Rebuilding" status.
Your controller will therefore automatically rebuild the failed hard drive on the new hard drive connected with the cable from the old hard drive.
It's therefore very important to respect the numbers when connecting your hard disks, because your controller will then use them to identify the members of this array and thus know which is the new physical disk used for the reconstruction of the lost data.
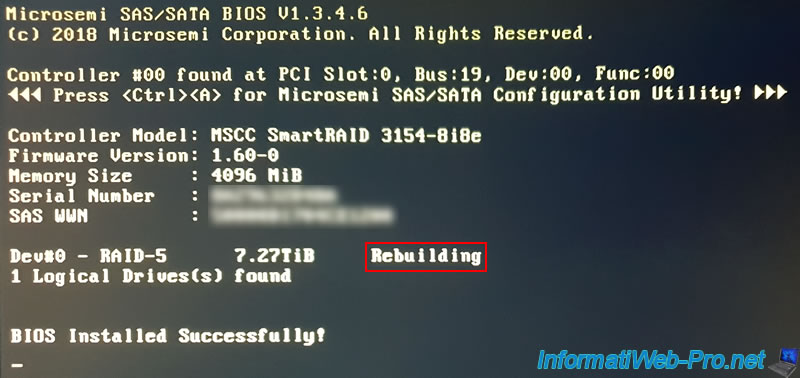
Since at least 1 logical device is available again on your Microsemi Adaptec SmartRAID controller, the "BIOS Installed Successfully" message reappears.
This means that you can boot to your logical drive again if you wish (if a supported operating system is installed on it).
7. Changes visible in the configuration tool of your Microsemi Adaptec SmartRAID controller
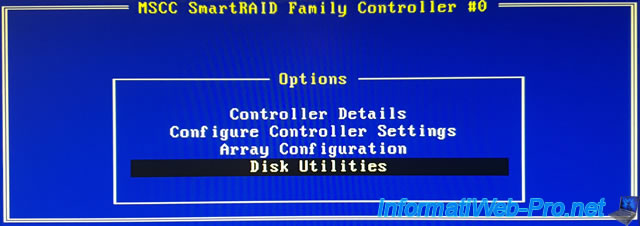
If you want to see the changes visible in the configuration tool of your Microsemi Adaptec SmartRAID controller, press "CTRL + A" (on a QWERTY keyboard) or "CTRL + Q" (on an AZERTY keyboard).
Then, go to : Disk Utilities.
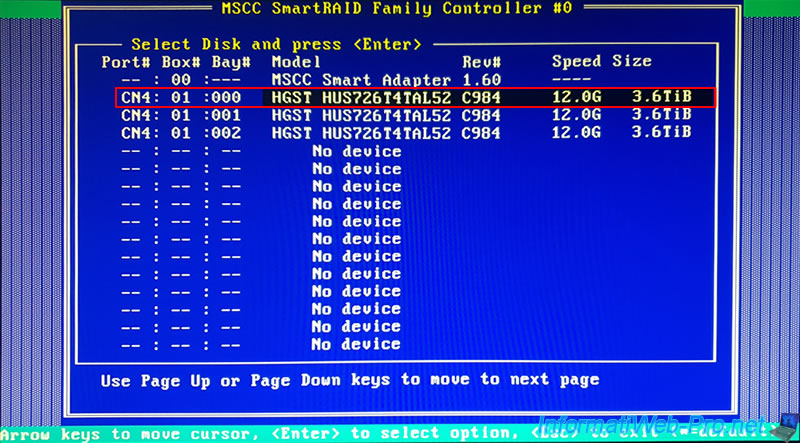
As you can see, our new physical disk appears for the location "CN4:01:000".
Note that the model of all our SAS hard drives is strictly identical, which is recommended.
To get informations about the selected physical disk, press Enter.
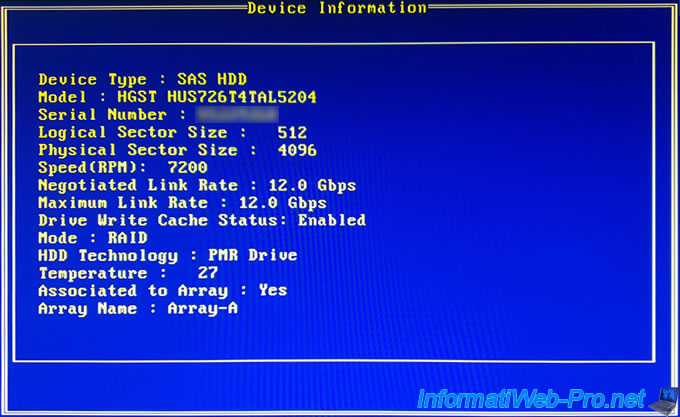
Select "Device Information" and press Enter again.

Information about this physical disk is displayed.
In particular, you can see that this physical disk has been automatically associated with an array (Associated to Array) whose name is : Array-A.
As for your array, you must return to the main menu by pressing "Esc" several times, then go to : Array Configuration.
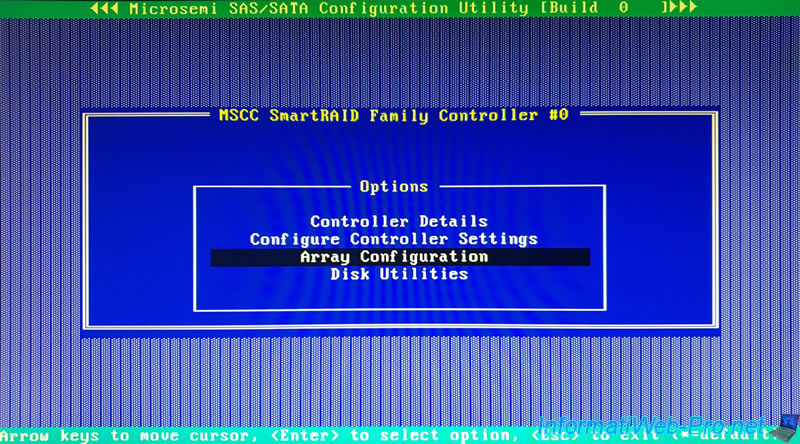
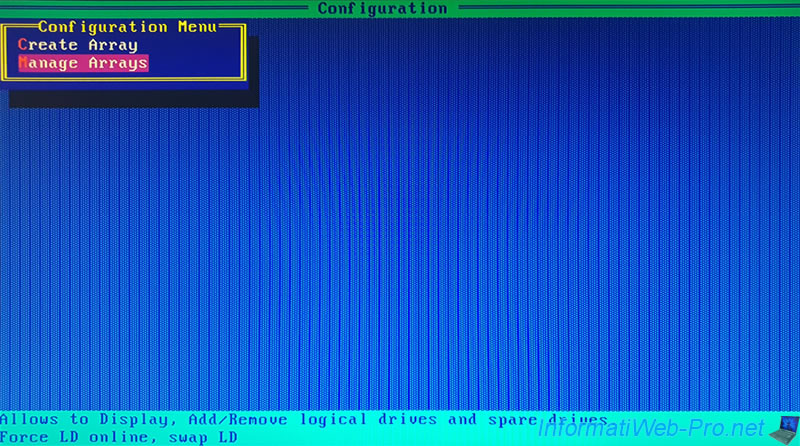
Select "Manage Arrays" and press Enter.
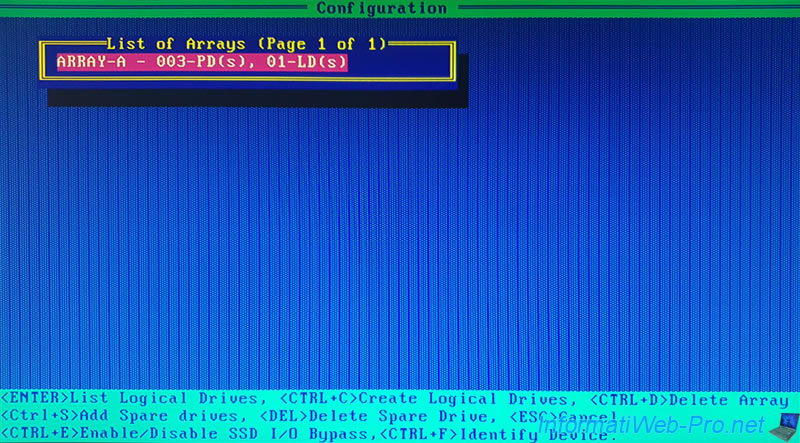
Select your array (ex : ARRAY-A) and press Enter.
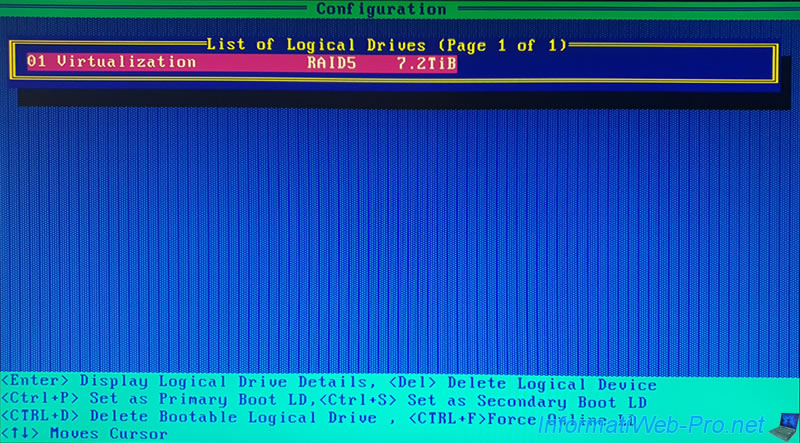
Select your logical drive (ex : Virtualization) and press Enter.
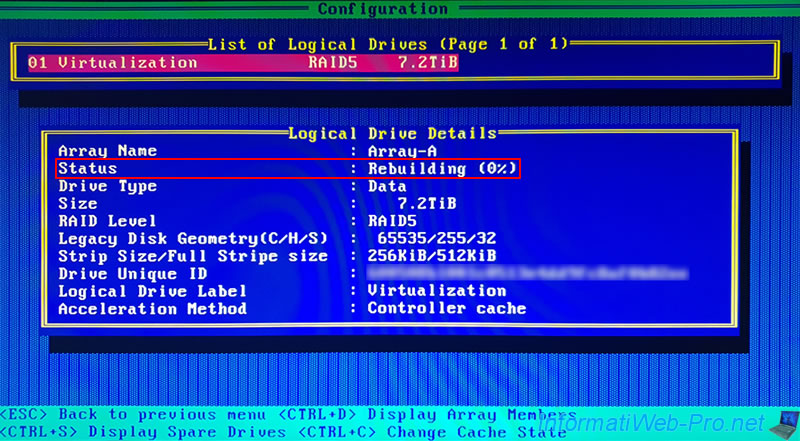
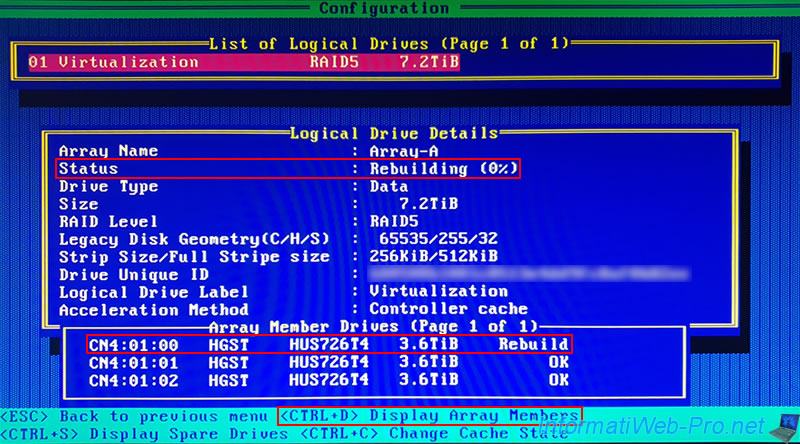
As you can see, your Microsemi Adaptec SmartRAID controller is telling you that your logical drive status is : Rebuilding (0%).
If you view the list of physical drives that are members of this logical drive by pressing "CTRL + D" keys, you will see that the physical drive at location "CN4:01:00" is being rebuilt (Rebuild).
Exit this configuration tool and your computer / server will restart.
On startup, you will see the "Rebuilding" status again until the rebuild is complete.
Note that this can take a long time depending on the total capacity of your array (even if the logical drive in it is almost empty).
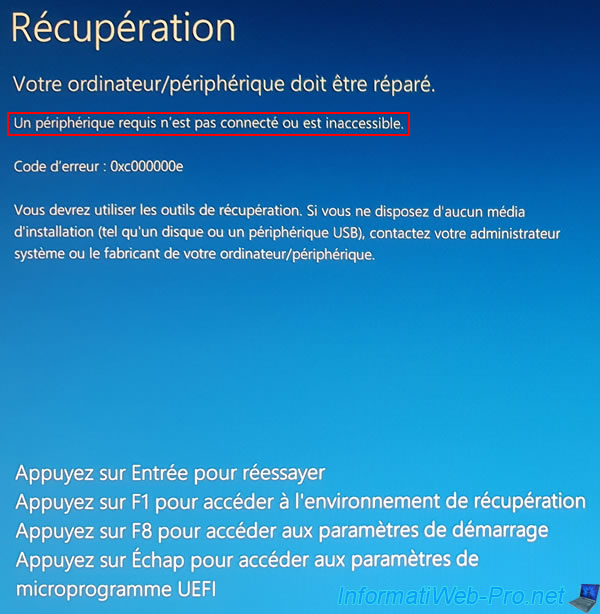
If Windows (or any other operating system supported by your Microsemi Adaptec controller) is installed on your logical drive, your computer may not be able to boot to it at this time.
Don't panic, just quickly reconfigure your motherboard BIOS.
8. Correct the boot order of your computer
If Windows (or any other operating system) is installed on your logical drive and your computer can no longer start automatically on it, enter the BIOS of your computer's motherboard to correct the order of starting it.
Otherwise, go to the next step of this tutorial.
If your BIOS is different from ours, refer to our "Change the BIOS boot priority" tutorial and be sure to place your array first in your BIOS boot order.
In our case, we have an ASUS WS X299 SAGE/10G motherboard and we can directly see that the BIOS of this motherboard detects our RAID volume "PCIEX16: B:19 D:0 F:0 Lun1 RAID5 (8001.5GB)".
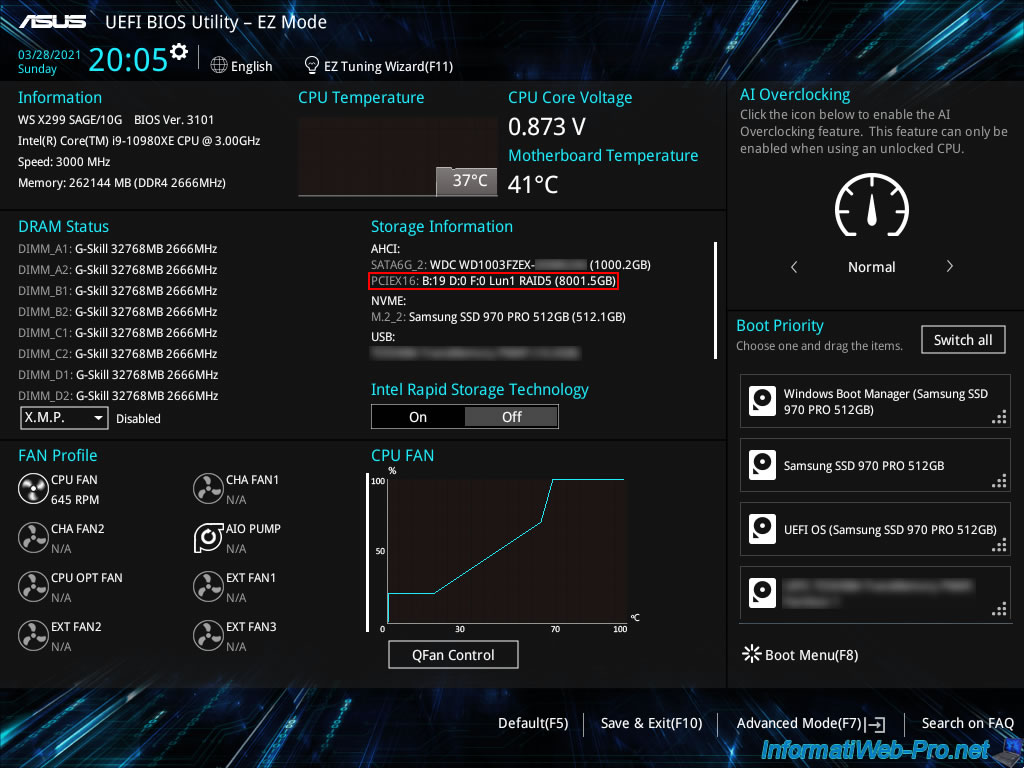
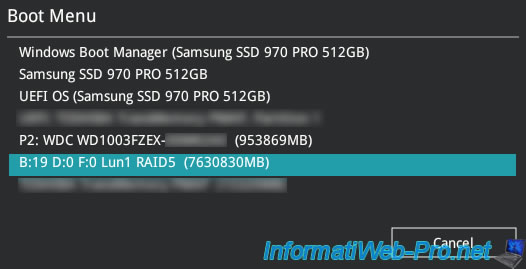
If we click on "Boot Menu (F8)" at the bottom right or if we press this F8 key when starting our computer, we will be able to choose to boot this time on our RAID volume "B:19 D:0 F:0 Lun1 RAID5 (7630830MB)".
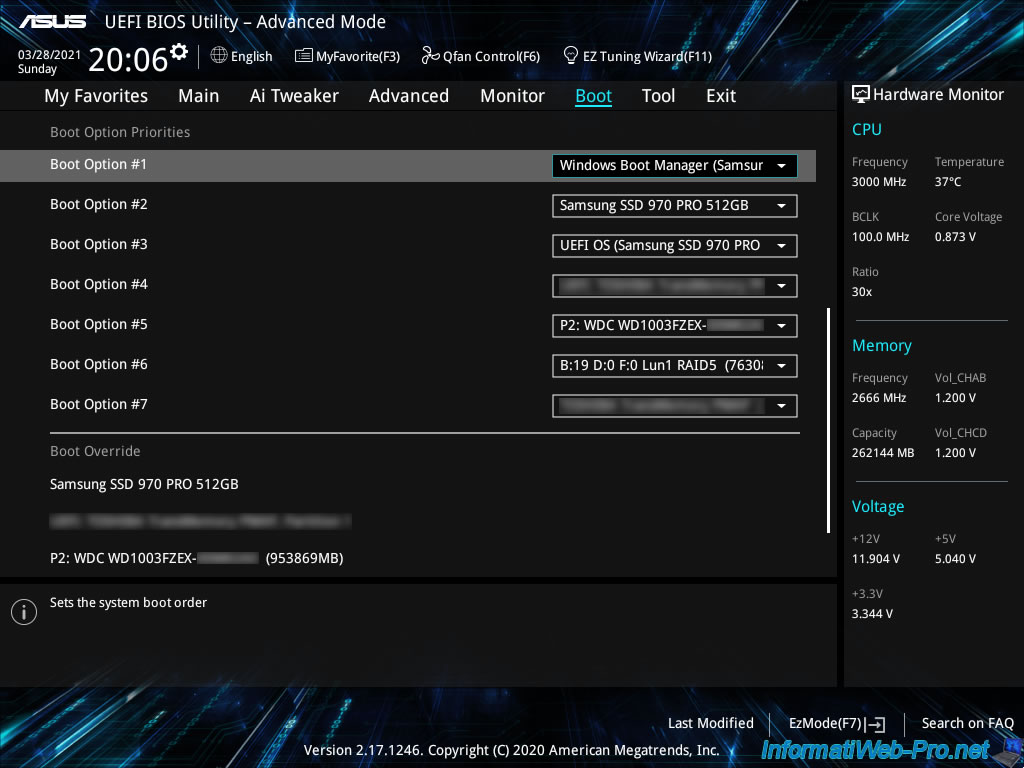
The other possibility, which is permanent, is to enter the advanced mode of the BIOS by clicking on "Advanced Mode (F7)" at the bottom right of the screen.
As you can see, in our case, the boot order has to be changed by itself and our computer tries to boot from an old Windows installation that was on our "Samsung SSD 970 PRO 512GB".
Hence the error displayed "by Windows".
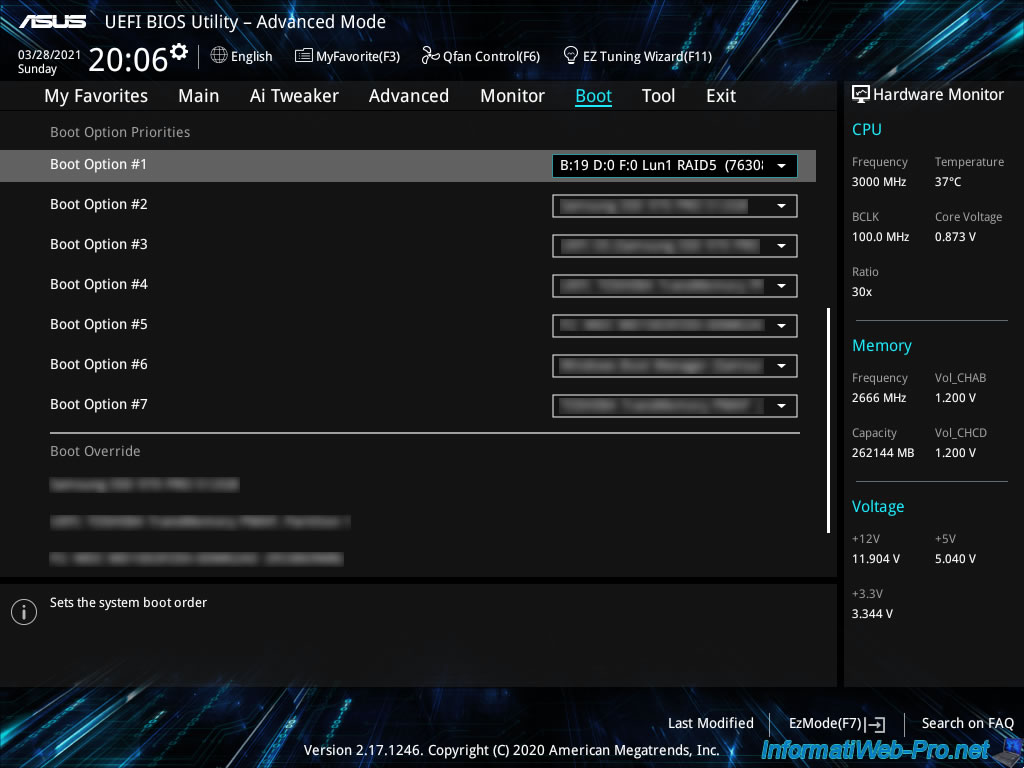
To solve our problem, we have chosen our RAID volume "B:19 D:0 F:0 Lun1 RAID5 (7630830MB)" as the 1st boot option (Boot Option #1).
Finally, don't forget to save the changes.
In the BIOS of Asus, you have to go to the "Exit" tab and click on "Save Changes & Reset".
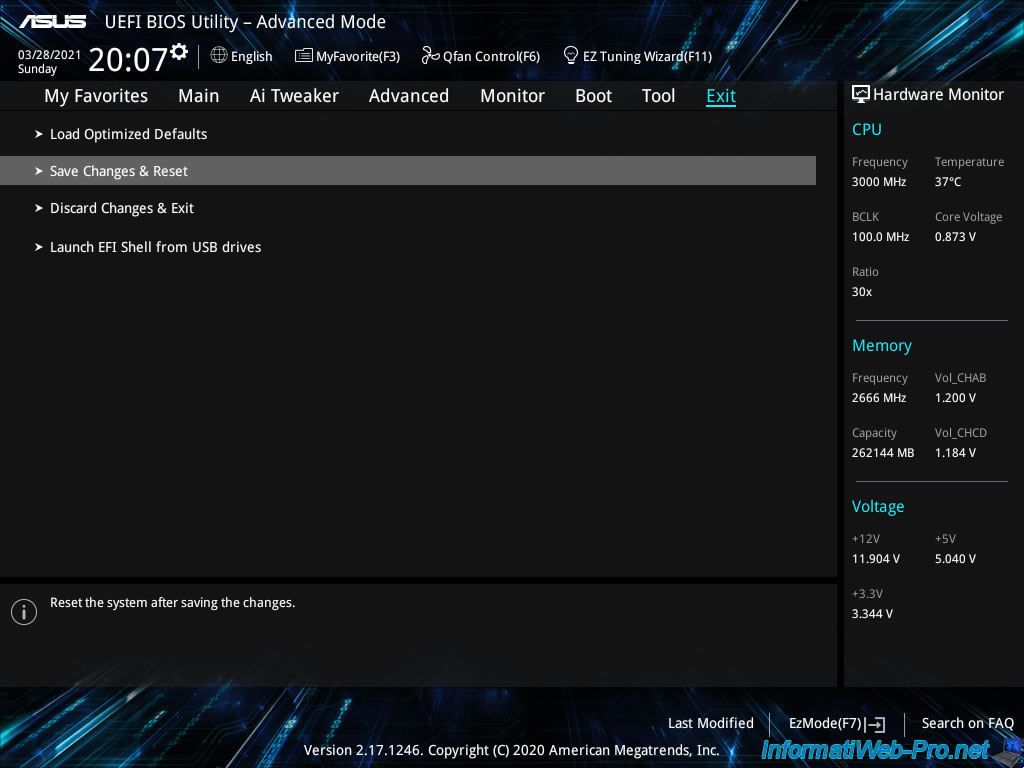
Confirm saving the changes.

Share this tutorial
To see also
-
RAID 4/20/2022
Adaptec maxView Storage Manager v3 - Create a RAID volume
-
RAID 4/8/2022
Adaptec maxView Storage Manager v3 - Download and boot on USB version
-
RAID 4/13/2022
Adaptec maxView Storage Manager v3 - Installation on Linux
-
RAID 4/15/2022
Adaptec maxView Storage Manager v3 - Manage an Adaptec SmartRAID controller on VMware ESXi 6.7

No comment