Create a gaming virtual machine (with an eGPU) on Unraid 6.9.2
- NAS
- Unraid
- 01 October 2026 at 10:13 UTC
-

- 2/5

3.4. Choose the graphics card to initialize in the BIOS
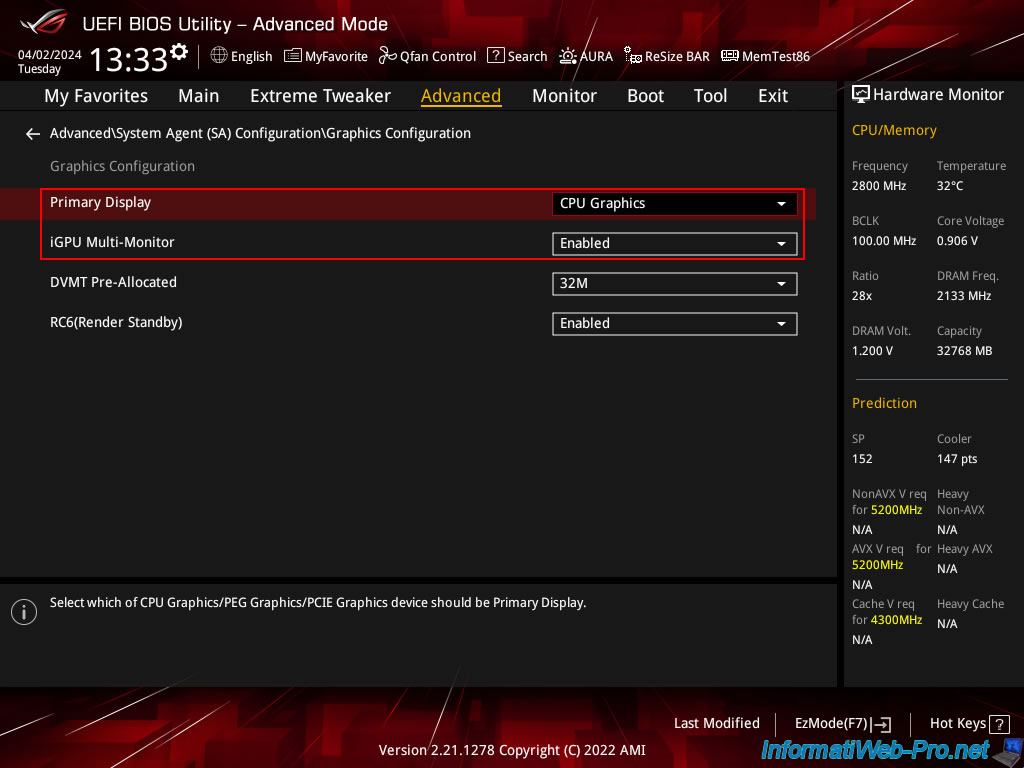
Just for your information, we've configured our BIOS/UEFI firmware so that our motherboard initializes the graphics portion of the processor first.
This means that the Unraid console will be displayed on the graphics port (HDMI or other) of our motherboard.
However, this shouldn't change anything when using an eGPU.
3.5. Configure Thunderbolt in BIOS
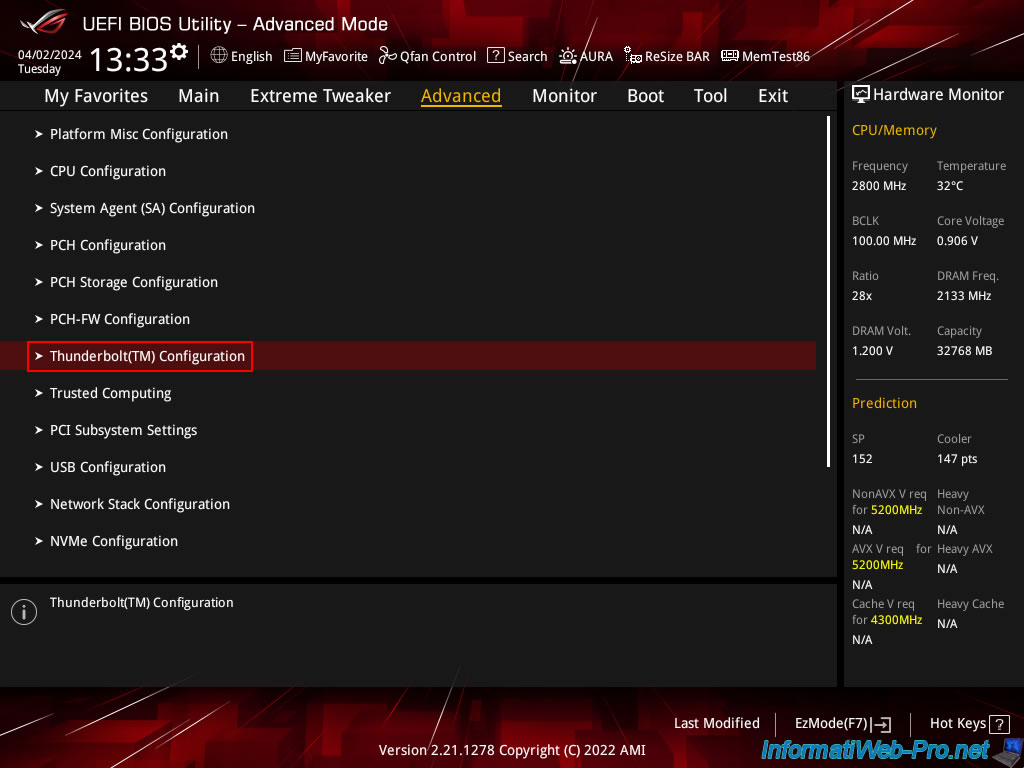
Finally, also check the Thunderbolt settings in the motherboard's BIOS/UEFI firmware.
To do this, go to the "Advanced\Thunderbolt(TM) Configuration" section.
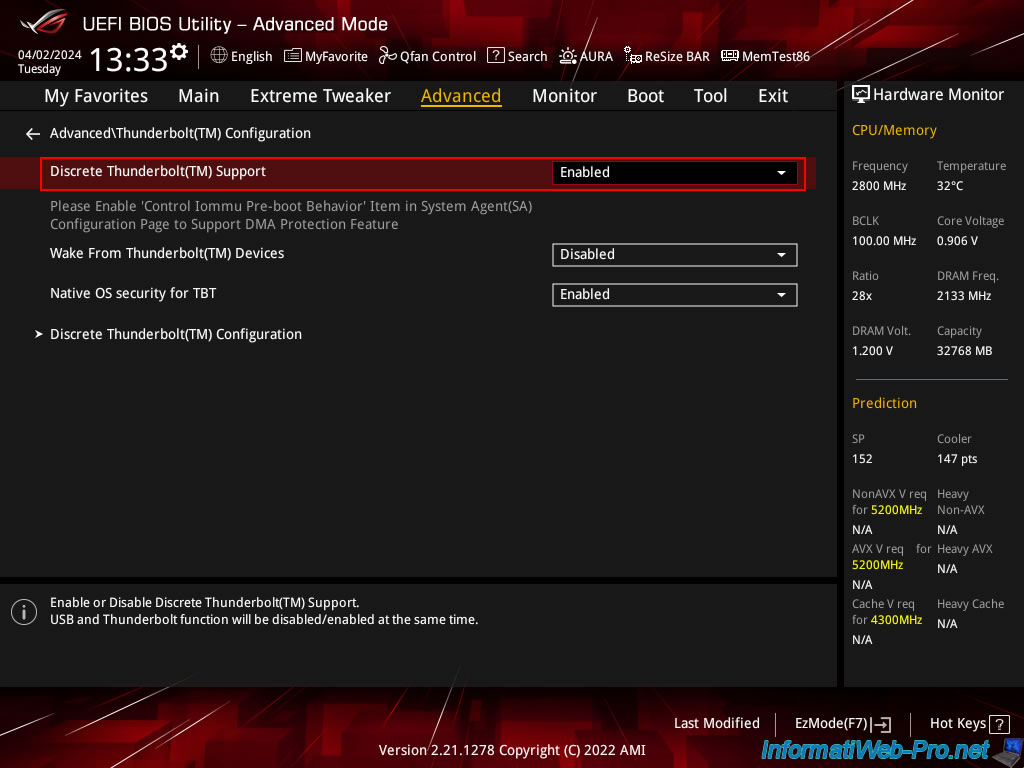
In the "Advanced\Thunderbolt(TM) Configuration" section, verify that the "Discrete Thunderbolt(TM) Support" setting is enabled.
This will enable Thunderbolt support on your motherboard.
Once this setting is enabled, you may need to reboot to see the settings below.
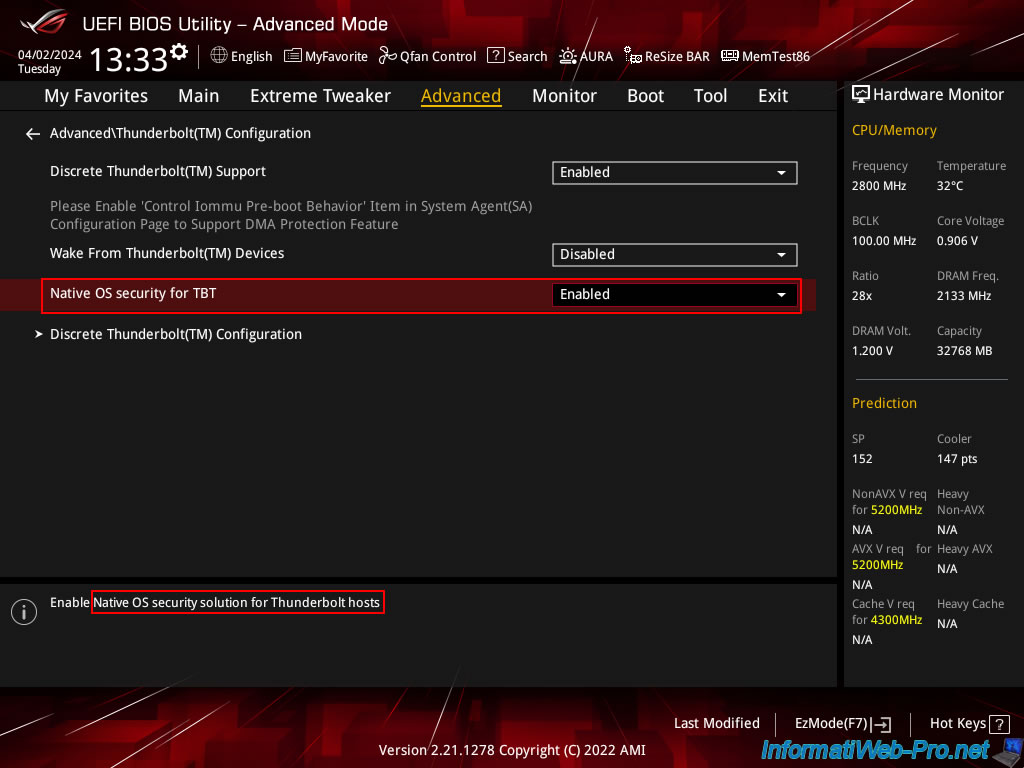
By default, a security system for Thunderbolt is enabled.
Plain Text
Native OS security for TBT = Enabled.
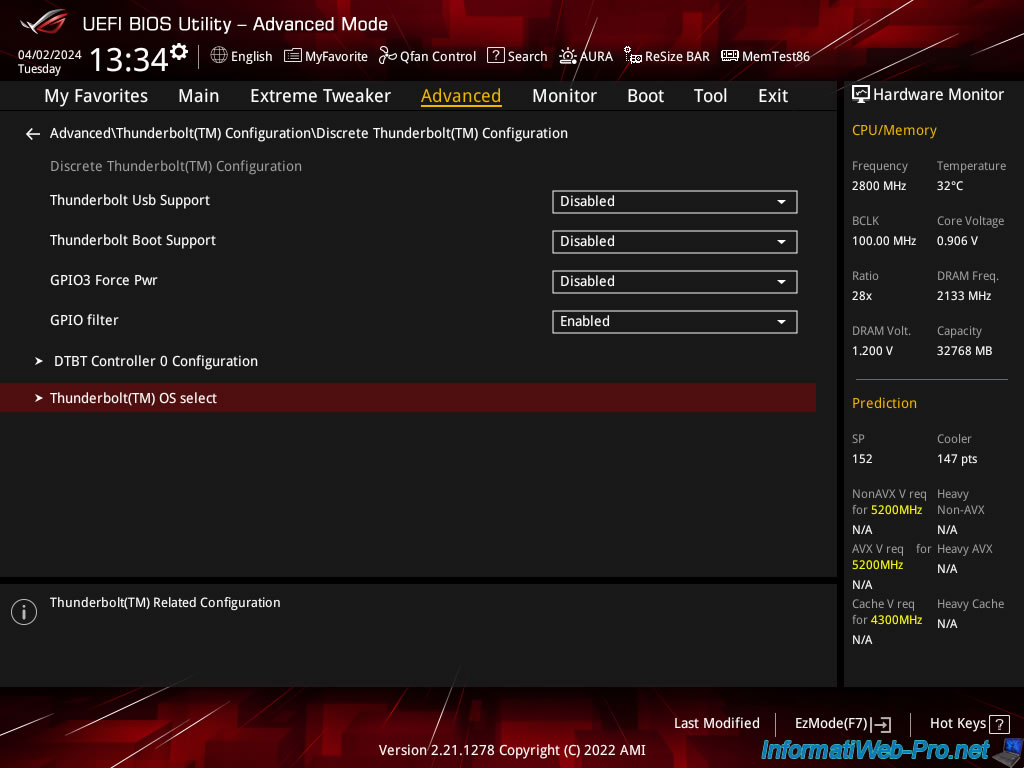
Then, go to the "Discrete Thunderbolt(TM) Configuration" section available just below.
In this "Discrete Thunderbolt(TM) Configuration" section, go to the subsection: Thunderbolt(TM) OS select.
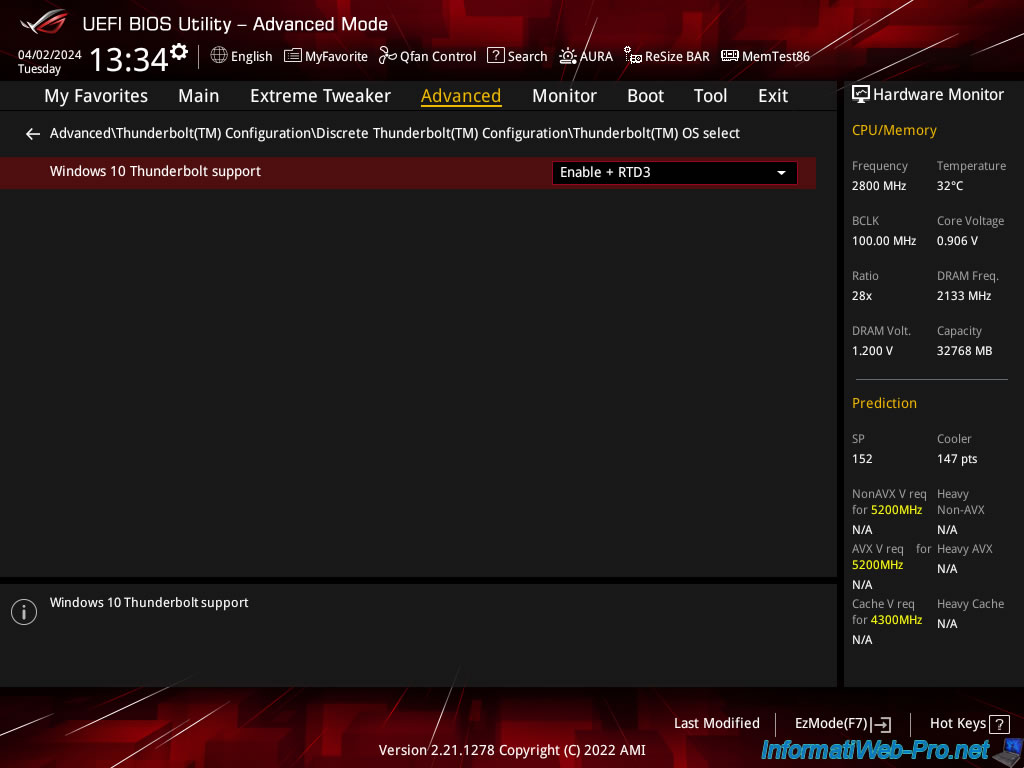
For your information, the value of the "Windows 10 Thunderbolt support" parameter available in this section is "Enable + RTD3".
This enables Thunderbolt support on Windows 10.
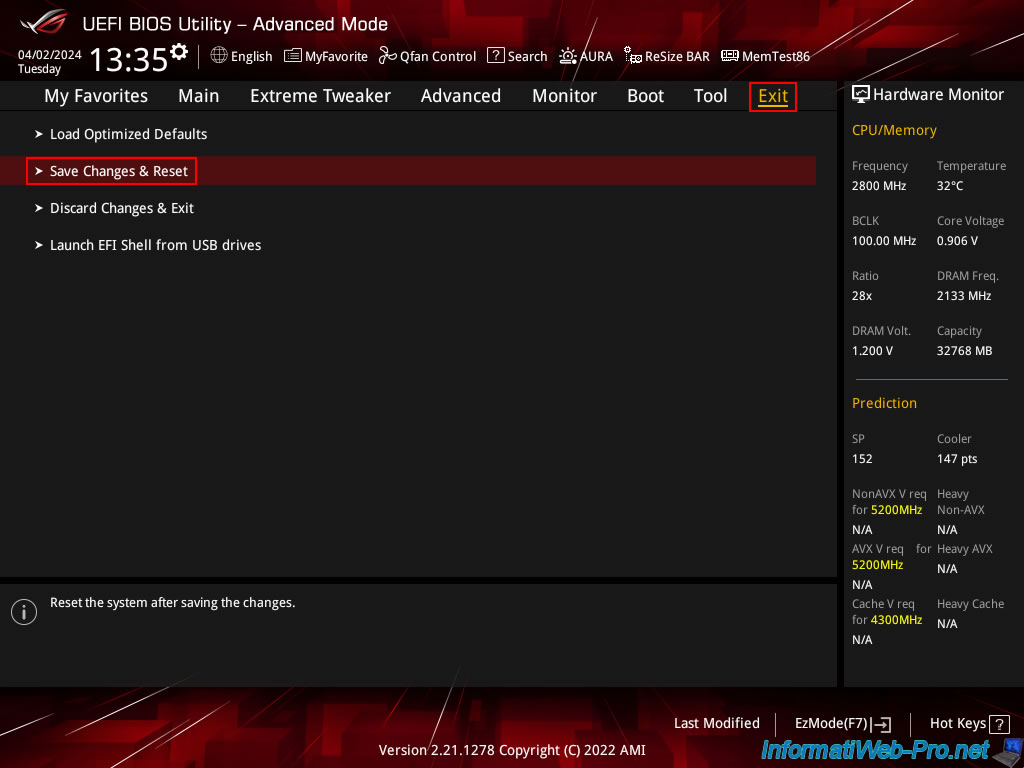
Finally, save the changes you made to your motherboard's BIOS/UEFI firmware.
To do this, go to the "Exit" tab, then click Save Changes & Reset.
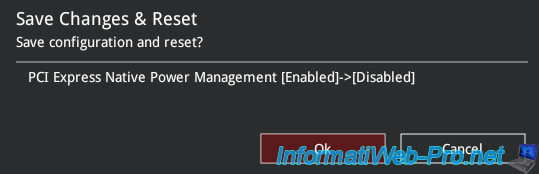
Confirm saving changes.
4. Check the prerequisites for creating a gaming virtual machine
Now that your motherboard's BIOS/UEFI firmware is configured to create a gaming virtual machine using an eGPU, check on Unraid to see if the necessary settings have been enabled for creating a gaming virtual machine.
To do this, click the 4th icon in the top right corner.
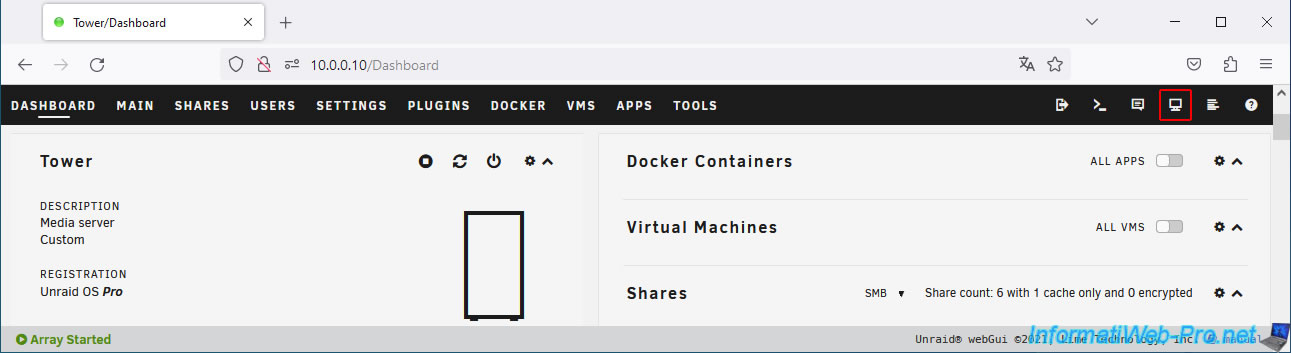
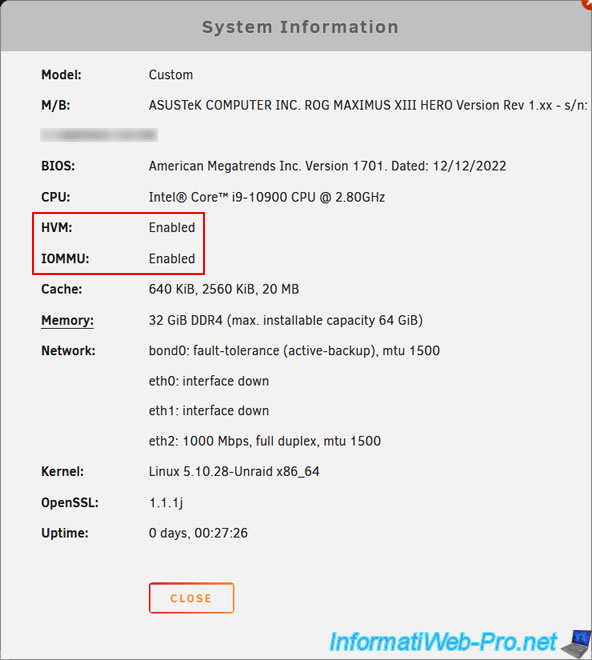
Check that the following 2 settings are enabled:
- HVM: if the value is "Enabled," this means that CPU virtualization is enabled.
This allows you to create a virtual machine on Unraid.
Otherwise, enable the setting in your motherboard's BIOS/UEFI firmware by referring to our tutorial: Enable virtualization (Intel VT-x / AMD-V). - IOMMU: if the value is "Enabled," this means that input/output (I/O) virtualization is enabled.
This allows you to pass a physical device (and therefore also a physical graphics card) to a virtual machine on Unraid.
Otherwise, enable the setting in your motherboard's BIOS/UEFI firmware by referring to our tutorial: Enable IOMMU or VT-d in your BIOS.
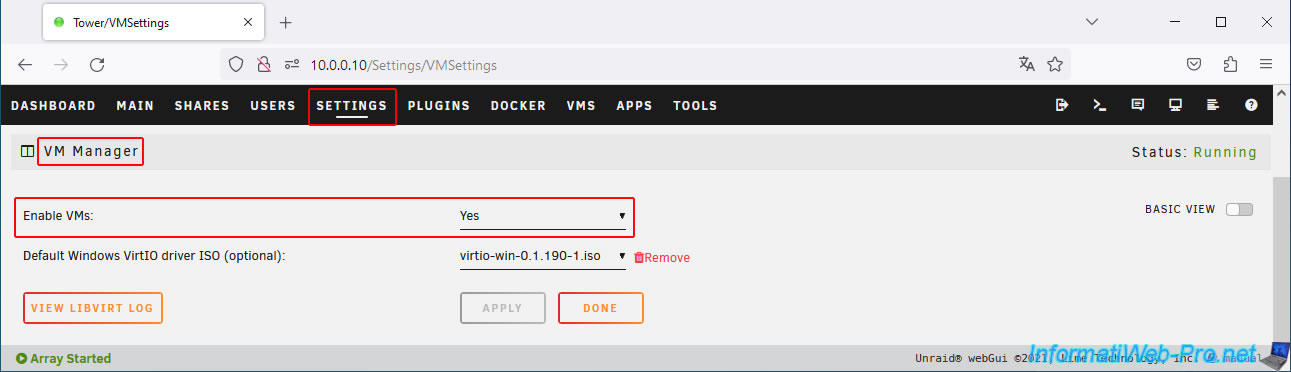
Once these settings are enabled, go to the "Settings -> VM Manager" section and enable the "Enable VMs" setting by selecting "Yes".
This will display the "VMs" tab in the black bar at the top of the page.
Once this feature is enabled, click the "Download" link to the right of the "Default Windows VirtIO driver ISO (optional)" list.
This ISO contains the VirtIO drivers you'll need for your VM later.
5. Create shares for your virtual machines
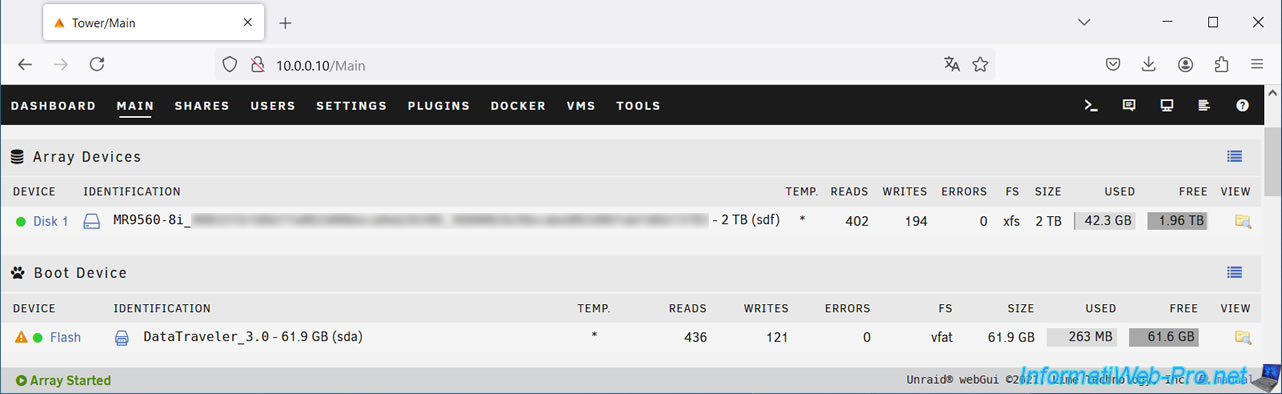
On our desktop PC, we don't have an SSD for Unraid.
So, we used only a RAID logical drive (instead of a standard hard drive) for our Unraid array.
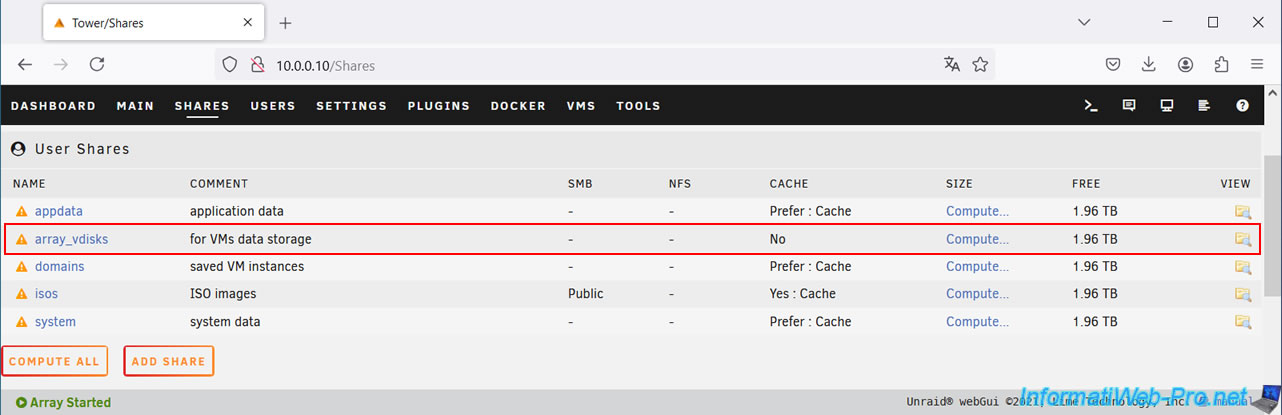
In the "Shares" tab, create:
- an optional "ssd_vdisks" share (to store the virtual hard drive where you'll install Windows for your gaming VM) if you assigned an SSD in the "Main" tab of Unraid.
The goal is simply to make Windows more responsive. - an "array_vdisks" share (to store the virtual hard drive where you'll install your games in your gaming VM), which corresponds to your hard drive array.
To do this, refer to step "4. Create shares for your virtual machines" of our tutorial on creating a gaming VM.
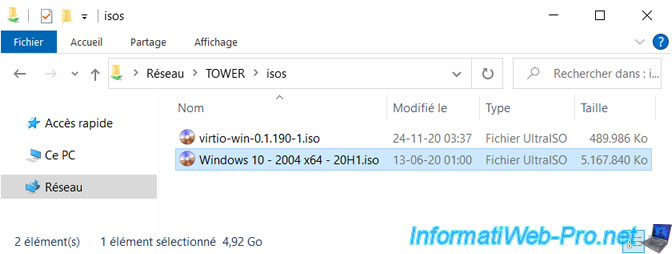
Store a Windows 10 ISO in the "isos" share of your Unraid server, as you will need it later to install Windows 10 in your future gaming VM.
Note: if you don't see this network share in your case, refer to the beginning of our tutorial "Unraid 6.9.2 - VMs - Create a virtual machine" to set the "Export" parameter for this share to "Yes".
6. Free up physical devices by assigning them to VFIO
To pass your eGPU's graphics card to your future gaming virtual machine, you must first assign it to the VFIO.
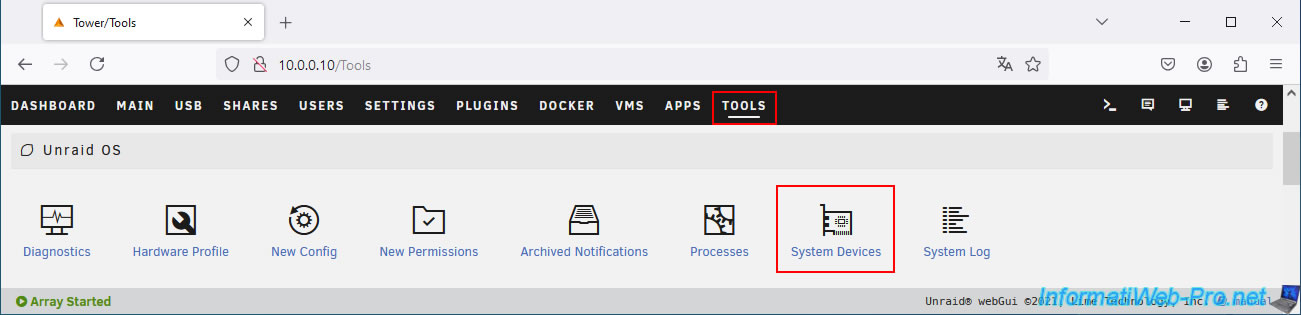
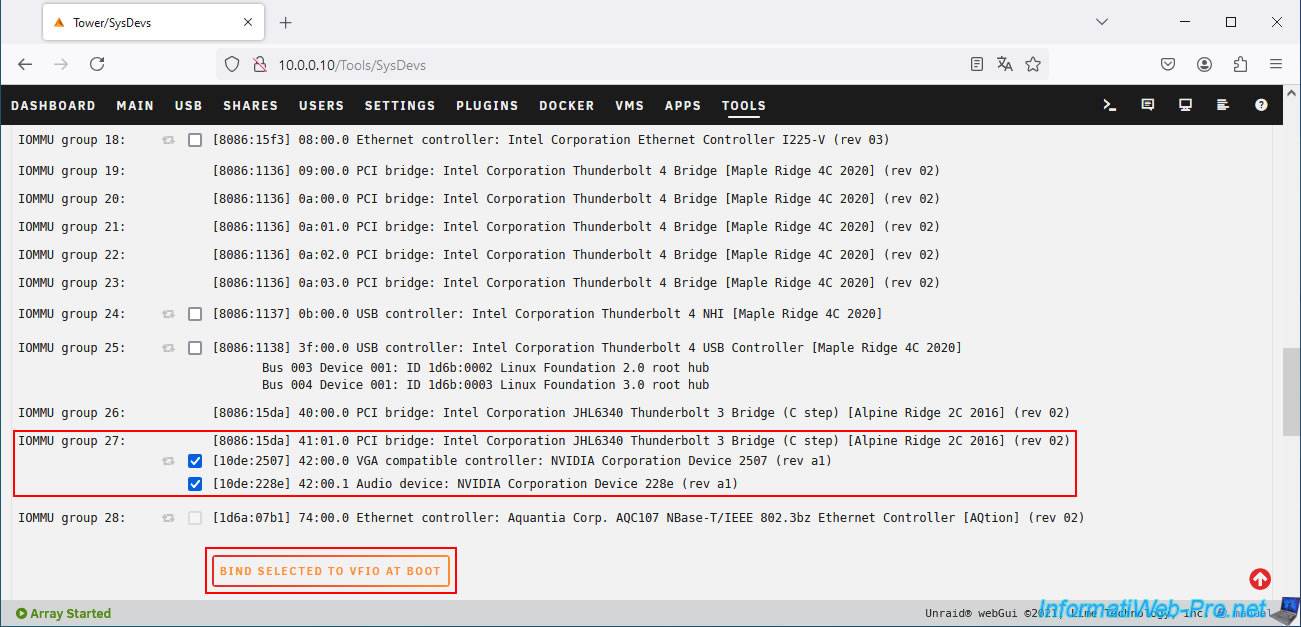
To do this, go to "Tools -> System Devices".
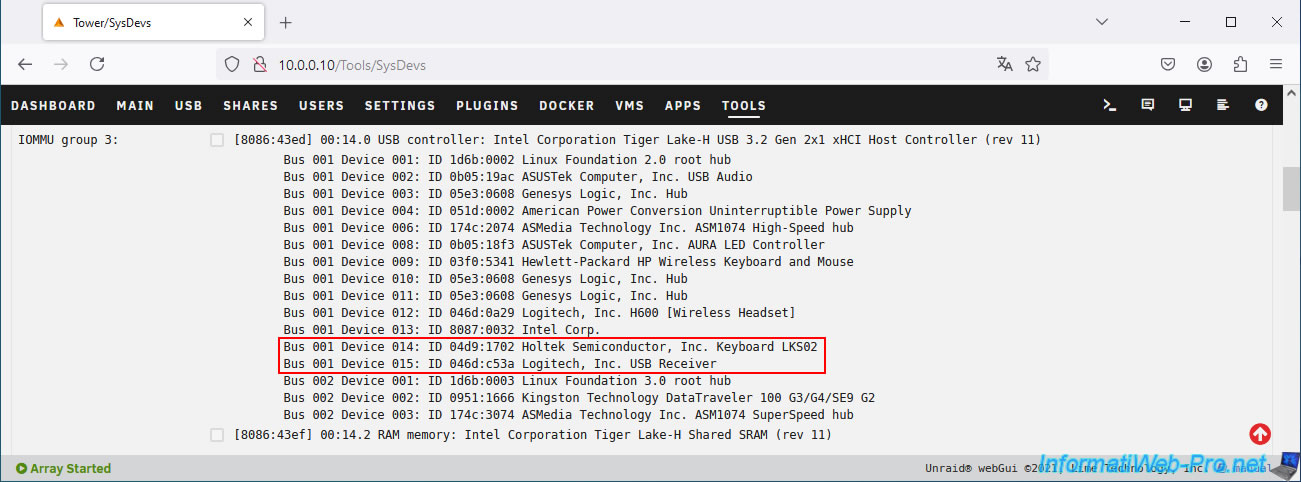
In the list that appears, you'll see your USB mouse and keyboard plugged into a USB controller on your computer.
However, you don't need to assign them to the VFIO.
You can easily connect them to your virtual machine later as USB devices.
In this list, you should find one or more Thunderbolt devices.
If Linux has detected the physical graphics card in your eGPU, you should find a "VGA compatible controller: NVIDIA ..." line (for the graphics portion of your graphics card), the corresponding "Audio device: NVIDIA ..." line (for its audio portion), and possibly other related lines (for the USB controller found on some graphics cards, for example).
As you can see, these "NVIDIA" lines are located just after the "41:01.0 PCI bridge ... Thunderbolt ..." component. This indicates that this is the physical graphics card in your eGPU connected via Thunderbolt to your PC.
Once you have checked the boxes for your entire NVIDIA graphics card, click the "Bind selected to VFIO at boot" button.
Important : make sure to assign all parts of your graphics card to the VFIO.
Otherwise, your incomplete graphics card will not work in your virtual machine and an error (code 43, I think) will occur in the device manager.
Important : you must always turn on your eGPU enclosure first, then wait 8 seconds (to give it time to boot) before turning on your Unraid server.
Unraid will not detect your eGPU in a plug-and-play manner. This means that your eGPU must be turned on before Unraid starts for it to be detected.
Important : for some unknown reason, even when following the above technique, the graphics card located in your eGPU may not be detected by Unraid and therefore may not appear here.
In this case, turn off your Unraid server, as well as your eGPU (via the switch on the back of your eGPU or by unplugging its power plug if you have no other choice).
Then, turn on your eGPU, wait another 8 seconds, and then restart your Unraid server. After two or three attempts, the physical graphics card in your eGPU will be recognized and appear in this list.
Note that Unraid does not officially support eGPUs, although it is possible with several attempts (as explained above).
The main thing is that once your eGPU's graphics card is recognized, it remains available without issue as long as you don't shut down Unraid or your eGPU.
Note: once your eGPU's graphics card is recognized, restarting your Unraid server will be no problem (if you restart your Unraid server, not if you turn it off and on again).
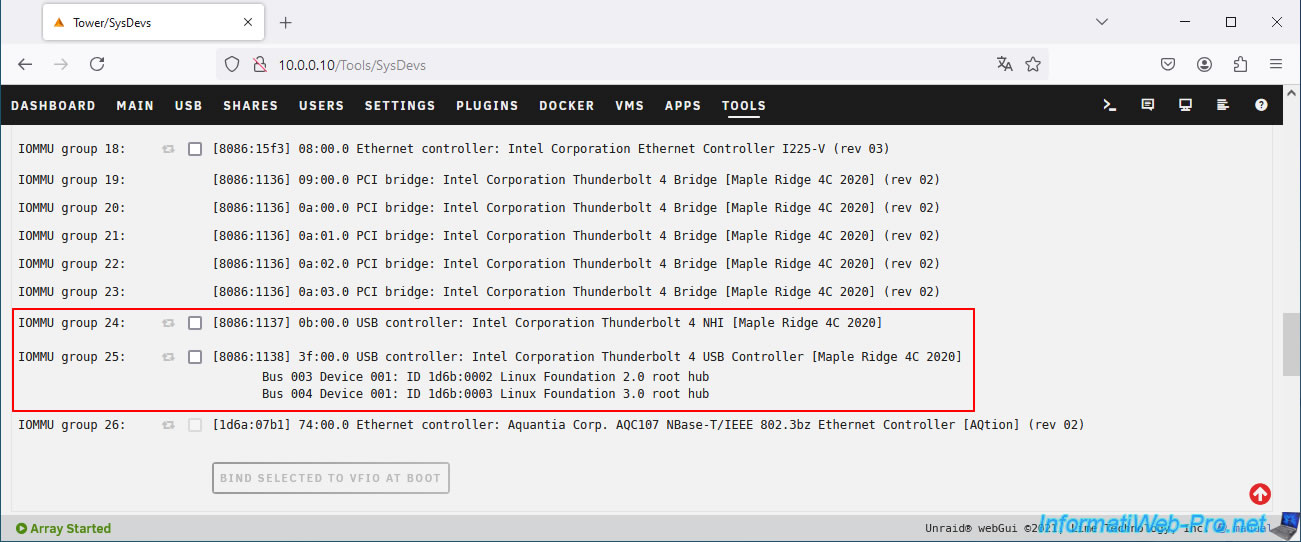
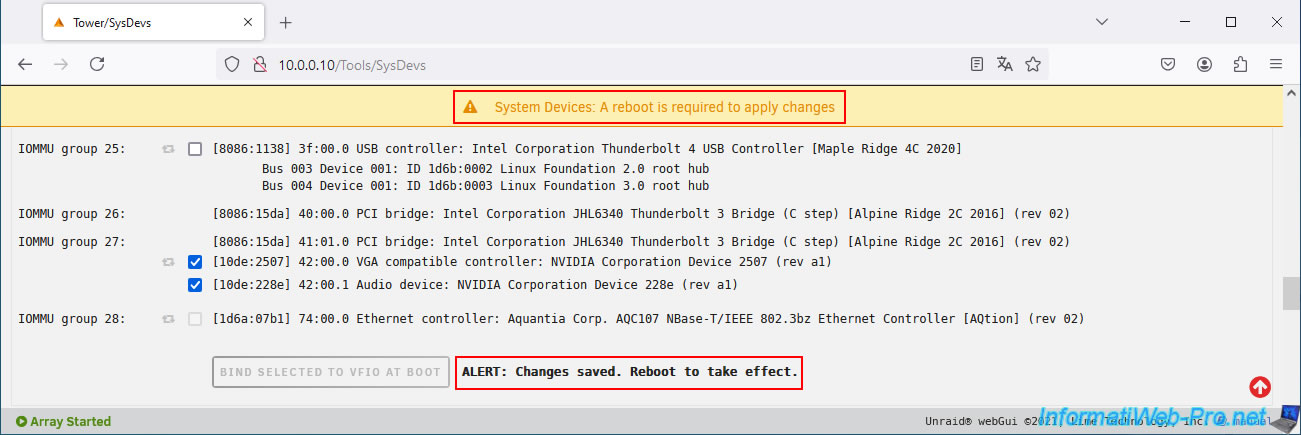
Once your graphics card (found in your eGPU) is assigned to the VFIO, you will need to restart your Unraid server.
Plain Text
System Devices: A reboot is required to apply changes.
ALERT: Changes saved. Reboot to take effect.
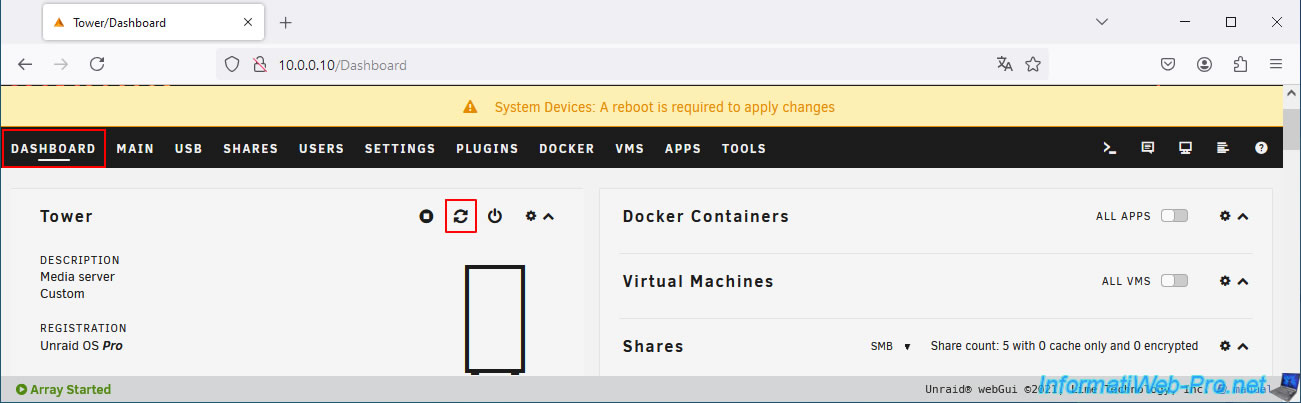
To do this, go to the "Dashboard" tab and click on the 2nd icon.
Confirm restarting your Unraid server.
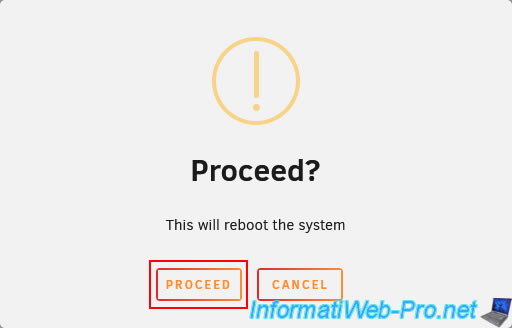
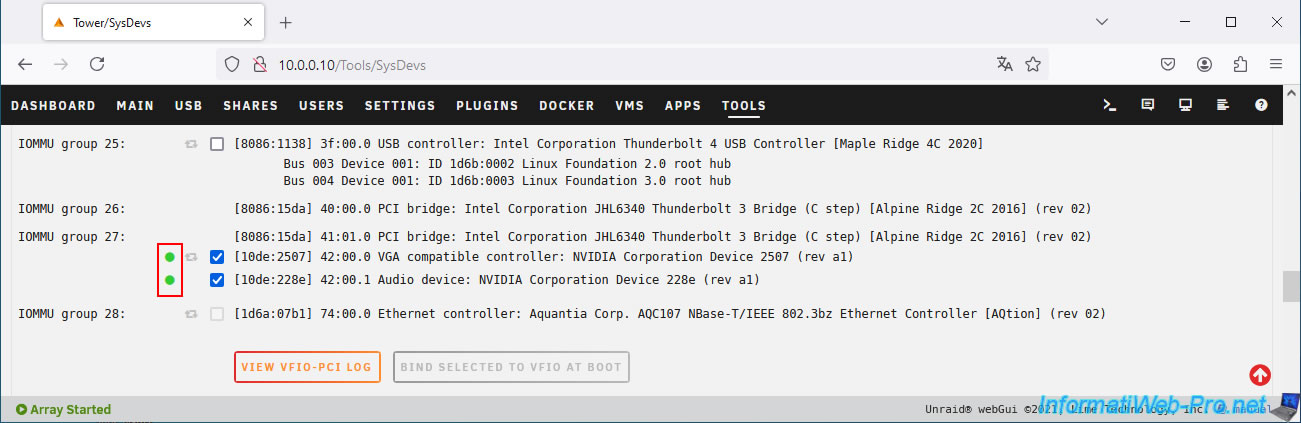
Once your Unraid server has restarted, return to the "Tools -> System Devices" section.
As you can see, green dots will appear to the left of your NVIDIA graphics card that you just assigned to the VFIO.
Share this tutorial
To see also
-
NAS 1/8/2026
Unraid 6.9.2 - Add a storage disk
-

NAS 11/21/2025
Unraid 6.9.2 - Install and configure Unraid 6.9.2
-

NAS 3/4/2026
Unraid 6.9.2 - Install the "Community Applications" plugin (old version)
-
NAS 1/28/2026
Unraid 6.9.2 - Replace the parity disk
No comment