- NAS
- Unraid
- 21 January 2026 at 09:45 UTC
-


Thanks to Unraid's array system and parity disk(s), your data is protected against data loss even if one of the disks fails.
If one of the disks in the array fails, no data will be lost; you only need to replace the affected disk.
In this tutorial, you will see how to recalculate the missing disk in the array.
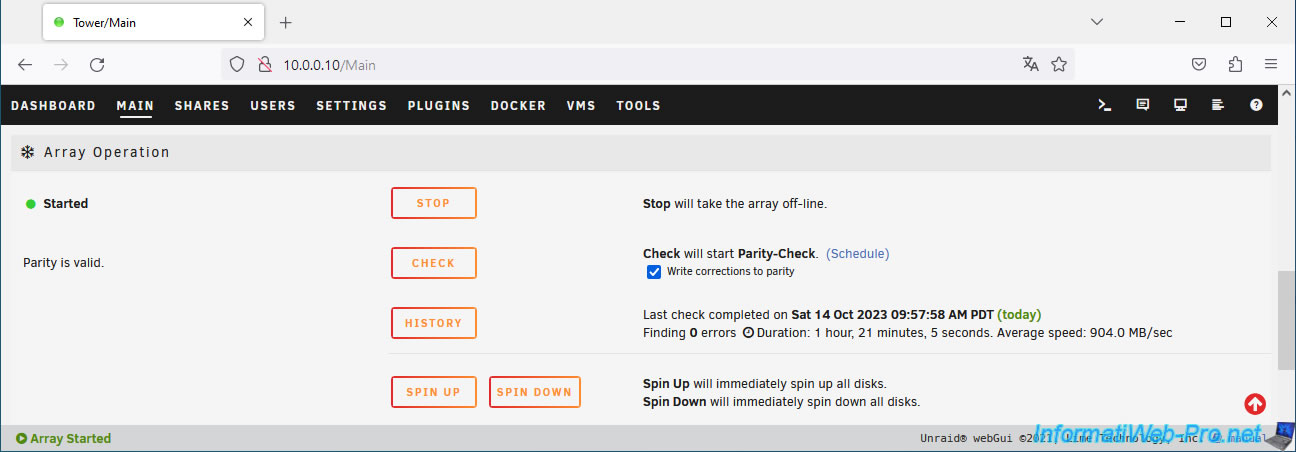
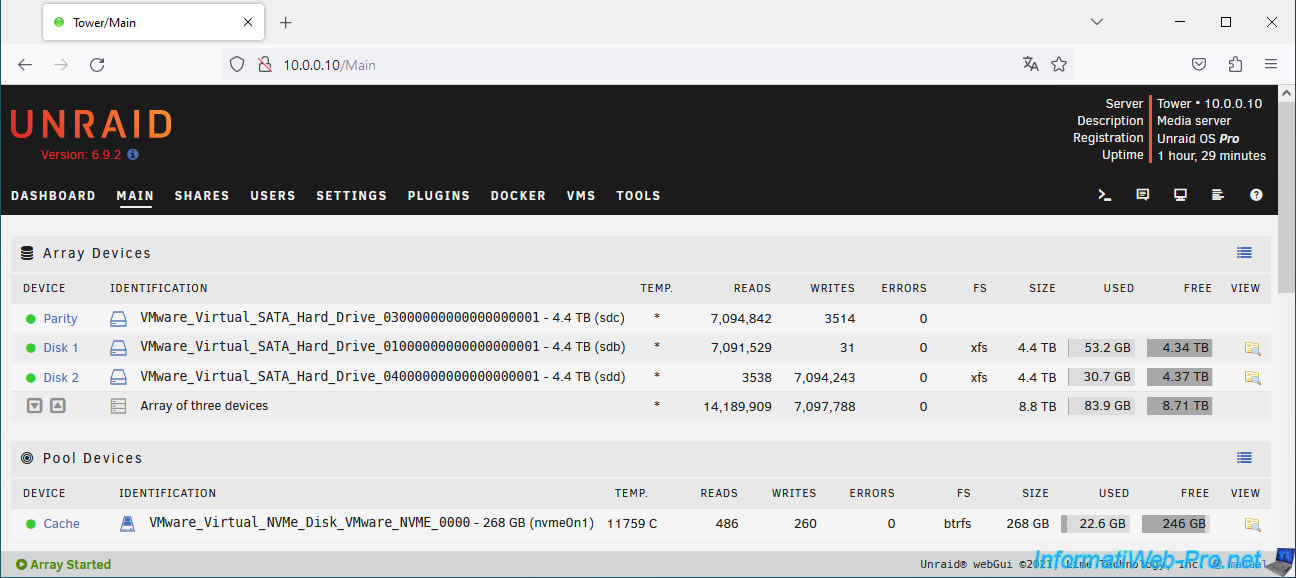
1. Array OK
Typically, you have at least one parity disk and several disks that are members of the array.
When everything is working, the icon to the left of these disks is green.

At the bottom of the page you can see that the array is started and the parity is good (Parity is valid).
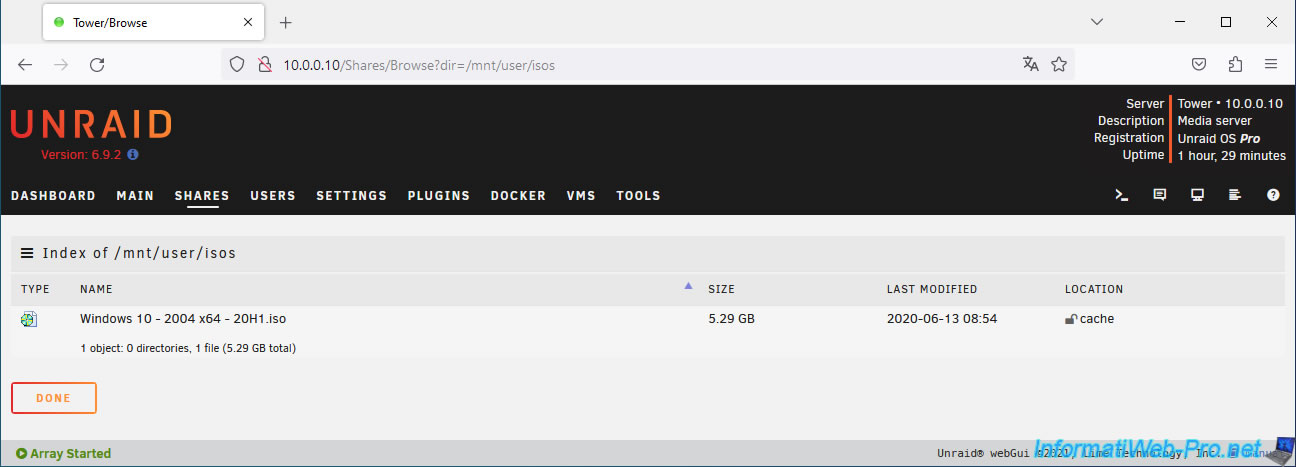
For this example, we added a file to the "isos" share, visible by default in the "Shares" tab of Unraid.
Simply click on the icon to the right of a share to view its contents.
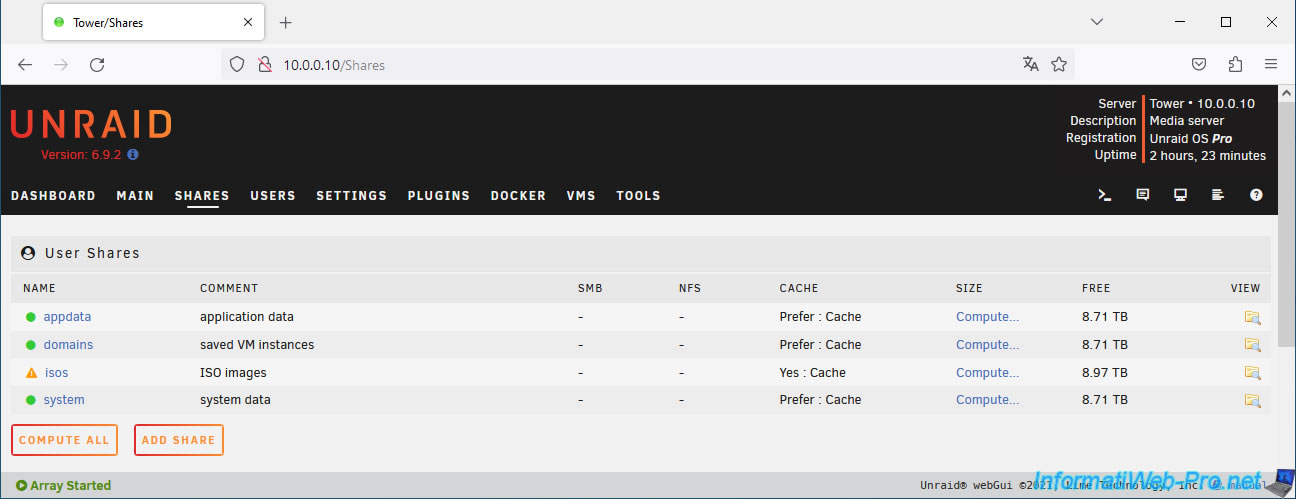
As you can see, there is an iso file in this folder.

2. Missing array disk
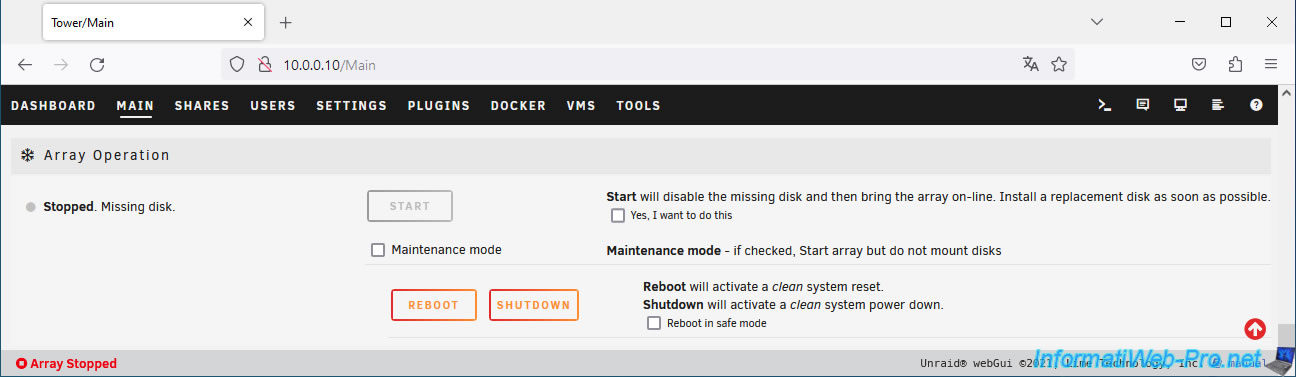
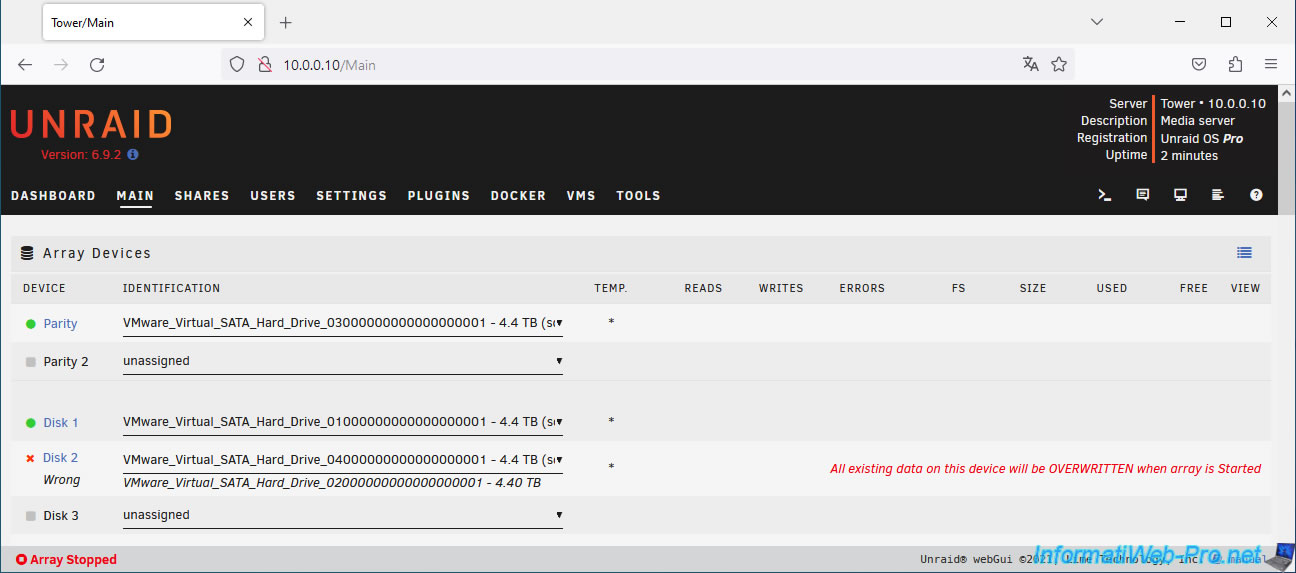
If a disk in the array fails, you'll see in the "Main" tab that Unraid indicates that the affected disk is missing (Disk 2 Missing).
Unraid also tells you the name of the missing disk.
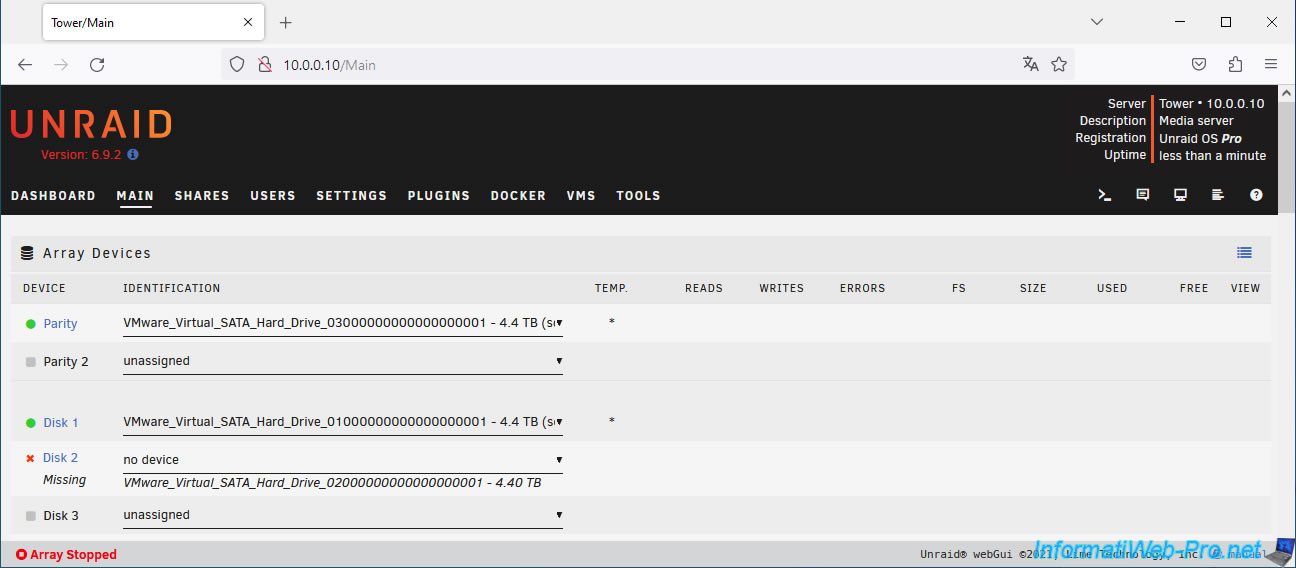
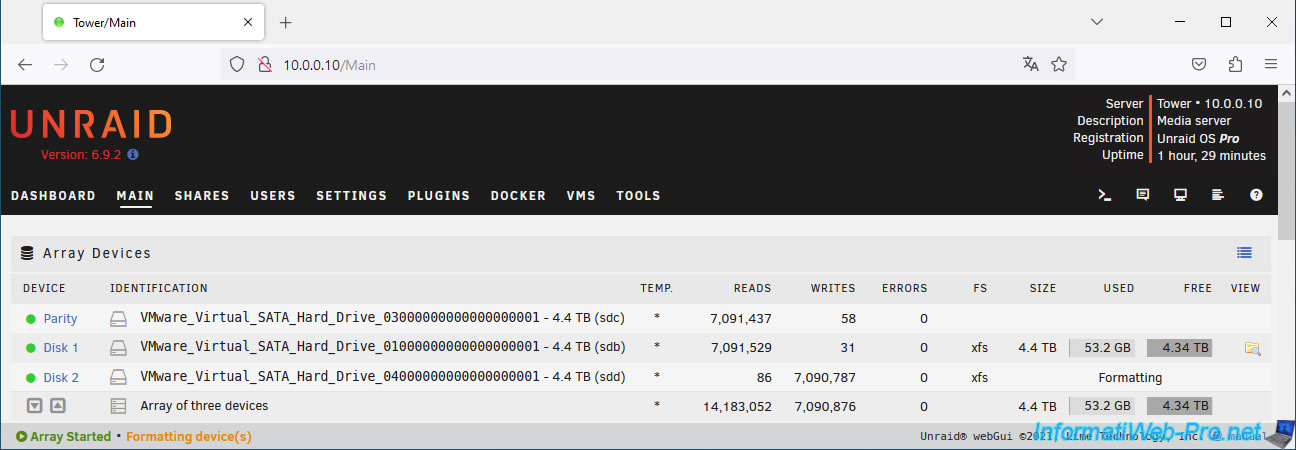
At the bottom of the page, you'll see that the array is shut down because the disk is missing.
To replace the failed disk, click "Shutdown" to shut down your Unraid server.
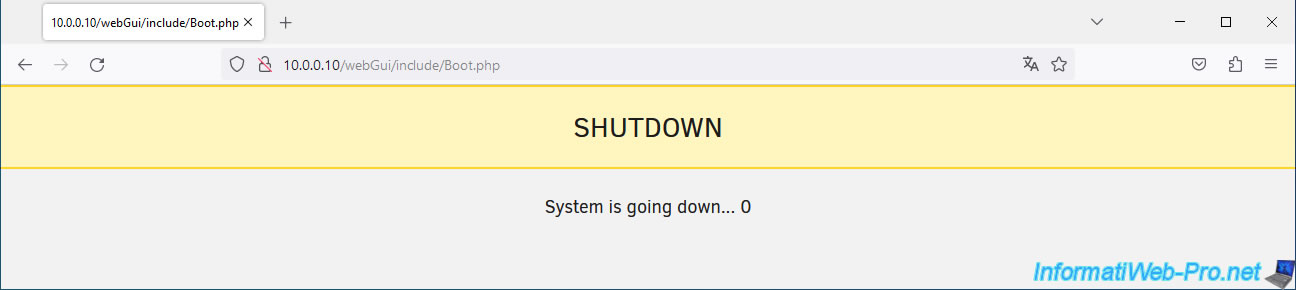
Confirm stopping the Unraid server by clicking Proceed.

The Unraid server is shutting down.
3. Replace the failed disk in the array
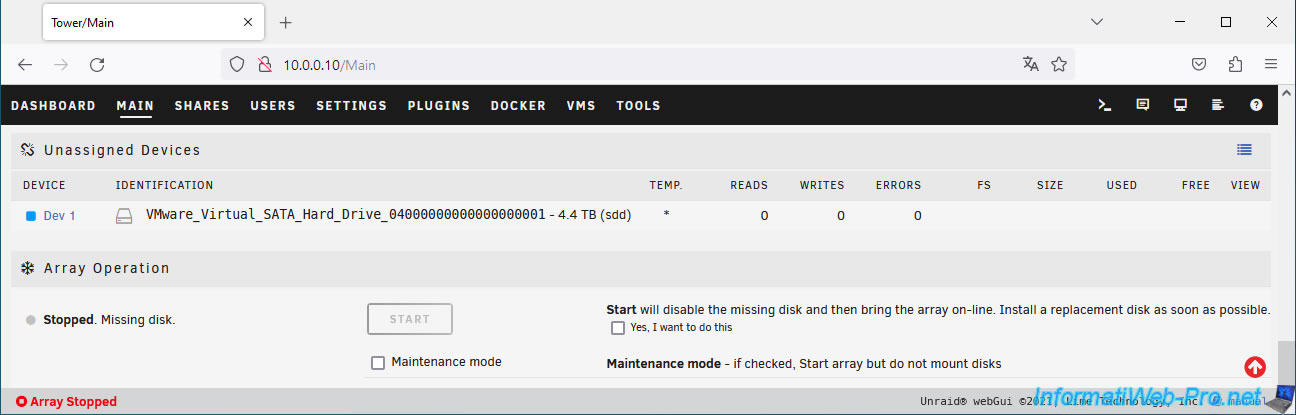
Plug a new disk for your array into your computer/server, then boot it.
Next, go to the "Main" tab and you'll see your new disk appear in the "Unassigned Devices" section.
In the "Array Devices" section, select your new disk for the missing disk (Disk X Missing).
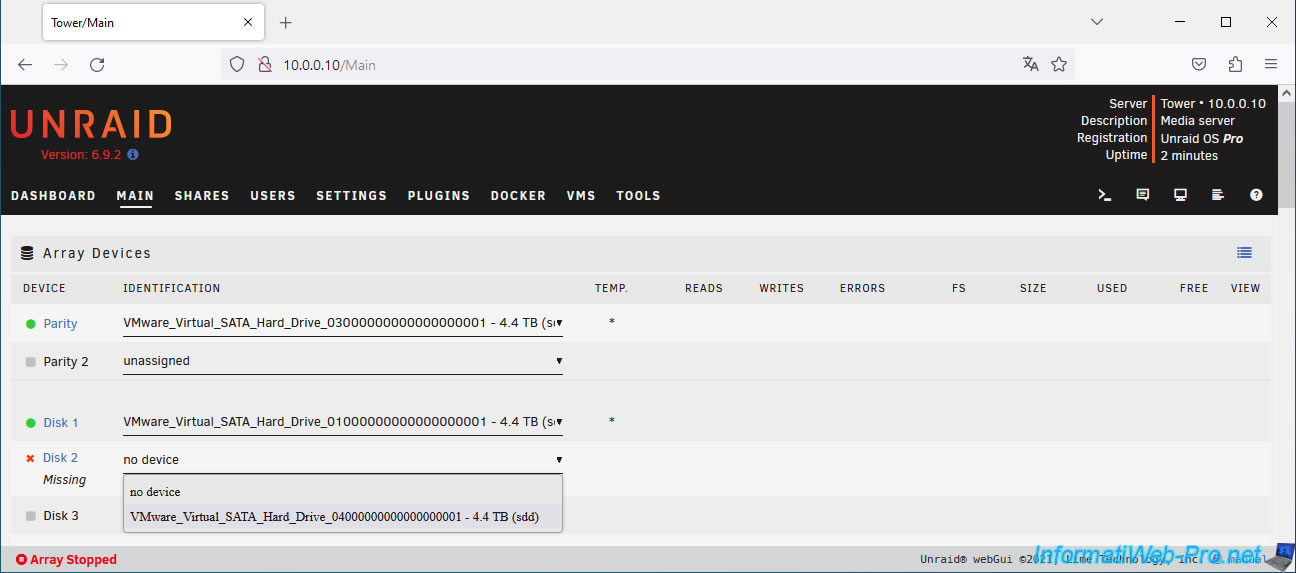
Important : Unraid warns you that all data on the selected disk will be overwritten (and therefore lost) when the array is started.
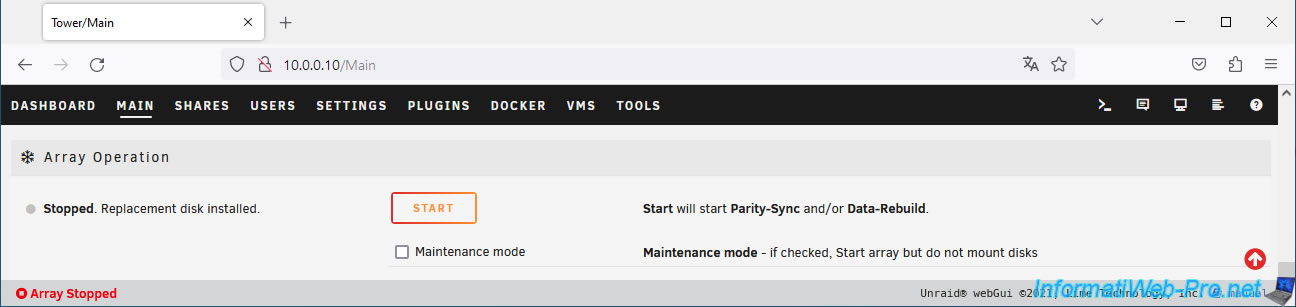
At the bottom of the page, you'll see that a replacement disk has been installed.
Click "Start" to boot the array and begin rebuilding the missing disk.
Plain Text
Start will start Parity-Sync and/or Data-Rebuild.
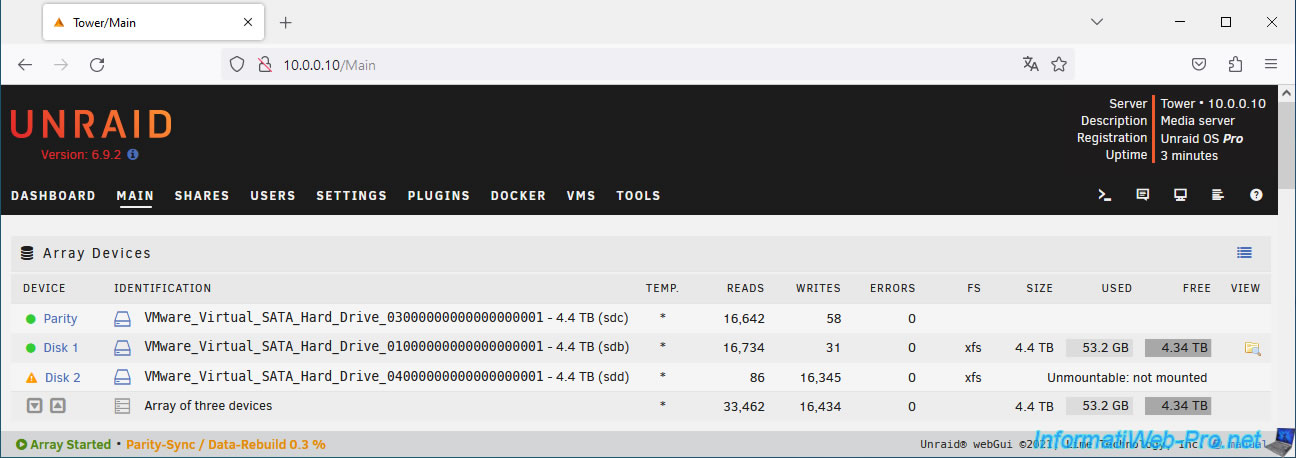
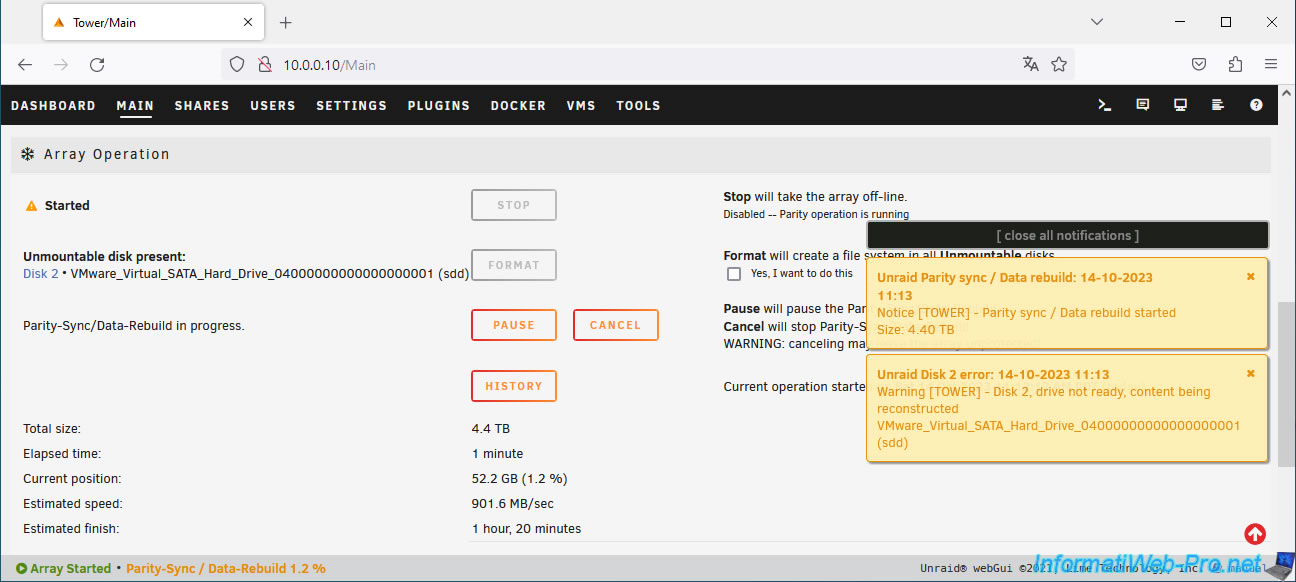
While the missing disk is being rebuilt, you will see:
- an orange triangle will appear next to the affected drive.
- the message "Parity-Sync / Data-Rebuild 0.3%" at the bottom of the page will allow you to monitor the progress of your drive's rebuild.
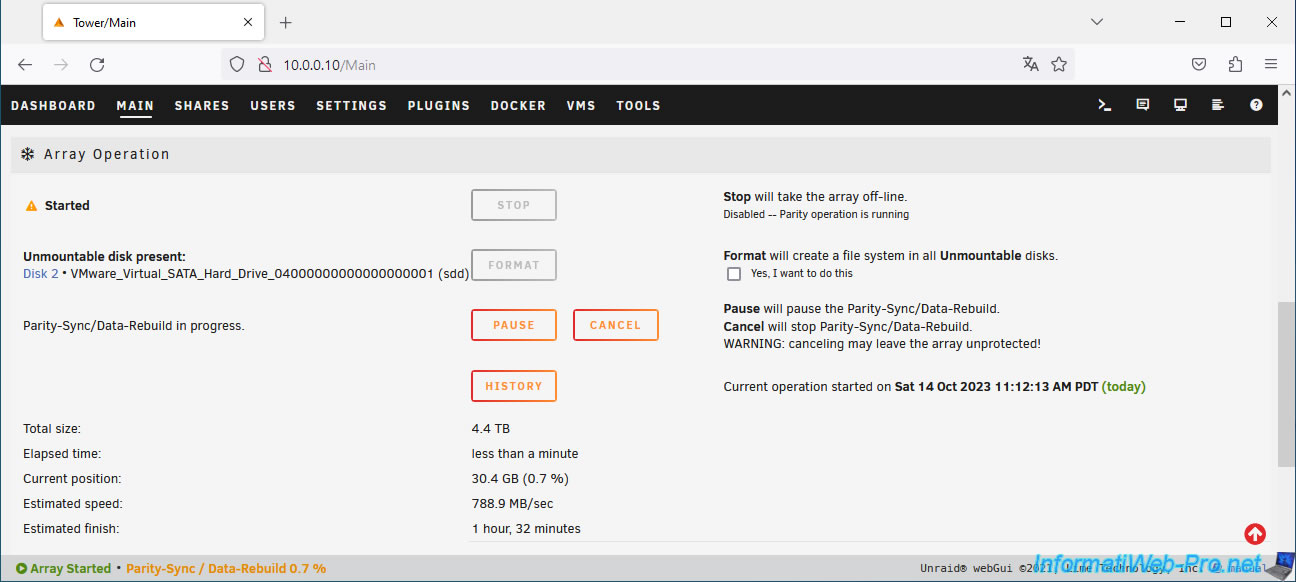
At the bottom of the page you can get detailed information about rebuilding your disk:
- the size of the disk to be rebuilt.
- the elapsed time.
- the current location.
- the estimated speed (in MB/sec).
- the estimated time remaining to rebuild the data on this disk.
You may also receive warning notifications about rebuilding data on your new drive.
Plain Text
Unraid Parity sync / Data rebuild: ...
Notice [TOWER] - Parity Sync / Data rebuild started.
Size: 4.40 TB.
Plain Text
Unraid Disk 2 error: ...
Warning [TOWER] - Disk 2, drive not ready, content being reconstructed ... (sdd).
Once the data reconstruction is complete, you will see 2 green notifications appear.
Plain Text
Unraid Parity sync / Data rebuild: ...
Notice [TOWER] - Parity Sync / Data rebuild finished (0 errors).
Duration: 1 hour, ...
Plain Text
Unraid Disk 2 message: ...
Warning [TOWER] - Disk 2 returned to normal operation ... (sdd).
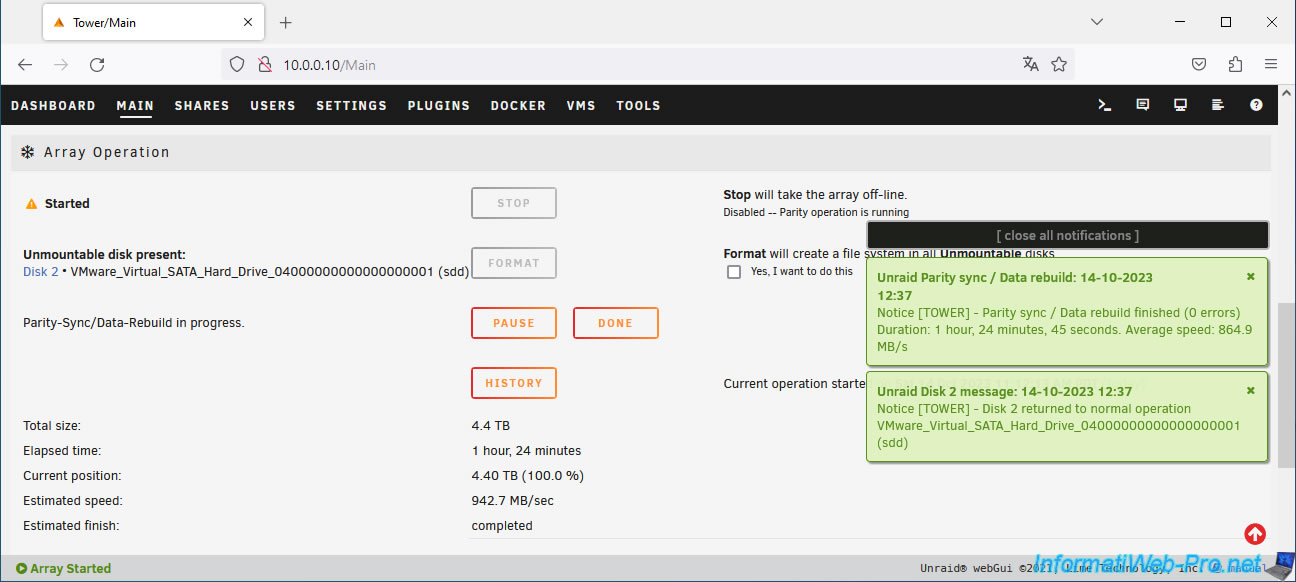
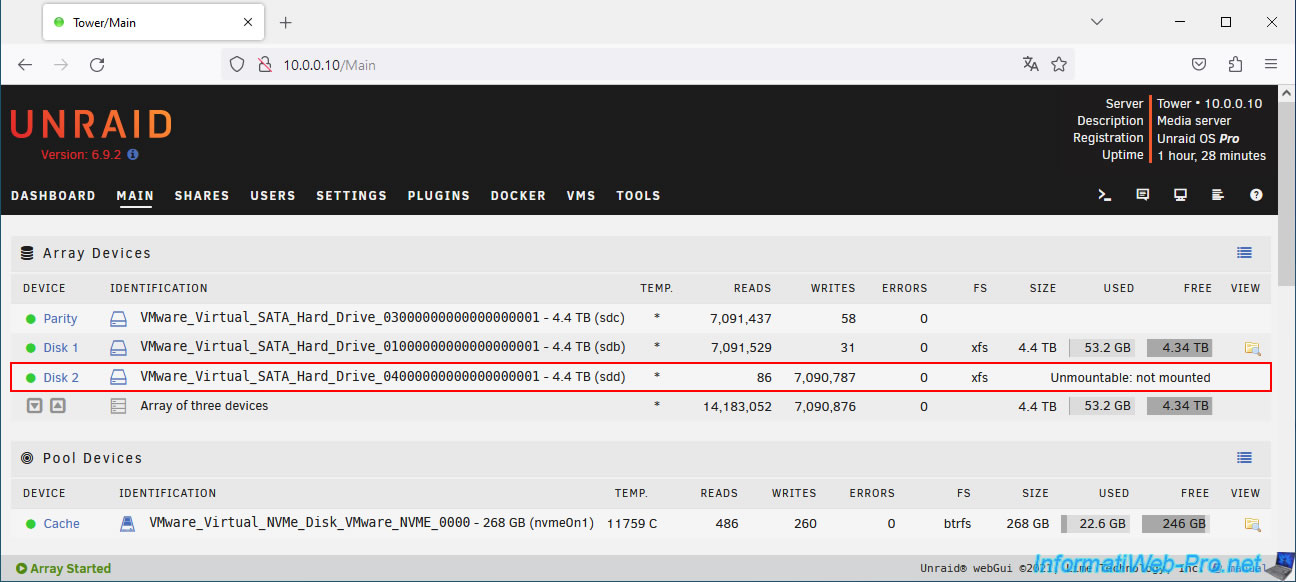
Important : as you can see, currently the new disk is not available (Unmountable: not mounted).
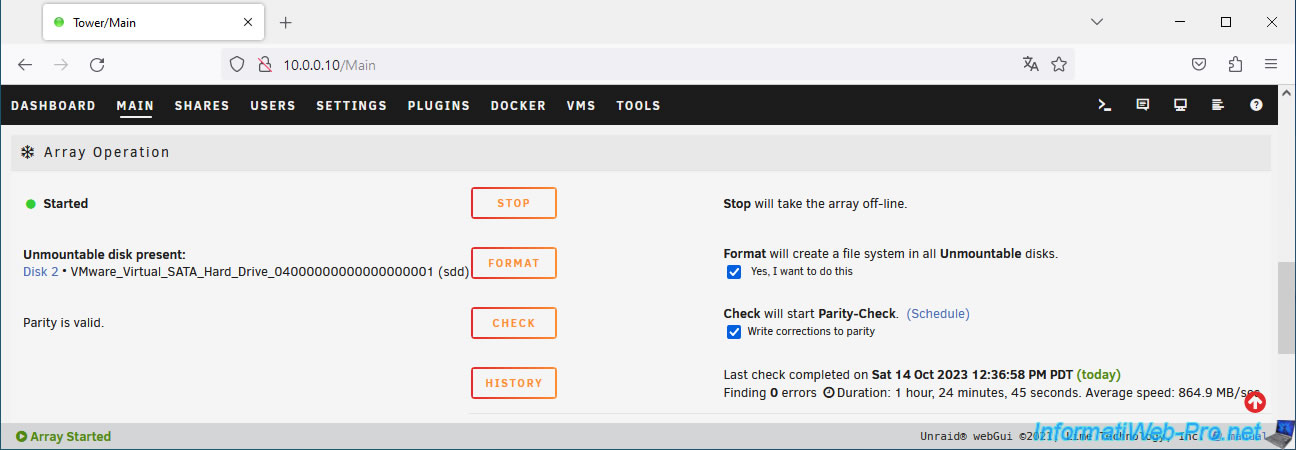
4. Format the new disk
To use the new disk in your array, you need to format it to create a file system.
To do this, scroll to the bottom of the page.
Here, you'll see that an unmountable disk is present.
However, you'll notice that the "Format" button is currently grayed out.
To fix this, simply check the "Yes, I want to do this" box (located just to the right).

Checking this box will display a warning informing you that formatting an unmountable disk will erase all data on it.
Click OK.

Then, click the "Format" button to format this disk.
Please wait while the disk is formatted.
Plain Text
Formatting devices.
Once the disk is formatted, a size will appear for it.
5. Data retained
As you can see, the data has been preserved.
Share this tutorial
To see also
-
NAS 1/15/2026
Unraid 6.9.2 - Change the parity disk
-
NAS 3/4/2026
Unraid 6.9.2 - Install the "Community Applications" plugin (old version)
-
NAS 5/13/2026
Unraid 6.9.2 - SWAG - Locally access the reverse proxy (SWAG)
-
NAS 7/22/2026
Unraid 6.9.2 - VMs - Backing up a VM manually
You must be logged in to post a comment