- Firewall
- pfSense
- 17 September 2025 at 07:32 UTC
-

- 1/6


Previously, we explained how to create a site-to-site VPN tunnel with OpenVPN on pfSense by protecting it with a shared key.
However, in this tutorial, we will explain how to do it by securing OpenVPN with SSL certificates.
Note: as for the OpenVPN tunnel in our previous tutorial, we will use a virtual infrastructure (in our case) with 2 sites: site 1 (Brussels) with the network ID "10.0.1.0/24" and site 2 (Paris) with the network ID "10.0.2.0/24".
The OpenVPN server will be installed on site 1 (Brussels), as this is the company's headquarters and the OpenVPN client will be installed on site 2 (Paris). If you have other geographic sites in your case, you will just need to install an OpenVPN client on pfSense and configure what is needed (as you will see in this tutorial).
- Configure site 1 in Brussels for OpenVPN
- Create an internal certificate authority for OpenVPN on the server (site 1 - Brussels)
- Create a certificate for the OpenVPN server on site 1 (Brussels)
- Create a certificate for the OpenVPN client on site 2 (Paris)
- Export internal CA certificate and client certificates
- Add an OpenVPN server on pfSense on site 1 (Brussels)
- Add specific configuration per OpenVPN client
- Allow access to the OpenVPN server from the WAN interface on site 1 (Brussels)
- Allow network traffic in OpenVPN tunnel to site 1 (Brussels)
- Configure site 2 in Paris for OpenVPN
- Check OpenVPN tunnel status
- View logs for OpenVPN
- Testing ping via the OpenVPN tunnel
- Testing access to a website from a remote site
- Add the OpenVPN widget to the pfSense dashboard (optional)
1. Configure site 1 in Brussels for OpenVPN
1.1. Create an internal certificate authority for OpenVPN on the server (site 1 - Brussels)
To get started, you need to create a certificate authority that will be used by OpenVPN to authenticate clients to your OpenVPN server.
The OpenVPN server will have a "server" type certificate and the clients will each have a different "user" type certificate.
These certificates will come from the internal certification authority that you will create on the pfSense machine at site 1 (Brussels) where you will later install the OpenVPN server.
To learn more about how a certificate authority works, refer to our article: WS 2016 - AD CS - What is a CA and install an enterprise CA.
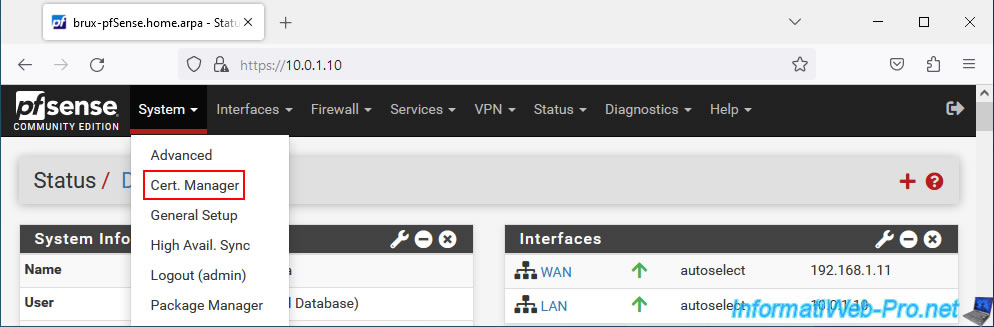
To do this, on site 1 (Brussels), go to: System -> Cert. Manager.
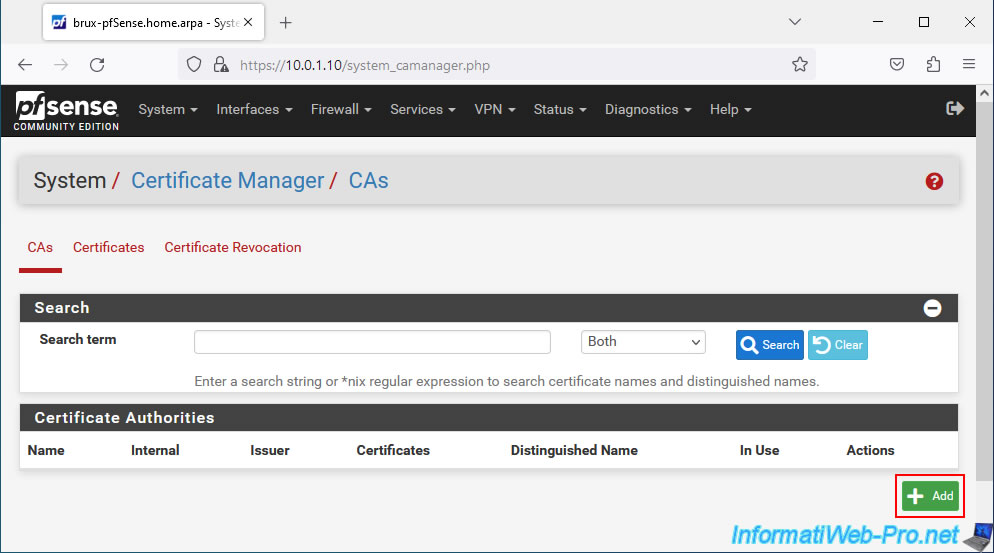
Then, in the "CAs" tab of the "System / Certificate Manager / CAs" page that appears, click on: Add.
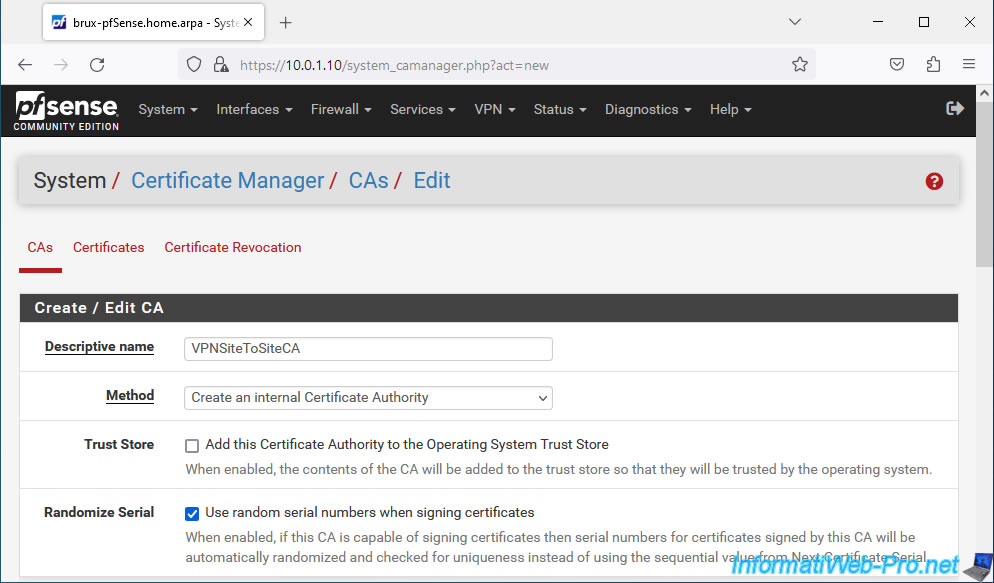
On the page that appears, in the "Create / Edit CA" section, configure these settings:
- Descriptive name: provide a name for your internal certificate authority (CA).
In our case: VPNSiteToSiteCA. - Method: Create an internal Certificate Authority.
This allows you to create a new "public key/private key" key pair, as well as register certificates for servers or users (VPN clients in this case). - Randomize Serial: check the box "Use random serial numbers when signing certificates" so that the serial numbers of certificates issued by this certification authority are generated randomly for security reasons.
Indeed, this greatly reduces the possibility of guessing the serial number of a certificate.
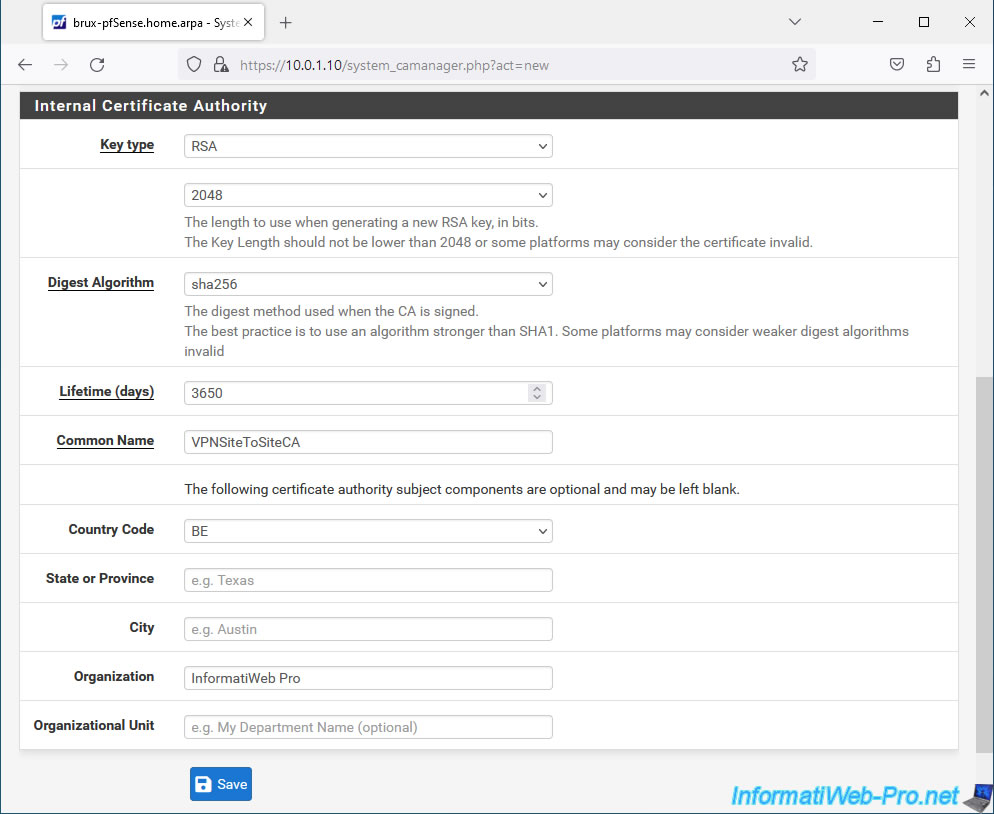
In the "Internal Certificate Authority" section, you will be able to configure security settings, as well as for information purposes for your certificate authority:
- Key type: leave the "RSA" encryption algorithm selected by default and use a key size of at least 2048 (for security reasons).
- Digest Algorithm: select the "sha256" algorithm at least.
- Lifetime (days): validity period of the certification authority certificate. Default: 3650 days = 10 years.
- Common Name: name of the certification authority.
In our case: VPNSiteToSiteCA. - The other settings are optional and allow you to add attributes for information purposes, such as: the country and city where the server is located, the name of your company, ...
Warning : when the certificate of a certification authority expires, the certificates issued by it become invalid.
Consider this when specifying the Lifetime of this certificate of authority.
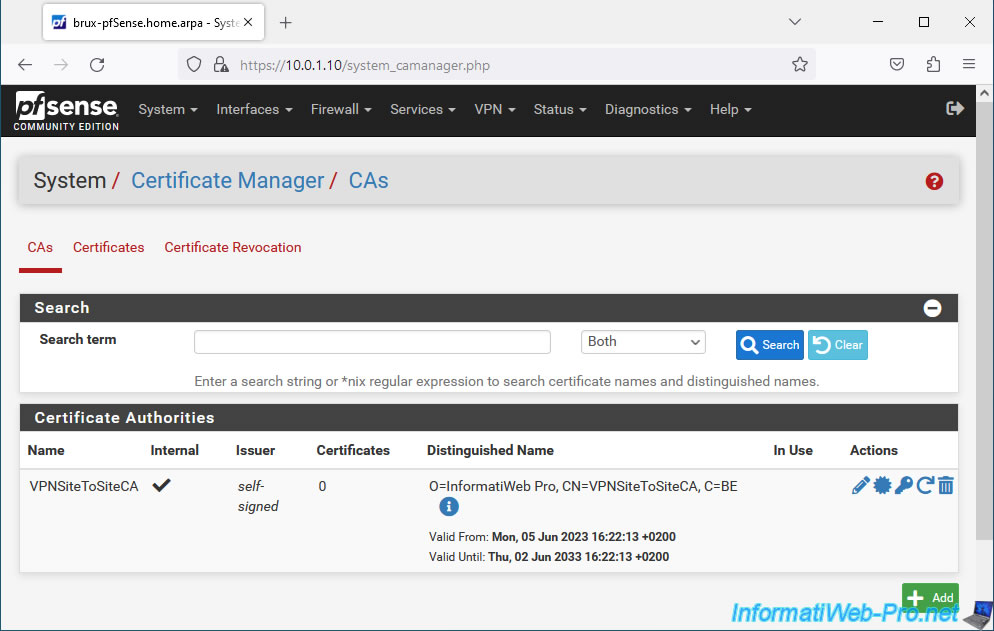
Your internal CA certificate has been created.
1.2. Create a certificate for the OpenVPN server on site 1 (Brussels)
Now that you have an internal certificate authority, you can generate certificates that will emanate from it.
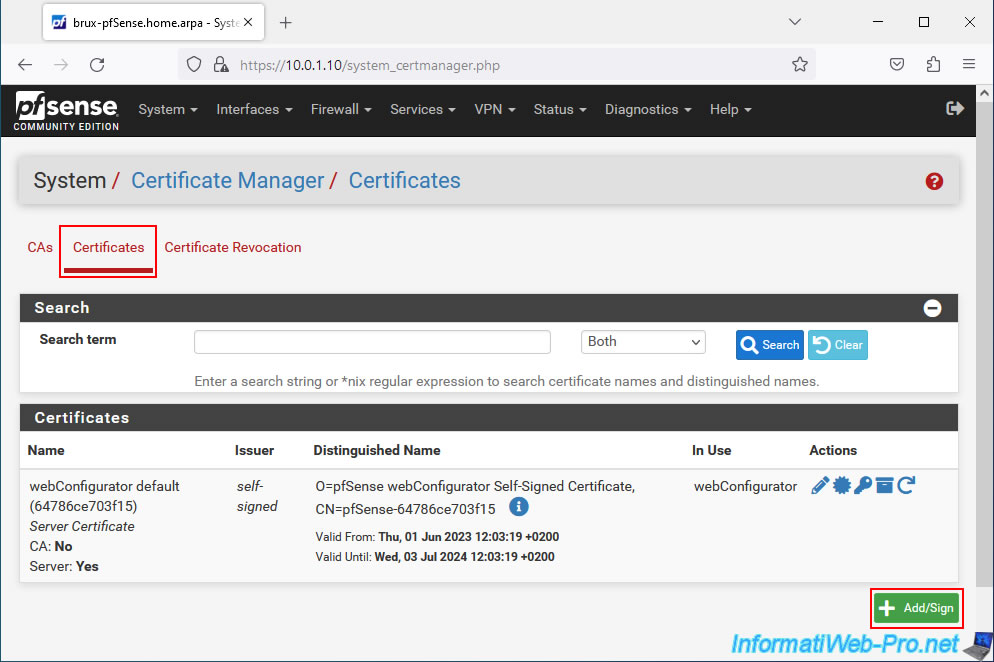
To do this, in the "Certificates" tab, click on: Add.
Note: the "webConfigurator default" SSL certificate that you see in the list simply concerns the web interface that you are currently using and which is accessible via HTTPS.
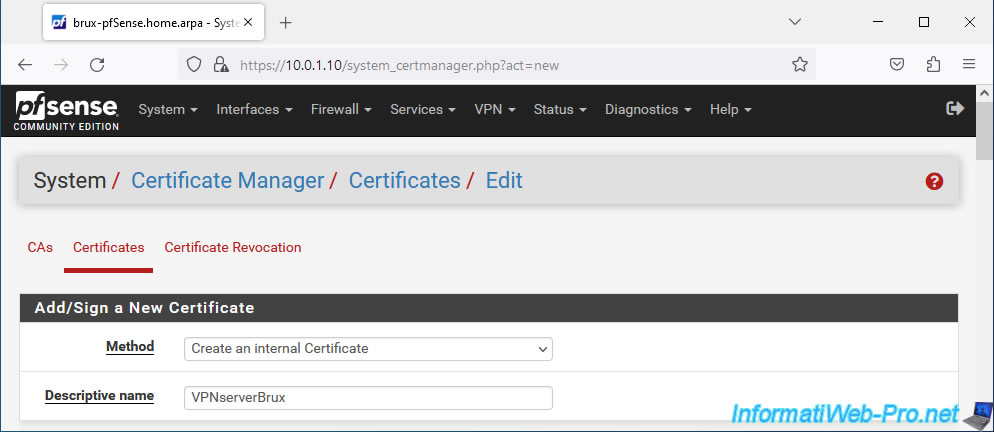
On the page that appears, in the "Add/Sign a New Certificate" section, configure these settings:
- Method: Create an internal Certificate. Allows you to create a new internal certificate (for a server or a user).
- Descriptive name: a name for this certificate.
In our case, this is a certificate for our OpenVPN server in Brussels, so we specified "VPNserverBrux" as the name.
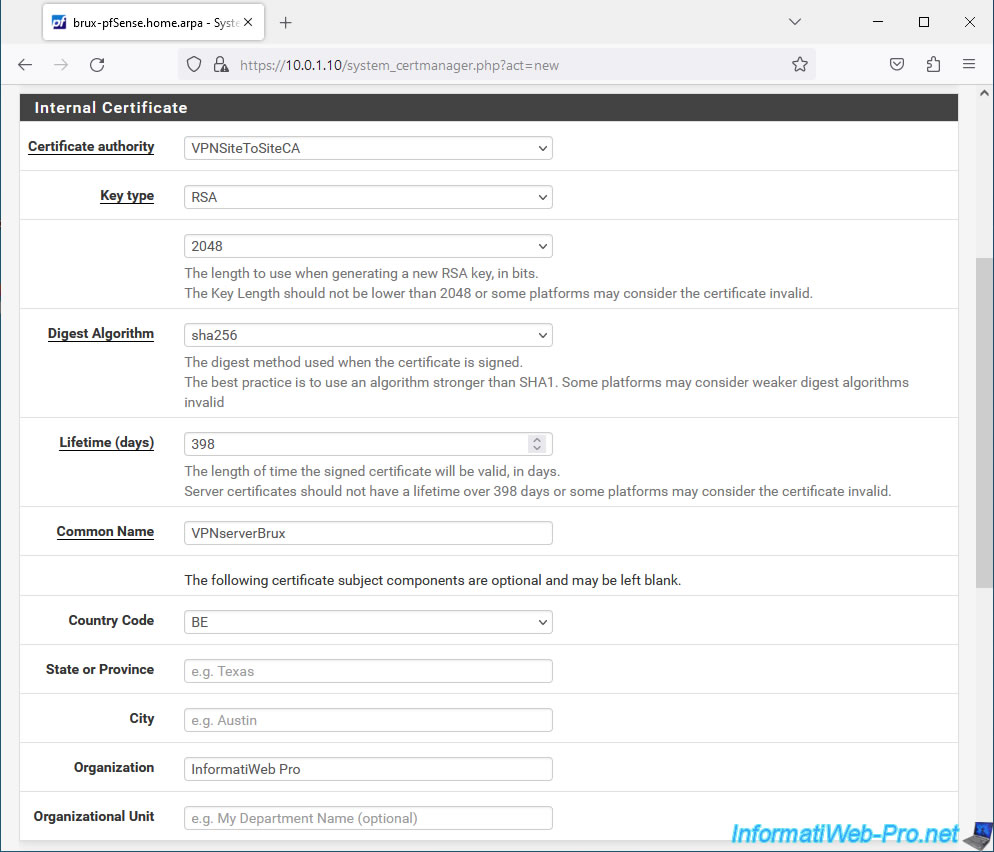
In the "Internal Certificate" section, configure these settings:
- Certificate authority: the certification authority which must issue (sign) this certificate.
Select the Certificate Authority (CA) created previously. In our case: VPNSiteToSiteCA. - Key type: type and size of the key.
In our case: RSA 2048. Which corresponds to the values previously used when creating the certificate of the certification authority (CA). - Digest Algorithm: choose "sha256" as when creating your internal CA certificate.
- Lifetime (days): indicate a maximum lifespan of 398 days for reasons of compatibility with certain platforms (according to the pfSense documentation).
398 days = 1 year, 1 month and 2 days. - Common Name: the common name of this certificate. This name is fictitious, but will be used when configuring OpenVPN.
In our case, for the OpenVPN server, we indicated "VPNserverBrux". - Country Code, ...: additional options that you can complete for information purposes. As for the internal CA certificate.
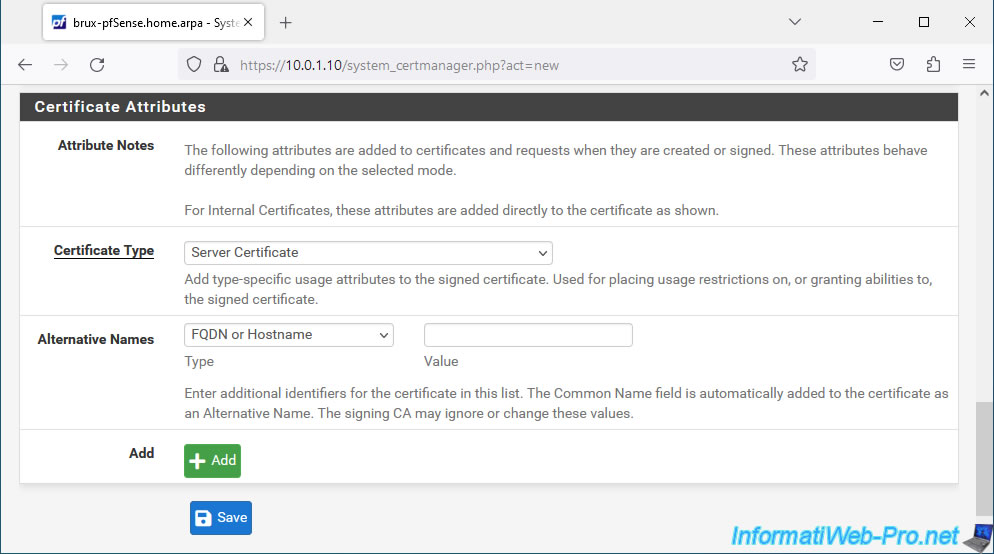
Finally, in the "Certificate Attributes" section, select "Server Certificate" and simply click Save.
Important : you must always select "Server Certificate" when generating a certificate that will be used by an OpenVPN server.
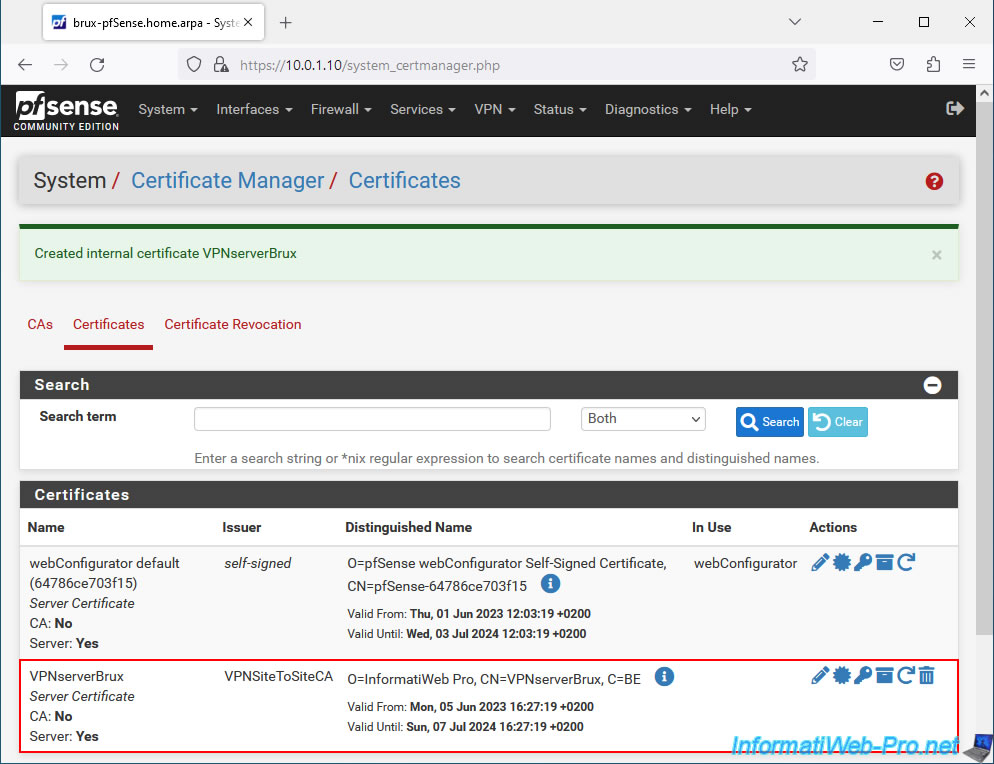
The certificate for your OpenVPN server has been created.
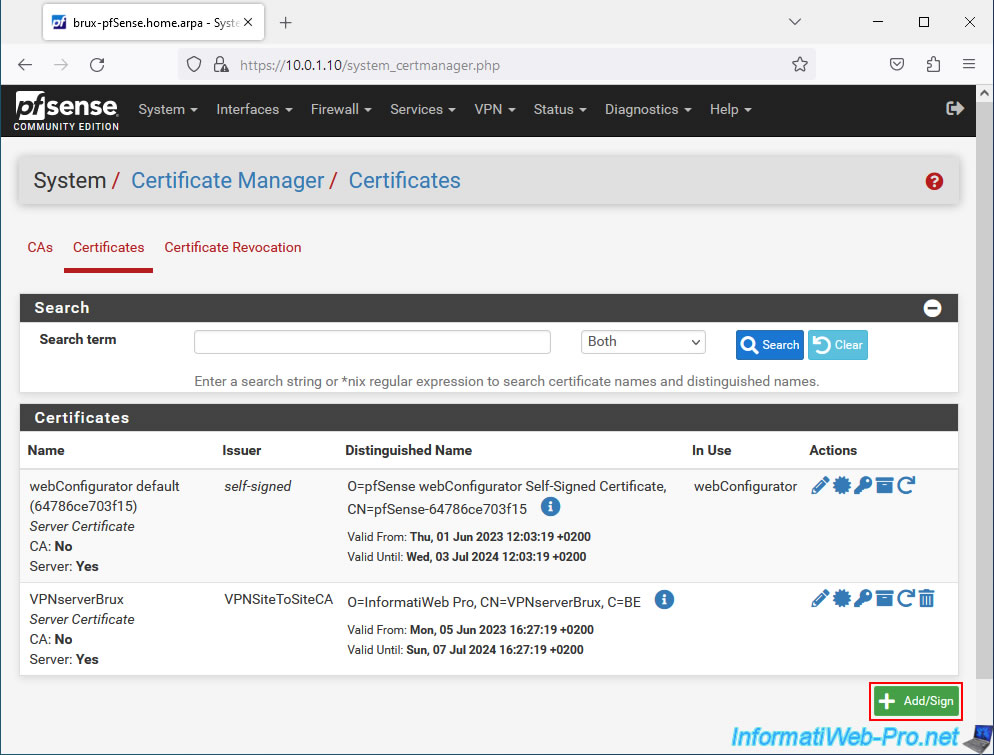
1.3. Create a certificate for the OpenVPN client on site 2 (Paris)
In the "Certificates" tab, click "Add" again.
Important : you must create as many certificates as sites that will be configured with an OpenVPN client.
Indeed, when OpenVPN operates in SSL/TLS mode, it uses client certificates to identify OpenVPN clients.
Additionally, you can assign specific configurations to an OpenVPN client by specifying the common name of the certificate you will create here.
Hence the importance of generating a certificate per site per OpenVPN client.
In our case, we have 2 sites. So, site 2 (Paris) will use an OpenVPN client.
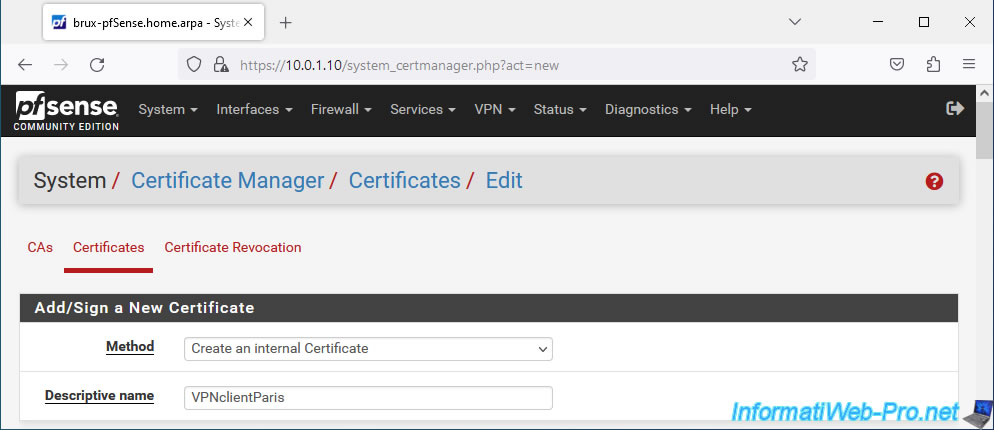
In the "Add/Sign a New Certificate" section of the page that appears, indicate this:
- Method: Create an internal Certificate.
- Descriptive name: VPNclientParis. In our case, it is a certificate for the future OpenVPN client from Paris.
In the "Internal Certificate" section, specify the same parameters as for the previous certificate, except for the Common Name of the certificate.
- Certificate authority: VPNSiteToSiteCA.
- Common Name: VPNclientParis. In our case, this certificate will be for the OpenVPN client from Paris.
- and more.
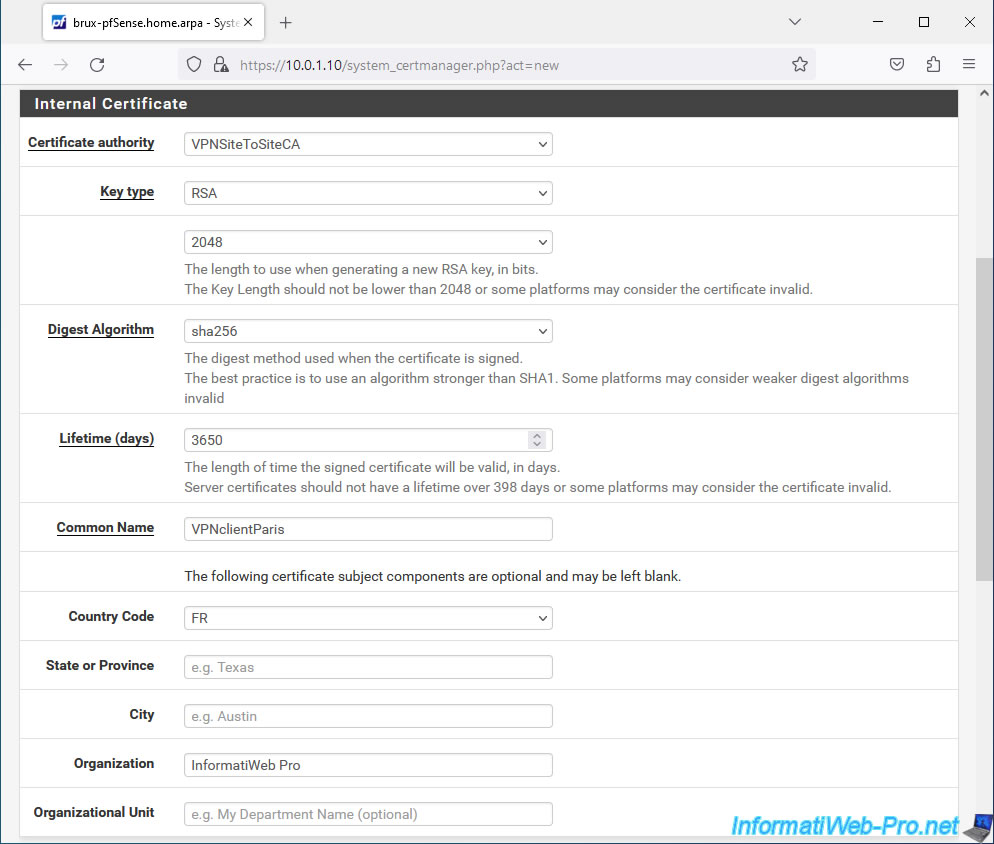
Select "User Certificate" for the certificate type and click: Save.
Important : you must always select "User Certificate" when it is to be used by an OpenVPN client.

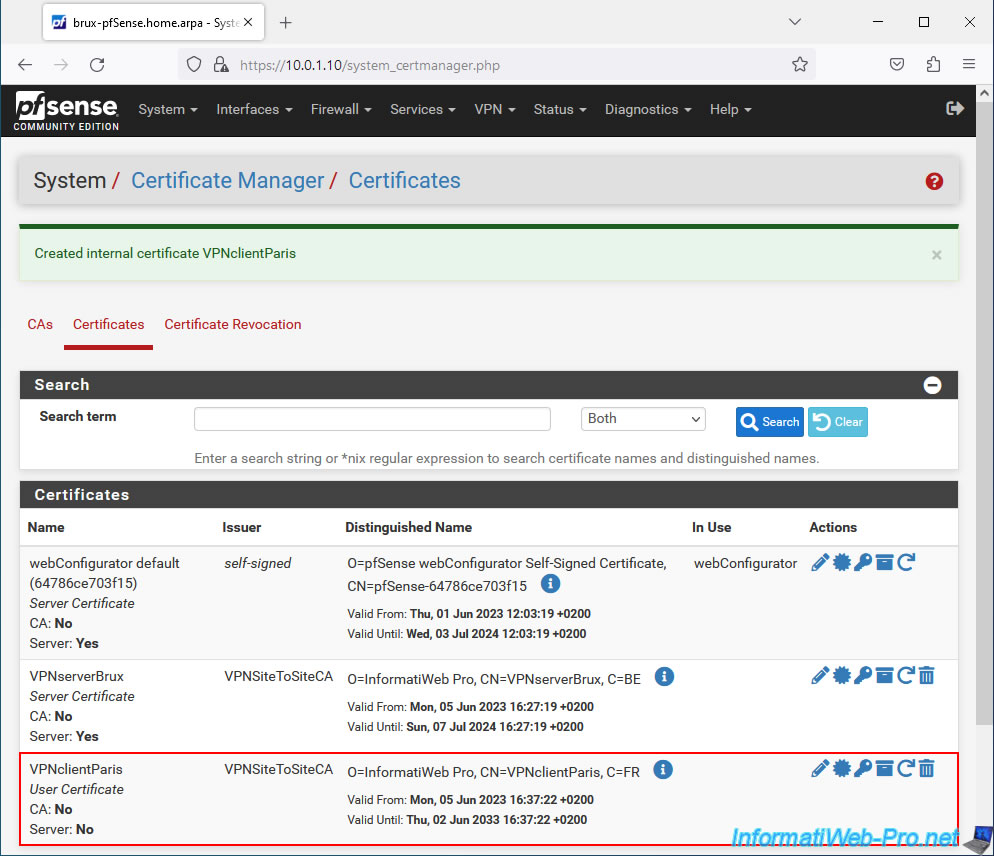
The certificate for your OpenVPN client has been created.
1.4. Export internal CA certificate and client certificates
When you want to configure an OpenVPN client on a remote site (in our case: that of Paris), you will need the user certificate corresponding to this OpenVPN client.
However, given that this comes from your internal certification authority created on site 1 (Brussels), you will also need the certificate from your CA so that the chain of trust is complete.
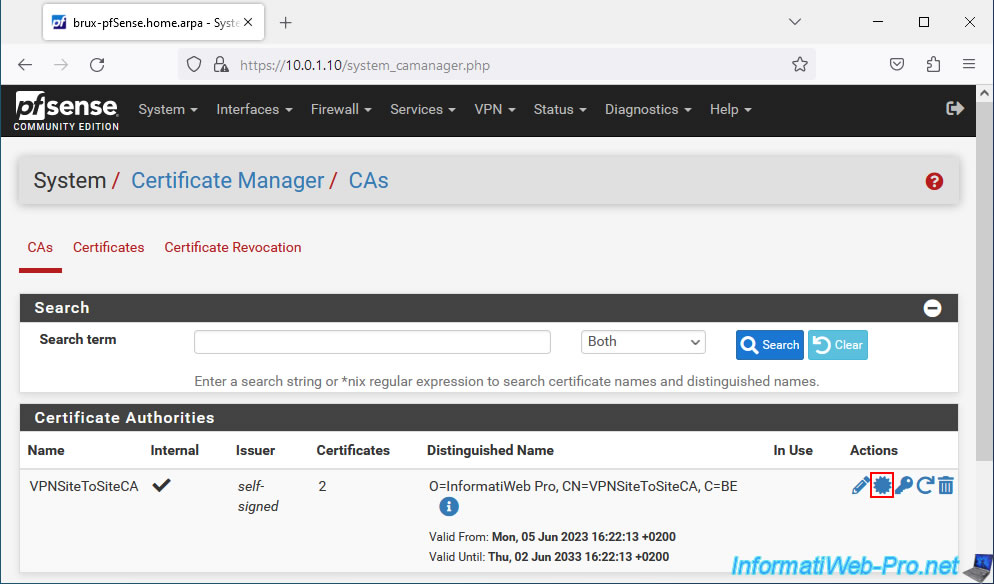
To get started, go to "System -> Certificate Manager", then to the "CAs" tab.
Then, click on the star icon (framed in red) in the image below to export only its certificate (which notably contains its public key).
Warning : to verify the signature and validity of a certificate, pfSense only needs the certificate from your certification authority.
In fact, the verification of a certificate is carried out using the public key present in the certificate of your certification authority.
The private key must remain on the server where you created your certificate authority and your clients must never know it. Otherwise, they could create valid certificates from your certificate authority (CA).
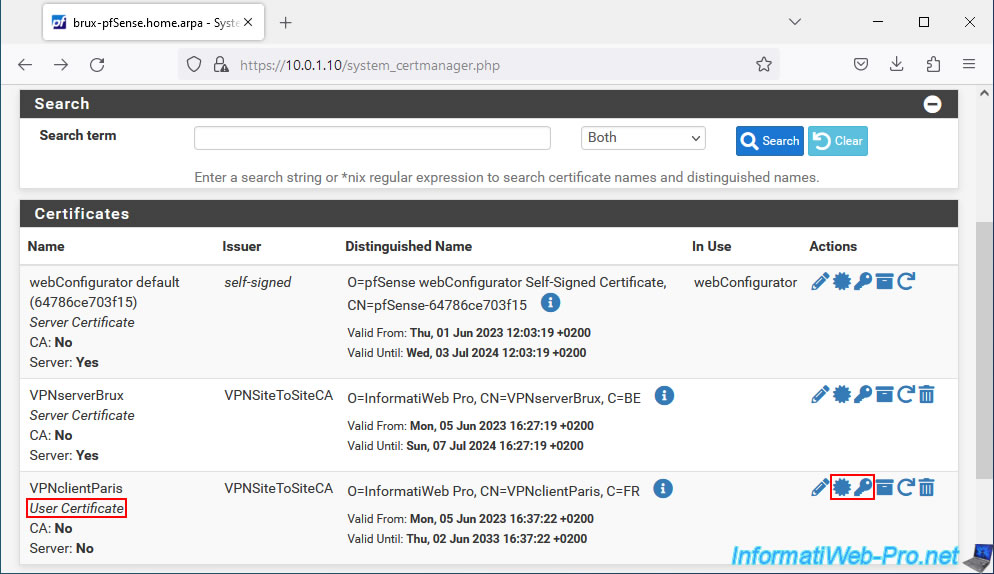
Next, go to the "Certificates" tab and export the certificate (using the star icon), as well as the private key (using the key icon) of each User Certificate.
Important : the certificate and private key for the OpenVPN server must remain on that server and therefore should NOT be exported.
In our case, we therefore have 3 files:
- VPNclientParis.crt: the user type certificate for our future OpenVPN client that we will install on site 2 (Paris).
- VPNclientParis.key: the private key associated with the certificate above.
- VPNSiteToSiteCA.crt: the certificate (which notably contains its public key) of our internal certification authority (CA) "VPNSiteToSiteCA".

Share this tutorial
To see also
-

Firewall 5/21/2025
pfSense 2.6 - Access to the web interface via the WAN interface
-

Firewall 9/5/2025
pfSense 2.6 - Create a VPN server (remote access) via OpenVPN (L3 mode)
-

Firewall 7/25/2025
pfSense 2.6 - Create and manage aliases
-

Firewall 8/27/2025
pfSense 2.6 - Load balancing via HAProxy
You must be logged in to post a comment