- Firewall
- pfSense
- 24 August 2025 at 08:29 UTC
-

- 1/5

To ensure the availability of your gateway, your DHCP server, as well as any other service configured on your pfSense machine or router, you can configure high availability on pfSense using the natively available options.
- Initial setup of your pfSense machines
- Add an interface for pfSync
- Configure the firewall of pfSense machines
- Configure state synchronization (pfSync) on the 2 pfSense machines
- Configure configuration synchronization (XMLRPC) on the 1st pfSense machine (master)
- Add CARP virtual IP (VIP) addresses shared by the 2 pfSense machines
- Configure Outbound NAT to Use CARP Virtual WAN IP (VIP) Address
- Change DHCP server configuration (to synchronize DHCP leases)
- Verify and test the failover on pfSense
1. Initial setup of your pfSense machines
In this tutorial, we will use 2 pfSense virtual machines connected to the same networks.
However, it is important that they have different IP addresses so as not to create an IP address conflict.
Note: once high availability is activated and configured on pfSense, your clients will use the virtual IP addresses (VIP) shared by your 2 pfSense machines.
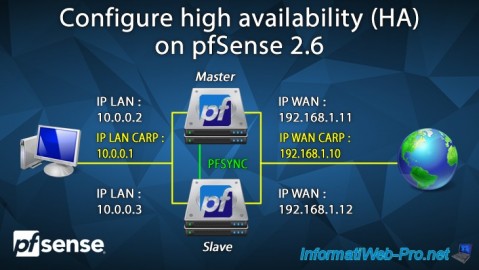
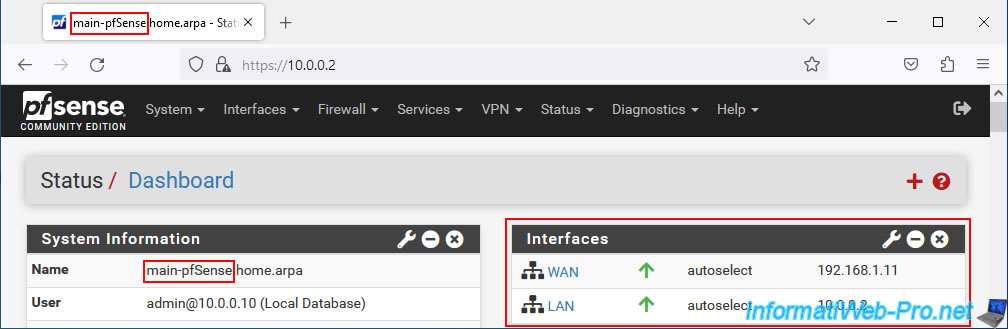
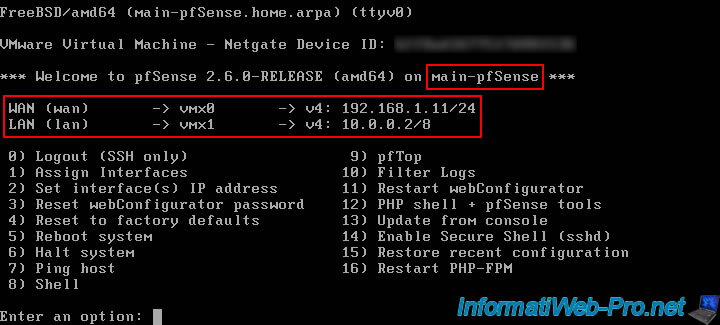
Our 1st pfSense machine, which will be defined as Master by default, is named "main-pfSense" and has these IP addresses:
- IP WAN : 192.168.1.11
- IP LAN : 10.0.0.2
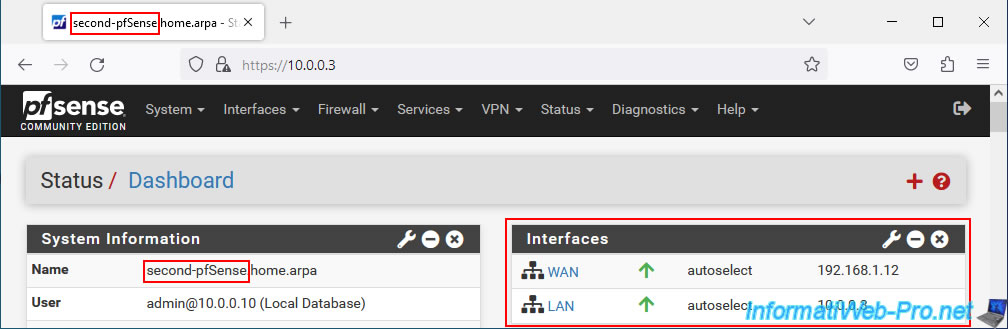
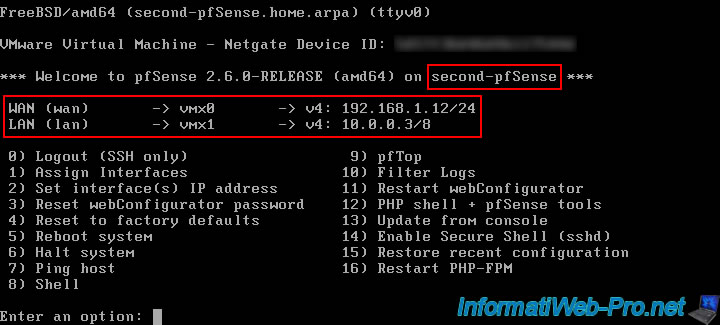
Our 2nd pfSense machine, which will be defined as a slave machine (Backup) by default, is named "second-pfSense" and has these IP addresses:
- IP WAN : 192.168.1.12
- IP LAN : 10.0.0.3
For information purposes, here are the IP addresses used in this tutorial:
- For the WAN :
- 192.168.1.10/24: CARP shared IP (virtual IP)
- 192.168.1.11/24 : main-pfSense - machine 1 - WAN IP
- 192.168.1.12/24 : second-pfSense - machine 2 - WAN IP
- For the LAN :
- 10.0.0.1/8 : CARP Shared IP (Virtual IP)
- 10.0.0.2/8 : main-pfSense - machine 1 - LAN IP
- 10.0.0.3/8 : second-pfSense - machine 2 - LAN IP
- For the synchronization interface (PFSYNC) which will be created in this tutorial:
- 172.16.1.2/24 : main-pfSense - machine 1 - PFSYNC IP
- 172.16.1.3/24 : second-pfSense - machine 2 - PFSYNC IP
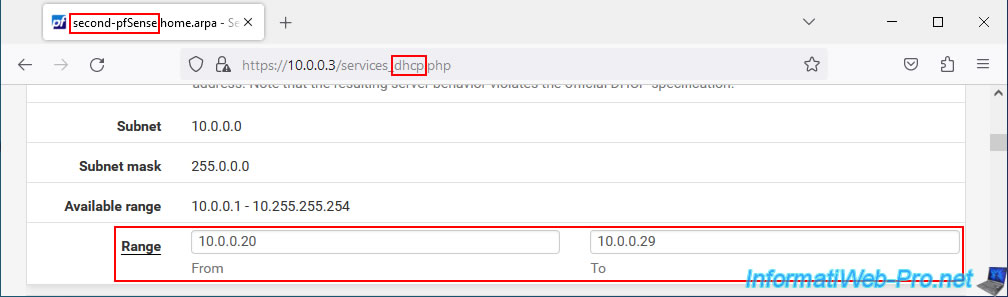
On our 1st pfSense machine, the DHCP server distributes IP addresses "10.0.0.11" to "10.0.0.19".

On our 2nd pfSense machine, the DHCP server distributes IP addresses "10.0.0.20" to "10.0.0.29".
Important : this prevents the 2 pfSense machines from distributing the same IP address to 2 different machines until high availability is enabled and configured.
Note: using 2 DHCP servers on the same network does not pose a problem as long as the distributed IP address ranges are different.
Indeed, the client PC will use the IP address offered by the DHCP server which responds first to its DHCP request.
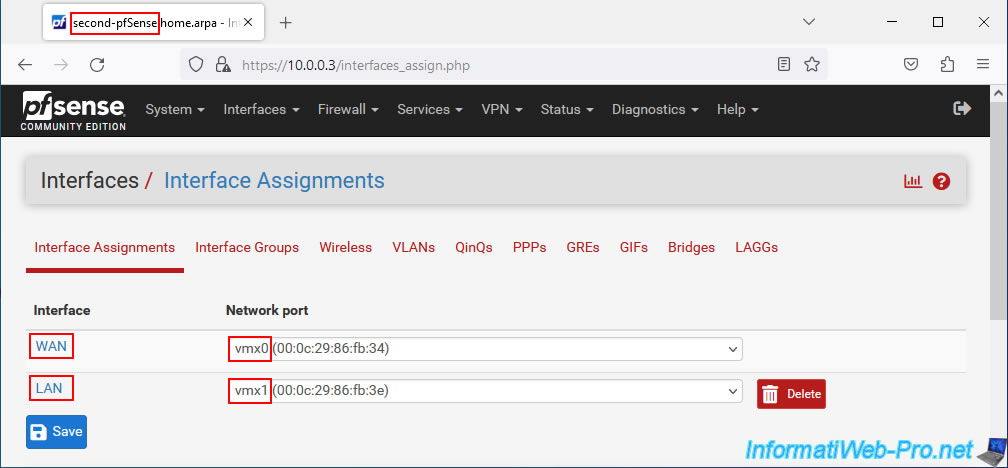
Important : you must assign the logical interfaces (WAN, LAN, ...) to the physical interfaces (eg: vmxX, emX, ...) in the same order on the 2 machines so that high availability can correctly replicate the network configurations.
Note: the name of the network ports depends on the driver used by the network card in question.

On the console, it gives this in our case.
On the 1st pfSense machine.
On the 2nd pfSense machine.
2. Add an interface for pfSync
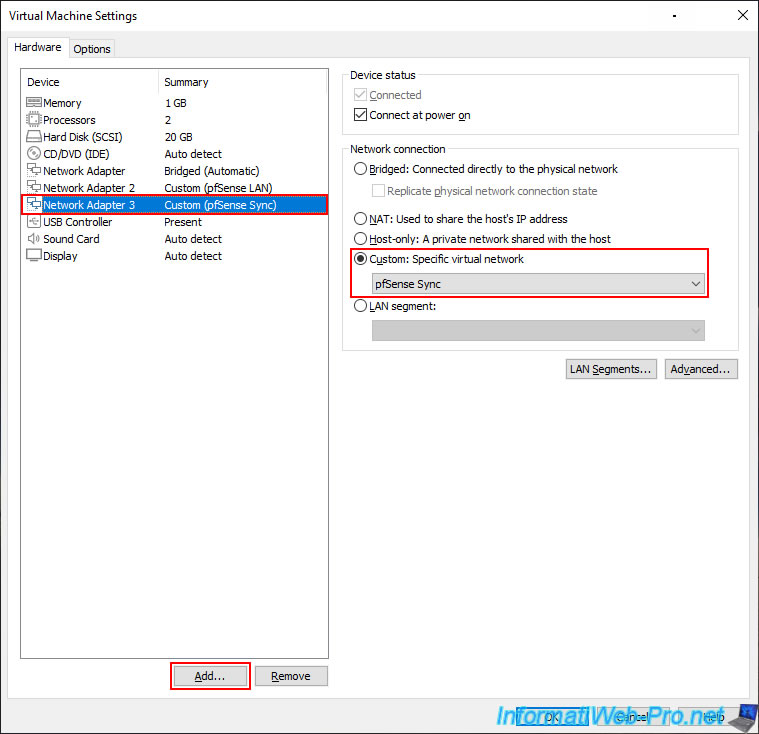
To synchronize the settings of the master pfSense machine (Master) to the slave one (Backup), it is recommended to use a dedicated network card to prevent a hacker or a malicious person from being able to recover or modify the pfSync messages sent via the network by pfSense.
2.1. Add a network adapter for pfSync (on both machines)
On your 2 pfSense machines, add a network card and connect it to a dedicated switch, a dedicated VLAN or connect them together with a crossover network cable.
In our case, we are virtualizing pfSense under VMware Workstation Pro for this tutorial, so we hot add a virtual network adapter to our pfSense virtual machines and we connect them to a virtual network named "pfSense Sync".
In the VMware Workstation Pro "Virtual Network Editor" program, we have indicated the subnet (Subnet) "172.16.1.0 / 255.255.255.0" which corresponds to the subnet that will be used by the pfSync interfaces in this tutorial.
In the case of a physical router or VMware ESXi hypervisor (vSphere), you do not need to specify the subnet in advance.
Warning : in the case of installing pfSense in a VMware virtual machine, pfSense recommends using a VMXNET3 virtual network adapter.
Which requires modifying the option below in the configuration file (.vmx) of the virtual machine concerned.
For more information, refer to step "3. Virtualize pfSense on VMware Workstation Pro" of our tutorial on installing pfSense on VMware Workstation Pro.
Note: in our case, "ethernet2" corresponds to our 3rd virtual network adapter which is connected to our "pfSense Sync" virtual network.
Plain Text
ethernet2.virtualDev = "vmxnet3"
2.2. Add a logical interface for pfSync on the 1st pfSense machine (master)
Before you can configure the logical interfaces, it is necessary to restart your pfSense machines if the network cards were hot added (without turning off the machine).
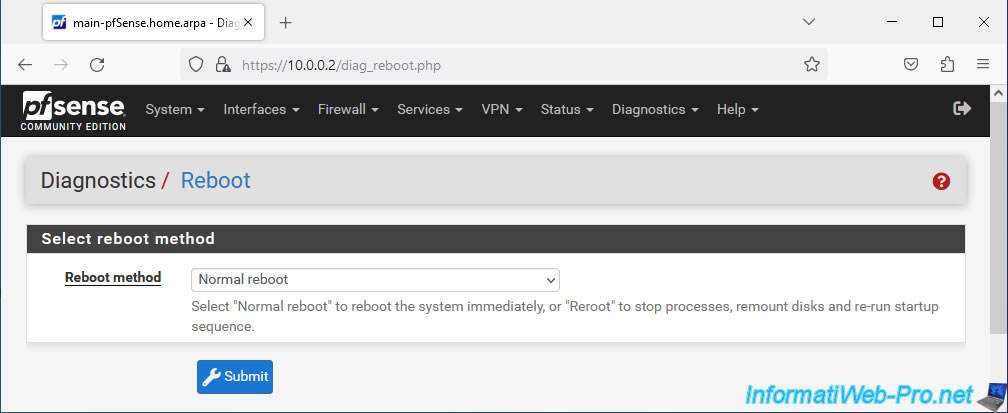
To do this, in the pfSense web interface, go to the menu: Diagnostics -> Reboot.
Then, select the Reboot method "Normal reboot" and click: Submit.
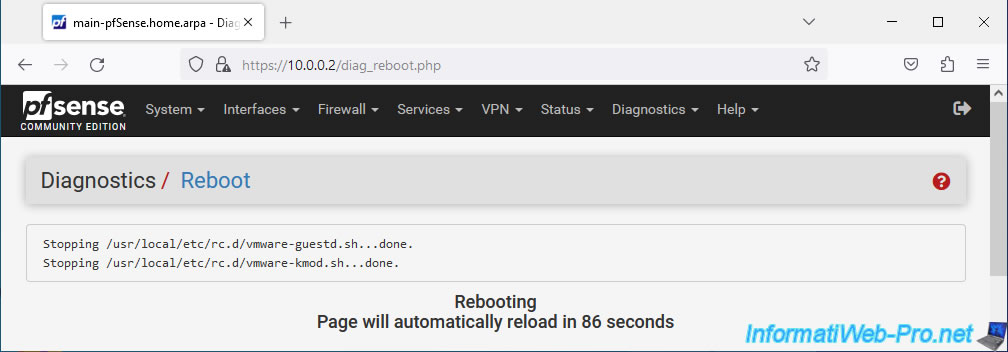
Wait while pfSense restarts.
Plain Text
Rebooting.
Page automatically reload in 90 seconds.
Once pfSense restarts, the pfSense login page will be displayed.
To begin, connect to the 1st pfSense machine (which will be master).
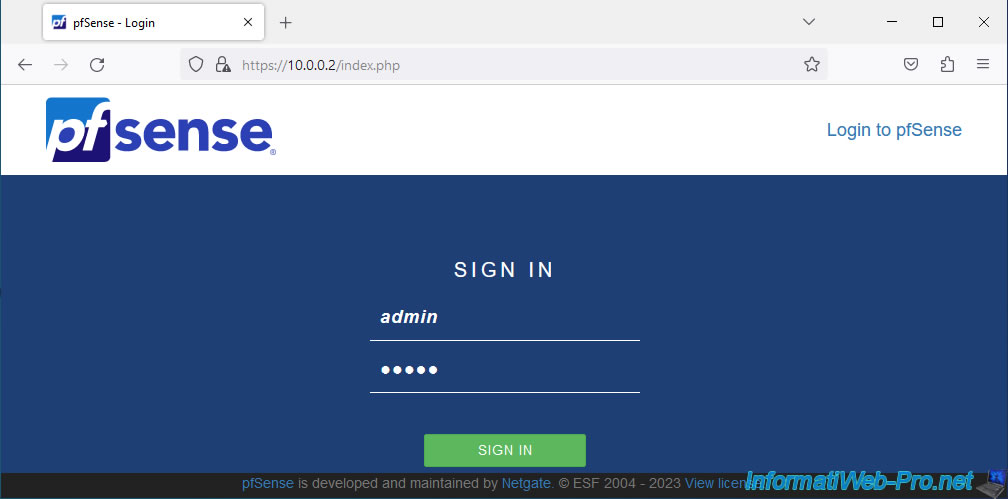
In our case, this 1st pfSense machine is called "main-pfSense" as you can see in the page name.
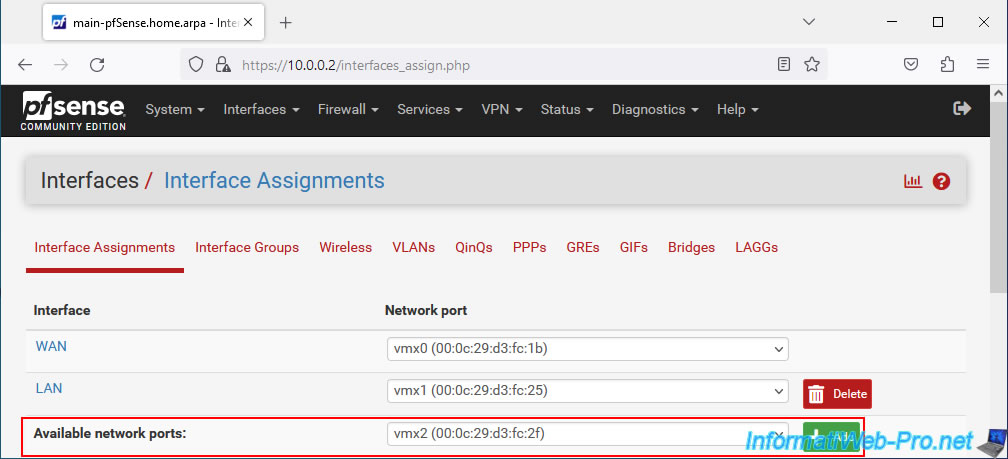
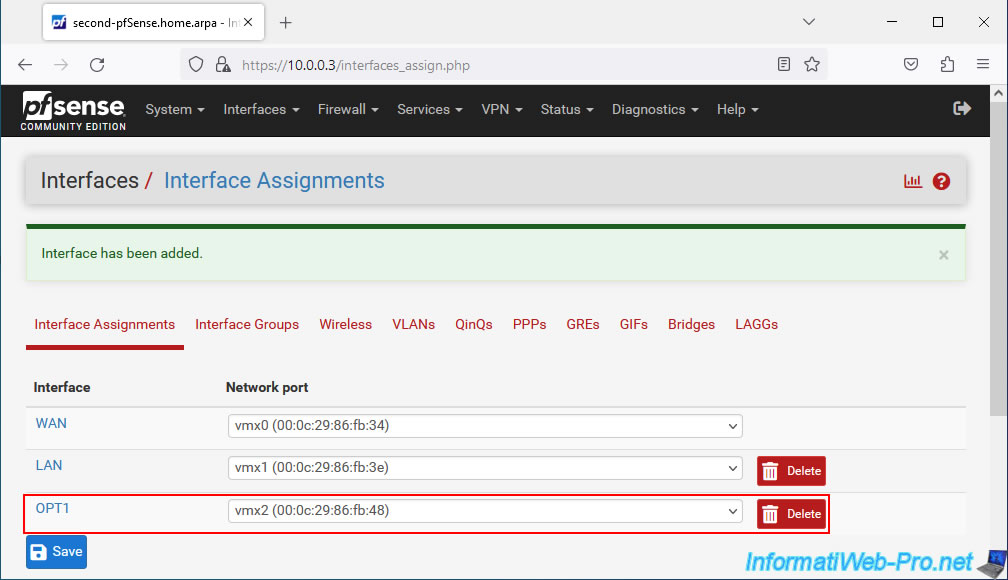
Go to: Interfaces -> Assignments.
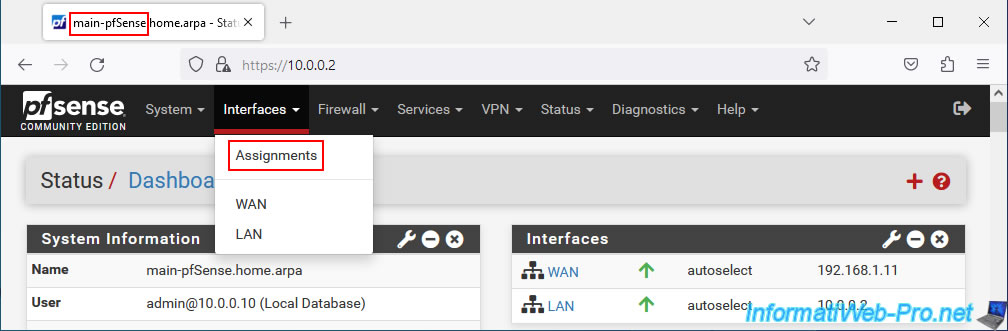
An "Available network ports" option will appear with the name of the physical network adapter added to your pfSense machine.
Click on: Add.
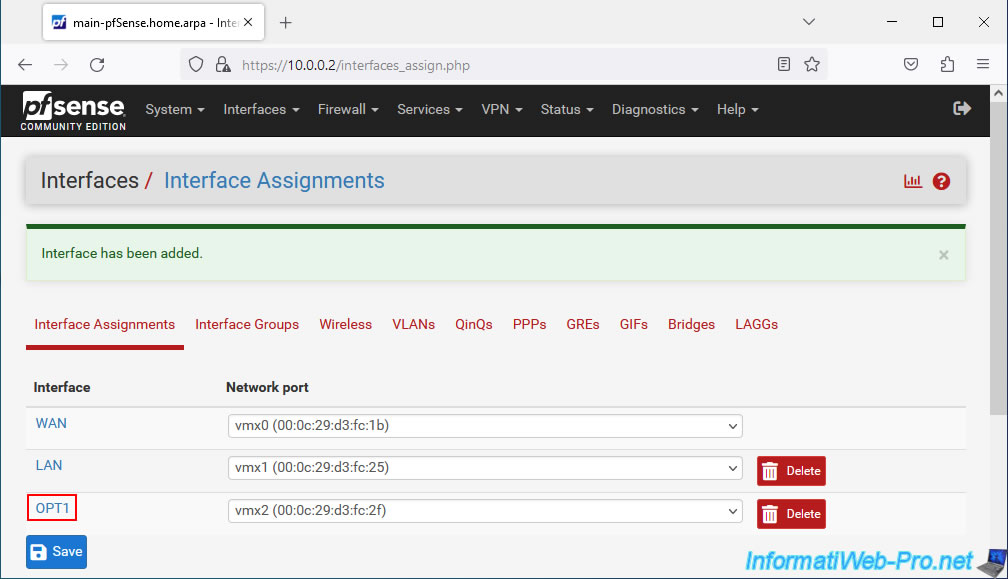
By default, the added interface will appear under the name "OPT1".
Click on the name of this interface "OPT1" or go to "Interfaces -> OPT1" to modify it.
Note: if you have already added interfaces besides "WAN" and "LAN" before, pfSense will use another number, but the prefix used will always be "OPT".
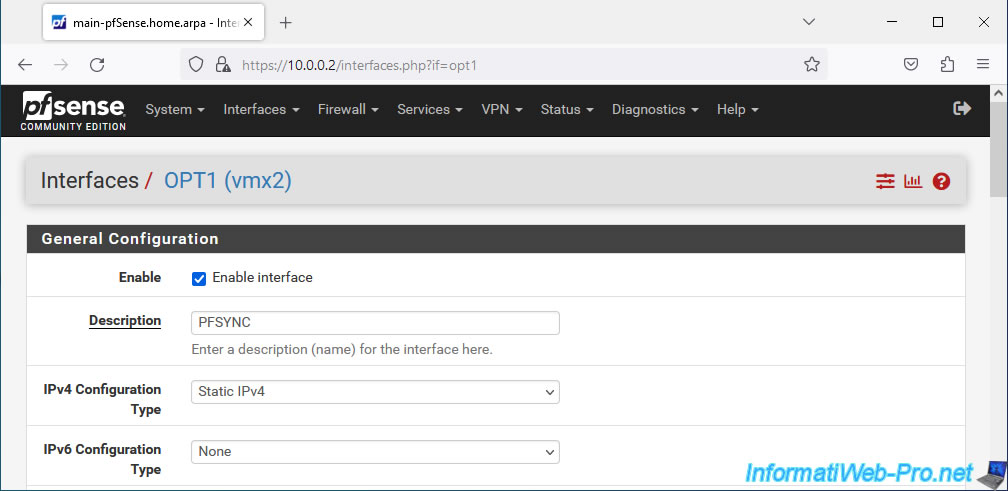
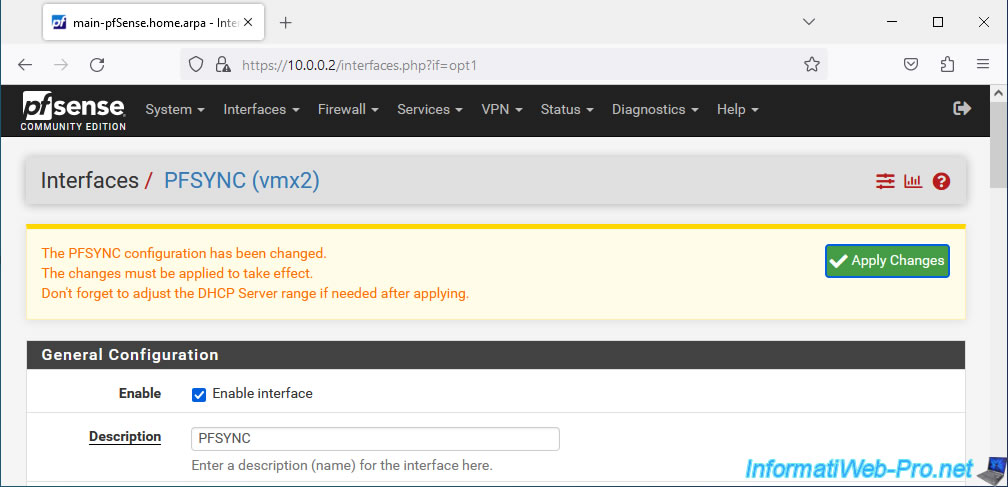
On the "Interfaces / OPT1" page that appears, configure the first settings:
- Enable: check the "Enable interface" box to enable this logical network interface.
- Description: specify "PFSYNC" so that this logical interface appears under this name rather than under the generic name "OPTx".
- IPv4 Configuration Type: select "Static IPv4" to define a static IPv4 address for this logical network interface.
In the "Static IPv4 Configuration" section of this page, specify the IPv4 address to use and the associated subnet mask.
In our case, we indicated: 172.16.1.2 / 24.
Note: this means that the subnet used for pfSync interfaces will be "172.16.1.x".

At the bottom of the page, click Save.
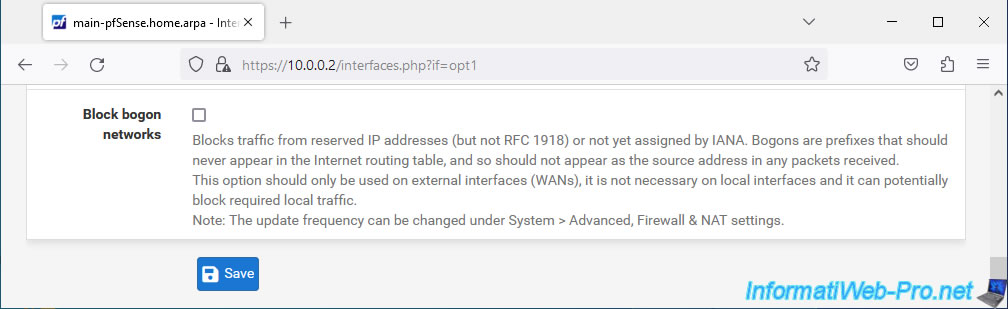
At the top of the page, click: Apply Changes.
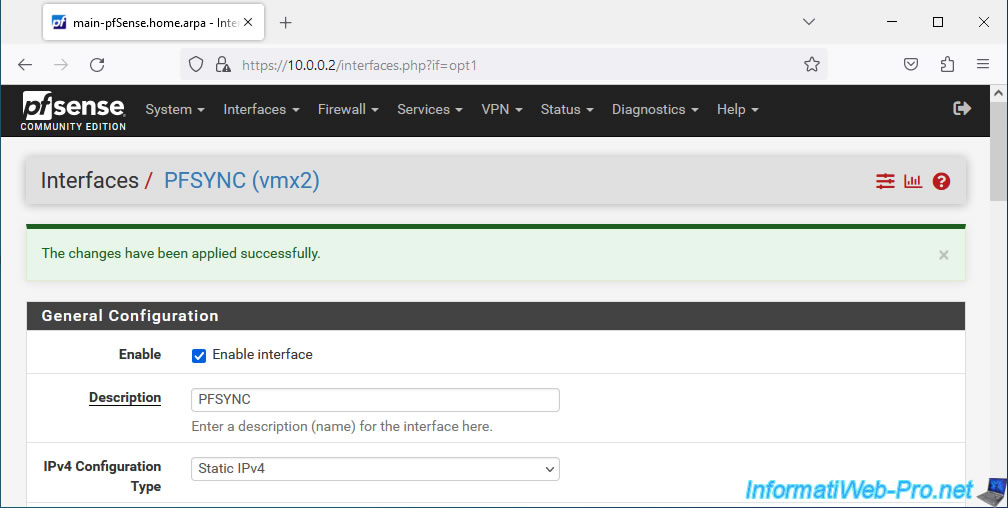
The PFSYNC interface of your 1st machine is enabled and configured.
Note that this is only the network configuration for this interface. No implementation of the HA at the moment.
2.3. Add a logical interface for pfSync on the 2nd pfSense machine (slave)
On the 2nd pfSense machine, do the same thing.
So, go to "Interfaces -> Assignments" and assign the new network port (physical network adapter) to a new logical interface (OPT1 in this case).
Then, click on its name to modify this interface.
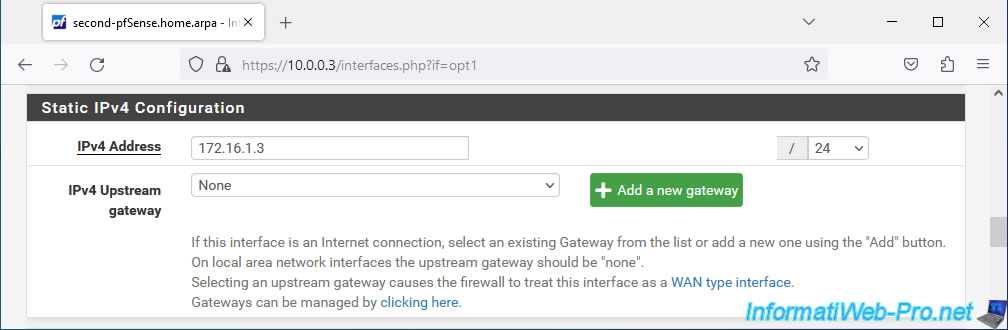
As before, activate this interface and rename it "PFSYNC".
Next, choose to set a static IPv4 address.
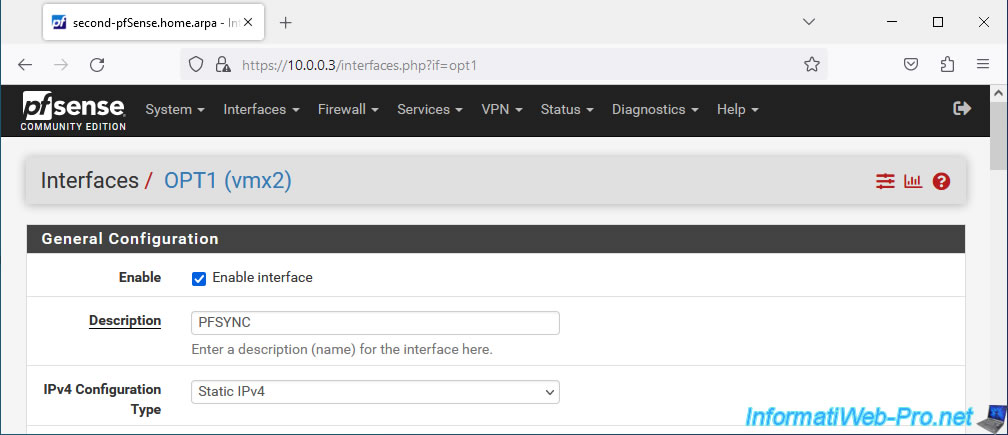
This time, we indicate "172.16.1.3" for the IPv4 address of this interface and we use the same subnet (/24) as on the 1st pfSense machine).
Then, at the bottom of the page, click Save. Then, on "Apply Changes" at the top of the page.
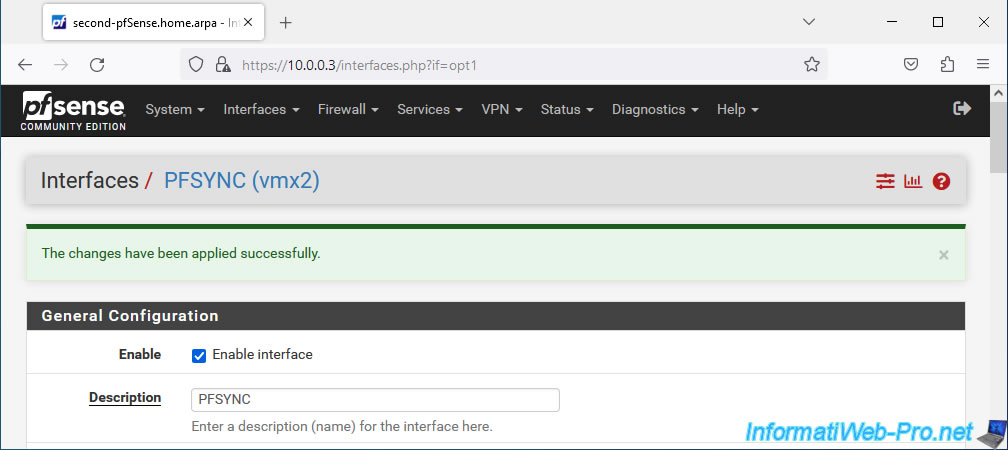
The PFSYNC interface of your 2nd pfSense machine is activated and configured.
Share this tutorial
To see also
-

Firewall 7/30/2025
pfSense 2.6 - Backup and restore configuration
-

Firewall 8/8/2025
pfSense 2.6 - Configure a LACP link (LAGG)
-

Firewall 5/17/2025
pfSense 2.6 - Enable SSH protocol
-
Firewall 8/29/2025
pfSense 2.6 - Implement Multi-WAN (Dual-WAN)
You must be logged in to post a comment