- VMware
- 01 July 2022 at 08:44 UTC
-

- 1/4

If you often use virtual machines under VMware Workstation Pro, you probably very often use copy and paste or drag and drop.
Whether it's to copy text, Linux commands, files, ...
However, you have most likely realized that this is not possible with virtual machines created on your VMware ESXi hypervisor.
Actually, text copying is possible with VMware ESXi, but it's disabled by default for security reasons.
On the other hand, for the transfer of files (either via a simple copy and paste or via drag and drop), this is not possible.
In addition, testing the different consoles (the web console, the VMware Remote Console program or even VMware Workstation Pro) will not change anything.
Transferring files between your computer and virtual machines running VMware ESXi will not work natively.
Fortunately, there are more or less practical and/or possible solutions depending on the case and what we will present to you in this tutorial.
Because, yes, transferring files between the local computer and a virtual machine is very convenient for many reasons.
Even if this also has a big drawback : allowing a user to steal a lot of data from you very easily (via a simple copy and paste for example).
But, if you know what you are doing, then here are several handy solutions.
- Enable copy and paste (of text) natively supported and disabled by default
- Use the VNC protocol (remote access)
- Use the RDP (Remote Desktop) protocol on Windows
- Use file sharing on Windows
- Use the FTP protocol (file server)
- Use the HTTP protocol (Web server)
- Use an ISO file (virtual CD/DVD)
1. Enable copy and paste (of text) natively supported and disabled by default
As explained previously, copy and paste of text is natively possible on VMware ESXi.
However, this feature is disabled by default by VMware for security reasons.
Indeed, if you copy something to the clipboard, then open the console of a virtual machine, it would have access to your computer's clipboard and could therefore have access to sensitive data.
The other case is a malicious user who would like to copy data from the virtual machine to his computer via a simple copy and paste.
However, with the Internet or even the network, it may be more or less easy to retrieve data outside of the virtual machine depending on the configuration of the guest operating system and the rights of that user in it.
Source : Limiting Exposure of Sensitive Data Copied to the Clipboard.
1.1. Enable SSH protocol
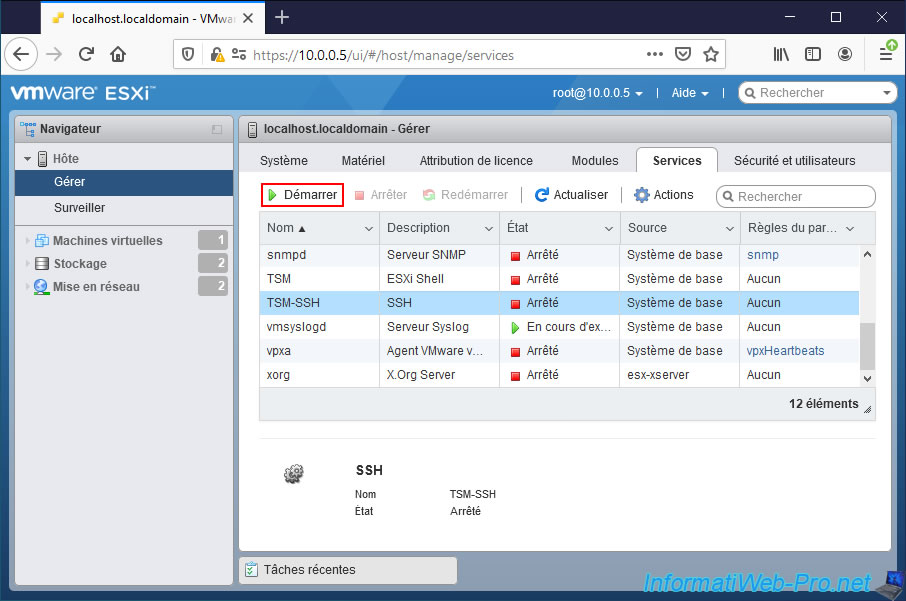
To get started, you will need to enable the SSH protocol of your VMware ESXi hypervisor.
To do this, access the web interface of your VMware ESXi hypervisor and go to "Host -> Manage -> Services" and start the "TSM-SSH" service.
1.2. Enable copy and paste (of text) globally
Copy and paste of text can be enabled :
- globally on a VMware ESXi hypervisor so that this setting is used by all the virtual machines present on it
- on each virtual machine separately
Important : if you enable this feature globally, this means that it will also be enabled for virtual machines that would potentially be migrated in the future to this VMware ESXi hypervisor via vMotion by a VMware vCenter Server to which your hypervisor would be connected.
To enable it globally, connect in SSH to your VMware ESXi hypervisor.
On Windows, you can use the "PuTTY" utility (for example).
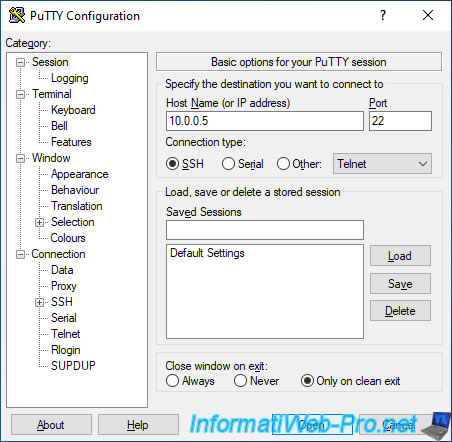
Authenticate as "root", then open the file "/etc/vmware/config".
Bash
vi /etc/vmware/config
Press "i" to switch to "insert" mode and add these 3 lines at the end of the file.
Warning : on several VMware products, adding the "vmx.fullpath=..." parameter creates a security vulnerability as you can check on the "Workstation 5.5 Release Notes" page of the VMware site.
Plain Text
vmx.fullpath = "/bin/vmx"
isolation.tools.copy.disable="FALSE"
isolation.tools.paste.disable="FALSE"
Then, press "Esc" to enter in "commands" mode and type ":wq" (without quotes) to exit and saving the changes made to this file.
Important : once this option is enabled globally, you will need to turn off the VMs and turn them back on for these new settings to be used by these VMs.
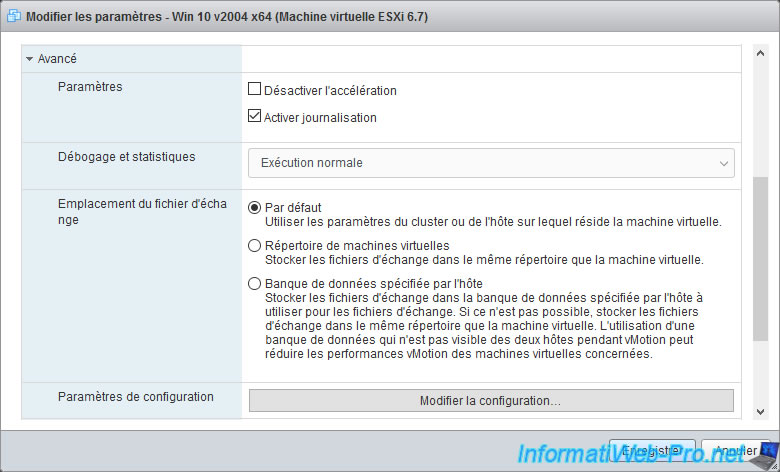
1.3. Enable copy and paste (of text) per virtual machine
If you want to enable this feature only for some virtual machines, then don't use the previously mentioned method.
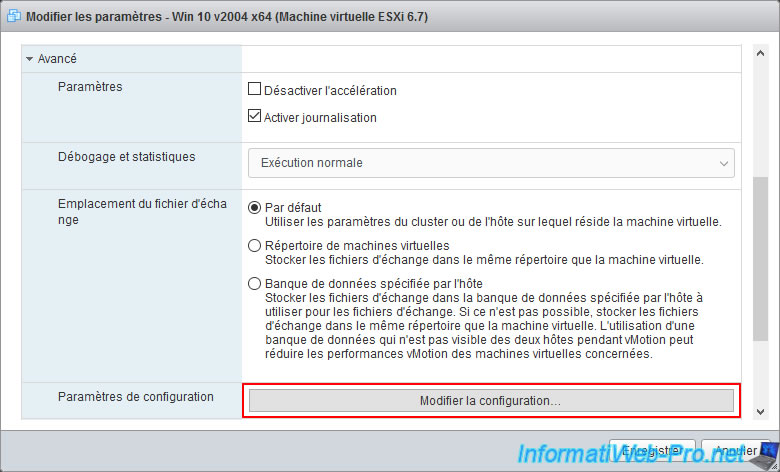
For this, you will need to edit the desired virtual machine.
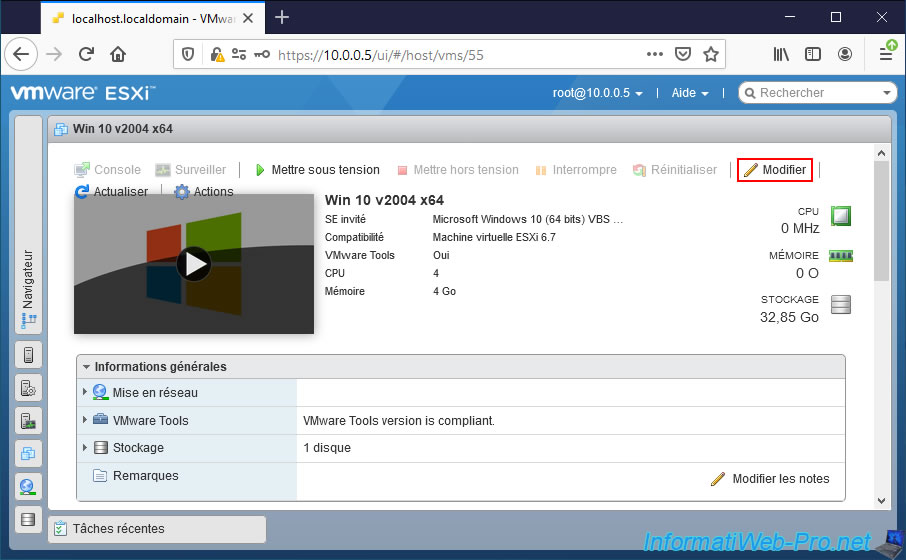
In the "VM Options -> Advanced" tab, click on the "Edit Configuration" button.
Then, click on : Add parameter.
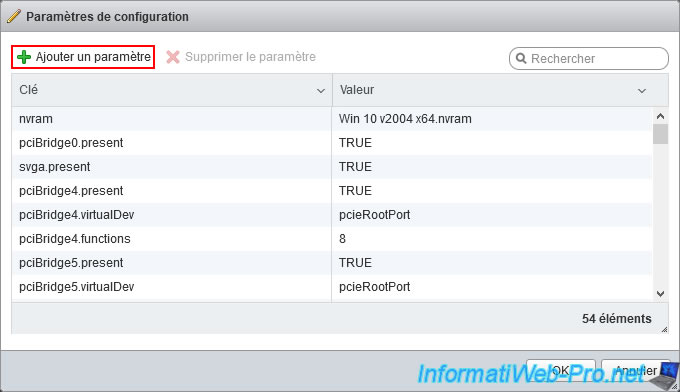
A new line appears.
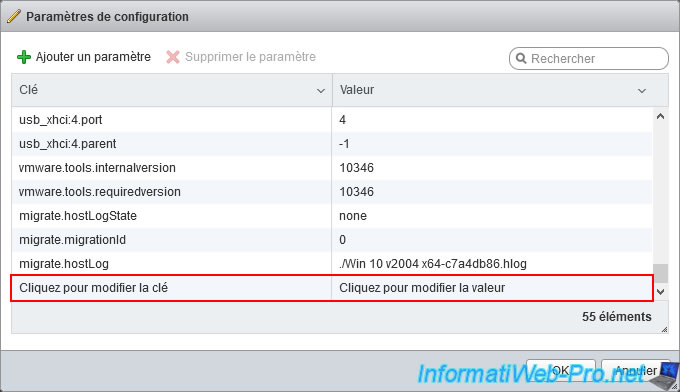
Click twice on the "Add parameter" button and specify these parameters :
Plain Text
isolation.tools.copy.disable			FALSE
isolation.tools.paste.disable			FALSE
isolation.tools.setGUIOptions.enable	TRUE
As stated on the "Enable content Copy/Paste between VMRC client and Windows/Linux Virtual Machine" page of the Broadcom site, this will allow you to copy and paste data (text), but not files.
In other words, you can still copy the contents of a text file (if you wish), but not the file itself.
Click on OK.
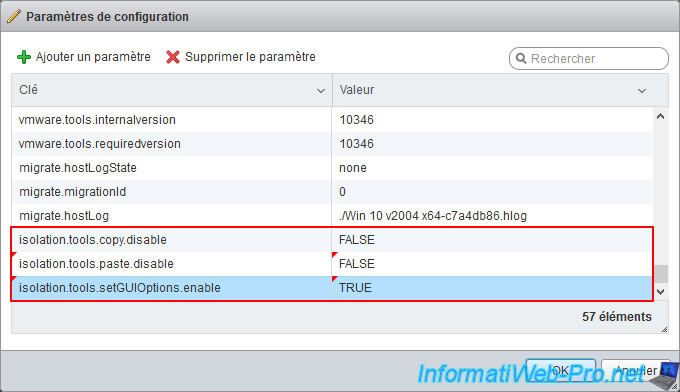
Then, click on : Save.
The "Virtual machine [VM name] was successfully reconfigured" message appears.

1.4. Copy and paste test
Start the virtual machine you just edited.
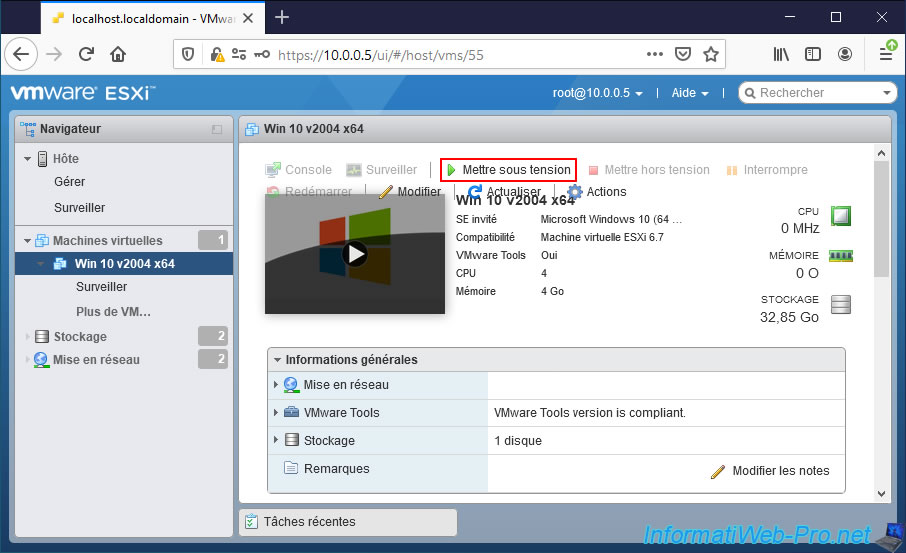
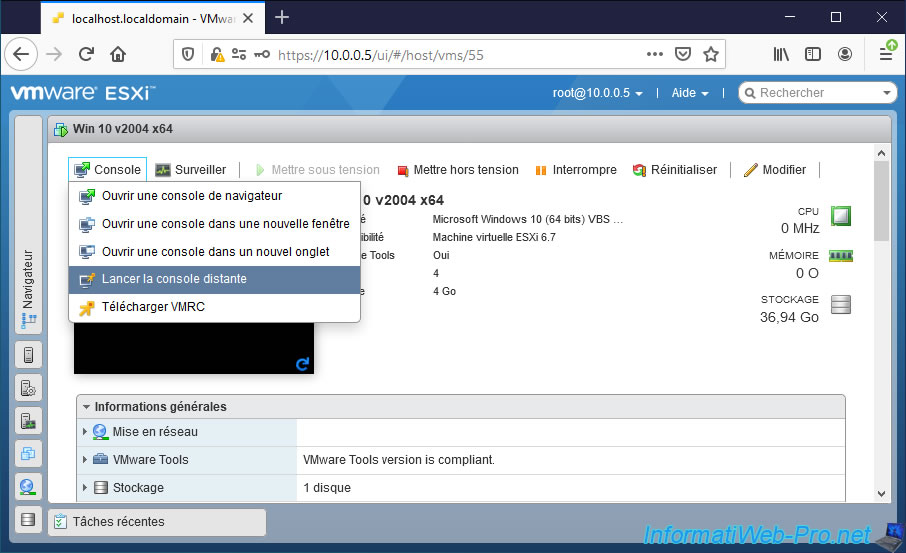
Once the virtual machine has started, click on : Console -> Launch remote console.
Important : copy and paste is only supported via the "vmrc://" protocol, which is supported by the "VMware Remote Console" (free) and "VMware Workstation Pro" (paid for commercial use, but free since version 17.5.2 for personal use) programs.
Copy and paste will therefore not work with the web console.
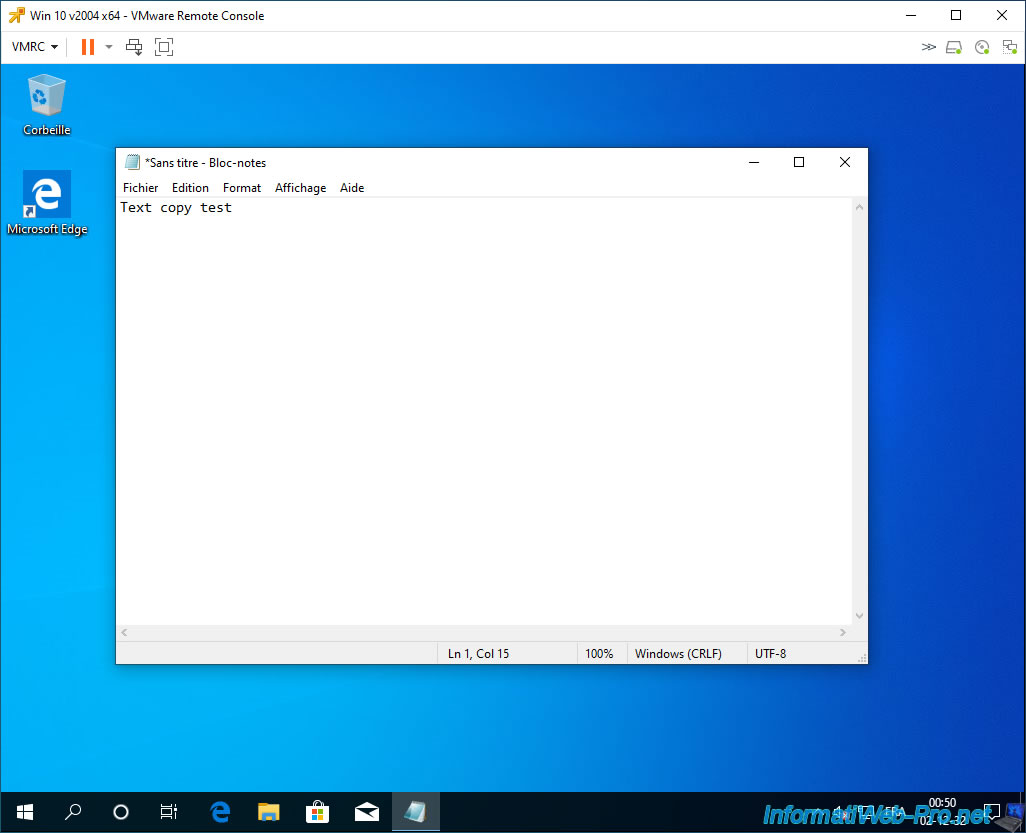
Copy text from your computer.
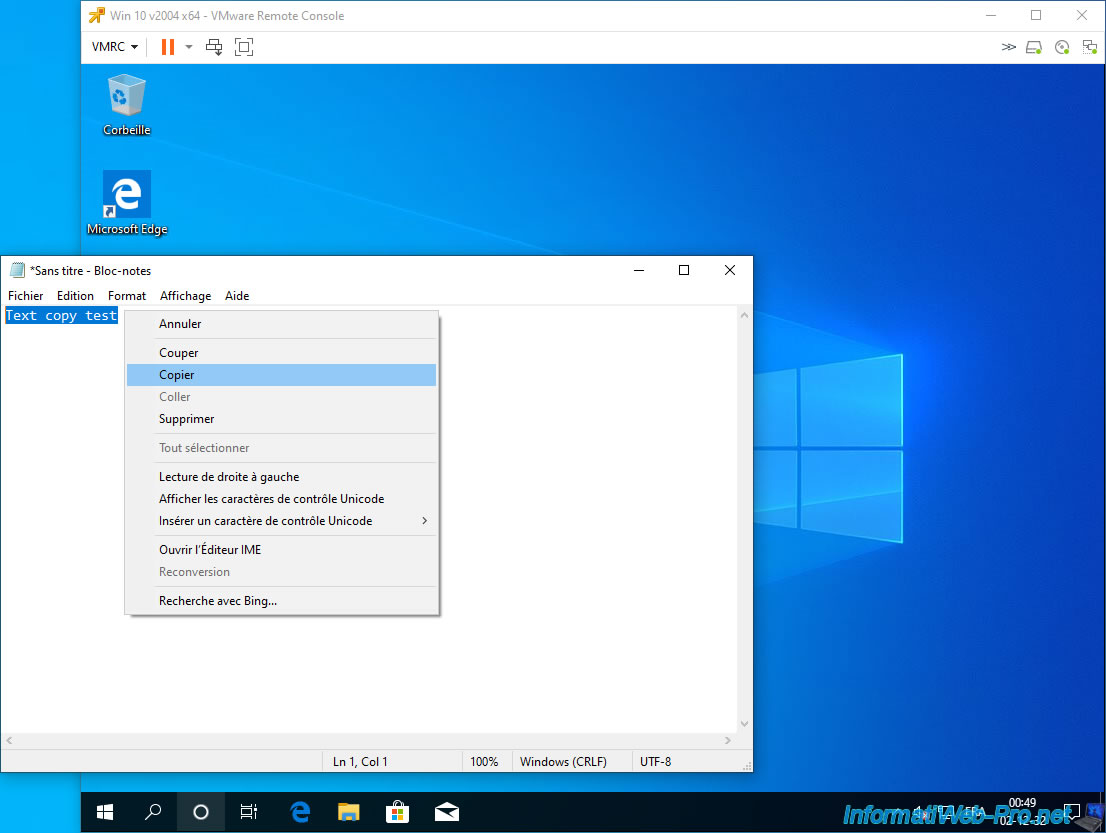
Then, try to paste this text in the virtual machine.
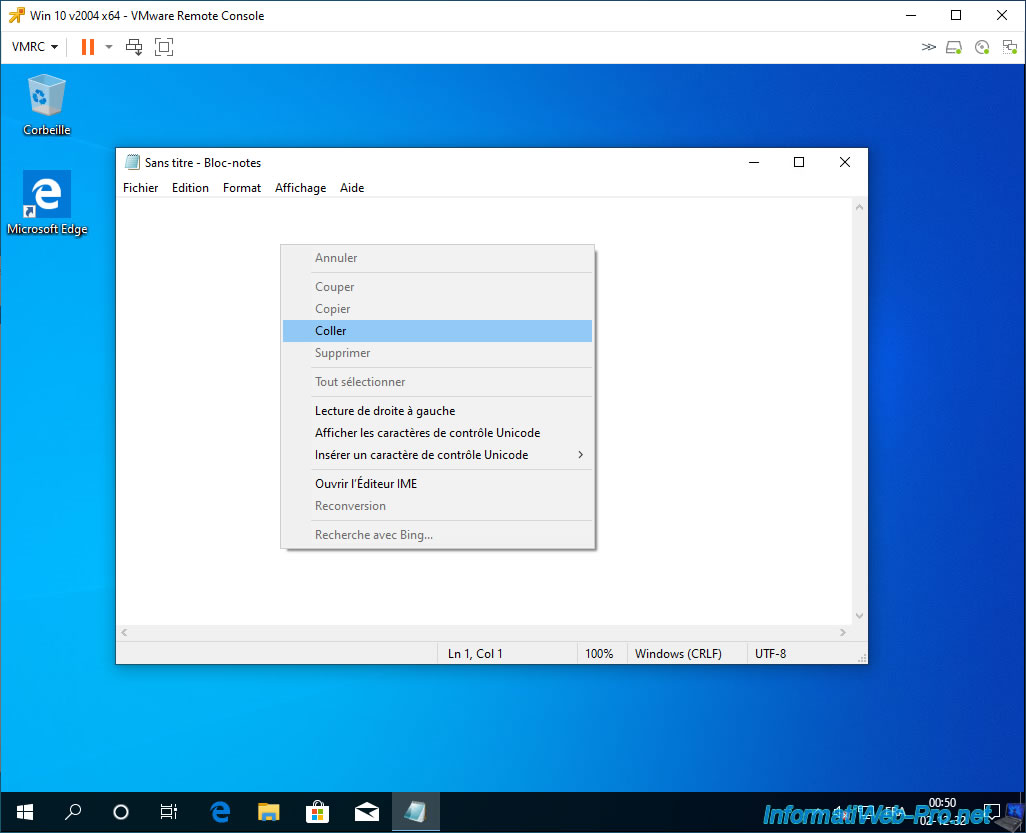
As you can see, it works.
2. Use the VNC protocol (remote access)
2.1. VMware ESXi 6.7 VNC protocol (missing file transfer support)
One of the solutions you will probably think of is to use the VNC protocol available on VMware ESXi 6.7.
Although this feature is not enabled or visible by default.
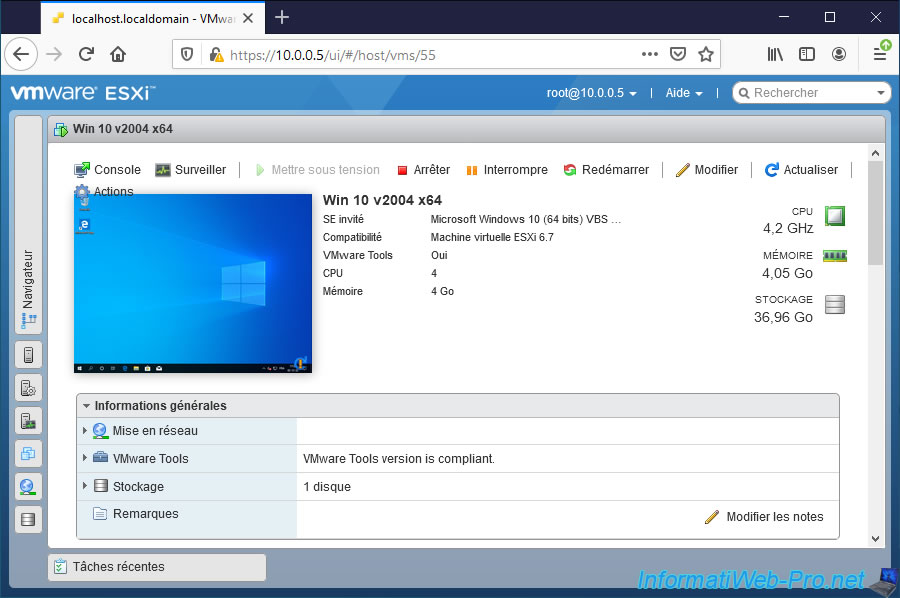
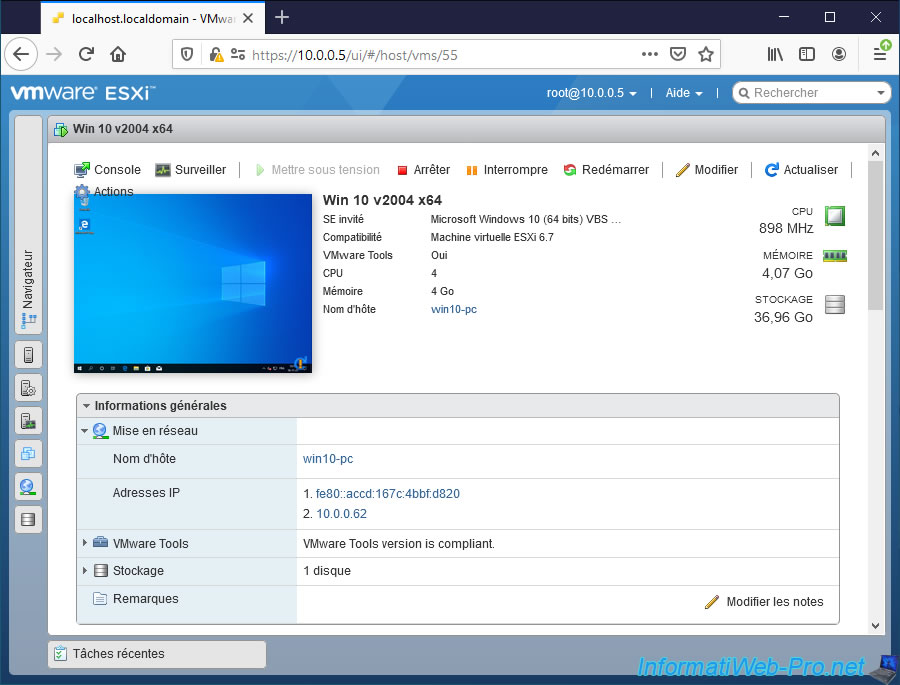
For this tutorial, we have enabled the VNC protocol on our "Win 10 v2004 x64" virtual machine and we have started it.
Important : since VMware ESXi 7.0, this hidden VNC server is no longer available.
Source : VMware vSphere 7.0 Release Notes.
Then, we used a VNC client supporting file transfer and noticed that the "File transfer" option was greyed out.
Indeed, the VNC server available on VMware ESXi 6.7 doesn't allow you to transfer files between your computer and your virtual machine.
2.2. Install a VNC server in your virtual machine
Although the VMware ESXi VNC protocol doesn't support file transfer, you can still use this VNC protocol to transfer files between your computer and the desired virtual machine.
However, for this, you will need to install a VNC server in the virtual machine with which you want to exchange files.
For this tutorial, we used TightVNC which is free and which supports file transfer via VNC protocol.
Note that RealVNC also supports file transfer, but this feature is chargeable for this solution.
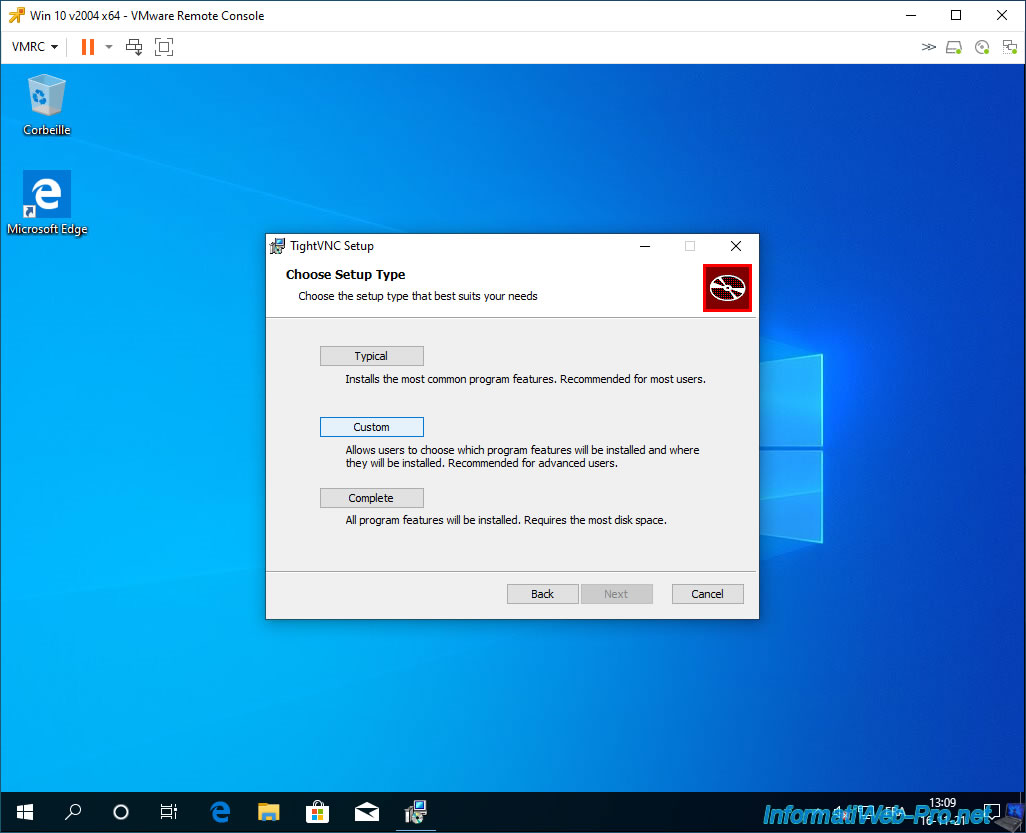
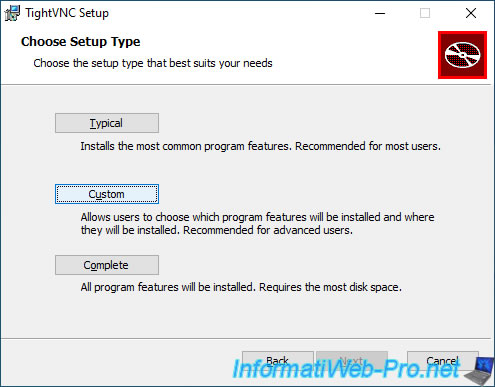
Once TightVNC is downloaded from the virtual machine, launch the downloaded file and choose the custom installation type : Custom.
If necessary, refer to our tutorial : Control a PC remotely via VNC protocol.
Note : TightVNC is also available on Ubuntu.
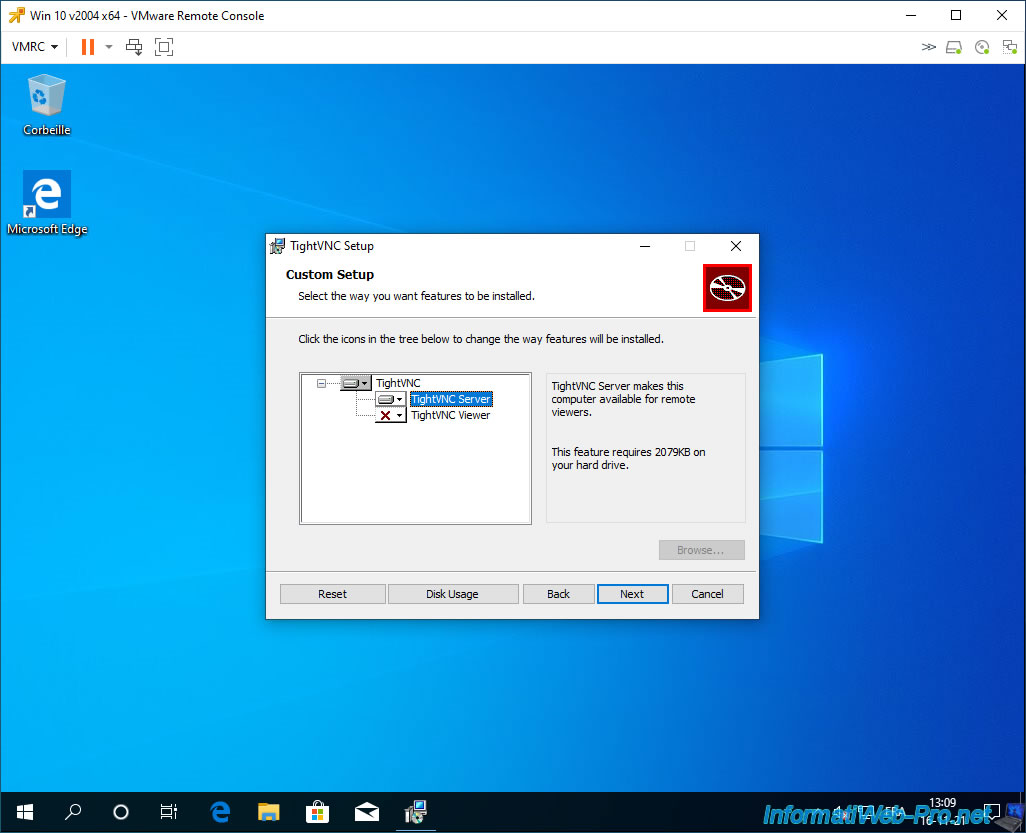
Install only the "TightVNC Server" component.
To do this, click on the icon to the left of "TightVNC Viewer" and click on : Entire feature will be unavailable.
Then, TightVNC will ask you to enter 2 passwords to protect this VNC server :
- Password for Remote Access : the password that you will need to enter in your VNC client when you attempt to connect to this virtual machine.
- Administrative Password : the password to use to manage the settings of this VNC server.
It's therefore preferable to use 2 different passwords for security reasons.

2.3. Install the VNC client on your local computer
On your computer, you will need to install the VNC client.
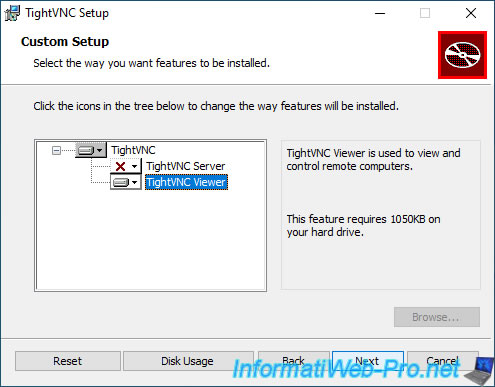
The installation file is the same, but don't forget to click on "Custom" in the TightVNC installation wizard.
Then, install only the "TightVNC Viewer" component (the VNC client).
To do this, click on the icon to the left of "TightVNC Server" and click on : Entire feature will be unavailable.
2.4. Connection to the virtual machine via the VNC protocol
To connect via the VNC protocol to your virtual machine, you will need its name or its IP address.
To do this, on the page of your virtual machine, deploy the "Networking" node found in the "General information" section.
Here, you will find :
- Host name : the NETBIOS name of this virtual machine. The one defined in the guest operating system.
- IP addresses : the IP addresses of this virtual machine.
Its IPv4 address (xx.xx.xx.xx) and (if applicable) its IPv6 address (xxxx::xxxx:xxxx:xxxx:xxxx).
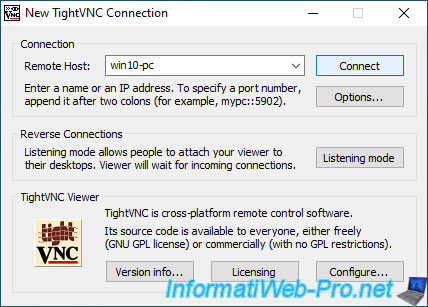
On your local computer, launch the "TightVNC Viewer" VNC client.
Enter the computer name or the IP address of your virtual machine and click on : Connect.
Enter the password previously defined for the VNC server (TightVNC Server).
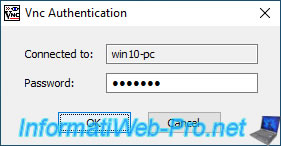
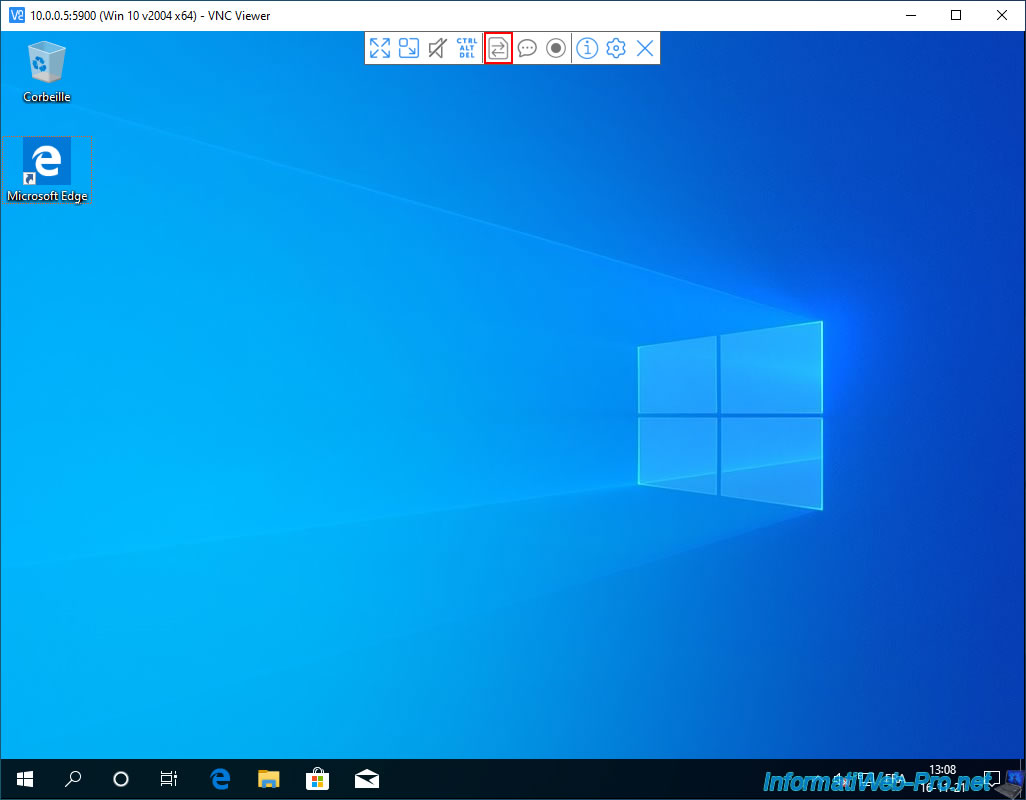
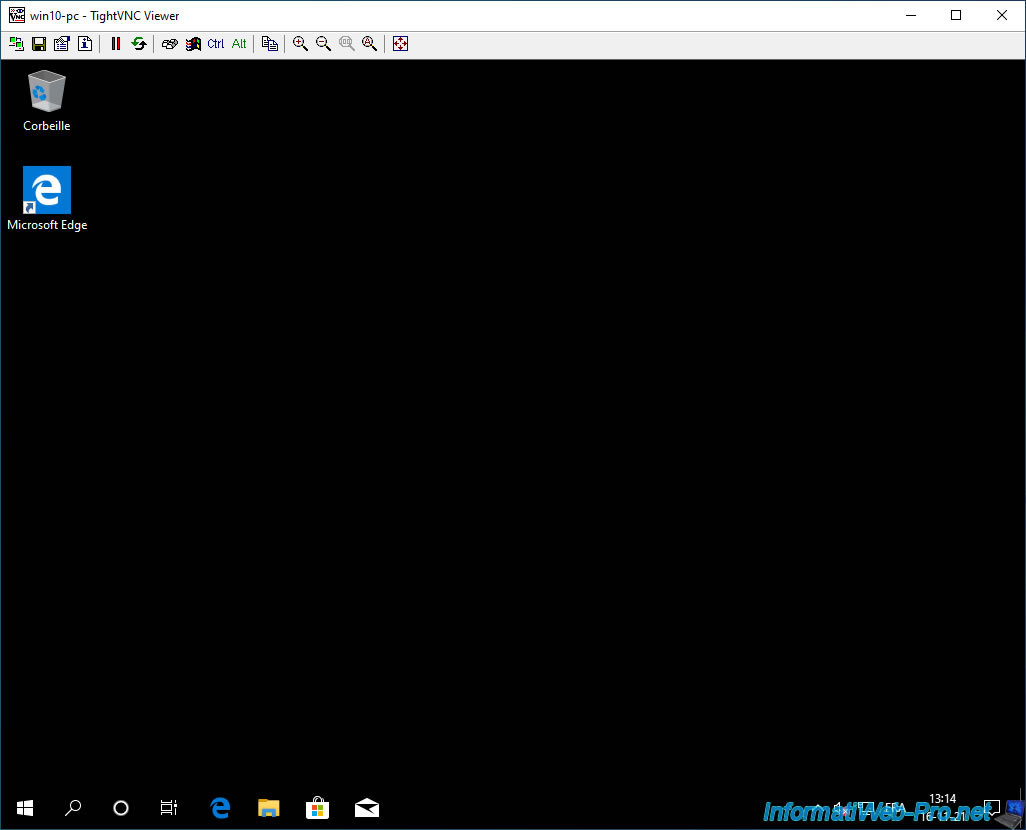
And the screen of your virtual machine appears.
The only difference is that the wallpaper is black by default for performance reasons.
2.5. Transfer files via VNC protocol
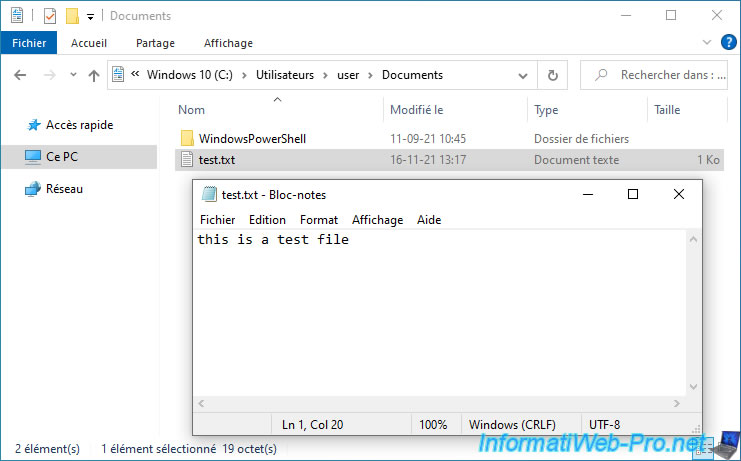
On our computer, we have a file created a "test.txt" file.
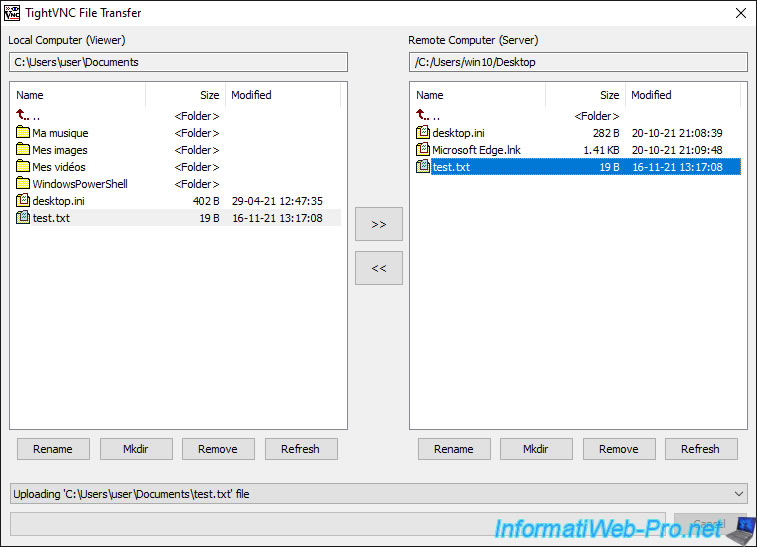
To transfer files between your local computer and your virtual machine, click the icon to the right of the TightVNC "Alt" icon.
![]()
A "TightVNC File Transfer" window appears and allows you to transfer files between the local computer and the remote computer (the virtual machine).
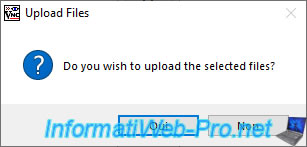
Select the local file you want to transfer to your virtual machine and click the ">>" button.
![]()
Confirm the sending of the selected file by clicking on Yes.
The file has been sent.
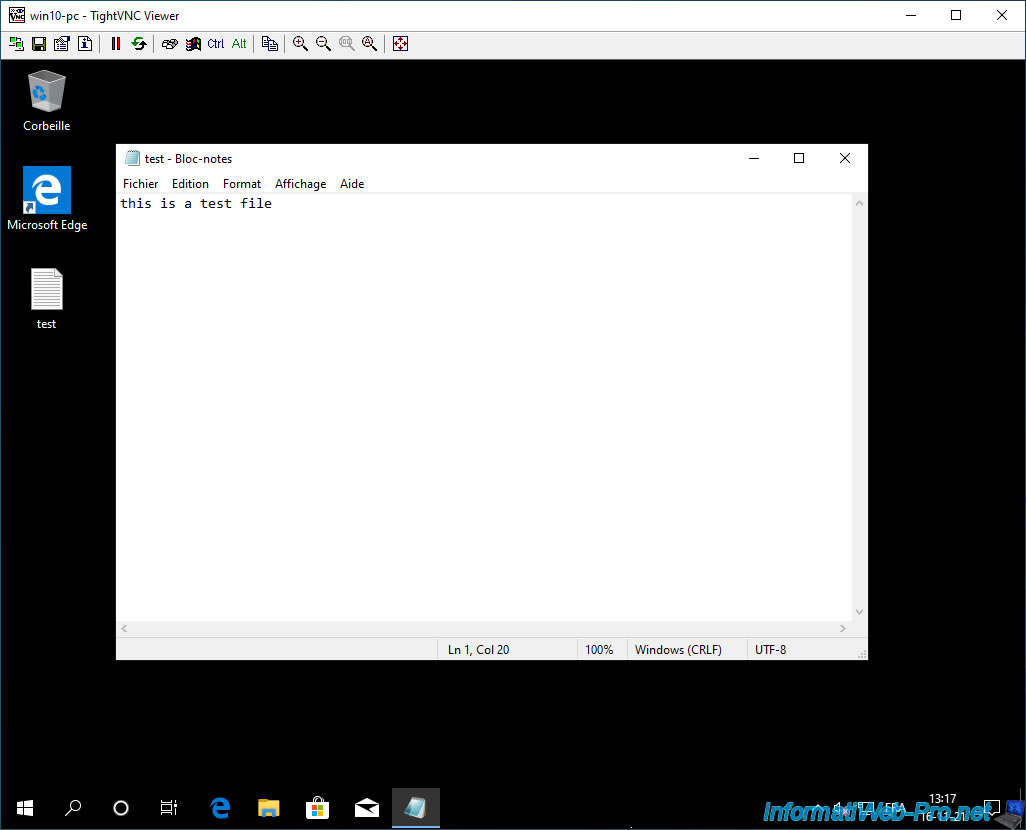
In our case, we sent it to the "Desktop" folder of the current user of our virtual machine.
As expected, our "test.txt" file appears on our virtual machine's desktop.
Share this tutorial
To see also
-

VMware 5/25/2022
VMware ESXi 6.0 - Install the VMware Host Client web client
-

VMware 5/27/2022
VMware ESXi 6.5 - Add a network driver in the installation ISO
-

VMware 1/27/2023
VMware ESXi 6.7 - Enable virtualization-based security (VBS)
-

VMware 12/2/2022
VMware ESXi 6.7 - Install and use the VMRC console on Linux
You must be logged in to post a comment