- VMware
- 27 January 2023 at 17:59 UTC
-

- 1/2


Starting with VMware vSphere version 6.7, you have the option to enable virtualization-based security (VBS) for virtual machines with a guest operating system Windows 10 or Windows Server 2016.
- Prerequisites
- Unsupported VMware features
- Configuring the host BIOS
- TPM 2.0 module recognized on Windows 10
- Create a VBS compatible virtual machine
- Install Windows 10 and VMware Tools
- Enable Hyper-V hypervisor
- Enable VBS feature in the guest operating system
1. Prerequisites
To be able to enable this VBS option on your Windows 10 and/or Windows Server 2016 virtual machines, you will have to meet several prerequisites for the host.
In fact, the BIOS of the motherboard of the VMware ESXi host must be configured in such a way as to :
- what your server starts in UEFI mode
- that Secure Boot is enabled. This requires the use of UEFI for booting.
- processor virtualization (Intel VT-x / AMD-V) must be enabled and supported by the processor itself
- I/O virtualization (Intel VT-d / IOMMU) must be enabled and supported by the processor itself
In addition, the host must have a TPM 2.0 (Trusted Platform Module) chip to secure the storage of credentials that Windows will perform through the VBS feature.
Source : Introducing support for Virtualization Based Security and Credential Guard in vSphere 6.7
2. Unsupported VMware features
Important : when you enable the "VBS (Virtualization-based Security)" option on a virtual machine, you will no longer be able to use these features :
- Fault tolerance (vSphere Fault Tolerance or FT) : a copy of the VM is created on a second server and is synchronized in real time to replace the source VM if the source server crashes.
- PCI passthrough : used to pass a physical device to a VM (such as an USB key, an USB controller, a PCI device, ...).
- Hot add of CPU or memory : allows you to hot increase the CPU and RAM resources allocated to the VM.
Source : Virtualization-based Security Best Practices
3. Configuring the host BIOS
As mentioned previously, enabling the "Virtualization-based Security (VBS)" option on a virtual machine requires that your VMware ESXi host's motherboard has a Trusted Platform Module (TPM) 2.0.
This is not the case with all motherboards.
In our case, our "ASUS WS X299 SAGE/10G" motherboard has a secure platform module (TPM 2.0) integrated into it.
If you have an Asus motherboard, you can check its compatibility on the page "[Motherboard] Which ASUS model supports Windows 11 and how to setup TPM 2.0 in BIOS?" of the official Asus website.
To begin, enter the BIOS of your motherboard by pressing the "Del" key at startup.
Then, go to advanced mode by clicking on : Advanced Mode (F7).

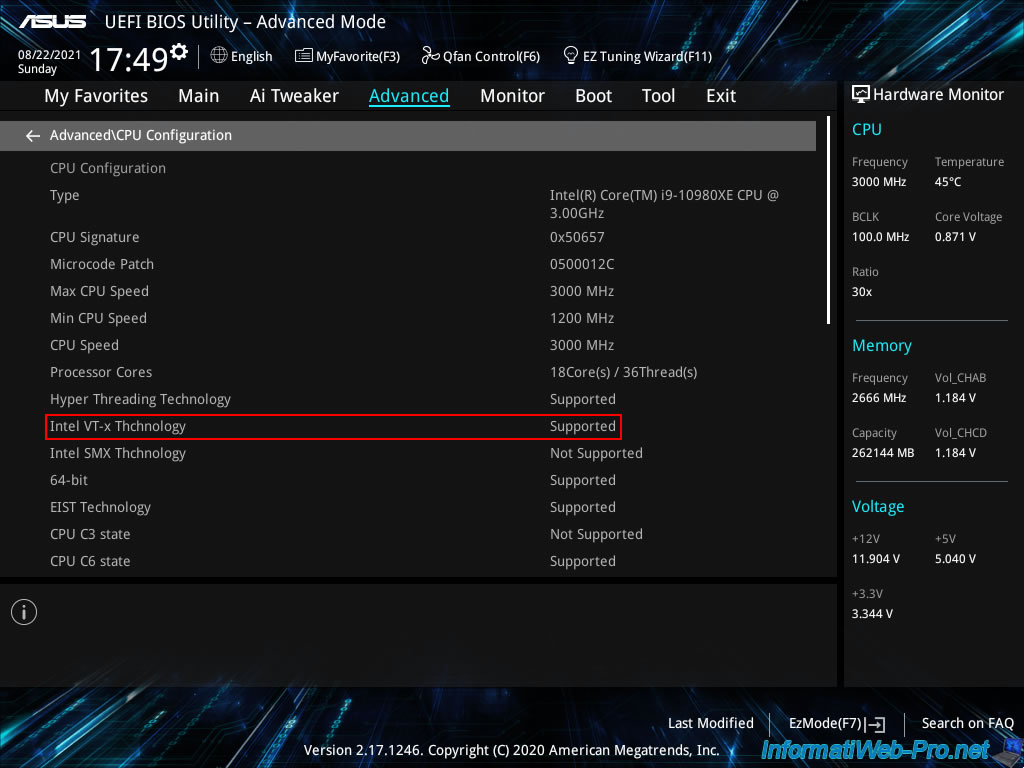
Then, go to "Advanced -> CPU Configuration".

As you can see, in our case, our BIOS tells us that processor virtualization (Intel VT-x Technology) is supported.
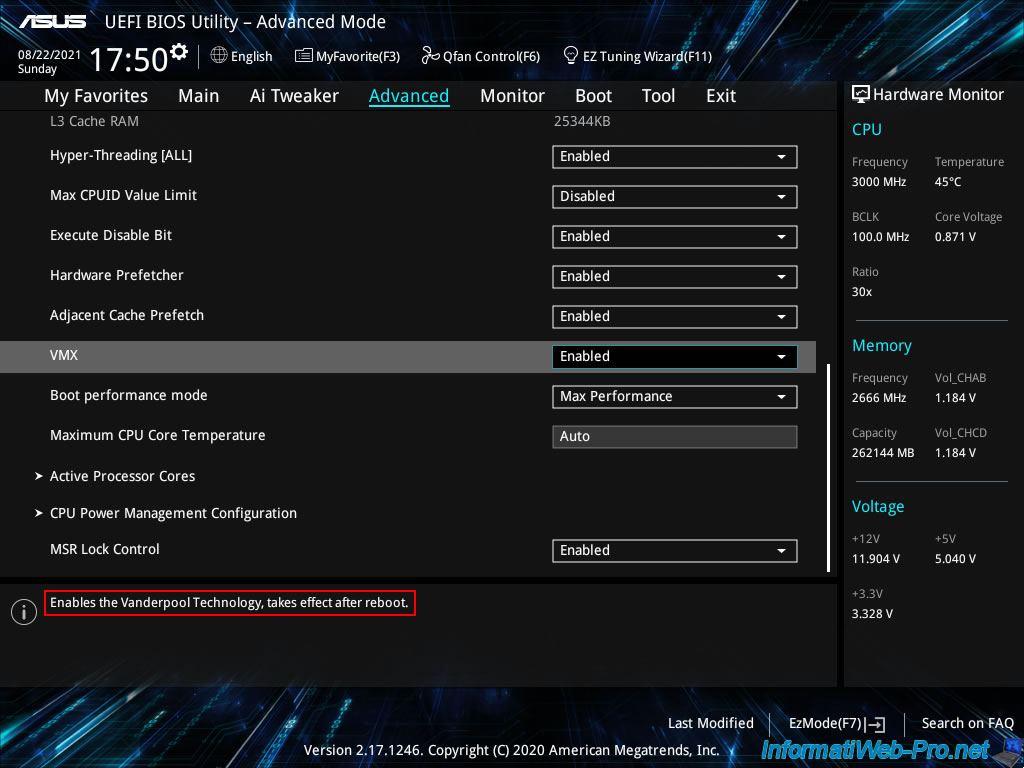
To enable processor virtualization (Intel VT-x / AMD-V) on this Asus motherboard, enable the "VMX" option.
If you look in the description of this option, you will find the "Vanderpool Technology" keyword which is the code name for "Intel Virtualization Technology (Intel VT)" as shown in the "Cover Slide Title - Intel" PDF of Intel.
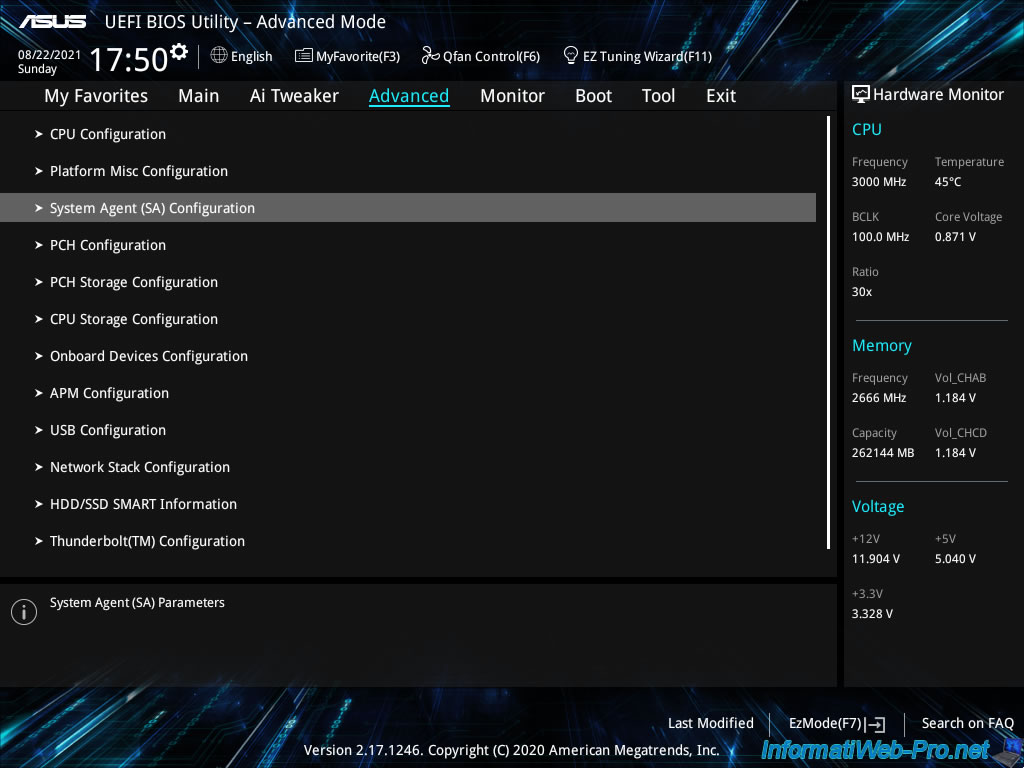
Then, go to "Advanced -> System Agent (SA) Configuration".
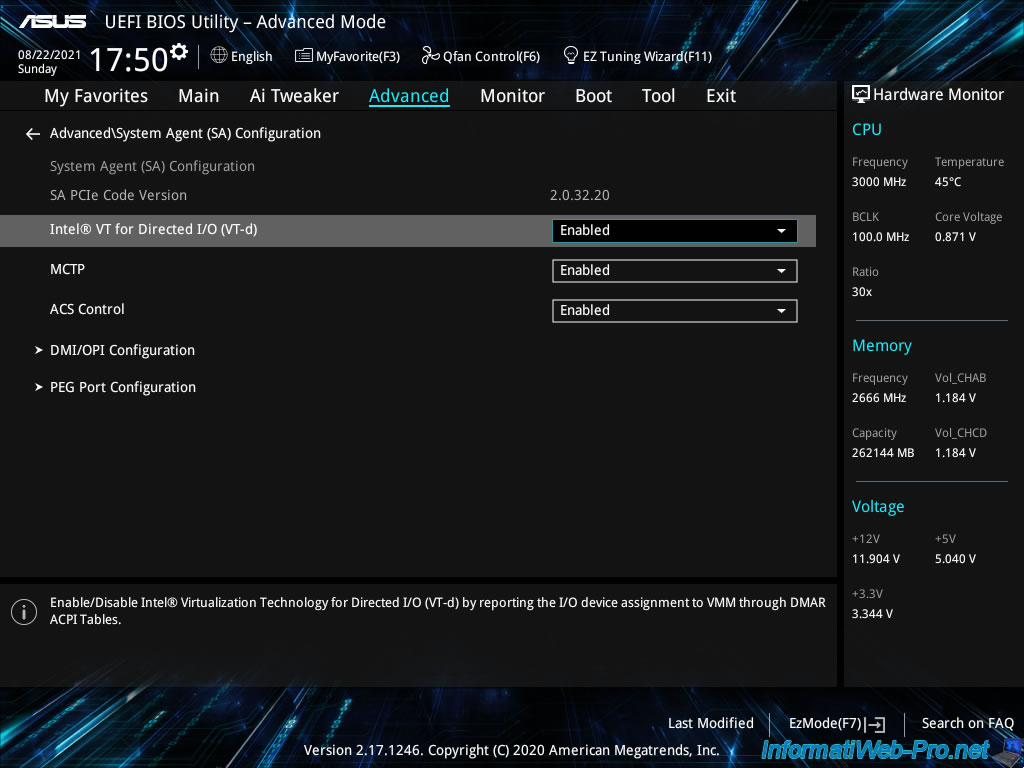
In this "System Agent (SA) Configuration" section, enable I/O virtualization (Intel VT-d / IOMMU) by enabling the "Intel VT for Directed I/O (VT-d)" option.
For the TPM 2.0 module, if your Asus motherboard supports it, you will find a "PCH-FW Configuration" section at the very bottom of the "Advanced" tab.
Note that you have to scroll with the mouse to access it, because it may not be visible on the screen by default.
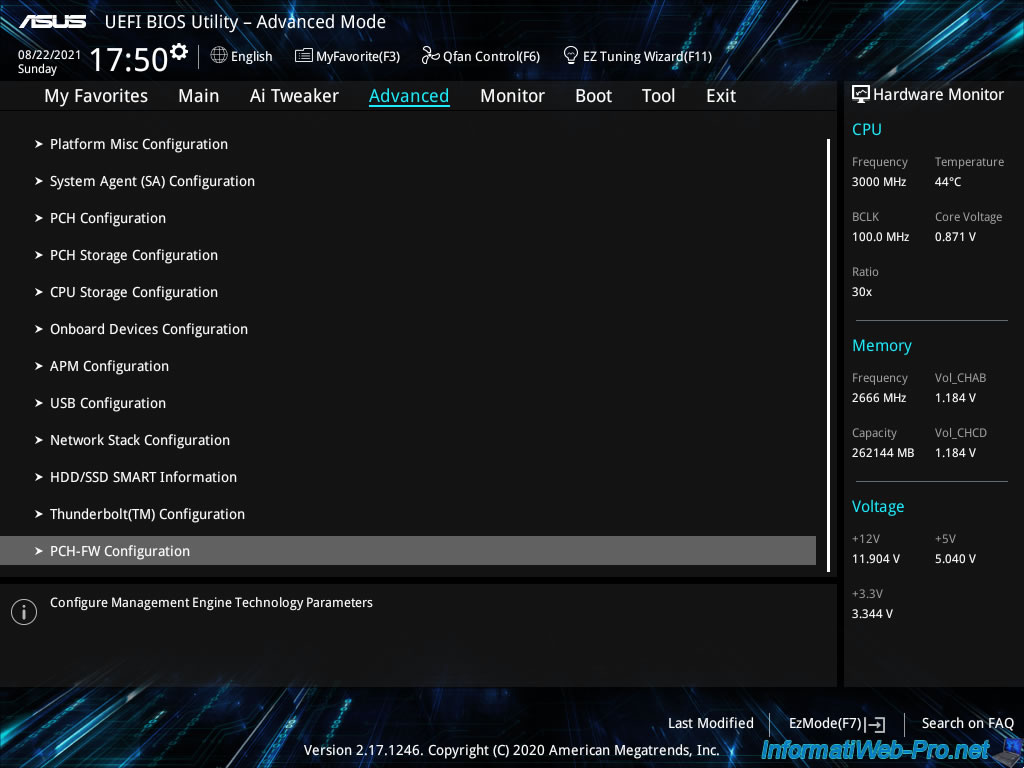
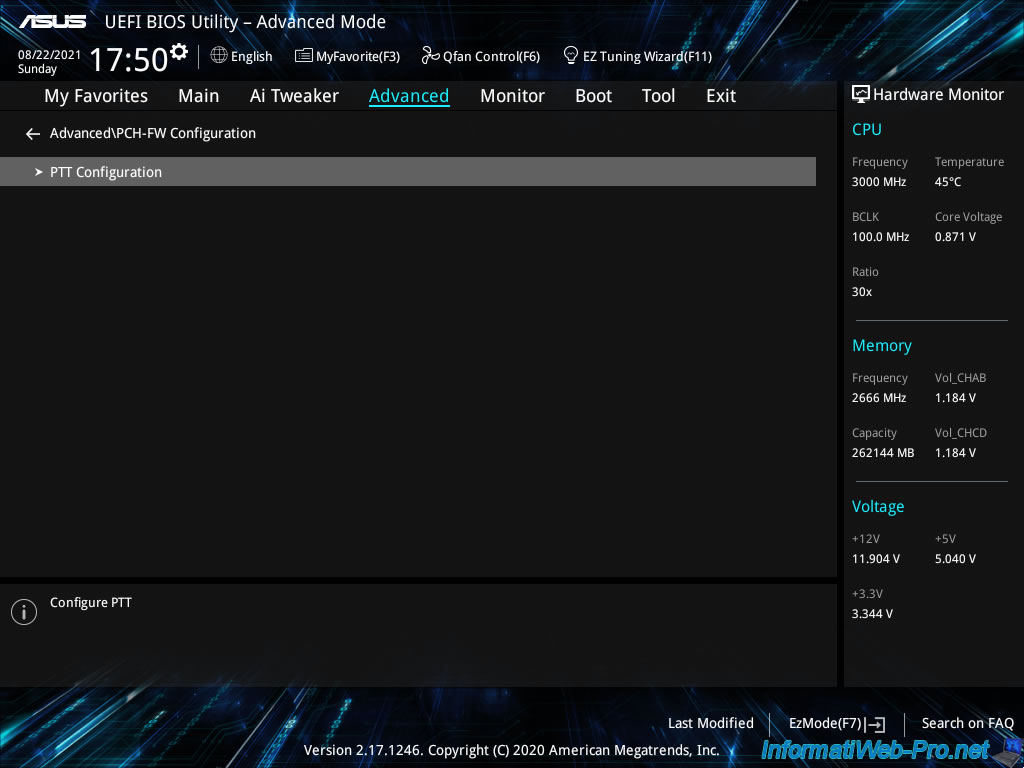
In this section "PCH-FW Configuration", you will find a section "PTT Configuration" in which you must enter.
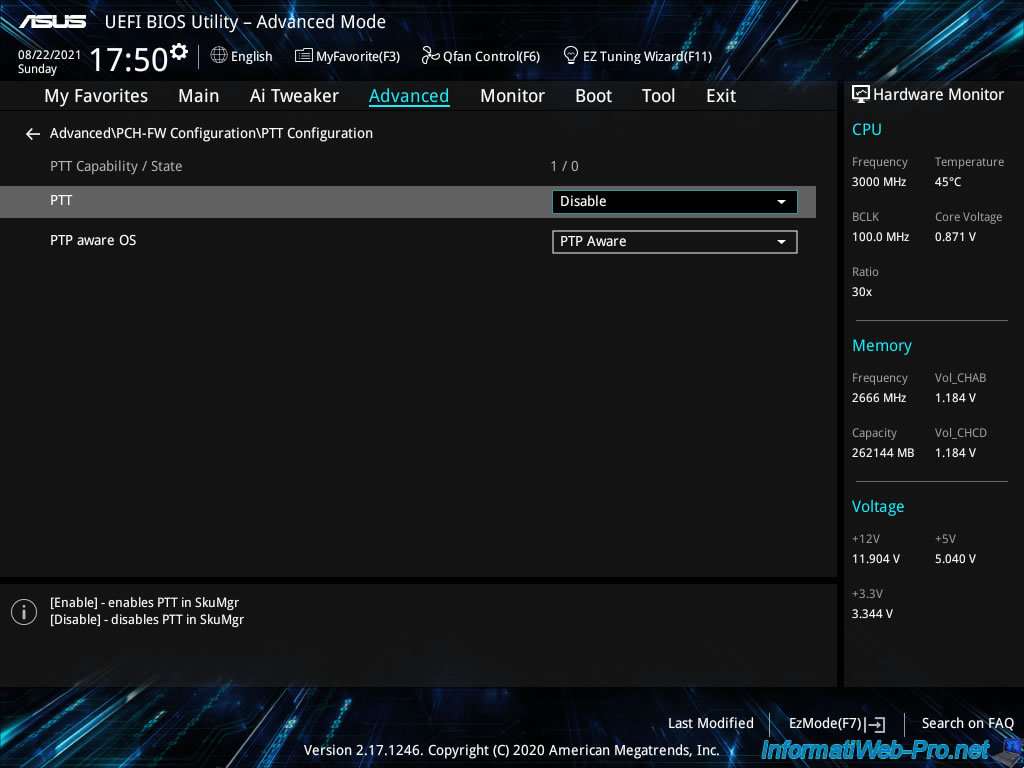
As you can see, your motherboard supports PTT feature, but this feature is disabled by default.
Plain Text
PTT Capability / State : 1 / 0
PTT : Disable
Intel PTT stands for "Intel Platform Trust Technology", but in other motherboards this option may appear under other names : TPM or Trusted Platform Module.
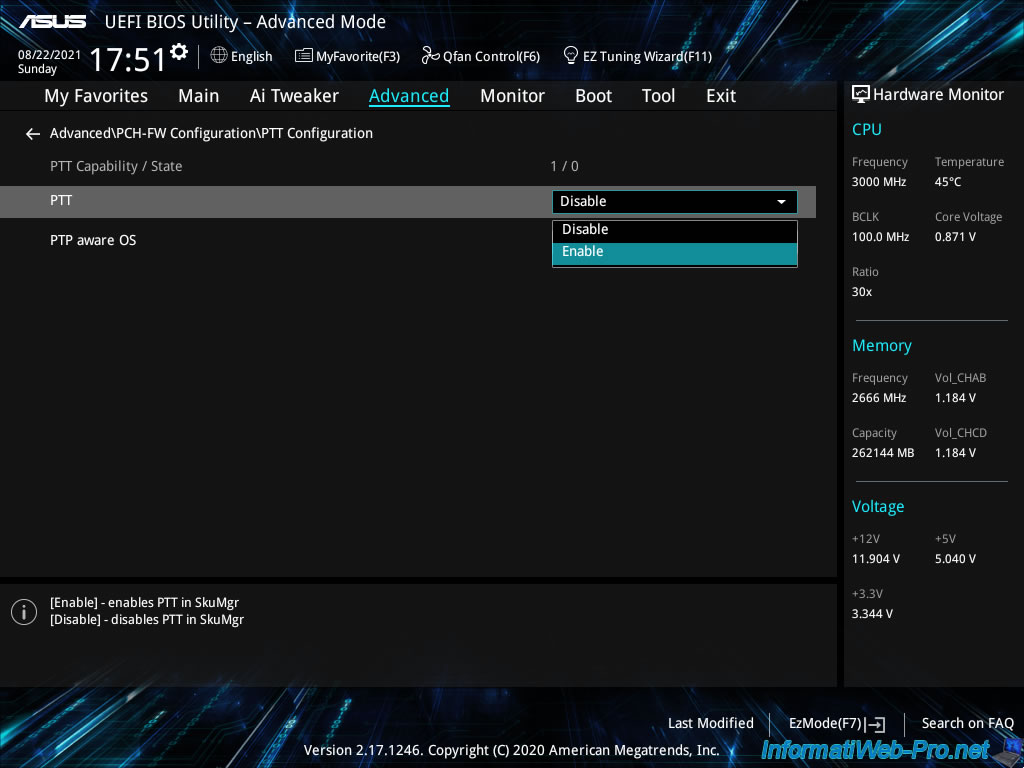
Enable Trusted Platform Module support by selecting "Enable" for the "PTT" option.
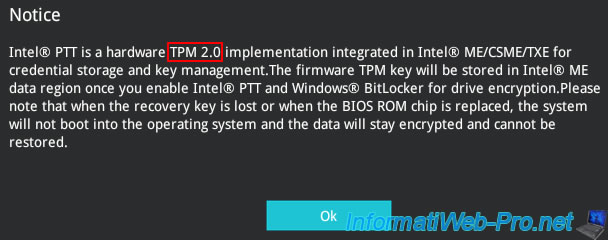
Enabling this "PTT" feature will display this message.
Without going into details, this indicates that the Trusted Platform Module key will be stored in a flash memory chip (Intel ME) located in your processor and that this will allow you to secure the storage of the encryption key required by the processor for the activation of the Windows BitLocker feature.
In addition, the loss of the recovery key or the replacement of the BIOS read-only memory chip will prevent the data from being decrypted and the data will therefore remain encrypted (and therefore lost, because they are unreadable).
For more information about this message, see the "Got a Warning For Enabling Firmware TPM" page.
However, we will not be using BitLocker in this case since it's VMware ESXi that is installed on our server.
Click on OK.
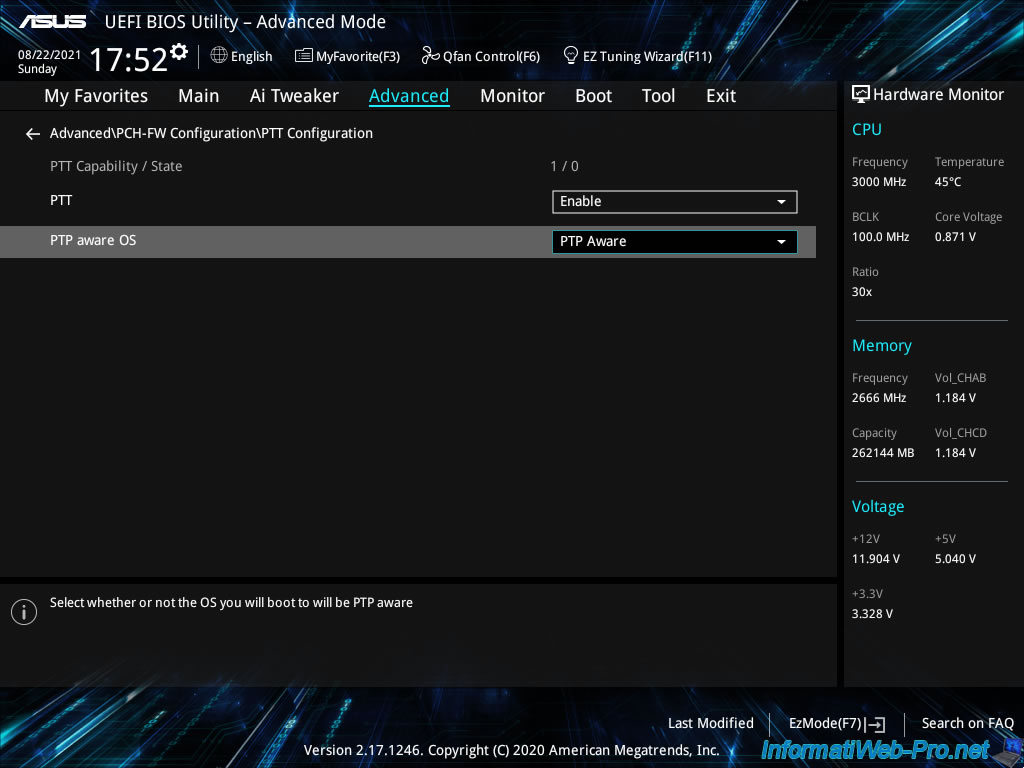
In our case, we have a second setting named "PTP aware OS" which allows you to indicate if the operating system installed on our server is compatible with PTP.
PTP corresponds to the "TCG PC Client Platform TPM Profile (PTP)" specification and "TCG" stands for "Trusted Computing Group".
This PTP specification defines the use of a TPM (Trusted Platform Module) on any generic platform (computer, server, ...).
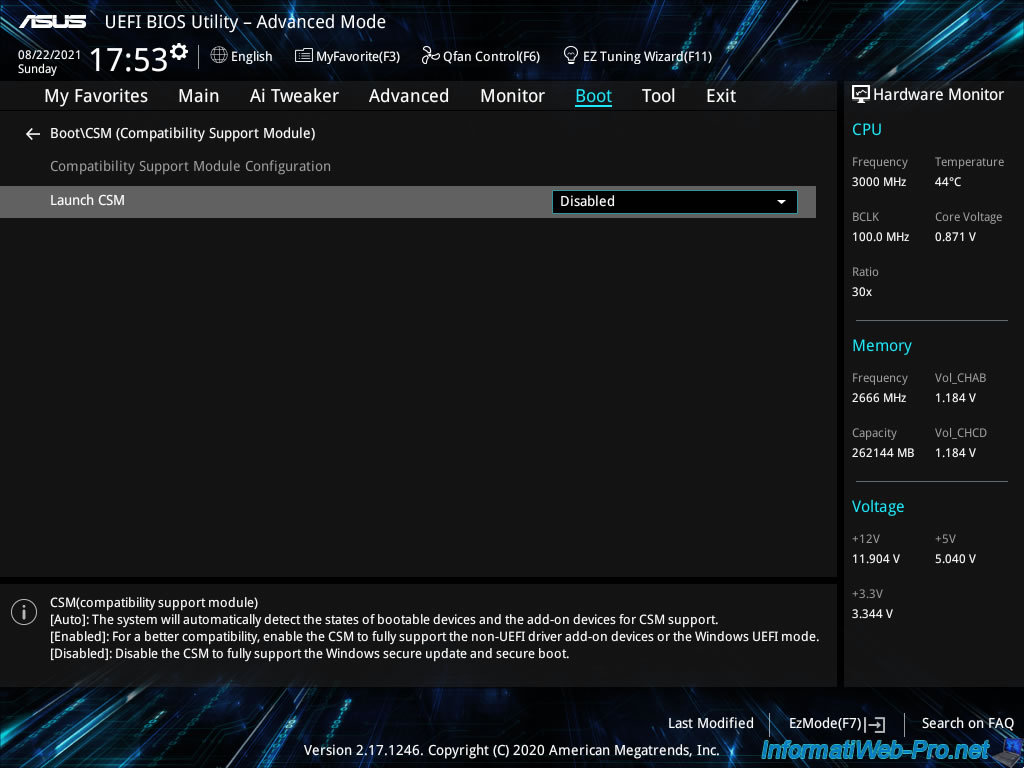
Then go to : Boot -> CSM (Compatibility Support Module).
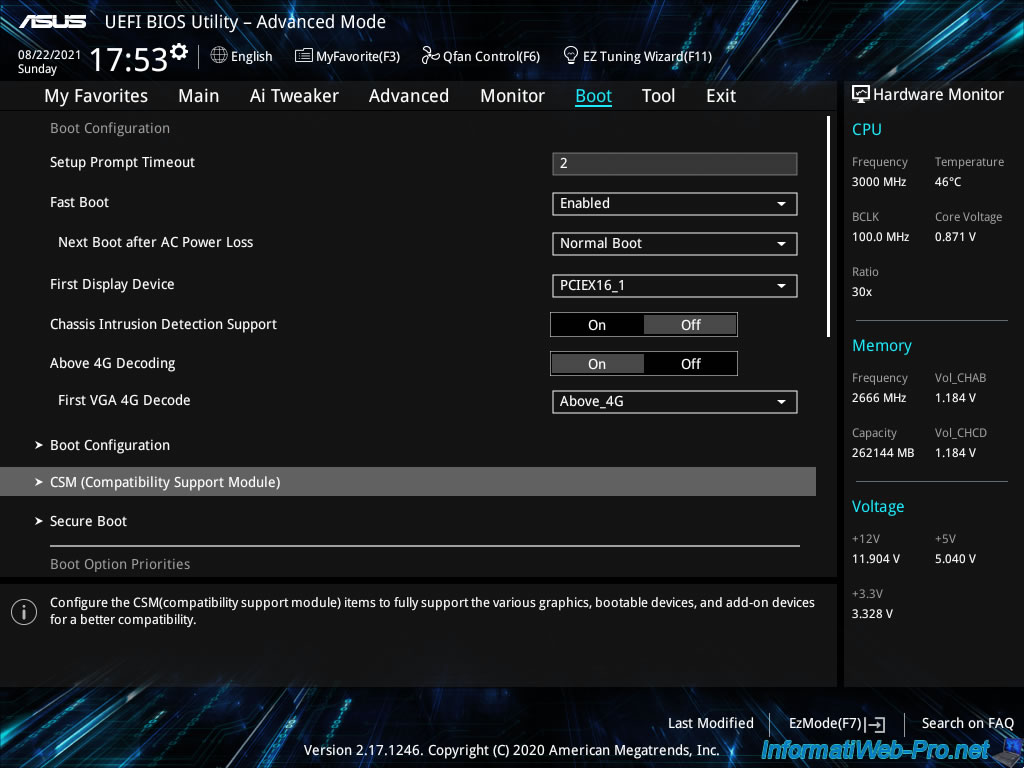
To be sure that your server boots in UEFI mode, you should disable the "CSM" module (which allows you to boot in "old BIOS" or "LEGACY BIOS" mode).
To do this, select "Launch CSM : Disabled".
However, in our case, this posed a compatibility problem with one of the components located in our server.
We therefore left this "CSM" module enabled. Most importantly, the BIOS boot order is configured to boot in UEFI mode on the hard drive or SSD where VMware ESXi is installed.
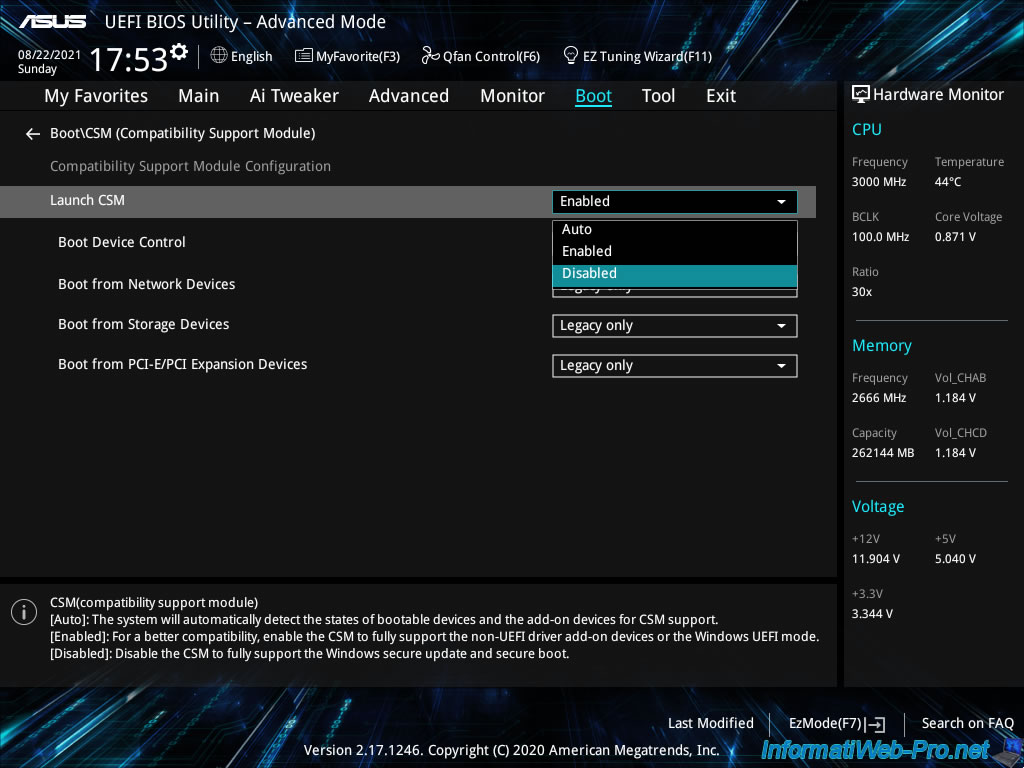
Note that disabling this "CSM (Compatiblity Support Module)" will display this warning.
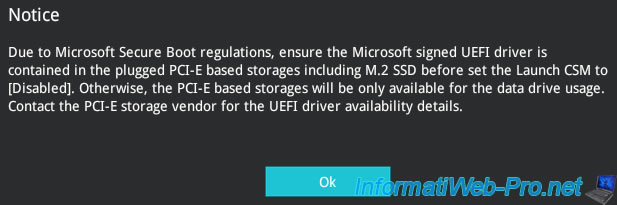
This "CSM (Compatiblity Support Module)" module is disabled.
Now, don't forget to enable Secure Boot related to this UEFI firmware.
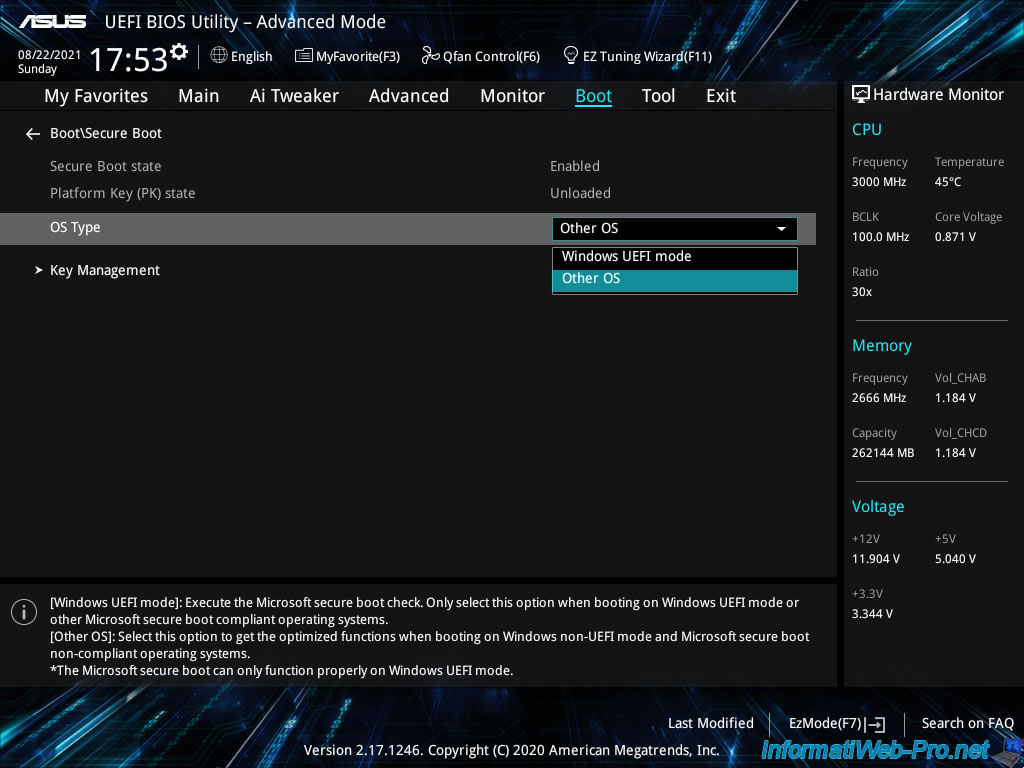
To do this, go to "Boot -> Secure Boot" and locate the "OS Type" option.
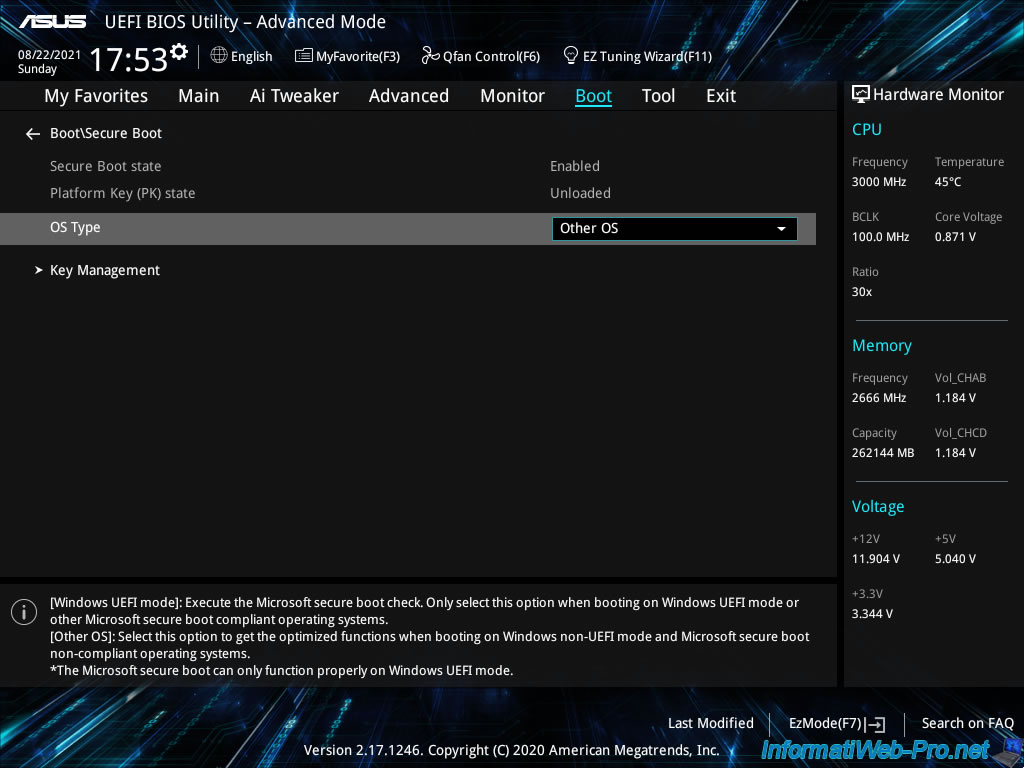
In our case, we can choose between "Windows UEFI mode" or "Other OS".
Since the operating system installed on our server is "VMware ESXi", we select "Other OS".
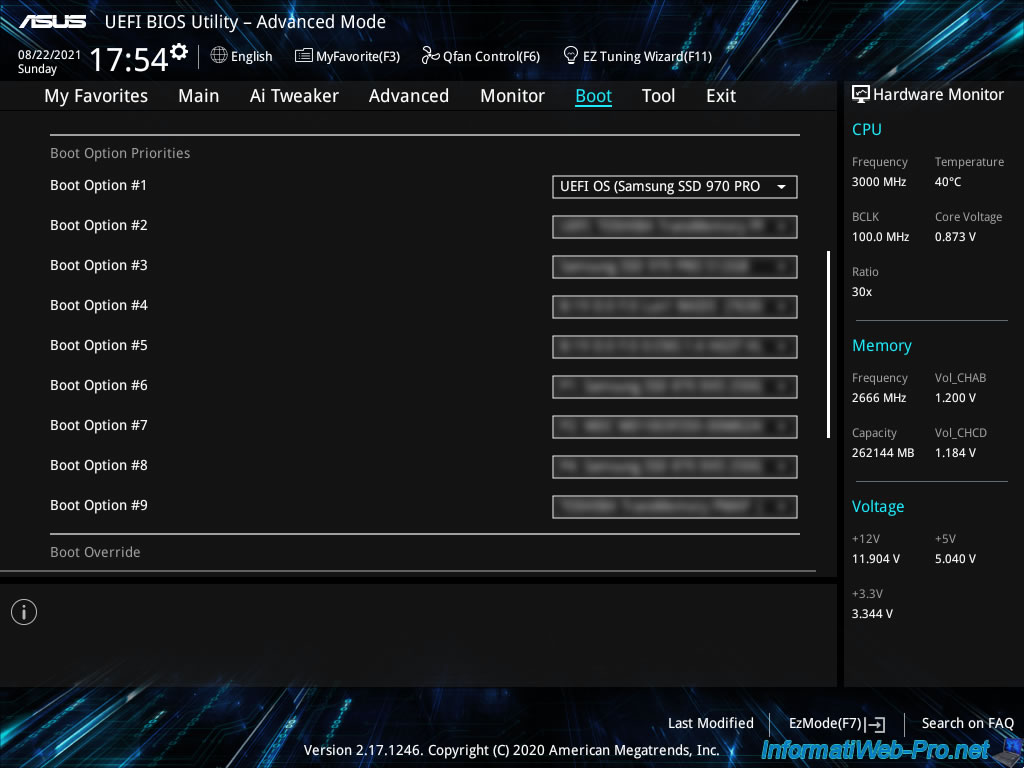
Finally, in the "Boot" tab, locate the "Boot Option Priorities" section and select the UEFI version of the hard drive or SSD where VMware ESXi is installed.
In our case, VMware ESXi is installed on our SSD : Samsung SSD 970 PRO NVMe M.2 512 Go.
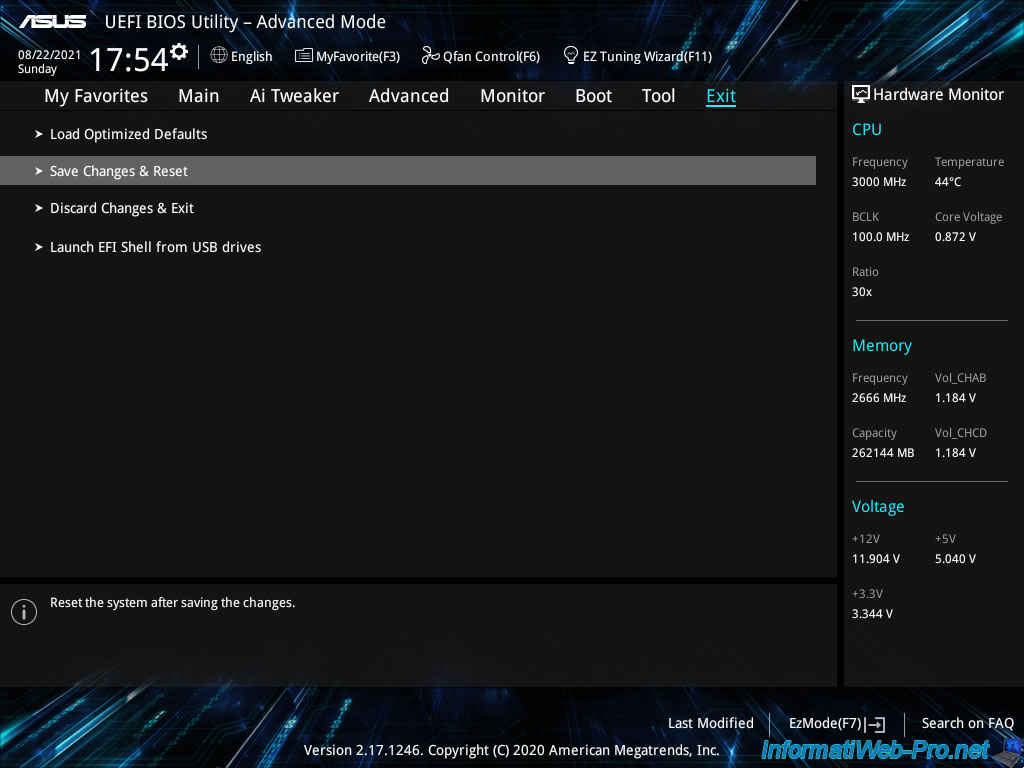
Finally, save the changes made in the BIOS.
To do this, go to the "Exit" tab and click on : Save Changes & Reset.
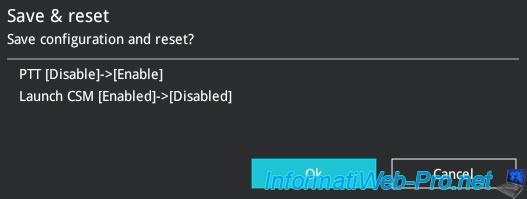
Confirm saving changes by clicking OK.
Share this tutorial
To see also
-

VMware 5/25/2022
VMware ESXi 6.0 - Install the VMware Host Client web client
-

VMware 5/27/2022
VMware ESXi 6.5 - Add a network driver in the installation ISO
-

VMware 12/2/2022
VMware ESXi 6.7 - Install and use the VMRC console on Linux
-
VMware 12/30/2022
VMware ESXi 6.7 - Install VMware Tools on Win Server in Core mode
You must be logged in to post a comment