Transfer files between your PC and your VMs on VMware ESXi 7.0 or 6.7
- VMware
- 01 July 2022 at 08:44 UTC
-

- 2/4

3. Use the RDP (Remote Desktop) protocol on Windows
To be able to easily transfer files (via a simple copy and paste) to a virtual machine (and vice versa) without having to install third-party software, you can use the RDP protocol available on Windows.
Thus, you will be able to connect to your virtual machine thanks to the "Remote Desktop Connection" client available in all versions of Windows.
Warning : the only downside is that the RDP server is NOT available in the home edition of Windows and you need to protect the user account in the virtual machine with a password.
Indeed, it's not possible to use the RDP protocol with a user account whose password is empty.
For more information on using Windows Remote Desktop (RDP), refer to our tutorial : Take control of a computer over Remote Desktop (RDP).
3.1. Enable RDP protocol on Windows (Pro minimum)
To enable the RDP protocol on Windows 10, 8.1, 8 or 7, open the control panel, then go to : System and Security -> System.
Then, click on the "Advanced system settings" link available in the left column.
In the "System Properties" window that appears, go to the "Remote" tab and select the "Allow remote connections to this computer" option.
If you don't see the "Remote Desktop" section, you are using a Home Edition of Windows.

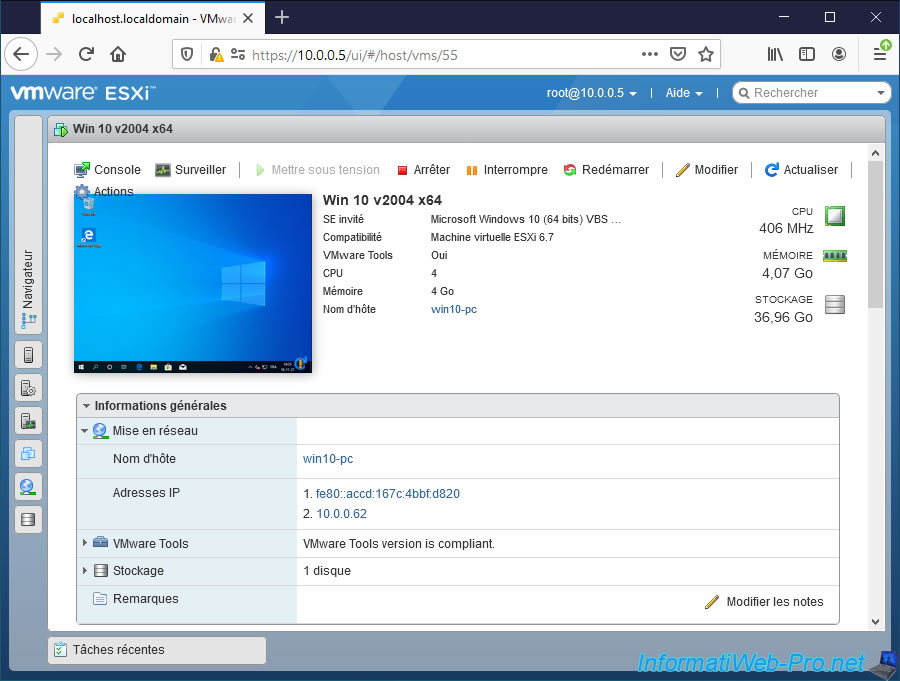
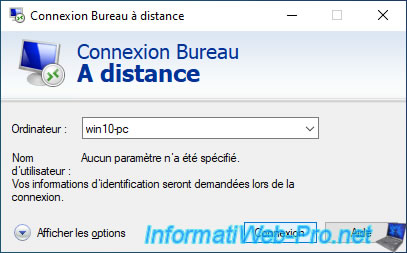
To be able to connect to this virtual machine using RDP, you will need its computer name.

Note that you can also find the computer name (NETBIOS name) and the IP addresses of your virtual machine in the "General Information" section of this one.
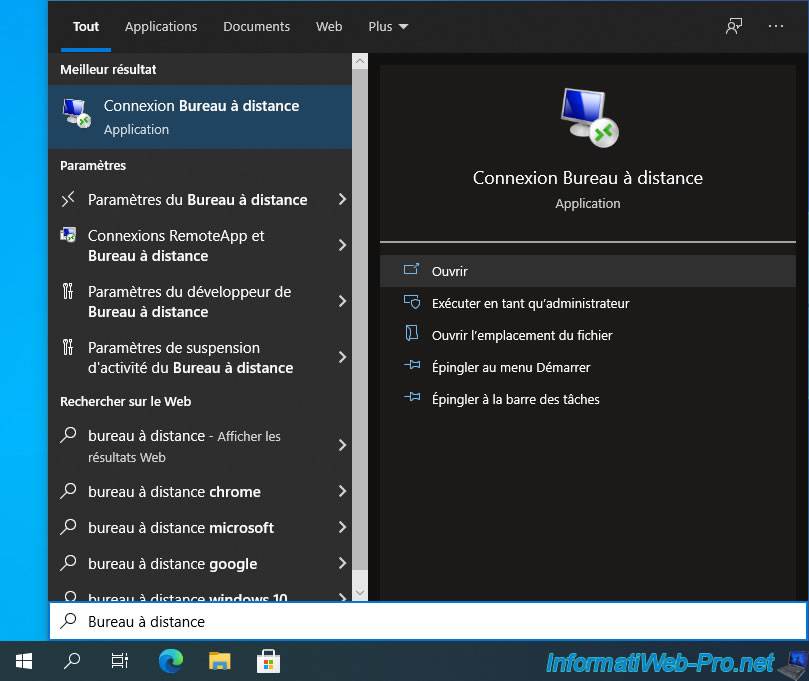
3.2. Connect to the virtual machine using the RDP (Remote Desktop) protocol
To control your virtual machine remotely using RDP, find the "Remote Desktop Connection" program on your computer.
This RDP client is available on all versions and editions of Windows.
This eliminates the need to install additional software on your computer. Which is very practical in business.
In the small "Remote Desktop Connection" window that appears, specify the computer name or the IP address of your virtual machine and click on Connection.
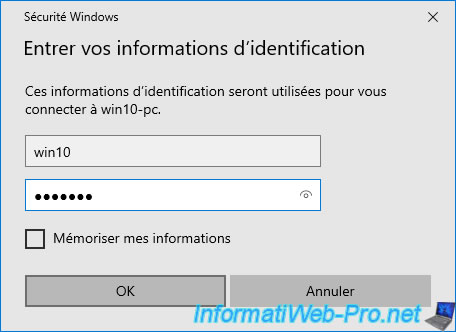
Enter the credentials of a user account present in the virtual machine.
Important : as a reminder, it's impossible to connect via the RDP protocol with a user account without a password.
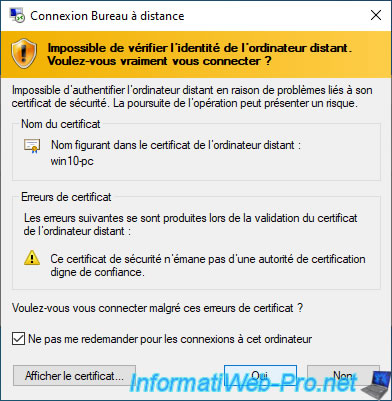
Ignore the warning that appears regarding the self-signed certificate used by default by Windows computers.
To do this, check the "Don't ask me again for connections to this computer" box and click on Yes.
Plain Text
The certificate is not from a trusted certifying authority.
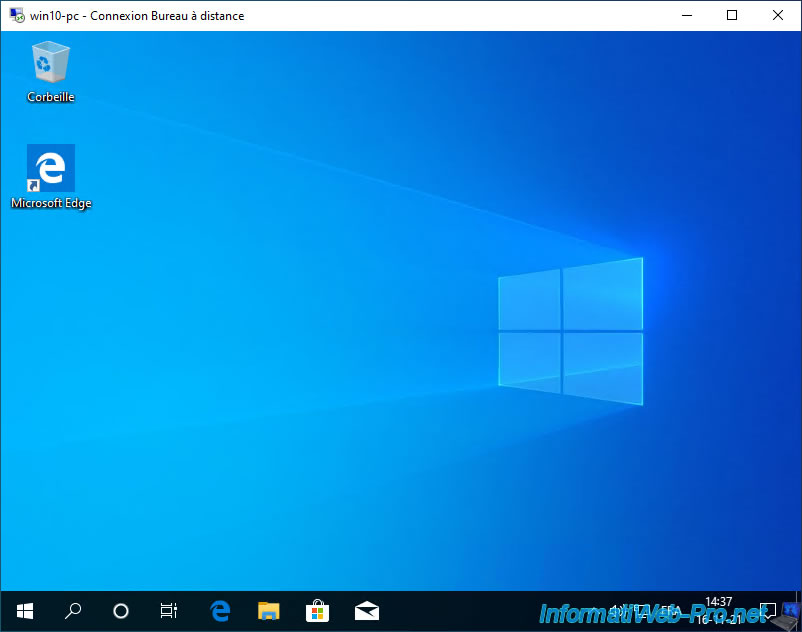
The screen of your virtual machine appears via the "Remote Desktop Connection" client.
3.3. Transfer files via RDP protocol
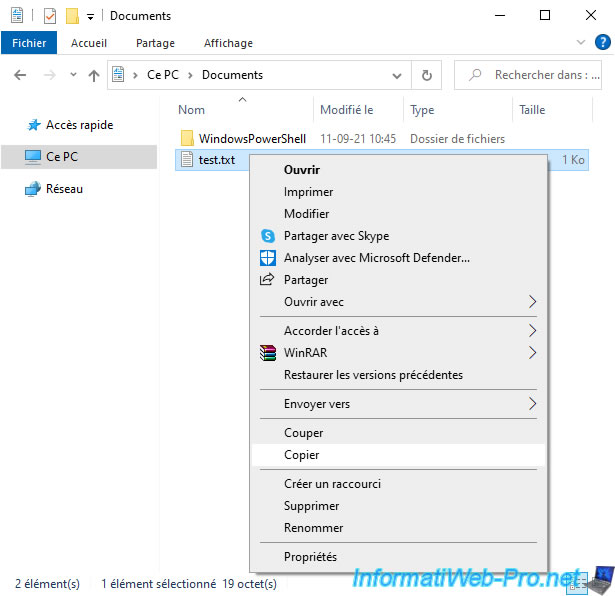
The advantage of RDP is that it allows you to transfer files very easily with a simple copy and paste.
To do this, copy a file from your local computer.
Warning : file transfer via the RDP protocol is only available on recent versions of Windows (Windows 7 and later).
Although the RDP protocol is also supported on Windows XP Pro, file transfer via RDP was not yet available on this version of Windows.
Then, right click "Paste" in the virtual machine.
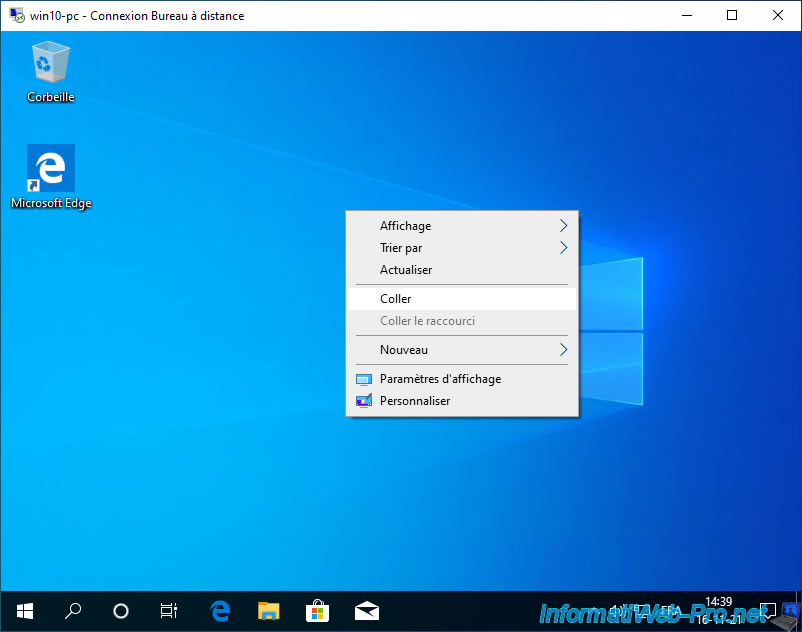
As expected, the file is transferred via RDP to the desired location.
![]()
4. Use file sharing on Windows
To avoid having to configure each virtual machine separately or install third-party software on each of them, you can use the file sharing available on Windows.
For this, the 1st option is to use a file server available in your company (if applicable).
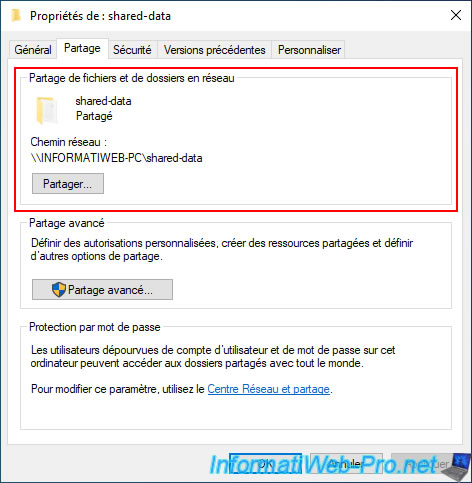
Otherwise, you just need to share a folder on your local computer and put the desired files there.
Then, you just need to access this shared folder from the virtual machine.
If you want to know how to create shared folders, password protected shares and/or hidden shares, refer to the tutorial for the version of Windows used as guest operating system in your virtual machine :
On the local computer, create a folder and store the files you want to use from your virtual machines inside.
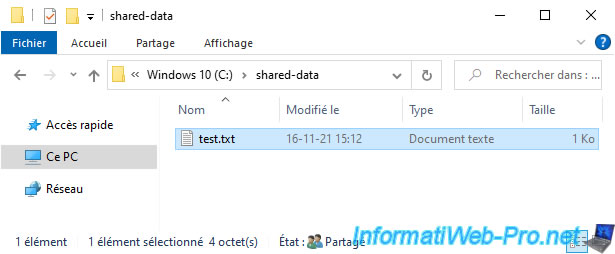
Then, share this folder by referring to one of the tutorials mentioned above.
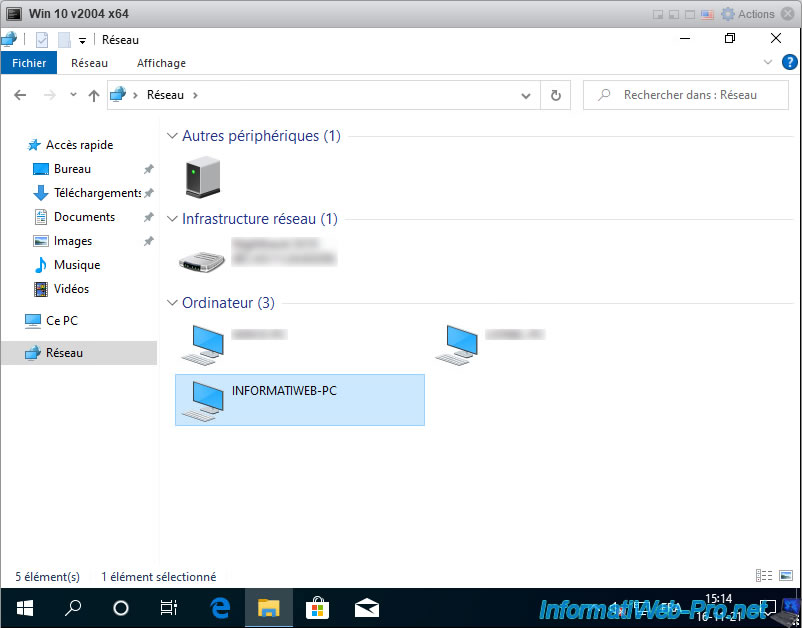
In your virtual machine, open the file explorer and go to the "Network" section (available in the left column).
If a yellow banner about network discovery and file sharing appears, click on it, then on : Turn on network discovery and file sharing.
Then, choose to change the network you are connected to a private network.

The computers on your network will appear, as well as your local computer (if it's correctly configured).
If necessary, refer to the tutorials mentioned above so that it's visible from the other computers on your network.
But, the most important thing is to use the "Private network" (or "Home network" on Windows 7) network location type so that file sharing and network discovery are allowed by the Windows firewall.
If you are using an Internet Security solution or a third-party firewall, be sure to configure it to allow file sharing and network discovery (if applicable).
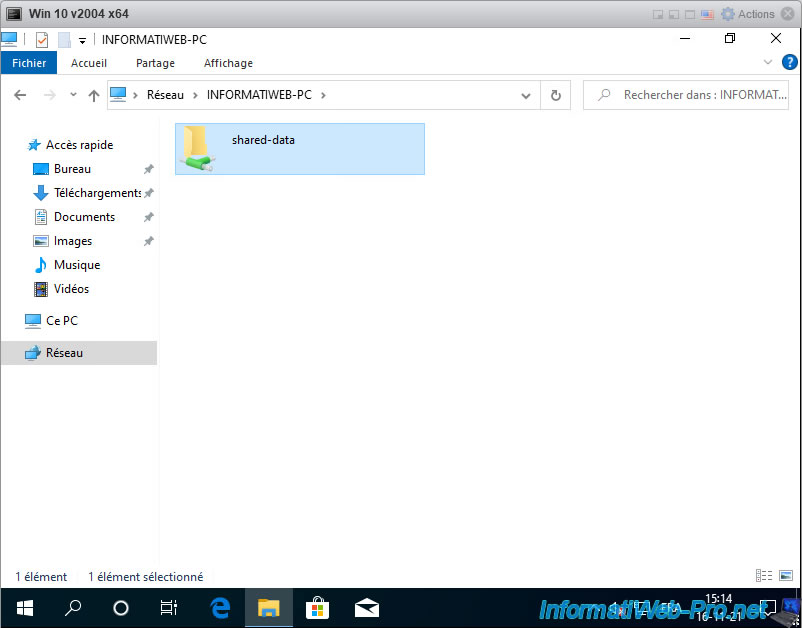
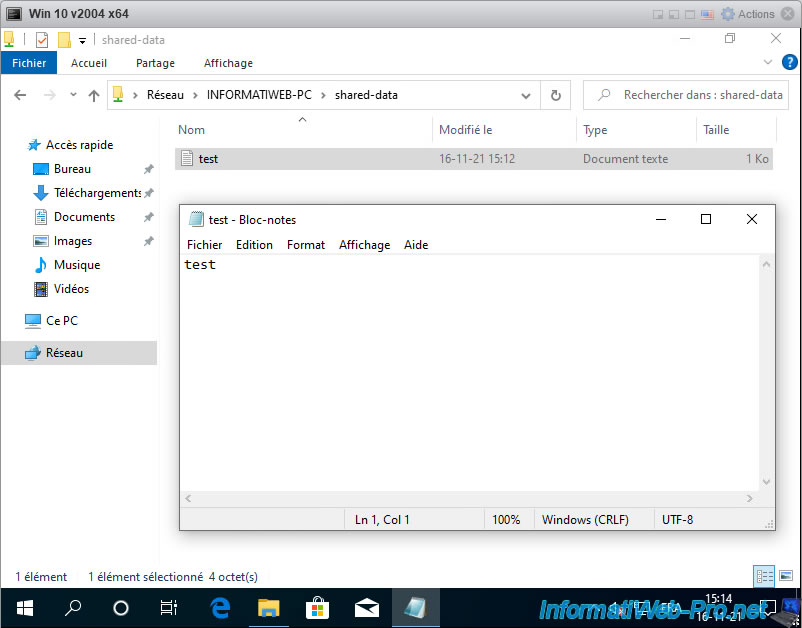
Double click on the name of your local computer.
As expected, your shared folder appears.
Unless you have created a hidden shared folder (as explained in the tutorials mentioned above).
Go into this shared folder.
As expected, files on your local computer are available from within the virtual machine, without the need for third-party software.
Share this tutorial
To see also
-

VMware 5/25/2022
VMware ESXi 6.0 - Install the VMware Host Client web client
-

VMware 5/27/2022
VMware ESXi 6.5 - Add a network driver in the installation ISO
-

VMware 1/27/2023
VMware ESXi 6.7 - Enable virtualization-based security (VBS)
-

VMware 12/2/2022
VMware ESXi 6.7 - Install and use the VMRC console on Linux
No comment