Understand and configure the settings of your virtual machines on VMware ESXi 6.7
- VMware
- 17 February 2023 at 12:16 UTC
-

- 2/2

2. Add virtual hardware
In the "Virtual Hardware" tab, you will find 3 options to add virtual or physical hardware to your virtual machine :
- Add hard disk
- Add network adapter
- Add other device
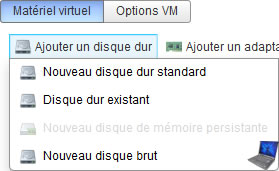
2.1. Add hard disk (virtual or physical)
By clicking on "Add hard disk", you will be able to :
- New standard hard disk : create and add a new virtual hard disk
- Existing hard disk : add an existing virtual hard disk stored in a datastore of your hypervisor
- New persistent memory disk : add a persistent memory disk (PMem) provided in particular by Intel (Intel Optane)
- New raw disk : connect a physical hard disk to your virtual machine
2.2. Add network adapter (network card)
By clicking on "Add network adapter", you can add a virtual or paravirtual network card.

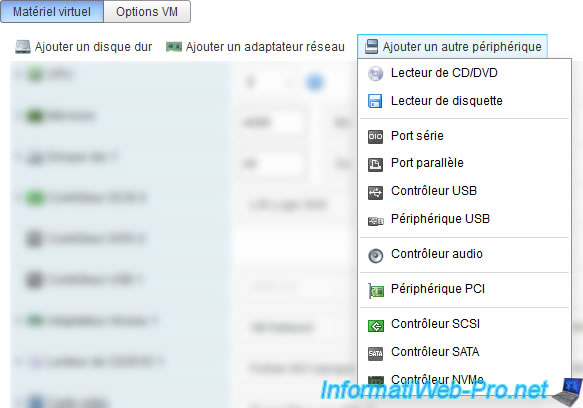
2.3. Add other device
By clicking on "Add other device", you can add :
- an additional virtual CD/DVD drive
- a floppy drive
- a serial port
- a parallel port
- an additional USB controller
- an USB device. This allows you to connect a physical USB support (USB key, external hard drive, ...) to a virtual machine.
- an audio controller
- a PCI device. This allows you to add a PCI or PCIe device, a physical USB controller, a compatible physical graphics card, ... to a virtual machine thanks to PCI passthrough.
- a virtual SCSI controller to connect virtual hard disks
- a virtual SATA controller to connect virtual hard disks and/or virtual CD/DVD drives
- an NVMe controller to plug in virtual hard disks
3. VM Options
In the "VM Options" tab, you can manage the options and settings of your virtual machine.
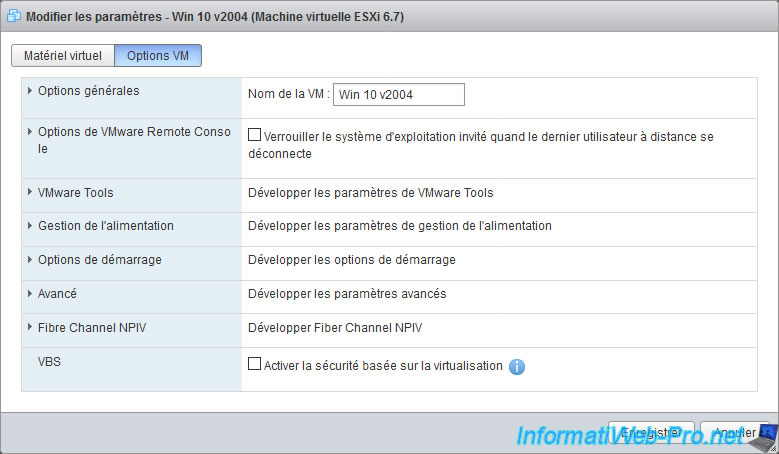
3.1. General Options
In the "General Options" section of the VM options, you will be able to :
- VM name : change the name of your virtual machine
- VM Config File : see where your virtual machine's ".vmx" configuration file is stored.
- VM Working Location : see where your virtual machine is stored
- Guest OS : change the guest operating system specified to VMware ESXi
- Guest OS Version : same, but for the version of this guest operating system

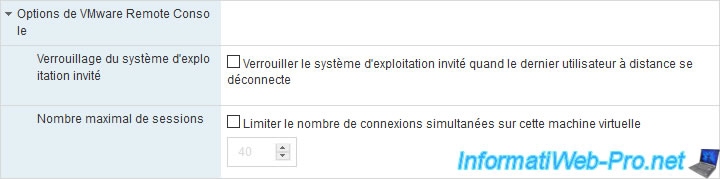
3.2. VMware Remote Console Options
In the "General Options" section of the VM options, you can configure options specific to the VMare Remote Console (VMRC) program :
- Guest OS lock : allows you to lock the guest operating system when the last remote user disconnects
- Maximum number of sessions : checking this box limits the number of simultaneous connections on this virtual machine to the number that you indicate in the box provided for this purpose.
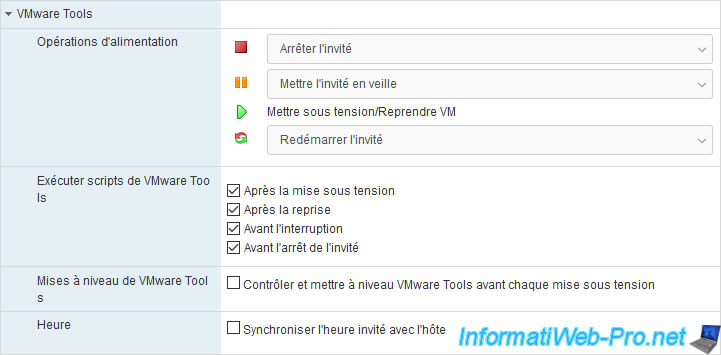
3.3. VMware Tools
In the "VMware Tools" section of the VM options, you will be able to :
- Power Operations : choose which actions to use if VMware Tools are installed. Preferably, actions concerning the guest to be able to properly shut down or restart the guest operating system.
- Run VMware Tools scripts : by default, all VMware Tools scripts are enabled and executed in different cases.
However, you can enable or disable the execution of these scripts if you wish :- After powering on : run a VMware Tools script after the virtual machine is started
- After resuming : run a VMware Tools script after the virtual machine is powered on again after a pause
- Before suspending : run a VMware Tools script before pausing the virtual machine
- Before shutting down guest : run a VMware Tools script before shutting down the virtual machine's guest operating system
- Tools upgrades : by default, you must manually update VMware Tools in each virtual machine.
This is recommended in production if you want to avoid ending up with a virtual machine that has crashed due to updating VMware Tools.
Indeed, in production, it's strongly recommended to create a snapshot on your virtual machine just before updating the VMware Tools in it to be able to go back in a few clicks if necessary.
However, if this is a test environment and therefore you want to automatically update the VMware Tools in this virtual machine, then check the "Check and upgrade VMware Tools before each power on" box. - Time : allows you to synchronize the guest time with the host each time it starts. In this case, first make sure that the date and time of your VMware ESXi hypervisor are correctly set.
3.4. Power management
In the "Power management" section of the VM options, you will be able to :
- Standby response : choose how VMware ESXi should handle power to your virtual machine when the guest operating system (in the virtual machine) is put to sleep.
- Suspend the virtual machine : the virtual machine is suspended and is therefore no longer "powered". This means that Wake on LAN (WoL) will not be able to work in this case.
- Put the guest OS into standby mode and leave the virtual machine powered on : the operating system will be put to sleep, but the virtual machine will still be "powered". This will allow you to restart it remotely thanks to Wake on LAN (WoL) if you wish.
- Wake on LAN : enable Wake on LAN for this virtual machine for the desired virtual network adapter IF the "Standby response" setting is configured to "Put the guest OS into standby mode and ...".
Otherwise, this option will be grayed out.
As a reminder, Wake on LAN (WoL) allows you to start or restart a computer (or a virtual machine, in this case) remotely via the network by sending it a magic packet.

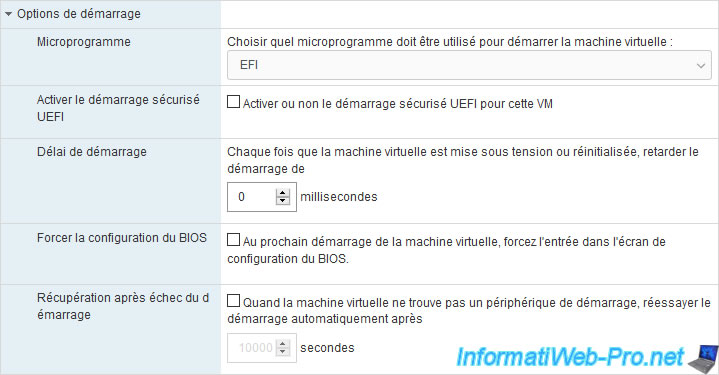
3.5. Boot Options
In the "Boot Options" section of the VM options, you will be able to :
- Firmware : allows you to choose whether you want to use classic BIOS or EFI firmware (for recent compatible operating systems).
- Enable UEFI secure boot : to benefit from UEFI secure boot for this VM (only if you have selected "EFI" as firmware), check the "Whether or not to enable UEFI secure boot for this VM" box.
- Boot Delay : allows you to delay the startup after powering on and restarting the virtual machine by x milliseconds for easier access to the BIOS or EFI firmware of the virtual machine.
- Force BIOS setup : check the "The next time the virtual machine boots, force entry into the BIOS setup screen" box allows you to automatically enter the BIOS or the EFI firmware of the virtual machine the next time that you will turn it on. This greatly facilitates access to the BIOS or its EFI firmware to configure the boot order if necessary.
- Failed Boot Recovery : attempt to automatically restart the virtual machine after the specified timeout in seconds if no boot device was found
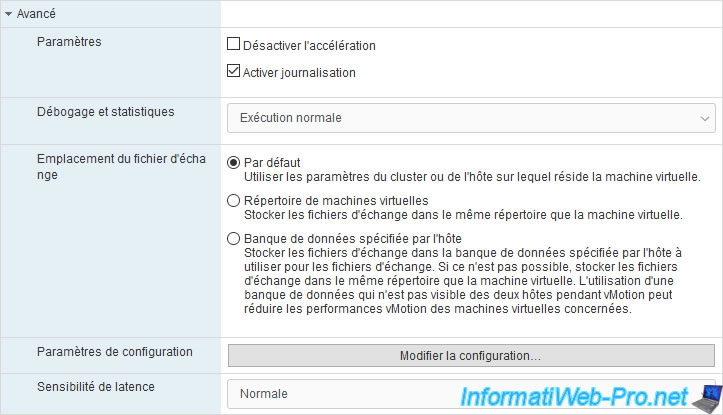
3.6. Advanced
In the "Advanced" section of the VM options, you will be able to :
- Settings :
- Disable acceleration : allows you to disable the acceleration of the virtual machine in the rare event that running or installing a program prevents the virtual machine from responding correctly (freeze).
However, this obviously decreases the performance of your virtual machine. This option is therefore only useful in the event of a problem. - Enable logging : by default, this option is checked and causes the automatic creation of ".log" files in the virtual machine folder.
These log files can be useful in the event of a problem and be useful to VMware Support so that they can assist you in the event of a problem.
To disable the automatic creation of these log files, uncheck this box.
- Disable acceleration : allows you to disable the acceleration of the virtual machine in the rare event that running or installing a program prevents the virtual machine from responding correctly (freeze).
- Debugging and statistics : allows you to collect additional information (debugging information or statistics) in the event of a problem so that VMware technical support can help you.
The default is "Run normally". - Swap file location : when you start a virtual machine, a paging file is automatically created and serves as alternate memory for RAM as long as the virtual machine is powered on.
After the virtual machine is shut down, this file disappears automatically.- Default : by default, the file will be stored according to the setting configured on your VMware ESXi hypervisor
- Virtual machine directory : the swap file will be stored in the same folder as the virtual machine
- Datastore specified by host : the paging file will be stored in the location specified by the host or by the cluster (if applicable) if possible.
Otherwise, it will be stored in the virtual machine folder.
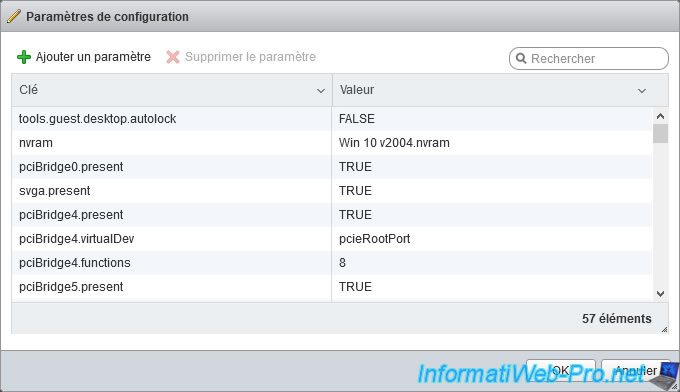
- Configuration Parameters : the "Edit Configuration" button allows you to easily edit the ".vmx" configuration file of the virtual machine.
- Latency Sensitivity : adapts the latency sensitivity to improve responsiveness for VoIP applications, media players, or applications where keyboard and mouse use is prevalent.
If you click on the "Edit Configuration" button (visible in the image above), you will see a "Configuration Parameters" window appear where you can add, edit or delete the parameters present in the ".vmx" configuration file.
However, note that some parameters of the ".vmx" file will not appear in this table.
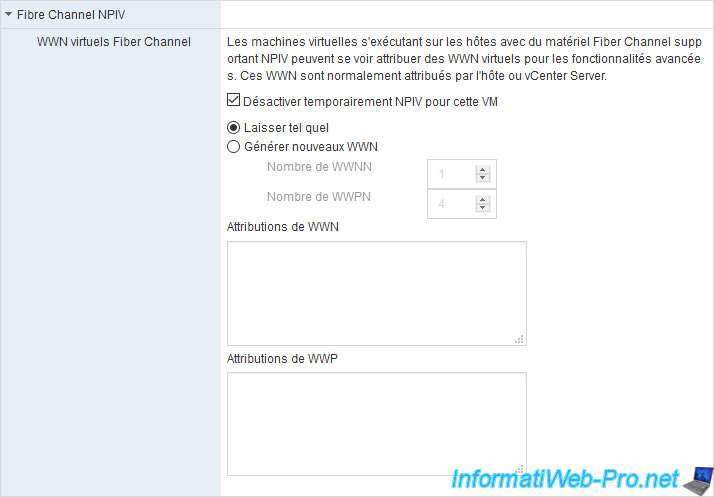
3.7. Fiber Channel NPIV
In the "Fiber Channel NPIV" section, you will be able to assign virtual WWNs and WWPs for advanced features for virtual machines accessible with Fiber Channel hardware supporting NPIV.
3.8. VBS (Virtualization-Based Security)
In the "VBS" section, you can choose to enable Virtualization Based Security (VBS) or not.
When the guest operating system is Windows 10, this allows it to use hardware virtualization features to create and isolate a secure region of host memory.
This allows you to avoid malicious attacks and the use of vulnerabilities on Windows 10.
![]()
Share this tutorial
To see also
-
VMware 4/14/2023
VMware ESXi 6.7 - Best practices for creating a VM
-
VMware 6/2/2023
VMware ESXi 6.7 - Connect a smart card reader to a VM
-
VMware 10/19/2022
VMware ESXi 6.7 - DirectPath I/O (PCI passthrough)
-
VMware 3/31/2023
VMware ESXi 6.7 - How CPU management works
No comment