- VMware
- 13 January 2023 at 09:53 UTC
-

- 1/2

With VMware ESXi, you can use persistent memory to increase the performance of one or more virtual machines.
Previously, we created an article explaining in detail what persistent memory (PMem) is, how to simulate it (for testing purposes), how to use it,. ..
However, persistent memory (PMem) is only supported from Windows Server 2016, Windows 10 (version 1607) and CentOS 7.4.
Otherwise, you will need to use the technique below, to indirectly use persistent memory from a virtual machine whose guest operating system doesn't support it.
- Create a virtual machine with a persistent memory virtual disk
- Information about the created virtual machine
- Installing the guest operating system
- Partition the persistent memory disk (PMem)
- Persistent memory retained when restarting a VM
- Restart the VMware ESXi host
- Virtual persistent memory (PMem) erased
- Replace persistent memory disk
- Lost data
- Disable simulated persistent memory
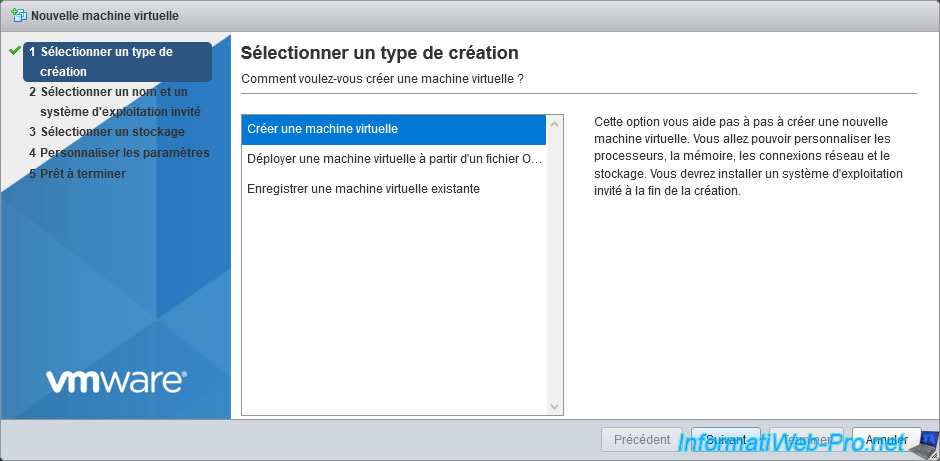
1. Create a virtual machine with a persistent memory virtual disk
To begin, select "Create a new virtual machine" and click Next.
For this example, we will create a virtual machine with Windows 7 SP1 x64 as the guest operating system.

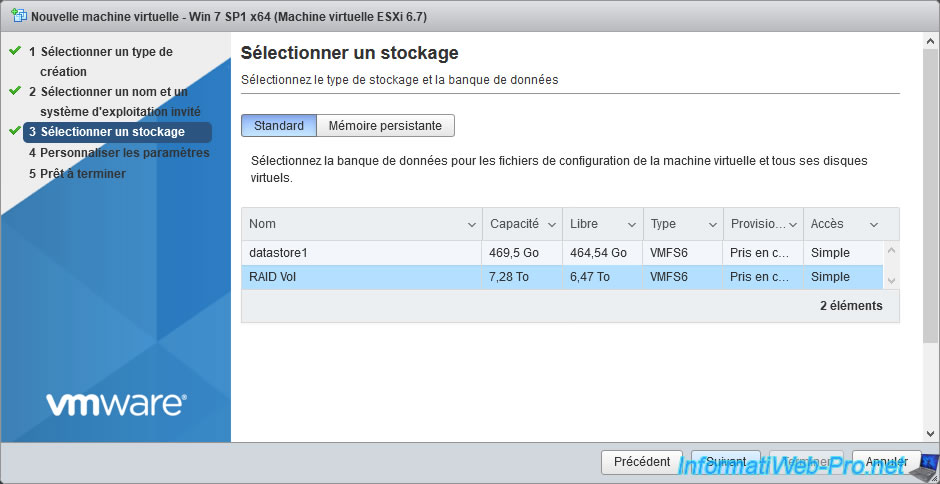
Select the datastore (Standard) where you want to store this virtual machine.
Configure the virtual hardware as desired.
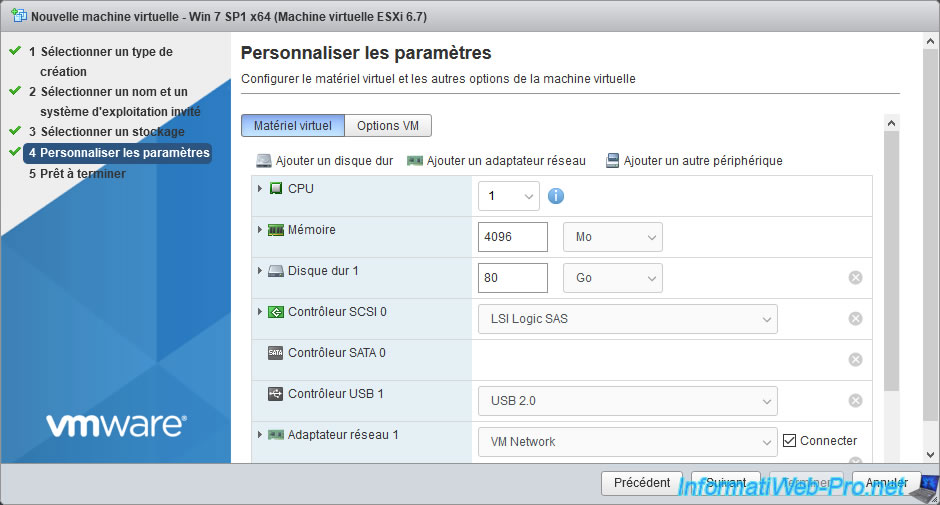
As explained earlier, in this tutorial, we used a guest operating system that doesn't support the direct use of persistent memory through virtual NVDIMMs.
In this case, the "NVDIMM" option is therefore not available.
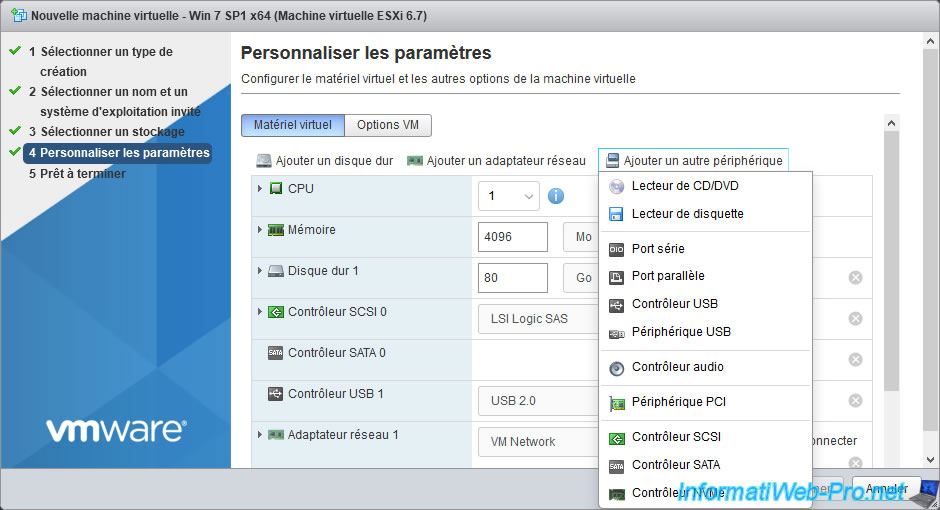
In this case, you will have to click on : Add hard disk -> New persistent memory disk.
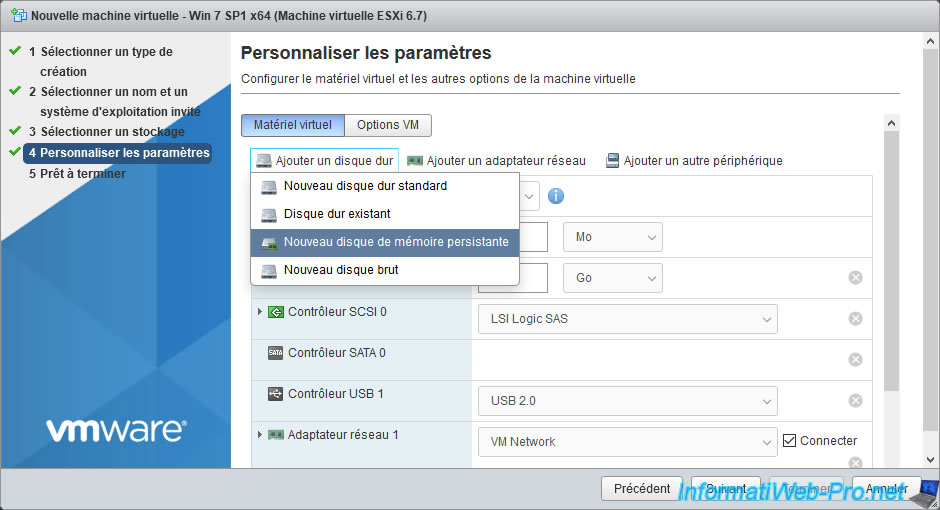
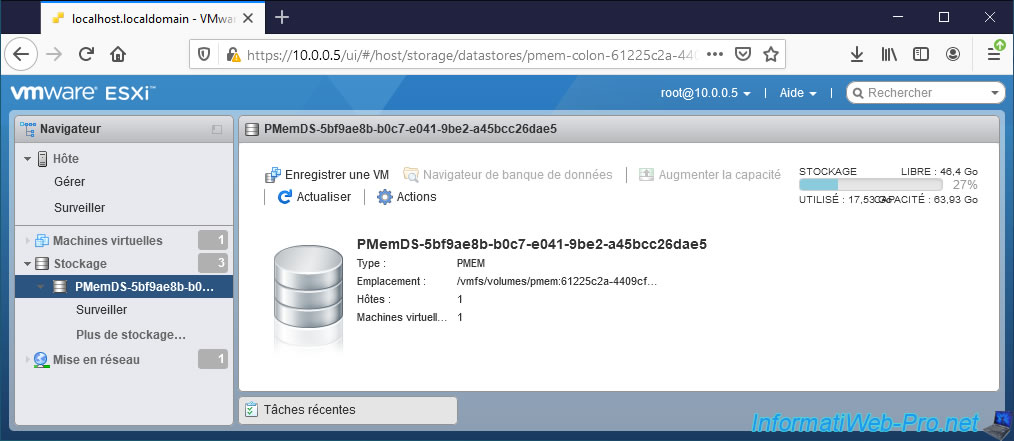
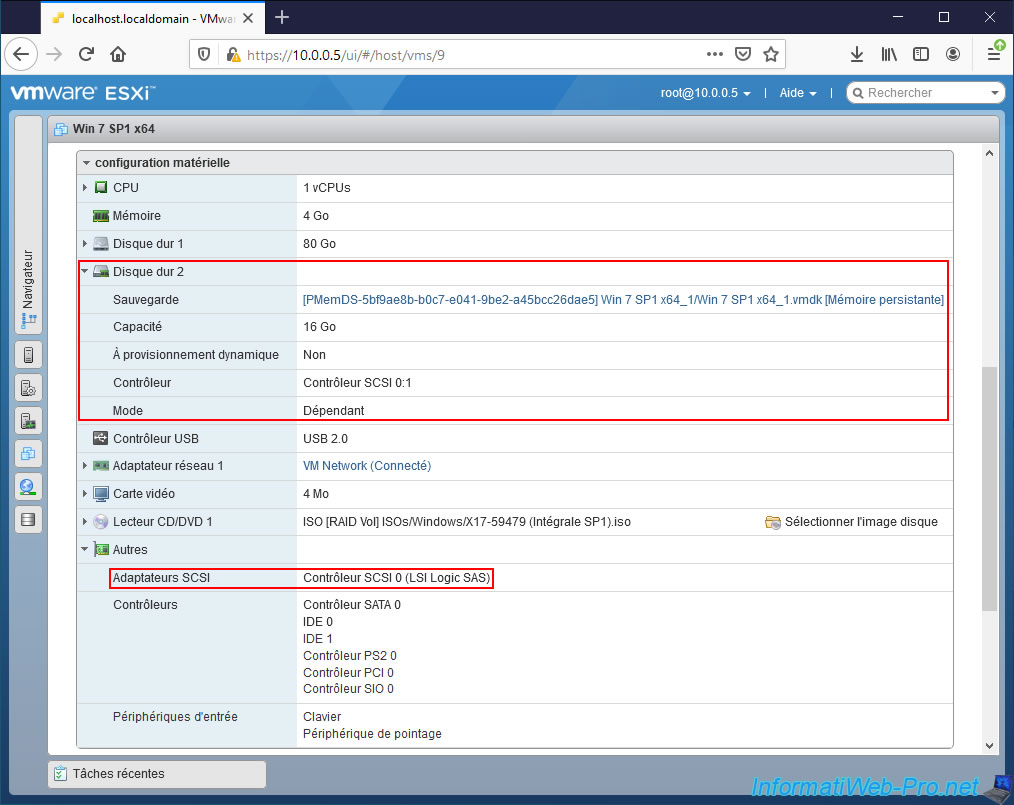
As you can see, this hard disk will be created in the "PMemDS-..." datastore (which physically corresponds to the persistent memory).
However, in this case, this virtual hard disk will be connected to a virtual SCSI controller.
Thus, you will be able to benefit from the performance of persistent memory (PMem) by using this little trick from VMware that allows you to use it even when the guest operating system doesn't support NVDIMMs (virtual).
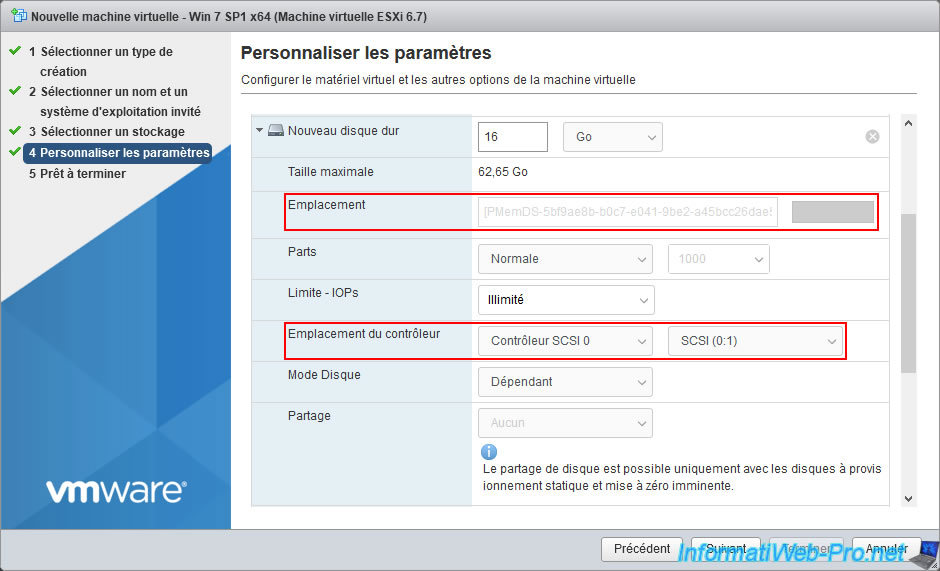
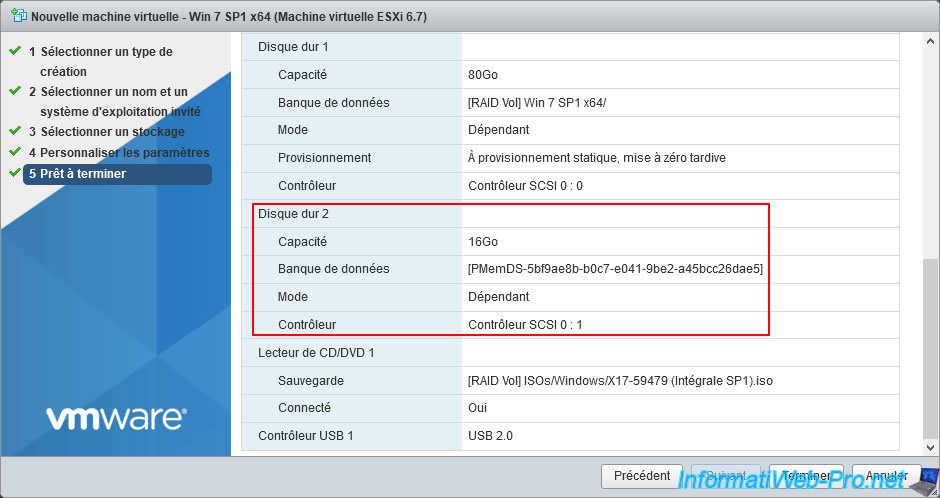
In the summary of the virtual machine configuration, you will see that the virtual hard disk is again stored in the "PMemDS-..." datastore and that the controller used will be a SCSI controller.
The virtual machine has been created.
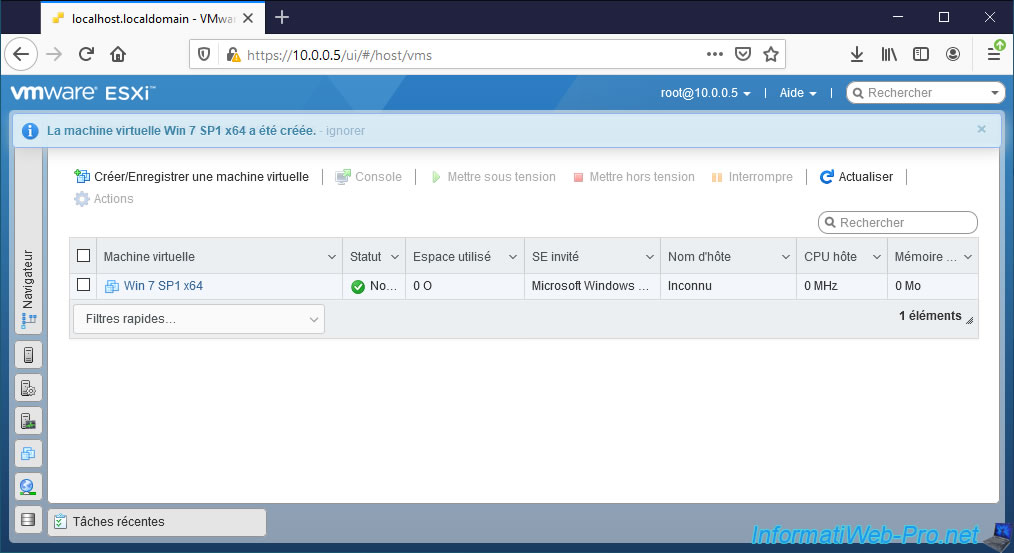
As you can see, a virtual machine is affected by this datastore and the space used has changed at the top right.
However, VMware ESXi doesn't allow the use of the datastore browser for PMEM type datastores.
2. Information about the created virtual machine
Click the name of the virtual machine to display its information.

As expected, you will see that this virtual machine has a persistent memory hard disk stored in the "PMemDS-..." datastore and that a SCSI controller will be used by it.
However, there is no NVDIMM controller since it's not supported by the guest operating system of this virtual machine.
3. Installing the guest operating system
To begin, start the virtual machine by clicking on "Power on".

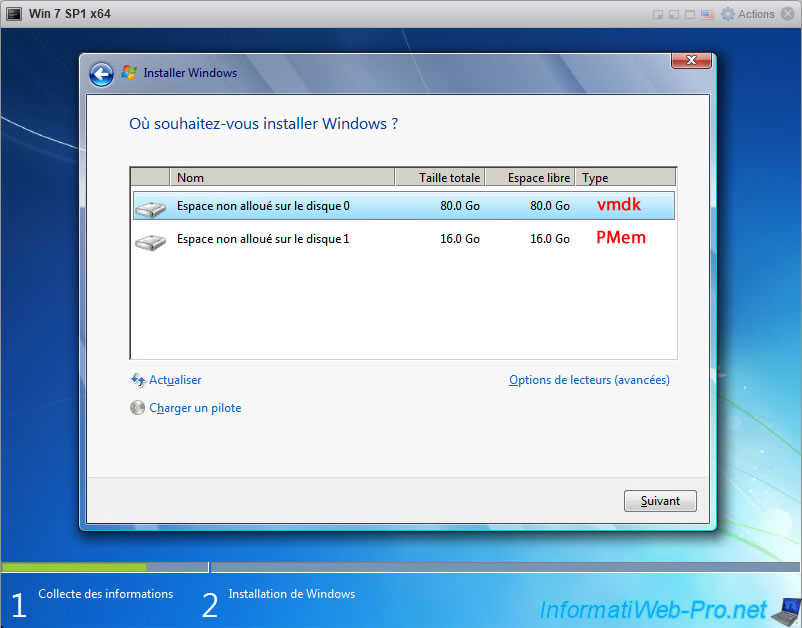
As expected, the Windows installer detects the 2 virtual hard disks :
- the 1st corresponds to virtual hard disk 1, whose .vmdk file is in a standard datastore
- the 2nd corresponds to the persistent memory virtual hard disk 2, the .vmdk file of which is located in the "PMemDS-..." datastore.
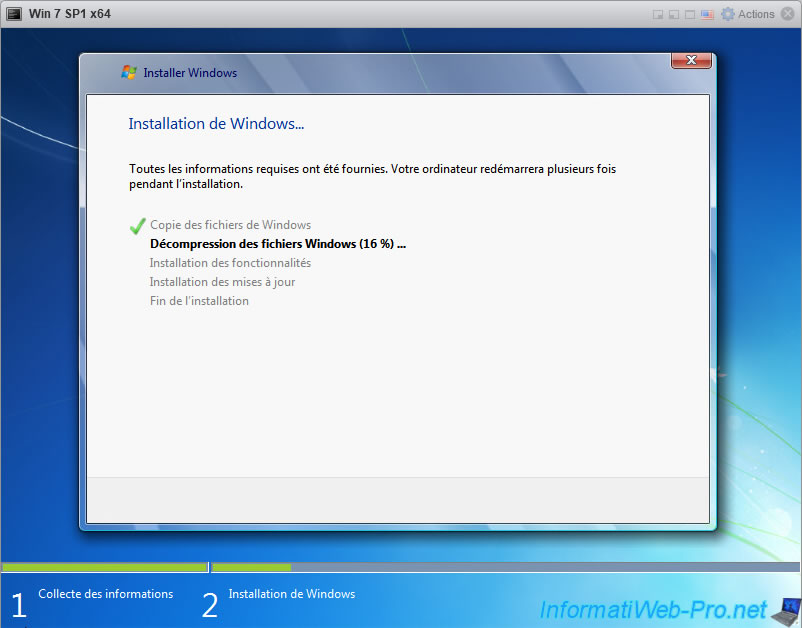
Install Windows 7 on the 1st virtual hard drive. Knowing that the persistent memory will be lost when shutting down or restarting your VMware ESXi host if you have simulated this "persistent" memory.
Wait while Windows installs.
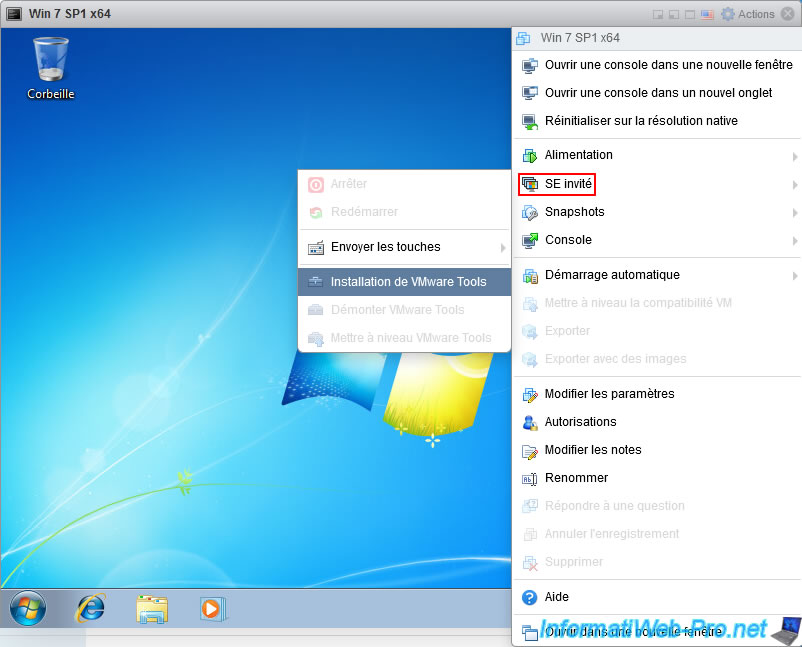
Once the guest operating system is installed, install the VMware Tools by clicking on : Actions -> Guest OS -> Install VMware Tools.
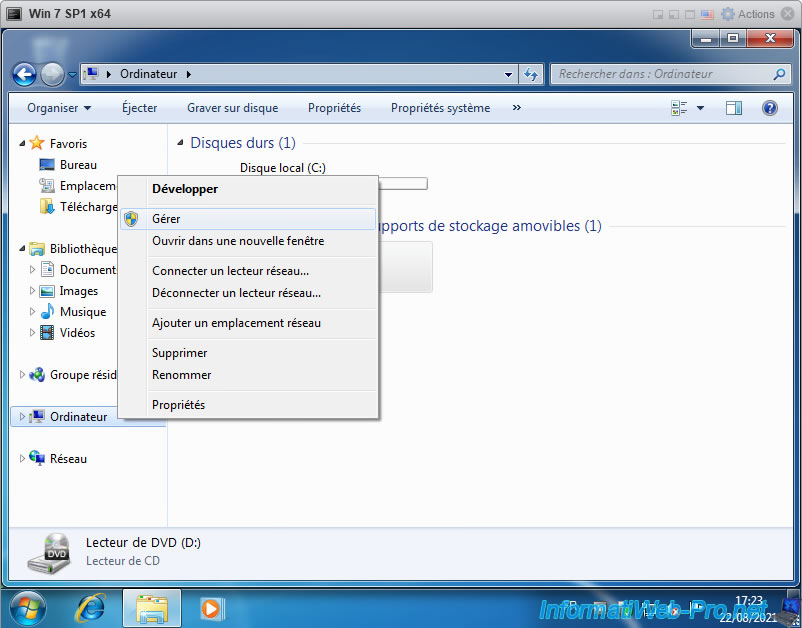
4. Partition the persistent memory disk (PMem)
To use the persistent memory disk (PMem), you will need to partition it (as with any other hard disk).
To do this, right click "Manage" on "Computer".
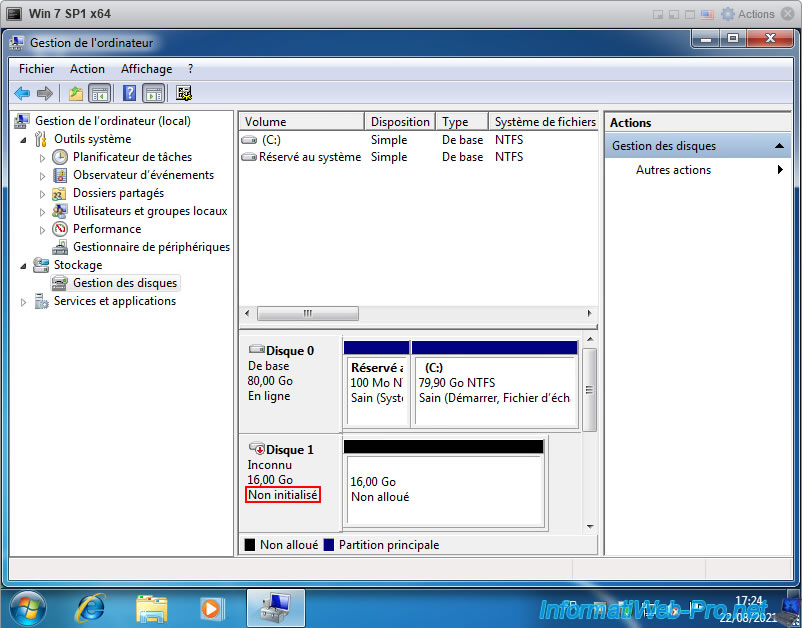
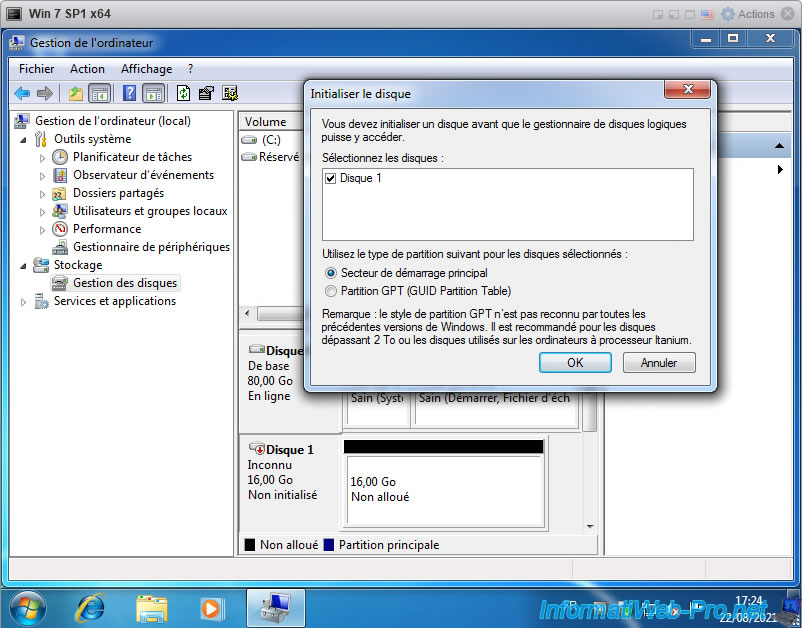
By going to "Disk Management", you will see that your persistent memory disk is not initialized.
An "Initialize Disk" window will automatically appear asking you if you want to use:
- MBR (Master Boot Record)
- GPT (GUID Partition Table)
This choice doesn't matter in this case. Click on OK.
Once the disk is initialized, partition it by right-clicking "New Simple Volume" on the unallocated space of it.
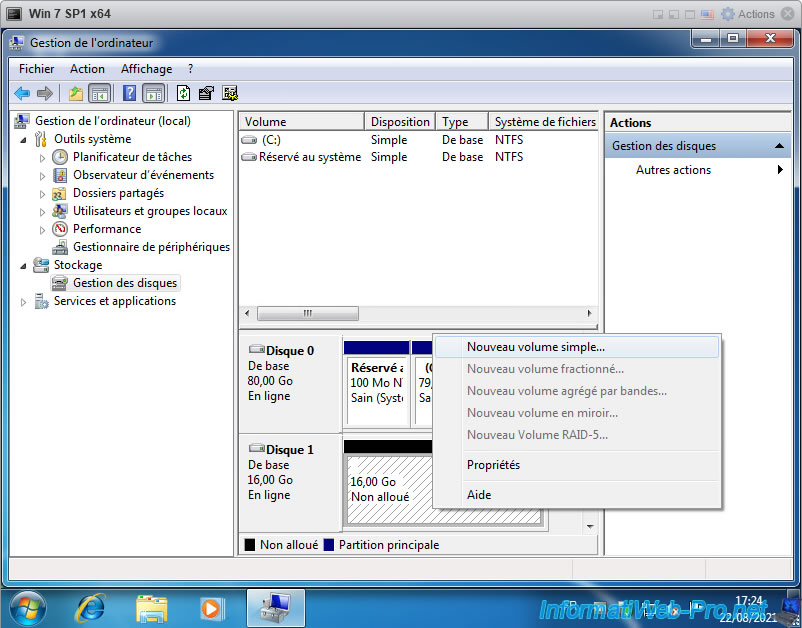
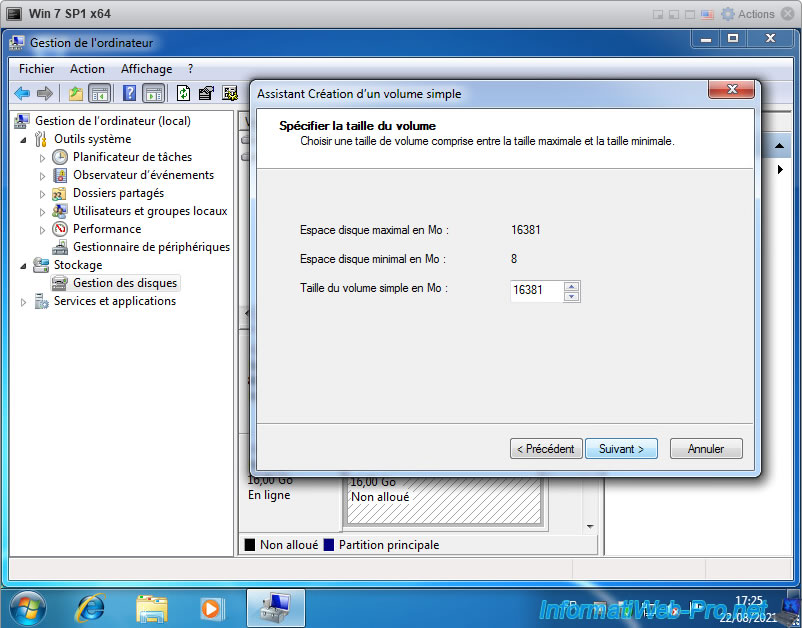
Leave the size specified to create a single simple volume (partition) on the entire disk.
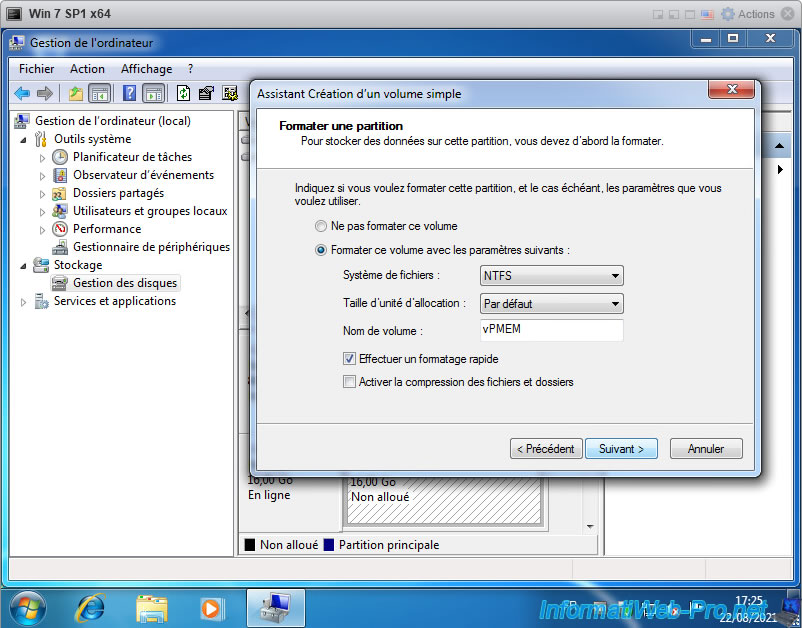
For the example, we have named this simple volume (partition) "vPMEM". But, it doesn't matter.
The disk is partitioned.
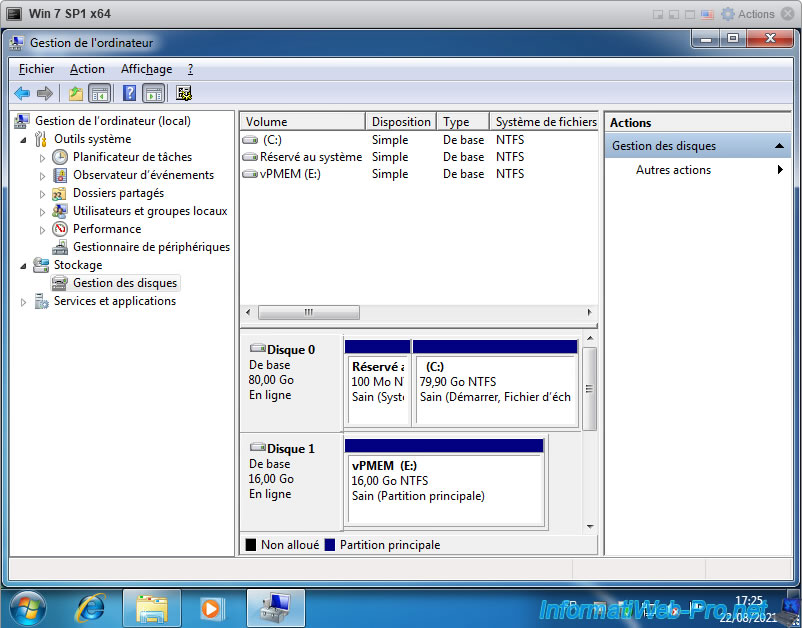
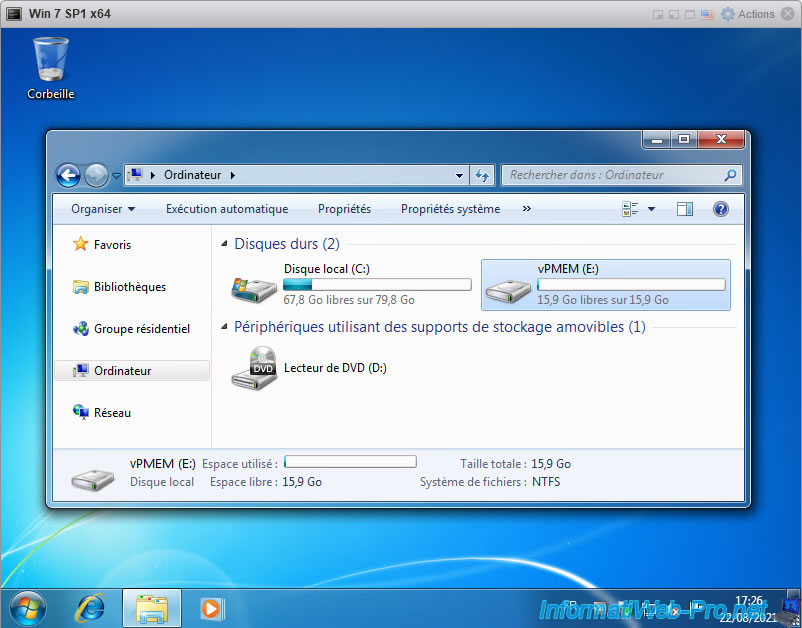
The created partition appears in the file explorer.
If you right click "Properties" on this disk from Windows Disk Management, you will see that it's a VMware Virtual disk SCSI Disk Device.
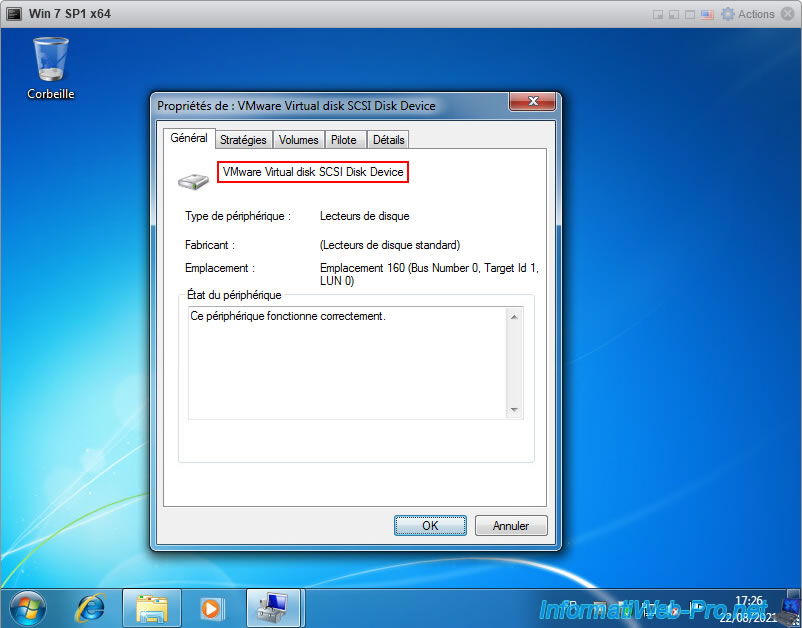
If you go to the "Volumes" tab, you will see that this disk corresponds to the "vPMEM" partition you just created.

Share this tutorial
To see also
-
VMware 4/14/2023
VMware ESXi 6.7 - Best practices for creating a VM
-
VMware 2/17/2023
VMware ESXi 6.7 - Configure your virtual machines settings
-
VMware 6/2/2023
VMware ESXi 6.7 - Connect a smart card reader to a VM
-
VMware 10/19/2022
VMware ESXi 6.7 - DirectPath I/O (PCI passthrough)
You must be logged in to post a comment