- VMware
- 23 December 2022 at 13:52 UTC
-

To improve the performance of a virtual machine or a professional application installed on it, you can use a physical disk from within a virtual machine.
This is particularly useful if you are virtualizing a database server like Microsoft SQL Server, for example. In this case, you will be able to install SQL Server in the virtual machine and store the DB of this one in another partition which is in fact a physical hard disk of the server.
Indeed, in the case of the use of a DB, you will have a significant number of inputs / outputs (I/O) and the use of a physical disk instead of a virtual disk makes it possible to reduce their latency.
- Locate the physical disk in VMware ESXi storage
- Attach a physical disk to a virtual machine
- Physical disk accessible from the virtual machine
1. Locate the physical disk in VMware ESXi storage
Depending on the physical drive (hard drive or SSD) used and how it's plugged into your computer / server, it may be more or less easy to spot.
To begin, access the VMware ESXi web interface and go to : Storage.
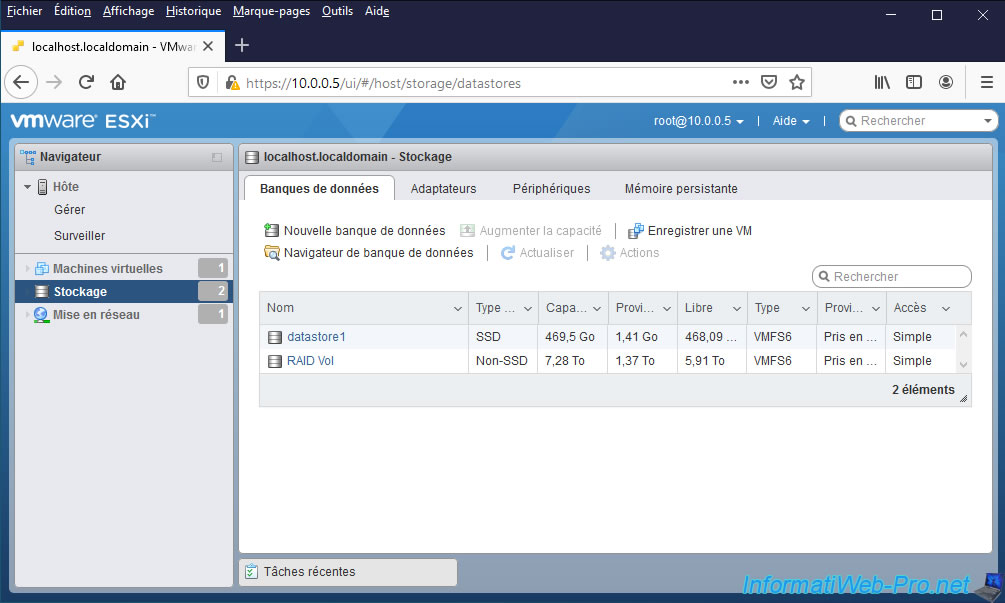
In our case, we can see in order :
- the SSD in NVMe format on which VMware ESXi is installed
- the RAID volume created on our Microsemi Adaptec SmartRAID 3154-8i8e controller (supplied by : MSCC)
- le SSD au format SATA que nous avons ajouté pour ce tutoriel
If you are familiar with the hardware of your server, you will be able to find your physical disks thanks to the name, type and capacity of these and/or via the vendor.
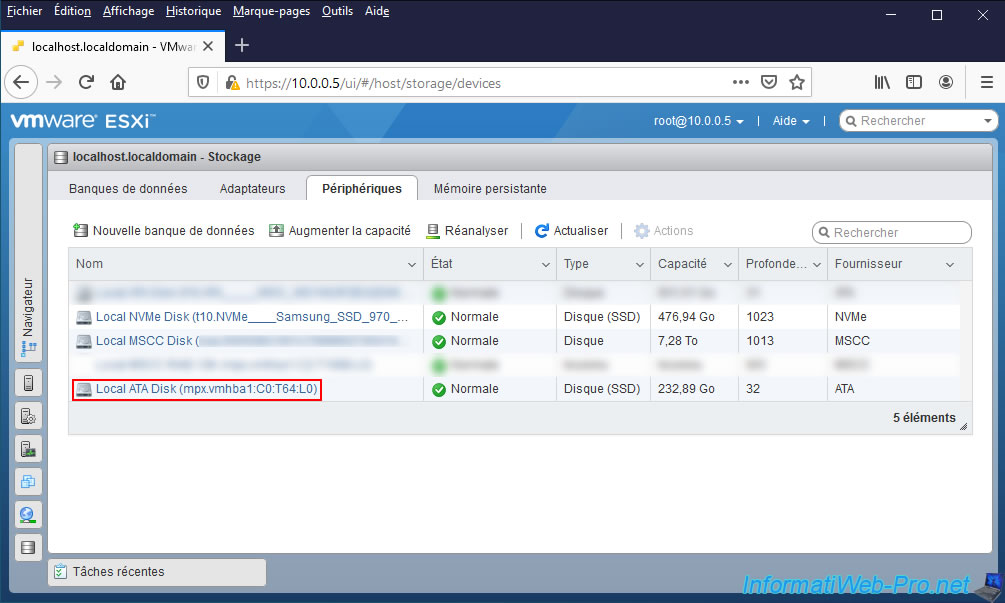
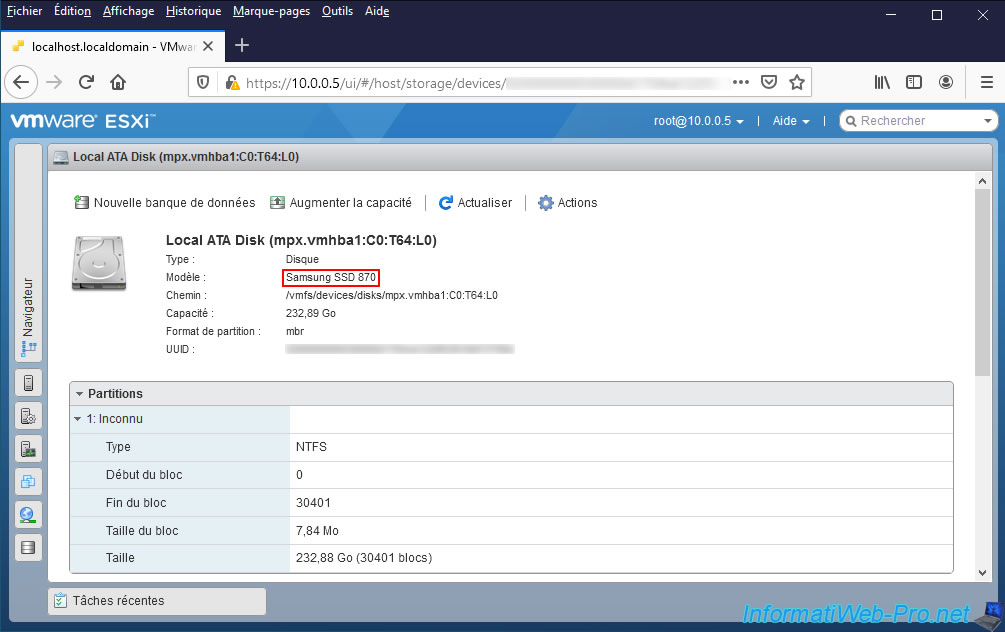
If we click on our "Local ATA Disk (mpx.vmhba1:C0:T64:L0)" physical disk, VMware ESXi tells us that the model is "Samsung SSD 870".
If we look in the name displayed by VMware ESXi for this physical disk, we see in particular "vmhba1". This corresponds to one of the adapters (controllers) present in your computer / server.
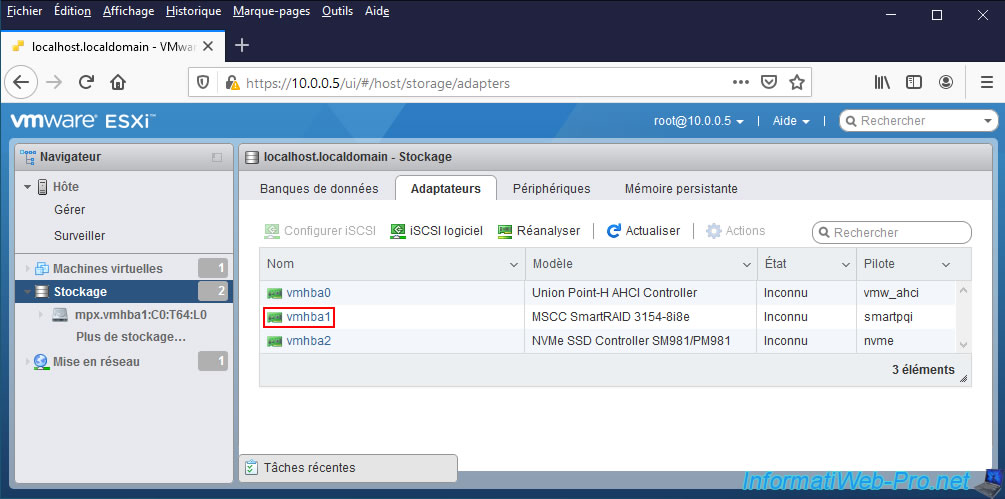
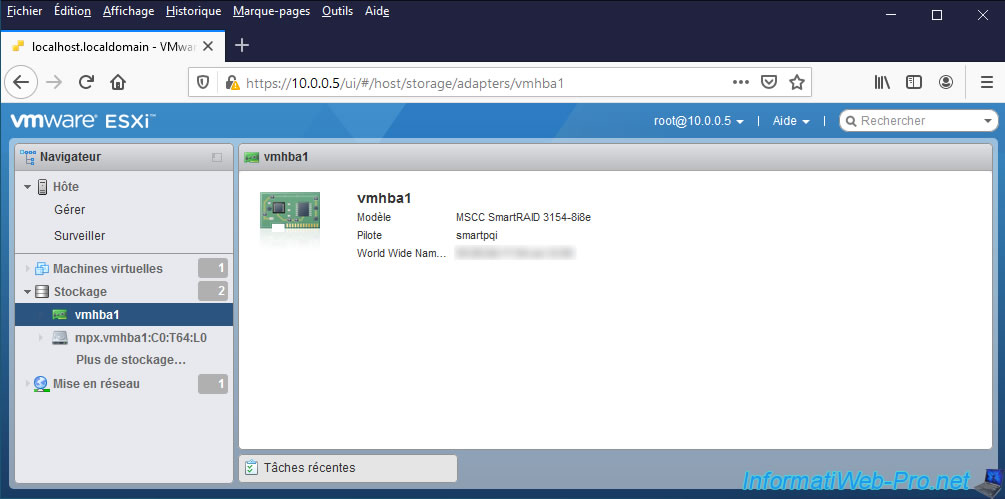
To find out what this "vmhba1" adapter corresponds to, go to : Storage -> Adapters.
As you can see in the picture below, in our case, "vmhba1" corresponds to our "MSCC SmartRAID 3154-8i8e" controller and the driver used is "smartpqi".
For info : MSCC = Microsemi. So, the name of the manufacturer of this controller.
If you click on the name of an adapter (controller), you can find out :
- his model
- the driver used
- its "WWN" (World Wide Name) unique identifier. This can be useful if you have multiple controllers of the same model.
2. Attach a physical disk to a virtual machine
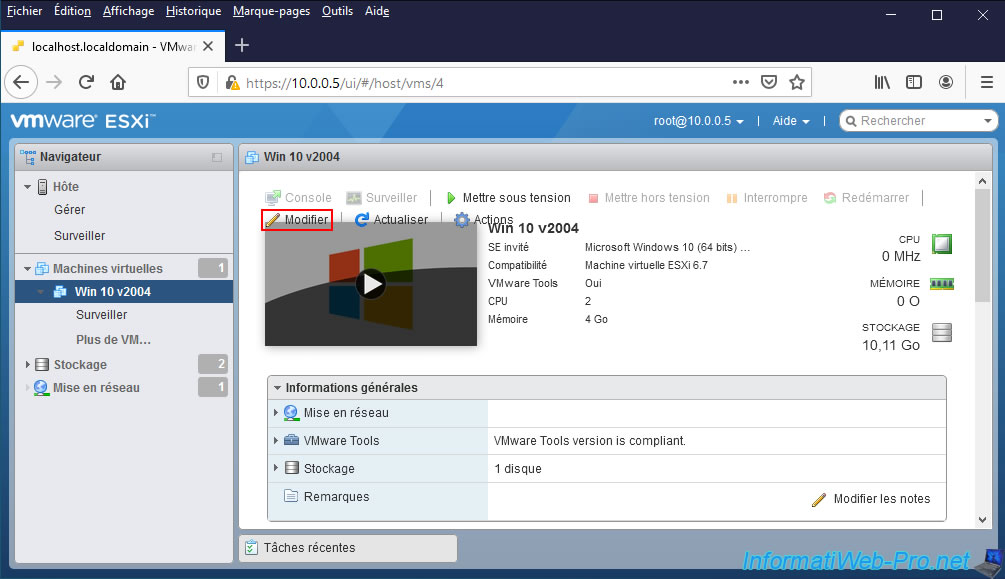
To use a physical disk from a virtual machine, edit the virtual machine.
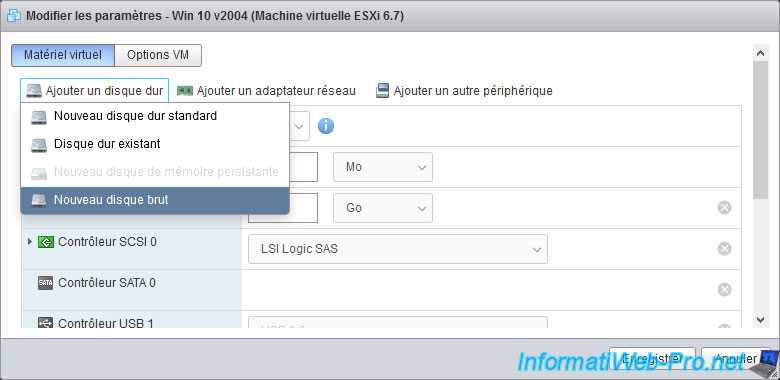
Click on : Add hard disk -> New raw disk.
Select the physical disk to add to this virtual machine.
As you can see, only the name and capacity of the available physical disks are displayed. The previous step of this tutorial therefore lets you know which physical disk you should select here.
Note that the disks used by VMware ESXi are therefore not available here. This includes physical disks on which you would have created datastores or on which you installed VMware ESXi.

The new hard drive appears in the virtual hardware of your virtual machine.
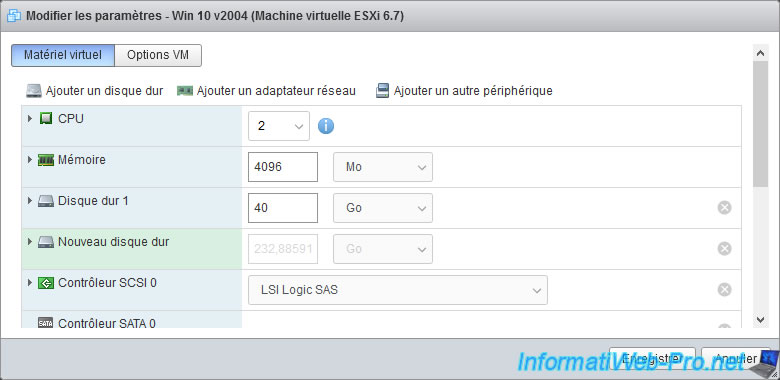
If you deploy the "New Hard disk" node, you will see that the compatibility mode is automatically set to "Physical".
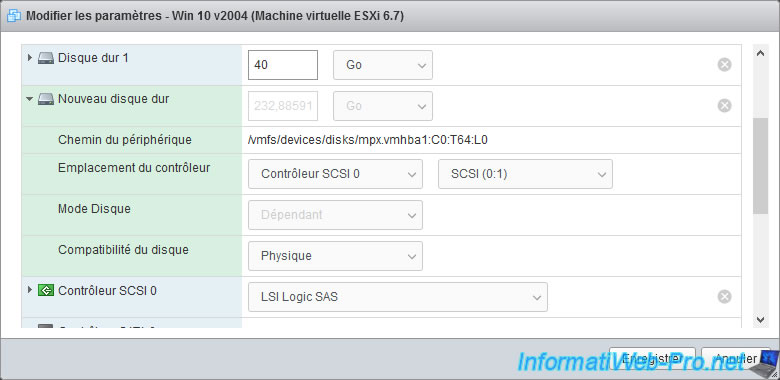
Note that you can change the type of virtual controller (SCSI, SATA or IDE) to which will be plugged in physical disk in the virtual machine if you wish.
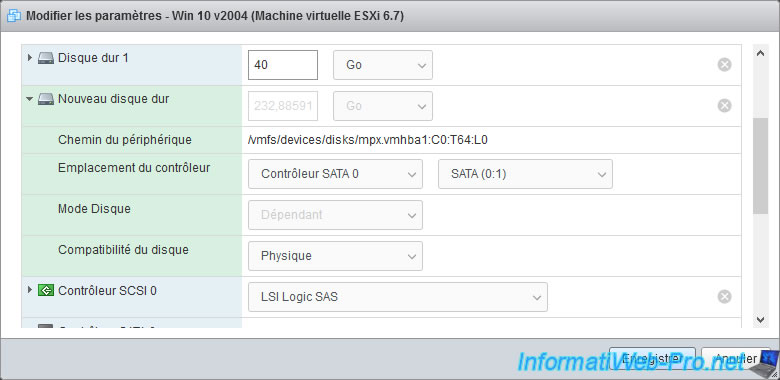
To make it more logical, we are going to plug our SATA SSD into a virtual SATA controller by selecting "Controller location: SATA controller 0".
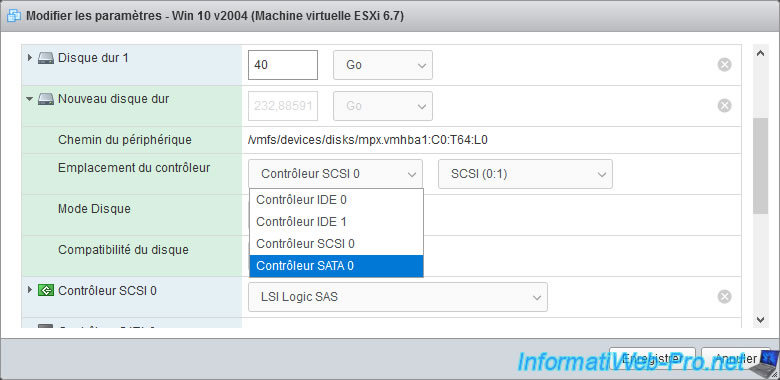
If you wish, you can manually choose at which position of the controller it will be plugged into.
Then, click on : Save.
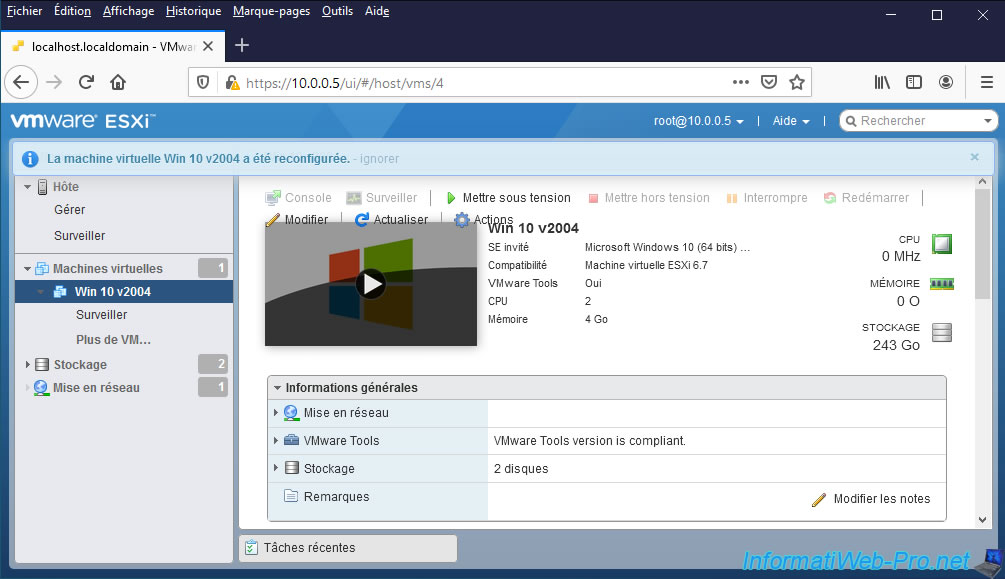
The virtual machine has been modified successfully.
3. Physical disk accessible from the virtual machine
Start your virtual machine.
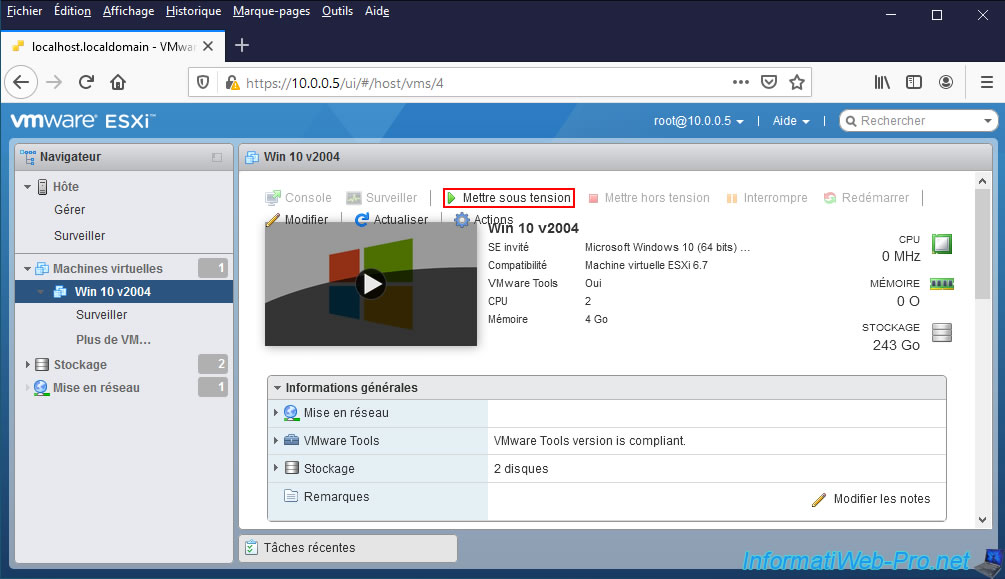
If your physical disk is already partitioned, its partition(s) will appear in the workstation (or "Computer").
If it was not partitioned, you can partition it by right clicking "Manage" on "This PC", then go to : Disk Management.
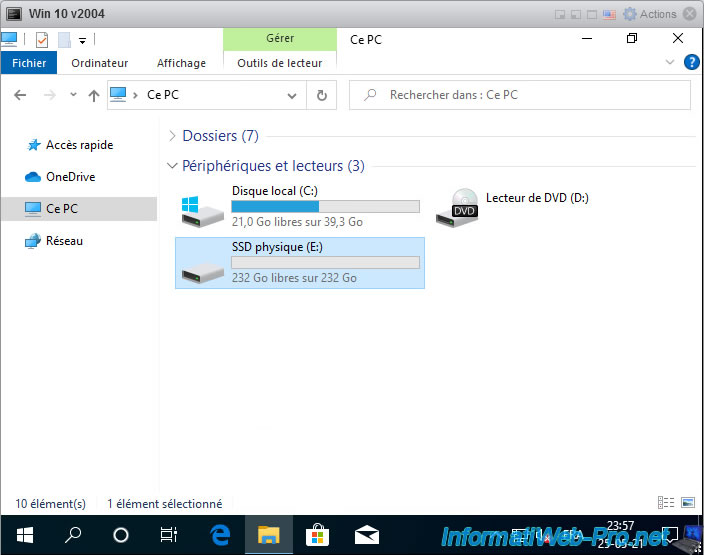
To learn more about the hardware recognized by the guest operating system (in this case : Windows 10), right-click "Properties" on your physical disk partition.
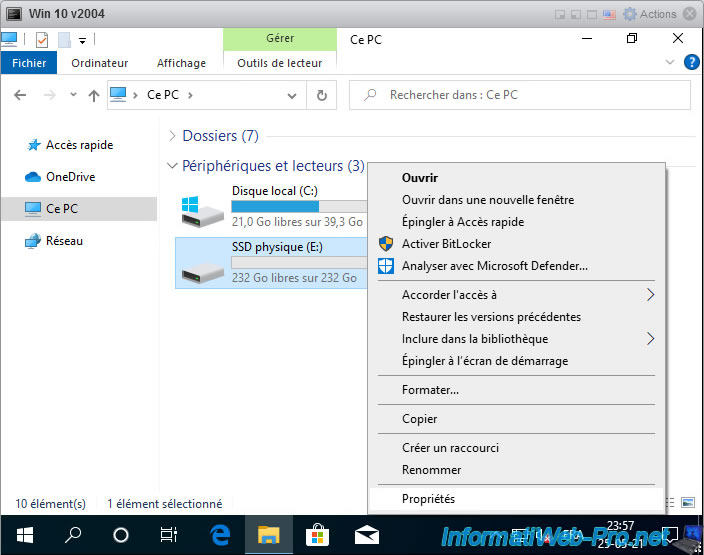
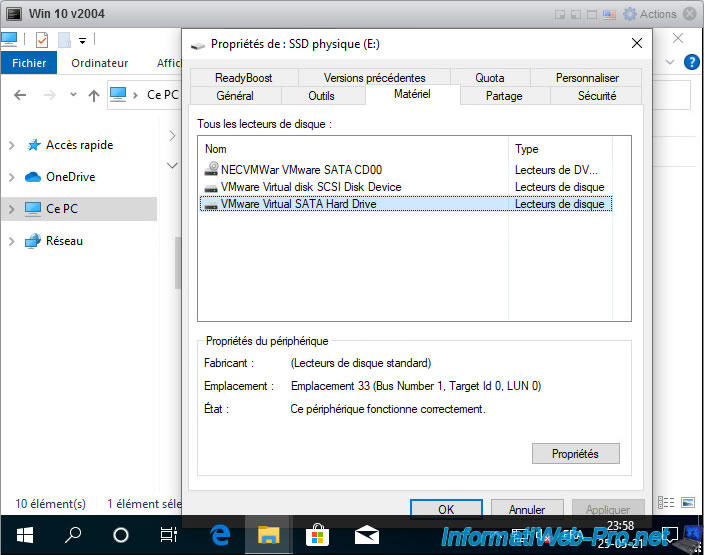
As you can see in the "Hardware" tab, Windows will recognize your physical drive as "VMware Virtual SATA Hard Drive".
Although the data is stored directly on the desired physical disk of the server and not in a virtual hard disk file (xxxxx.vmdk).
Share this tutorial
To see also
-
VMware 4/21/2023
VMware ESXi 6.7 - Change virtual disk provisioning
-
VMware 5/19/2023
VMware ESXi 6.7 - Create an iSCSI datastore
-
VMware 5/5/2023
VMware ESXi 6.7 - Direct Attached Storage (DAS)
-
VMware 5/12/2023
VMware ESXi 6.7 - Network Attached Storage (NAS)

You must be logged in to post a comment