- Microsoft
- 10 August 2019 at 13:49 UTC
-

- 1/2

Hyper-V is a hypervisor (or virtualization server) created by Microsoft that is available :
- free for its standalone version. For example : Microsoft Hyper-V Server 2012 R2 or Microsoft Hyper-V Server 2016.
- as a role in different versions of Windows Server (which are paid).
- as a feature under Windows 8, 8.1 and 10.
- in several versions : Hyper-V 1.0, 2.0 and 3.0 (on Windows Server 2012 R2).
Important : although virtualizing Hyper-V is not always possible, there is a method to virtualize it seamlessly with VMware Workstation or VMware ESXi.
If you want to virtualize Hyper-V, follow one of these techniques :
- Virtualize Hyper-V using nested virtualization with VMware Workstation 16 or 11
- Virtualize Hyper-V using nested virtualization with VMware ESXi 6.7
- Required configuration
- Configuration used
- Join the Hyper-V server to an Active Directory domain
- Installing the Hyper-V role
- Create a virtual machine
- Aero not supported
- Protect your virtual machine
1. Required configuration
As explained previously, it's not always possible to virtualize Hyper-V with virtualization software.
Although this is possible by following one of the techniques mentioned above.
So, you will need :
- a real computer or a mini PC : Intel NUC Skull Canyon (NUC6i7KYK)
- a 64-bit processor that supports processor virtualization and has this option enabled in BIOS : Enable virtualization (Intel VT-x / AMD-V)
- at least 8 GB of RAM to be able to operate at least 1 virtual machine in 64-bit in a fluid way
- acceptable performance
2. Configuration used
For this tutorial, we used :
- the Intel NUC Skull Canyon (NUC6i7KYK) mini PC with 16 GB of RAM and an SSD : Samsung SSD 850 EVO M.2 500 GB
- Windows Server 2012 R2
- the Intel Virtualization Technology option is enabled in BIOS (Advanced -> Security -> Security Features)
Update 2022 : this tutorial has also been tested on Windows Server 2016.
3. Join the Hyper-V server to an Active Directory domain
Although this is not necessary for the proper functioning of a Hyper-V server, this will become necessary if you want to create a Hyper-V cluster.
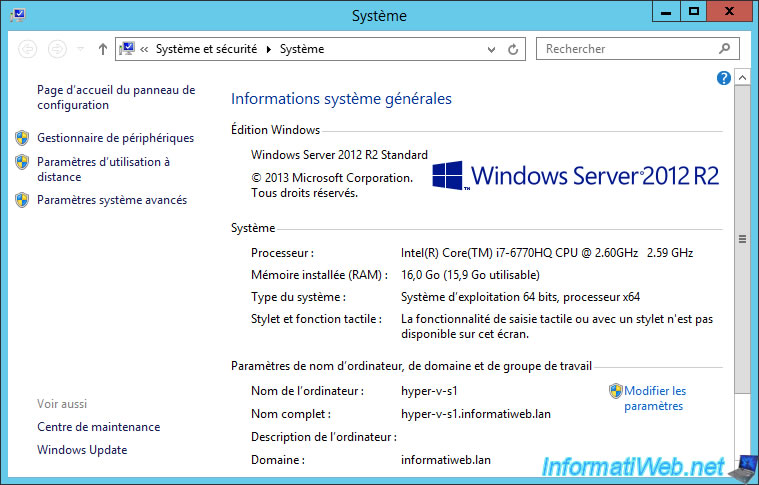
In our case, we linked our Windows Server 2012 R2 ou 2016 server to our domain : informatiweb.lan.
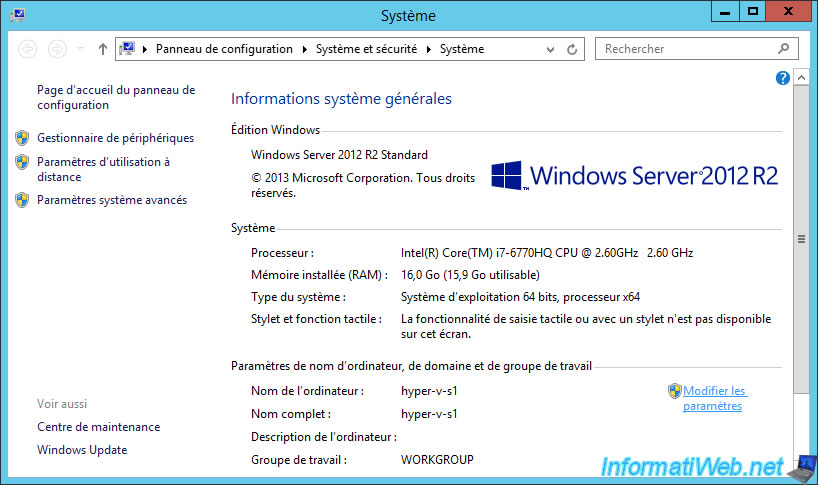
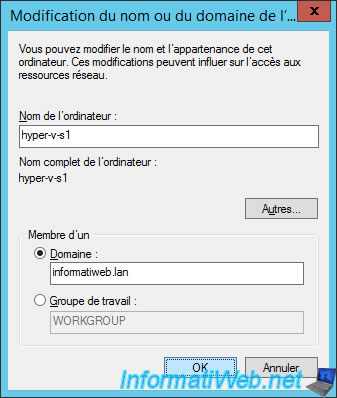
Now, our server is a member of our Active Directory domain.
4. Installing the Hyper-V role
To install Hyper-V on Windows Server 2012 R2 or 2016, simply install the Hyper-V role.
For that, in the server manager, click on "Add Roles and Features".
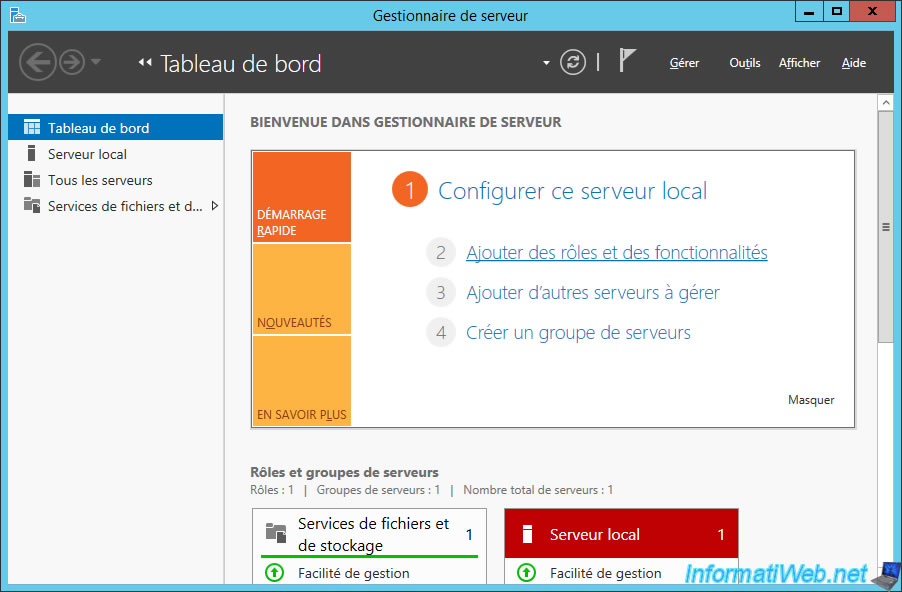
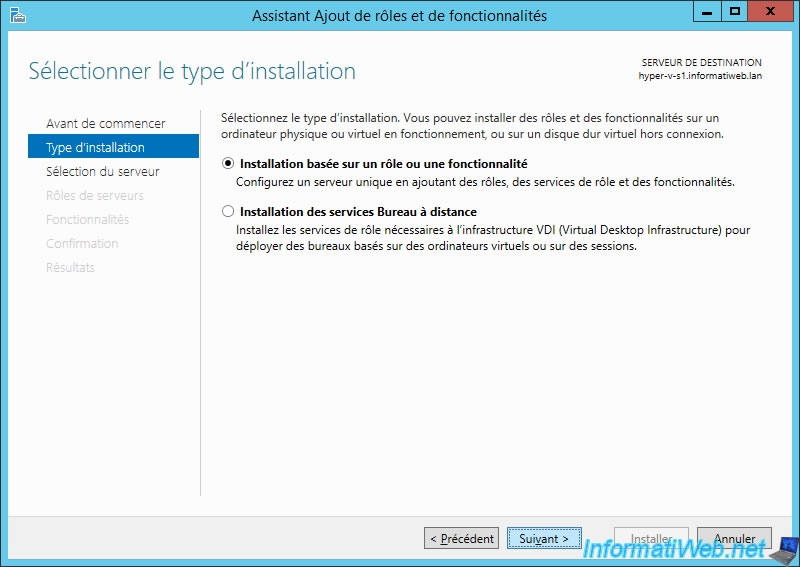
Leave the option "Role-based of feature-based installation" checked.
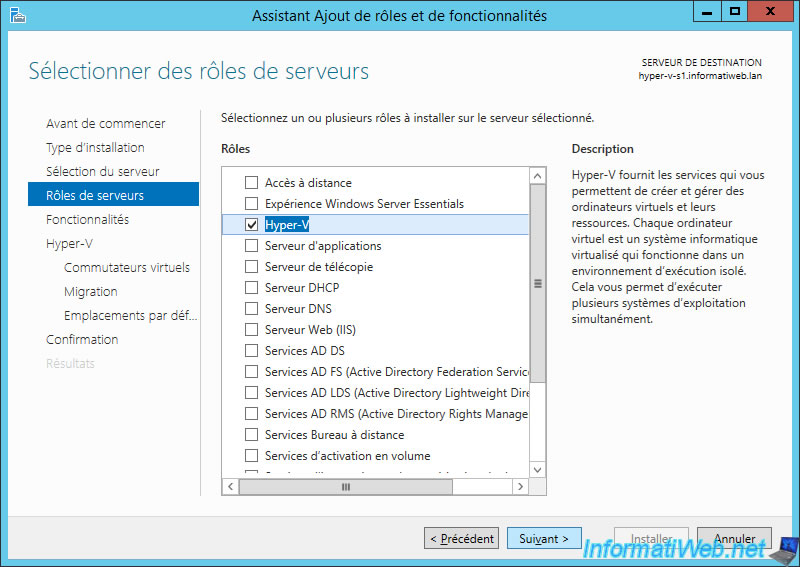
Check the "Hyper-V" box.
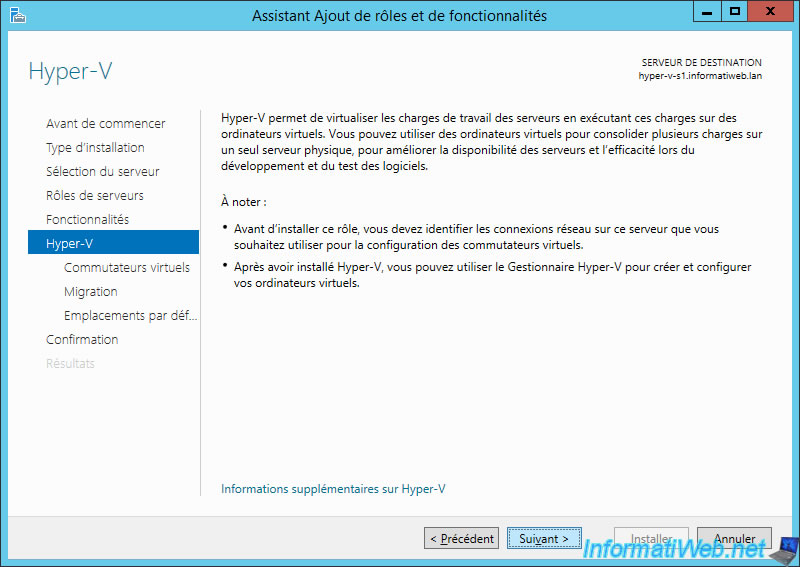
Windows Server displays a description of the Hyper-V role.
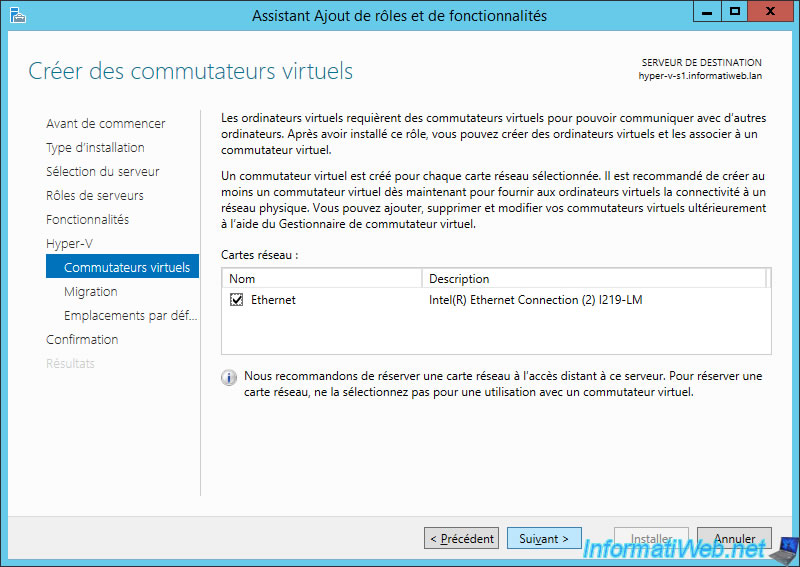
Windows Server will ask you to create virtual switches.
Simply check the box corresponding to the physical network card of your server and click Next.
Then, the virtual machines that you create in Hyper-V will use this network adapter to access the network (and the Internet, if applicable).
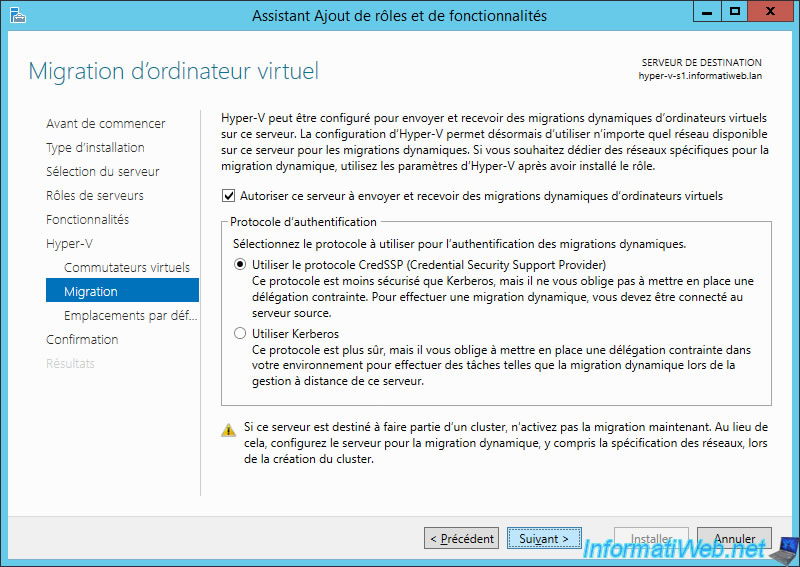
If you want to allow virtual machine transfer from one Hyper-V server to another, select the check box : Allow this server to send and receive live migrations of virtual machines.
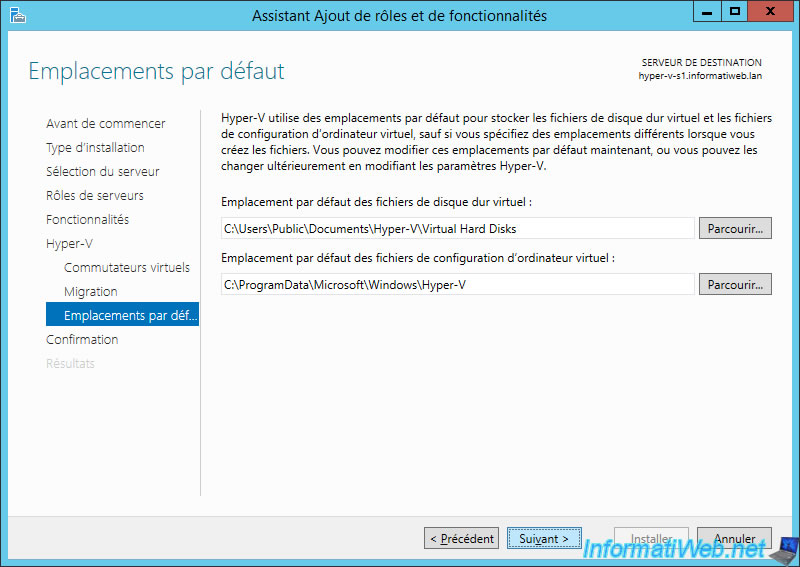
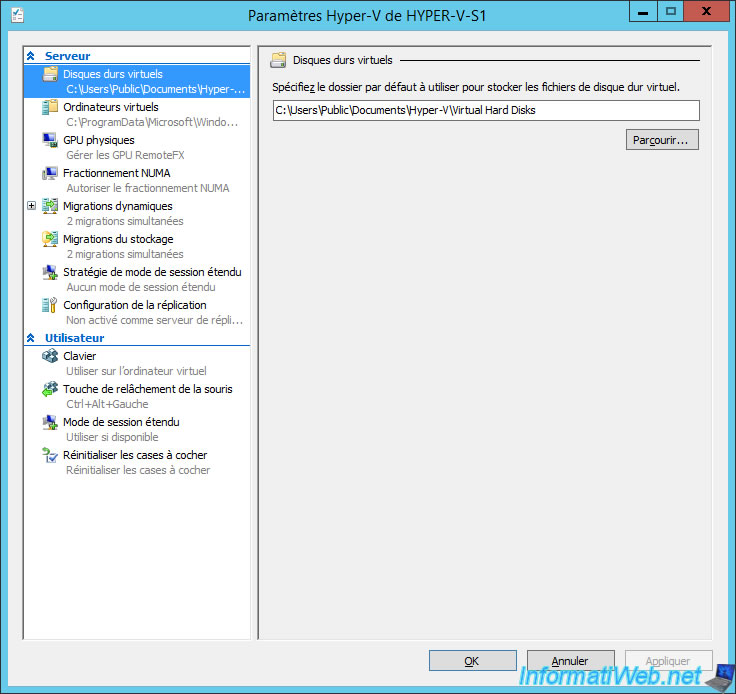
Change the locations to use to store the virtual hard disks of your virtual machines, as well as their configuration files if you wish.
By default :
- virtual hard disks will be stored in this folder : C:\Users\Public\Documents\Hyper-V\Virtual Hard Disks
- configuration files of your virtual computers will be stored in this folder : C:\ProgramData\Microsoft\Windows\Hyper-V
Click Install and wait while installing the Hyper-V role.
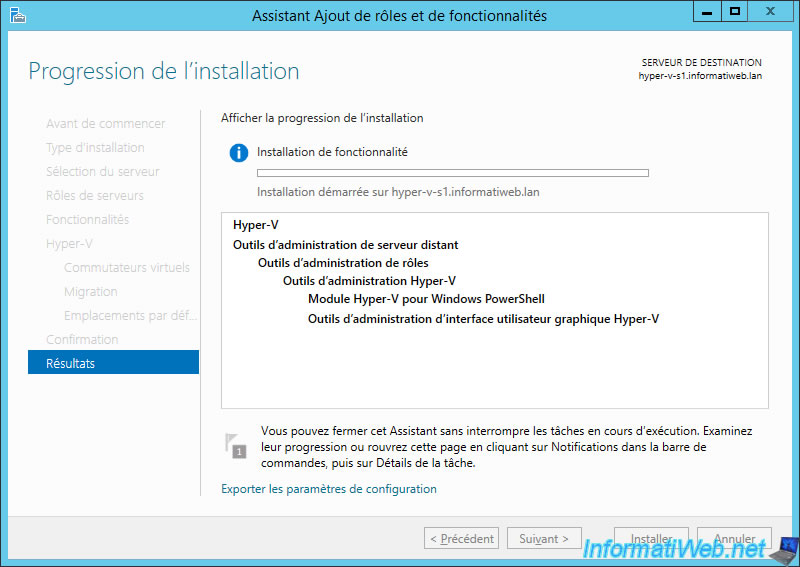
Once the Hyper-V role is installed, you will need to restart your server.
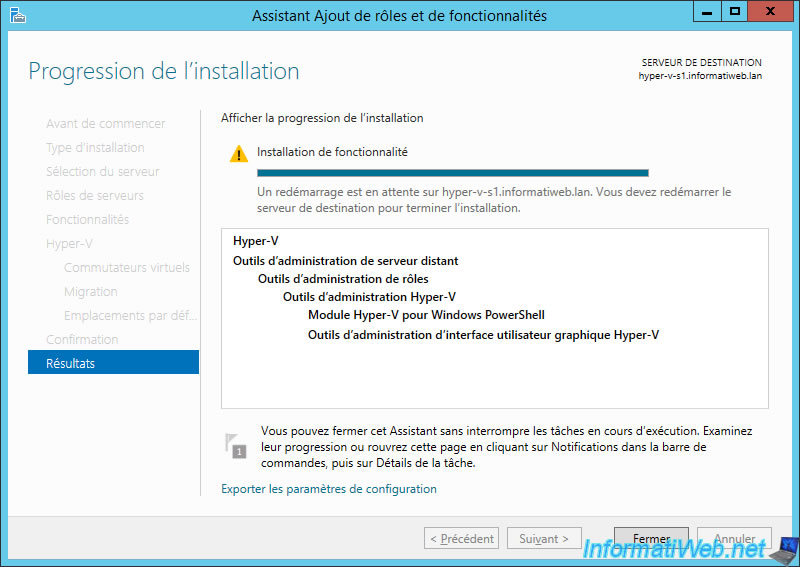
After the server restarts, the Hyper-V role will appear in the server manager.

In the "start menu" of Windows Server 2012 R2, you will find 2 shortcuts :
- Hyper-V Manager : allows you to manage your Hyper-V server and create new virtual machines
- Hyper-V Virtual Machine Connection : allows you to use a virtual machine in window mode
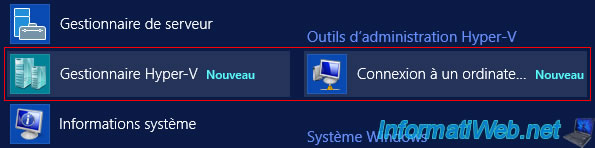
On Windows Server 2016, you will only find the "Hyper-V Manager" shortcut in the start menu.

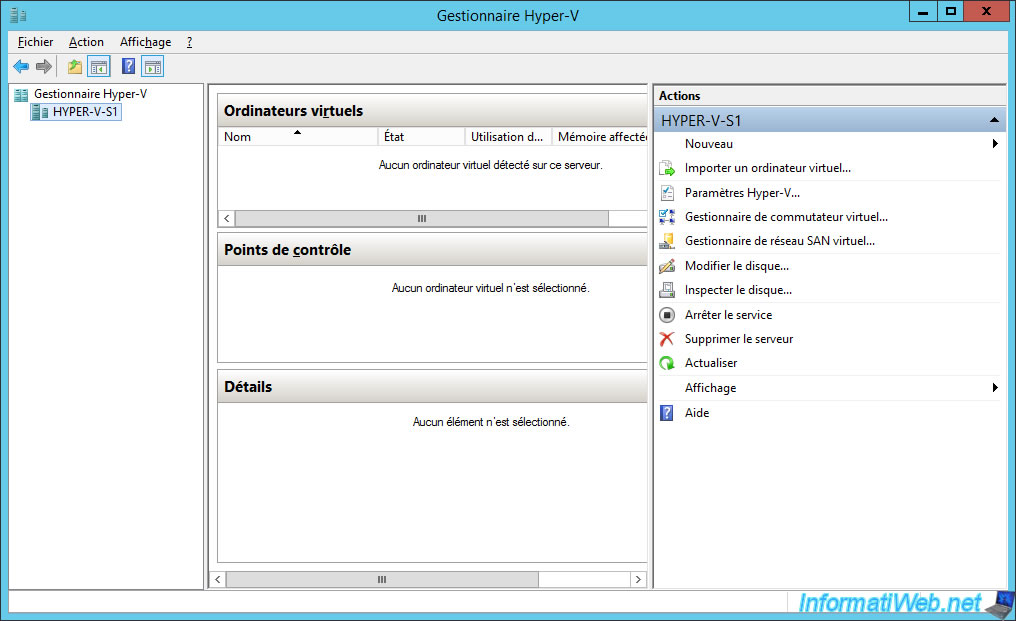
The Hyper-V Manager on Windows Server 2012 R2 and 2016 looks like this.
To change the settings of your Hyper-V server, click "Hyper-V Settings" in the right menu.
As you can see, you will be able to change the settings mentioned earlier when installing the Hyper-V role :
- Virtual hard drives
- Virtual computers
- Live migrations
Share this tutorial
To see also
-
Microsoft 9/6/2019
Hyper-V (WS 2012 R2 / 2016) - Create a generation 2 VM
-
Microsoft 11/8/2019
Hyper-V (WS 2012 R2 / WS 2016) - Automatically replicate virtual machines
-
Microsoft 11/15/2019
Hyper-V (WS 2012 R2 / WS 2016) - Automatically replicate virtual machines (securely)
-
Microsoft 11/22/2019
Hyper-V (WS 2012 R2 / WS 2016) - Configure live migration
You must be logged in to post a comment