- Microsoft
- 29 November 2019 at 10:34 UTC
-

- 1/6


As you probably know, under Windows Server it's possible to create failover clusters.
If you look in the roles available in the Failover Cluster Manager, you will see that 2 roles concern Hyper-V :
- Virtual Machine : this role allows you to add an existing virtual machine to a cluster
- Hyper-V Replica Broker : this role allows you to replicate virtual machines from one cluster to another without having to configure replication on each node in the cluster
In this tutorial, we will create a cluster with 2 Hyper-V servers and we will only use the 1st role : Virtual Machine.
The 2nd role will be explained in an upcoming tutorial.
- Configuring iSCSI disks for the cluster
- Creating the cluster
- Cluster management
- Add an existing virtual machine to your Hyper-V cluster
- Failover test
- Live migrations
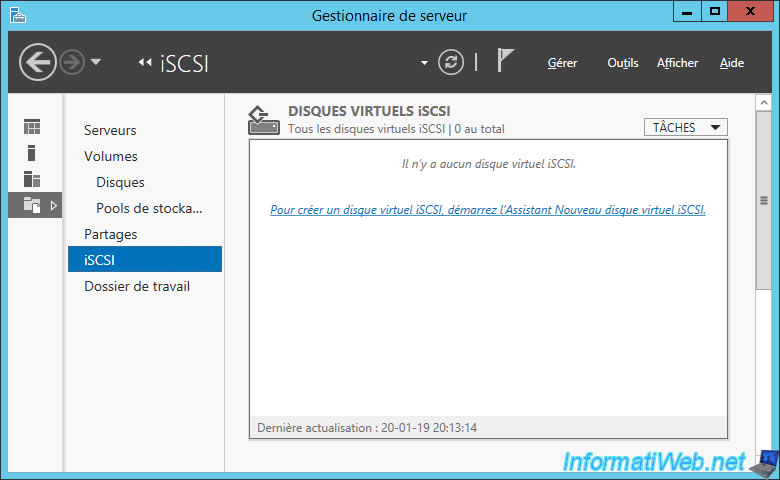
1. Configuring iSCSI disks for the cluster
If you have never created a cluster, we advise you to consult our tutorial : Create a failover cluster of file servers.
Indeed, to avoid lengthening unnecessarily this tutorial, we will only mention the main steps related to the clustering of Hyper-V servers.
It's therefore best to have at least some notions about creating failover clusters :
- their prerequisites : number of network adapters to use, same hardware, ...
- resources : iSCSI disks, MPIO, ...
In short, before creating your Hyper-V cluster, you will need at least 2 Hyper-V servers, but also iSCSI disks that will be used by it :
- 1 witness disk of 1 GB
- 1 disk (of 500 GB in our case) on which will be stored the virtual machines of the cluster
For this tutorial, we will create these iSCSI disks on an iSCSI server (iSCSI Target) under Windows Server.
However, in production, you will probably use a NAS (provided for example by Synology) or a SAN.
For best performance, you can create your iSCSI virtual disks on a different server than the one where Windows is installed.
Nevertheless, this is not mandatory.
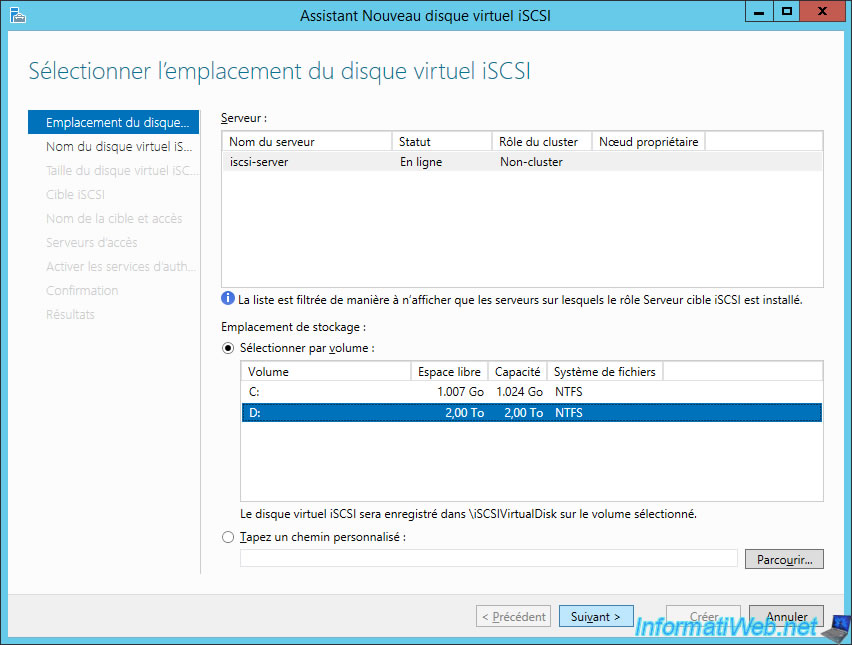
Start by creating a witness disk (which will serve as a witness disk in your Hyper-V failover cluster).
For example, specify 1 GB for the size.
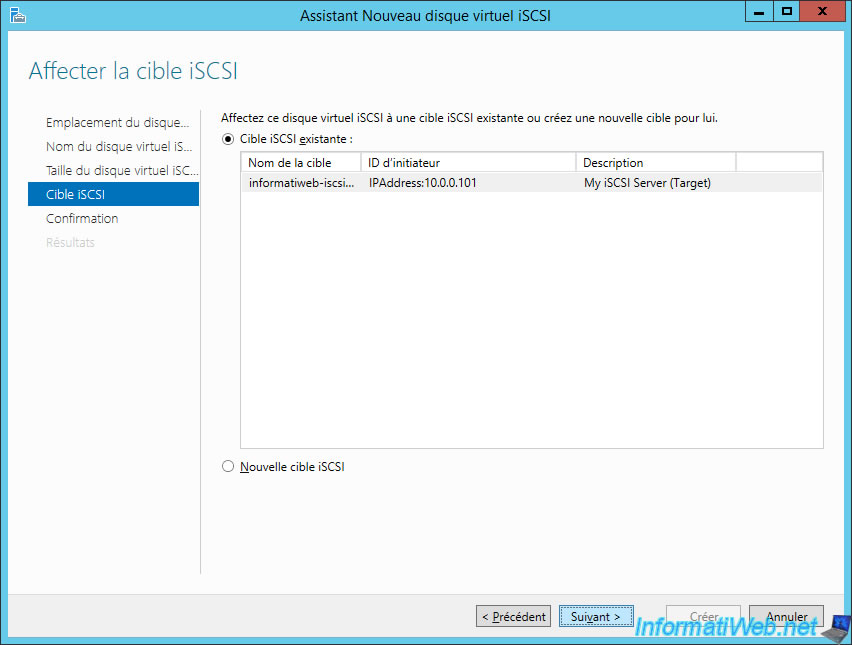
In your case, you will probably need to create a new iSCSI target.
If needed, refer to our tutorial : Install and configure an iSCSI server and an iSCSI client
In our case, the iSCSI target already exists, so we select it.
For the next disk, we select again our 2nd hard disk.

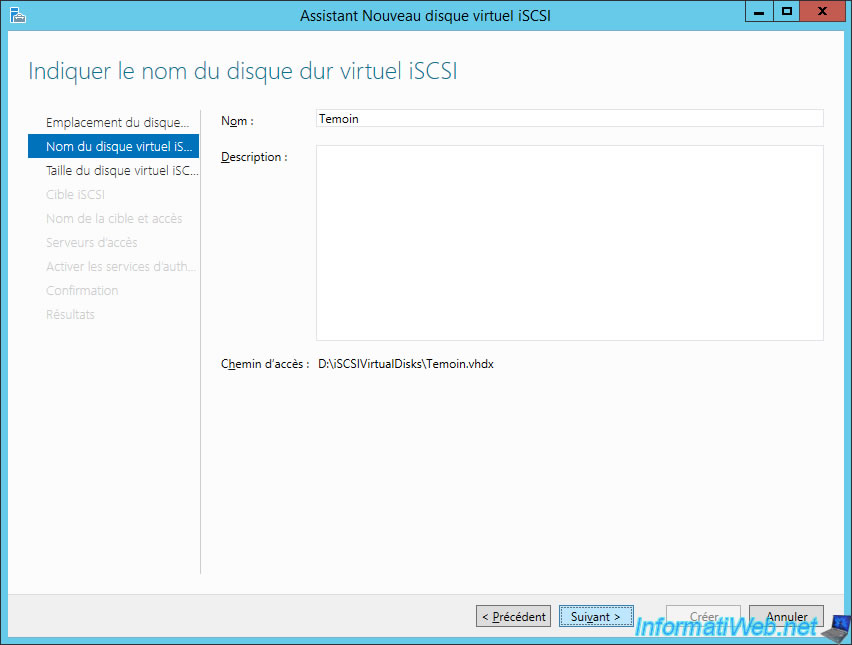
Specify a name for the iSCSI virtual disk where you will store your virtual machines.
In our case, we named it : VMs.

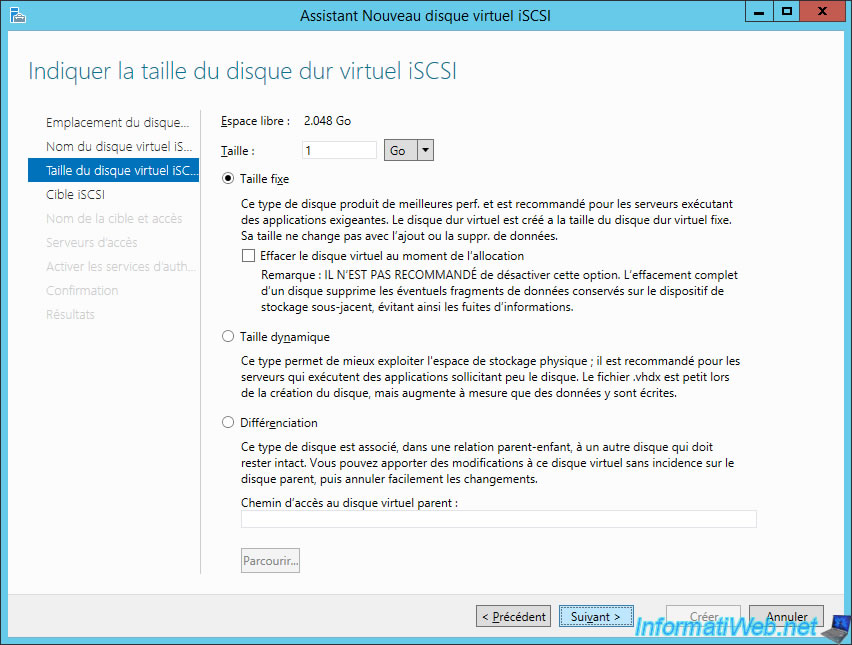
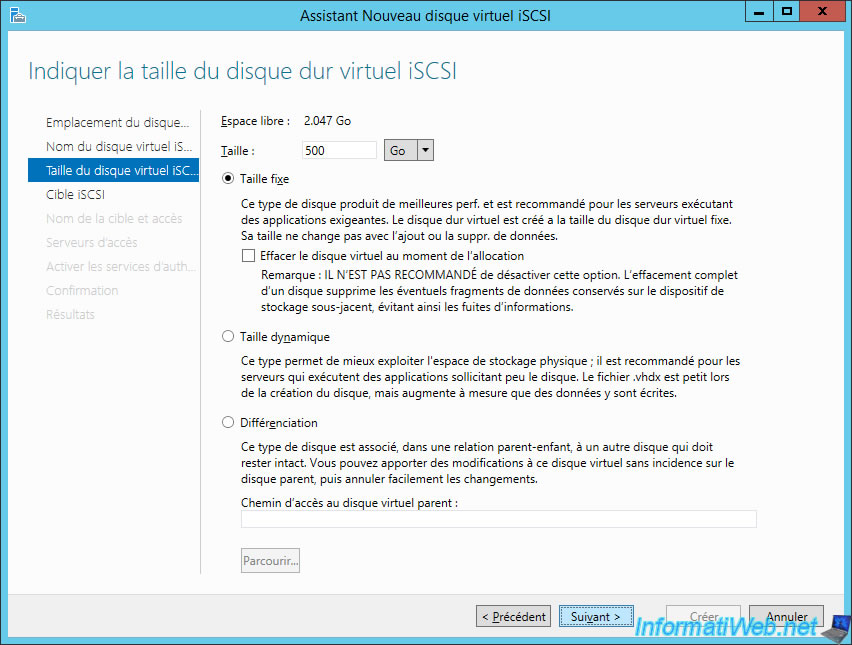
Specify the desired size.
For this tutorial, we will create a 500GB virtual disk in fixed size, as this is recommended for better performance.
What is needed to run your virtual machines smoothly.
Assign the disk to your iSCSI target.

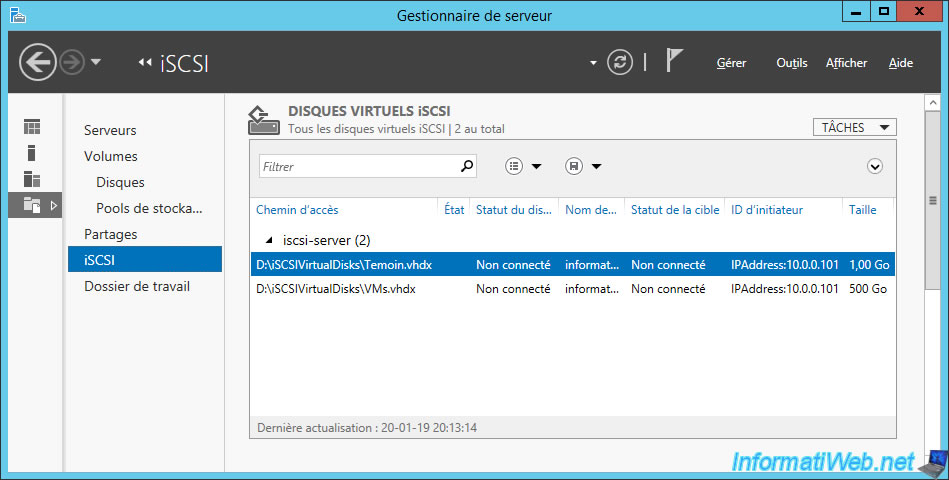
In the end, you will have 2 new iSCSI virtual disks on your iSCSI server :
- a 1 GB witness disk
- a 500 GB VMs disk (for storing your virtual machines)
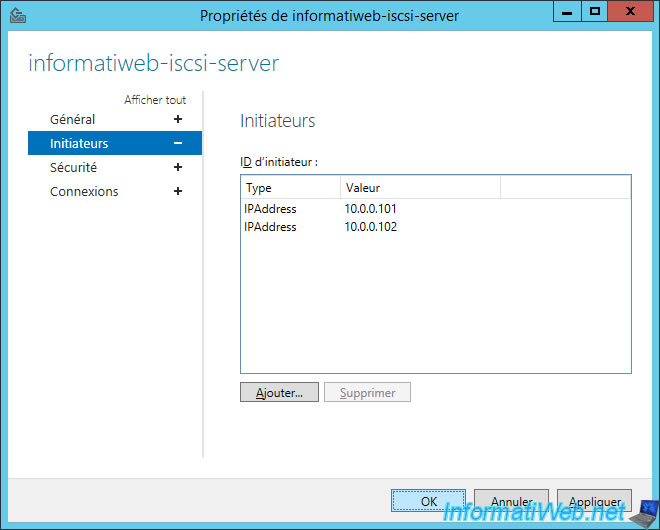
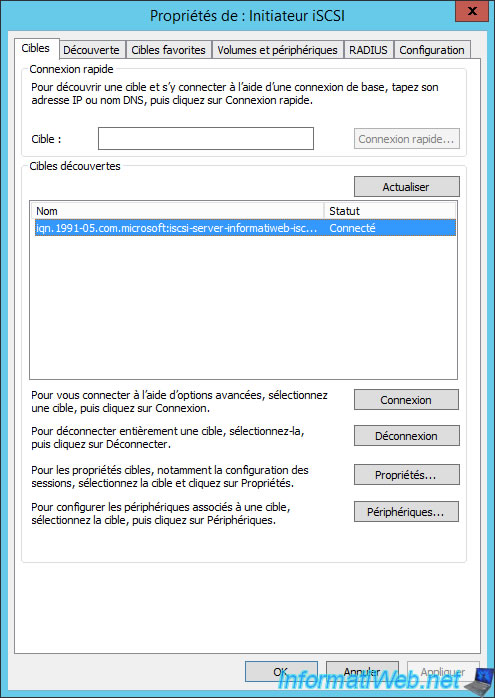
In the properties of your iSCSI target, be sure to allow the IP address of your Hyper-V servers.
On your 2 Hyper-V servers, launch the iSCSI initiator and connect to your iSCSI server.
If needed, refer to our tutorial : Install and configure an iSCSI server and an iSCSI client
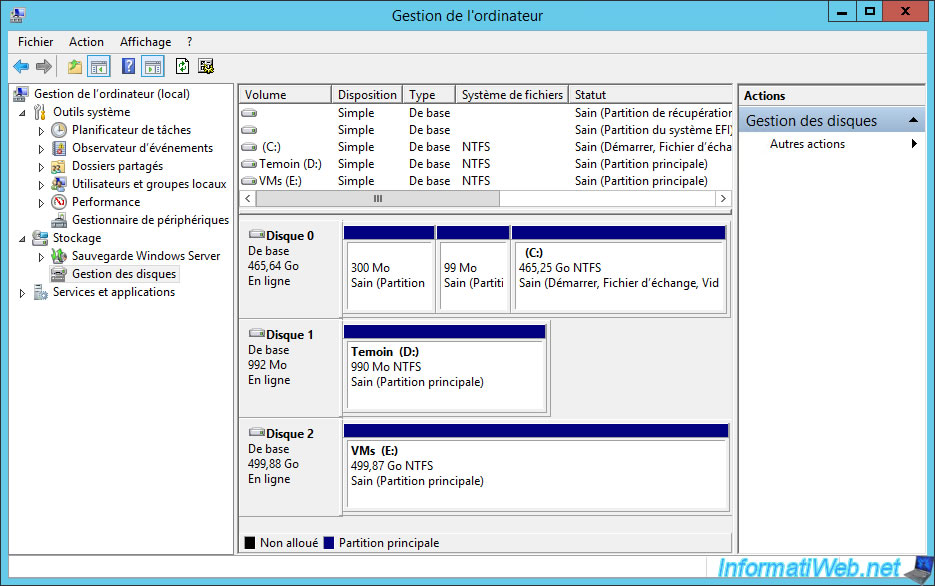
On your 2 Hyper-V servers, open the "Computer Management" console and go to : Disk Management.
You will see 2 new offline disks.
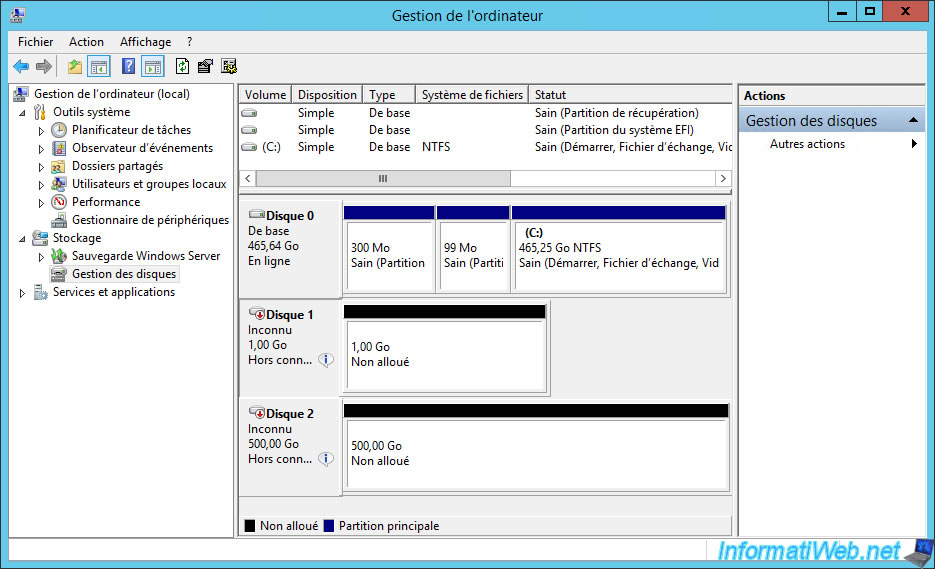
Initialize them and partition them to get 2 disks like this.
Share this tutorial
To see also
-
Microsoft 9/6/2019
Hyper-V (WS 2012 R2 / 2016) - Create a generation 2 VM
-
Microsoft 8/10/2019
Hyper-V (WS 2012 R2 / 2016) - Install Hyper-V and create your first VM
-
Microsoft 11/8/2019
Hyper-V (WS 2012 R2 / WS 2016) - Automatically replicate virtual machines
-
Microsoft 11/15/2019
Hyper-V (WS 2012 R2 / WS 2016) - Automatically replicate virtual machines (securely)
You must be logged in to post a comment