- Microsoft
- 08 November 2019 at 09:40 UTC
-

- 1/3
On Windows Server 2012 R2 and Windows Server 2016, there are many ways to enable virtual machine replication between 2 (or more) Hyper-V servers.
But, you can create the initial copy in different ways :
- via the network : the standard method used mainly in a LAN and preferably via a network dedicated to this automatic replication (for better performance)
- via external media (ex : an external hard disk) : this method is useful for saving bandwidth (or if your Hyper-V servers are in different places on earth)
- using a virtual machine as the initial copy : this method is similar to the previous one (external support)
Note that this replication system only keeps copies more or less up-to-date (depending on the methods and settings used) and doesn't provide as much flexibility as high availability (HA).
- Allow replication on the remote Hyper-V server
- Replication via the network
- Remove replication
- Replication with initial copy transferred via external media (external hard disk)
- Enable replication manually on a reimported virtual machine
1. Allow replication on the remote Hyper-V server
Before you can replicate virtual machines to another Hyper-V server, the remote server must first be configured to allow the reception of virtual machines through the Hyper-V replication system.
For that, on your server 2nd server Hyper-V :
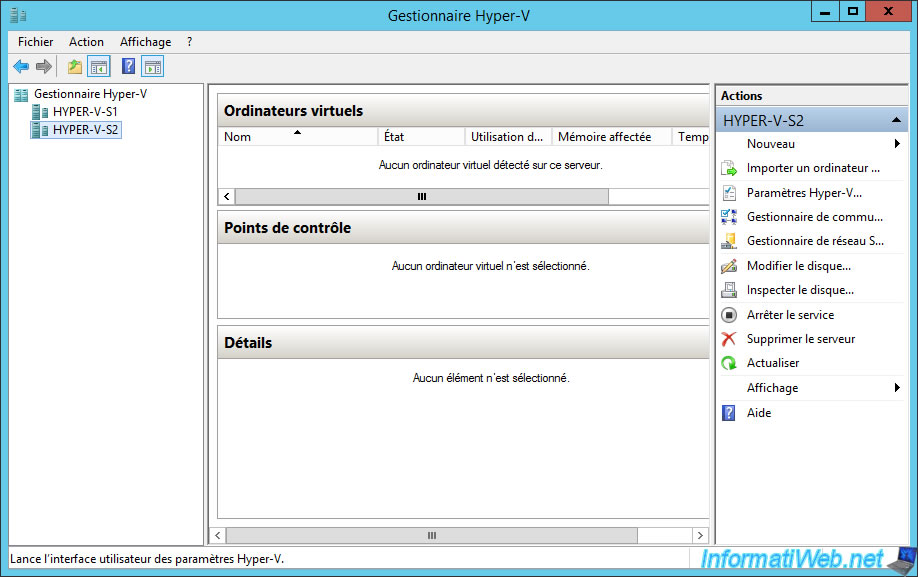
- open the Hyper-V Manager
- select your Hyper-V server
- click : Hyper-V Settings
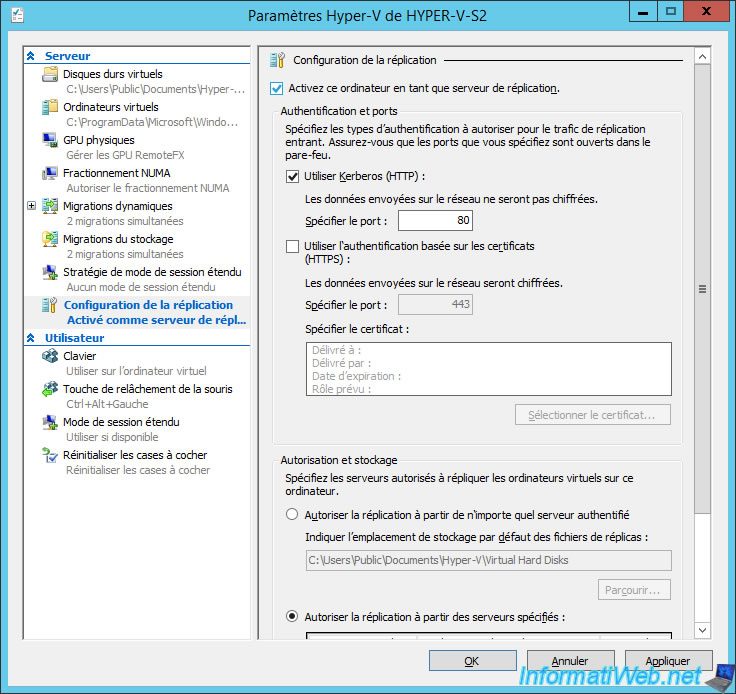
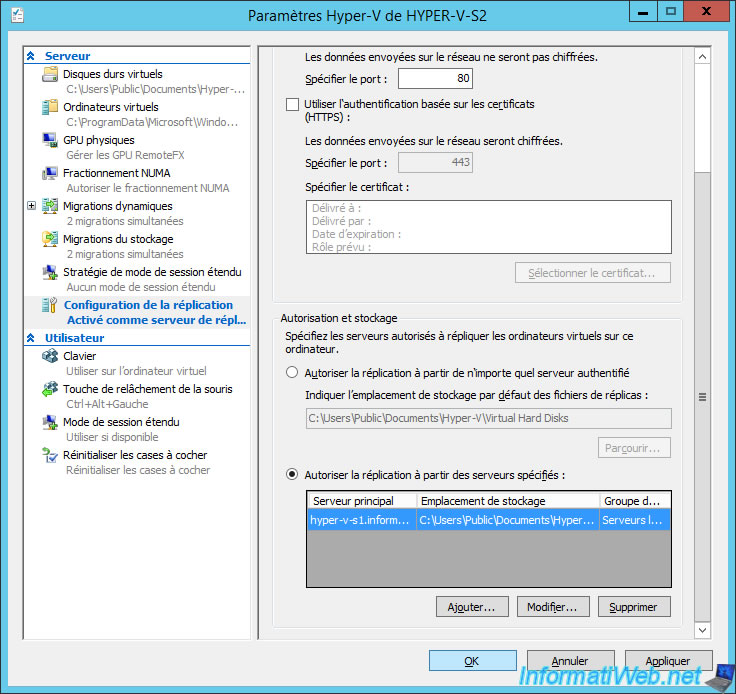
In the "Replication Configuration" section, check the "Enable this computer as a Replica server" box.
As you can see, there are two types of authentication available for replicating virtual machines from one Hyper-V server to another :
- Use Kerberos (HTTP)
- Use certificate-based Authentication (HTTPS)
For now, we will use the version "HTTP" which is easier to set up.
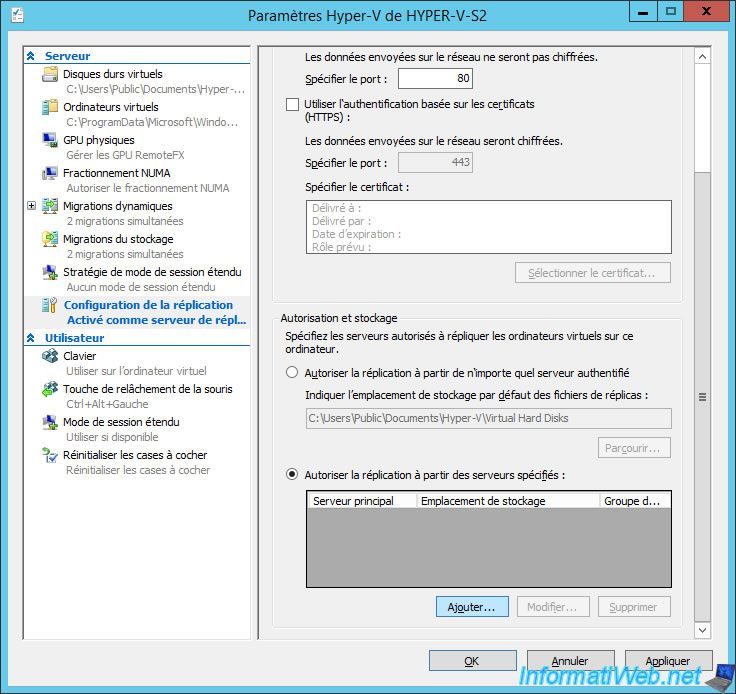
For security, it's better to choose the option "Allow replication from the specified servers".
Then, click Add.
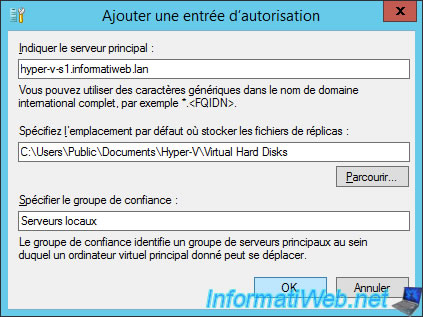
To allow a source Hyper-V server, provide its full name (FQDN).
In our case, our first server is called : hyper-v-s1.informatiweb.lan
If you wish, you can store copies received from this server in another folder.
Finally, enter a name (trust group) to remember which Hyper-V server it's (for example : IT room).
Now, our 1st Hyper-V server is allowed to replicate virtual machines on our 2nd Hyper-V server.
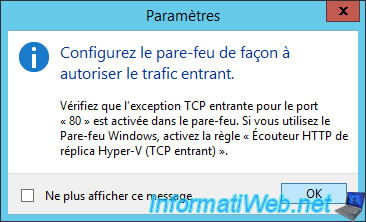
As indicated by Hyper-V, you will need to enable the Hyper-V Replica HTTP Listener (TCP-In) rule that will allow you to replicate virtual machines to your Hyper-V server over the HTTP protocol.
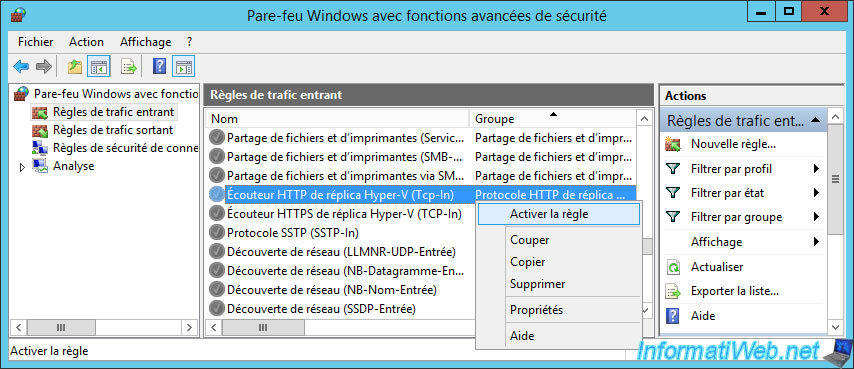
In the incoming firewall rules of the remote Hyper-V server, enable the "Hyper-V Replica HTTP Listener (TCP-In)" rule.
2. Replication via the network
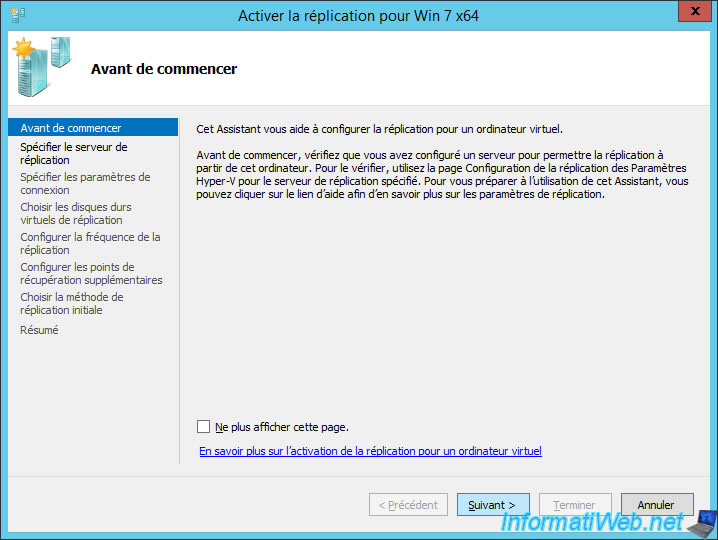
To enable "real-time" replication of a virtual machine over the network, select it on the source server and click "Enable replication".
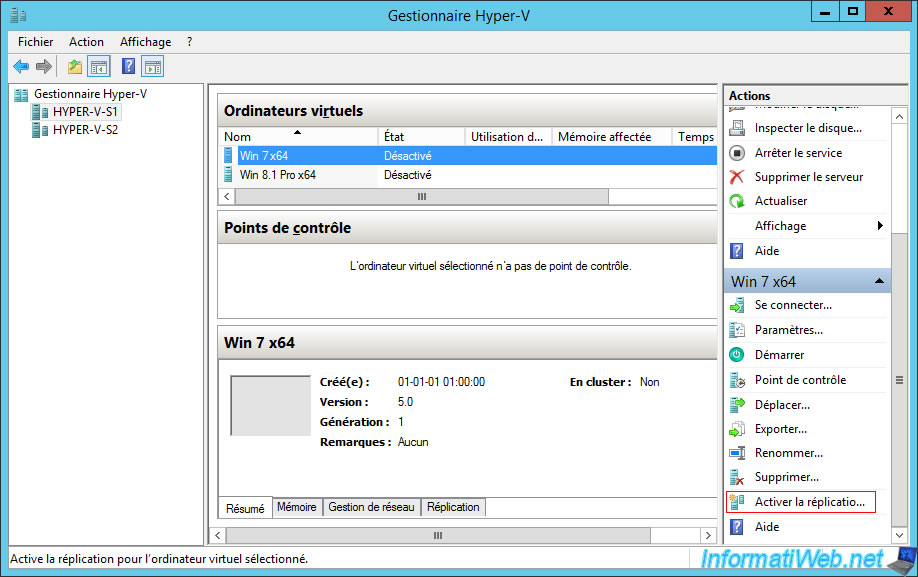
The "Enable Replication for [virtual machine name]" wizard is displayed.
Click Next.
To replicate the virtual machine on your 2nd Hyper-V server, click Browse.
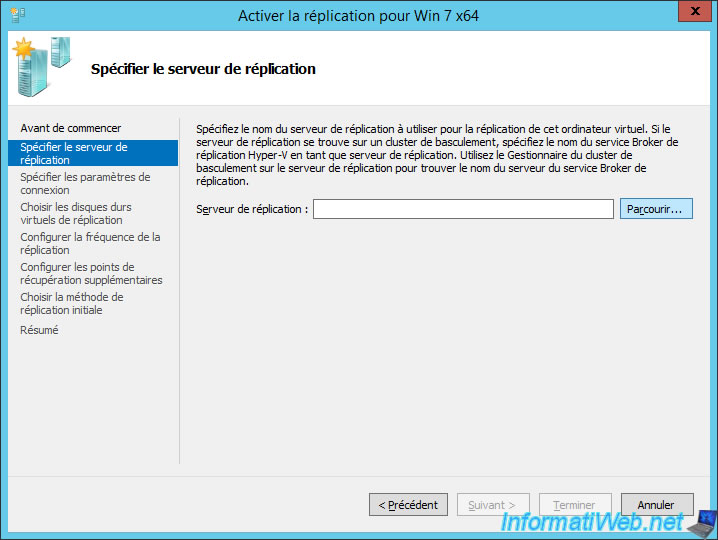
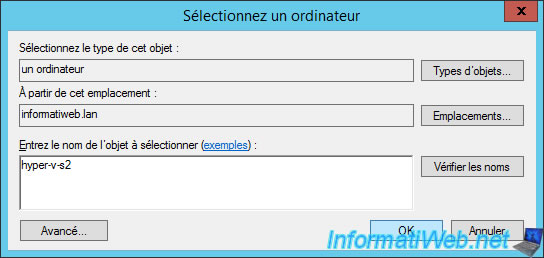
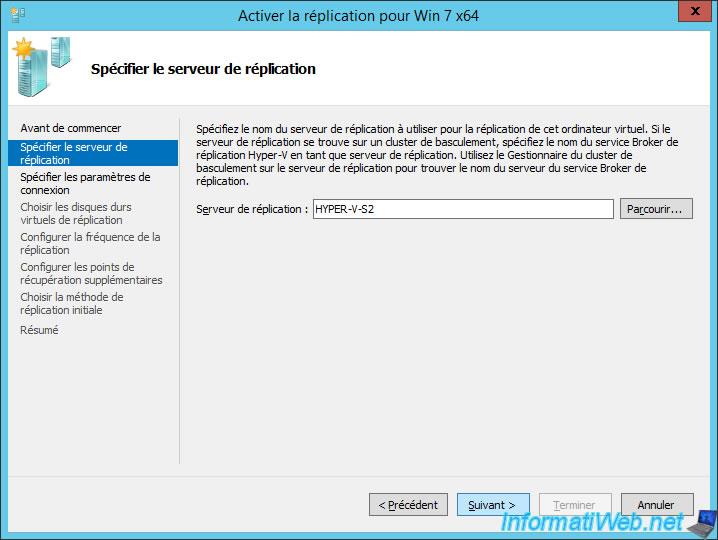
If your Hyper-V servers are not part of a cluster, enter the name of your 2nd Hyper-V server and click OK.
Otherwise, you will need to specify the replication broker service name (as indicated by the wizard).
Then, click Next.
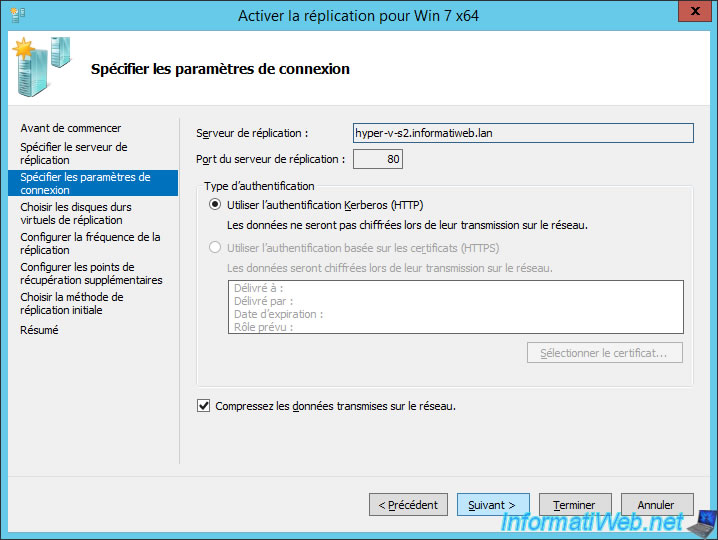
For now, we use the easy method : Use Kerberos authentication (HTTP).
Then, check that the destination server port is "80" (which stands for HTTP). Otherwise, manually specify "80" as the port number.
Note : the "Compress the data that is transmitted over the network" option is checked by default to increase the performance of the replication.
However, if you have a WAN optimization (provided by Cisco or Riverbed), you can disable the data compression because it performs worse than WAN optimization.
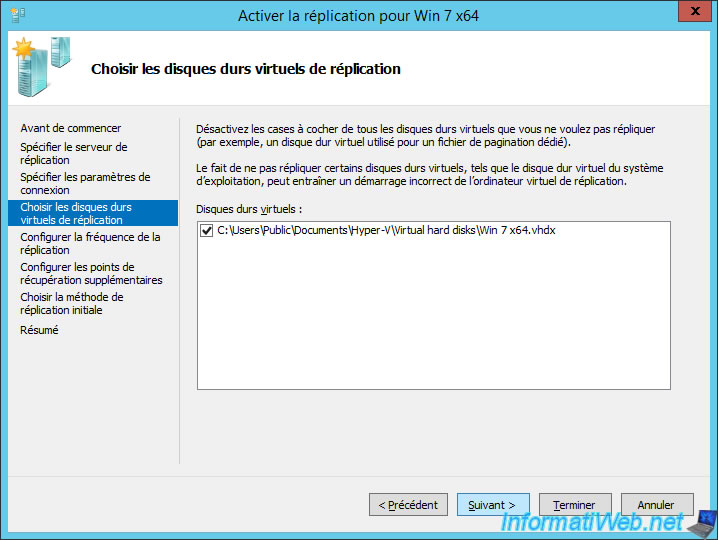
Select the virtual hard disk(s) to replicate to the remote Hyper-V server.
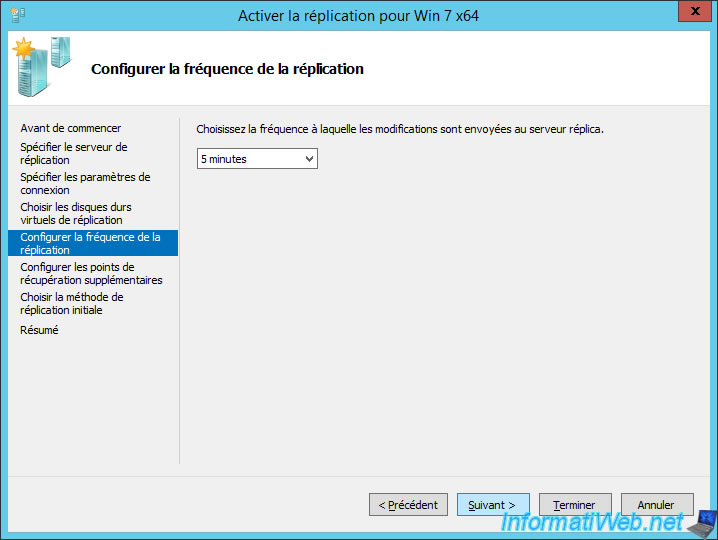
Depending on the performance of your network, the amount of data changed on your virtual machine, ... you can adjust the copy update frequency between : 30 seconds and 15 minutes.
For example : if you select "5 minutes" (the default frequency), it means that in the worst case, you will have lost the changes made during the last 5 minutes (if your network is good enough, of course).
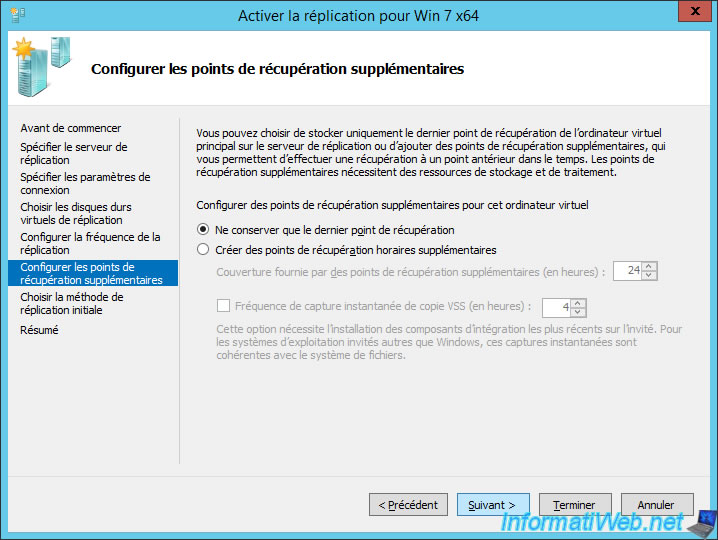
As you probably know, one of the advantages of virtualization is to be able to make snapshots of a virtual machine to be able to return to a previous state in a moment (+ the restart time of the VM).
When you want to replicate a virtual machine, you can choose to keep only the last state of the virtual machine to replicate or create new snapshots every x time.
In our case, we will only keep the last state of the virtual machine.
So, we select "Maintain only the latest recovery point".
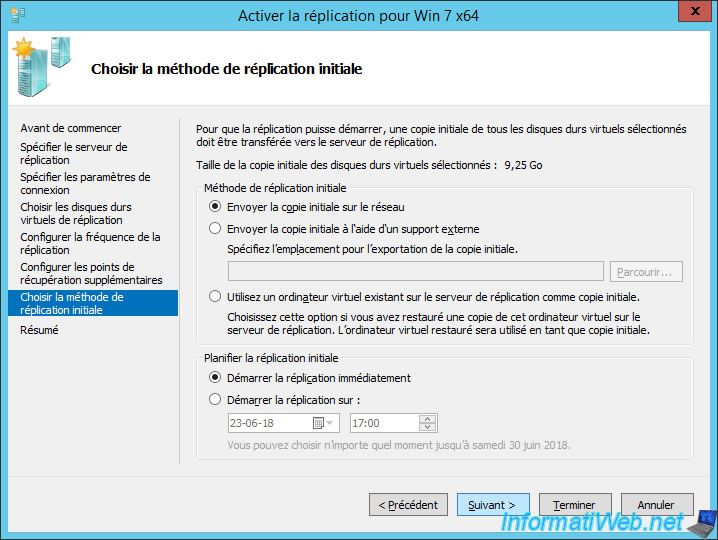
To begin, we will replicate the virtual machine entirely via the network.
To do this, select the option : Send initial copy over the network.
By default, replication will begin directly after this wizard closes.
Nevertheless, in production, you will surely launch this replication overnight to avoid saturating the bandwidth of the server during working hours.
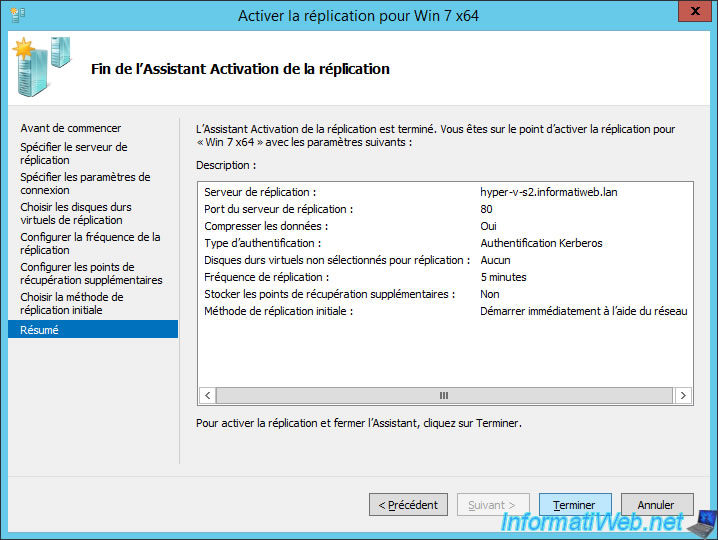
Finally, the wizard displays a summary of the replication settings used.
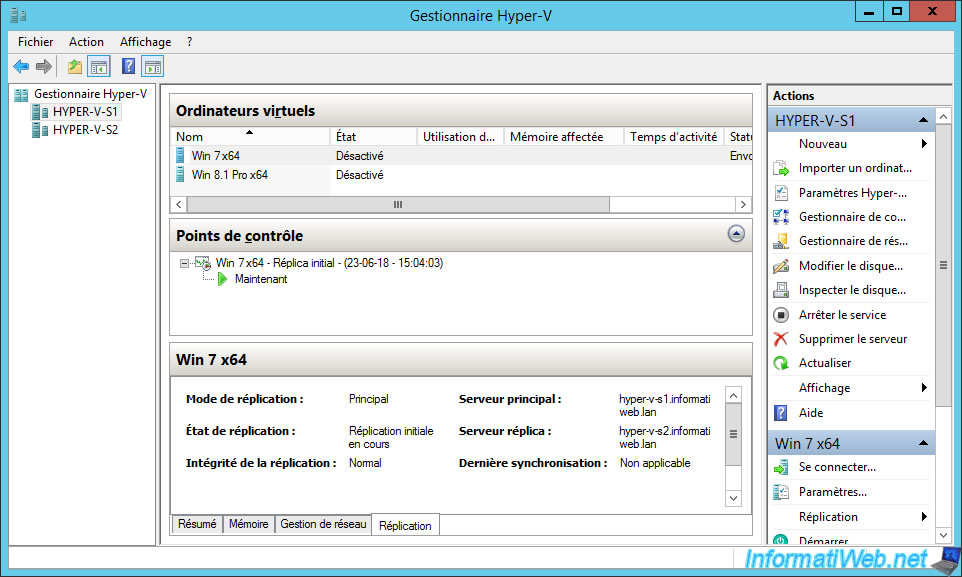
As you can see :
- our "HYPER-V-S1" server is the primary server for the "Win 7 x64" virtual machine
- the replication state is : Initial replication in progress
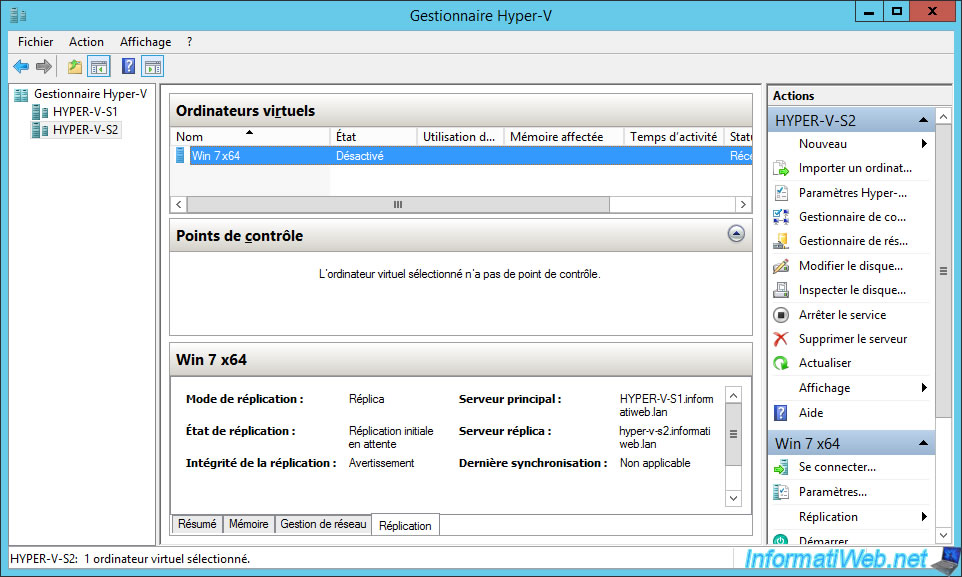
On the secondary server (or replica server under Hyper-V), you will see that the replication health is "Warning" at this time.
This means that replication is in progress and the copy is not yet up to date with respect to the primary server.
Once the replication is complete, you will see on the 2 servers (primary server and replica server) that :
- the replication state is : Replication enabled
- the replication health is : Normal
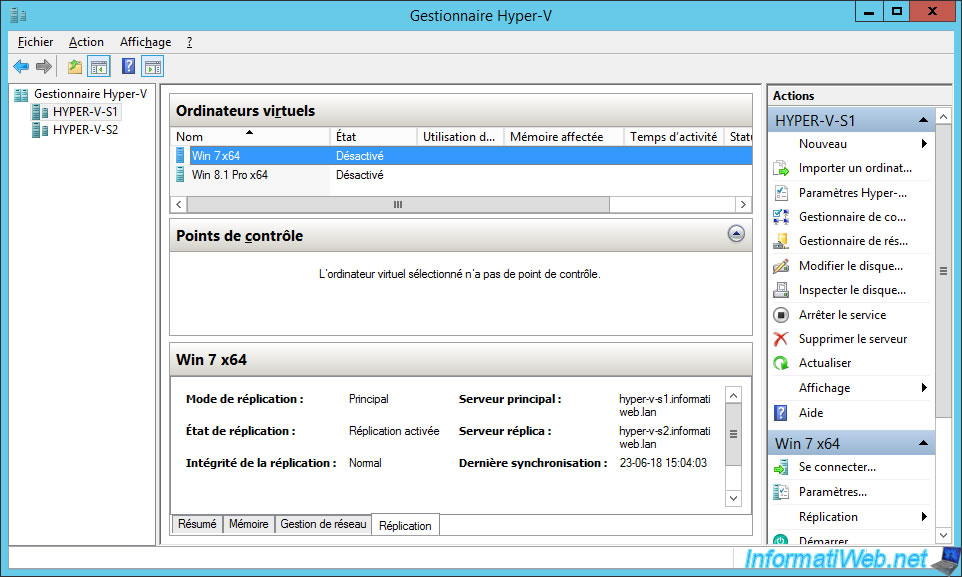
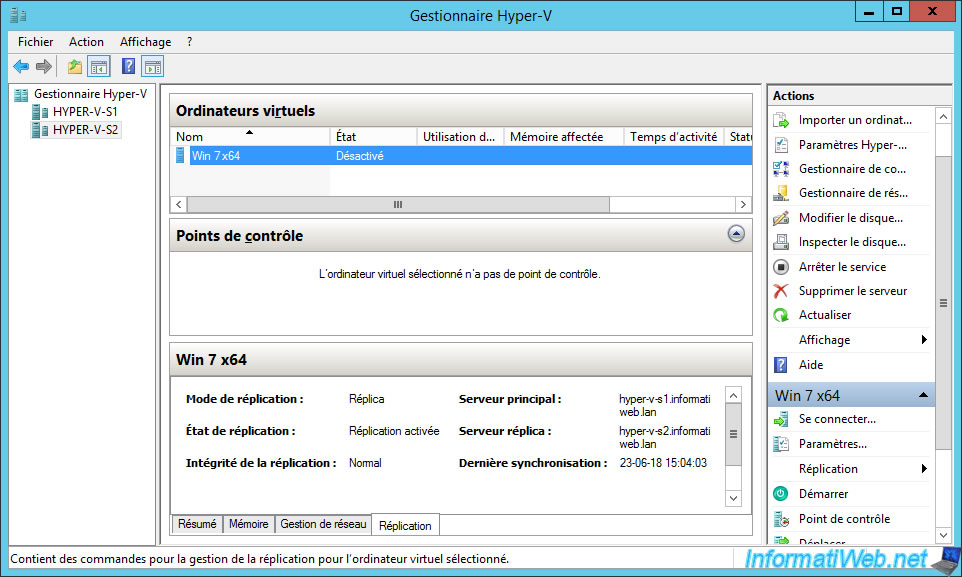
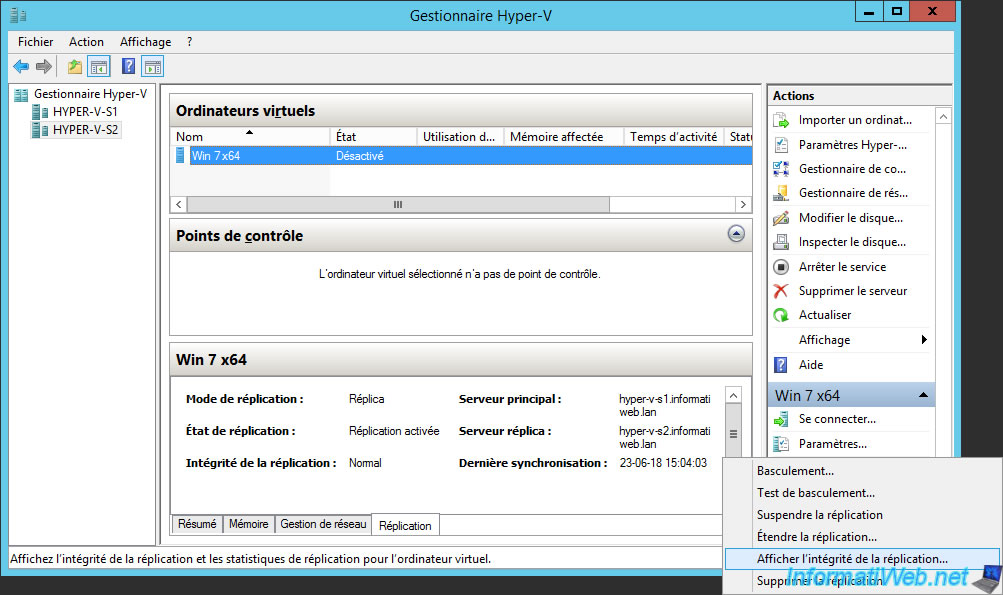
If you want, you can view the replication integrity on the replica server by selecting the desired virtual machine, and then clicking : Replication -> View Replication Health.
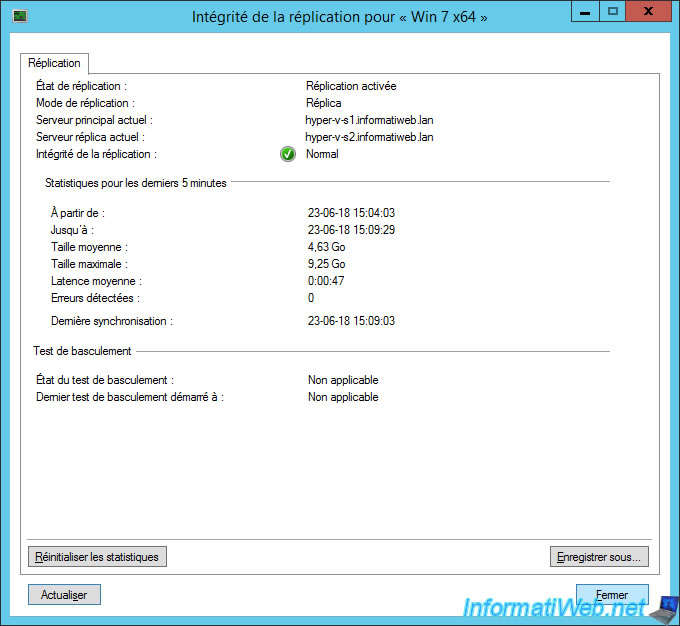
Hyper-V will show you a summary of the replication information for this virtual machine.
3. Remove replication
To remove the replication process between your 2 servers for a specific virtual machine, select it on the primary server and click : Replication -> Remove Replication.
Note : the suppression of the replication must be done on the 2 servers (the primary server + the replica server).
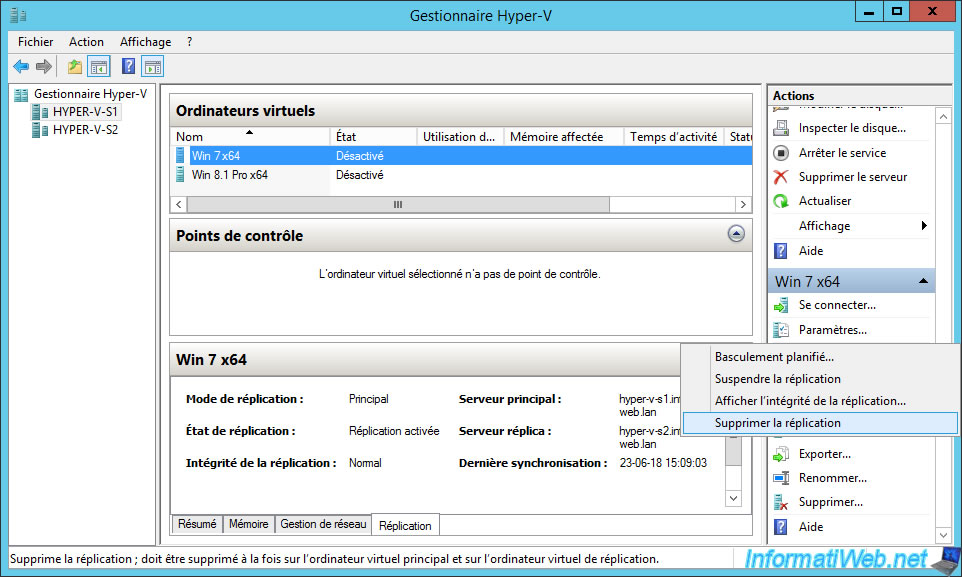
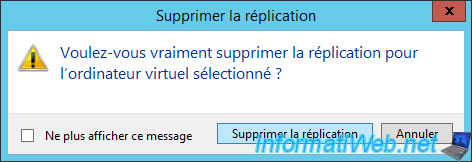
Click on "Delete Replication".
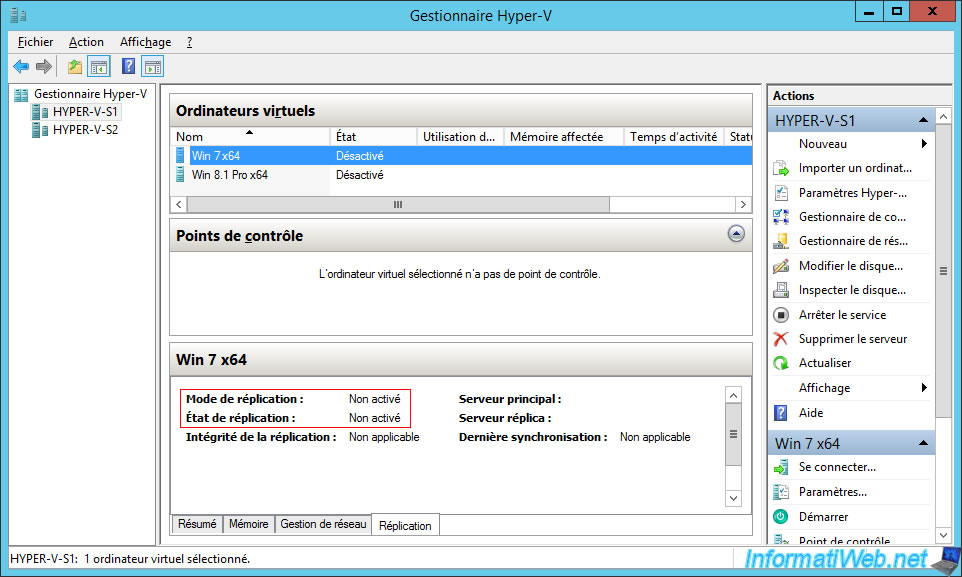
As you can see, Hyper-V tells us that replication is not enabled for this virtual machine.
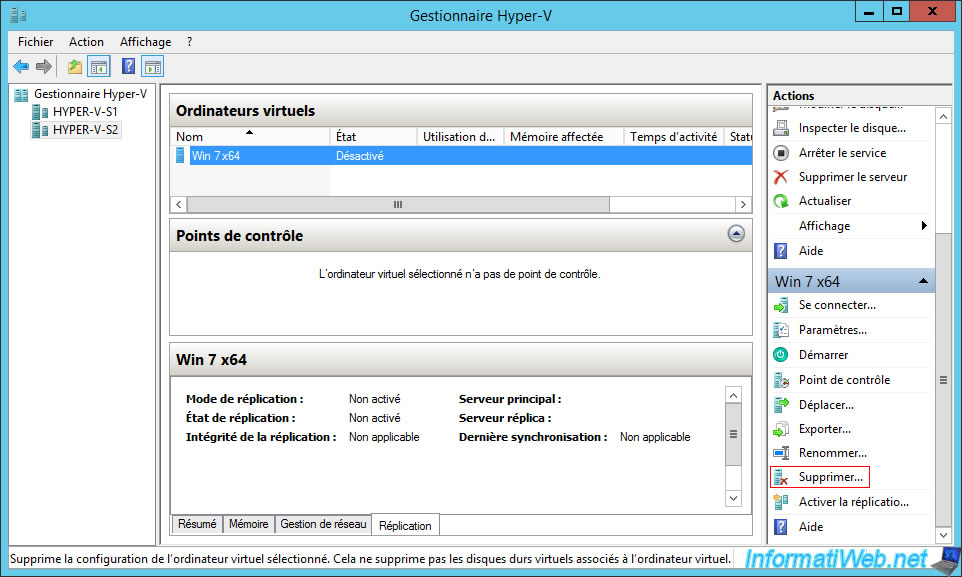
However, the copy is still on the replica server.
It will simply no longer updated. If you wish, you can safely delete this copy by selecting the desired virtual machine and clicking "Delete".
Share this tutorial
To see also
-

Microsoft 9/6/2019
Hyper-V (WS 2012 R2 / 2016) - Create a generation 2 VM
-
Microsoft 8/10/2019
Hyper-V (WS 2012 R2 / 2016) - Install Hyper-V and create your first VM
-
Microsoft 11/15/2019
Hyper-V (WS 2012 R2 / WS 2016) - Automatically replicate virtual machines (securely)
-
Microsoft 11/22/2019
Hyper-V (WS 2012 R2 / WS 2016) - Configure live migration

You must be logged in to post a comment