Automatically rebuild a failed physical disk using a dedicated Hot Spare with an Adaptec SmartRAID 3154-8i8e controller
- RAID
- 04 May 2022 at 11:52 UTC
-

- 3/4

12. Hard drive failure
The day one of your hard drives (NOT the Spare) that are members of your array fails, here's what will happen.
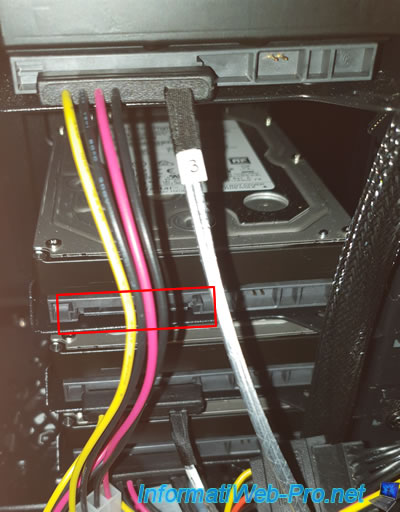
To simulate a failure of our hard drive which was connected with cable n ° 0, we unplugged it.
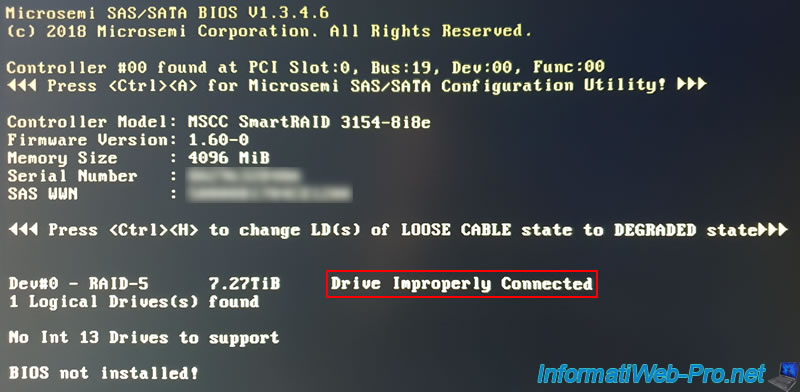
When your computer / server starts up, the "Drive Improperly Connected" status will be displayed for the affected array and this message will be displayed :
Plain Text
Press <Ctrl><H> to change LD(s) of LOOSE CABLE state to DEGRADED state.
If you go into the configuration tool (ACU) of your Microsemi Adaptec SmartRAID controller, you will be able to see the new status of your logical drive by going to : Array Configuration -> Manage Arrays -> [Array name] -> [Logical Drive name].
As expected, the displayed status is "Drive Improperly Connected". This means that at least 1 physical disk in the affected array has failed and this logical drive is not available at this time.
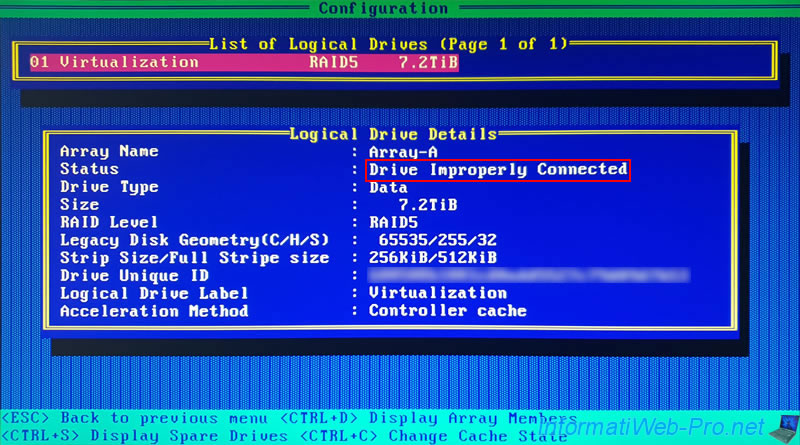
In order for this logical drive to be available, you must press the "CTRL + H" keys as requested when starting your computer / server.
By pressing these keys, this message will appear :
Plain Text
LD(s) of LOOSE CABLE state will be changed to DEGRADED State
However, the displayed status will always be "Drive Improperly Connected" this time.
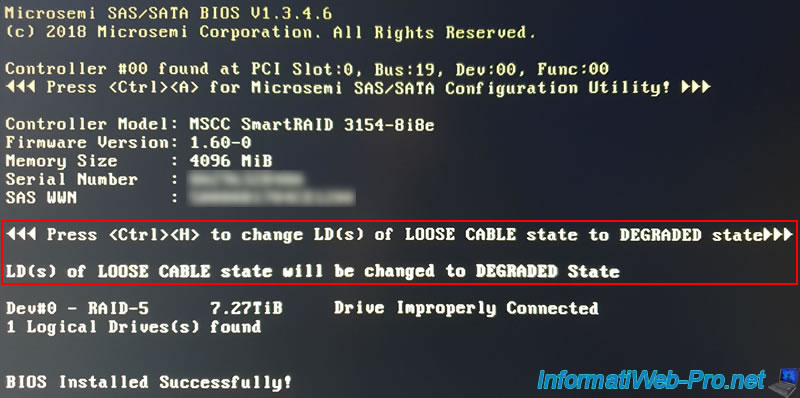
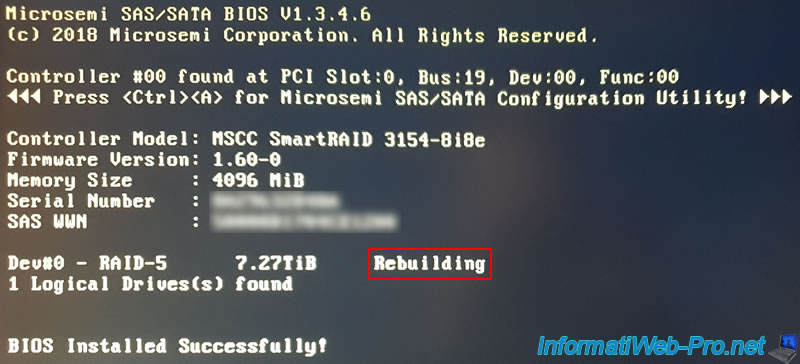
On the next restart, since there is at least 1 Spare available for the affected cluster, the array status will change to : Rebuilding.
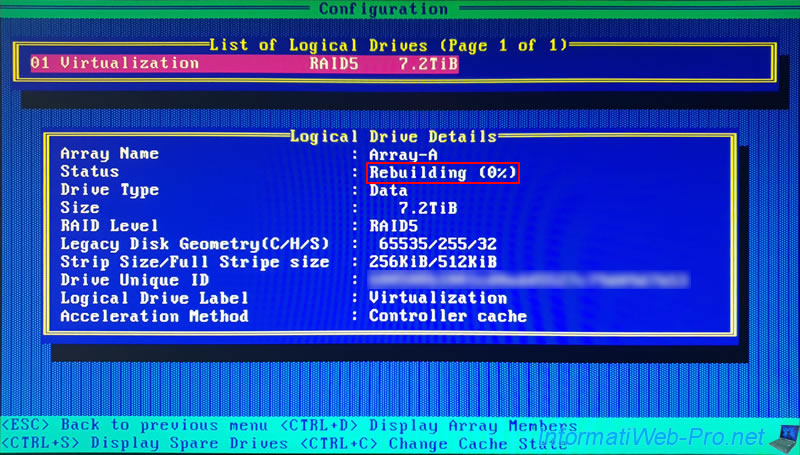
13. Logical drive rebuilding (visible in ACU)
Note that you can also see it directly by entering the configuration tool of your Microsemi Adaptec controller by then pressing the "CTRL + A" keys (on a QWERTY keyboard) or "CTRL + Q" (on an AZERTY keyboard) .
Go to "Array Configuration -> Manage Arrays -> [Array name] -> [Logical Drive name]" and you will see that the status has changed to : Rebuilding (0%).
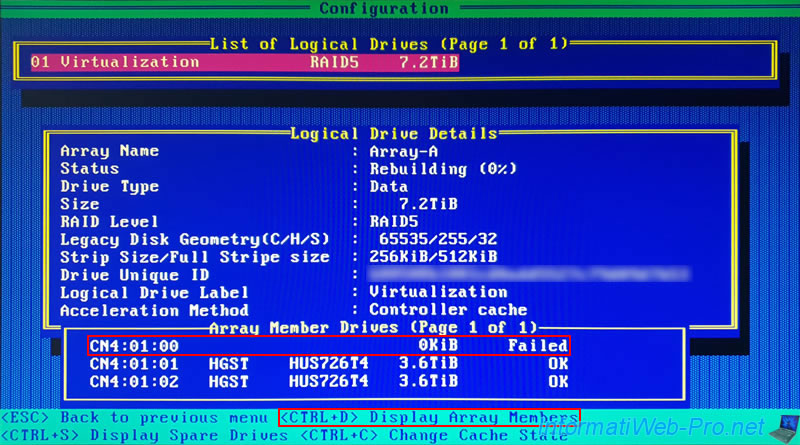
If you display the members for this logical drive by pressing the "CTRL + D" keys, you will find :
- the failed hard drive (CN4:01:00 - 0 KiB - Failed)
- those in good state : OK
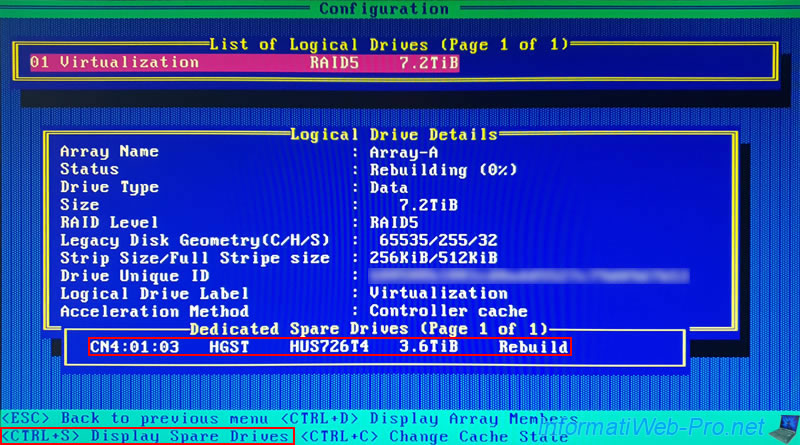
If you display the Spares assigned to the array concerned by this logical drive, you will see that the reconstruction (Rebuild) of the missing (failed) physical drive is carried out automatically on one of these Spares.
In our case, you can see that the Spare is connected to location : CN4:01:03.
Then, you can also go to : Disk Utilities.
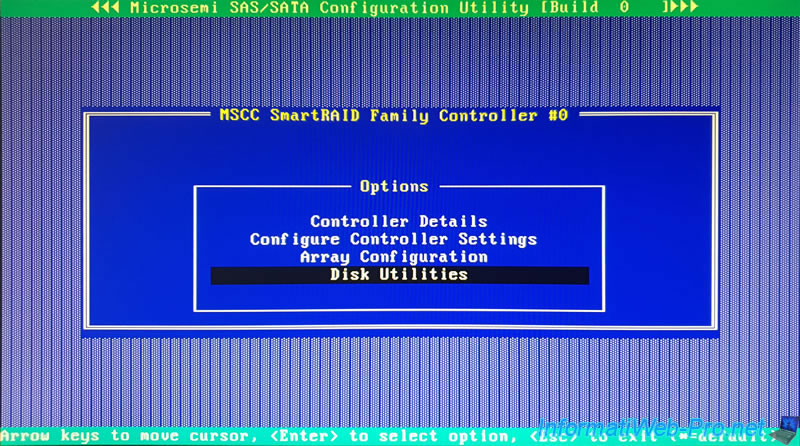
In the list that appears, you will see that :
- the failed hard disk (which was connected at "CN4:01:000" in our case) is not present in the list
- the physical disk defined as Spare is displayed with the location "CN4:01:003"
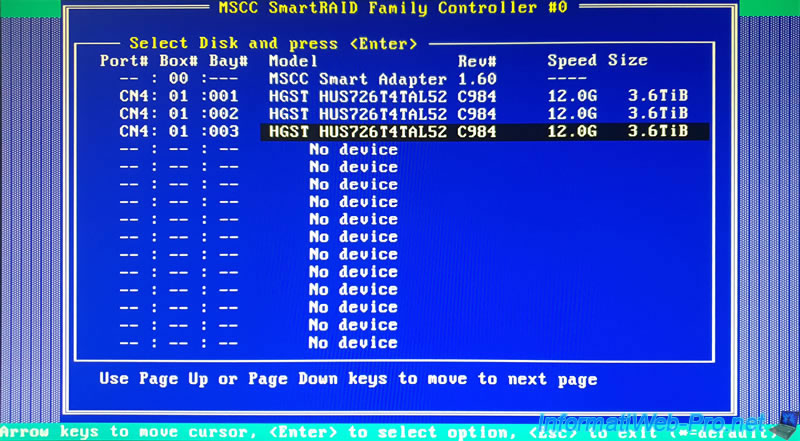
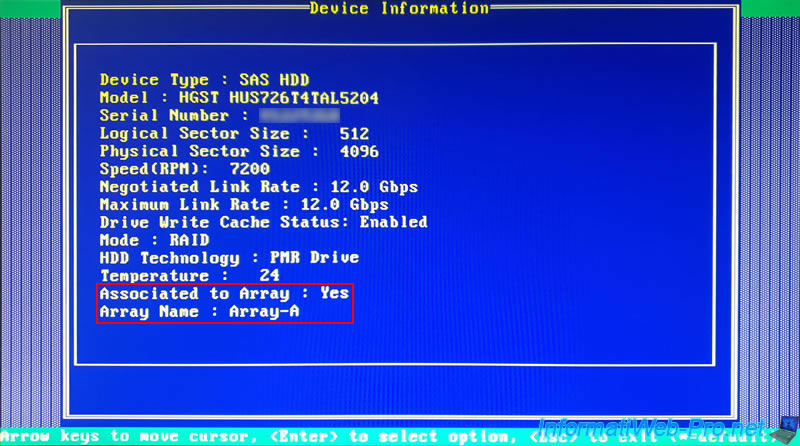
Select the disk serving as Spare, press Enter, then select "Device Information" and press Enter again.

As you can see, this physical disk serving as Spare is well associated with our "Array-A" array.
14. Rebuilding the physical disk using the Spare (in case of failure or predicted failure)
In the event of a failure or predicted failure (depending on the activation mode you have configured on your controller, see step 3 or 4 of the tutorial), the Spare you configured previously is used to rebuild the missing (failed) hard drive.
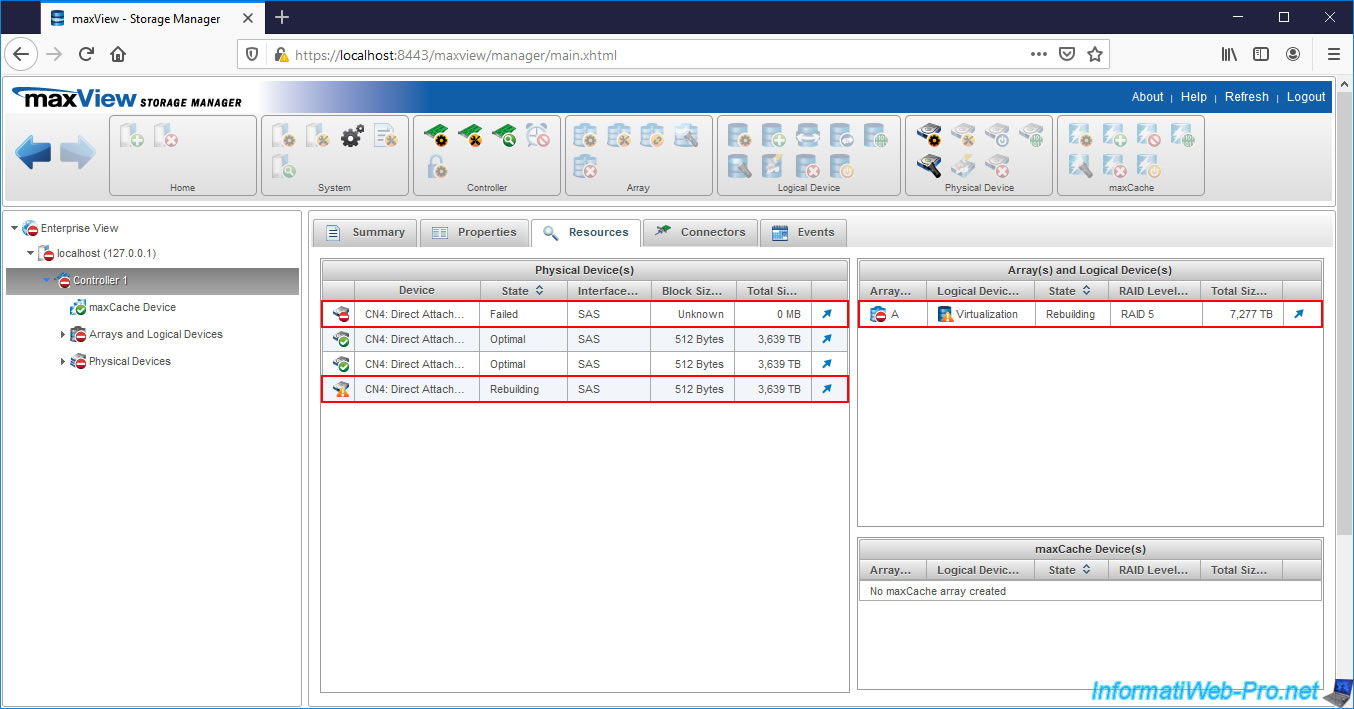
If you select your controller in maxView Storage Manager, you will see that you have :
- 4 physical data disks (Data Drives) : the 3 hard disks that are members of your array, of which 1 is faulty
- 1 physical disk defined as Spare (Spare Drives) : the hard disk serving as Spare in your array
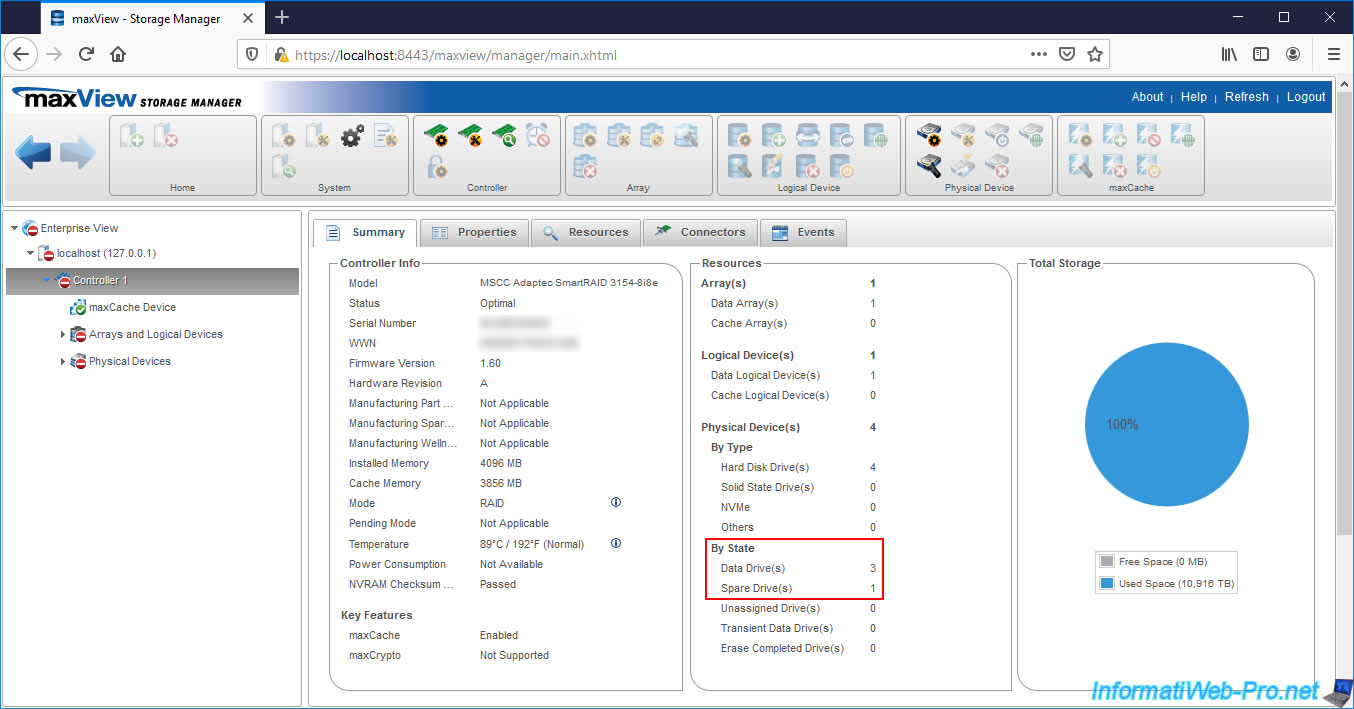
If you look in the "Resources" tab of your Microsemi Adaptec controller, you will see that :
- the 1st physical disk has failed (State : Failed)
- the 4th physical disk (which is actually the Spare) is being rebuilt and is a member of your Array, because it's currently referenced in the "Physical Device(s)" list
- array "A" and logical drive "Virtualization" therein are being rebuilt (State : Rebuilding)
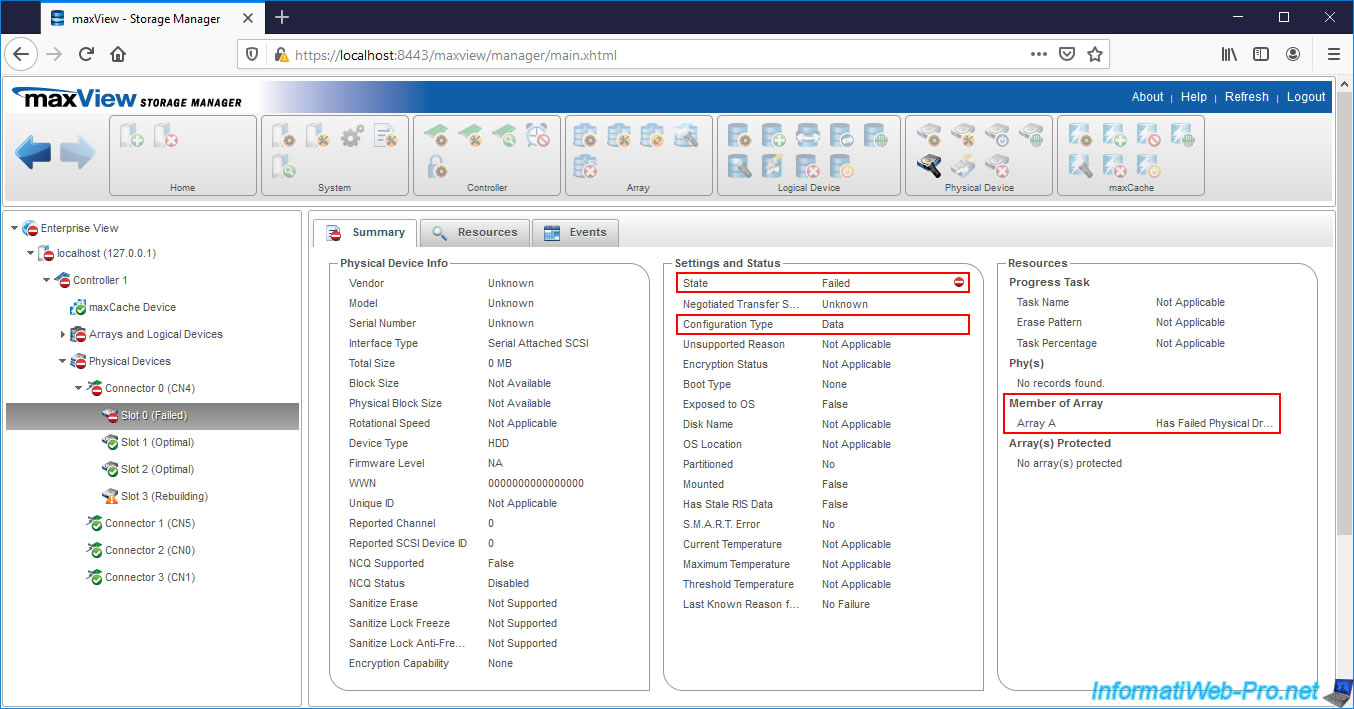
If you select the 1st physical disk, you will see that :
- this is the hard disk that was connected to the slot "Connector 0 (CN4) - Slot 0" = "CN4:01:000" (in "ACU")
- it's down (State : Failed)
- this is always configured in "Data" type since our Spare is configured in "Dedicated" mode
- that it's a member of your "A" array (Member of Array : Array A)
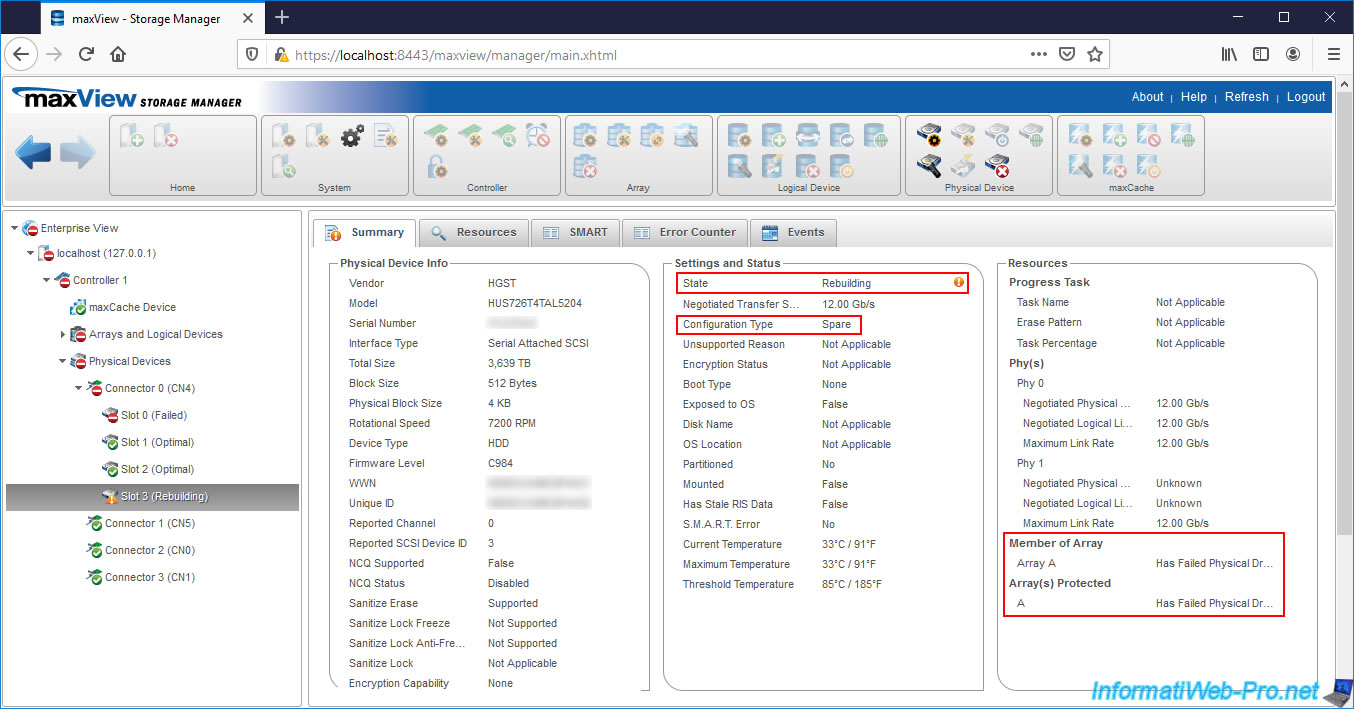
If you select the 4th physical disk, you will see that :
- this is the hard disk connected to the slot "Connector 0 (CN4) - Slot 3" = "CN4:01:003" (in "ACU")
- this one is being rebuilt (State : Rebuilding)
- it's configured as a Spare and it will remain so if you had added it to your array as "Dedicated Spare"
- it's a member of your "A" array (Member of Array : Array A) at the moment. But, if it's a "Dedicated Spare", it won't be when the original hard drive (on Slot 0 in our case) is replaced and rebuilt.
- it continues to protect your "A" array (Array(s) Protected : A)
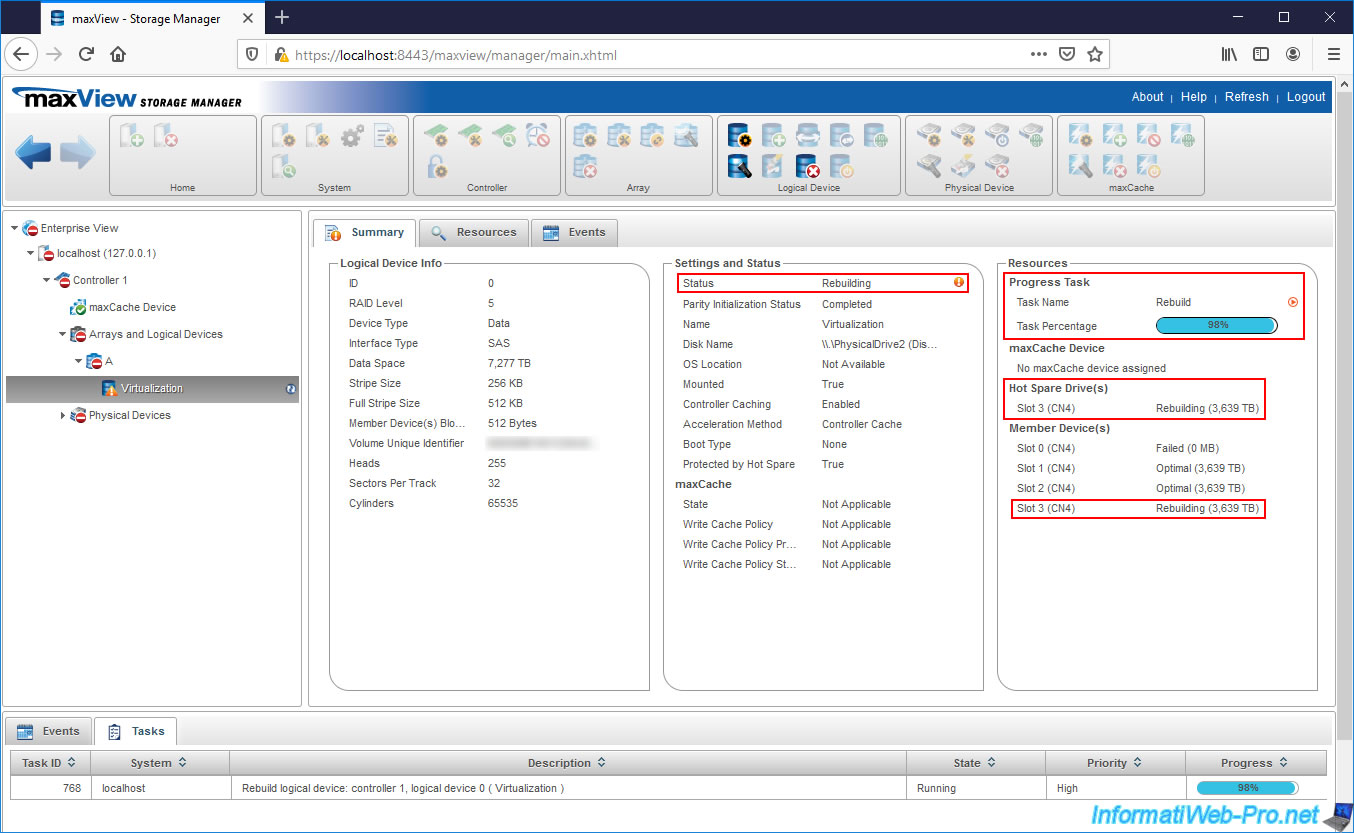
If you select the logical drive affected by the failure of your physical drive, you will see that it's being rebuilt (Status : Rebuilding) and you can see the progress of this rebuild from the right column (Progress Task - Rebuild).
You will also see that the rebuilding of the failed physical disk is performed on the Spare.
Your physical disk configured as Spare therefore appears for the moment in the list of Spares (Hot Spare Drives), as well as in the list of Members (Member Devices).
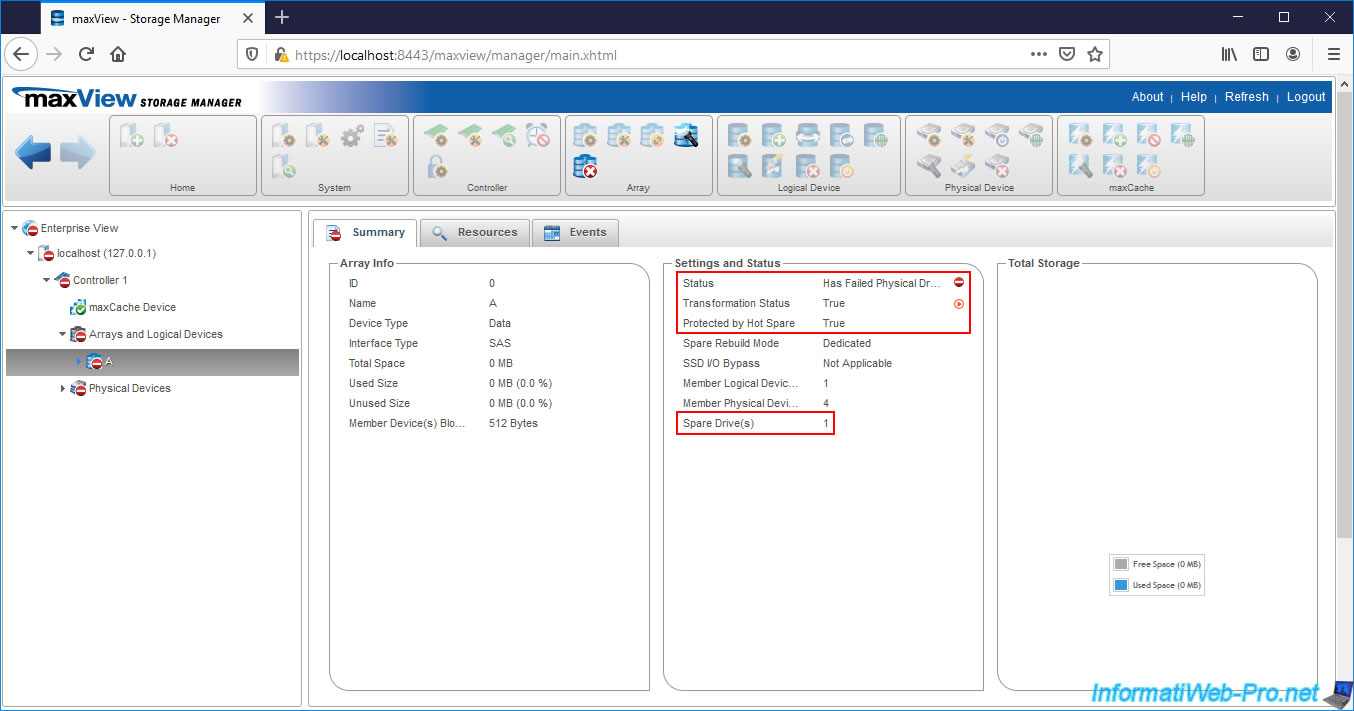
If you select the array affected by this failure, you will see that :
- its status is "Has Failed Physical Drive" which means that it has a failed physical drive
- it's being transformed (due to the change in its member physical disks)
- this is protected by a Spare (which is currently used for rebuilding the failed disk)
Share this tutorial
To see also
-

RAID 4/20/2022
Adaptec maxView Storage Manager v3 - Create a RAID volume
-

RAID 4/8/2022
Adaptec maxView Storage Manager v3 - Download and boot on USB version
-

RAID 4/13/2022
Adaptec maxView Storage Manager v3 - Installation on Linux
-

RAID 4/15/2022
Adaptec maxView Storage Manager v3 - Manage an Adaptec SmartRAID controller on VMware ESXi 6.7
No comment