Automatically rebuild a failed physical disk using a dedicated Hot Spare with an Adaptec SmartRAID 3154-8i8e controller
- RAID
- 04 May 2022 at 11:52 UTC
-

- 4/4

15. Parity initialization
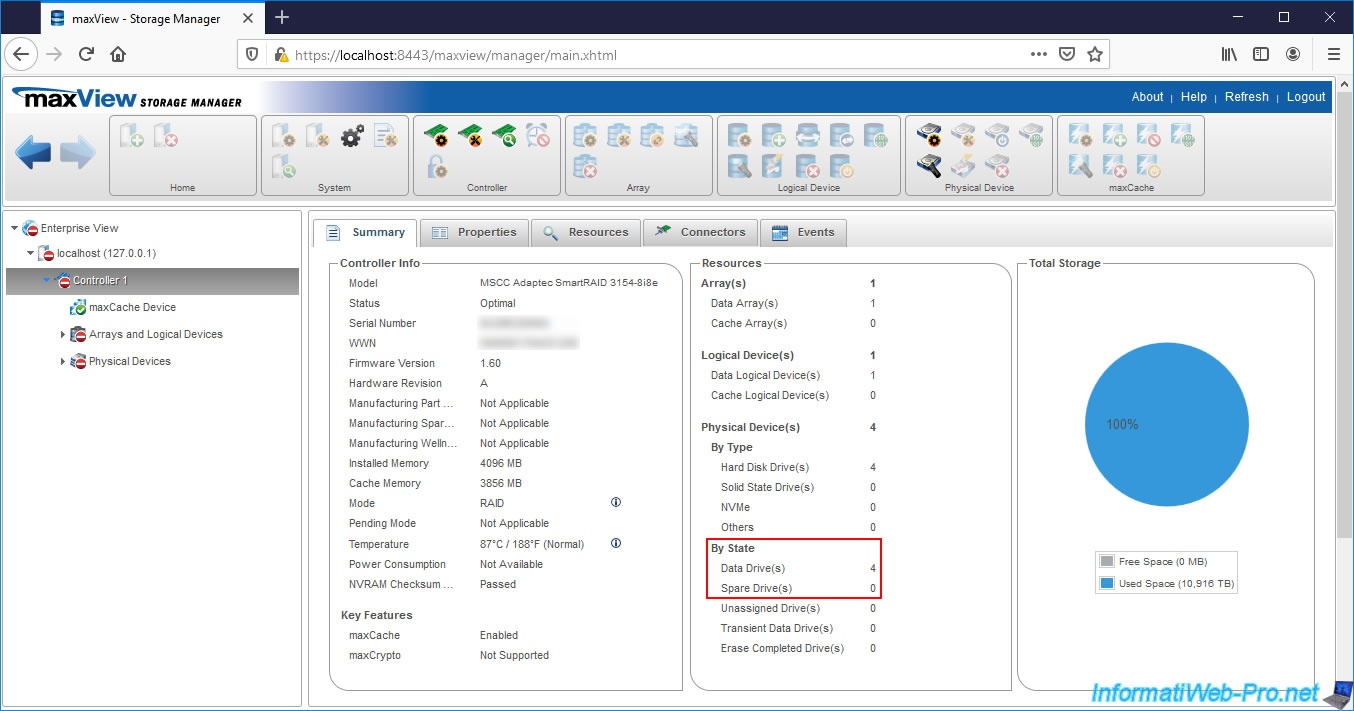
Once the missing physical disk has been rebuilt using the Spare assigned to your array, the Spare will become a physical data disk (Data Drive).
The number of Spares (Spare Drives) connected to your Microsemi Adaptec SmartRAID controller will therefore decrease by 1. In our case, we only had one, so there is no more.
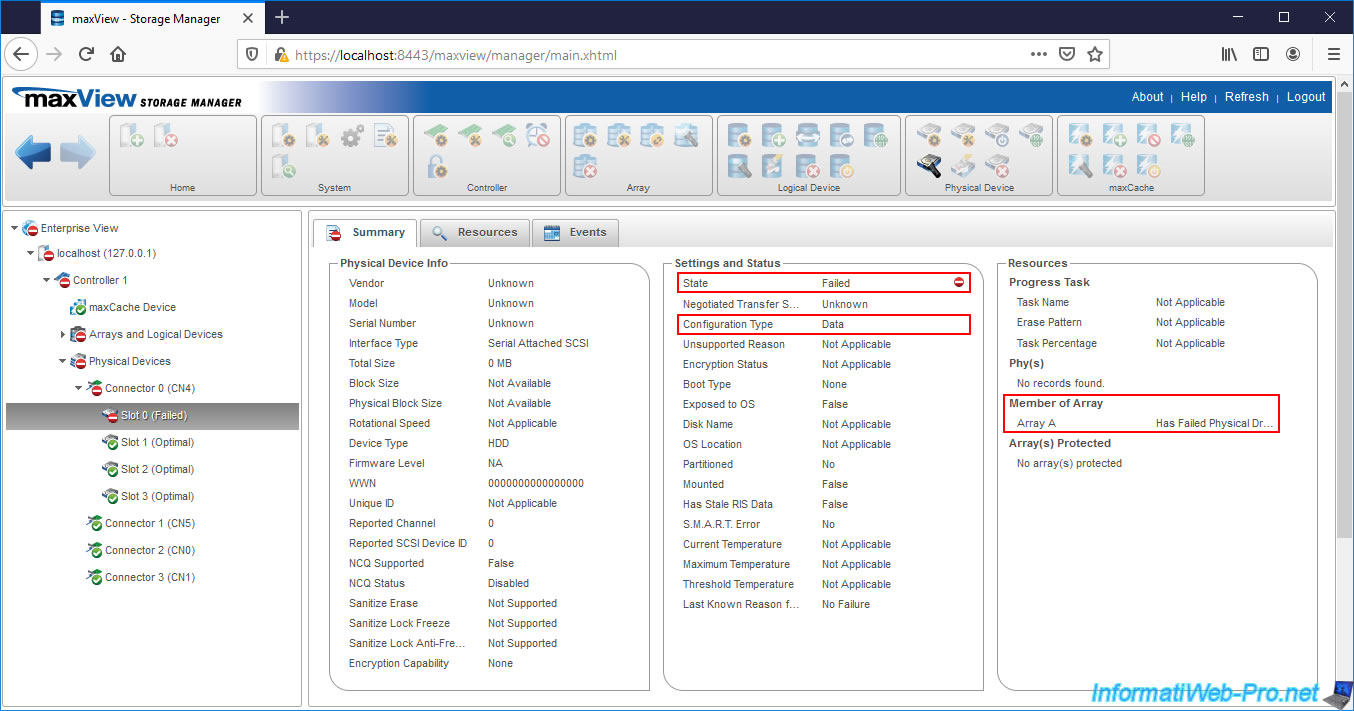
If you look at the failed physical disk, it's still there despite having been rebuilt on the Spare and that physical disk is still a member of your array (although it's not even plugged in anymore).
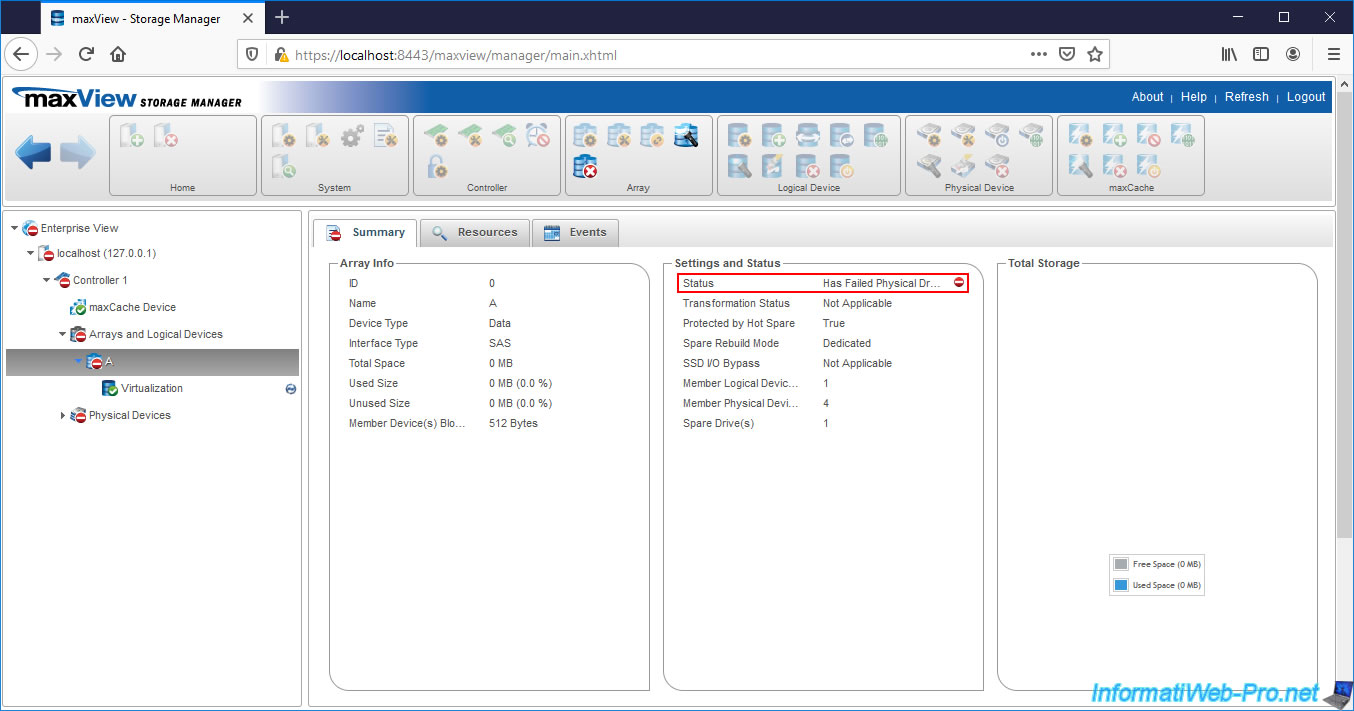
If you select your Array, you will see that its status is always : Has Failed Physical Drive.
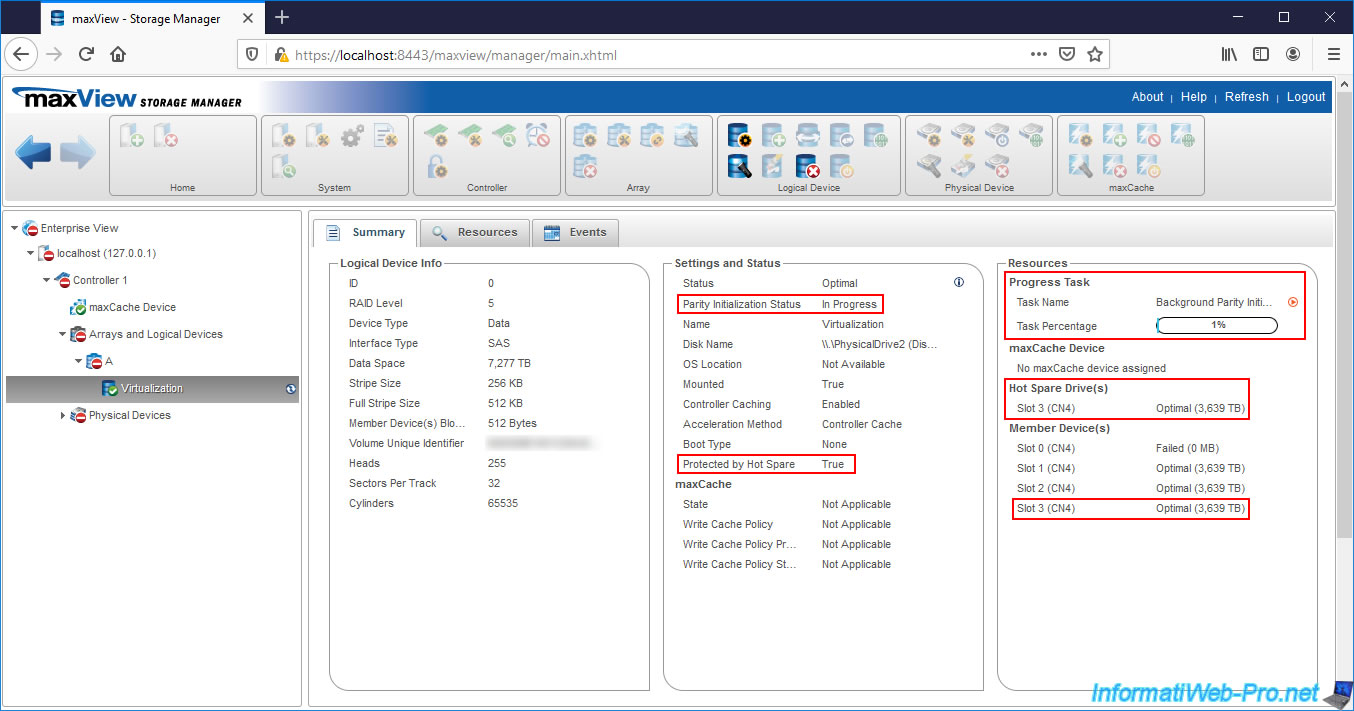
As the failed physical drive has been rebuilt on the Spare, your controller will recalculate the parity of your logical drive.
As you can see, at the moment our Spare is still referenced as a Spare (Hot Spare Drives) and as a Member (Member Device) for this logical drive.
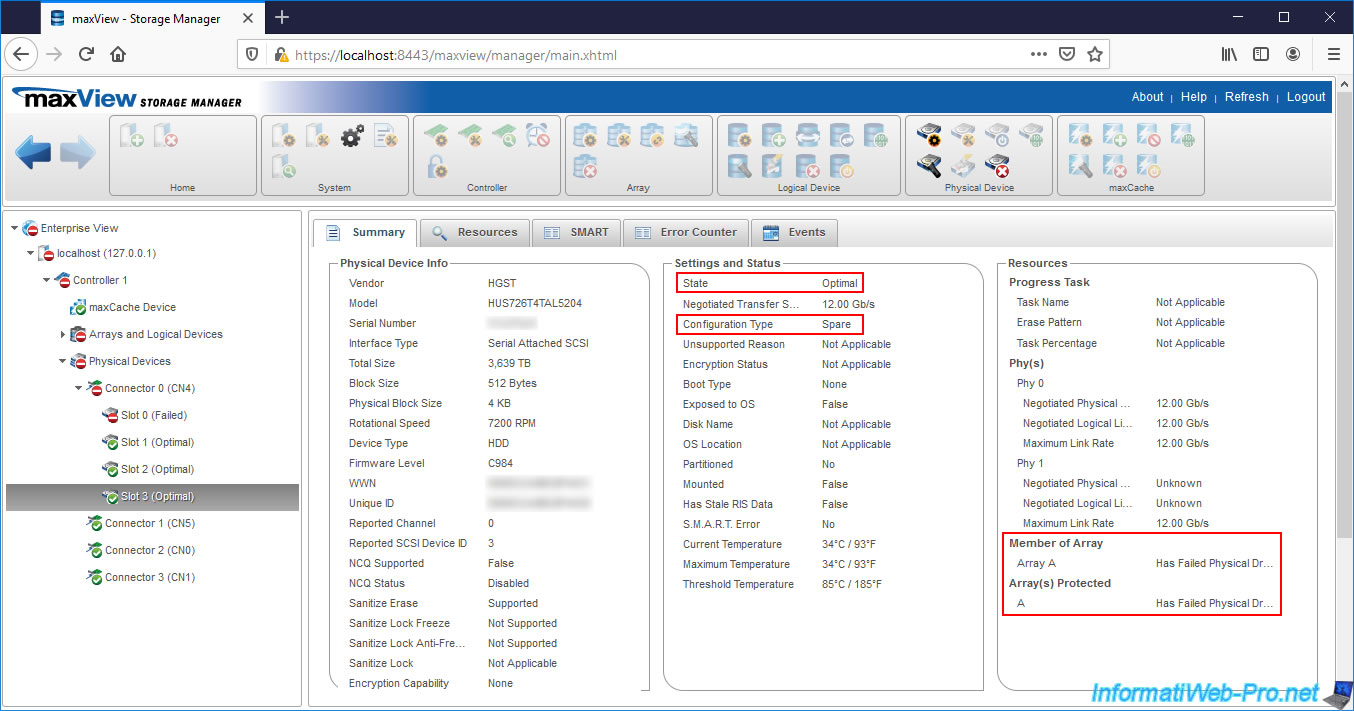
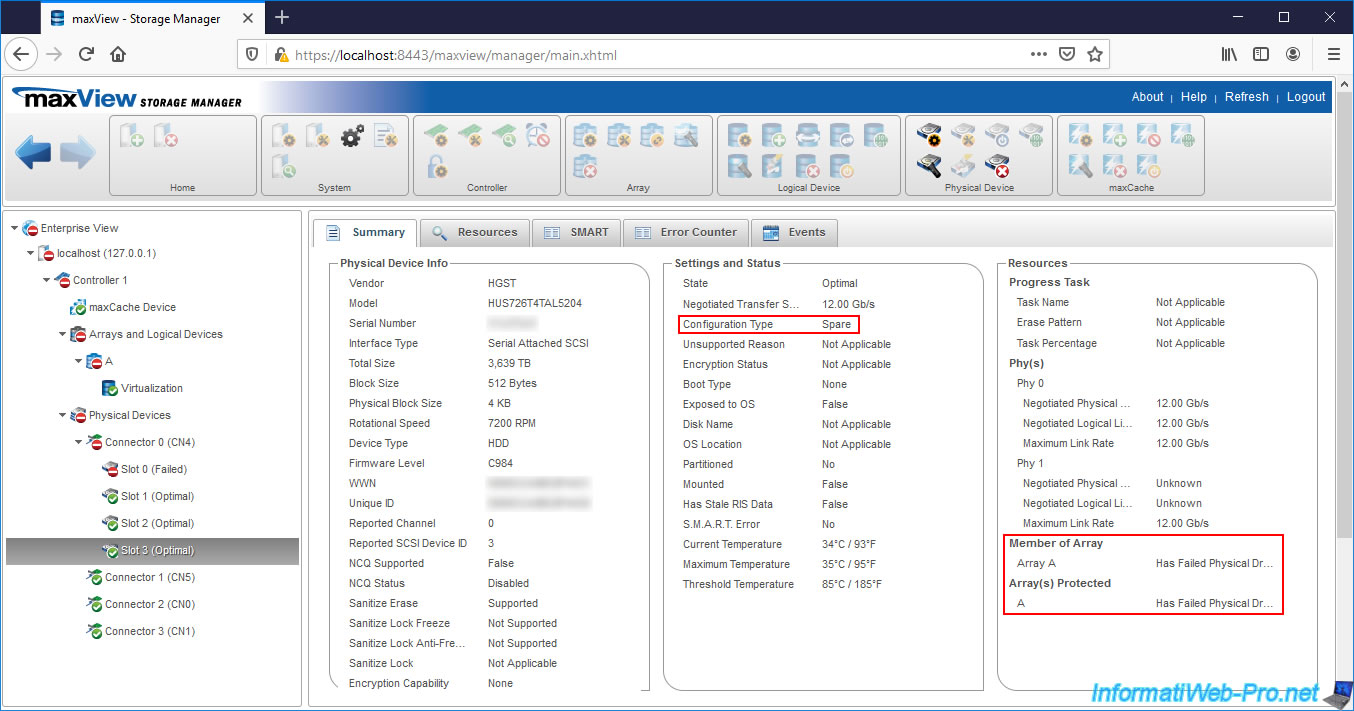
If you select the disk used as Spare, you will see that maxView always indicates that it's a Spare (Configuration Type : Spare), despite it being used for data reconstruction.
Which is normal, given that it was added as a "Dedicated Spare".
For the moment, this Spare is therefore still a member of the cluster concerned by the failure and referenced as a Spare for it.
Once the parity calculation is complete (Background Initialization Status : Completed), you will see that :
- your Spare (Slot 3) is always referenced as Spare for the logical drive concerned
- your failed physical drive (Slot 0) is still referenced as a member for the affected logical drive
- your Spare (Slot 3) is always referenced also as a member for the relevant logical drive

16. Waiting for a replacement of the failed physical disk
Since we had configured our Spare as "Dedicated Spare", our controller is waiting for us to replace the failed physical disk.
Indeed, when you define a Spare as "Dedicated Spare", the Spare can only be used while waiting for the replacement of the failed hard disk of your cluster.
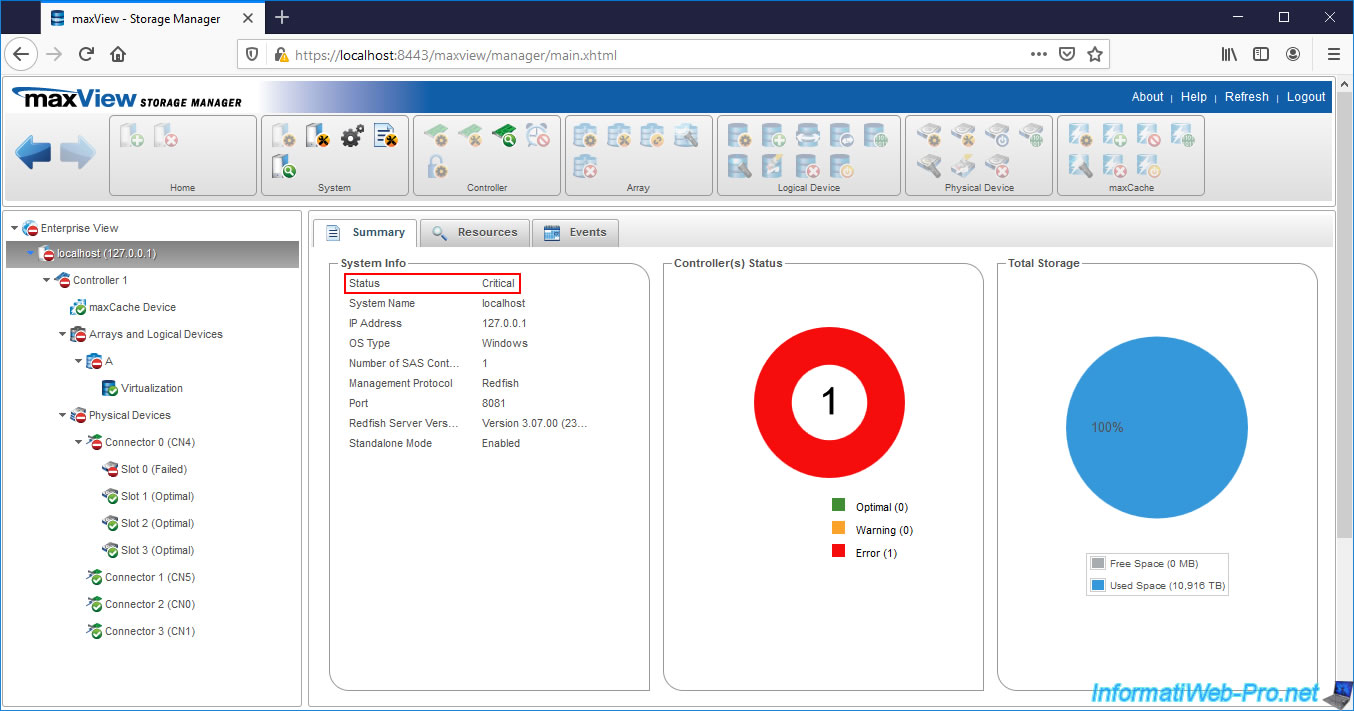
Until you physically replace it, errors will continue to appear in maxView and the failed hard drive will also continue to appear in maxView.
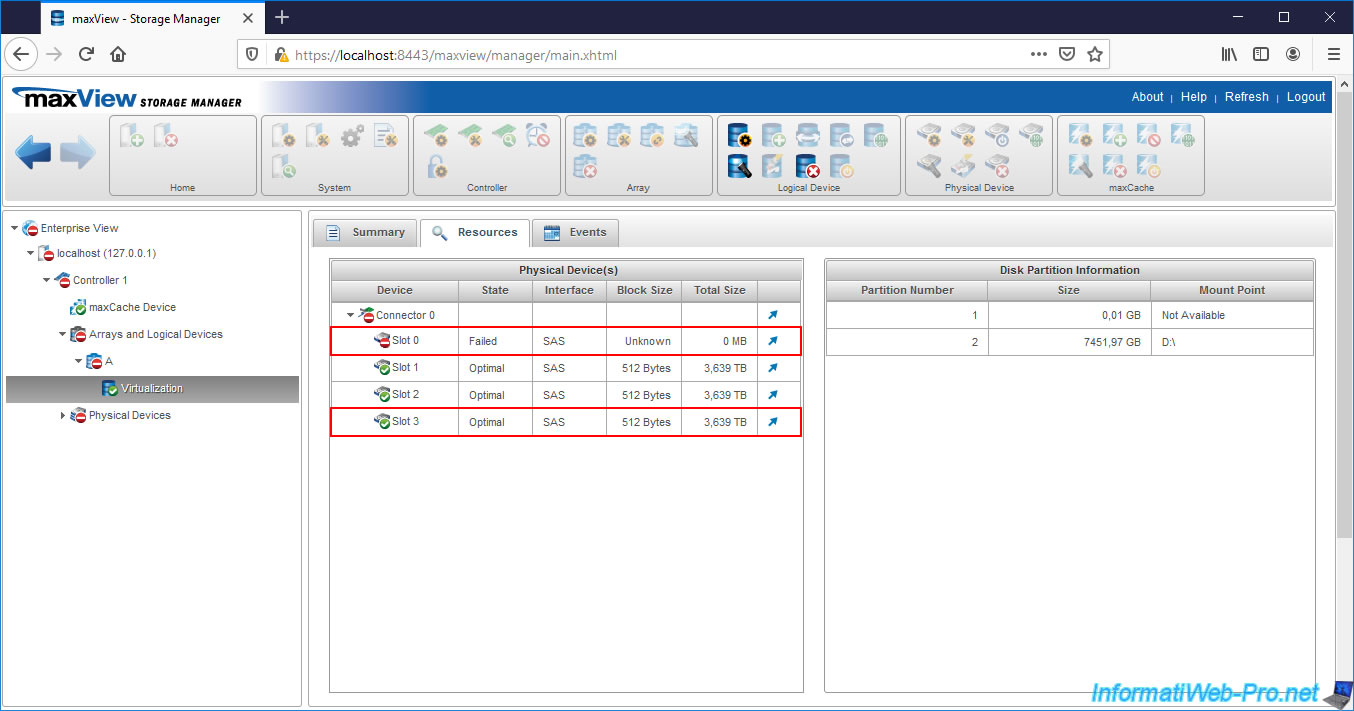
If you view the resources related to your logical drive, you will see that :
- your failed hard drive is always referenced with the "Failed" status
- your Spare is always referenced in the "Physical Device(s)" list with an "Optimal" status.
If you select the array affected by the failure, you will see that the status is still "Has Failed Physical Drive" and the Spare Rebuild Mode is : Dedicated.
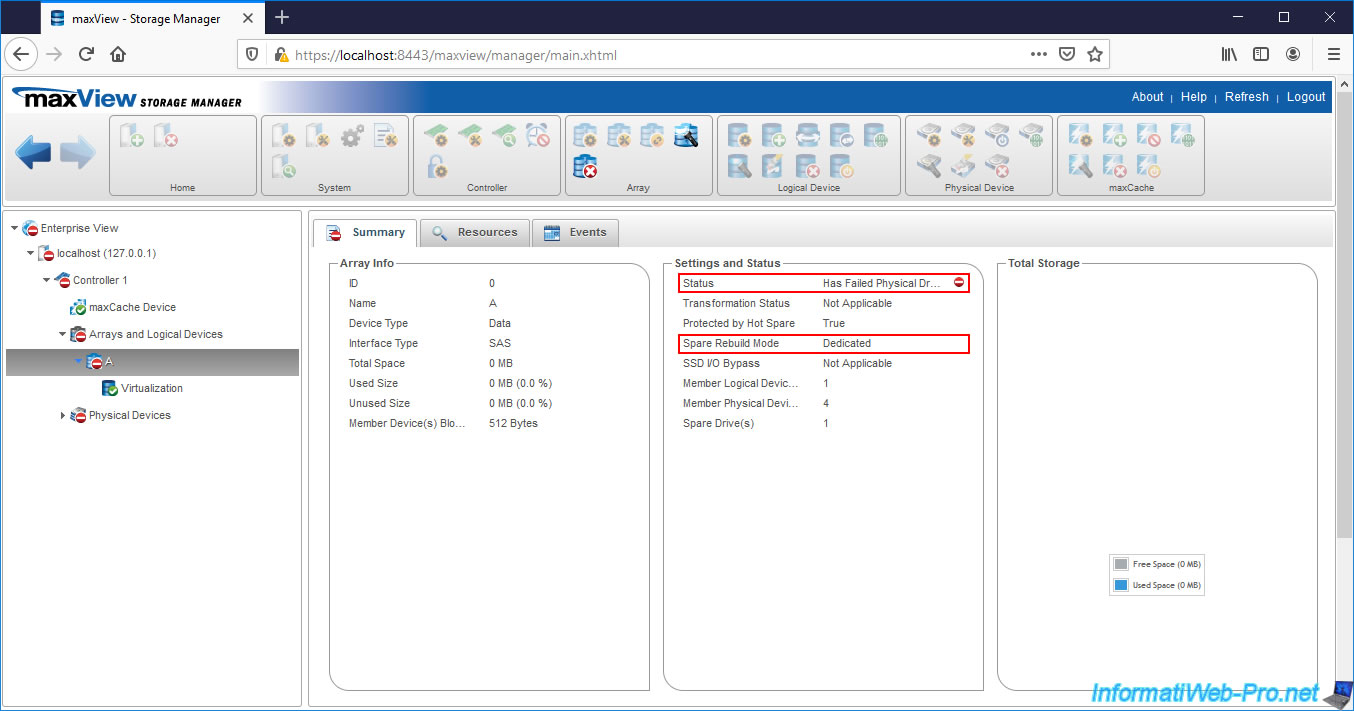
If you select your Spare, you will see that it is still configured as a Spare (Configuration Type : Spare) and not as a data disk (Configuration Type : Data) as it would be if it had become a permanent member of your cluster.
17. Replacing the failed physical disk
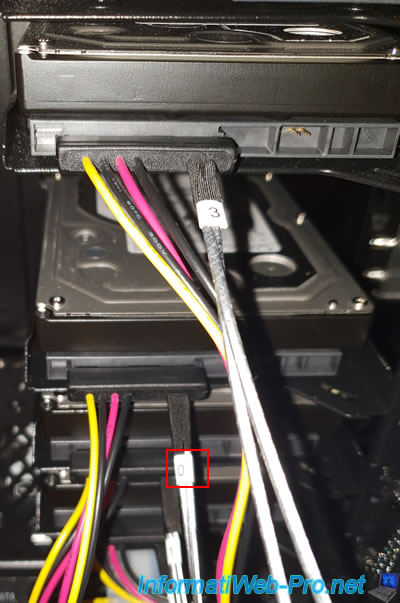
We replace the defective hard drive that was plugged in with cable # 0 by reusing the same cable so that our controller can detect the replacement of this failed physical drive.
18. Automatic rebuilding of the replaced physical disk (Copyback process)
As explained at the very beginning of the tutorial, when you configure a physical disk as "Dedicated Spare" for an array, the failed hard disk is first rebuilt on the Spare assigned to the affected array.
Then, when you physically replace the failed physical disk with a new one, a Copyback process occurs and consists of copying the data temporarily present on your Spare to the physical disk you have just replaced.
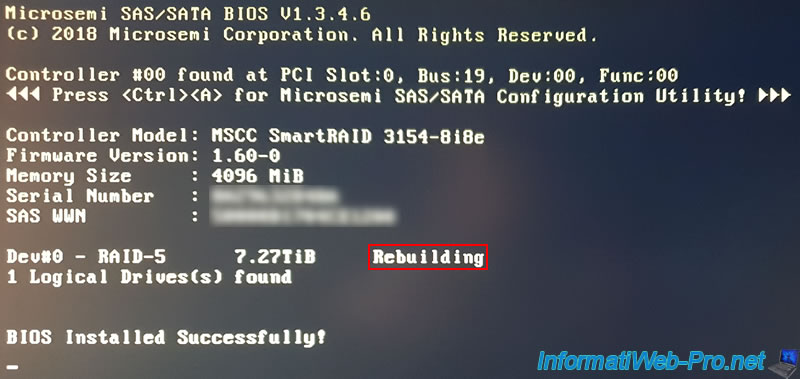
When your computer / server starts up, you will therefore see that your cluster is again being rebuilt (Rebuilding).
However, your data is not at risk since there are already enough hard drives in good state to withstand a hard drive failure.
If you go to the "maxView Storage Manager" web interface during this data reconstruction, you will see that there is an additional Physical Device.
If you look in detail, you will see that there are :
- 4 hard disks : the 2 data disks, the Spare and the new physical disk which is being rebuilt
- the "Other" type disk corresponds to the failed physical disk which is temporarily discarded during the reconstruction of the data on the new disk which replaces it
- 4 physical data disks : the 2 hard disks in good state of your array, the one configured as "Dedicated Spare" and the new disk which is being rebuilt
- 1 unassigned physical drive (Unassigned Drive) : the defective hard drive that has been temporarily discarded since it has been replaced by a new one
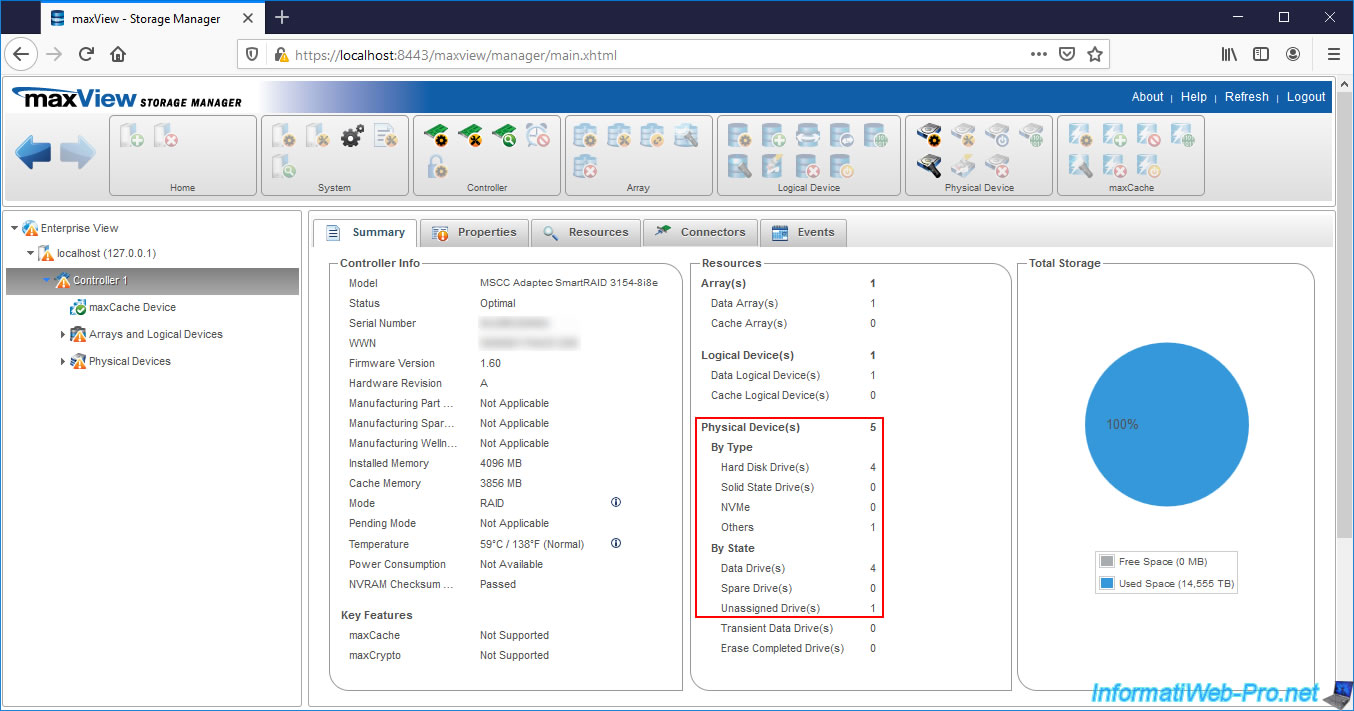
If you look in the resources of your controller, you will see that the failed disk is gone, although it's still temporarily counted in the "Summary" tab.
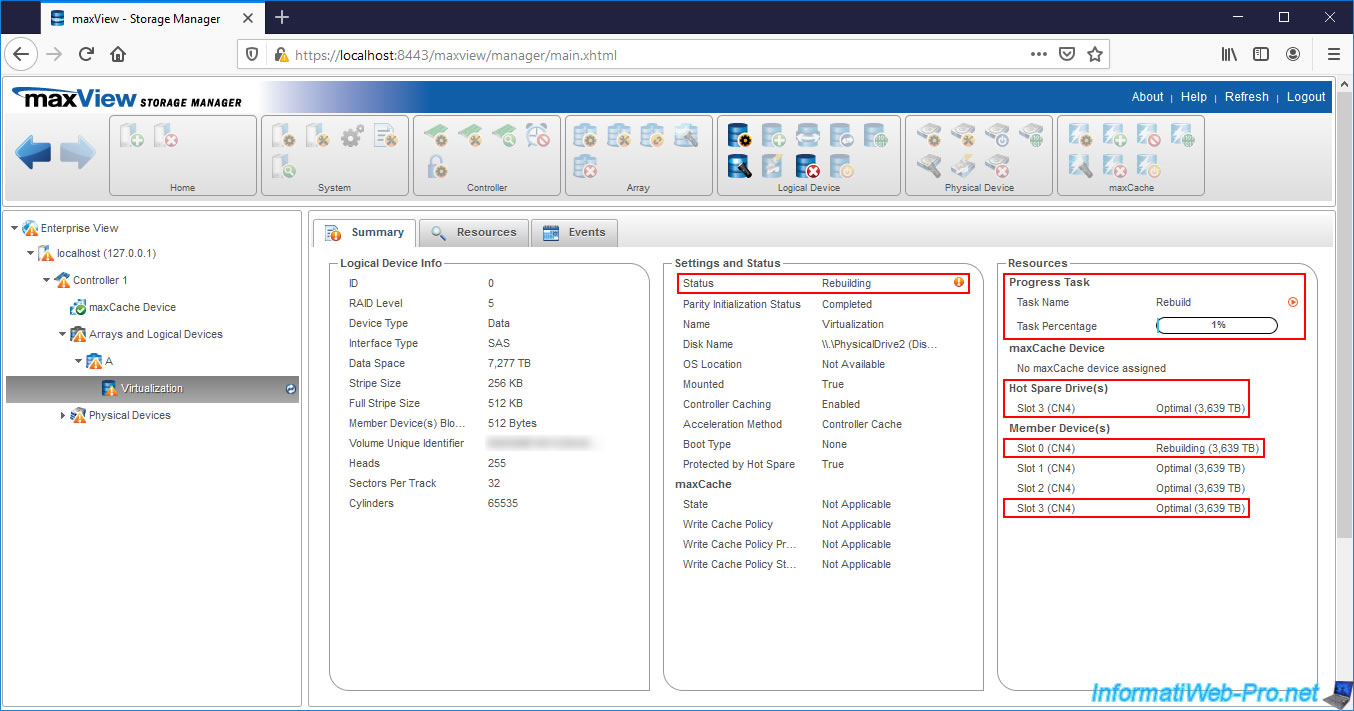
You will also see that the original physical drive (which was replaced) is being rebuilt, so your logical drive is also being rebuilt.
It's the Copyback process that is copying the data from the Spare (the 4th physical disk in the image below) to the physical disk that has been replaced (the 1st physical disk in the image below).

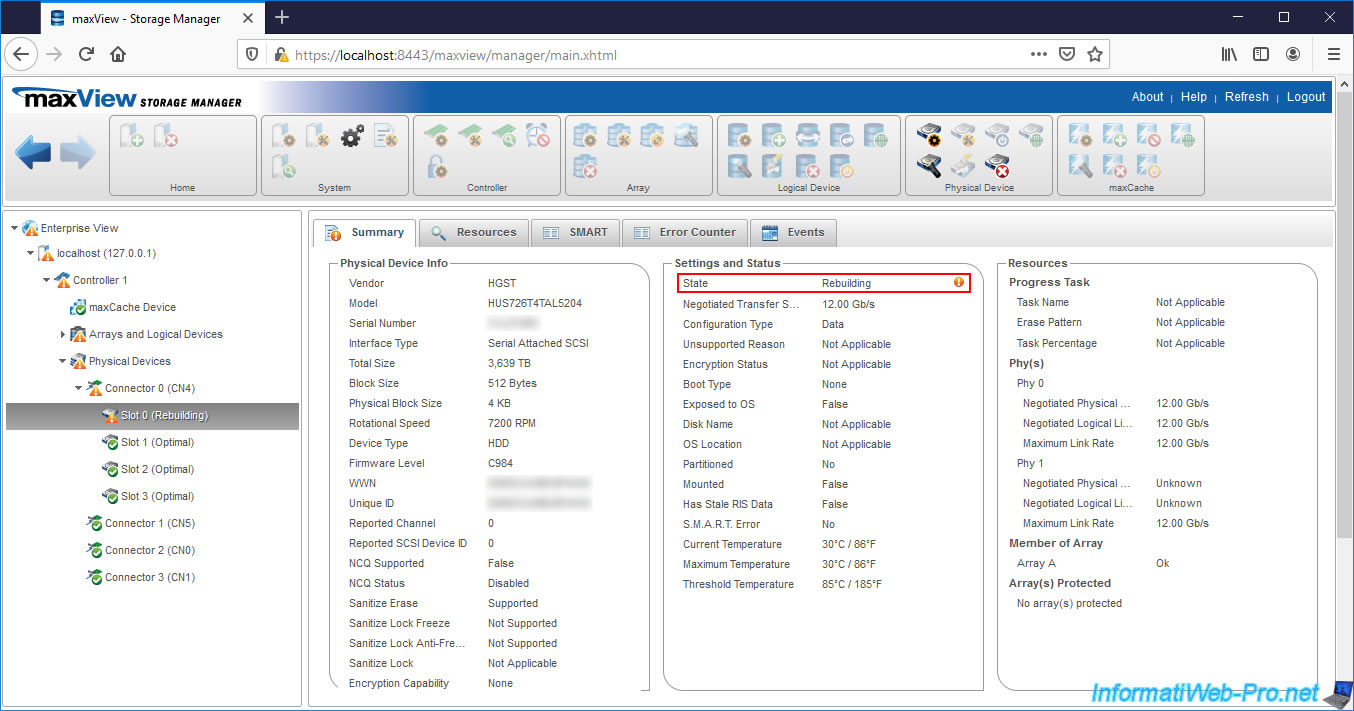
If you select your 1st physical disk, you will see that it's indeed being rebuilt (Rebuilding).
For the 4th physical disk, this is always in "Optimal" status (because it also remained a member of your array during the rebuilding of the original physical disk) and is still configured as Spare.

If you select your logical drive, you will see that it's being rebuilt on the physical disk which has been replaced (in our on Slot 0 - CN4) thanks to the Spare which in our case is connected on Slot 3 - CN4.
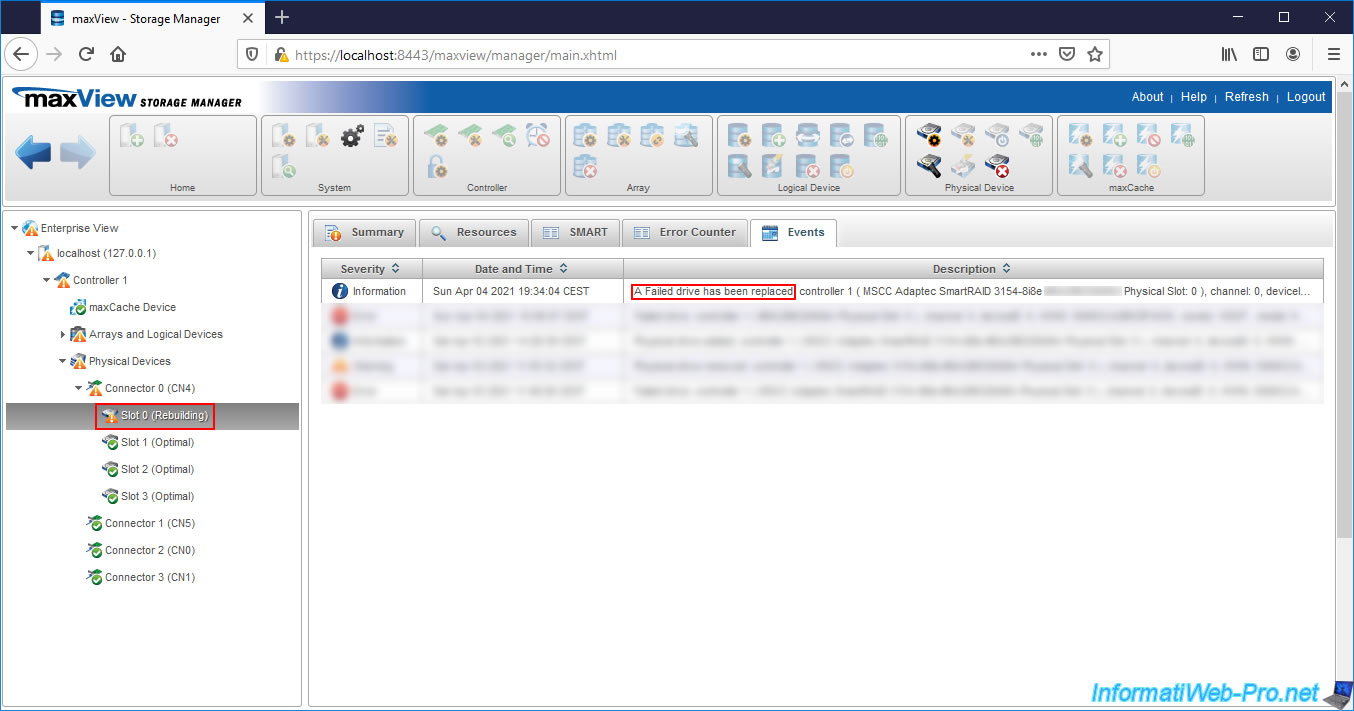
If you look in the "Events" tab of the replaced physical device, you will see the "A Failed drive has been replaced" event.
19. Initialization of parity (following the replaced physical disk rebuilding)
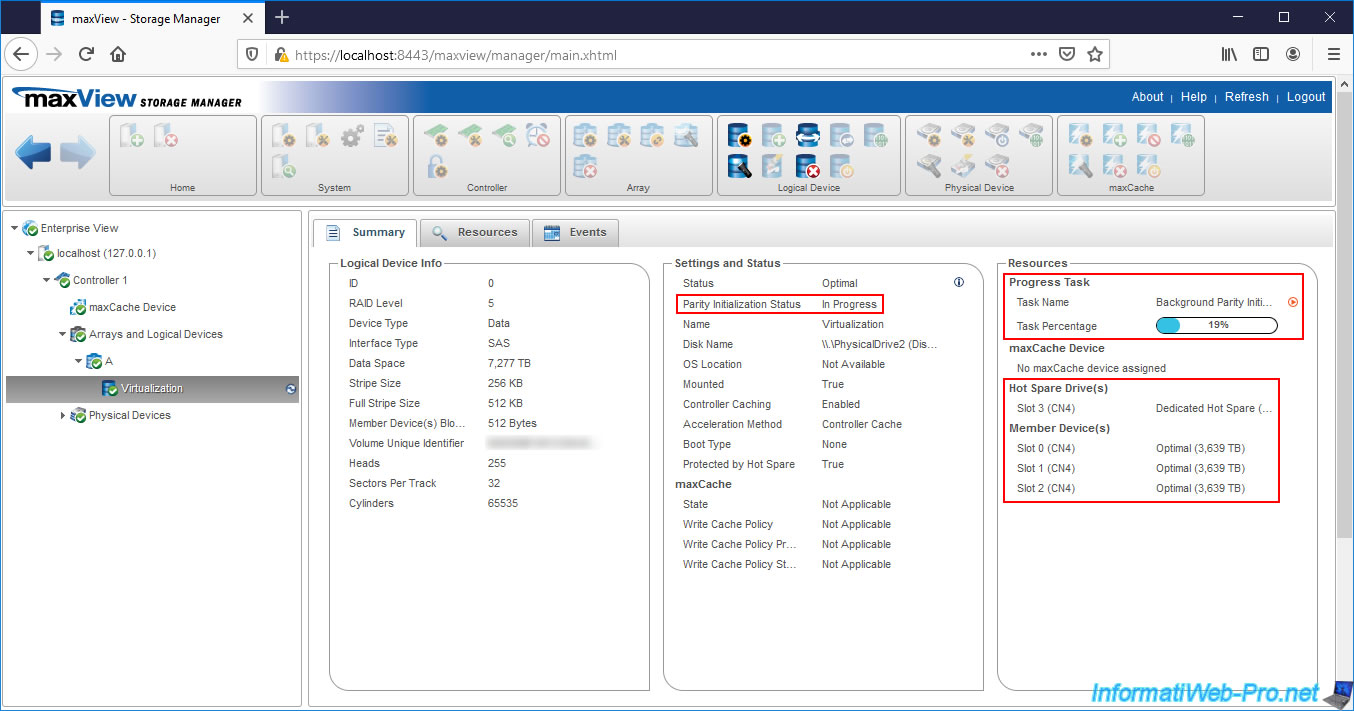
Now that the failed physical drive has been replaced and rebuilt, your controller will again recalculate the parity for your logical drive.
If you look in the right column, you will also notice that your Spare is no longer a member, but only a Hot Spare to continue protecting your logical drive in case a failure occurs again later.
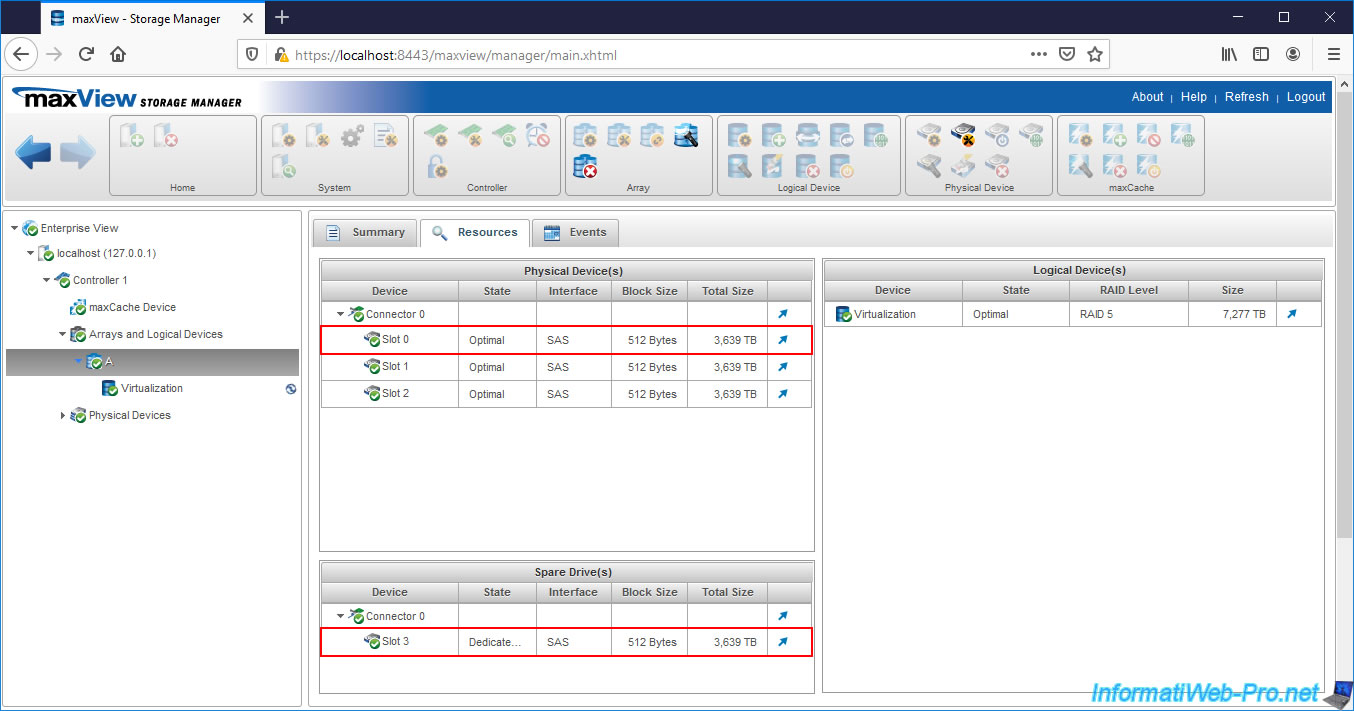
If you select the array affected by the old failure, you will see the resources are back to normal :
- the 3 hard disks composing our RAID 5 are physical disks (= physical disks members of the array)
- the physical disk serving as Spare has become a Spare again and not a simple physical disk (member)
- the status of your logical drive will be returned to "Optimal"
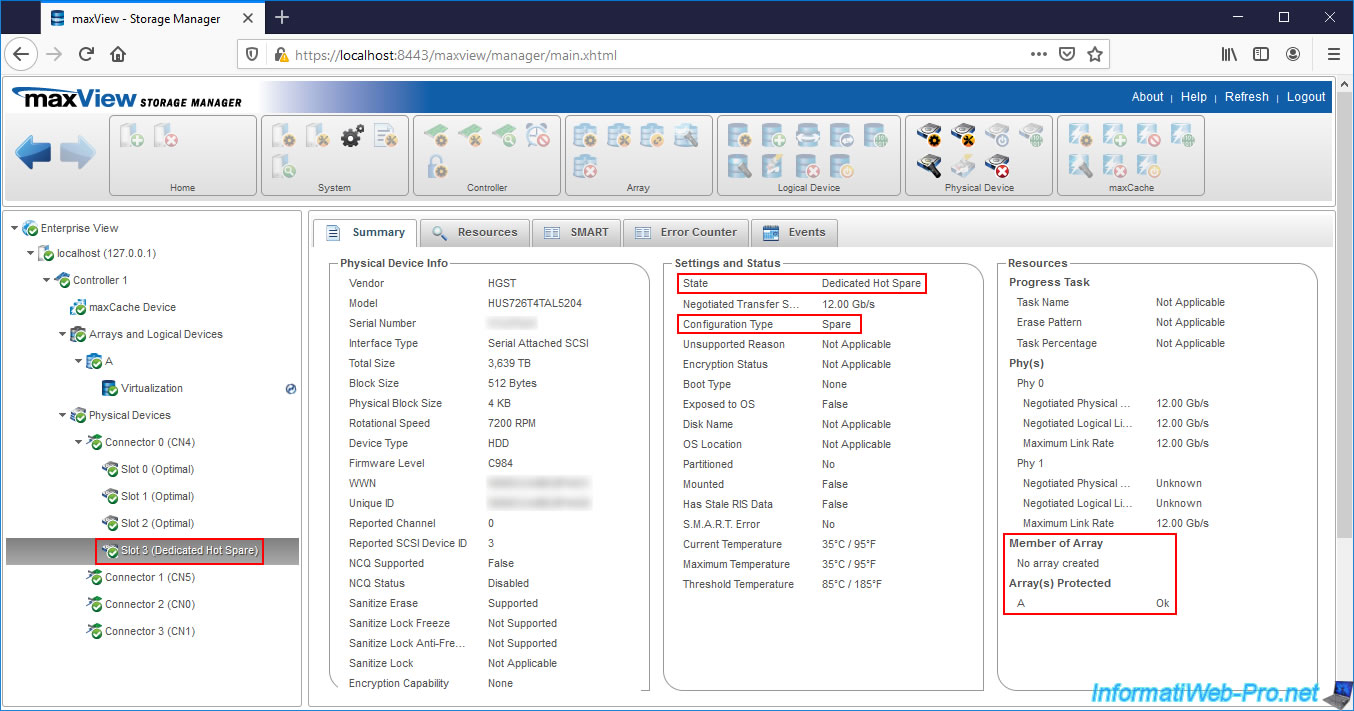
If you select your Spare, you will see that it has become a simple Spare of type "Dedicated Hot Spare" and that it's no longer a member of your array (Member of Array : No array created).
Share this tutorial
To see also
-

RAID 4/20/2022
Adaptec maxView Storage Manager v3 - Create a RAID volume
-

RAID 4/8/2022
Adaptec maxView Storage Manager v3 - Download and boot on USB version
-

RAID 4/13/2022
Adaptec maxView Storage Manager v3 - Installation on Linux
-

RAID 4/15/2022
Adaptec maxView Storage Manager v3 - Manage an Adaptec SmartRAID controller on VMware ESXi 6.7
No comment