- NAS
- Unraid
- 20 May 2026 at 13:19 UTC
-

- 1/2

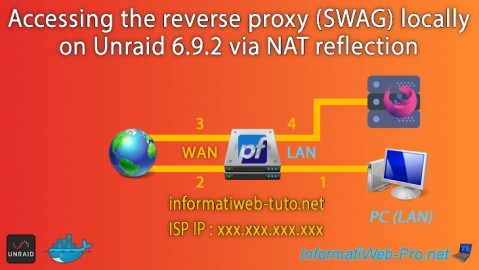
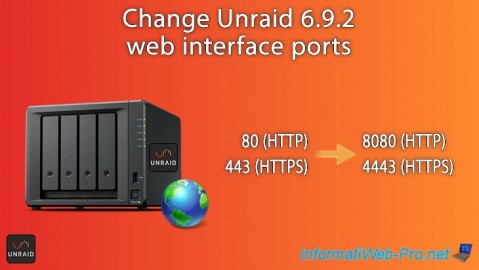
When you install the "SWAG" reverse proxy in Unraid, you configure it to use ports 8080 (for HTTP) and 4443 (for HTTPS), for example, to avoid conflicting with ports 80 (HTTP) and 443 (HTTPS) used by the Unraid web interface.
Furthermore, you've probably already noticed that the domain you're using with SWAG can only be used from the outside (Internet).
Indeed, if you type your domain name into the web browser of a computer on your own local network, the connection simply fails.
This is due to "loopback," which is prohibited by default in routers. In other words, you can't access your public IP address from your own local network.
One way around this problem is to enable NAT reflection on your router (if it supports it, which is generally not the case). However, if you use pfSense as your router, you can enable this "NAT reflection" option. This means you'll be able to use your domain from the Internet and your local network as if nothing had happened.
We've already explained how to use NAT reflection with pfSense in our tutorial: pfSense 2.6 - Enable NAT reflection.
But the purpose of this tutorial is to show you that it also works with SWAG.
- Domain configuration (at OVH)
- Redirect ports 80 (HTTP) and 443 (HTTPS) in your Box
- Redirect ports 80 (HTTP) and 443 (HTTPS) on pfSense
- NAT reflection not working (if pfSense is an intermediate router)
- Split DNS via pfSense's "DNS Overrides" option
1. Domain configuration (at OVH)
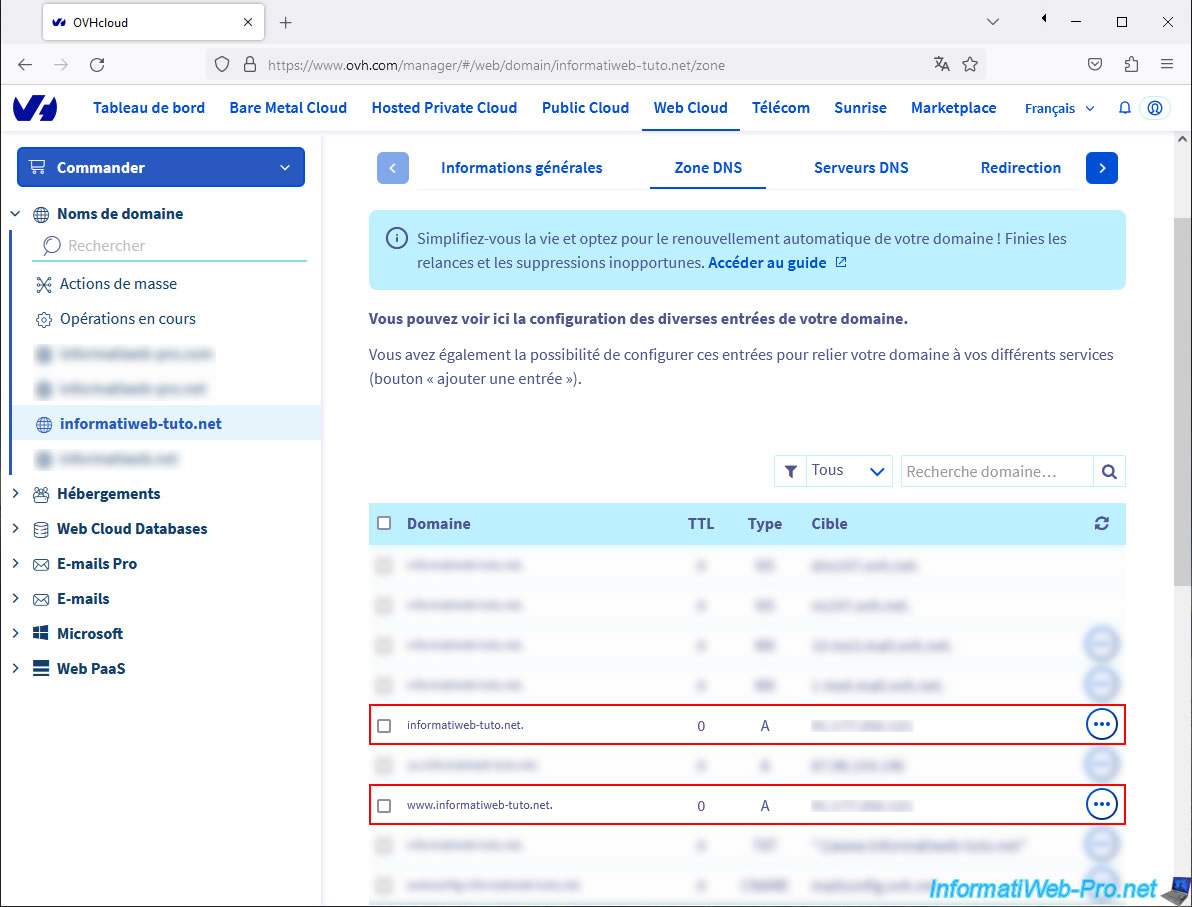
When using the "SWAG" reverse proxy, you need a domain whose root domain, "www" subdomain (optional), and other subdomains (one per service) point to your public IP address (i.e., the one assigned to your box).
In our case, we're using our domain "informatiweb-tuto.net," whose root domain and "www" subdomain point to our public IP address.
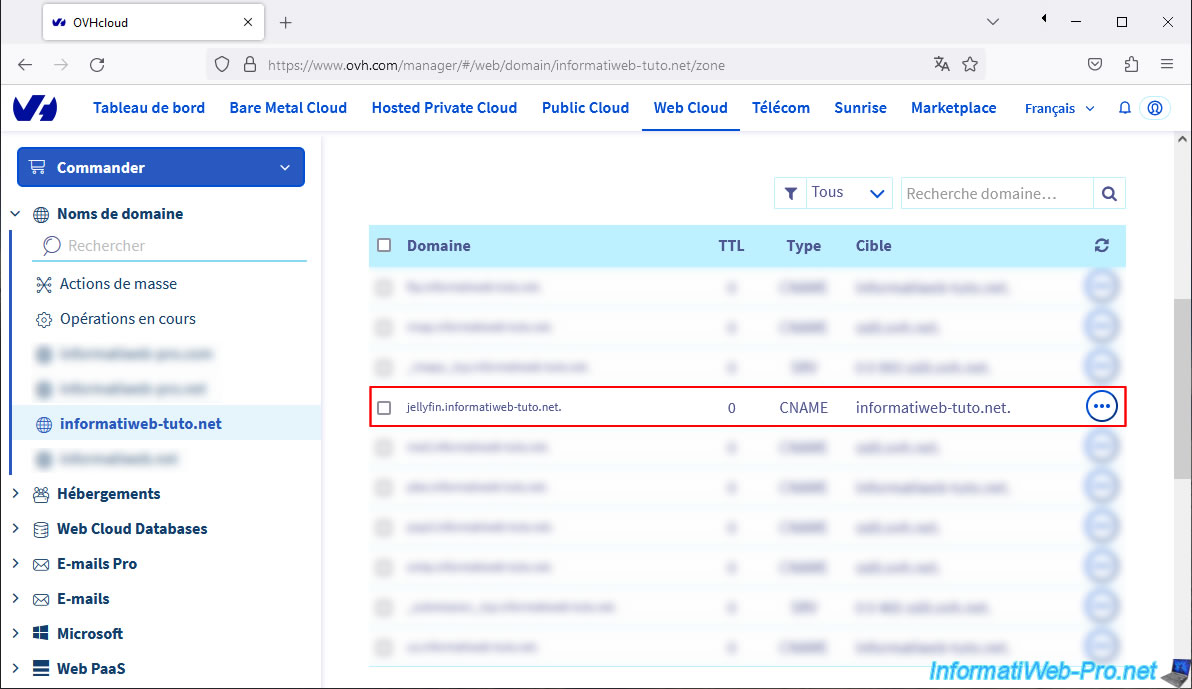
We also pointed the subdomain "jellyfin" (as an example for this tutorial) to the same IP address as our root domain "informatiweb-tuto.net".
2. Redirect ports 80 (HTTP) and 443 (HTTPS) in your Box
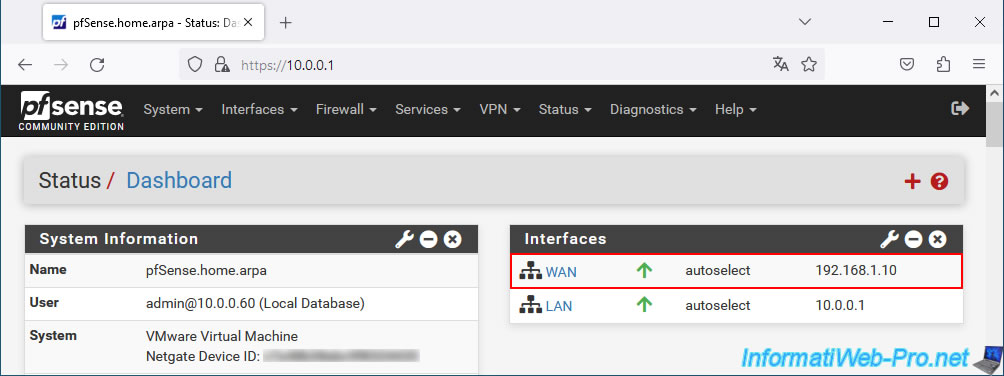
If pfSense is an intermediate router (i.e., one located between your router and your computer), it has a private (local) IP address for its WAN interface.
In our case: 192.168.1.10.
Note: pfSense can be installed on a computer, a virtual machine, or purchased as a physical router from Netgate (the company that manages pfSense).
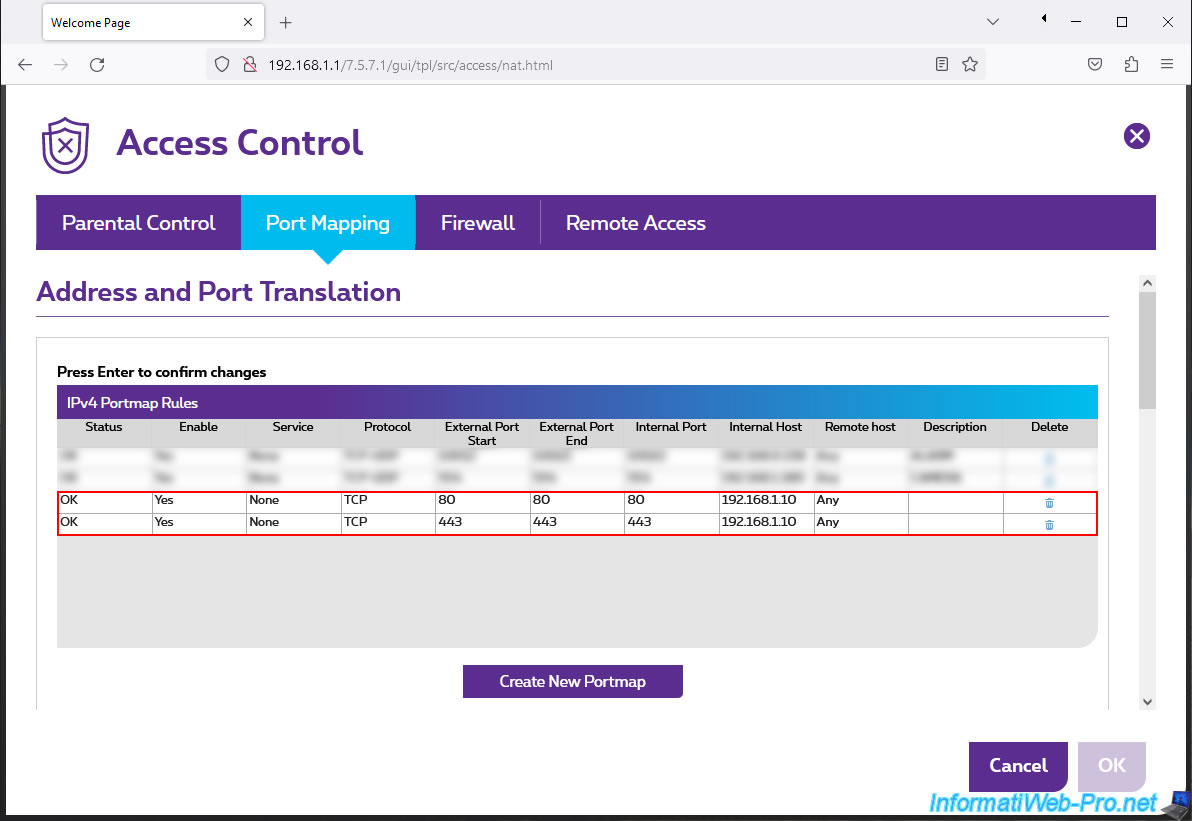
In this case, start by redirecting ports 80 (HTTP) and 443 (HTTPS) to the WAN IP address of your pfSense machine.
In our case, we redirected these two ports to the IP address "192.168.1.10," which corresponds to the IP address assigned to the pfSense WAN interface.
3. Redirect ports 80 (HTTP) and 443 (HTTPS) on pfSense
To ensure that packets arriving from outside reach your reverse proxy (SWAG), you must also create a port forwarding in pfSense.
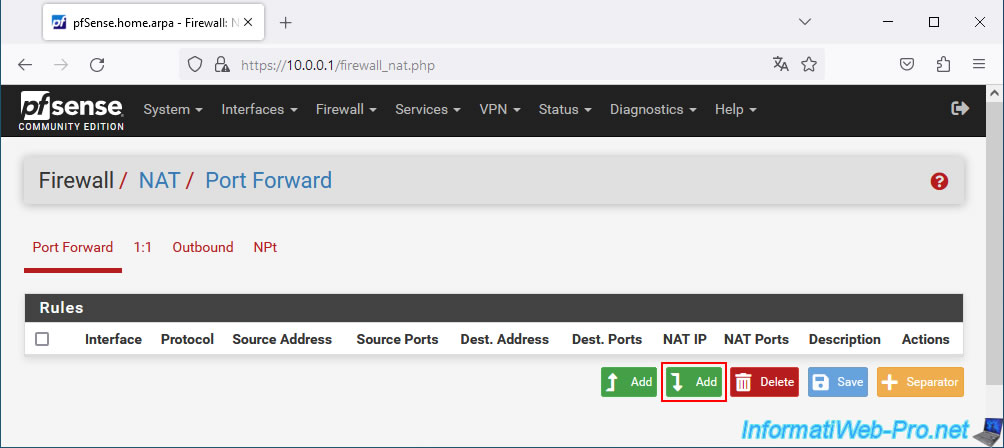
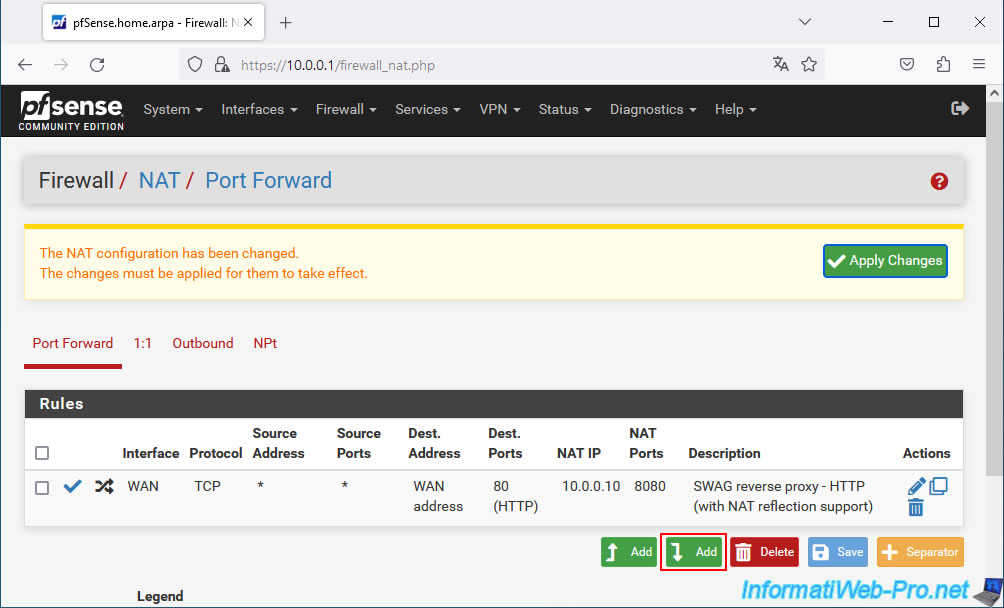
To do this, in the pfSense web interface, go to: Firewall -> NAT.
Then, click the "Add" button.
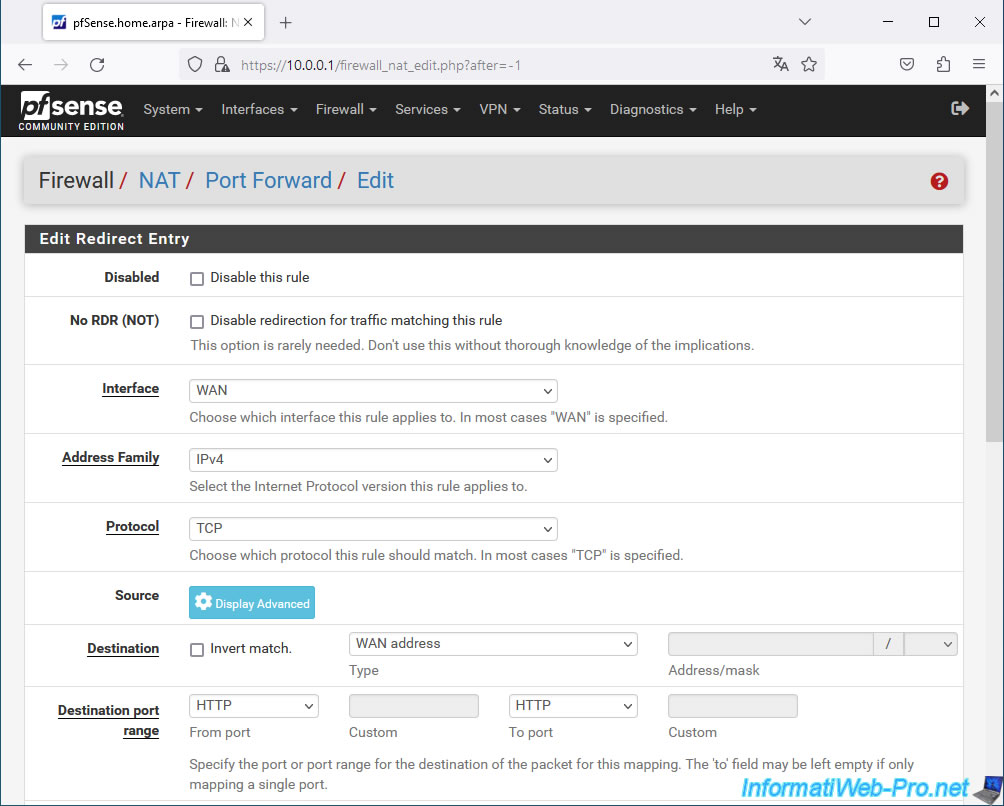
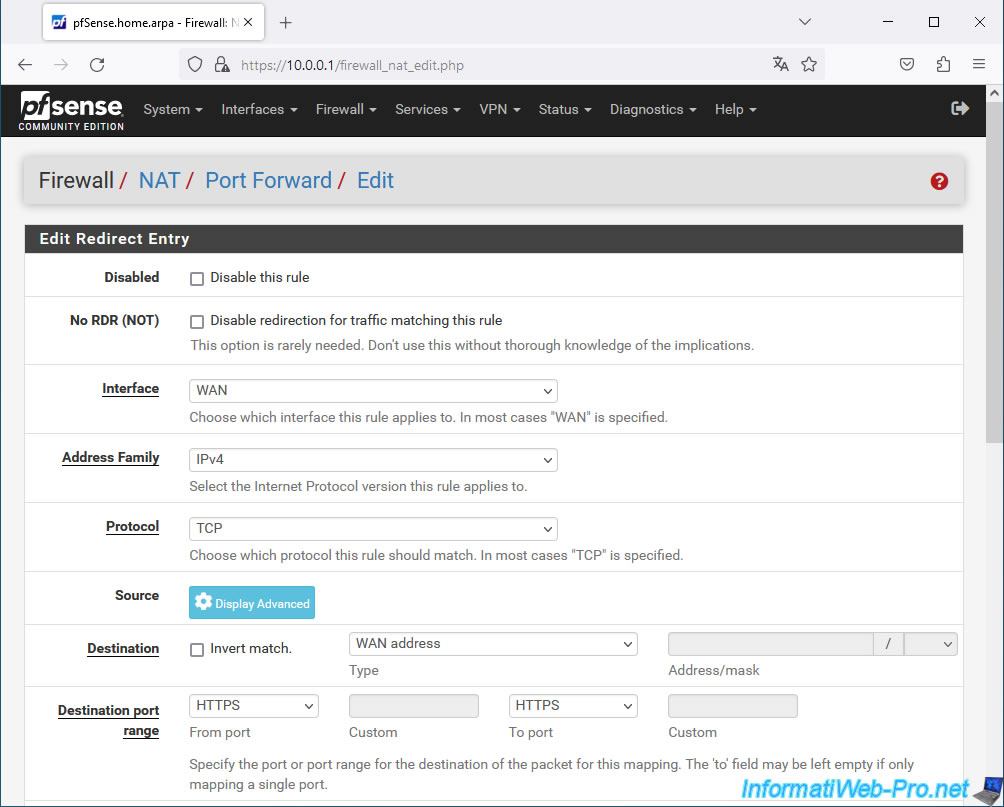
Configure the port forwarding settings like this:
- Interface: WAN.
- Address Family: IPv4.
- Protocol: TCP. The HTTP protocol is TCP.
- Destination: WAN address. The reverse proxy is accessed from the Internet, i.e., via the pfSense WAN interface (after port forwarding from your box).
- Destination port range: HTTP. We use port 80 (HTTP) of the pfSense machine on its WAN interface.
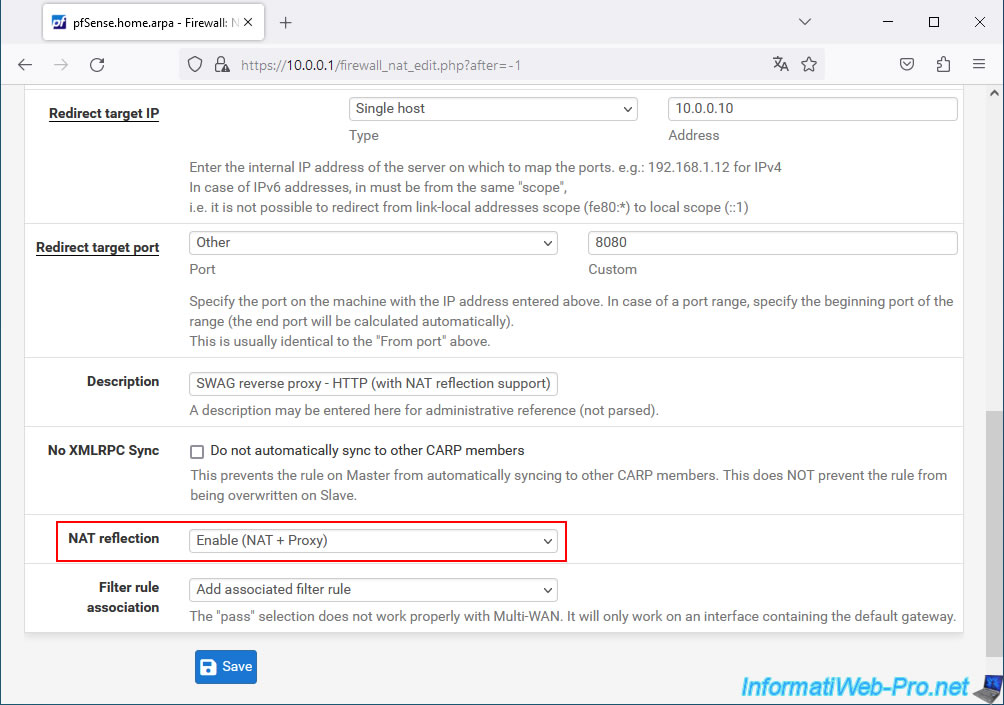
- Redirect target IP: Select "Single host" and specify the IP address of your Unraid server (which is also used by your reverse proxy (SWAG) via Unraid's port mapping between the Docker virtual network and the physical network used by Unraid).
- Redirect target port: Select "Other" and specify port 8080 used as the HTTP port in your SWAG container configuration on Unraid.
- Description: Specify whatever you want.
For example: SWAG reverse proxy - HTTP (with NAT reflection support). - NAT reflection: Select "Enabled (NAT + Proxy)" to enable NAT reflection for this port forwarding.
Then, click Save.
The new port forwarding rule appears.
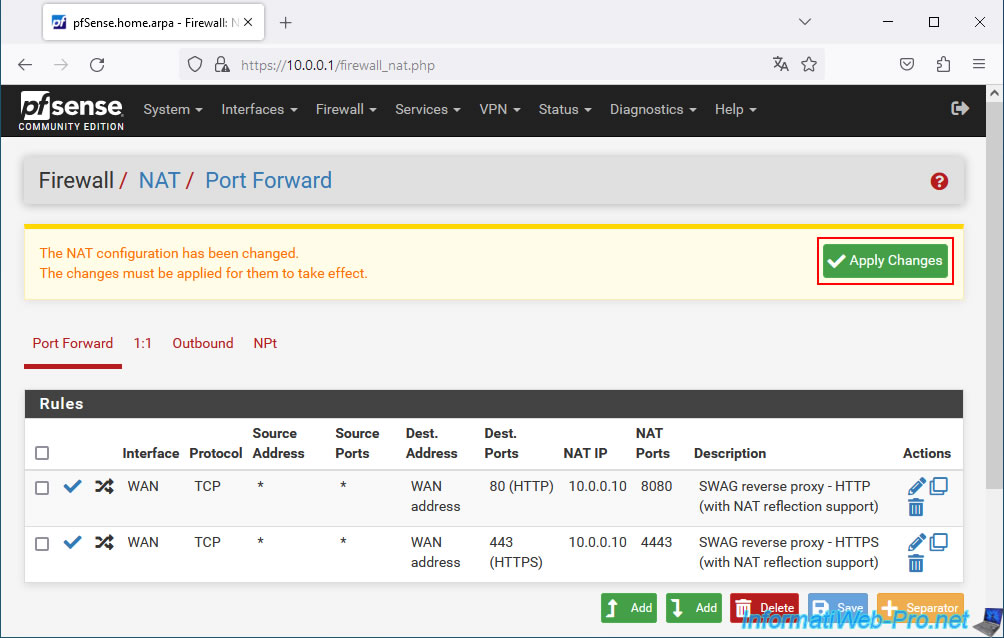
Click "Add" again to also forward port 443 (HTTPS) for SWAG.
Most of the values are the same.
However, this time, select:
- Destination port range: HTTPS (which corresponds to port 443).
- Redirect target port: 4443 (port used as the HTTPS port in your SWAG container configuration on Unraid).
- Description: enter your desired value.
For example: SWAG reverse proxy - HTTPS (with NAT reflection support). - NAT reflection: again, select "Enabled (NAT + Proxy)" to enable NAT reflection for this port forwarding.
Click Save.

The new port forwarding rule for HTTPS also appears.
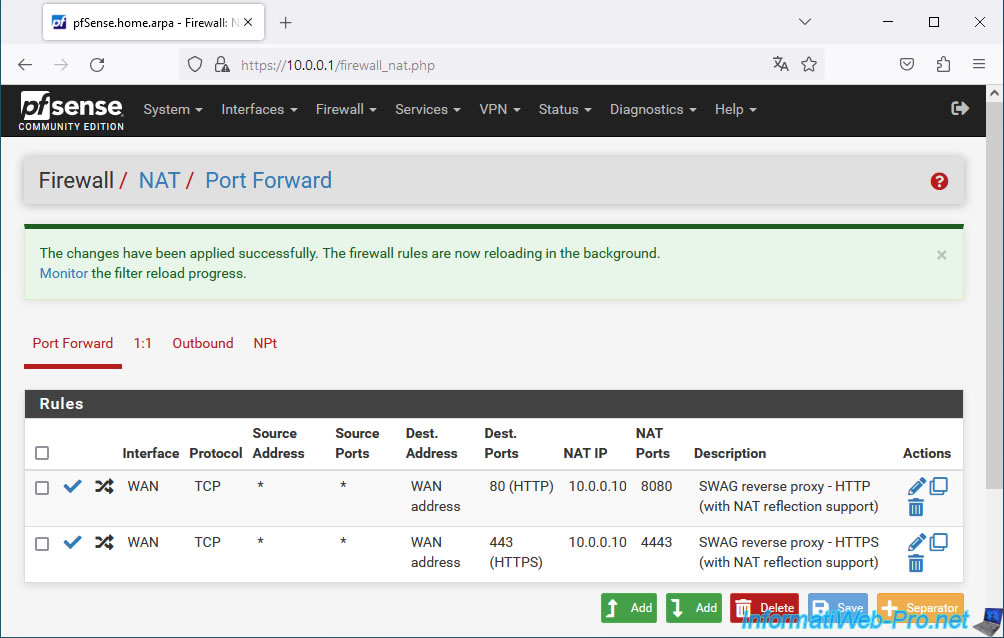
Click "Apply Changes" to apply these new rules.
The new port forwarding rules have been applied.
Share this tutorial
To see also
-
NAS 3/25/2026
Unraid 6.9.2 - Change web interface ports
-
NAS 1/30/2026
Unraid 6.9.2 - Create shares (network / user)
-
NAS 1/1/2026
Unraid 6.9.2 - Disable flash network sharing
-
NAS 7/22/2026
Unraid 6.9.2 - VMs - Backing up a VM manually
You must be logged in to post a comment