- NAS
- Unraid
- 08 April 2026 at 16:39 UTC
-

- 1/5

Thanks to Unraid, you can create your own media server using Jellyfin which is a free and open-source equivalent of Plex.
The advantage of Jellyfin is that video transcoding using a graphics card (GPU) does not require a (paid) license, unlike its competitors: Plex and Emby.
In this tutorial, you will see how to install and configure Jellyfin, but also how to install the prerequisites necessary for using video transcoding via a graphics card (although this is optional).
- Check the compatibility of your NVIDIA graphics card with NVENC (NVIDIA encoder)
- Install the driver for your NVIDIA graphics card on Unraid (for hardware transcoding)
- Monitor your graphics card usage (for hardware transcoding)
- Create shares for your media library
- Install Jellyfin
- Initial setup of Jellyfin
- Software video transcoding (via your processor)
- Use hardware video transcoding via NVIDIA NVENC (using your NVIDIA graphics card)
- Hardware video transcoding (via your graphics card)
- Refresh your Jellyfin library
- Hardware transcoding via NVIDIA NVENC limited to 3 simultaneous sessions
- Remove the 3 session limit from NVENC
1. Check the compatibility of your NVIDIA graphics card with NVENC (NVIDIA encoder)
In this tutorial, we will use an "MSI GeForce RTX 3070 VENTUS 3X OC" graphics card, but the procedure is identical for all NVIDIA graphics cards supporting NVENC (NVIDIA encoder).
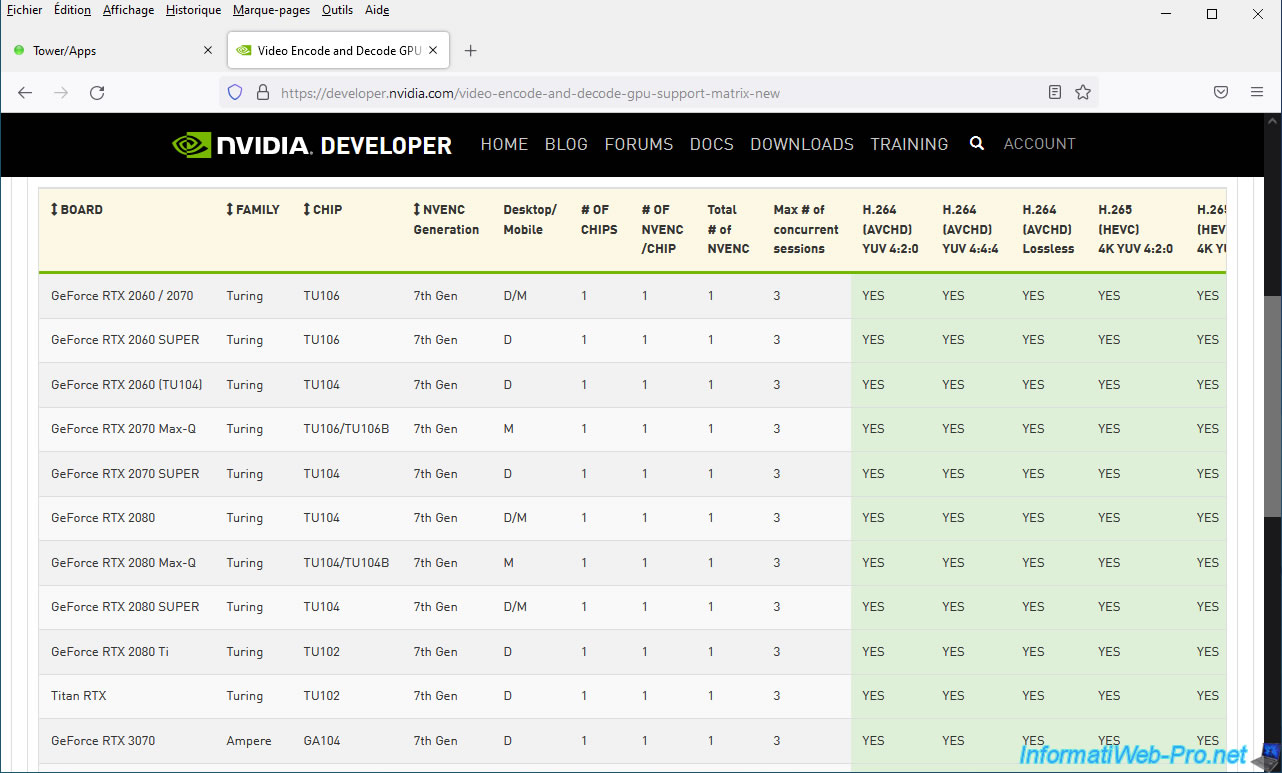
To check if your graphics card supports NVENC, go to the "Video Encode and Decode GPU Support Matrix" page on the official NVIDIA website.
Next, open the "NVENC - Encoding" section and select the type of graphics card:
- Consumer (GeForce): graphics cards intended for individuals. Including the new NVIDIA RTX 2000, 3000, ...
- Professional (NVIDIA RTX / Quadro): graphics cards intended for professionals. These require a license and have the advantage of being able to be sliced virtually to provide different parts of your physical graphics card to multiple virtual machines.
- Server (Data Center)
- DGX
Note that the number of concurrent sessions (or "processes" in the rest of this tutorial) is limited to 3 for "Consumer (GeForce)" graphics cards and is often unlimited for "Professional (NVIDIA RTX / Quadro)" graphics cards. .
This information is displayed in the "Max # of concurrent sessions" column of the NVIDIA table.
2. Install the driver for your NVIDIA graphics card on Unraid (for hardware transcoding)
By default, Jellyfin will use your processor (CPU) for transcoding (converting) videos to a different quality than the original.
If you want to use hardware acceleration (hardware transcoding) using your NVIDIA graphics card (which is free with Jellyfin), you will first need to install the Unraid version of the NVIDIA driver for your graphics card(s).
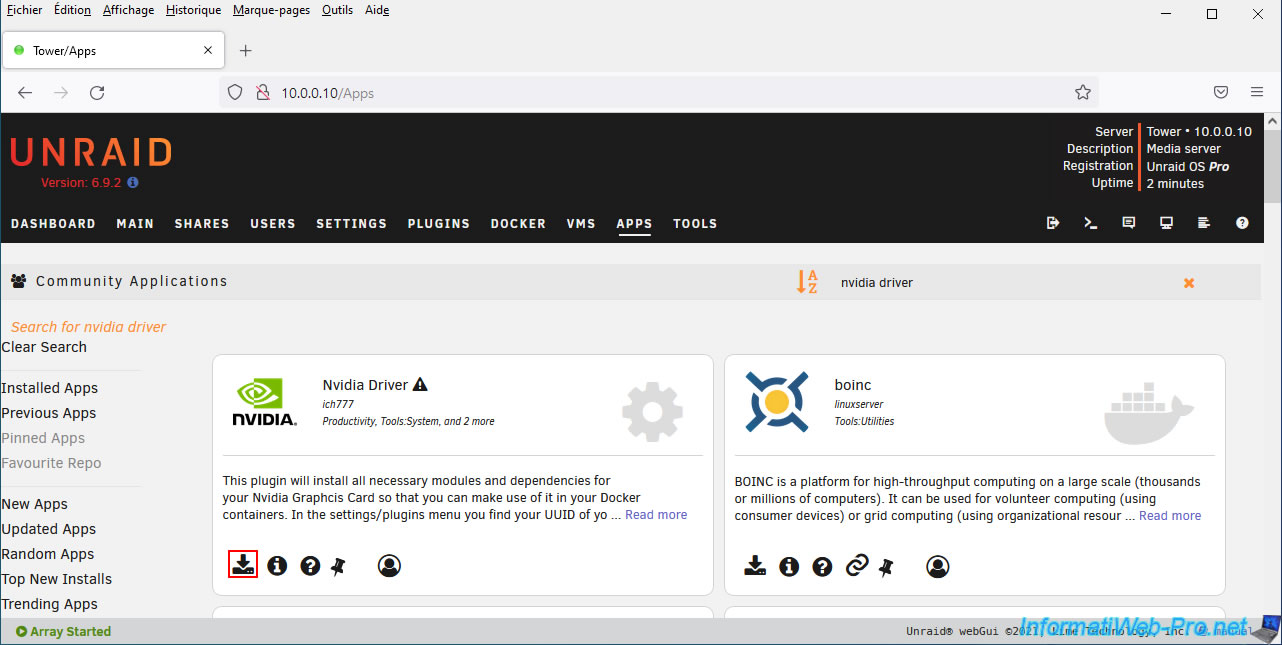
2.1. Download and install the NVIDIA driver on Unraid
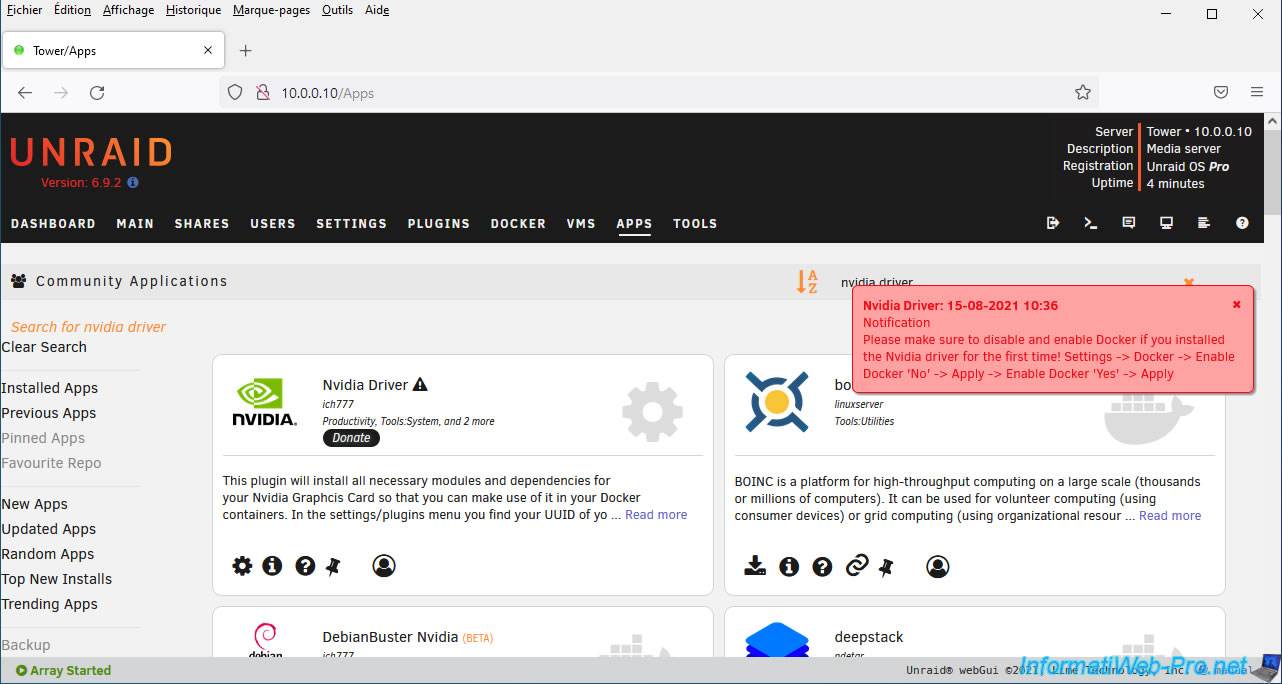
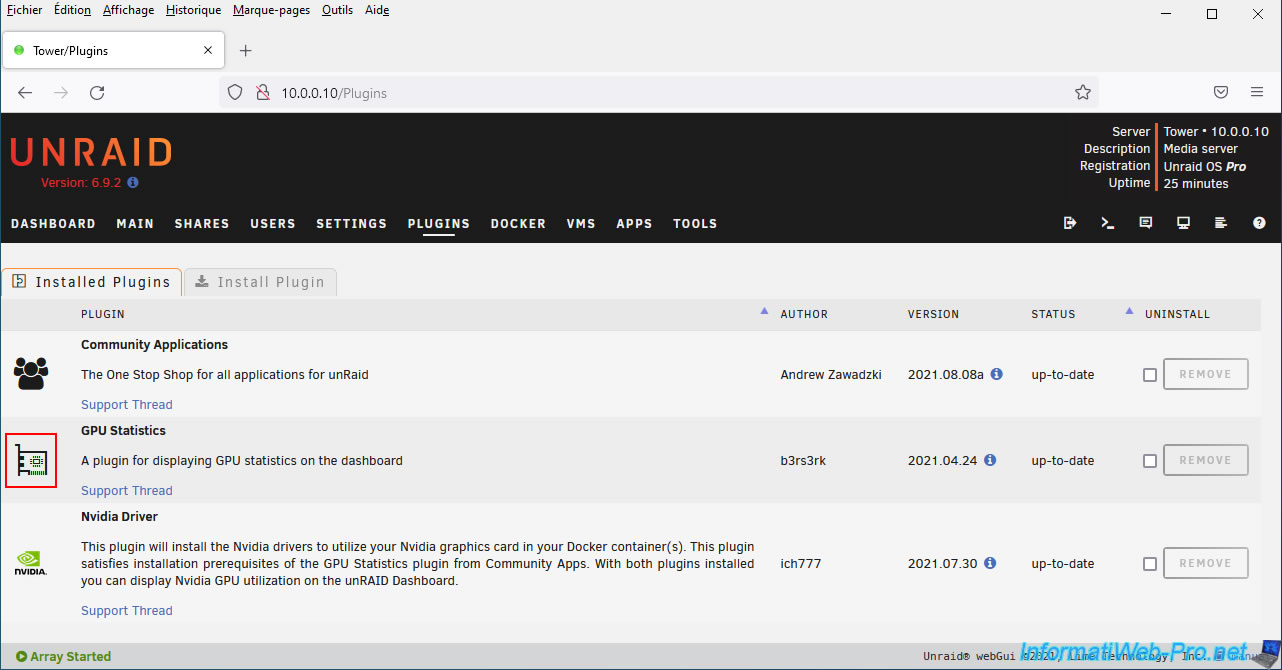
To install the NVIDIA driver for your graphics card on Unraid, you will need to install the "Nvidia Driver" plugin.
To do this, search for and install the "Nvidia Driver" plugin via "Community Applications".
Note that the "Unraid Nvidia" plugin created by "linuxserver" no longer exists. Nonetheless, the "Nvidia Driver" plugin created by "ich777" is a very similar replacement to "Unraid Nvidia".
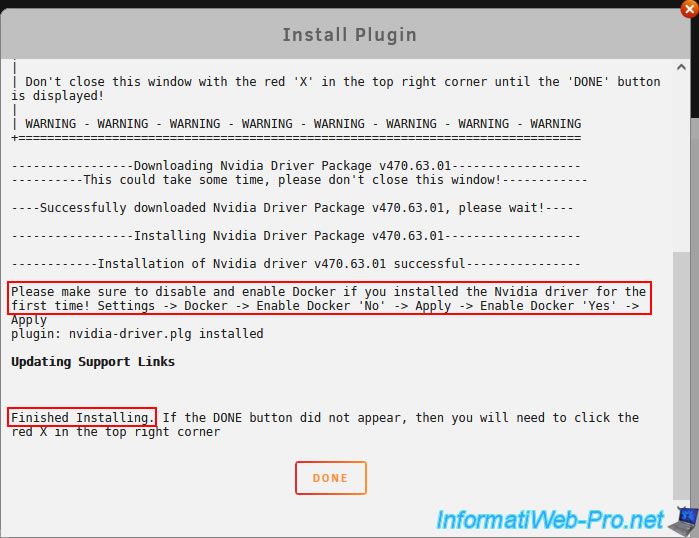
Important : downloading and installing this "Nvidia Driver" plugin will also download the Nvidia driver.
Which may take a few minutes depending on your Internet connection.
However, this will only happen during the first installation of the plugin and not during updates of this "Nvidia Driver" plugin.
It is therefore important to leave this window open until the "Done" button (orange) appears.
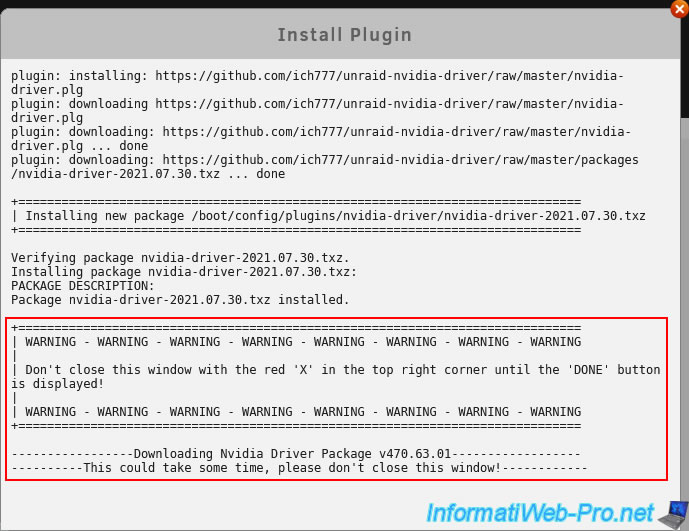
Once the Nvidia driver is downloaded and installed, the "Done" button will appear.
Now click on this "Done" button.
Note that the author of this plugin tells you that you will need to disable and then re-enable Docker if you have just installed the NVIDIA driver for the first time.
2.2. Restart the Docker service
After installing the "Nvidia Driver" plugin, a red notification will be displayed to warn you again that you need to restart Docker following the installation of the NVIDIA driver.
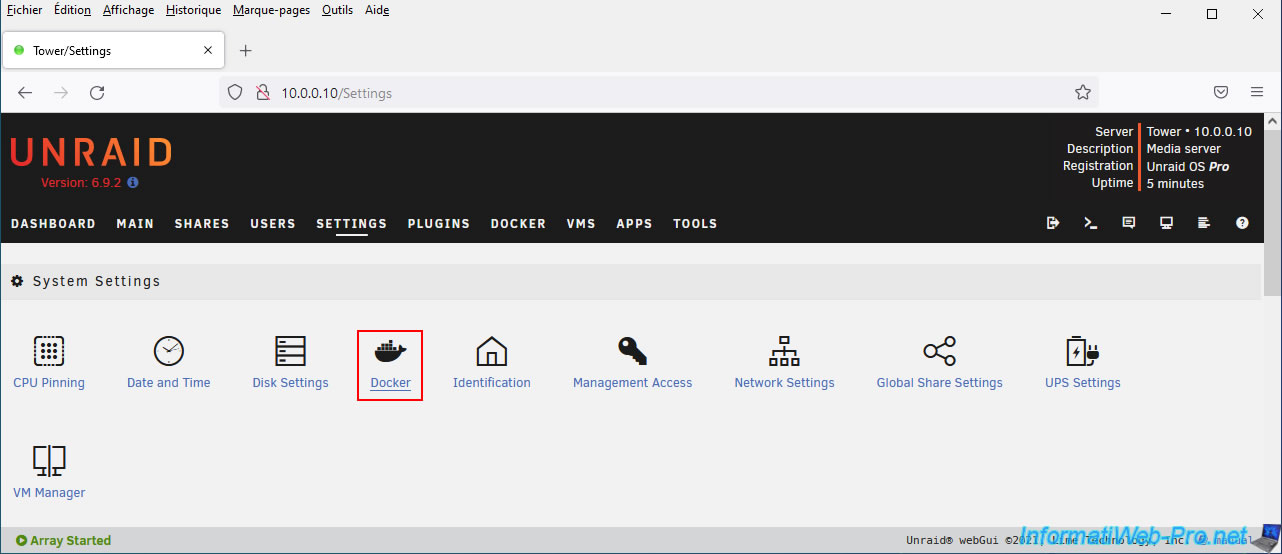
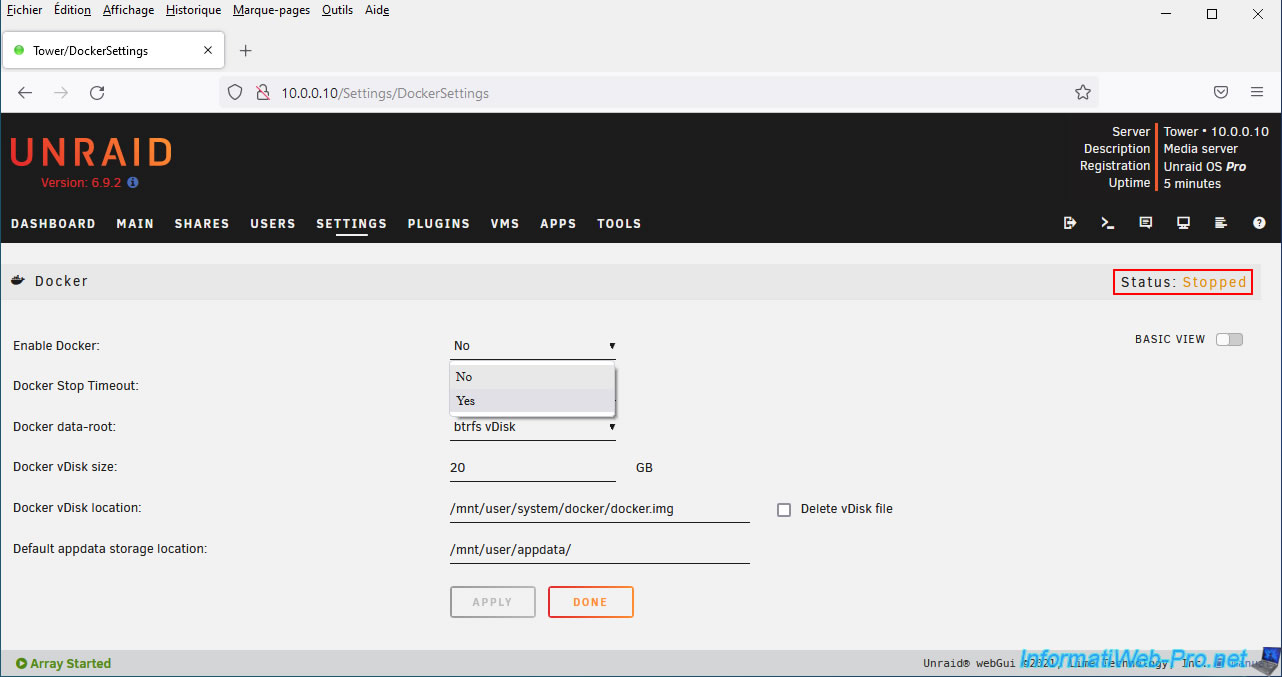
To do this, go to: Settings.
Next, click on Docker.
Change the value of the "Enable Docker" parameter to "No".

Then, click "Apply".
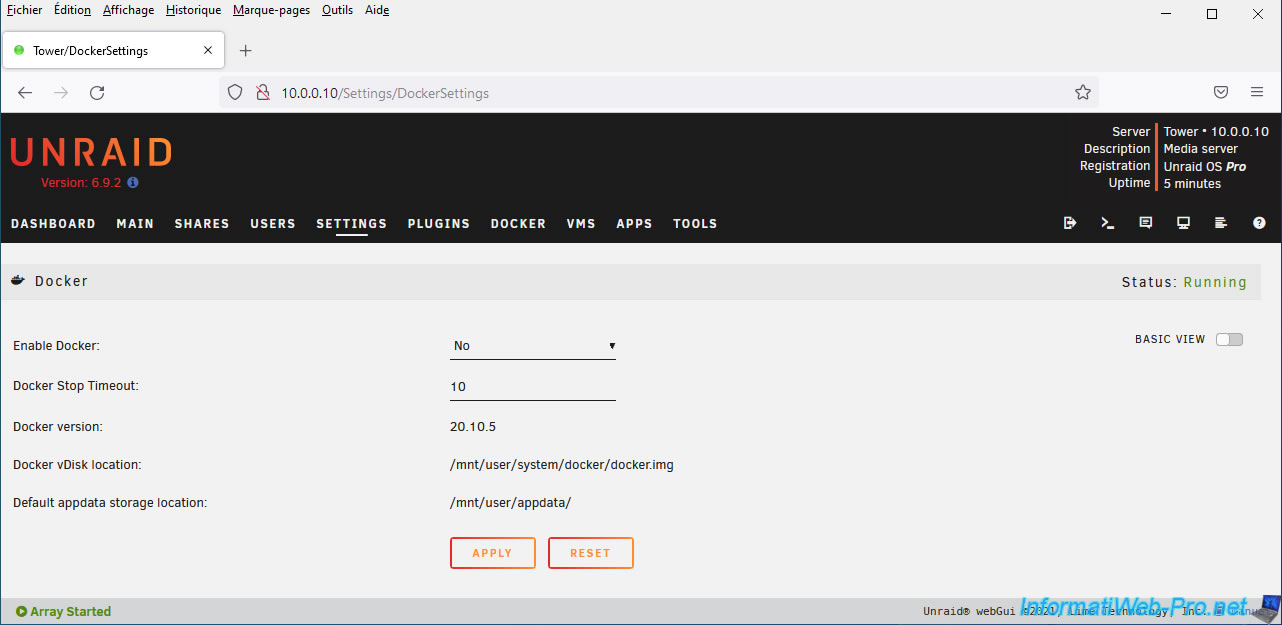
As you can see on the right, Docker is now stopped (status: stopped).
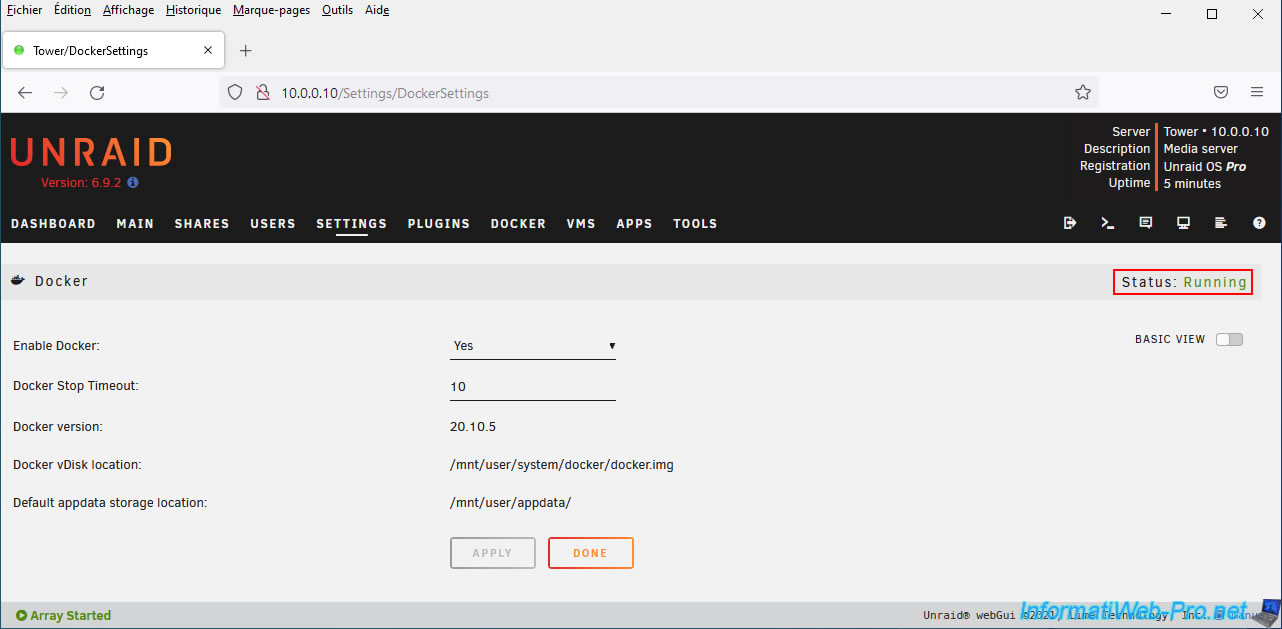
Re-enable Docker by changing "Enable Docker" to "Yes".
Then, click: Apply.

Docker is running again (status: running).
2.3. Information about the installed NVIDIA driver
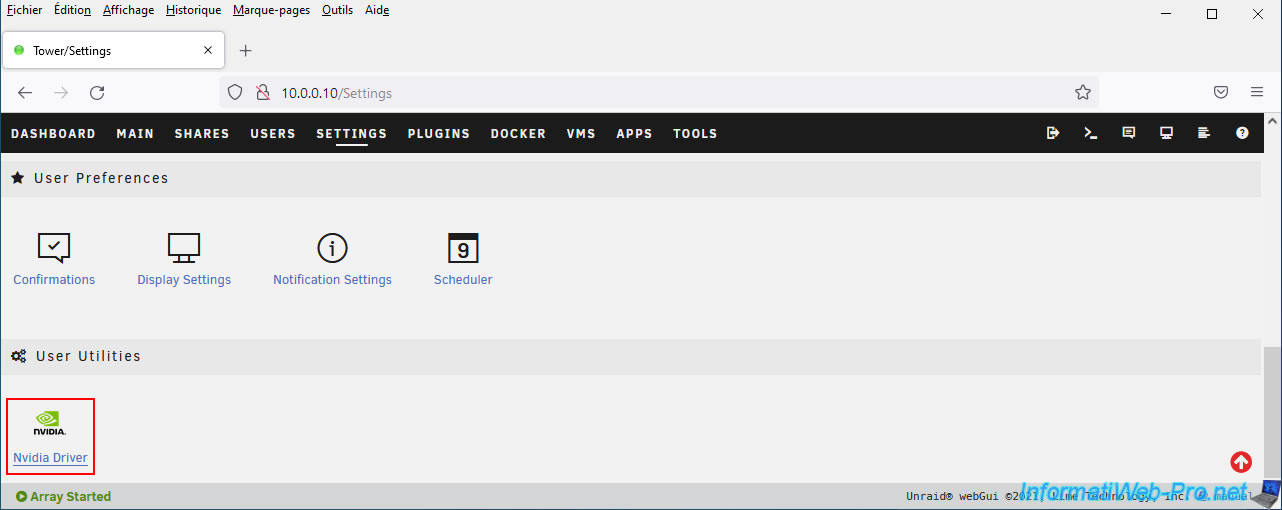
To access information about the NVIDIA driver installed on Unraid, go to: Settings -> Nvidia Driver.
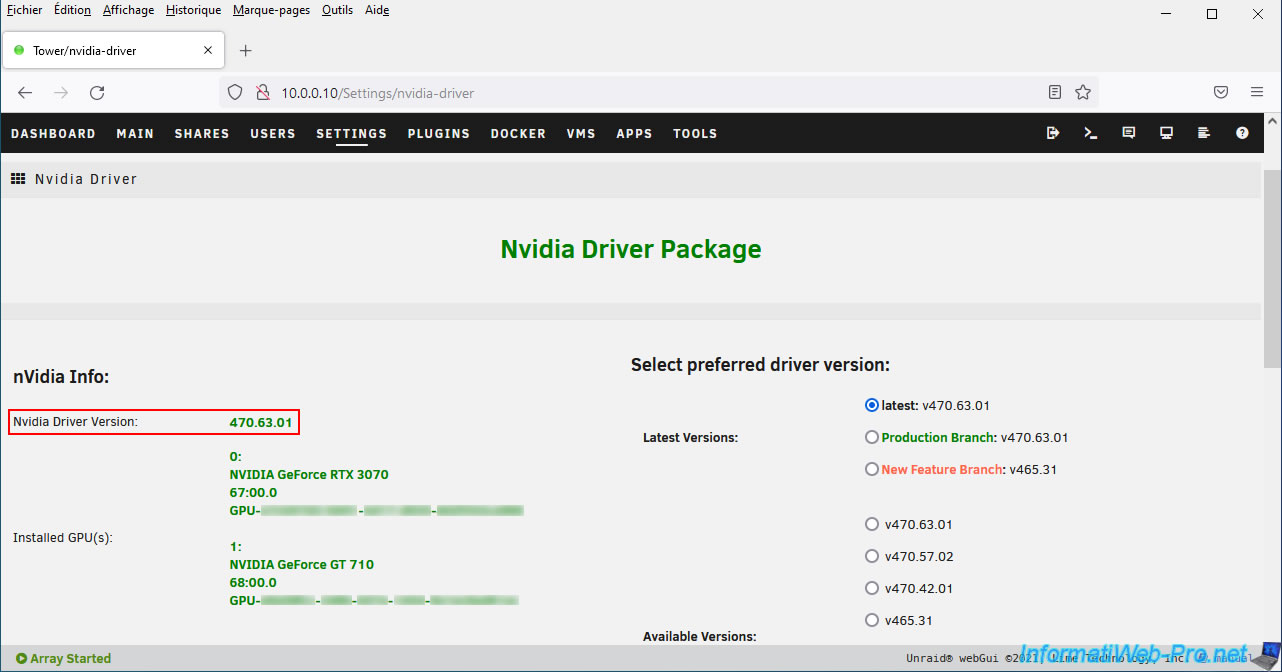
On the "Nvidia Driver Package" page that appears, you will find:
- Nvidia Driver Version: the version of the NVIDIA driver currently installed on your Unraid server.
- Installed GPU(s): the list of NVIDIA graphics cards detected by this plugin in your server with their name (e.g.: NVIDIA GeForce RTX 3070), its PCI slot (e.g.: 67:00.0) and its GPU UUID (GPU-xxxxxxxx-xxxxxx-xxxxxxxx).
On the right, you will have the possibility to choose another version of NVIDIA driver if you wish. However, we advise you to only use production versions to avoid system instabilities.
3. Monitor your graphics card usage (for hardware transcoding)
To ensure that Jellyfin is using your graphics card for video transcoding and not your processor, you can install the "GPU Statistics" plugin.
With this, you will see the overall usage percentage of your graphics card, as well as some of its features (including hardware encoding/decoding).
3.1. Install the plugin: GPU Statistics
Search for and install the "GPU Statistics" plugin from "b3rs3rk" via "Community Applications".
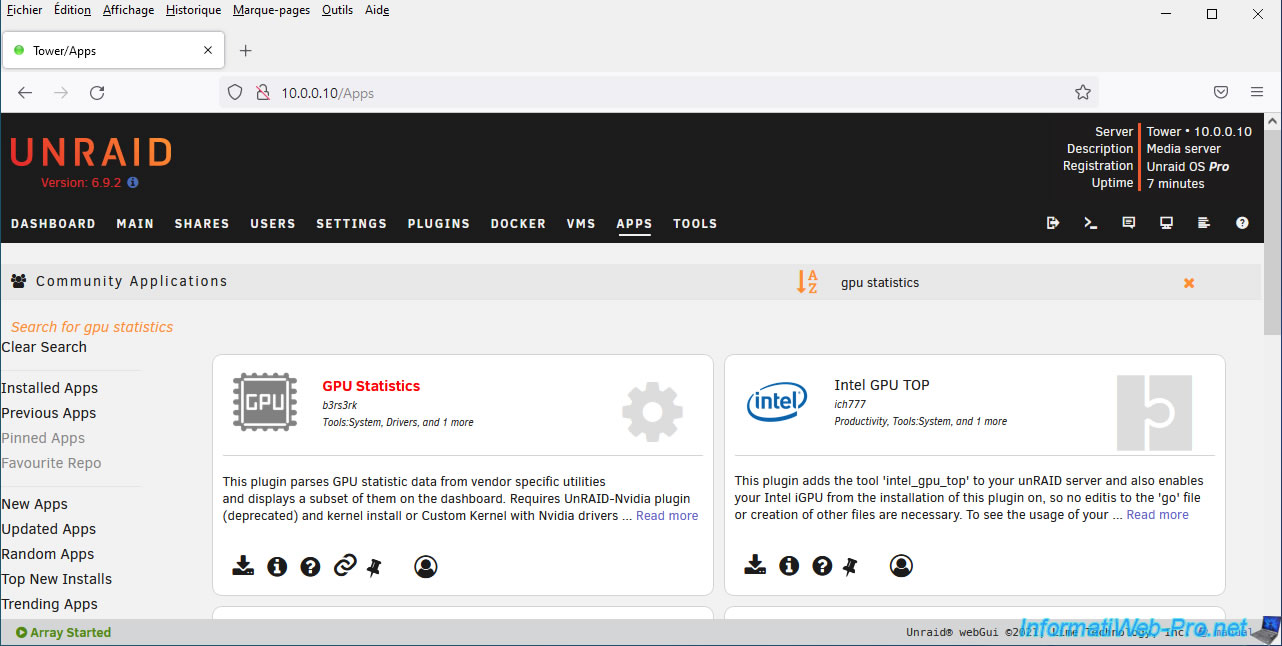
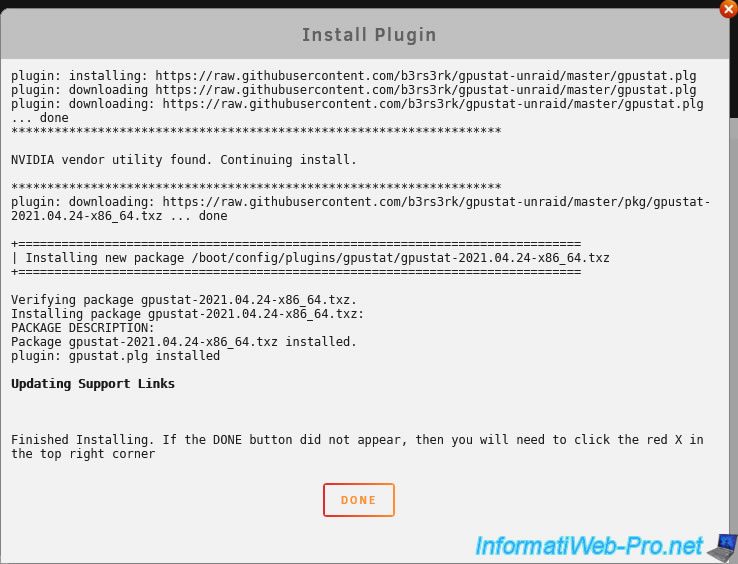
Wait while this "GPU Statistics" plugin downloads and installs.
3.2. Configure the plugin: GPU Statistics
To configure the "GPU Statistics" plugin and in particular choose which graphics card you want to monitor, go to: Settings -> GPU Statistics.
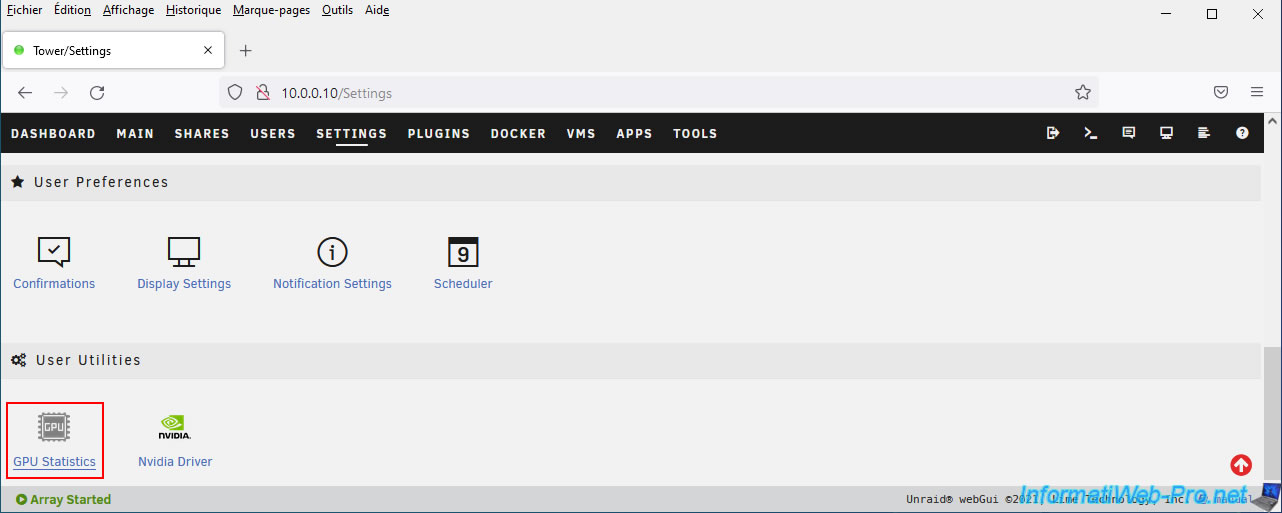
The "GPU Statistics" page appears.
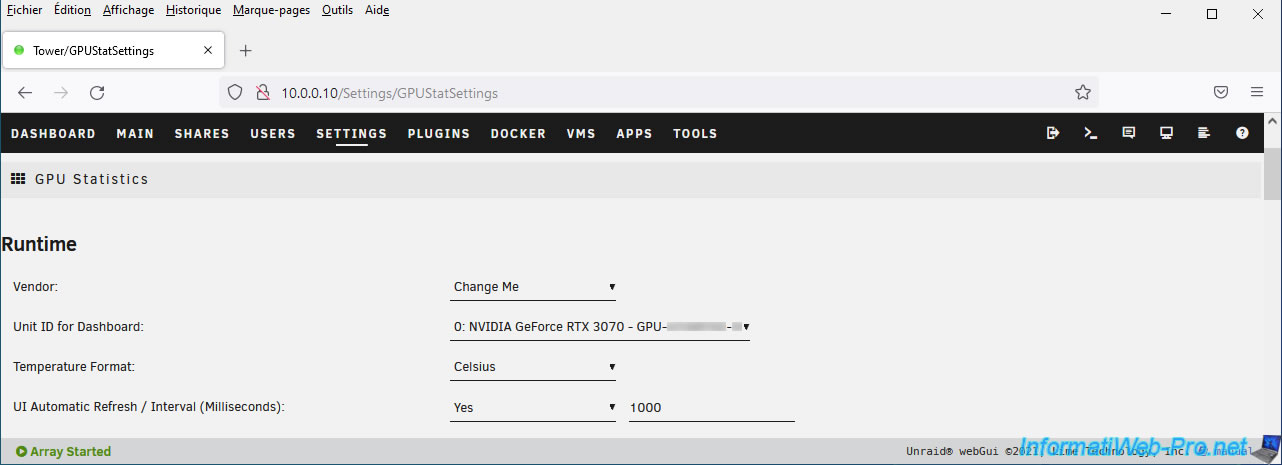
To get started, select "Vendor: NVIDIA".
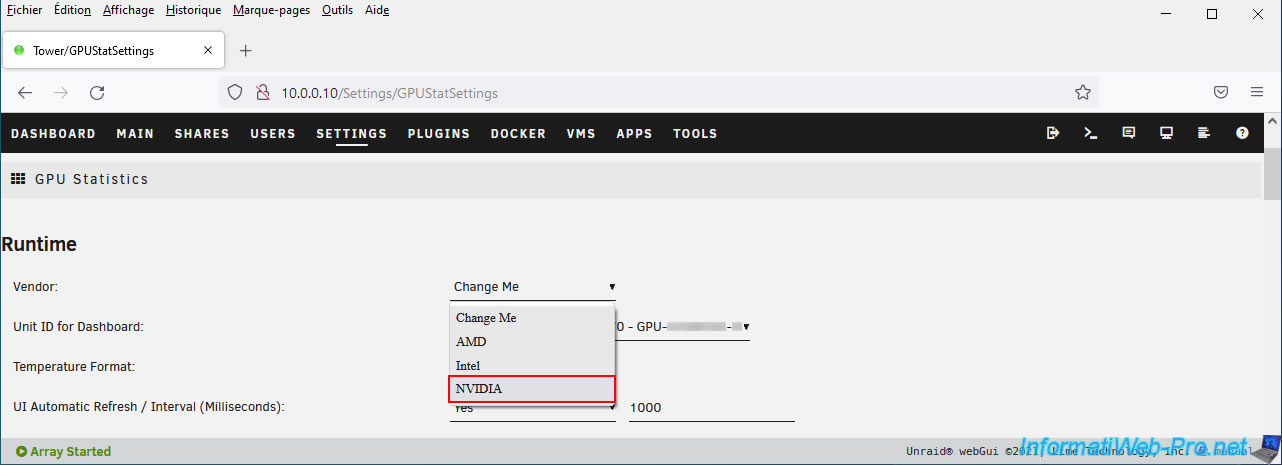
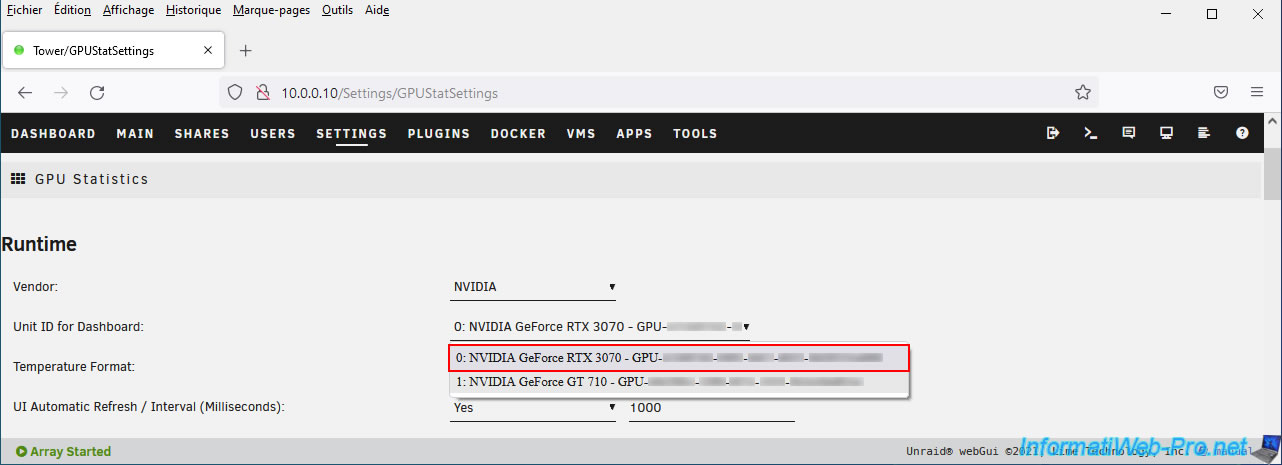
Next, from the "Unit ID for Dashboard" list, select the graphics card you will use for hardware transcoding via Jellyfin.
In our case, our "NVIDIA GeForce RTX 3070" graphics card.
Note that the "GPU-xxxxxxxx-xxxxxx-xxxxxxxx" identifier behind the name of your graphics card corresponds to its UUID.
This UUID will be needed when configuring the "Jellyfin" container if you want to use hardware transcoding.
But, we'll come back to that later.
Then click: Apply.
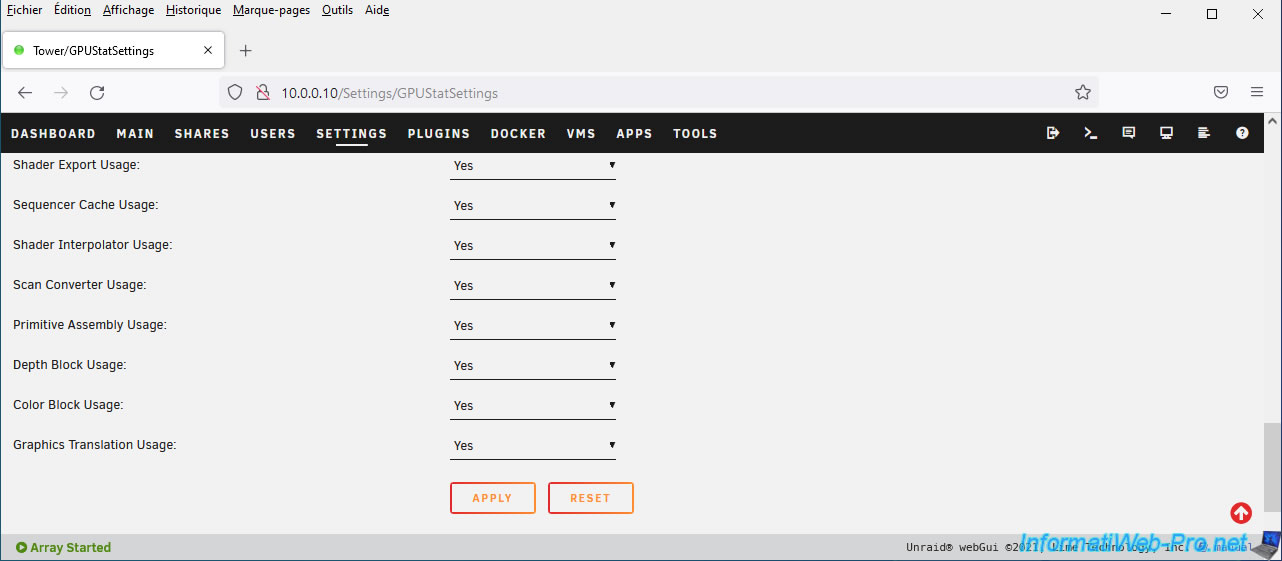
The "GPU Statistics" plugin appears in the list of plugins.
Share this tutorial
To see also
-
NAS 3/25/2026
Unraid 6.9.2 - Change web interface ports
-

NAS 7/8/2026
Unraid 6.9.2 - Docker - Install a password manager (Vaultwarden)
-
NAS 3/18/2026
Unraid 6.9.2 - Fixing common problems
-
NAS 6/17/2026
Unraid 6.9.2 - SWAG - Access Nextcloud via reverse proxy and personal domain
You must be logged in to post a comment