Install a media server (Jellyfin) with hardware transcoding on Unraid 6.9.2 via Docker
- NAS
- Unraid
- 08 April 2026 at 16:39 UTC
-

- 4/5

7. Software video transcoding (via your processor)
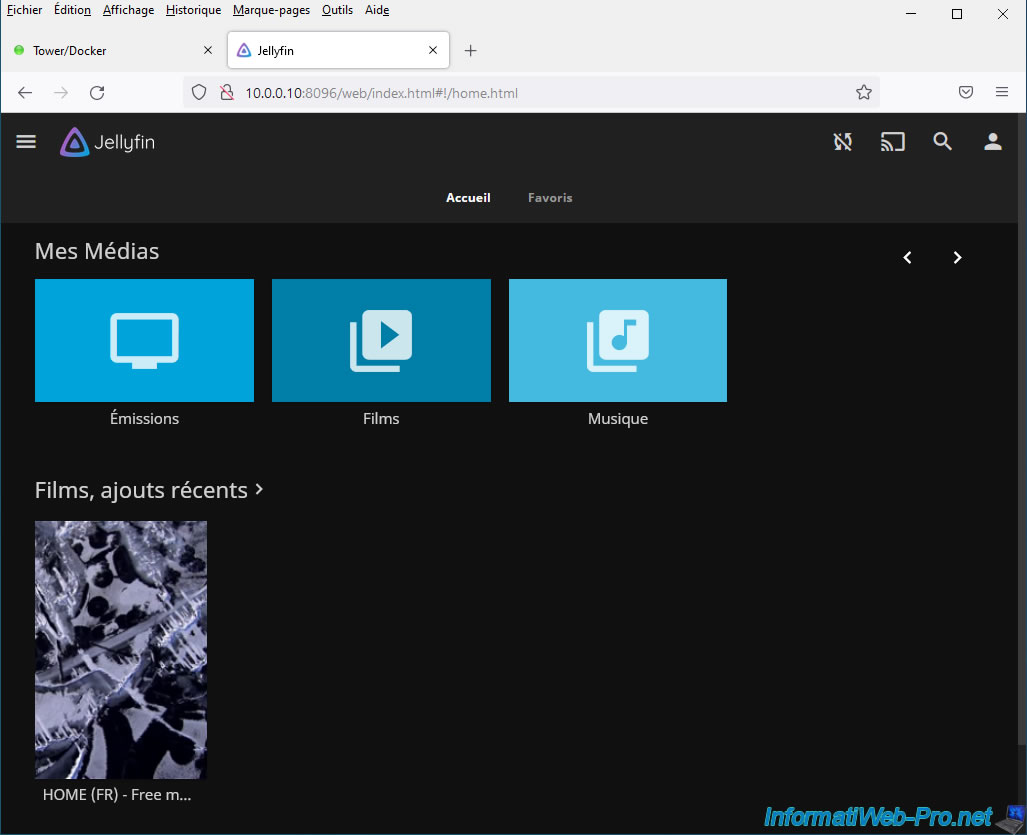
Thanks to Jellyfin, you will be able to dynamically convert (transcode) your videos into other qualities.
To do this, choose a film and start playing it.
Note that the film used in this tutorial is free. The goal is to avoid legal problems.
The video player appears.
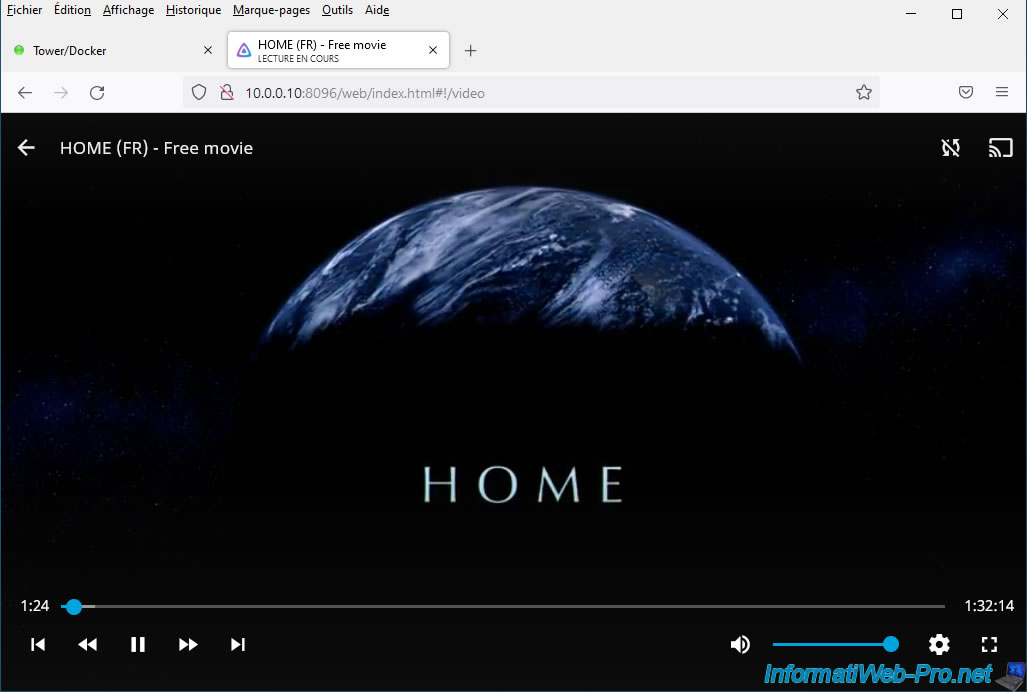
To play your favorite movie in a quality other than the original, hover over the video to reveal the controls and click the gear icon.

Click on: Quality.
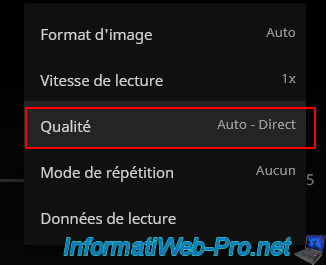
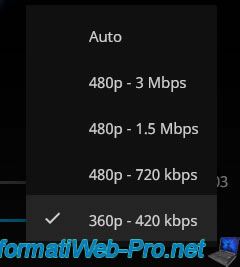
Select the desired quality (other than "Auto").
Leave the video playing and open your Unraid server dashboard in a new tab.
As you can see, this is the processor (CPU) that is currently in use.
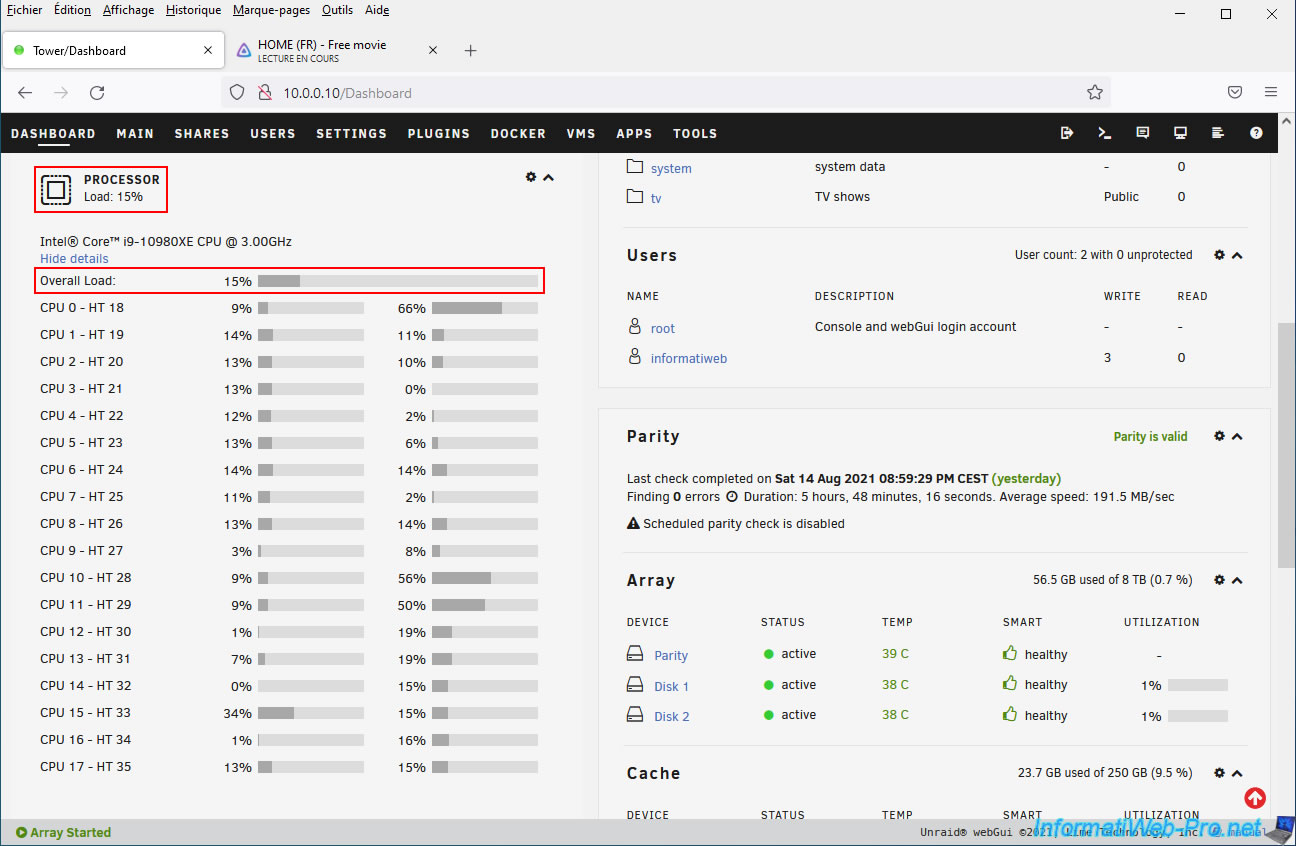
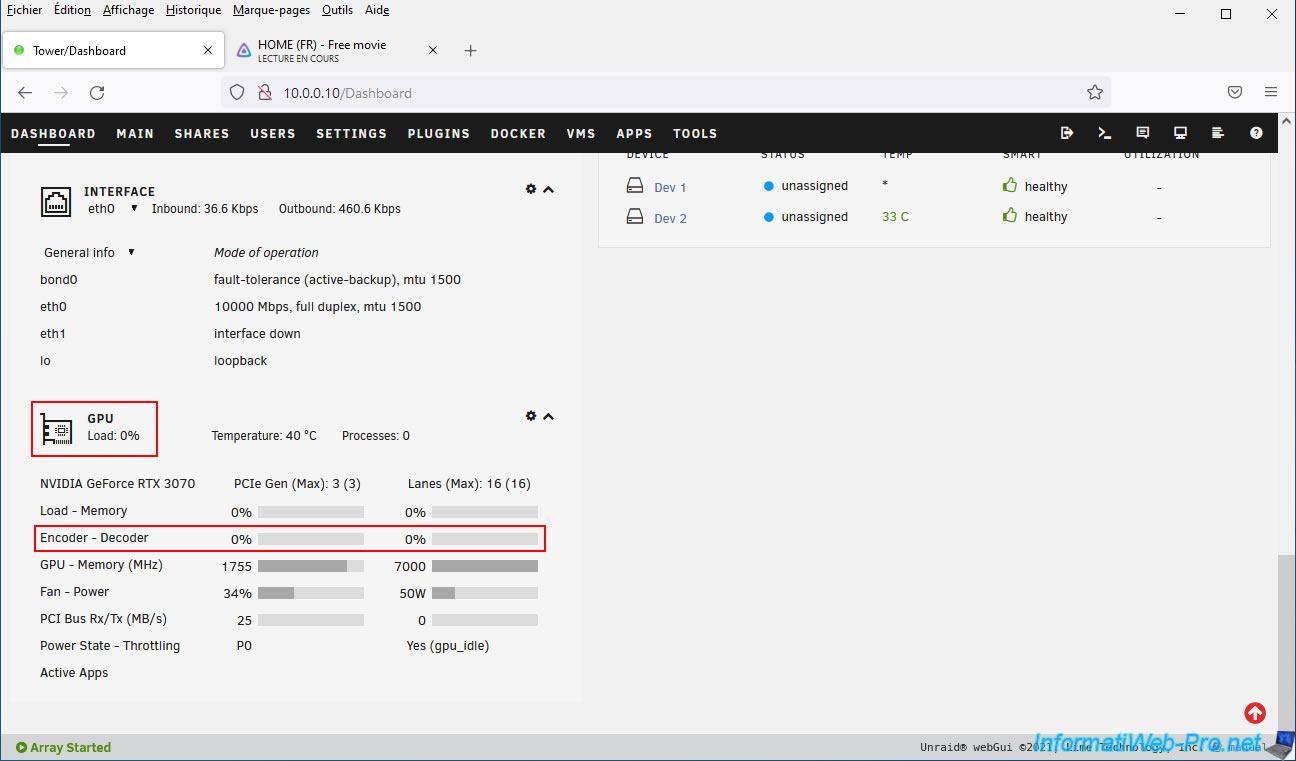
For the graphics card, you will see that it is absolutely not used.
The transcoding of your video is therefore carried out entirely by your processor (CPU) by default.
Note: this "GPU" section of the dashboard only appears if the "GPU Statistics" plugin is installed and configured on your Unraid server.
8. Use hardware video transcoding via NVIDIA NVENC (using your NVIDIA graphics card)
To use hardware transcoding (also called "hardware acceleration" in Jellyfin), click the "User" icon at the top right.
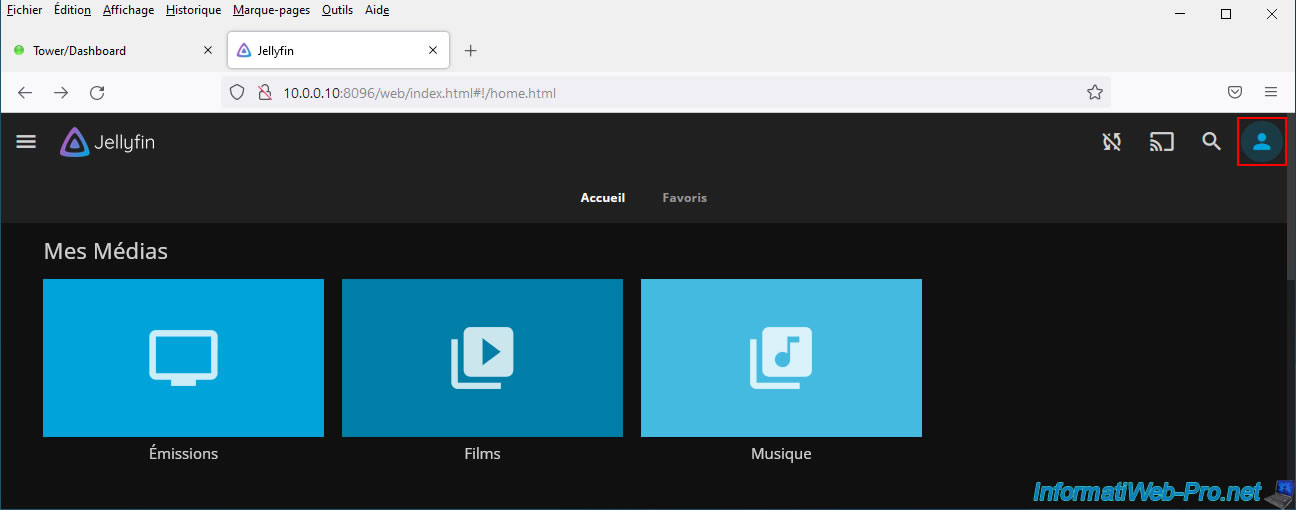
Then, in the "Administrator" section, click: Dashboard.
The Jellyfin dashboard appears.
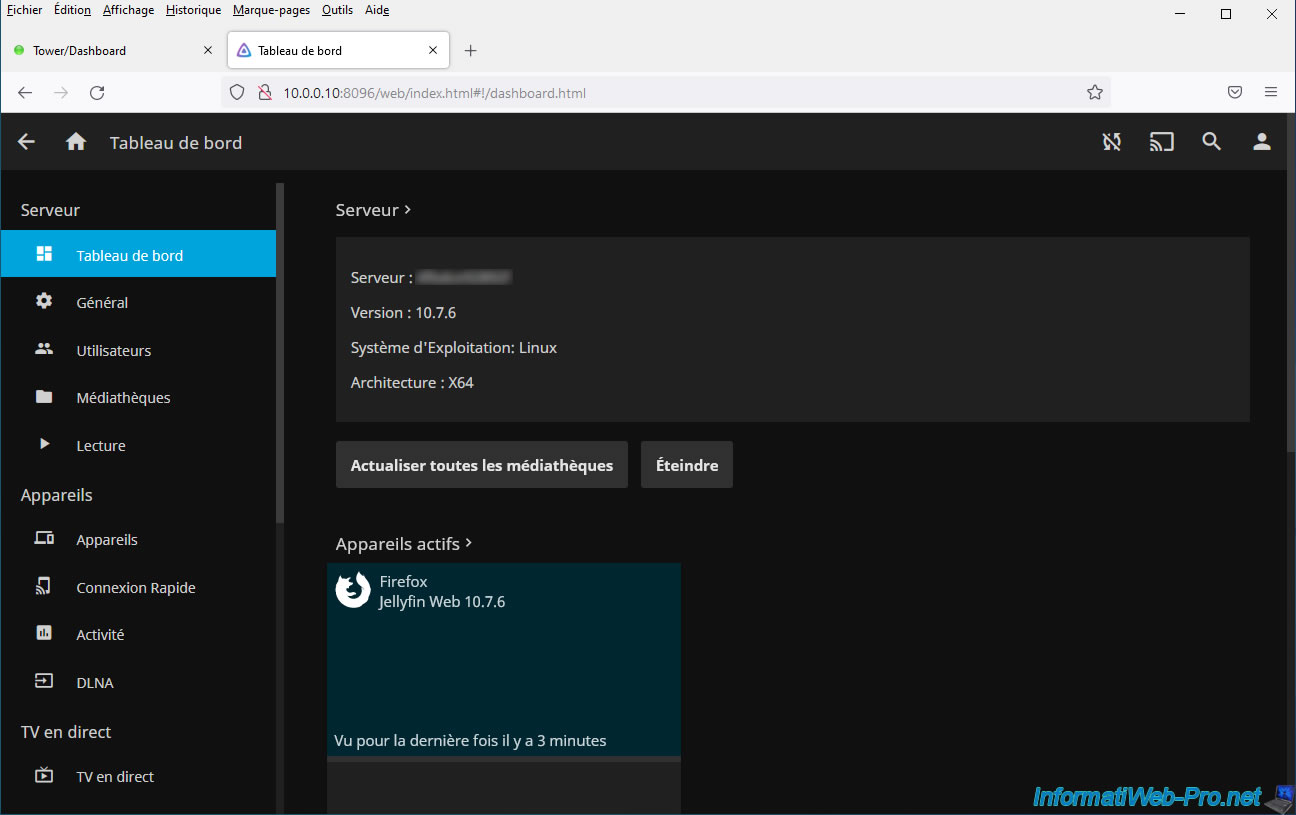
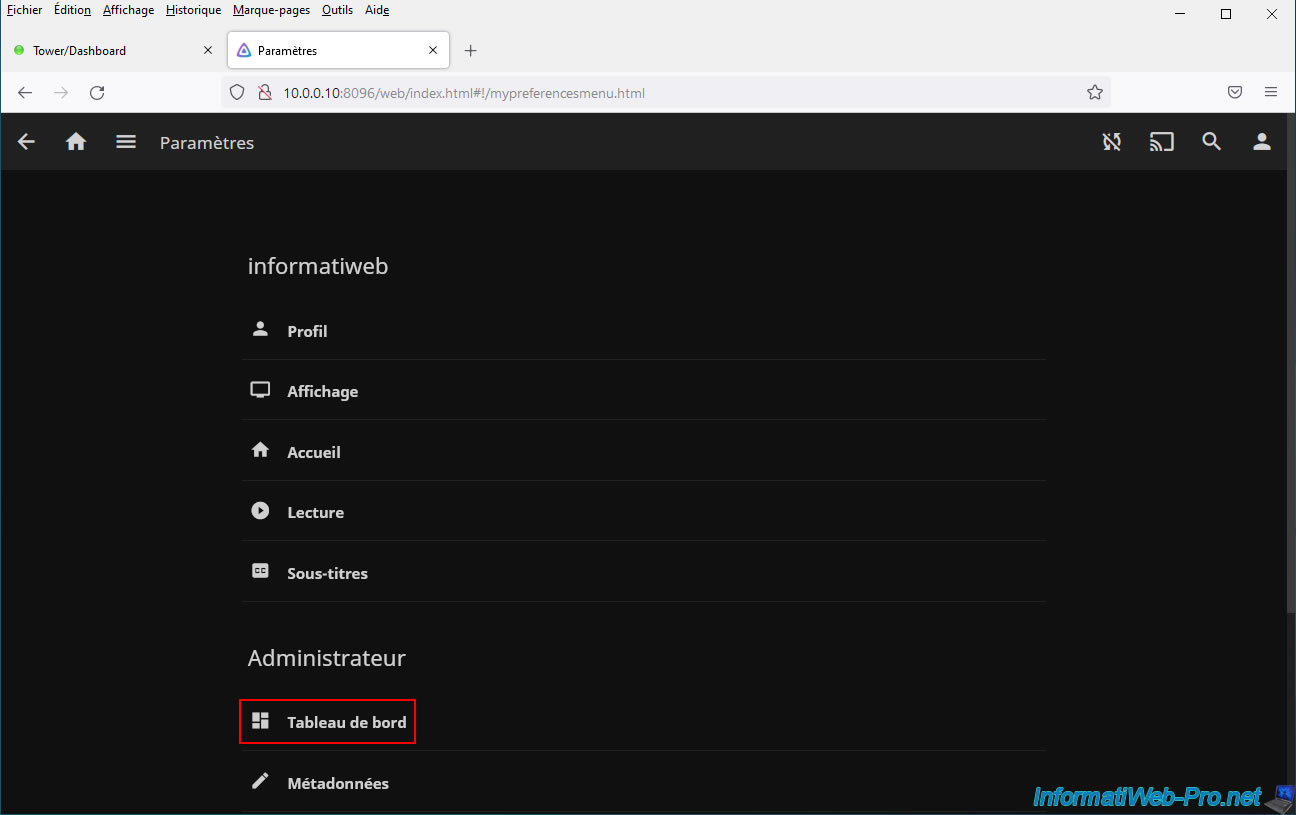
Click "Playback" in the left menu to access the transcoding settings.
![]()
In the "Hardware Acceleration" list, select "Nvidia NVENC."
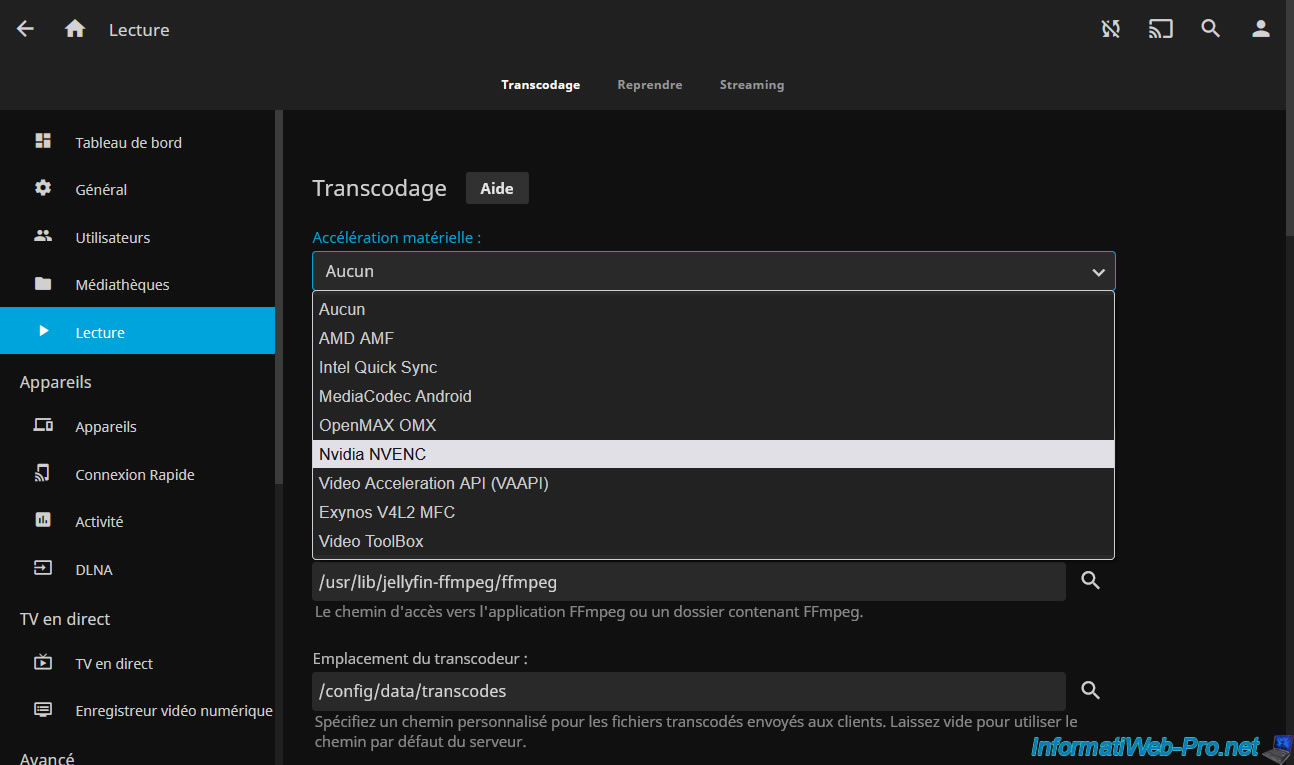
Check the formats for which you want to enable hardware decoding: H264, HEVC, MPEG2, MPEG4, ...
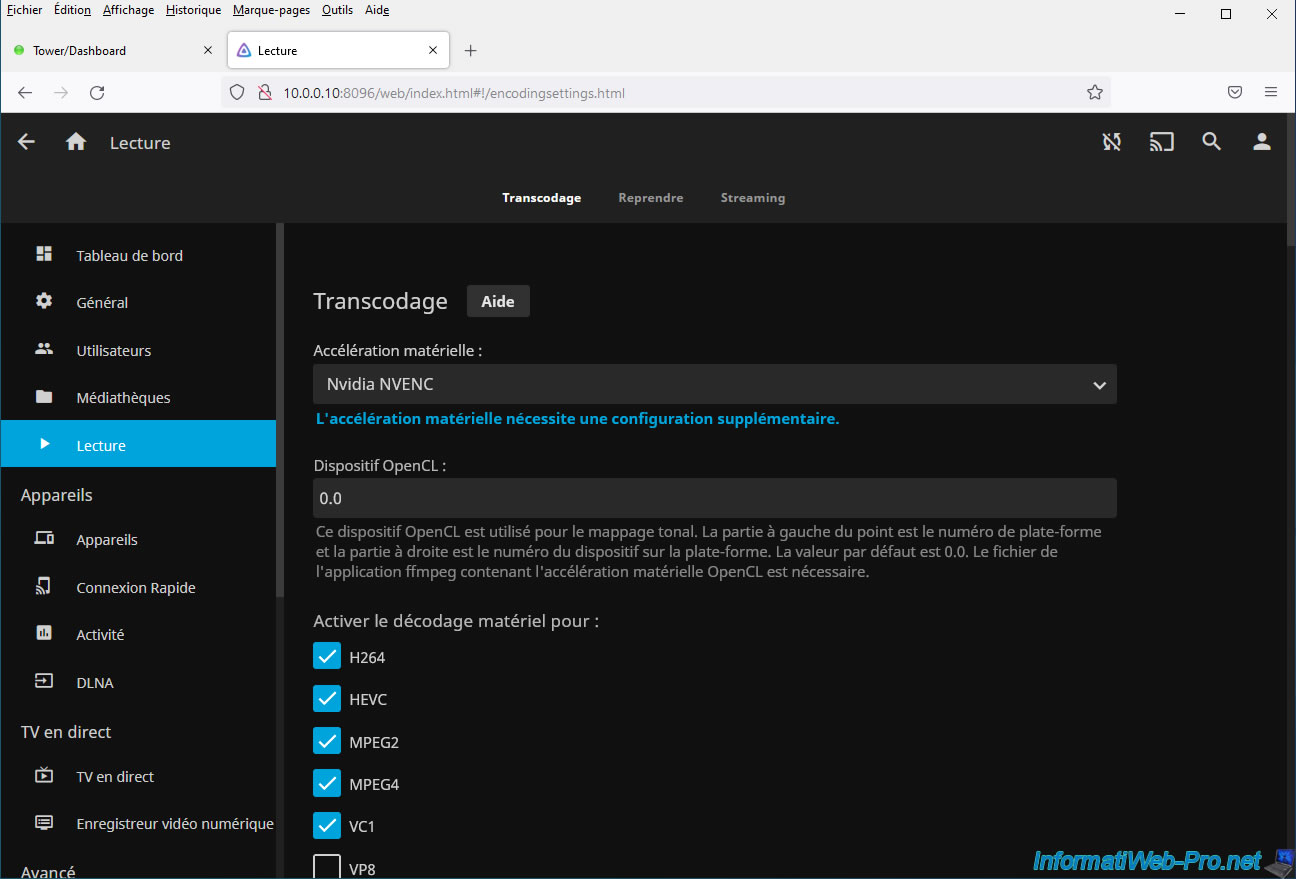
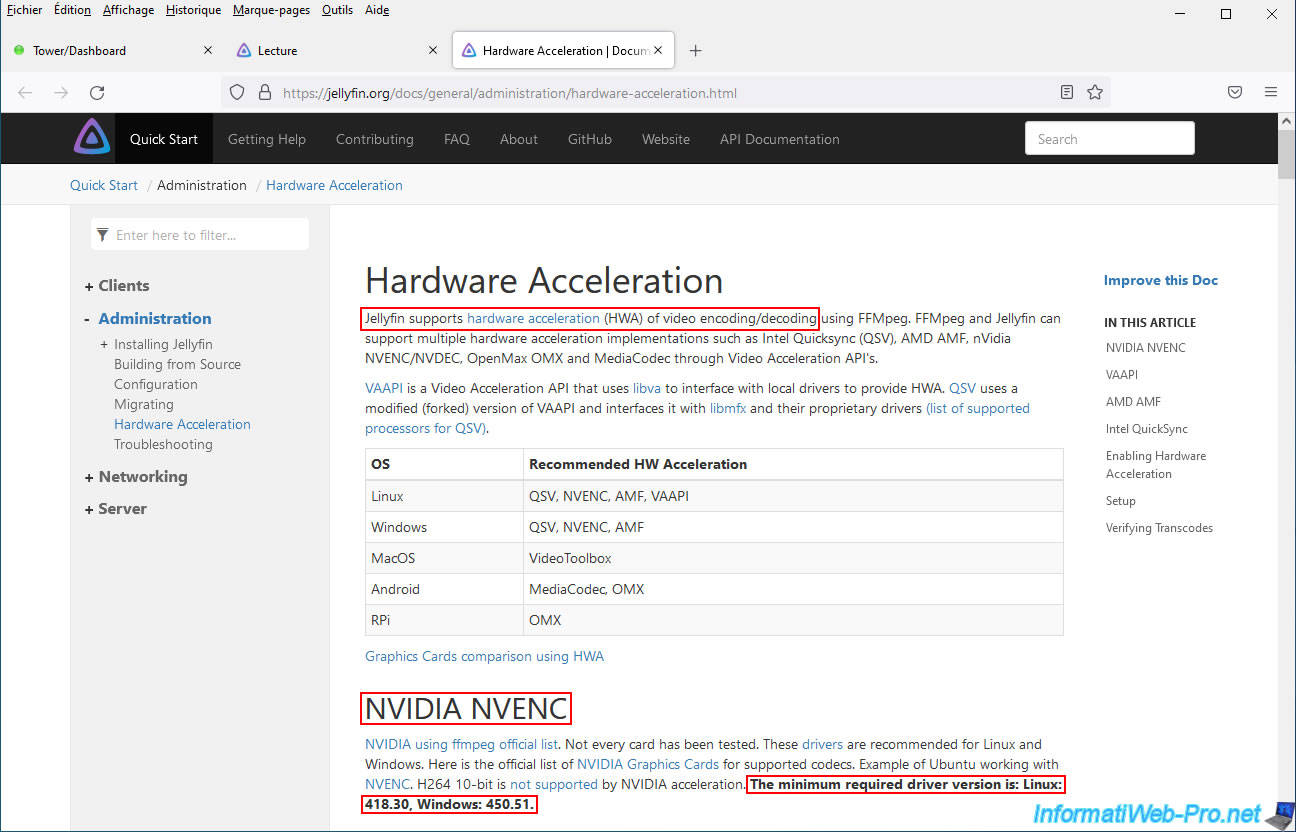
If you click on the "Hardware acceleration requires additional configuration" link, you will arrive on the "Hardware Acceleration" page of the Jellyfin site where it is notably indicated that:
- Jellyfin supports hardware acceleration for video encoding and decoding (video transcoding)
- NVIDIA NVENC requires at least version 418.30 of the NVIDIA driver on Linux. Note that Unraid is based on Linux.
Then, at the bottom of the page, click "Save".
![]()
Ignore the warning that appears about enabling hardware acceleration by clicking "Understood."
7. Software video transcoding (via your processor)
Thanks to Jellyfin, you will be able to dynamically convert (transcode) your videos into other qualities.
To do this, choose a film and start playing it.
Note that the film used in this tutorial is free. The goal is to avoid legal problems.
The video player appears.
To play your favorite movie in a quality other than the original, hover over the video to reveal the controls and click the gear icon.
Click on: Quality.
Select the desired quality (other than "Auto").
Leave the video playing and open your Unraid server dashboard in a new tab.
As you can see, this is the processor (CPU) that is currently in use.
For the graphics card, you will see that it is absolutely not used.
The transcoding of your video is therefore carried out entirely by your processor (CPU) by default.
Note: this "GPU" section of the dashboard only appears if the "GPU Statistics" plugin is installed and configured on your Unraid server.
8. Use hardware video transcoding via NVIDIA NVENC (using your NVIDIA graphics card)
To use hardware transcoding (also called "hardware acceleration" in Jellyfin), click the "User" icon at the top right.
Then, in the "Administrator" section, click: Dashboard.
The Jellyfin dashboard appears.
Click "Playback" in the left menu to access the transcoding settings.
![]()
In the "Hardware Acceleration" list, select "Nvidia NVENC."
Check the formats for which you want to enable hardware decoding: H264, HEVC, MPEG2, MPEG4, ...
If you click on the "Hardware acceleration requires additional configuration" link, you will arrive on the "Hardware Acceleration" page of the Jellyfin site where it is notably indicated that:
- Jellyfin supports hardware acceleration for video encoding and decoding (video transcoding)
- NVIDIA NVENC requires at least version 418.30 of the NVIDIA driver on Linux. Note that Unraid is based on Linux.
Then, at the bottom of the page, click "Save".
![]()
Ignore the warning that appears about enabling hardware acceleration by clicking "Understood."
Share this tutorial
To see also
-
NAS 12/4/2025
Unraid 6.9.2 - Define a private static IP address
-
NAS 1/1/2026
Unraid 6.9.2 - Disable flash network sharing
-
NAS 6/17/2026
Unraid 6.9.2 - SWAG - Access Nextcloud via reverse proxy and personal domain
-
NAS 5/13/2026
Unraid 6.9.2 - SWAG - Locally access the reverse proxy (SWAG)
No comment