- Firewall
- pfSense
- 28 May 2025 at 07:47 UTC
-

- 1/5


On pfSense, you can create VLANs to create several subnets on the same network link (the same physical network interface).
Important : to be able to use the VLANs configured on pfSense, your switch (physical switch) to which your pfSense firewall, as well as your servers and/or computers will be connected, must be configured correctly.
For this tutorial, we used the VMware ESXi hypervisor which allows you to create switches where you can configure certain ports for a specific VLAN and other ports in trunk mode (= accept all VLAN IDs).
But, you will see how to configure this in this tutorial.
- Create a virtual sandard switch (vSS)
- Add a network adapter to pfSense and connect it
- Change LAN interface subnet
- Add VLANs on pfSense
- Assign VLANs to logical interfaces
- Configure VLAN 10 on pfSense
- Configure VLAN 20 on pfSense
- Allow network traffic on pfSense for OPT1 interface (VLAN 10)
- Allow network traffic on pfSense for OPT2 interface (VLAN 20)
- Connect machines to your VLANs
- Test capturing VLAN IDs via Wireshark
- Configure the Intel network card to not remove VLAN IDs
- Capture VLAN IDs using Wireshark
- Restore the connection of your machine connected to a VLAN
1. Create a virtual sandard switch (vSS)
If you installed pfSense on a physical machine, you will need to configure the physical switch where you will use the VLANs.
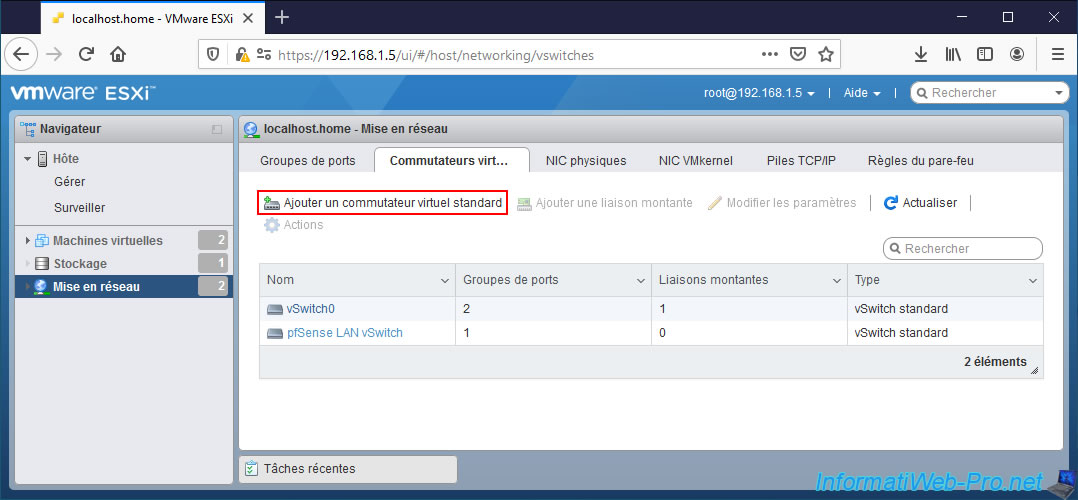
But in the case of VMware ESXi, you will need to create a new Virtual Standard Switch (vSS) by going to: Networking -> Virtual switches.
Next, click: Add standard virtual switch.
Note: just for information, our pfSense virtual machine is connected to the 2 switches below via the port groups:
- VM Network: for the pfSense WAN interface. The "VM Network" network allows access to our physical network and therefore to the Internet.
- pfSense LAN: for the pfSense LAN interface. This allows virtual machines to be connected to the pfSense LAN network, which is used by default.
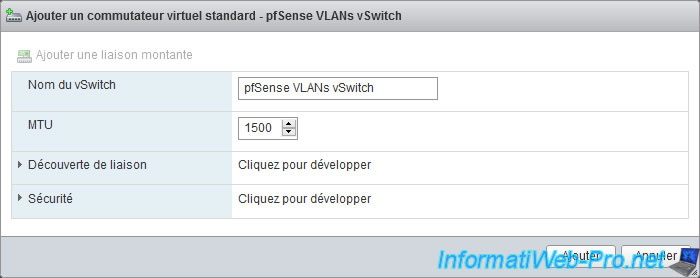
Name your new standard virtual switch: pfSense VLANs Switch.
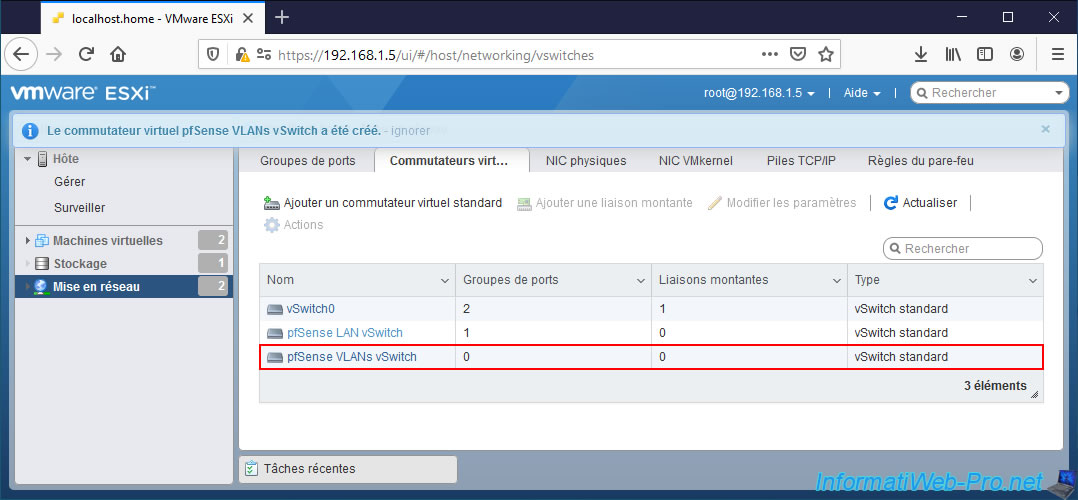
The new pfSense VLANs vSwitch virtual switch has been created.
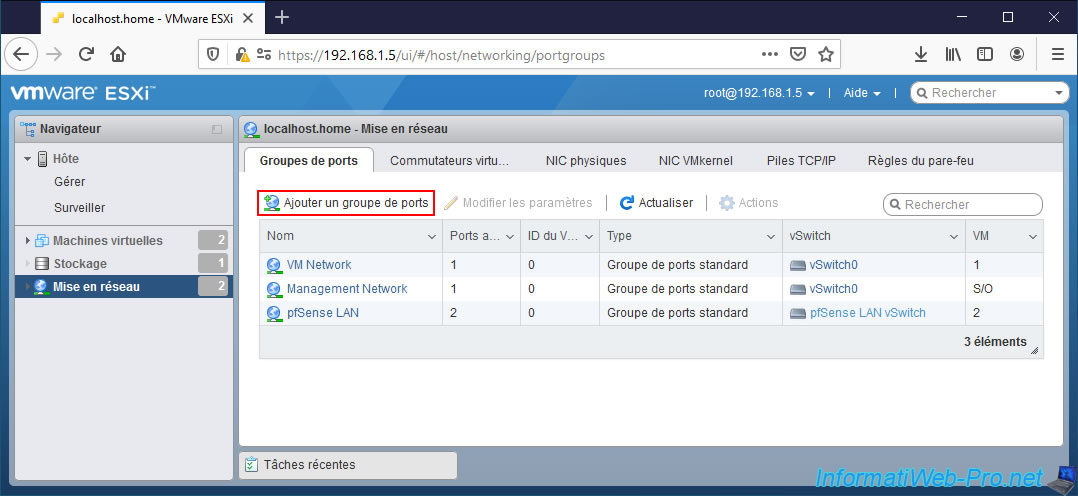
Now that your standard virtual switch has been created, you need to create ports on it.
To do this, in the "Port groups" tab, click on: Add port group.
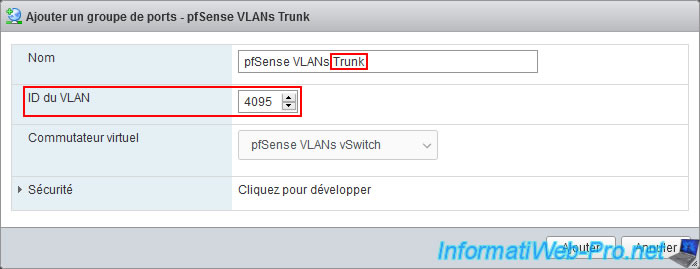
For the 1st port group to create, configure these settings:
- Name: pfSense VLANs Trunk.
- VLAN ID: 4095. The value "4095" at VMware is a special value indicating that trunk mode will be used.
Which means that all VLAN IDs will be preserved and it will be up to the guest OS to manage packets tagged with a VLAN ID.
It is therefore on this group of ports that you will connect the physical interface of pfSense dedicated to VLANs. - Virtual switch: pfSense VLANs Switch. The name of the standard virtual switch you just created.
Note: in the case of installing pfSense on a physical machine, you will need to configure a port of your switch in trunk mode.
You will then connect the physical interface of your pfSense machine dedicated to VLANs to this port.
Source : VLAN Configuration - VMware Docs.
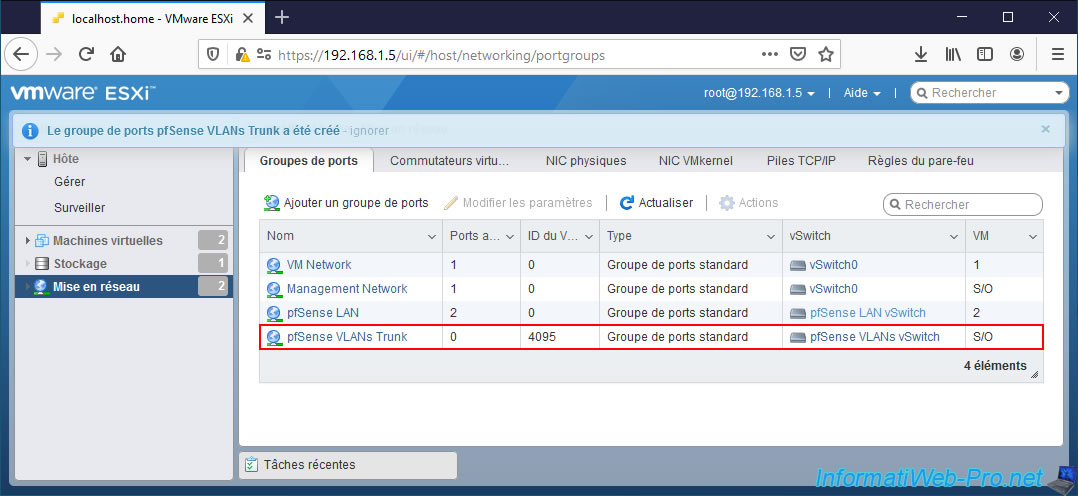
Your "pfSense VLANs Trunk" port group has been created.
Click again: Add port group.
In this tutorial, we will create 2 VLANs on pfSense: VLAN 10 and VLAN 20.
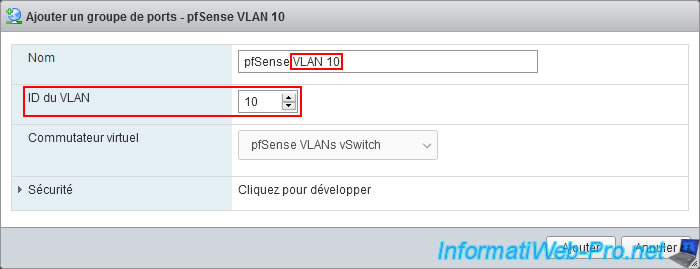
Create a port group for VLAN 10:
- Name: pfSense VLAN 10.
- VLAN ID: 10.
- Virtual switch: pfSense VLANs Switch.
Note: in the case of a physical switch, you will need to configure the desired ports with the desired VLAN ID.
In this case, the VLAN ID: 10.
Warning : the VLAN ID must be between 1 and 4094 (inclusive).
Again, create a new port group for the other VLAN.
- Name: pfSense VLAN 20.
- VLAN ID: 20.
- Virtual switch: pfSense VLANs Switch.

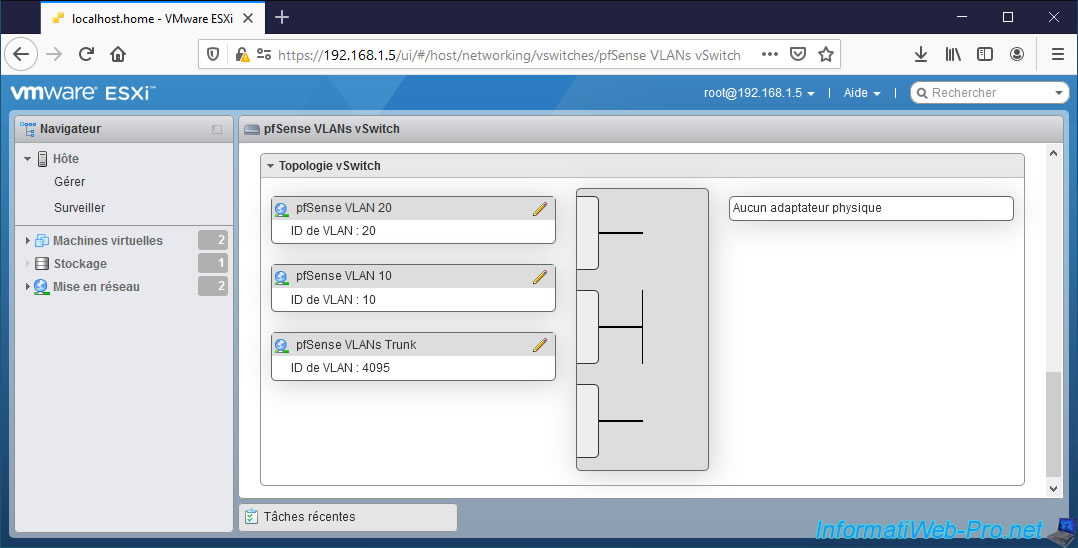
For this tutorial, we therefore have 3 groups of ports for managing VLANs on pfSense:
- pfSense VLAN 20
- pfSense VLAN 10
- pfSense VLANs Trunk
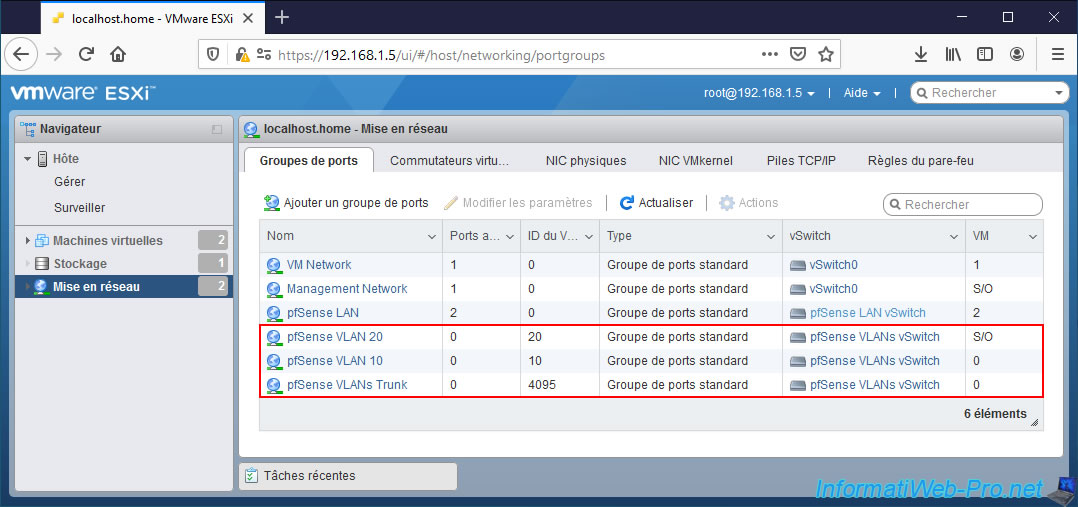
If you click on the name of the virtual standard switch (vSS) created, you will see that it has 3 port groups:
- pfSense VLAN 20: virtual machines connected to this port group will be automatically placed in VLAN 20.
- pfSense VLAN 10: virtual machines connected to this port group will be automatically placed in VLAN 10.
- pfSense VLAN Trunk: virtual machines connected to this port group will see all traffic and it is up to their guest operating system to know how to manage them thanks to the VLAN ID present on the packets.
This port group also allows packets with any VLAN ID to be transmitted.
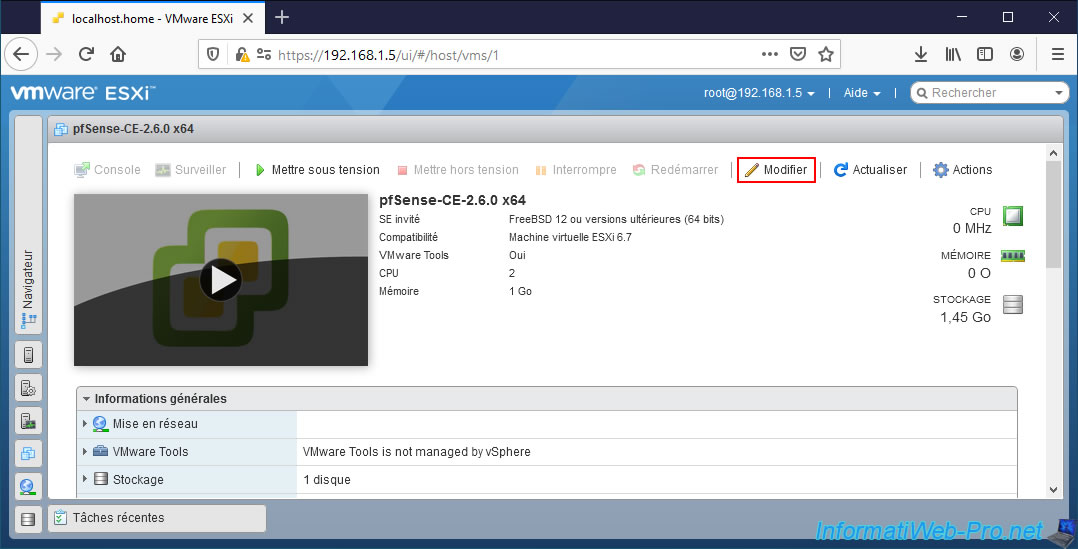
2. Add a network adapter to pfSense and connect it
For VLAN management, we will add an additional network interface to our "pfSense-CE-2.6.0 x64" virtual machine.
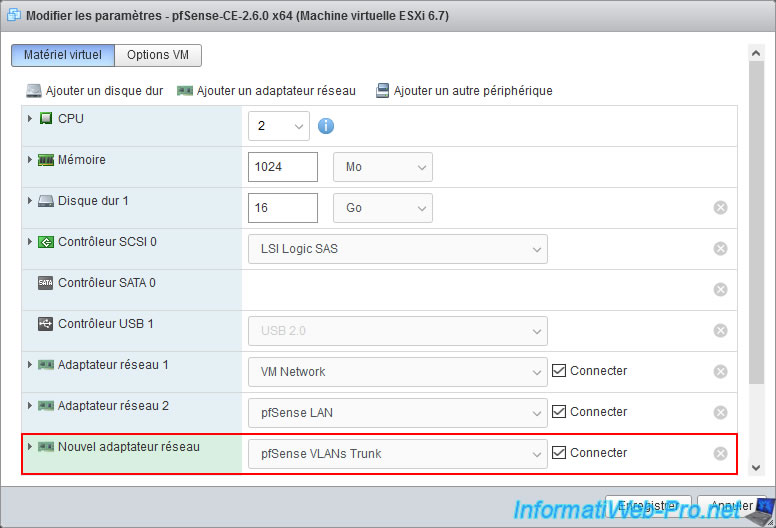
Click: Add network adapter.
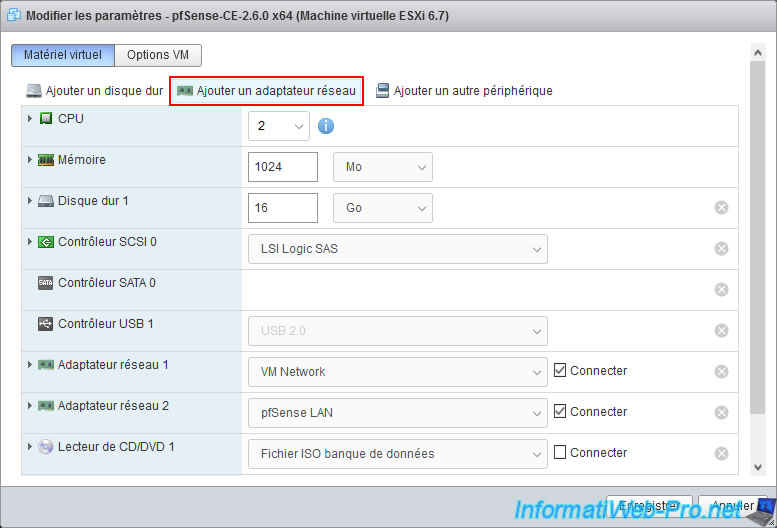
Connect this new network adapter to the "pfSense VLANs Trunk" port group and click: Save.
Next, start your pfSense machine.
3. Change LAN interface subnet
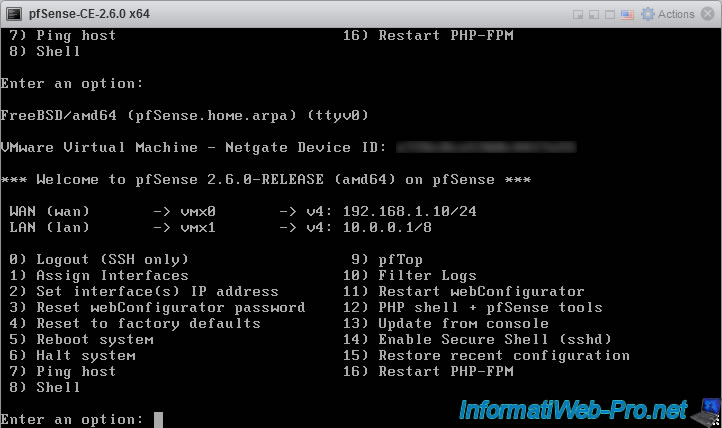
When you want to create subnets using VLANs, it is necessary that they are not part of a subnet that is already used by pfSense.
In our case, we were already using the subnets "192.168.1.x" (CIDR: 24) and "10.x.x.x" (CIDR: 8) as you can see on the pfSense console visible above.
However, for this tutorial, we want to create the "10.10.0.x" and "10.20.0.x" subnets. Which would create a conflict with the "10.x.x.x" network used on our LAN interface.
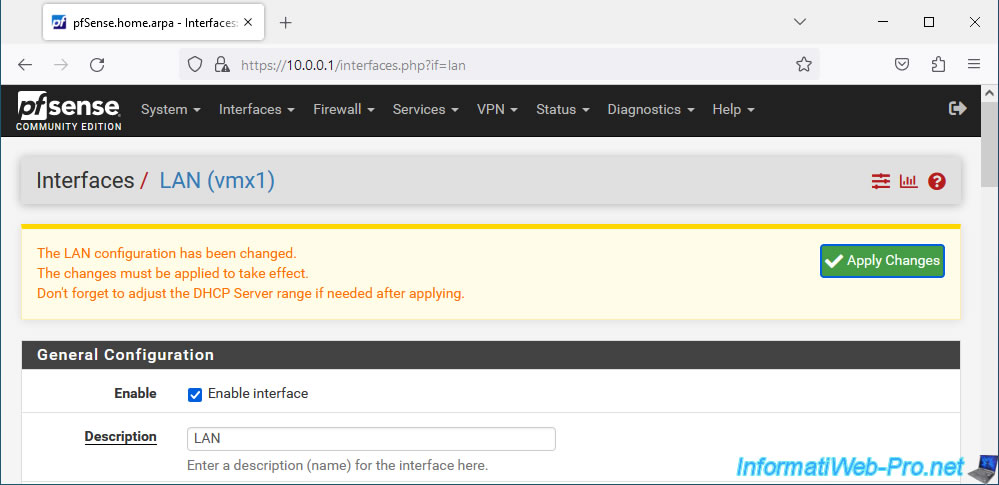
So we'll first modify our LAN interface to change its subnet.
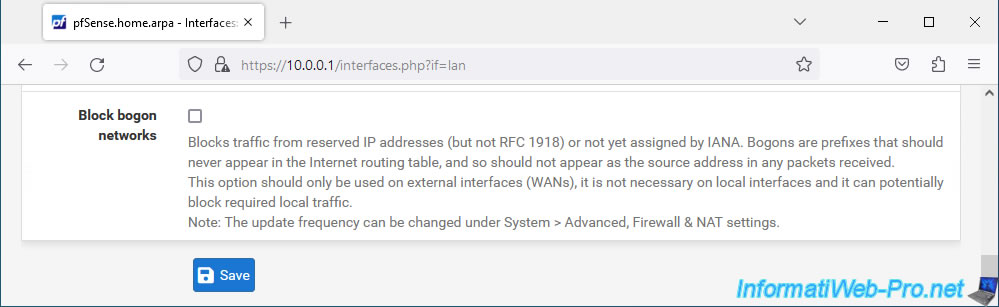
To do this, go to: Interfaces -> LAN.
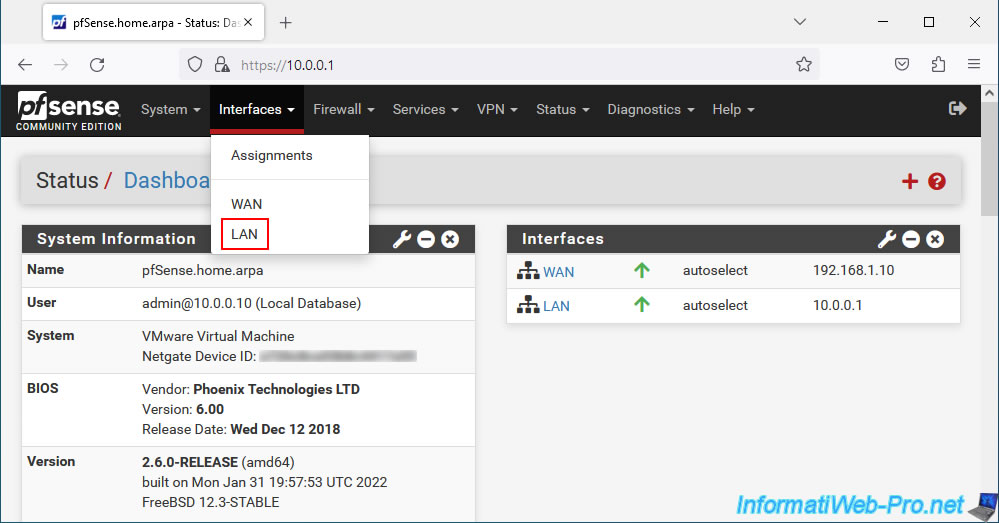
The "Interfaces / LAN" page appears.
As you can see, in our case the IP address of this LAN interface is set statically (IPv4 Configuration Type: Static IPv4). Which should also be the case for you.
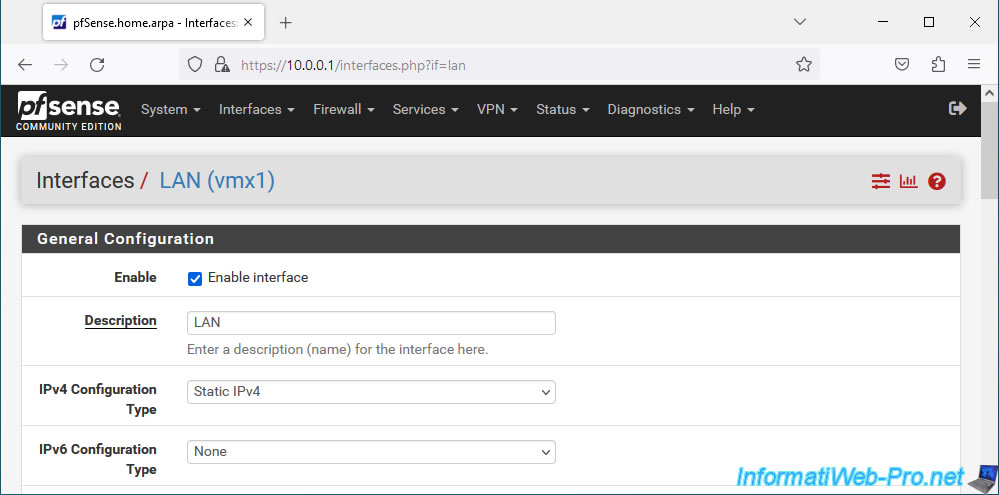
In the "Static IPv4 Configuration" section, you will see the pfSense IP address for this LAN interface, as well as the subnet mask used in CIDR format.
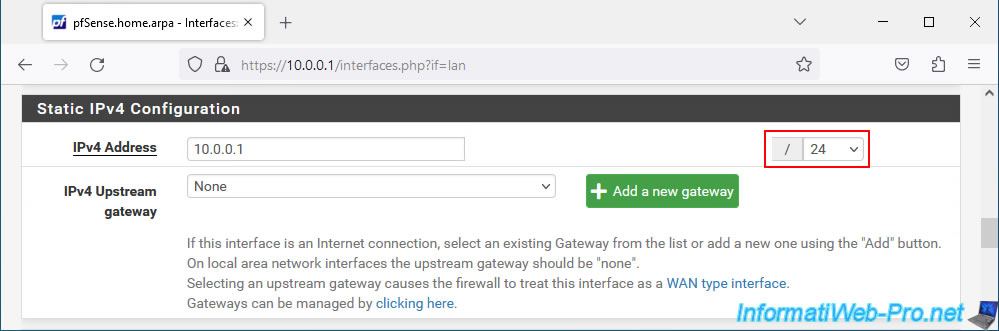
Currently, the subnet mask in CIDR format is "8". Which corresponds to the subnet mask "255.0.0.0".
The subnet currently used is therefore: 10.x.x.x.

To avoid conflicts with the VLANs we will create later, we changed this subnet mask to "24".
Which corresponds to the subnet mask "255.255.255.0". The subnet that will be used will therefore be: 10.0.0.x.
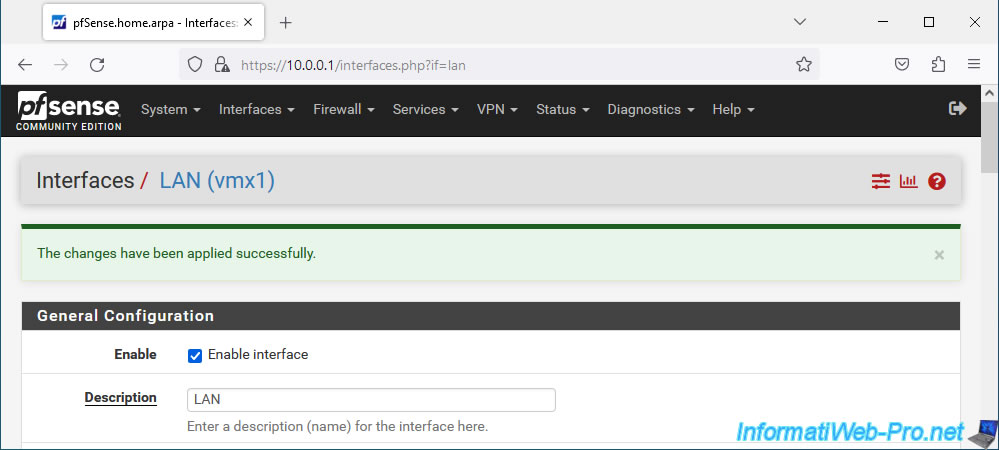
At the bottom of the page, click on: Save.
Then, at the top of the page, click: Apply Changes.
The changes have been applied.
Share this tutorial
To see also
-
Firewall 8/8/2025
pfSense 2.6 - Configure a LACP link (LAGG)
-
Firewall 9/12/2025
pfSense 2.6 - Create a site-to-site (S2S) VPN tunnel via OpenVPN secured with shared key (PSK)
-
Firewall 5/17/2025
pfSense 2.6 - Enable SSH protocol
-
Firewall 8/27/2025
pfSense 2.6 - Load balancing via HAProxy
You must be logged in to post a comment