- Firewall
- pfSense
- 30 May 2025 at 06:09 UTC
-

- 1/2

pfSense can act as a DHCP server to distribute IP addresses to machines on your network, as well as the information (gateway IPs, DNS server IPs, ...) they need.
- Enable and configure the pfSense DHCP server
- Obtain an IP address on Windows (Server) from a DHCP server
- View DHCP leases on pfSense
- View DHCP logs for troubleshooting
- Bonus: use a DHCP relay agent instead of the DHCP server
1. Enable and configure the pfSense DHCP server
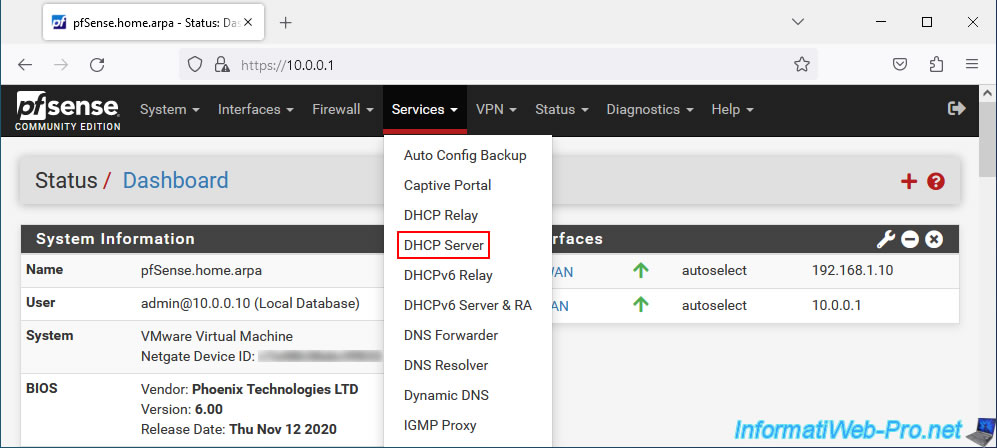
To enable and configure the pfSense DHCP server, go to: Services -> DHCP Server.
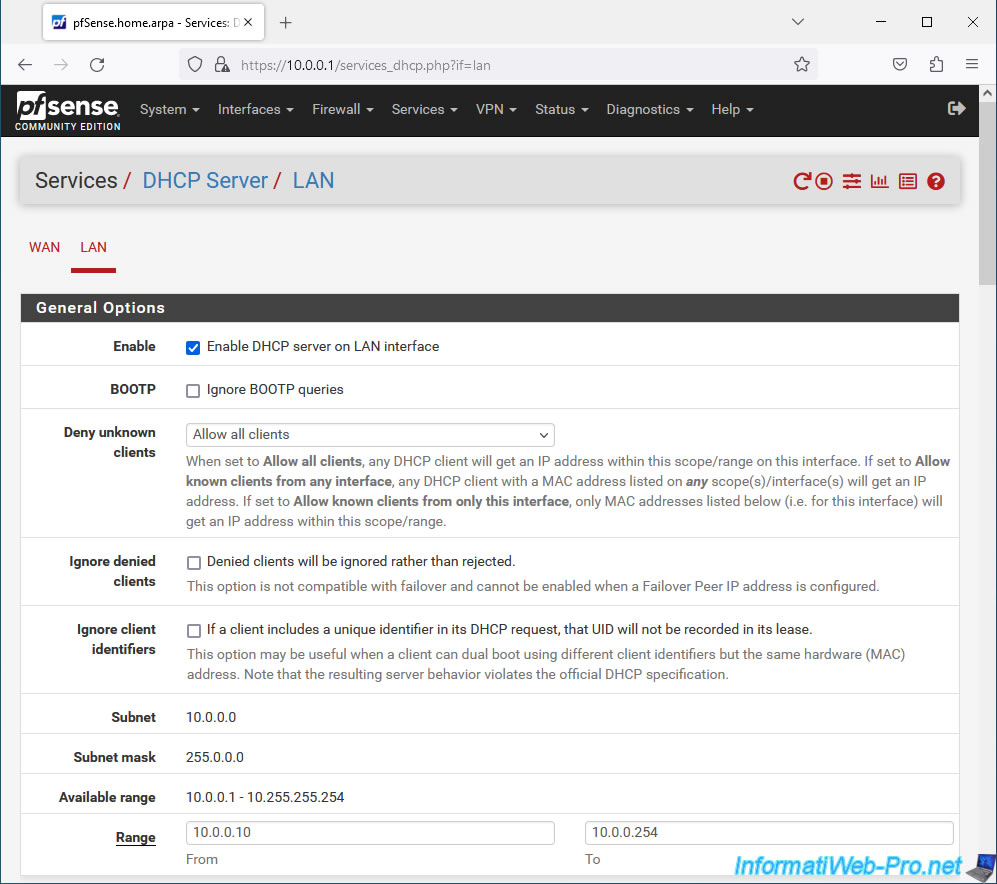
On the page that appears, check the "Enable DHCP server on LAN interface" box to enable the DHCP server and configure the "Range" setting to specify the range of IP addresses to distribute to machines on your network.
Note that using a DHCP server is only useful on the LAN interface or an interface connected to a local network or subnet.
This is of no interest to the WAN interface.
In the "General Options" section of the pfSense DHCP server settings, you will find these settings:
- Enable: check the "Enable DHCP server on LAN interface" box to enable the DHCP service for the LAN interface and uncheck it to disable it.
- BOOTP: Check the "Ignore BOOTP queries" box if you want to disable BOOTP. BOOTP being in some way the ancestor of the DHCP server.
Note that BOOTP allows machines without a hard drive booting over the network to obtain an IP address, the address of a host server, and the name of the image file to load to boot.
If the pfSense DHCP server ignores BOOTP requests, network booting may not work for machines on your network. - Deny unknown clients:
- Allow all clients: by default, the DHCP server will respond to all IP address requests sent by machines on your network (to which the LAN interface is connected, in this case, from pfSense).
- All known clients from any interface: the DHCP server will respond to DHCP requests only for known clients (having a static DHCP mapping on at least one pfSense interface). The client being identified by its MAC address.
- All known clients from any interface: similar to the previous option, but requires that the DHCP client has a static DHCP mapping on the same interface.
- Ignore denied clients: check the "Denied clients will be ignored rather than rejected" box to ignore clients whose MAC address is part of the "MAC address control - MAC Deny" list located at the bottom of the configuration page.
- Ignore client identifiers: check the box "If a client includes a unique identifier in its DHCP request, that UID will not be recorded in its lease" so that the DHCP server ignores the client identifier.
Thus, a client configured with a multi-boot will be able to use the same IP address if the source MAC address of the DHCP request is the same.
However, enabling this option will also mean that your DHCP server will no longer comply with the official DHCP specification. - Subnet: subnet used on the network to which this interface (LAN in this case) is connected.
- Subnet mask: the associated subnet mask.
- Available range: the IP address range available for this combination (subnet + subnet mask).
- Range: the range of IP addresses that your DHCP server will be able to distribute.
Avoid creating too large ranges if you want to avoid the bug that occurs with the default range "10.0.0.10-10.255.255.245" that pfSense had automatically defined in our case.
Hence the fact that we changed our IP address range to: 10.0.0.10 to 10.0.0.254.
Sources :
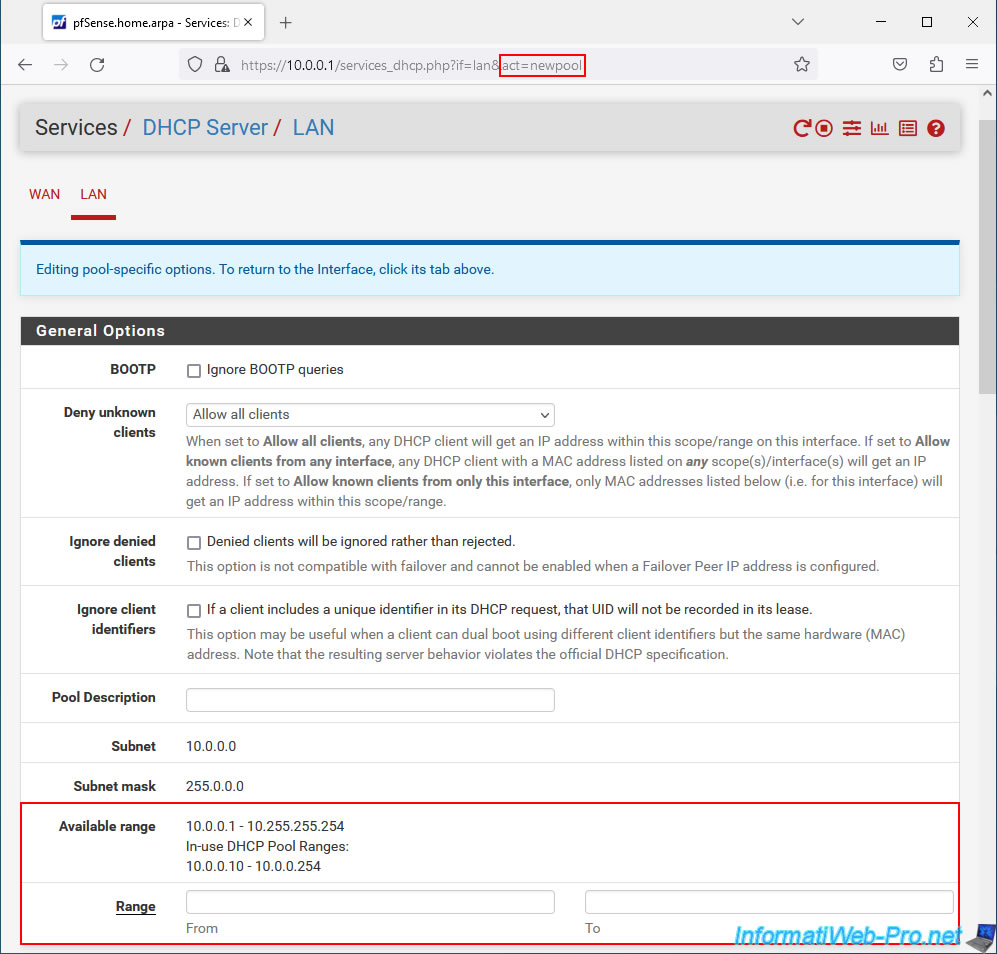
In the "Additional Pools" section just below, you will be able to add additional DHCP ranges for the subnet shown above.
To do this, click on the "Add pool" button.

On the page that appears, you will see that the URL ends with "newpool". Although the page closely resembles the one allowing you to configure your DHCP server.
On this page, you will see the Available address range for your subnet, as well as the IP address ranges already defined on your DHCP server (In-use DHCP Pool Ranges).
Configure the additional IP address range that your DHCP server will be able to distribute, then modify other available settings as necessary.
Important : as shown at the top of the page (blue background), when you add a new IP address range, the settings configured on it will be applied only to this one.
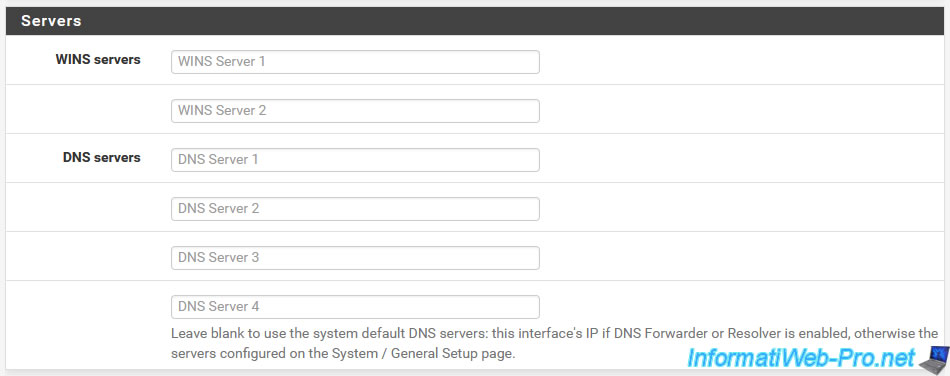
In the "Servers" section, you can specify:
- WINS servers: the IPv4 address of one or two WINS servers (if you have one on your network).
- DNS servers: the IPv4 address of one or more DNS servers to send to the client.
In business, if you have deployed an Active Directory infrastructure, you will indicate the IP address of one or more Active Directory domain controllers (from the same AD domain).
By default, pfSense will indicate its own address for the affected interface if the DNS Resolver and DNS Forwarder are enabled on pfSense.
If the DNS forwarder is disabled, pfSense will send the address of the DNS servers specified in "System -> General Setup".
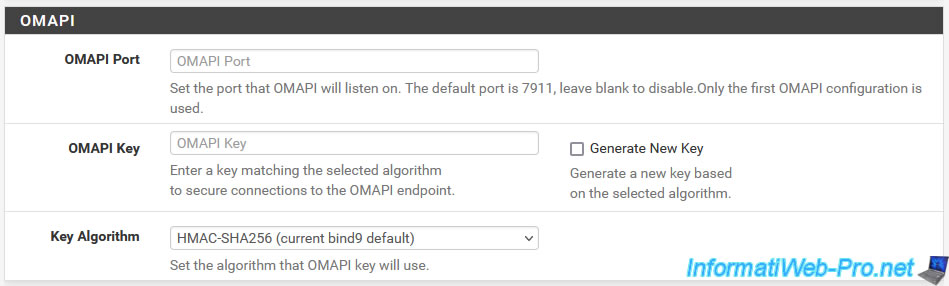
In the "OMAPI" section, you can configure the settings related to the OMAPI programming layer.
OMAPI allows you to control remote applications and know their status and the connection to OMAPI can be secured thanks to a shared secret.
- OMAPI Port: port on which OMAPI should listen. By default, the port to use is 7911.
However, if you leave the box empty, OMAPI will be disabled. - OMAPI Key: specify the key (shared secret) to use for OMAPI or generate a new key by checking the "Generate New Key" box.
- Key Algorithm: algorithm to use for the OMAPI key.
Possible values: HMAC-MD5, HMAC-SHA1, HMAC-SHA256, HMAC-SHA512, ...
Source : ISC DHCP 4.1 Manual Pages - omapi.
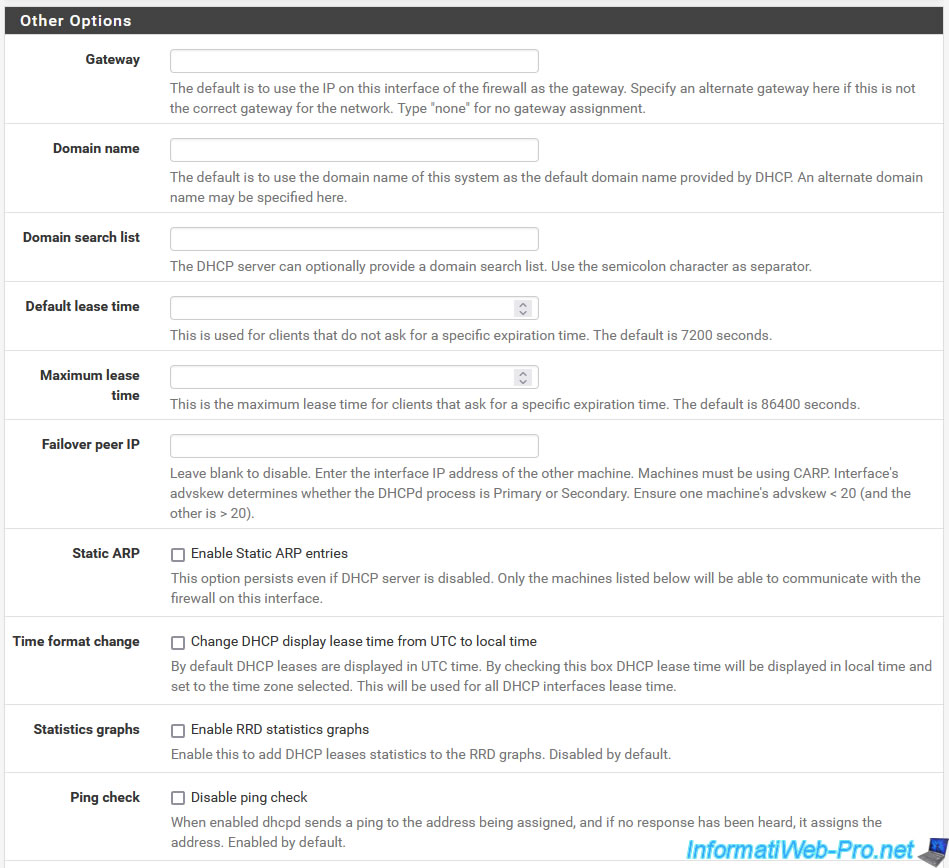
In the "Other Options" section, you can configure other options:
- Gateway: the IP address of the default gateway to send to the client.
Which allows the client to access the Internet via it (a gateway corresponds to a router).
By default, the IP address sent will be the pfSense IP address for the relevant interface (in our case, the LAN interface). - Domain name: the domain name used on your network. This domain name will be used by customers to form their fully qualified domain name (FQDN).
In an Active Directory infrastructure, you will indicate your Active Directory domain name.
If you leave this box empty, the pfSense domain name (configured in "System -> General Setup") will be used. - Domain search list: allows you to specify a list of domains to use when attempting to resolve short names (e.g. NETBIOS names) into fully qualified domain names (FQDN).
Again, in an Active Directory infrastructure, you will indicate at least your Active Directory domain name.
If you want to specify multiple domains, simply separate them with commas. - Default lease time: default lease time that your DHCP server will use when assigning an IP address to a machine on your network.
This value is only used if the client does not specify a specific lease duration in its DHCP request. - Maximum lease time: maximum lease time that your DHCP server will use when assigning an IP address to a machine on your network.
If the client requests a lease duration greater than this maximum value, your DHCP server will use the maximum value defined here instead of the one requested by the client. It is therefore above all a protection to prevent a customer from requesting a lease period that is much too long. - Failover peer IP: if you enable high availability on 2 pfSense servers, you will need to indicate the real IP address (therefore not the CARP virtual IP) of the other pfSense server.
- Static ARP: to allow only the machines listed at the bottom of the page (in the "DHCP Static Mappings for this interface" section) to communicate with your pfSense machine, check the "Enable Static ARP entries" box.
Warning: make sure you have entered the machines that must be able to communicate with pfSense at the bottom of the page before activating this option. Otherwise, you will no longer have access to it. - Time format change: allows you to display DHCP lease durations in local format rather than UTC time zone.
To do this, simply check the box "Change DHCP display lease time from UTC to local time".
Note: the pfSense time zone can be configured via the "System -> General Setup" menu. - Statistics graphs: allows you to enable the creation of graphs for your DHCP server statistics.
These graphs can be viewed via the "Status -> Monitoring" menu.
To do this, check the "Enable RRD statistics graphs" box. - Ping check: by default, this setting is enabled and allows the DHCP server to ping the IP address it wants to assign to your client. Then it waits for 1 second and if it does not receive any response then it assigns the IP address to the client. This therefore avoids allocating an IP address that already exists on your network and therefore also prevents an IP address conflict from appearing on this network.
In rare cases, in the event of a problem, you can disable this check by checking the "Disable ping check" box.
Sources :
- ISC DHCP 4.1 Manual Pages - dhcpd.conf - The ping-check statement
- Add an option to disable the ping-check in dhcpd
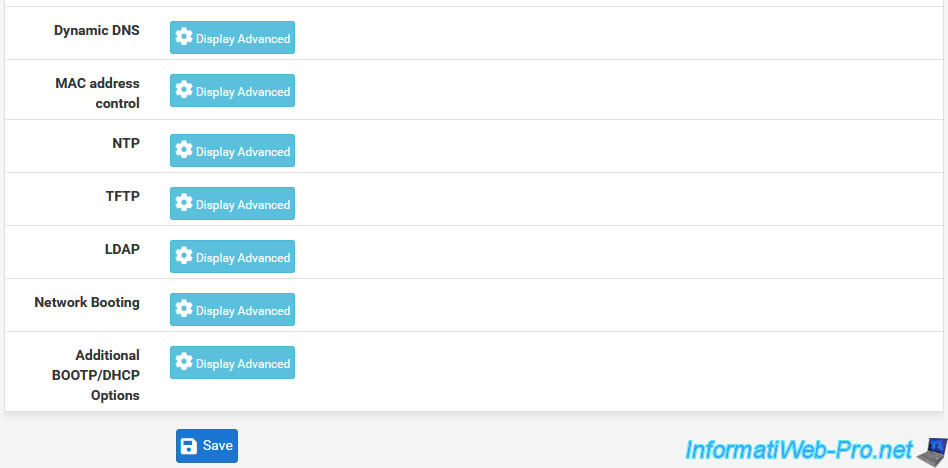
Next, you will find several buttons for advanced settings:
- Dynamic DNS: allows you to register the name of DHCP clients in the DNS system (from an external DNS server).
- MAC address control: allows you to authorize / refuse clients using their MAC addresses.
- NTP: allows you to specify one or more time servers (NTP) to use.
- TFTP: allows you to specify the parameters for accessing a TFTP server (useful for telephony or network booting, for example).
- LDAP: Allows you to specify an LDAP URI that will be sent to the client.
Useful for systems using OpenDirectory, for example. - Network Booting: allows you to specify the parameters necessary for booting a machine on the network (PXE).
- Additional BBOTP/DHCP Options: allows you to manually specify other DHCP options that exist, but cannot be configured via pfSense settings.
To view advanced settings for any of the sections above, simply click on the relevant "Display Advanced" button.
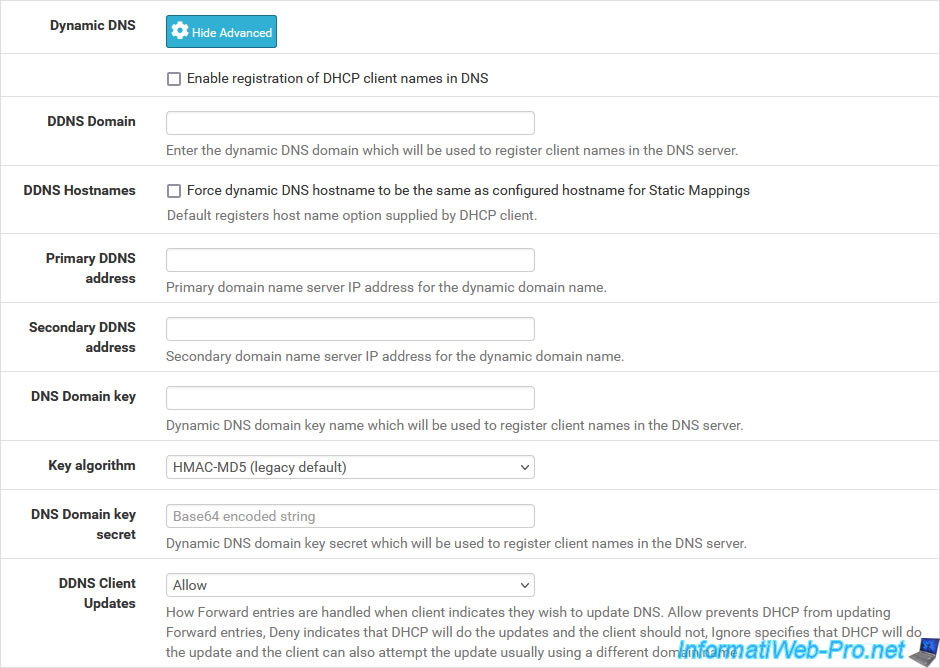
For the "Dynamic DNS" section, you can specify:
- Enable registration of DHCP client names in DNS: allows you to enable registration of DHCP client names in an external DNS server. You cannot use pfSense's DNS server, but for example "ISC BIND".
- DDNS Domain: specify the domain name to use to register the name of DHCP clients in the external DNS server. For example: informatiweb.lan.
- DDNS Hostnames: force DNS domain names to match the names configured in static DHCP mappings.
- Primary DDNS address: IP address of the primary DNS server where the domain specified in the "DDNS Domain" box is located and where the host name of DHCP clients will be updated.
- Secondary DDNS address: same principle, but for the IP address of a secondary DNS server.
In case you have 2 DNS servers (one primary and one secondary) for the same domain to update. - DNS Domain key: key to use to update the DNS zone of the domain specified above.
- Key algorithm: allows you to specify the algorithm used to secure dynamic DNS updates.
- DNS Domain key secret: the shared secret (defined on the external DNS server to secure dynamic DNS updates) to use.
- DDNS Clients Updates: allows you to authorize or not dynamic DNS updates.
Source : ISC DHCP 4.1 Manual Pages - dhcpd.conf - DYNAMIC DNS UPDATE SECURITY.
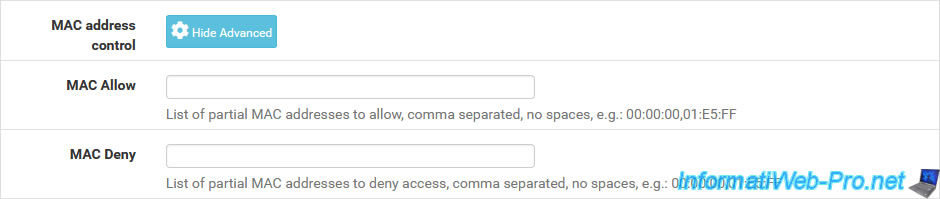
For the "MAC address control" section, you can specify:
- MAC Allow: MAC address prefixes to allow.
- MAC Deny: MAC address prefixes to refuse.
This allows you to authorize or not allow machines on your network to obtain an IP address from your DHCP server.
Note that each "xx.xx.xx" prefix in MAC addresses corresponds to a manufacturer.
For example: in the case of VMware virtual machines, there are the prefixes "00:0C:29" and "00:50:56".
To find out the manufacturer corresponding to the prefix of a MAC address, go to the "Welcome to The Public Listing For IEEE Standards Registration Authority" page, select "All MAC (...)" and type only the 6 digits of the desired prefix.
Note: you can very well deny MAC addresses here and allow them on another IP address range of your DHCP server, so that clients receive IP addresses from one or the other IP range depending on their MAC address.
This allows the IP range of VoIP phones to be separated from that of client PCs, for example.
Important : a device (computer, server, smartphone, ...) can currently very easily use a false MAC address. This protection can therefore be circumvented very easily.
In addition, this protection does not prevent a machine on your network from communicating with other machines on your network. This protection only concerns the allocation of IP addresses from your DHCP server to the clients concerned.
Sources :
- Prefix-Based MAC Address Allocation - VMware Docs
- MAC Address Generation on ESXi Hosts - VMware Docs
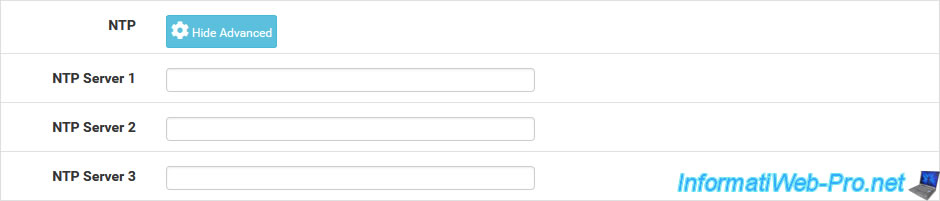
For the "NTP" section, you can specify one or more time servers which will be used by the client machine to update its clock (using the NTP Server 1, ... settings).
Clock synchronization on a network is necessary to avoid authentication problems (eg: Kerberos), as well as for the validity of certificates used on your network (if applicable).
Note: this setting corresponds to DHCP option 042.
For the "NTP" section, you can specify the address of a TFTP server using the "TFTP Server" parameter.
This TFTP server is mainly used for telephony over IP (VoIP), but can also be used to boot a client machine on the network (PXE). See the "Network Booting" section for network booting.
Note: this setting corresponds to DHCP option 066.

For the "LDAP" section, you can specify the URI of an LDAP server using the "LDAP Server URI"setting.
This setting will be sent to the client to help certain clients find their LDAP server (e.g. OpenDirectory).
Note: this setting corresponds to DHCP option 095.

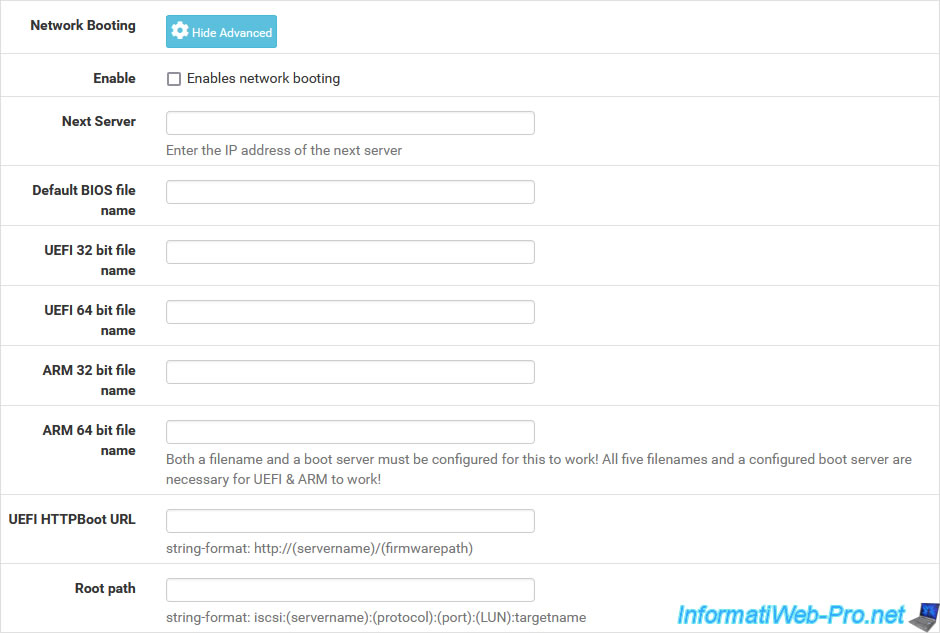
For the "LDAP" section, you will be able to specify settings regarding booting a client machine over the network via PXE.
For example: a thin client without a hard drive will be able to boot on the network by obtaining an IP address from your DHCP server, as well as download a bootable image from a TFTP server to boot from it.
- Enable: check the "Enables network booting" box to enable network booting.
- Next Server: the address of a server (e.g. a TFTP file server) from which the client machine will download a bootable image.
- Default BIOS file name: the name of the bootable image file (for old BIOS = Legacy BIOS).
- UEFI 32 bit file name: same, but for the 32-bit (x86) UEFI bootable image file.
- UEFI 64 bit file name: same, but in 64-bit UEFI (x64).
- ARM 32 bit file name: same, but for the ARM x32 bit architecture (instead of classic architectures: x86/x64).
- ARM 64 bit file name: same, but in ARM 64 bits (x64).
- UEFI HTTPBoot URL: allows you to use an HTTP link for booting over the network (in UEFI mode).
- Root path: allows you to target a specific device as the root system device for the client.
Important : if you want to use network boot (PXE), make sure BOOTP is enabled (at the top of the page).
Indeed, BOOTP will be used by the client machine to obtain its IP address, as well as the parameters configured here.
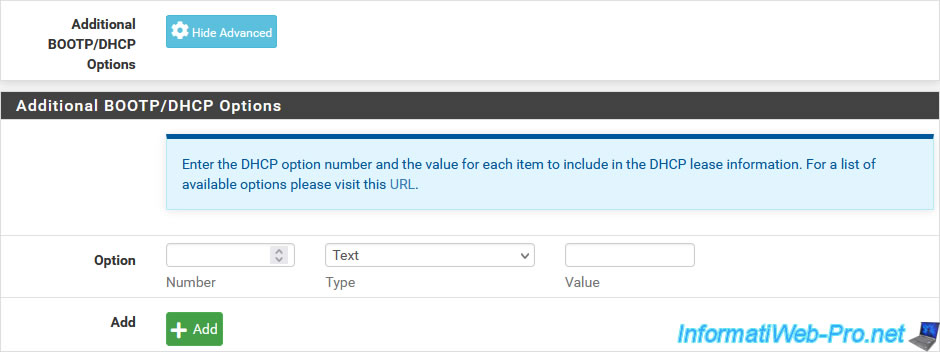
For the "Additional BOOTP/DHCP Options" section, you will be able to specify any other DHCP options not available via the previous settings.
Which allows you to use all existing DHCP options in the official specification (the link to which is available on the word "URL" visible in the blue frame) even if pfSense does not currently offer the corresponding settings.
At the bottom of the page, in the "DHCP Static Mappings for this Interface" section, you can add static mappings for specific DHCP clients (using their MAC address).
So these clients will always receive the same IP address from your DHCP server. The advantage is being able to define static IP addresses without manually going to each workstation or server separately.
Warning : clicking on the "Add" button in this section will send you to another page (Static DHCP Mapping on LAN).
Hence the fact that this section is displayed after the "Save" button.

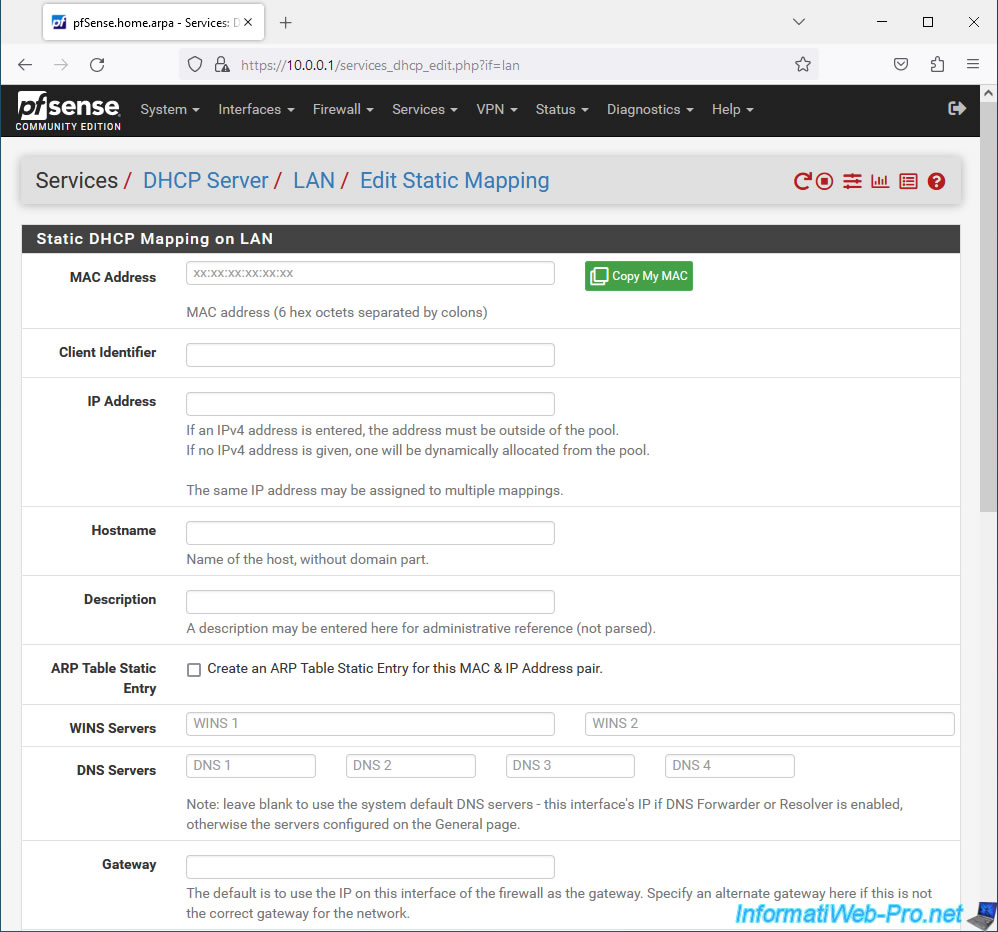
If you clicked on the "Add" button in the "DHCP Static Mappings for this Interface" section, the "Edit Static Mapping" page will appear with a "Static DHCP Mapping on LAN" section in which you can specify:
- MAC Address: the MAC address of the client to which you want to assign a static (fixed) IP address.
- Client Identifier: the client identifier (optional).
- IP Address: the IP address you prefer to assign to this specific client.
Warning: this is only a preference and not a reservation (as you could do on Windows Server, for example).
Which means that if the specified client is not turned on and the IP address specified here is part of a range of IP addresses distributed by your DHCP server, your DHCP server may assign this IP address to a another machine on the network.
When the specified client is powered on, it will not be able to use this IP address since it is already in use.
It is therefore recommended to specify it outside the range of IP addresses distributed by your DHCP server.
Moreover, in general, static IP addresses defined on machines on a network must always be outside the range of IP addresses distributed by your DHCP server to avoid IP address conflicts. - Hostname: the name of the targeted machine. Ex: its name NETBIOS. Not its full domain name (if applicable).
- Description: a description you want to provide for this customer. Purely indicative information displayed under pfSense.
- ARP Table Static Entry: allows you to create a static ARP table entry for this "MAC Address / IP Address" combination. Which is generally useless, but which can also be useful to avoid ARP spoofing, WoL (Wake on LAN), to reduce ARP traffic on a network, etc.
To do this, simply check the "Create an ARP Table Static Entry for this MAC & IP Address pair" box. - WINS Servers: allows you to specify the WINS server(s) that the client should use.
- DNS Servers: allows you to specify the DNS server(s) that the client should use.
In an Active Directory infrastructure, preferably indicate the IP address of the AD domain controller first. - Gateway: allows you to specify the IP address of the default gateway to use.
Then, the other settings offered are the same as when configuring your DHCP server.
Therefore, refer to the explanations given previously for these settings.
Sources :
- Static Mappings Inside DHCP Pools | pfSense Documentation
- Why create a static entry in the Arp table? | Netgate Forum
Share this tutorial
To see also
-
Firewall 8/6/2025
pfSense 2.6 - Create a network bridge
-
Firewall 8/29/2025
pfSense 2.6 - Implement Multi-WAN (Dual-WAN)
-
Firewall 8/27/2025
pfSense 2.6 - Load balancing via HAProxy
-
Firewall 6/18/2025
pfSense 2.6 - Manage quality of service (QoS)
You must be logged in to post a comment