Configure high availability (HA) on pfSense 2.6
- Firewall
- pfSense
- 24 August 2025 at 08:29 UTC
-

- 2/5

3. Configure the firewall of pfSense machines
3.1. Configure the firewall of the 1st pfSense machine (master)
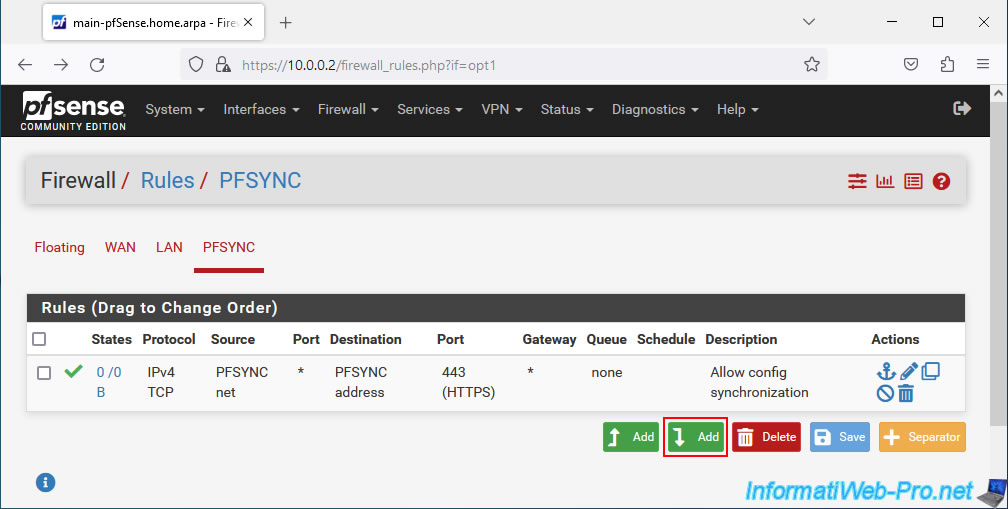
To start, on your 1st pfSense machine, go to: Firewall -> Rules.
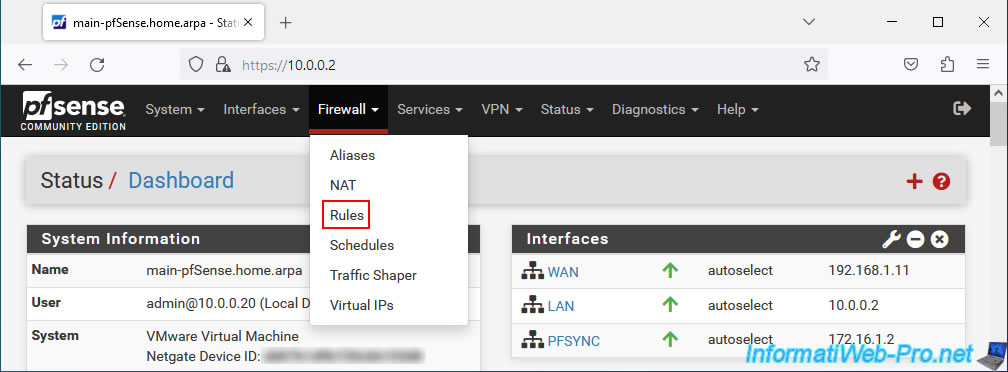
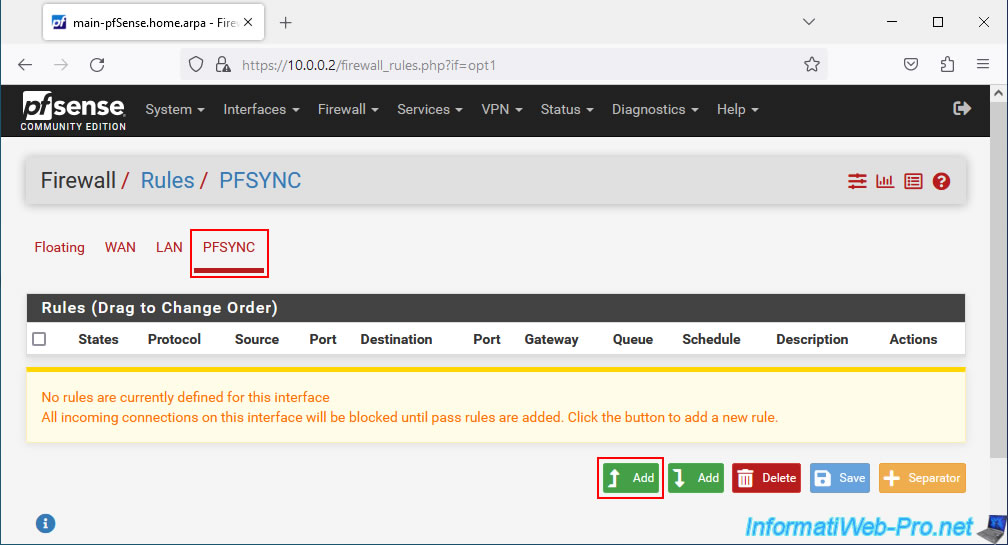
Go to the "PFSYNC" tab (which corresponds to the name of the logical interface (default: OPT1) added and renamed previously), then click on: Add.
Note: 2 rules + 1 optional must be created for synchronization via pfSync to work correctly.
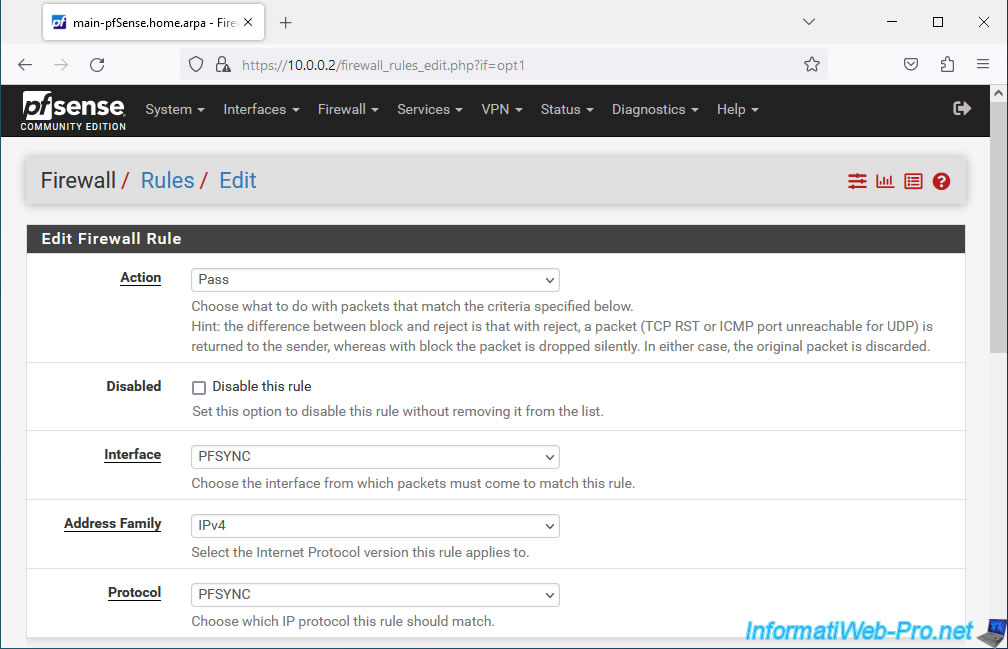
To get started, enable configuration synchronization by configuring these options:
- Action: Pass. To allow network traffic.
- Interface: PFSYNC. This concerns the "OPTx" logical interface renamed to "PFSYNC".
- Address Family: IPv4. In our case, we only use IPv4 for pfSync.
- Protocol: TCP. pfSync uses the HTTPS protocol (port 443) which is of type "TCP".

For the rest, configure:
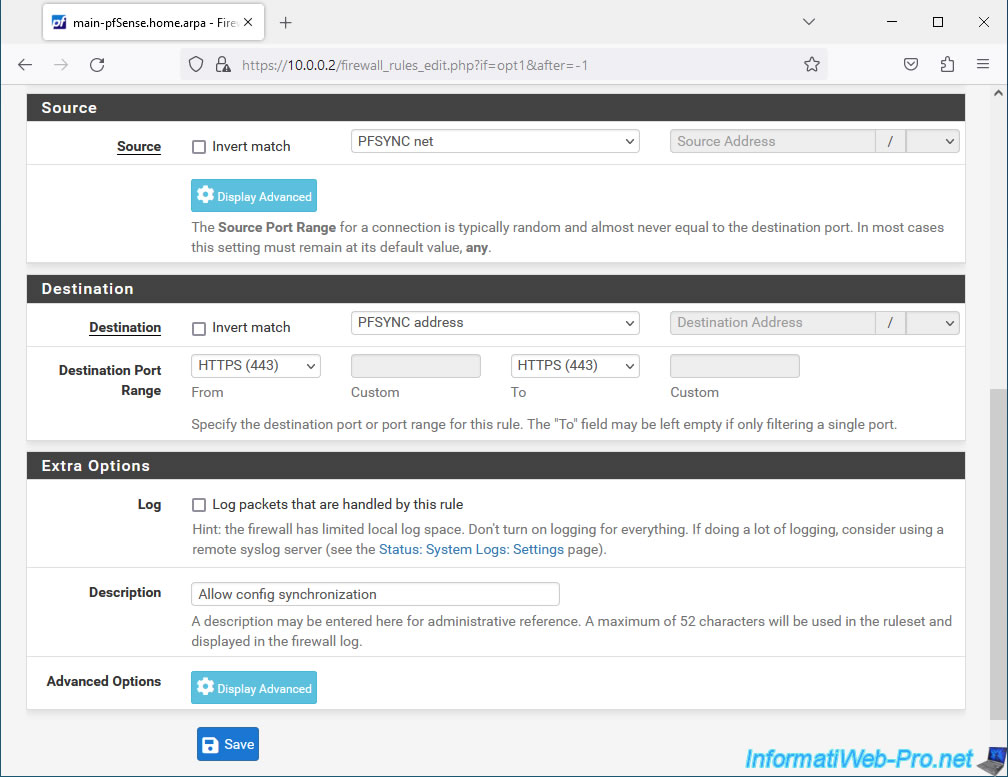
- Source: PFSYNC net. Corresponds to the network ID used on the "OPTx" interface renamed to "PFSYNC".
- Destination: PFSYNC address. Corresponds to the IP address defined on this "PFSYNC" interface.
- Destination Port Range: select port "HTTPS (443)" for "From" and "To".
As noted in the official documentation, pfSync uses the HTTPS protocol (port 443) for pfSense configuration synchronization. - Description: specify what you want.
In our case: Allow config synchronization.
Click Save.
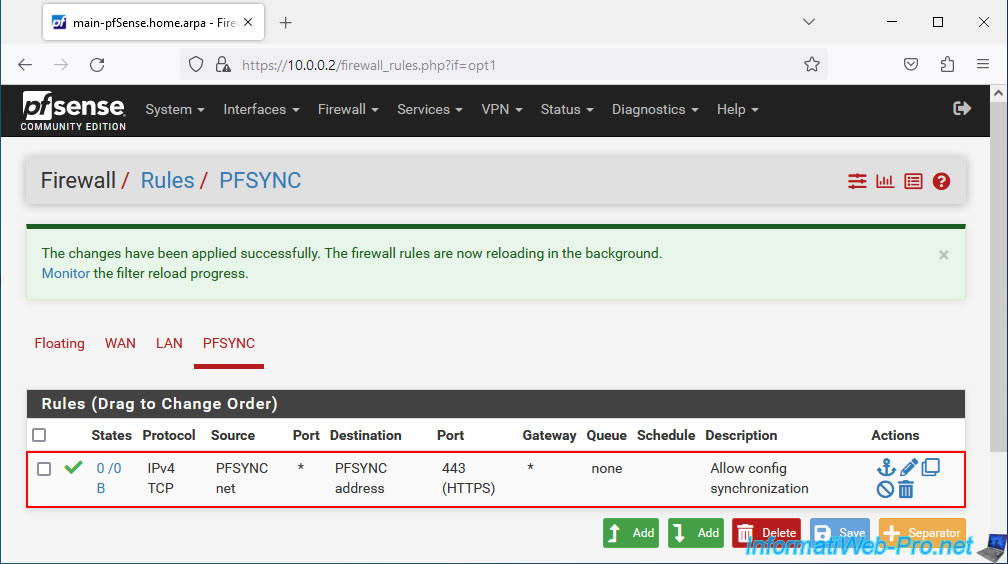
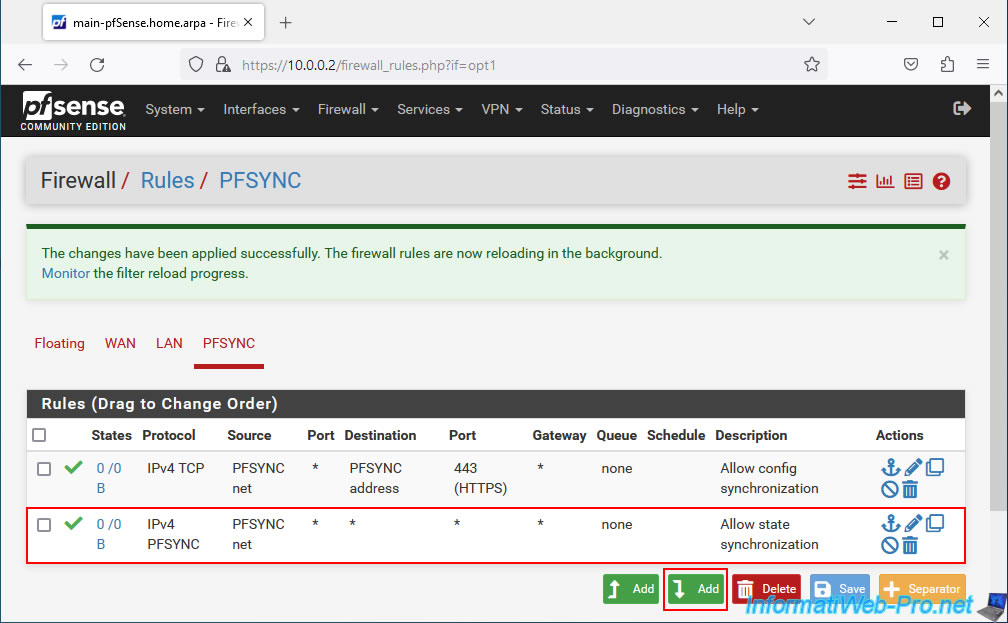
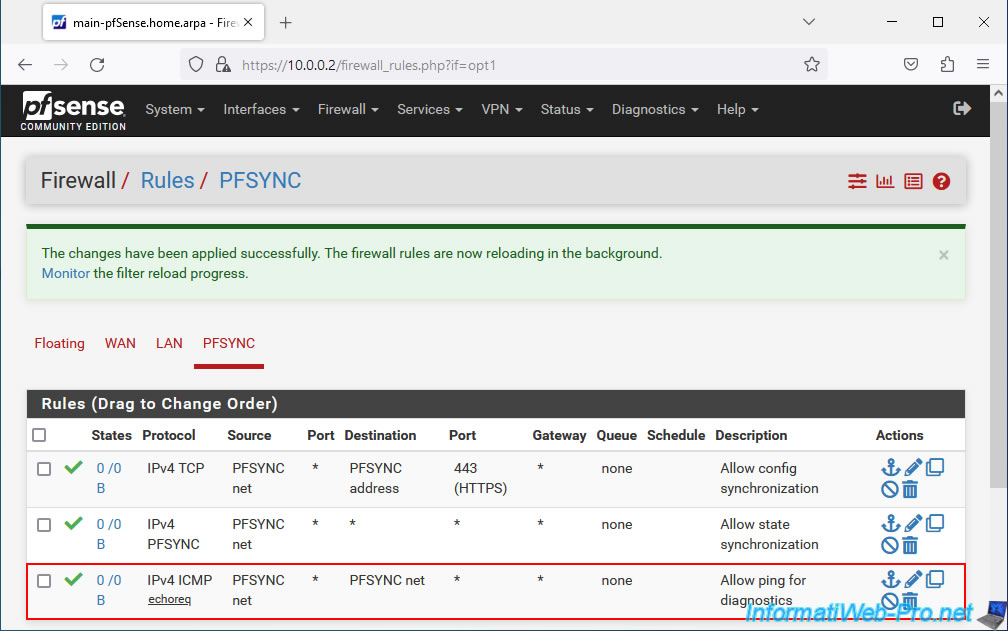
The 1st firewall rule was created for your "PFSYNC" logical interface.
Click again on: Add.
This time, you must allow network traffic using the "PFSYNC" protocol for state synchronization (master/slave) to work correctly.
- Action: Pass.
- Interface: PFSYNC. Concerns the "PFSYNC" logical interface (previously named "OPTx" by pfSense).
- Address Family: IPv4.
- Protocol: PFSYNC. Allows network traffic using the "PFSYNC" network protocol.
Then, configure this:
- Source: PFSYNC net. Corresponds to the subnet used for pfSync communication.
- Destination: any. (= everyone)
- Description: indicate for example "Allow state synchronization".
Click Save.

Your 2nd firewall rule has been created for your logical network interface "PFSYNC".
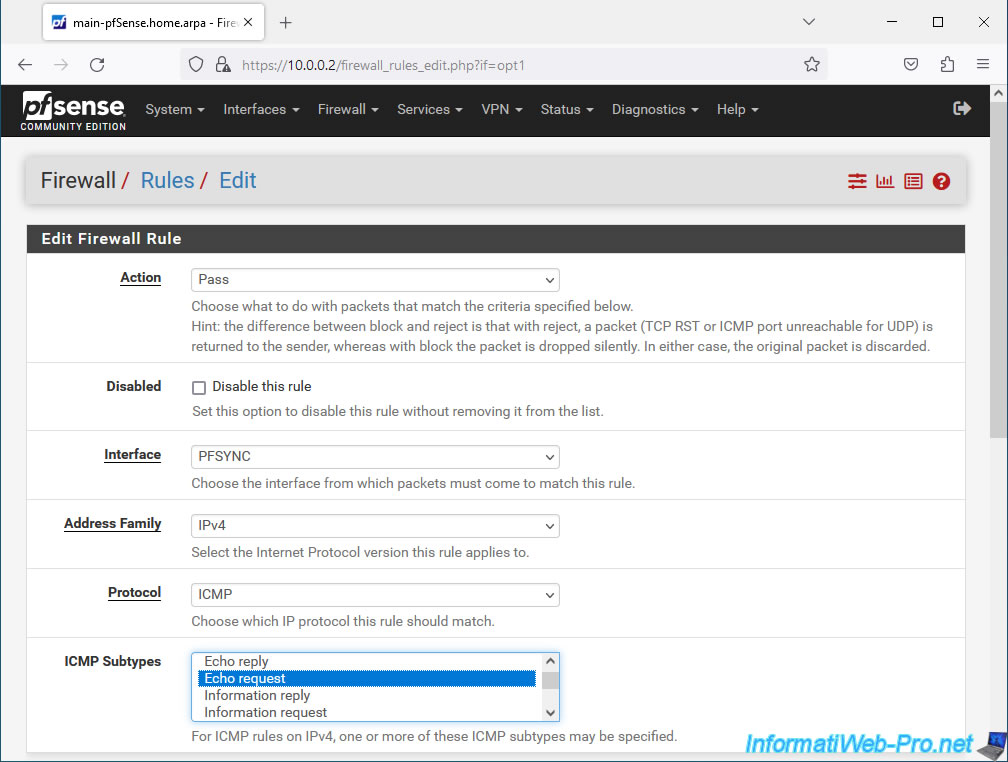
To be able to easily test the network connection via this interface, you can add a 3rd firewall rule (but which is optional).
To do this, click again on: Add.
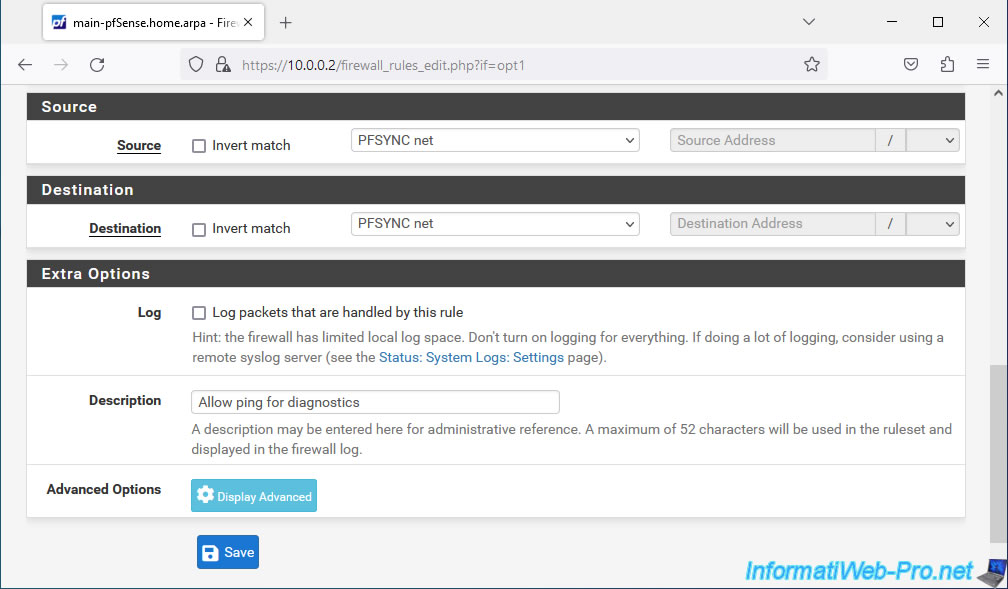
For this 3rd rule (optional), indicate this:
- Action: Pass.
- Interface: PFSYNC.
- Address Family: IPv4.
- Protocol: ICMP. Allows ping to be authorized.
- ICMP Subtypes: select only "Echo request". By default, all ping types are allowed, but the official pfSense documentation says to only select "Echo request" in this case.
Then, configure this:
- Source: PFSYNC net. Corresponds to the subnet used on this "PFSYNC" interface.
- Destination: same.
- Description: Allow ping for diagnostics.
Click Save.
Your 3rd firewall rule has been created.
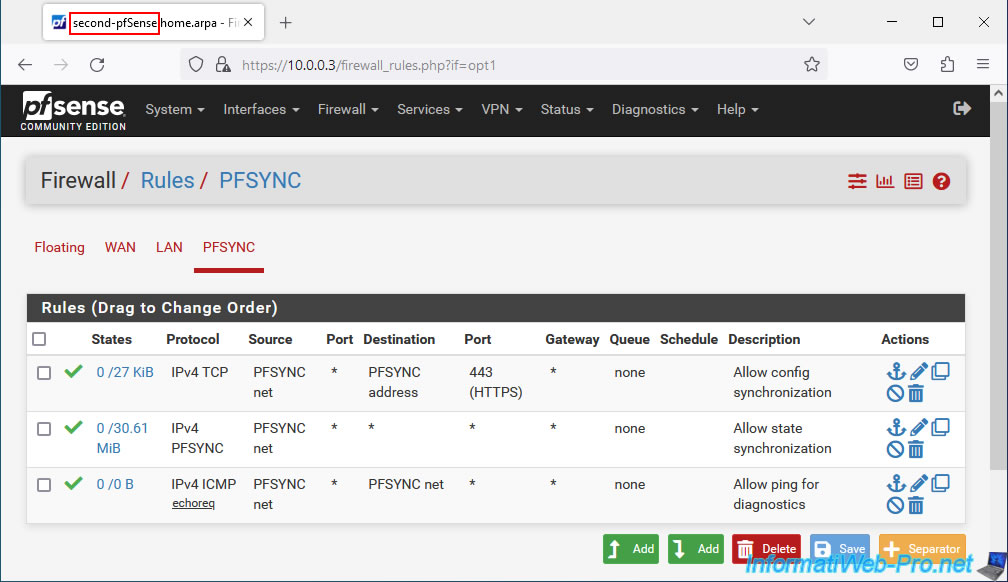
For your PFSYNC interface, you should therefore see these 3 rules in the pfSense firewall.
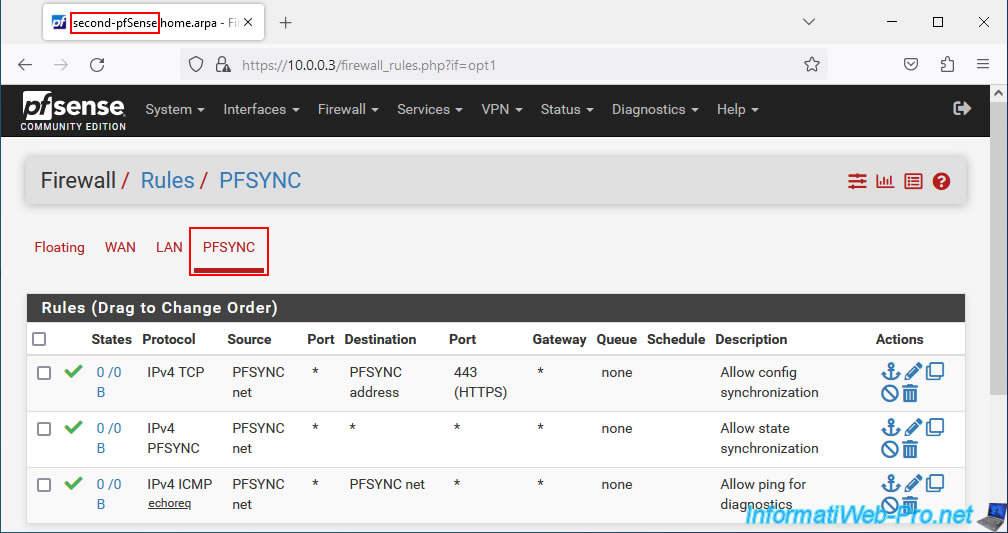
3.2. Configure the firewall of the 2nd pfSense machine (slave)
On your 2nd pfSense machine, create the same 3 rules in the firewall for the "PFSYNC" interface.
Which will give you this.
4. Configure state synchronization (pfSync) on the 2 pfSense machines
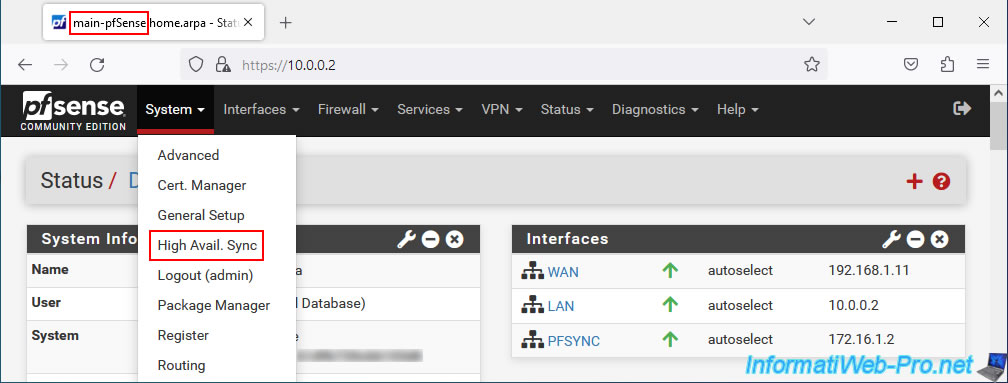
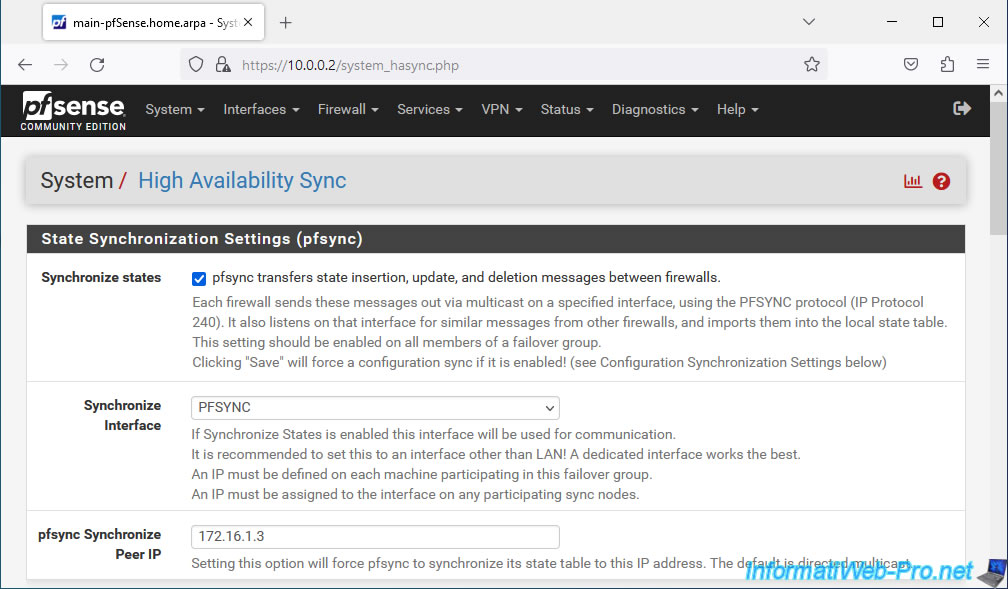
To get started, on your 1st pfSense machine, go to: System -> High Avail. Sync.
In the "State Synchronization Settings (pfsync)" section, configure only these settings for now:
- Synchronize states: check the "pfsync transfers state insertion, update, and deletion messages between firewalls" box to activate the sending and reception of messages sent in multicast and using the PFSYNC protocol.
This option must therefore be enabled on all members of a failover group. - Synchronize Interface: select the logical network interface "PFSYNC" created previously for pfsync to use this network interface.
- pfsync Synchronize Peer IP: indicate the IP address defined on the "PFSYNC" logical interface of the 2nd pfSense machine.
In our case, the "PFSYNC" interface of our "second-pfSense" machine has the IP address "172.16.1.3".
Then, at the bottom of the page, click Save.
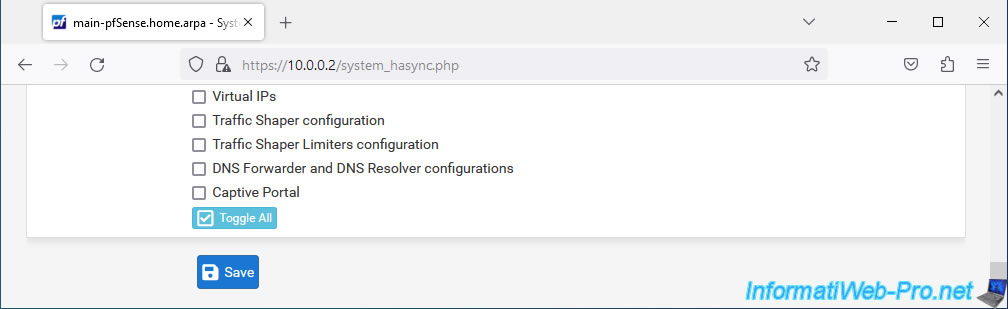
Then, on your 2nd pfSense machine also go to "System -> High Avail. Sync" and configure these first 3 settings as well.
Warning : in this case, the IP address to indicate for the "pfsync Synchronize Peer IP" parameter corresponds to the IP address of the "PFSYNC" interface of your first pfSense machine.
In our case, the 1st machine has the IP address "172.16.1.2" for PFSYNC.
![]()
Then, click "Save" at the bottom of the page.

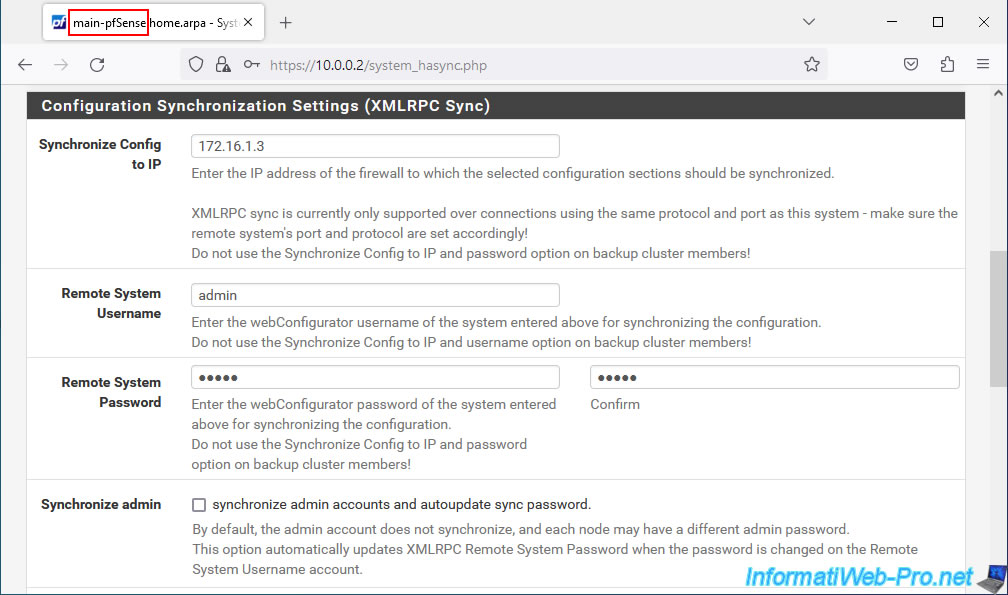
5. Configure configuration synchronization (XMLRPC) on the 1st pfSense machine (master)
Important : only on your 1st pfSense machine (master), configure the settings in the "Configuration Synchronization Settings (XMLRPC Sync)" section.
- Synchronize Config to IP: indicate the IP address (for the PFSYNC interface) of the 2nd pfSense machine.
This IP address is the same as for the "pfsync Synchronize Peer IP" option configured a little higher on this same page.
In our case: 172.16.1.3. - Remote System Username: the pfSense account username to use to synchronize the configuration.
Warning: this user account must be present on both pfSense machines and have the same password. - Remote System Password: the user account password.
- Synchronize admin: check this box if you want the modification of the password of the admin accounts to be replicated automatically to the 2nd pfSense machine.
This prevents synchronization between the two machines from being blocked if you change the password for the account specified here.
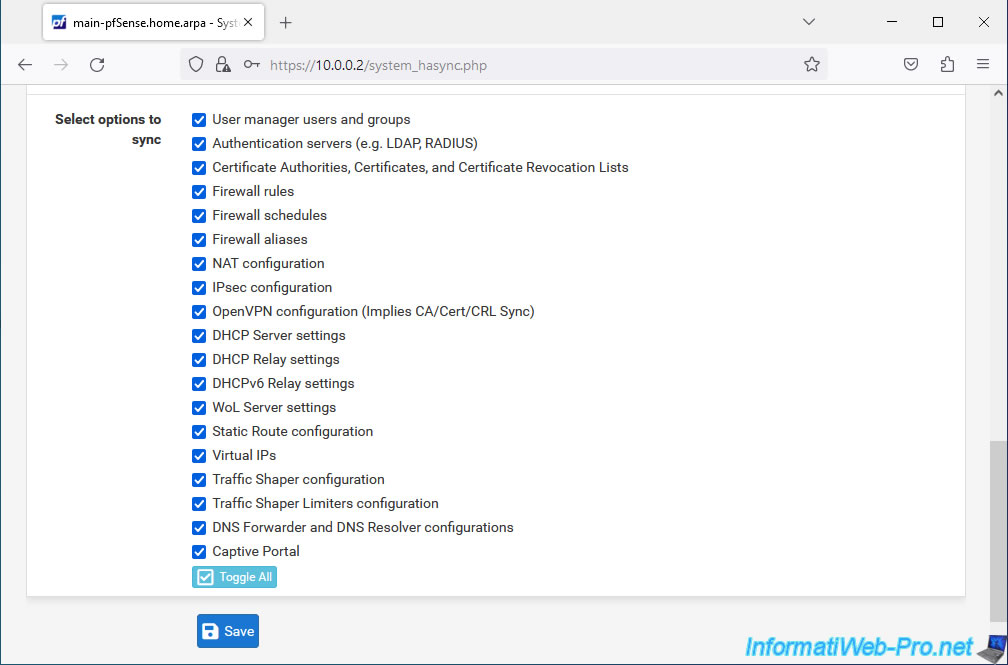
Select the items you want to automatically sync from the master pfSense machine to the slave pfSense machine.
To select everything, simply click "Toggle All" at the bottom of the "Select options to sync" option.
Then, click Save.
If you go to your 2nd pfSense machine, you will see that the desired configurations have been replicated there.
Warning : no longer modify configuration options on the 2nd pfSense machine which are replicated from the 1st pfSense machine.
Indeed, the modifications made on the 2nd pfSense machine would be lost when the 1st pfSense machine replicates its settings again to the 2nd pfSense machine.
Share this tutorial
To see also
-
Firewall 8/8/2025
pfSense 2.6 - Configure a LACP link (LAGG)
-

Firewall 9/5/2025
pfSense 2.6 - Create a VPN server (remote access) via OpenVPN (L3 mode)
-
Firewall 5/9/2025
pfSense 2.6 - Download and installation on VMware Workstation
-
Firewall 8/16/2025
pfSense 2.6 - Monitoring via SNMP and Zabbix 6
No comment