Configure high availability (HA) on pfSense 2.6
- Firewall
- pfSense
- 24 August 2025 at 08:29 UTC
-

- 5/5

9.3. Check pfSense configuration replication
If you enabled synchronization of all pfSense configuration items in step "5. Configure configuration synchronization (XMLRPC) on the 1st pfSense machine (master)", you can check the replication of the pfSense configuration in many places.
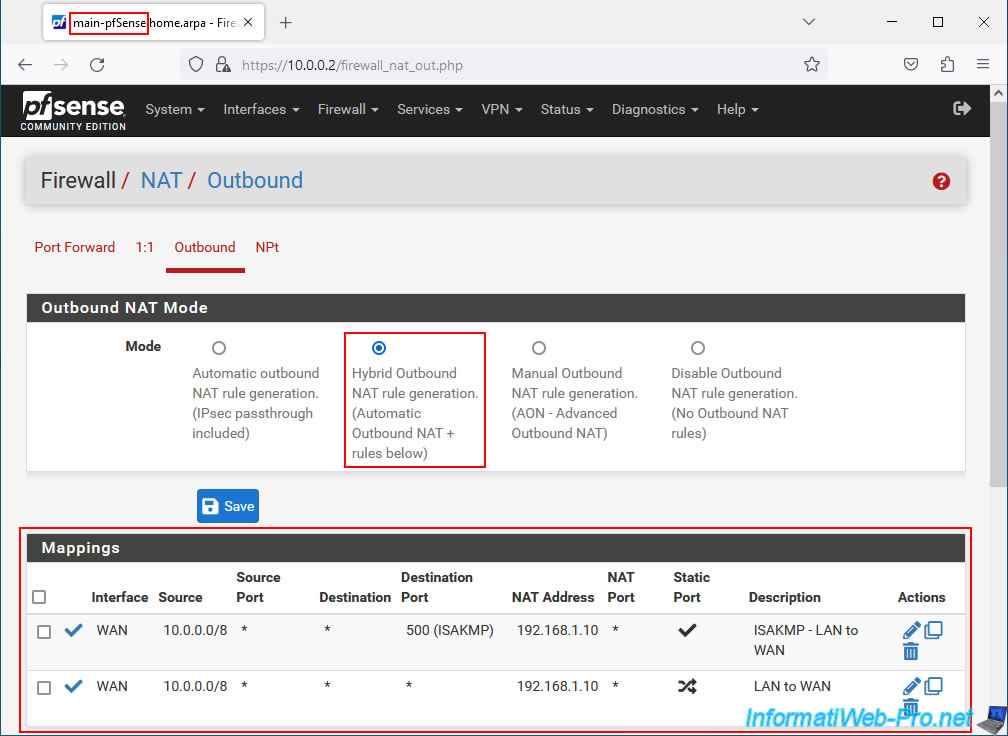
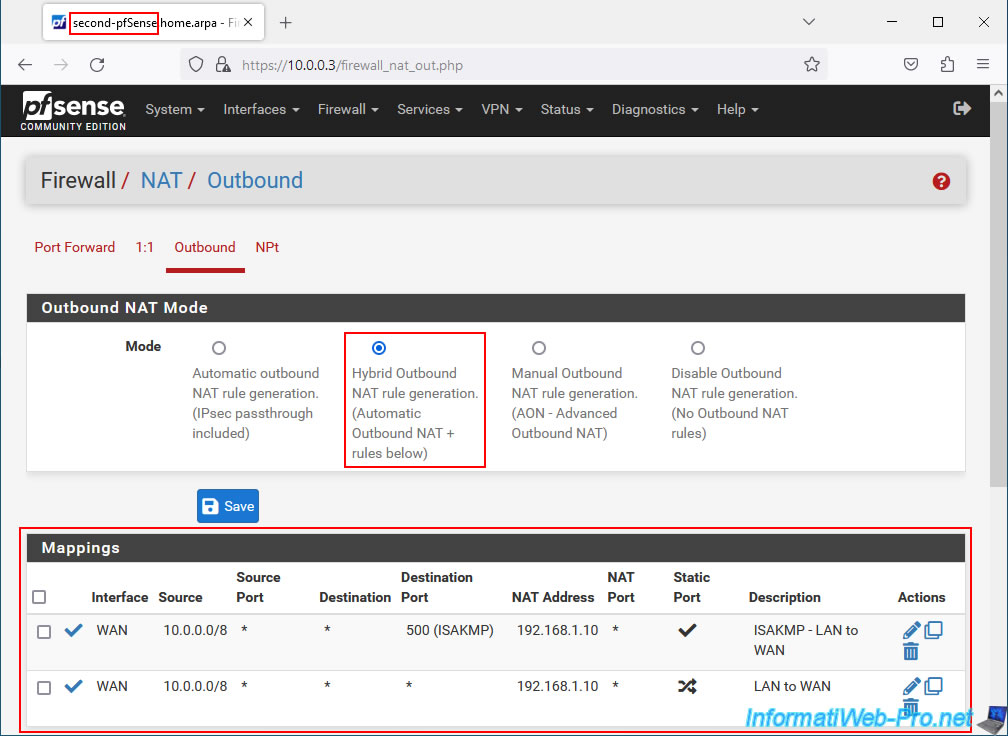
But, for example, you can check the replication of the Outbound NAT configuration by going to: Firewall -> NAT -> Outbound.
On your 2 machines, you will see that Hybrid Outbound NAT is used and that 2 NAT mappings are present.
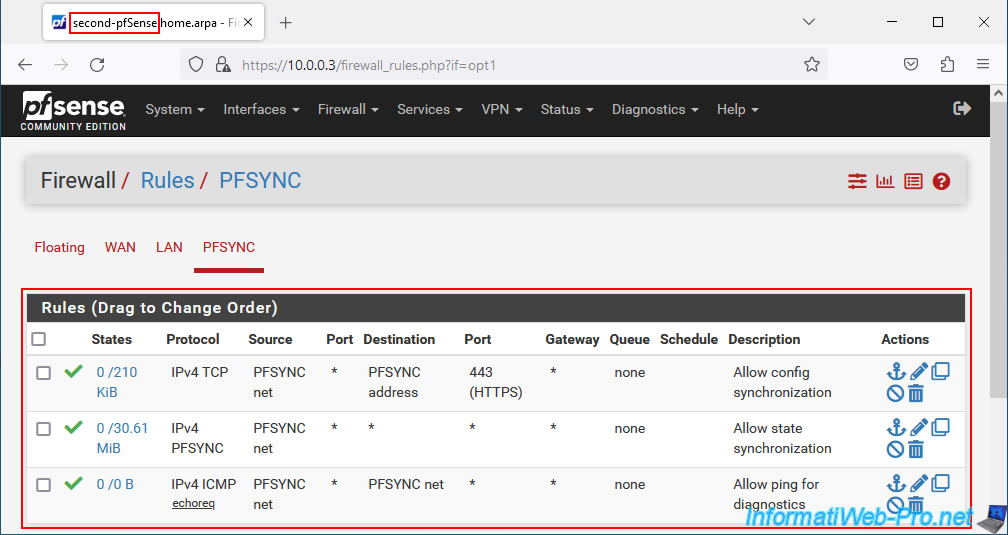
You can also check the pfSense firewall configuration by going to: Firewall -> Rules.
You will be able to see, for example, the replication of the rules defined for the "PFSYNC" interface.

9.4. Check DHCP server failover status
Previously, you specified the IP address of the other pfSense machine in the "Failover peer IP" field in the pfSense DHCP server configuration.
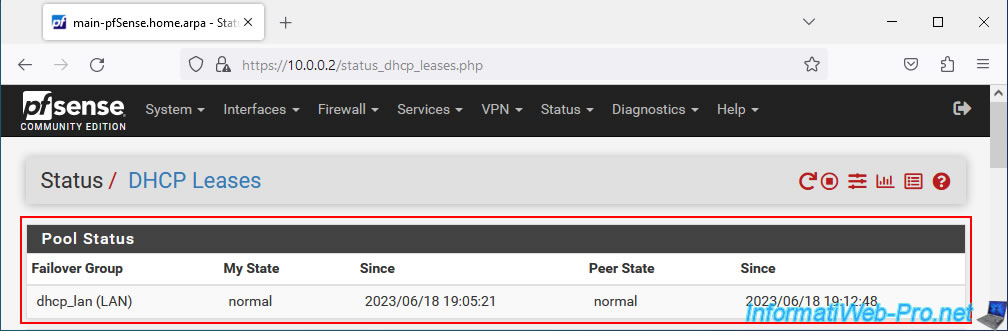
To check that pfSense has taken this into account, go to "Status -> DHCP Leases".
At the top of the page, you will see a "Pool Status" section appear.
As expected :
- My State: the status of the pfSense machine you are currently in is normal.
- Peer State: the status of the other pfSense machine is also normal.
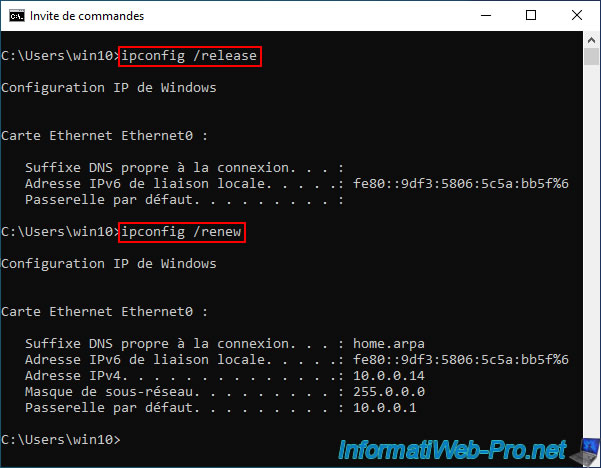
9.5. Force a LAN client PC to obtain new DHCP information
For machines on the LAN network to receive the new DHCP information (including the default gateway IP address and the preferred DNS server IP address pointing to the CARP virtual LAN IP (VIP) address), you simply need to open a command prompt and type the 2 commands below.
These respectively allow you to reset the network card of your machine, as well as release the IP address used. Then, request a new IP address from the DHCP server on your network.
Batch
ipconfig /release
ipconfig /renew
Note: if you do not want to use the command prompt, you can try to disable the network card, then re-enable it from the Windows "Network Connections" window.
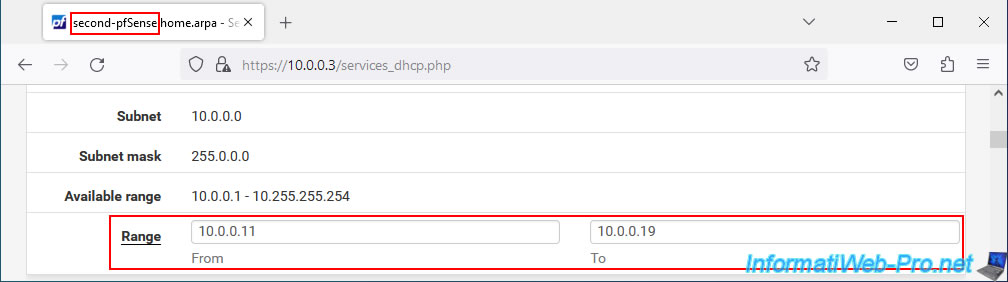
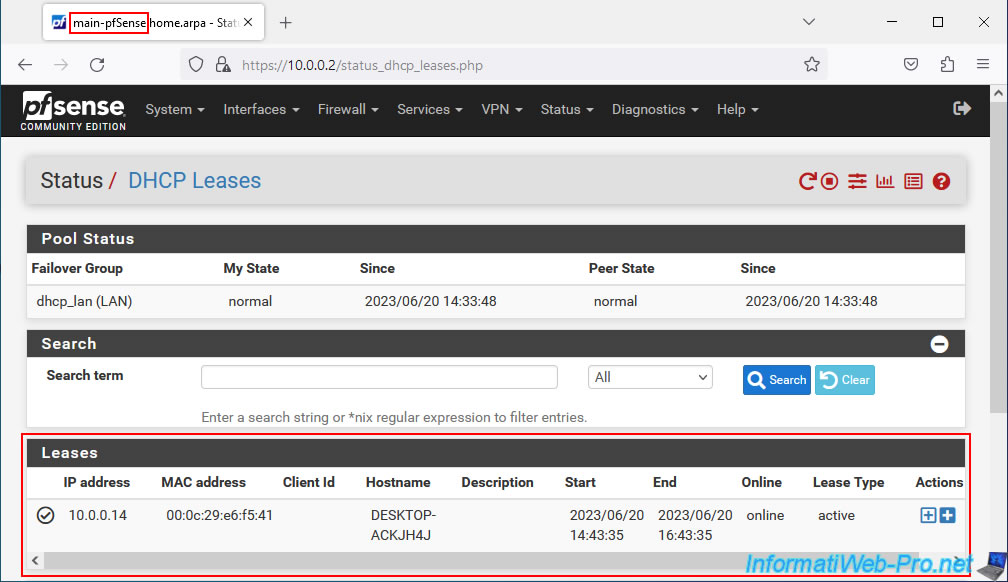
9.6. Replicated IP address pools and DHCP leases
If you go to the DHCP server configuration of your 2 machines, you will see that the DHCP range configured on the 1st pfSense machine (acting as master) has been replicated to the 2nd machine (acting as slave).

For DHCP leases, you will see that these are present on your 2 pfSense machines.
Thus, the 2 pfSense machines already know the list of IP addresses distributed on your network by your DHCP servers and will therefore never distribute the same IP address twice to 2 machines on your network.

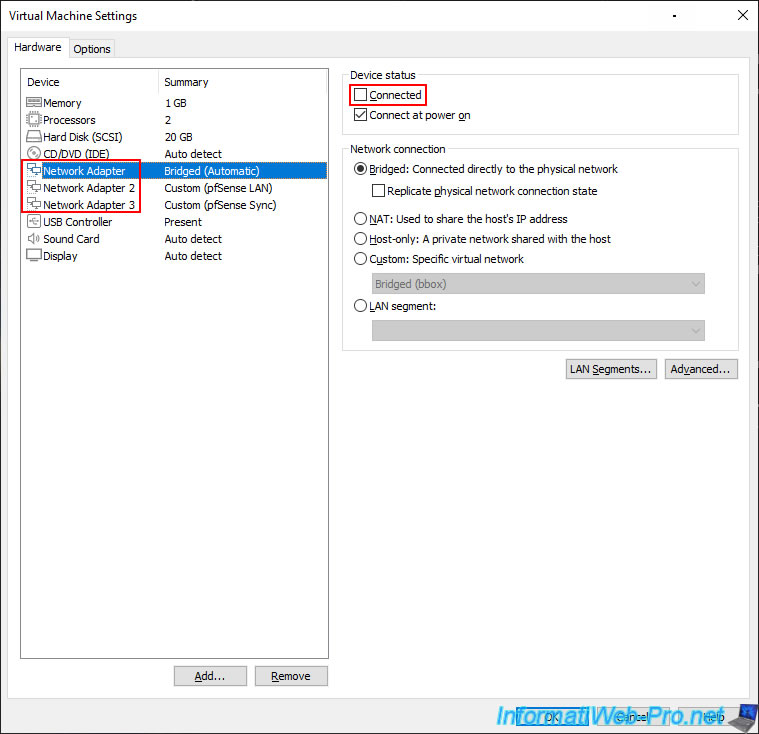
9.7. Test pfSense failover
If everything is good, then you can test the automatic failover of pfSense by disconnecting the 1st pfSense machine (which was acting as MASTER) from the network.
Disconnect all network adapters from this pfSense machine for testing.
Note: in our case, we installed pfSense in a virtual machine.
Hence the window below.
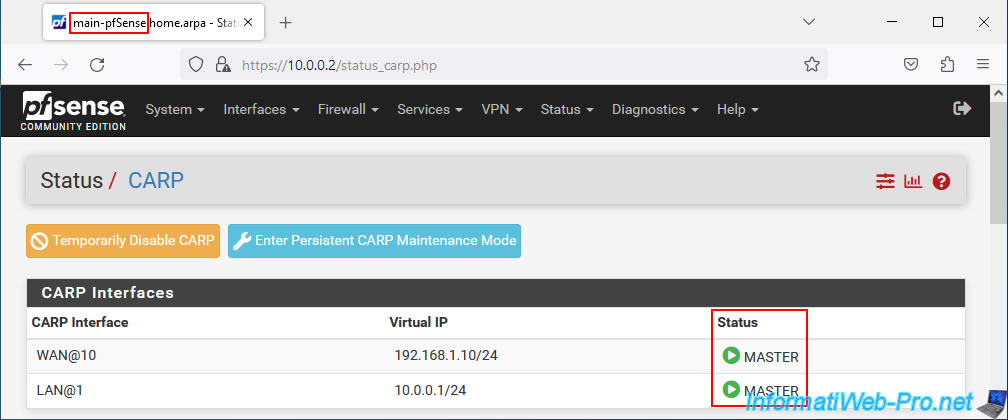
As expected, the 1st pfSense machine is inaccessible.
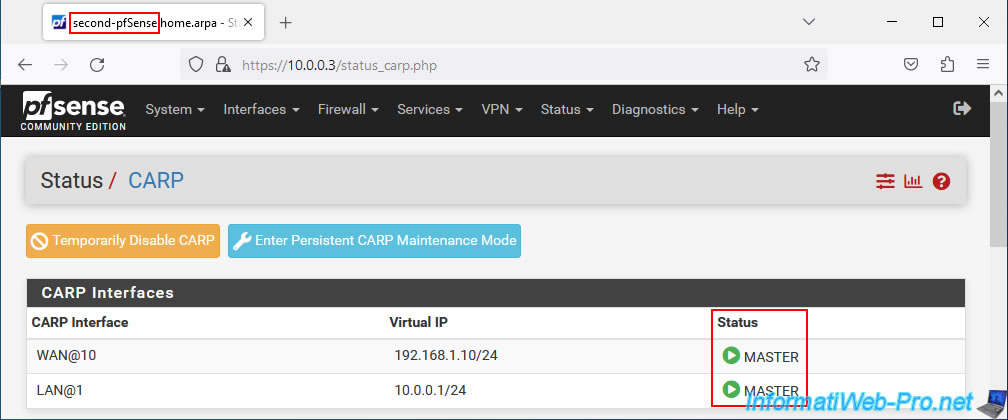
On your 2nd pfSense machine, go to: Status -> CARP.
As you can see, your 2nd pfSense machine now acts as the master for your CARP virtual IP (VIP) addresses.
Note: network and Internet access also work correctly.
Reconnect the 1st pfSense machine to the network.
Note: reconnect all its network adapters.

The 1st pfSense machine automatically becomes MASTER again.
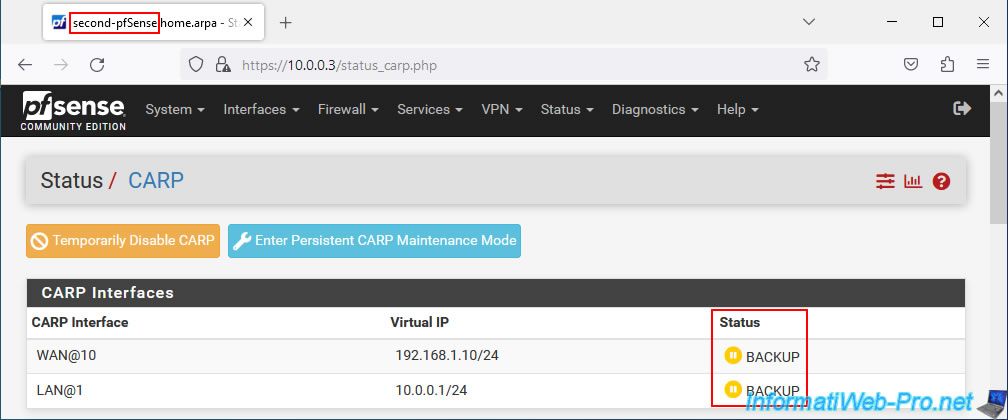
The 2nd pfSense machine automatically becomes a slave again (BACKUP).
If you test access to the network and more precisely to the LAN IP addresses, as well as the virtual LAN IP address shared by your 2 pfSense machines, you will see that it works.

The same goes for the Internet.
To do this, try to ping the IP address of Google's public DNS server "8.8.8.8". If this works, then you can try to ping a domain name, such as: google.com.

Testing procedure based on official pfSense documentation : Verifying Failover Functionality | pfSense Documentation.
Share this tutorial
To see also
-
Firewall 9/12/2025
pfSense 2.6 - Create a site-to-site (S2S) VPN tunnel via OpenVPN secured with shared key (PSK)
-
Firewall 8/29/2025
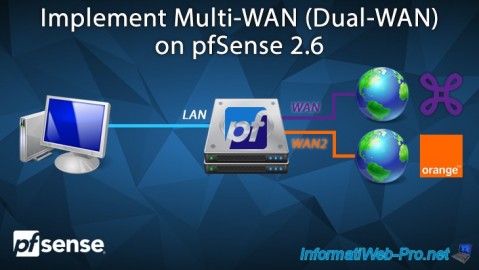
pfSense 2.6 - Implement Multi-WAN (Dual-WAN)
-
Firewall 5/23/2025
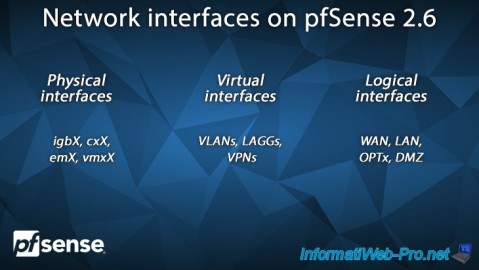
pfSense 2.6 - Network interfaces
-
Firewall 7/16/2025
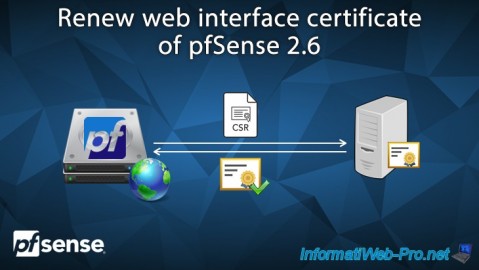
pfSense 2.6 - Renew web interface certificate
No comment