- Firewall
- pfSense
- 09 May 2025 at 11:57 UTC
-

- 1/4

pfSense is software originally allowing you to create a firewall/router, but pfSense can also be used to create a VPN server, as well as install other network services (DHCP, DNS, NTP, ...).
- Download pfSense CE
- Create the internal LAN network (virtualized via VMware Workstation)
- Virtualize pfSense on VMware Workstation Pro
- Install pfSense CE 2.6
- Initial configuration of pfSense from the command line
- Configure the IP address of the pfSense WAN and LAN interfaces
- Connect a client PC to the pfSense LAN network
- Initial configuration of pfSense via web interface
- Network access of client machines
- Install VMware drivers (VMware VMs only)
- Configuring the pfSense DHCP server
- Remove Netgate support widget (optional)
- DNS resolution for client PCs
1. Download pfSense CE
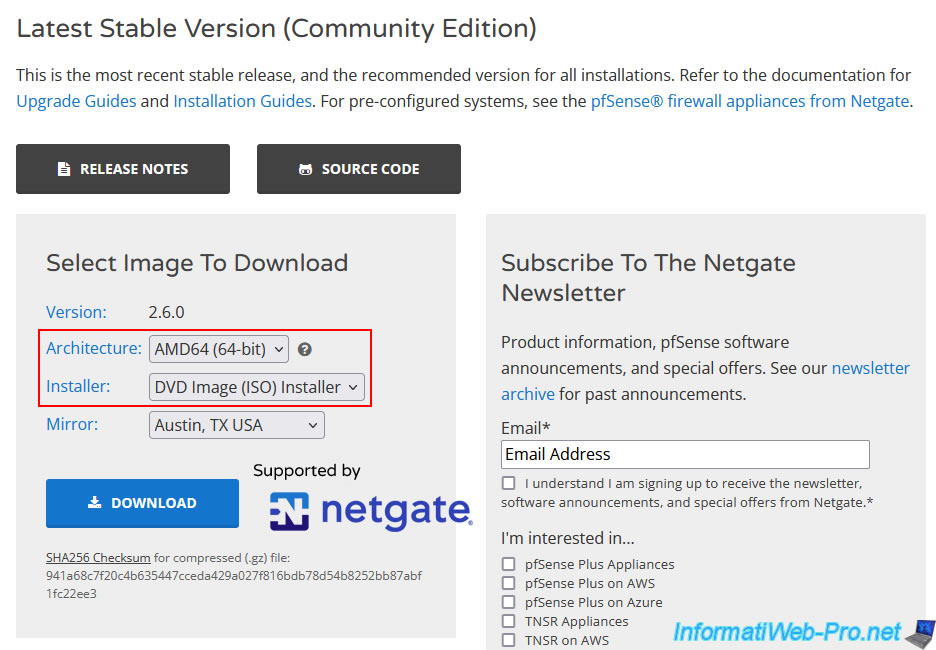
To get started, go to the pfSense download page and select:
- Architecture : AMD64 (64-bit).
- Installer : DVD Image (ISO) Installer.
Then, click "Download".
Note: the "Community Edition" version is the free version of pfSense, but it is possible to benefit from paid support from Netgate if you wish.
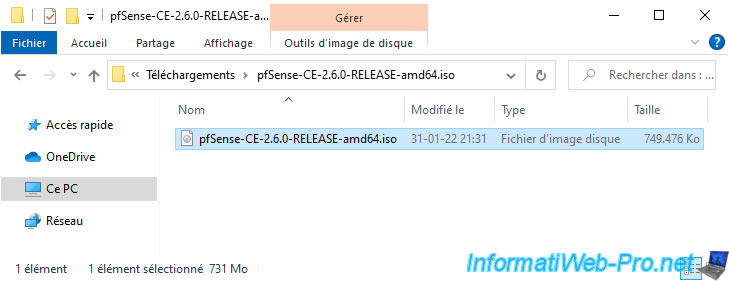
Once the download is complete, unzip the resulting "pfSense-CE-x.x.x-RELEASE-amd64.iso.gz" file.
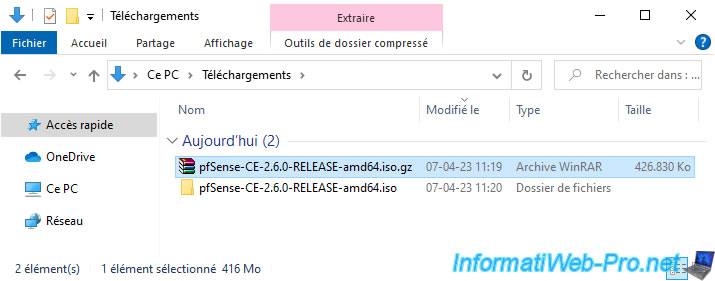
As expected, you will find a file "pfSense-CE-x.x.x-RELEASE-amd64.iso".
2. Create the internal LAN network (virtualized via VMware Workstation)
Although pfSense can be installed on a physical computer to turn it into a firewall, router, ..., you can also install it in a virtual machine.
In our case, we will use VMware Workstation Pro which allows you to easily create virtual internal networks using Virtual Network Editor.
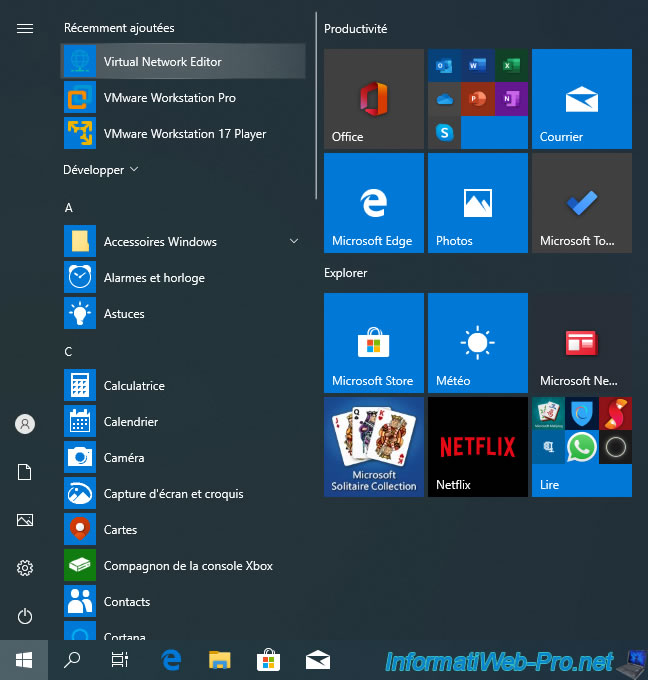
To launch the "Virtual Network Editor" program, use the shortcut in the start menu.
You can also go through the "Edit -> Virtual Network Editor" menu in VMware Workstation Pro.

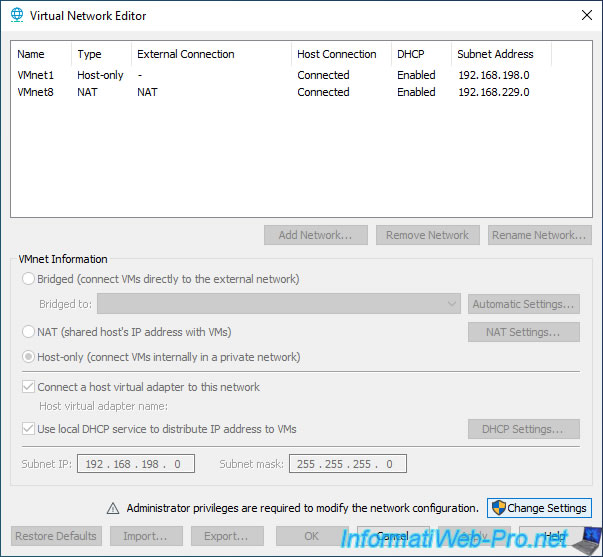
To get started, click "Change Settings".
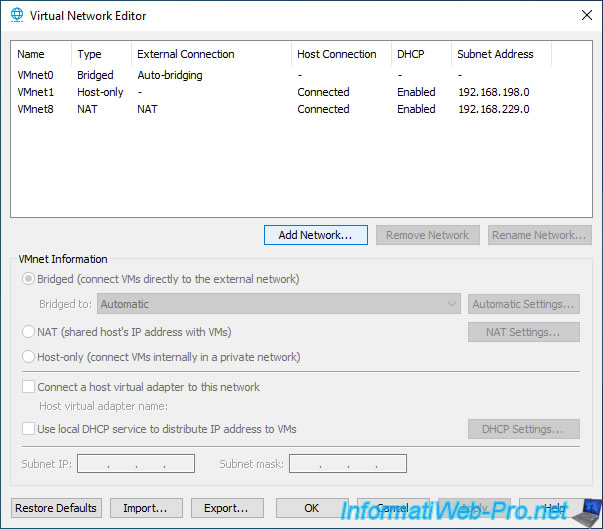
Click "Add Network" to add a new VMware virtual network.
Click OK.
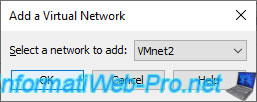
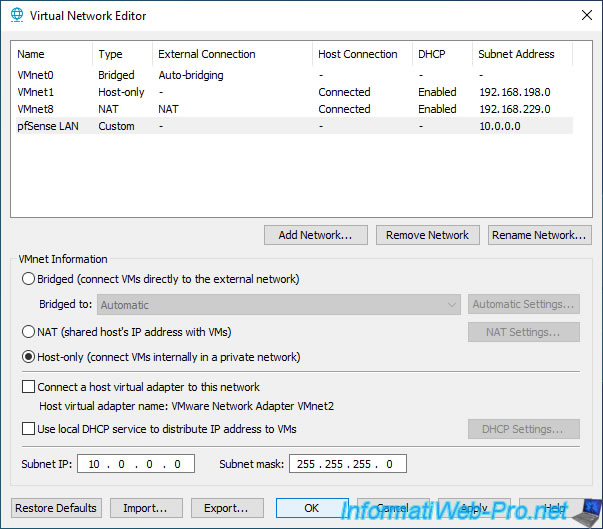
In our case, it is the virtual network "VMnet2" which has been added (the number does not matter, except to locate it).
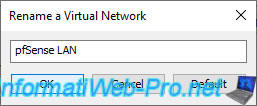
However, you can rename it (for information only in VMware) by selecting the added virtual network, then clicking on "Rename Network".
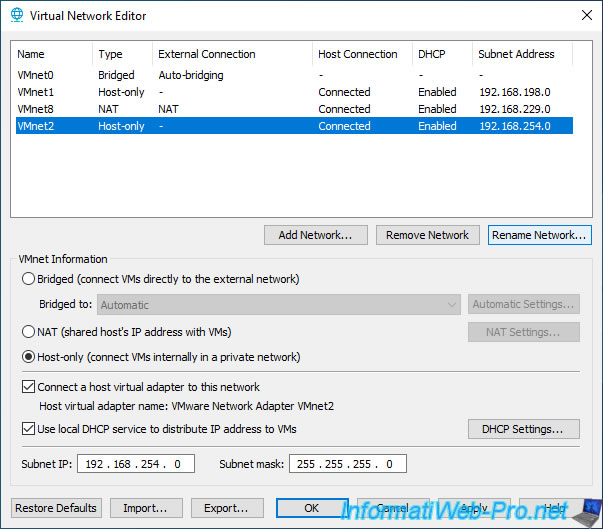
In our case, we will rename this virtual network "pfSense LAN".
Then, configure this virtual network "pfSense LAN" like this:
- select "Host-only (connect VMs internally in a private network)" to create a virtual network internal to your computer.
- uncheck the box "Connect a host virtual adapter to this network" to prevent your physical computer from connecting to this internal VMware network.
- uncheck the box "Use local DHCP service to distribute IP address to VMs" to disable the VMware Workstation Po DHCP server so that your VMs (which you will connect to this virtual network) can receive an IP address from the pfSense DHCP server.
- Subnet IP: the network ID you will use on this internal network.
In our case, we will use the network ID 10.0.0.0. - Subnet mask: the corresponding subnet mask.
In our case, the corresponding subnet mask is "255.0.0.0".
Note: we will use the "10.x.x.x" network for the internal network, because the pfSense WAN network card will be connected to our physical network at "192.168.1.x".
3. Virtualize pfSense on VMware Workstation Pro
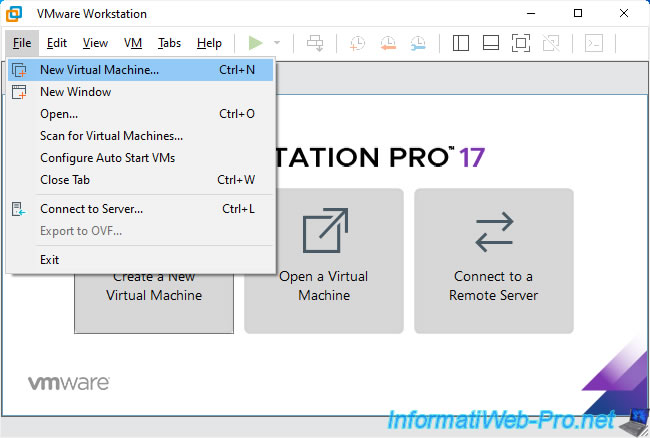
To get started, in VMware Workstation Pro, go to: File -> New Virtual Machine.
Note: if you want to install pfSense on a physical machine, refer to the "Official pfSense Hardware, Appliances, and Security Gateways" page.
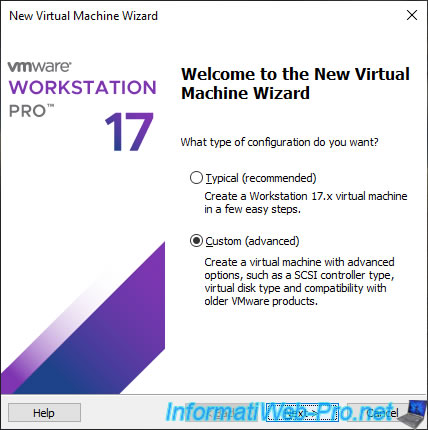
Select "Custom (advanced)" and click Next.
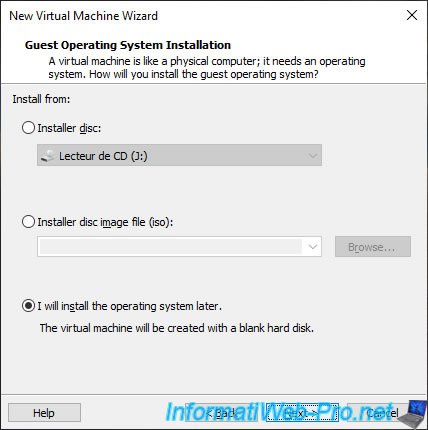
Select "I will install the operating system later".
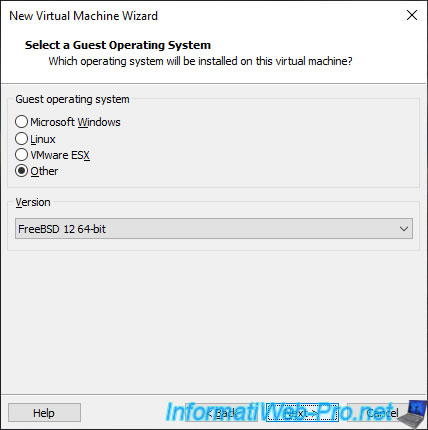
In the case of pfSense 2.6.0, this distribution is based on FreeBSD 12.3.
For future pfSense releases, you can find the FreeBSD version your pfSense release is based on on the "Versions of pfSense software and FreeBSD | pfSense Documentation" page.
In our case, we therefore select:
- Guest operating system : Other.
- Version : FreeBSD 12 64-bit.
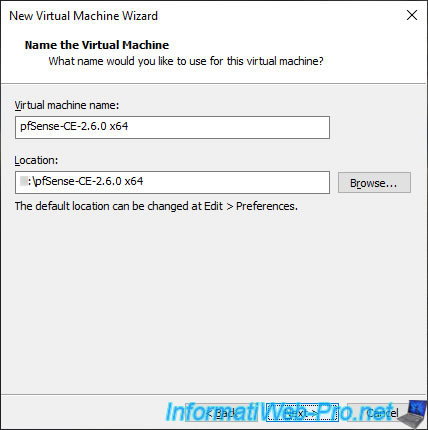
Specify "pfSense-CE..." as the name for this VM.
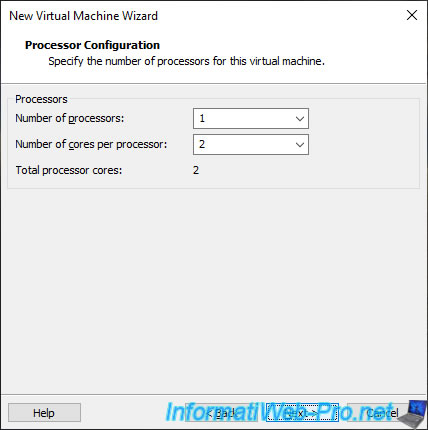
The minimum number of cores to use for the processor is 1.
However, if you have the possibility, it may be interesting to add some.
In our case, we will therefore allocate 2 processor cores to this VM.
For the minimum configuration required by pfSense, refer to the "Minimum Hardware Requirements | pfSense Documentation" page.
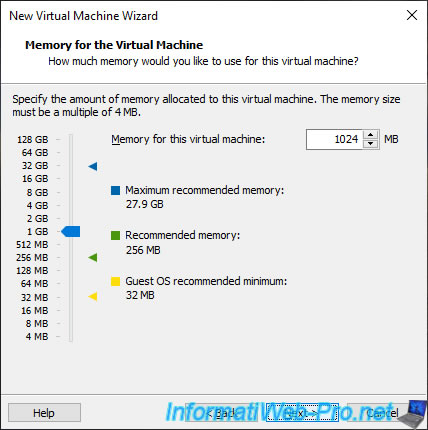
According to the official pfSense documentation, if you want to use pfSense as a firewall only, 1 GB (1024 MB) of RAM is sufficient.
However, depending on the features you want and the plugins you may install, you may need more RAM.
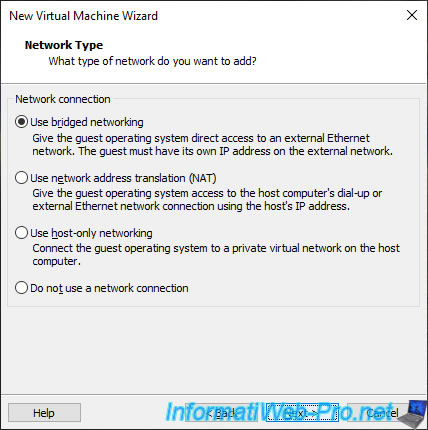
When you install pfSense as a router (by default), pfSense will be connected to 2 networks:
- WAN interface: in our case, our physical network.
So, we select "Use bridged networking" for the 1st virtual network card of this VM. - LAN interface: for which you will later need to add a virtual network card that you will connect to your "pfSense LAN" virtual network.
But, you will see that later.
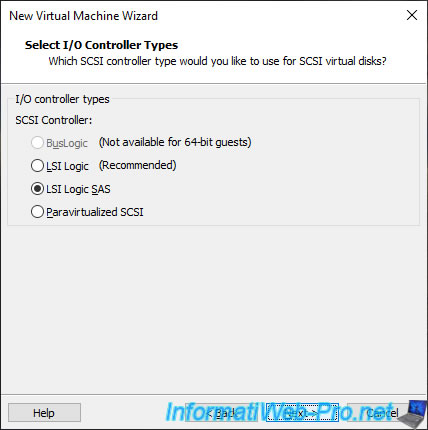
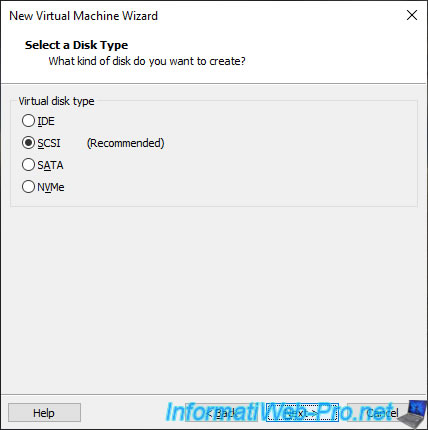
As noted in the official pfSense documentation, LSI Logic SAS is a pfSense compatible controller.
So, select this type of SCSI controller.
Leave the "SCSI" disk type selected as default.
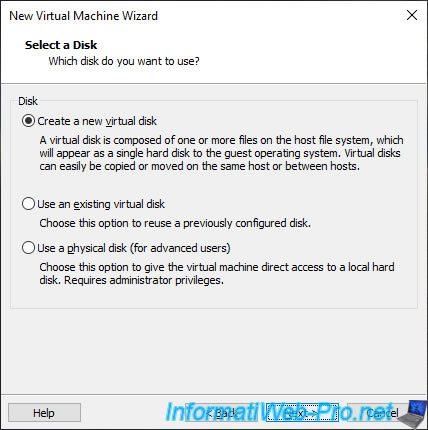
Leave the "Create a new virtual disk" option selected and click Next.
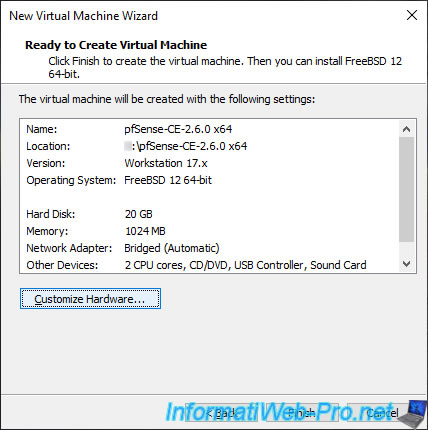
Again, the documentation says to allocate at least 16 GB of disk space, but you may need more disk space if you install large plug-ins.
So, leave the value of 20 GB indicated as default or indicate at least 16 GB.

Click "Customize Hardware".
In the "Hardware" window that appears:
- select the device "New CD/DVD (IDE)"
- select the option "Use ISO image file"
- click "Browse" and select the "pfSense-CE-x.x.x-RELEASE-amd64.iso" file downloaded previously.

Next, click "Add" (at the bottom of the window).

Select "Network Adapter" and click Finish to add a second virtual network adapter to your virtual machine.
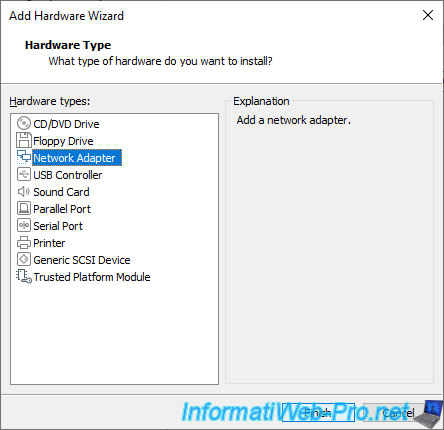
For this 2nd virtual network adapter (Network Adapter 2), select "Custom", then select your virtual network "pfSense LAN" from the list provided.
Click Close.
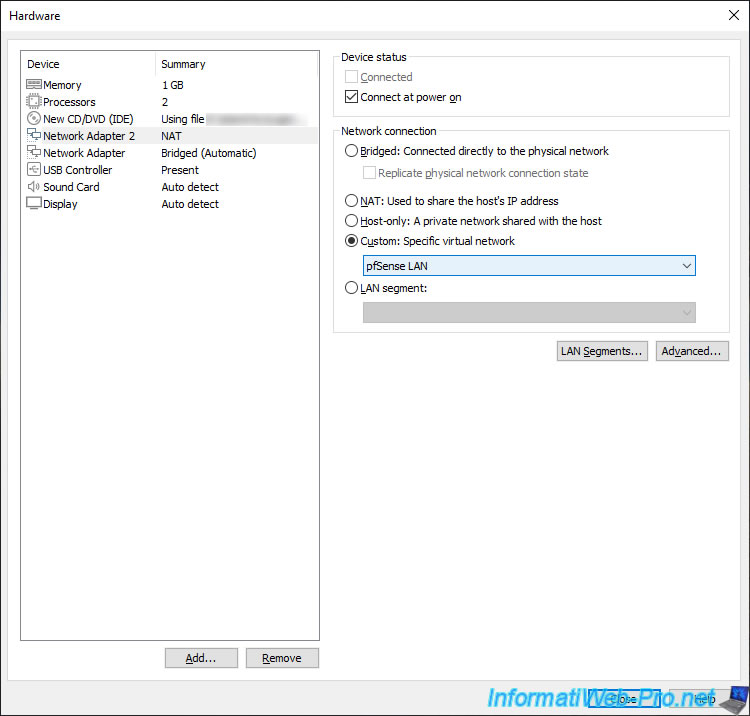
Click Finish.
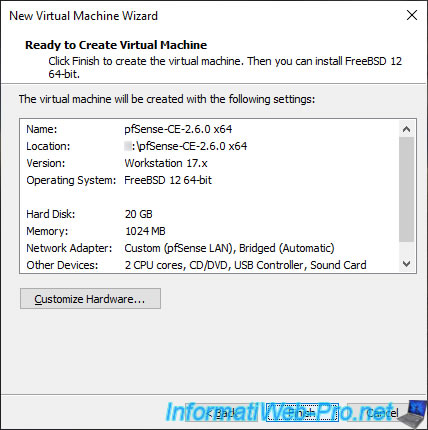
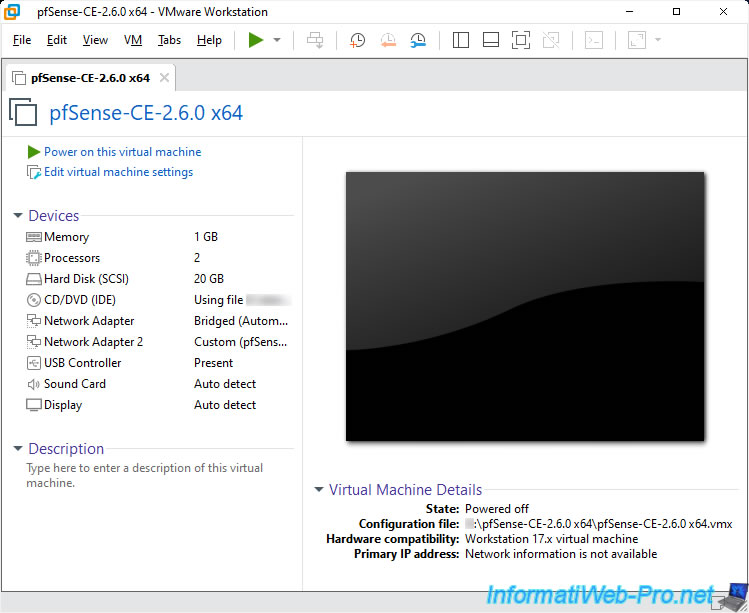
Your "pfSense-CE-x.x.x x64" virtual machine appears.
To improve the performance of your virtual machine, pfSense recommends using "VMXNET3" paravirtual network adapters instead of the virtual network card model used by default.
However, this requires modification of the ".vmx" configuration file of your virtual machine, as this is not possible from the VMware Workstation Pro graphical interface.
Warning : for these changes to be taken into account, it is important that the virtual machine concerned is not currently open in VMware Workstation Pro.
To do this, close the tab corresponding to your "pfSense-CE-x.x.x x64" virtual machine or close the VMware Workstation Pro window.

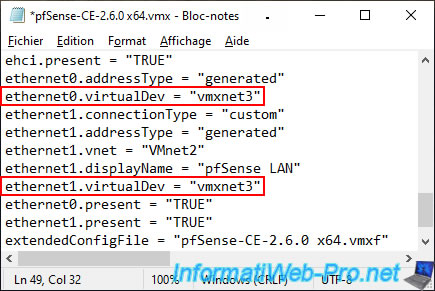
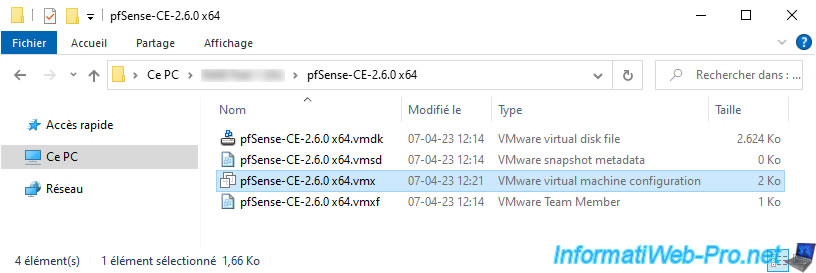
Next, go to your virtual machine folder and open the ".vmx" file with notepad.
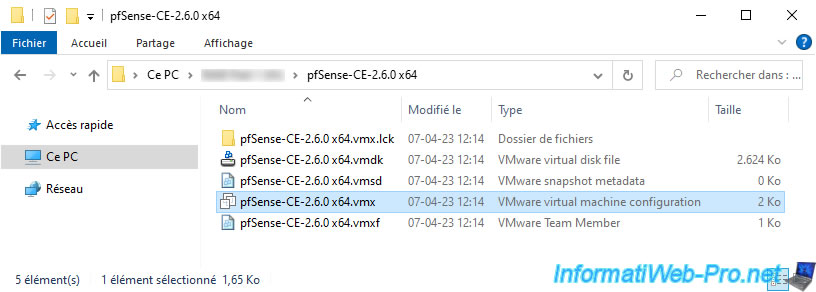
In this file, you will find configuration options for your 2 virtual network cards (ethernet0 and ethernet1).
As you can see, by default, VMware Workstation Pro uses an "e1000" virtual network adapter (which corresponds to the "Intel 82545EM Gigabit Ethernet" network adapter).
Source : Network Adapter Basics - VMware Docs.
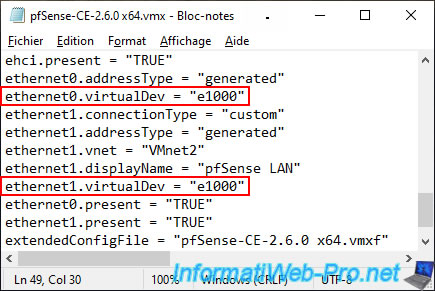
For your virtual machine on VMware Workstation Pro to use VMXNET3 paravirtual network adapters, simply modify the "virtualDev" property of them like this:
Plain Text
ethernet0.virtualDev = "vmxnet3"
ethernet1.virtualDev = "vmxnet3"
Source : Configure vNIC to use vmxnet3 driver | VMware Workstation - Broadcom.
For VMware Workstation Pro to use the new values in this configuration file, you must double-click on this ".vmx" file.
Your virtual machine appears on VMware Workstation Pro.
Procedure based on official pfSsense documentation : Virtualizing pfSense Software with VMware vSphere / ESXi | pfSense Documentation.
Share this tutorial
To see also
-
Firewall 8/24/2025
pfSense 2.6 - Configure high availability (HA)
-
Firewall 6/11/2025
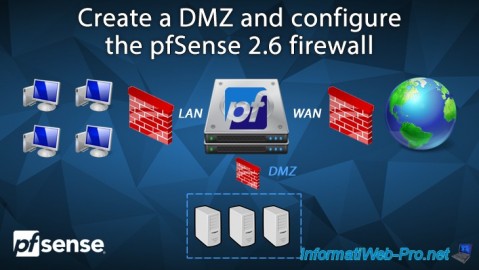
pfSense 2.6 - Create a DMZ and configure the firewall
-
Firewall 9/3/2025
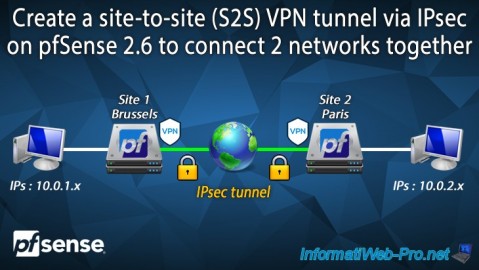
pfSense 2.6 - Create a site-to-site (S2S) VPN tunnel via IPsec
-
Firewall 6/13/2025
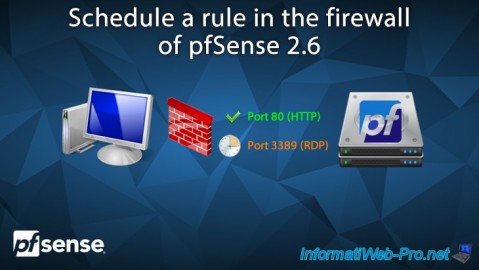
pfSense 2.6 - Schedule a rule in the firewall
You must be logged in to post a comment