- Firewall
- pfSense
- 20 August 2025 at 08:38 UTC
-


By default, pfSense supports the SNMPv1 and SNMPv2 protocols for monitoring via monitoring software (such as: Zabbix, Nagios, ...).
However, these versions of the SNMP protocol are not secure and therefore require the use of difficult-to-guess community names and/or a separate network to limit possible attacks.
To overcome this security problem, you can use the SNMPv3 protocol using a third-party package available for pfSense.
- Disable pfSense native SNMPv1/SNMPv2 protocol
- Install the SNMPv3 protocol on pfSense using the net-snmp package
- Configure the net-snmp packet to enable the SNMPv3 protocol
- Add pfSense in Zabbix using SNMPv3
1. Disable pfSense native SNMPv1/SNMPv2 protocol
Before you can use the SNMPv3 protocol (which necessarily uses the same port as previous versions of SNMP), you must disable the SNMP protocol installed natively in pfSense.
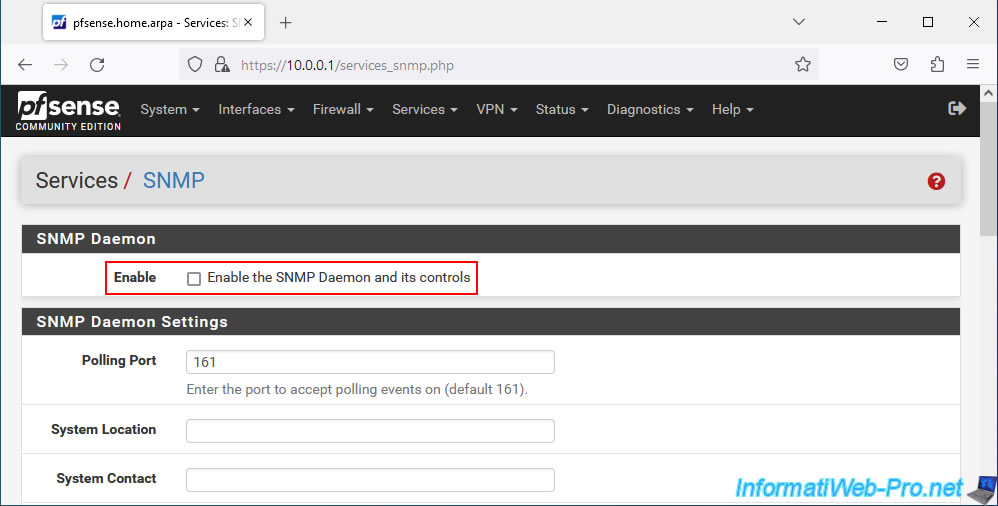
To do this, go to: Services -> SNMP.

On the "SNMP" page that appears, simply uncheck the "Enable the SNMP Daemon and its controls" box, then click the "Save" button (at the bottom of the page).
2. Install the SNMPv3 protocol on pfSense using the net-snmp package
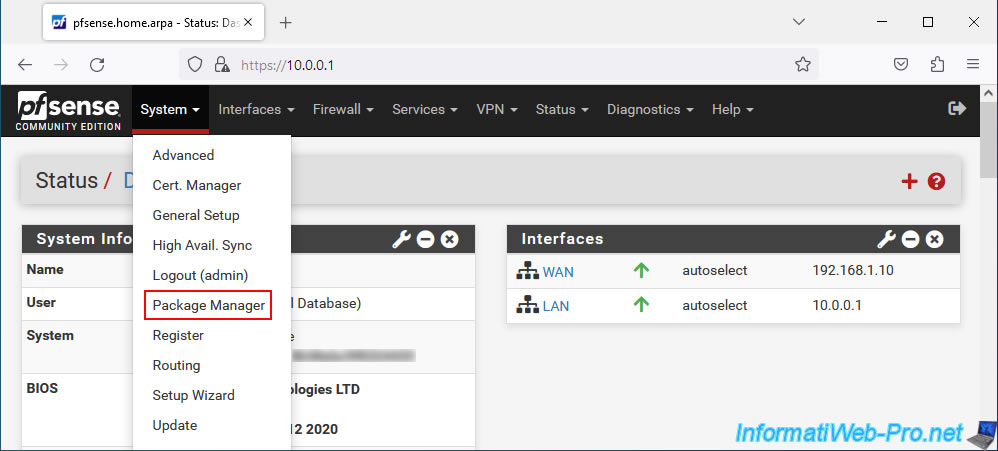
To install the "net-snmp" package, go to: System -> Package Manager.
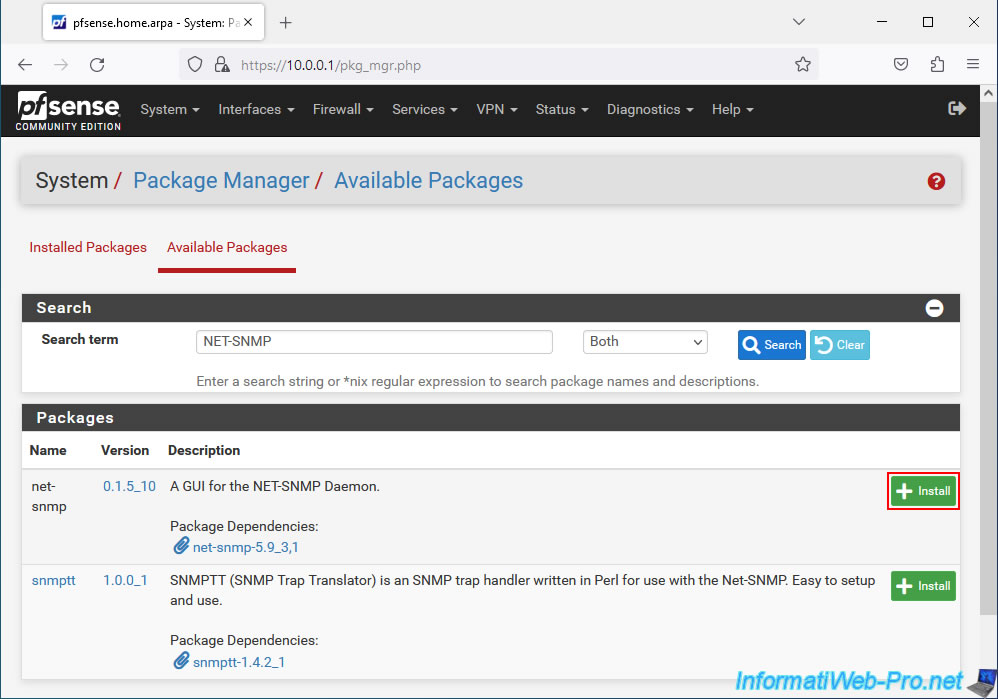
Go to the "Available Packages" tab, search for "NET-SNMP" and click the "Install" button for the "net-snmp" package.
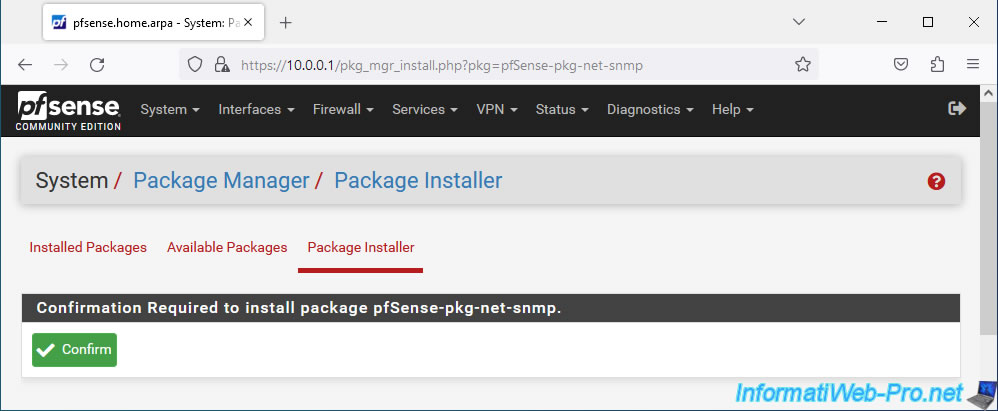
Confirm the installation of this package "pfSense-pkg-net-snmp" by clicking on Confirm.
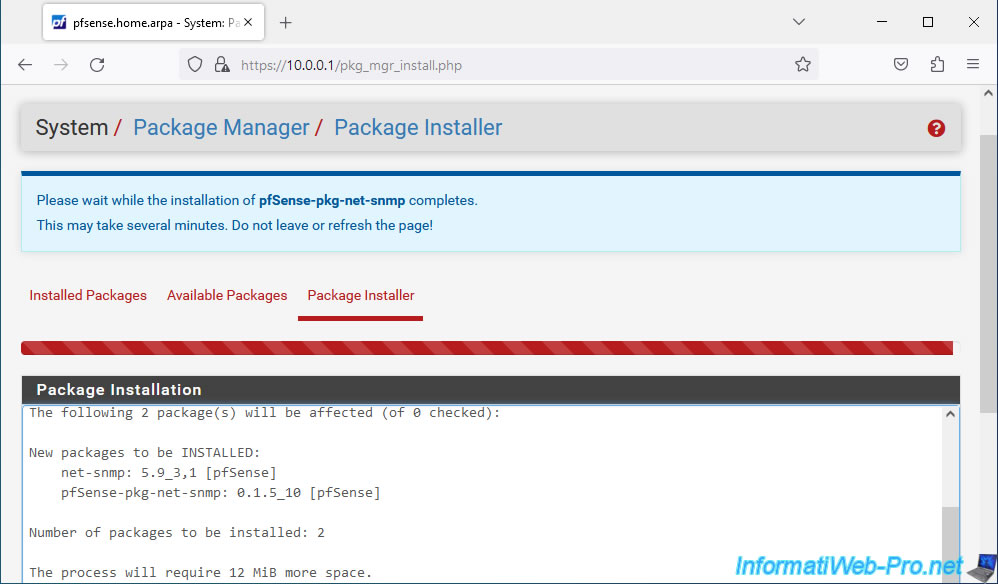
Wait while the "pfSense-pkg-net-snmp" package is installed.
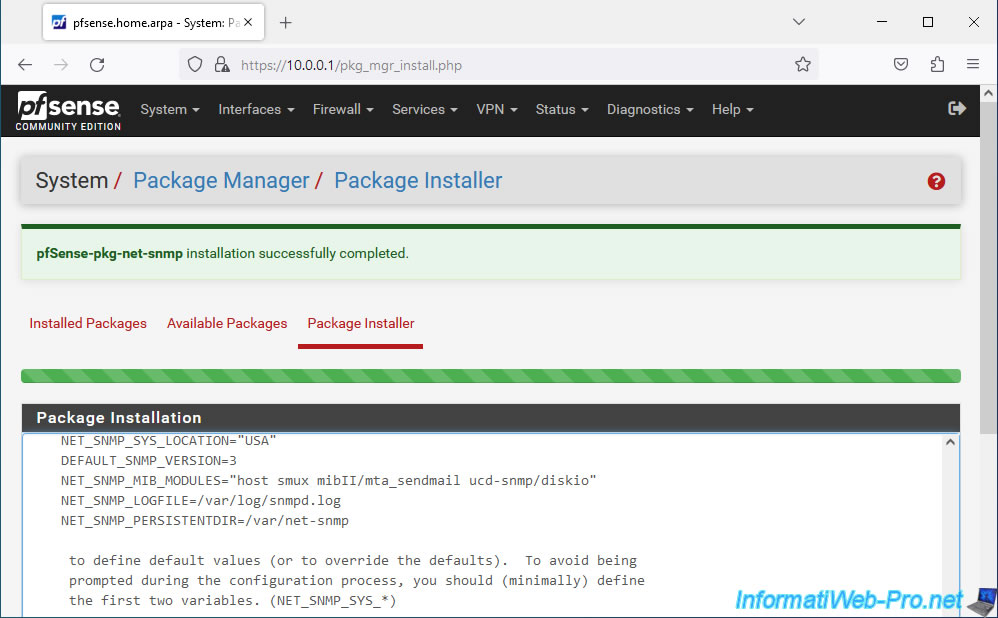
Once the package is installed, the "pfSense-pkg-net-snmp installation successfully completed" message will appear.
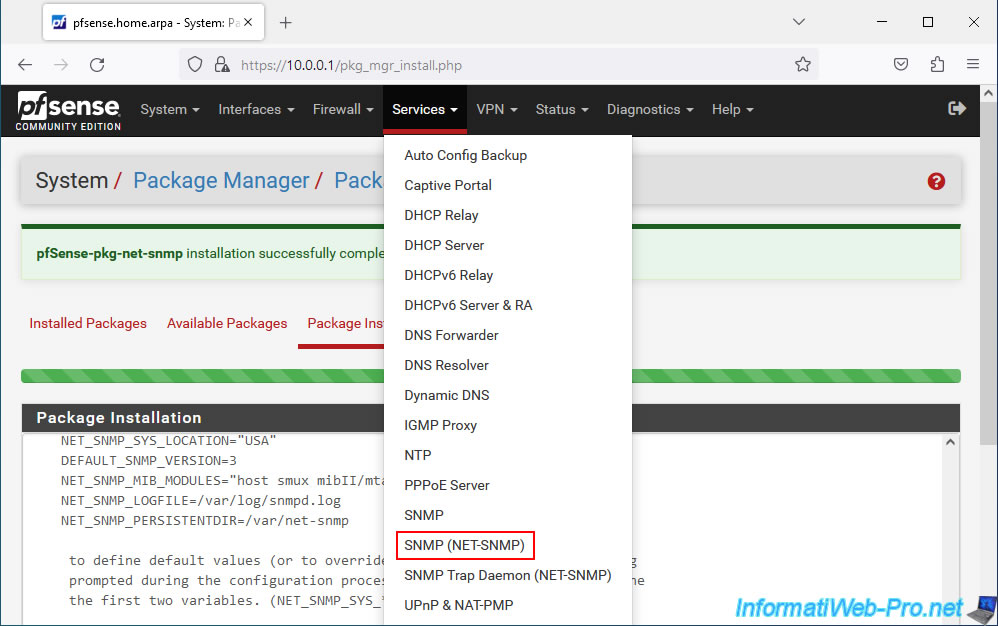
3. Configure the net-snmp packet to enable the SNMPv3 protocol
Once the package is installed, go to: Services -> SNMP (NET-SNMP).
To begin, in the "General" tab, check the "Check to enable snmpd" box.
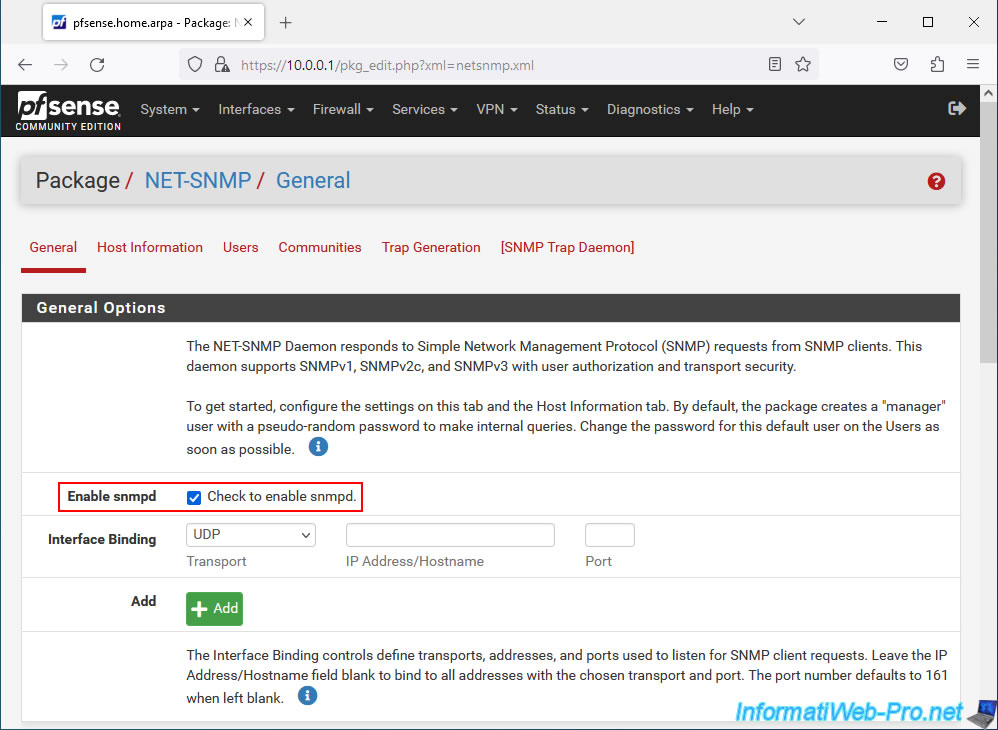
At the bottom of the page, click on: Save.
Then, in the "Host Information" tab, fill in the 4 proposed fields:
- Location: physical location of your pfSense firewall.
- Contact: name and/or email address of the admin of this pfSense firewall.
- Name: name of your pfSense firewall.
- Description: a description of it.
Note: this information is purely for information purposes.
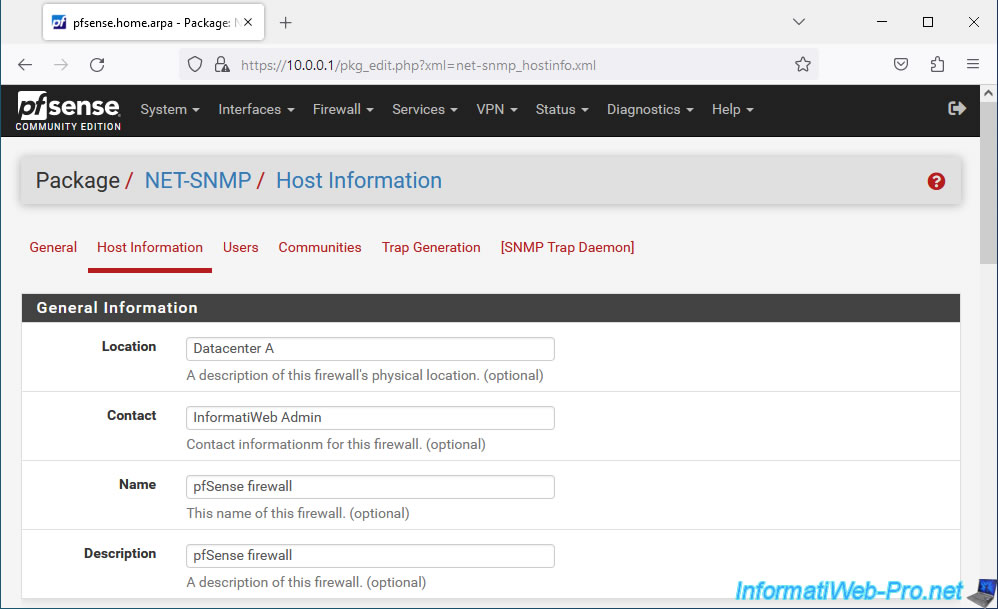
At the bottom of the page, click on: Save.
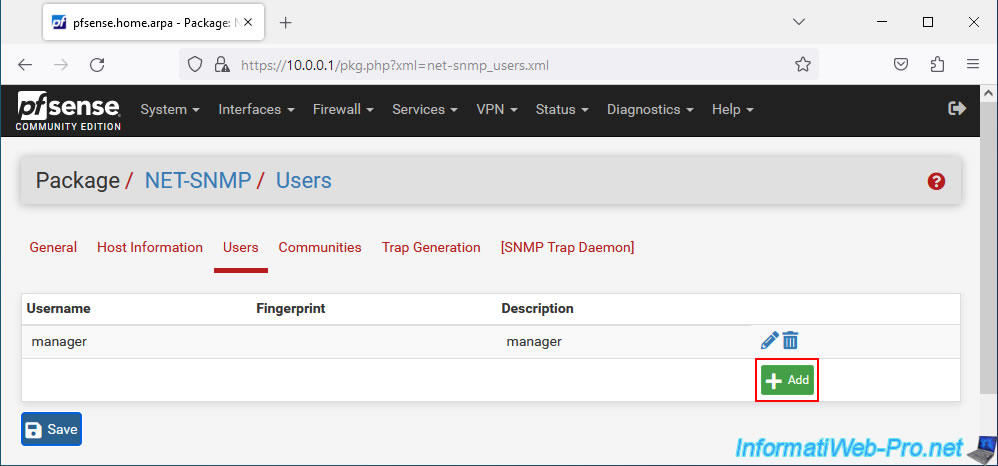
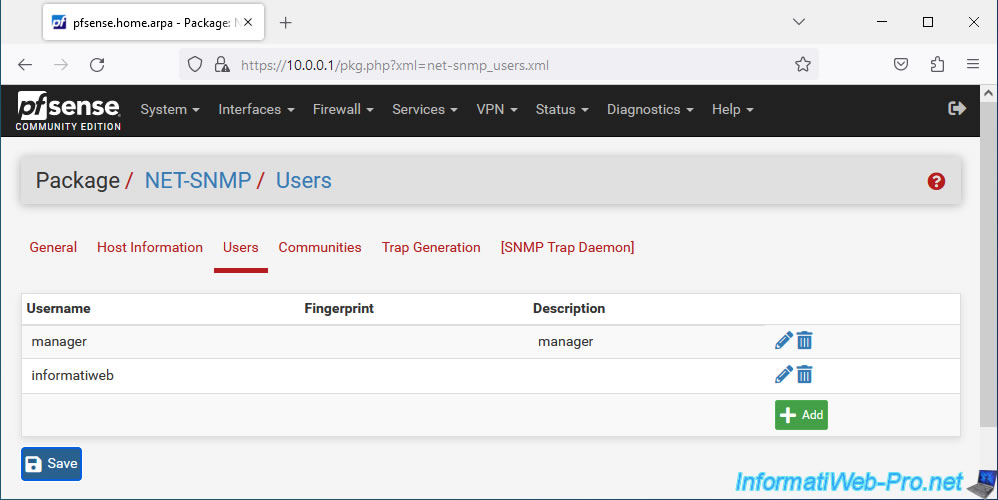
In the "Users" tab, you will see that a "manager" user exists by default.
Click "Add" to add one.
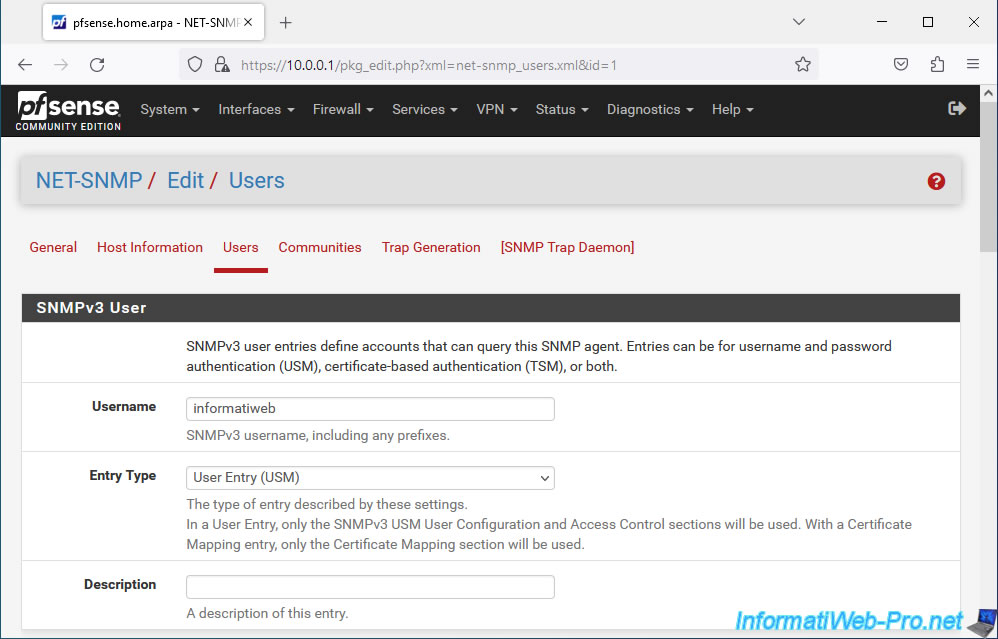
In the "SNMPv3 User" section, indicate:
- Username: a username for this new SNMPv3 user.
- Entry Type: User Entry (USM) to log in with this user using an authentication username and password.
The other option is digital certificate connection. - Description: a description for this user, if desired.
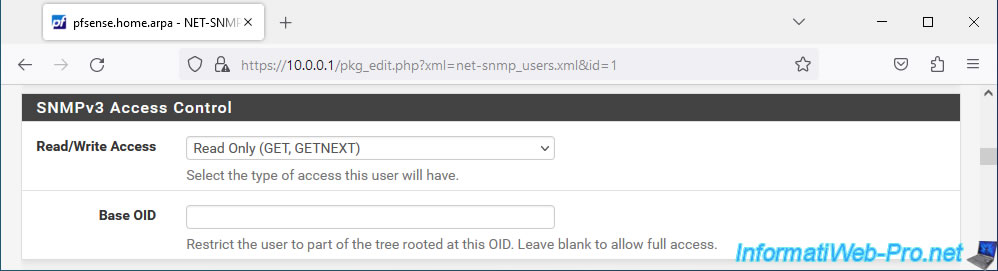
In the "SNMPv3 Access Control" section, you can specify:
- Read/Write Access: whether the user can only read data via SNMPv3 or read and write.
For read only, select "Read Only (GET, GETNEXT). Which is sufficient. - OID base: allows you to restrict a user's access to the data they can see.
Leave blank.
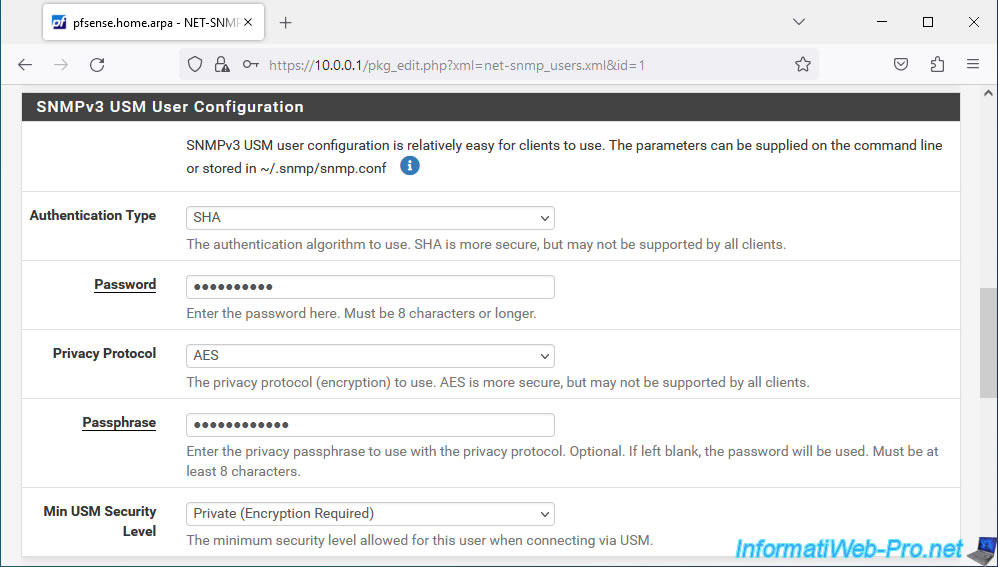
In the "SNMPv3 USM User Configuration" section, you can configure:
- Authentication Type: the type of authentication to use.
Select "SHA" which is more secure than the other type (MD5) available. - Password: the password to use for authentication via SNMPv3.
Provide a password of at least 8 characters. - Privacy Protocol: the privacy protocol to use.
Select "AES", which again, is more secure. - Passphrase: a 2nd password, but which will be used for the SNMPv3 confidentiality protocol.
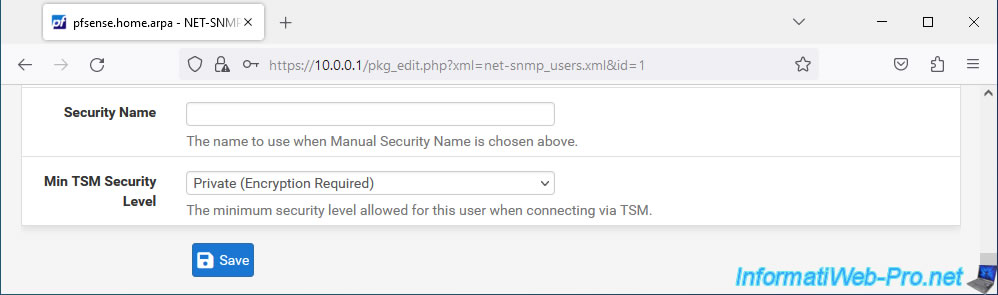
- Min USM Security Level: the minimum security level allowed for this user.
Select "Private (Encryption Required)" if encryption is required.
At the bottom of the page, click Save.
The desired user has been created.
4. Add pfSense in Zabbix using SNMPv3
To install Zabbix, refer to step "2. Installing Zabbix (for monitoring via SNMP)" of our tutorial on monitoring pfSense with Zabbix.
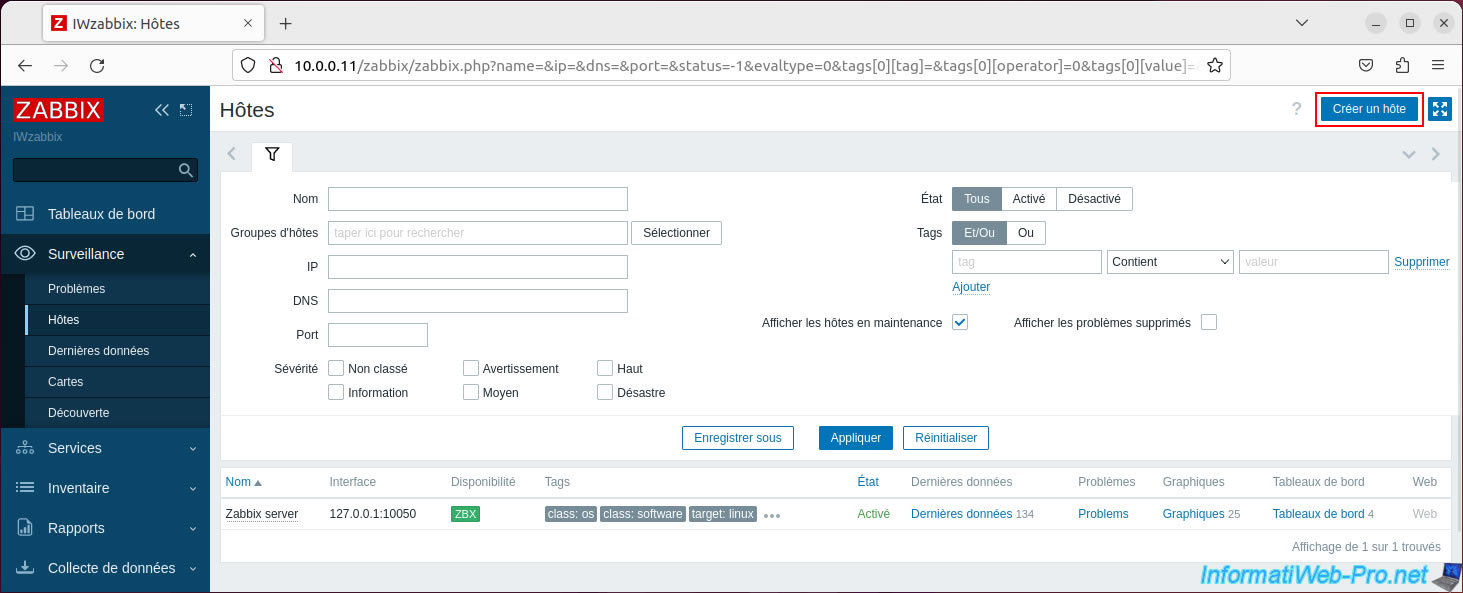
Once Zabbix is installed, go to the "Monitoring -> Hosts" section and click "Create host" (top right).
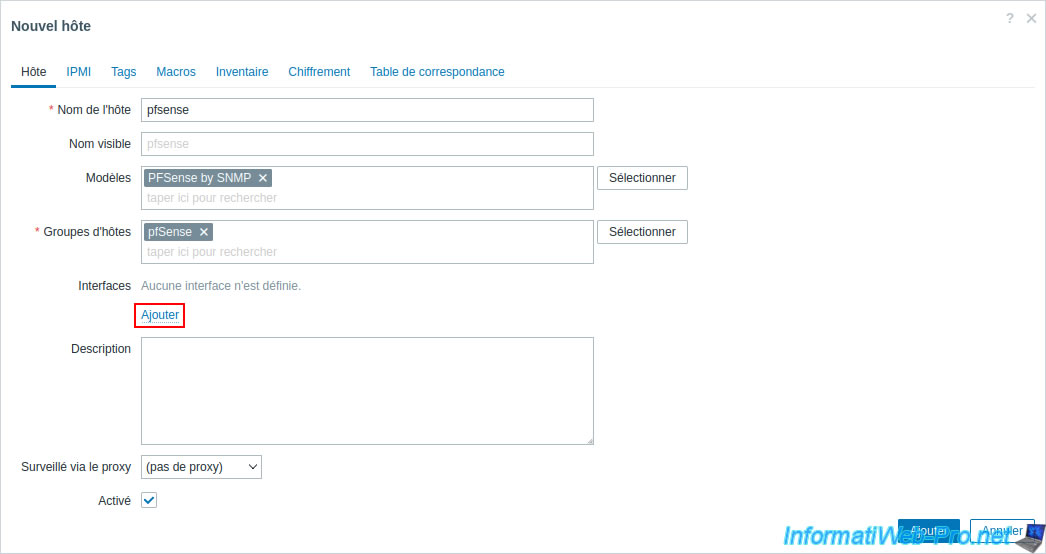
In the "New Host" window that appears, indicate:
- Host Name: host name defined on your pfSense machine.
- Visible name: name visible on Zabbix. By default, the name will be the same as the hostname specified above.
- Models: select the "PFSense by SNMP" model.
Note: if necessary, click on the "Select" button, then on "Templates" to find the "PFSense by SNMP" template in the list that will be displayed. - Host groups: specify in which Zabbix group you want to add your pfSense machine.
Specify "pfSense" and click on the "pfSense" (or "pfSense (new)") option that appears.
Note that you can also use the groups defined by default in Zabbix rather than creating new ones, if you wish. - Interfaces: click "Add -> SNMP".
For the SNMP interface that appears, you can configure the settings:
- IP Address: the IP address of your pfSense machine.
- DNS name: its DNS name (if applicable).
- SNMP version: select "SNMPv3". Which will display additional options specific to SNMPv3.
- Maximum number of repetitions: Leave the default value.
- Context name: optional option added to comply with the SNMP specification and is only useful in very specific cases.
So leave this box empty. - Security Name: the username of the SNMPv3 user previously created on pfSense.
In our case: informatiweb. - Security Level: select "authPriv" to specify an authentication protocol, as well as a privacy protocol.
- Authentication protocol: select "SHA1".
- Authentication phrase: indicate the password indicated previously in the "Password" box of the configuration of the "net-snmp" package on pfSense.
- Privacy Protocol: select "AES128".
- Confidentiality passphrase: indicate the 2nd password indicated previously in the "Passphrase" box of the configuration of the "net-snmp" package on pfSense.
Once the settings are configured, click "Add".

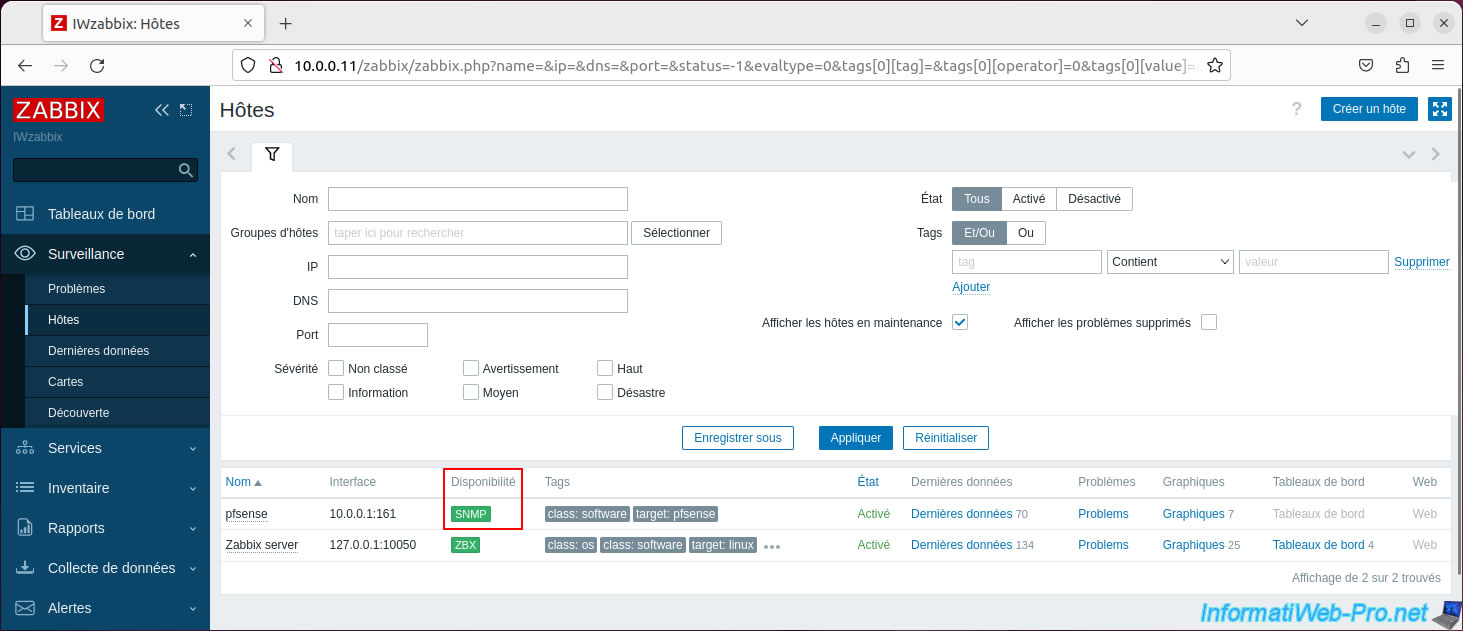
Your "pfsense" host appears and for the moment, SNMP availability appears grayed out.

A little later, SNMP availability will turn green.
Otherwise, it will turn red and you will just need to hover over the word "SNMP" to see the error encountered.
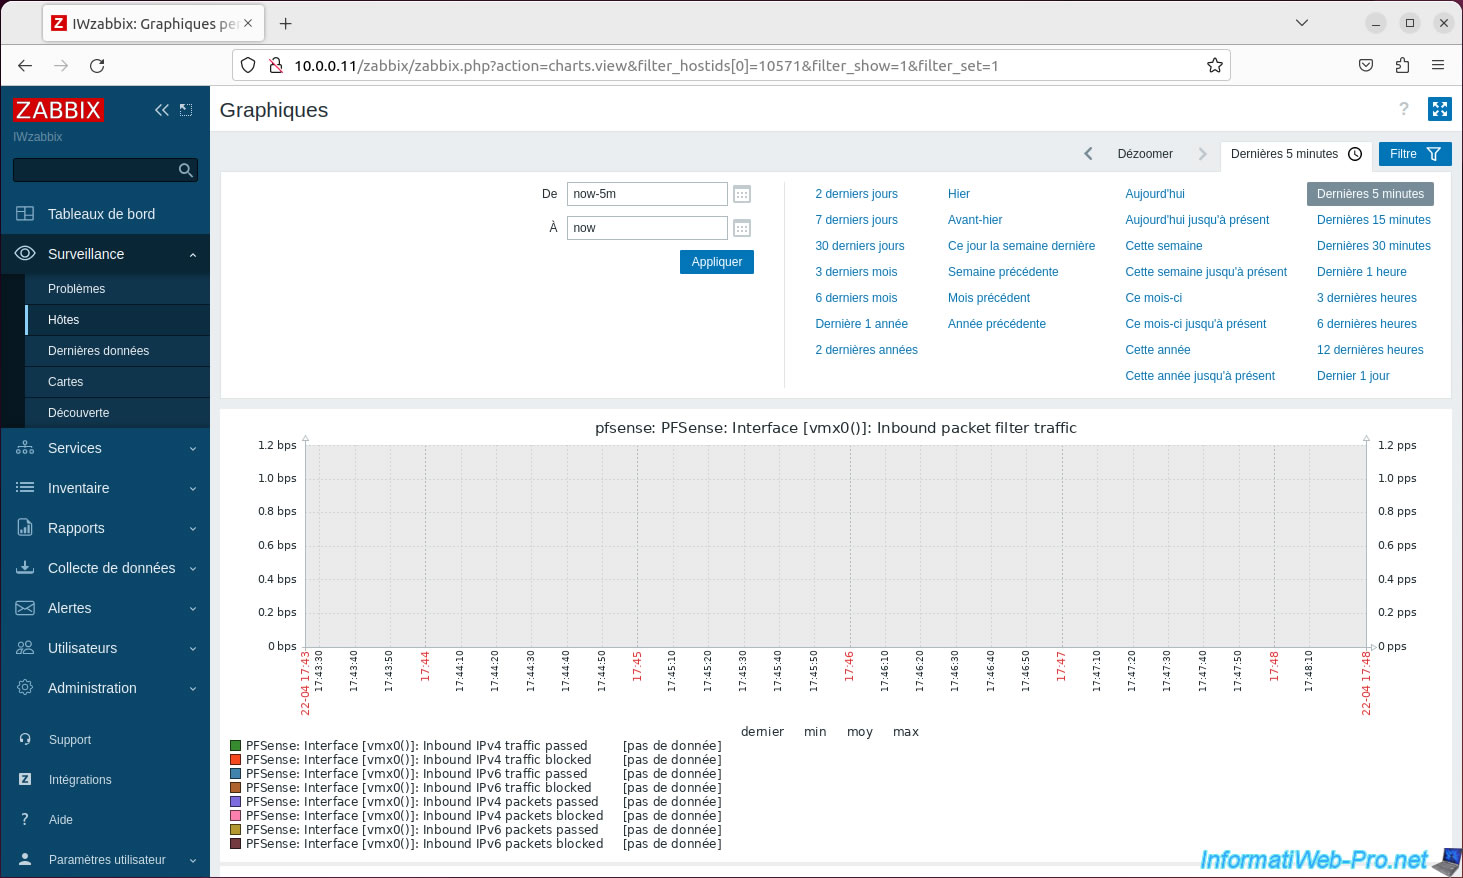
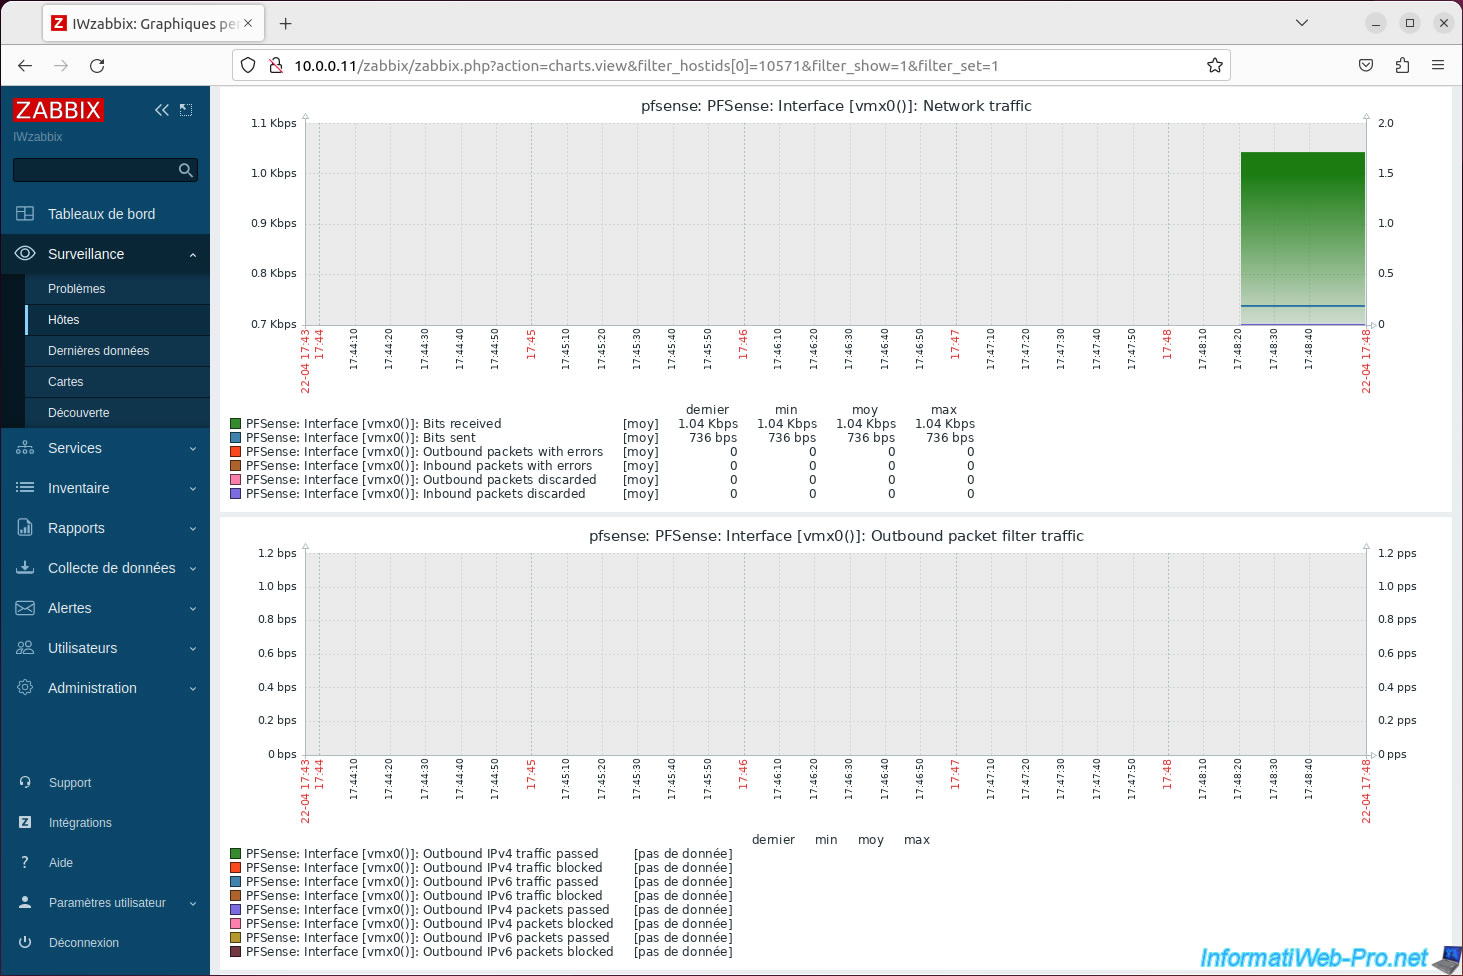
If you click on the "Latest data" link for your "pfsense" host, you will see a page with the various data recoverable via SNMP.

By clicking on the "Graphs" link on your "pfsense" host, you will be able to obtain graphs regarding pfSense network usage for the desired time period.
Note that you might also get more information by using the Zabbix agent as well.
To do this, you will need to install the Zabbix agent on pfSense and add an "agent" interface for your "pfsense" host that you have just added in the Zabbix interface.
To do this, refer to the step "4. Configure Zabbix 6 to monitor pfSense via Zabbix agent and SNMP" of our previous tutorial concerning monitoring pfSense via Zabbix and SNMPv2.
Share this tutorial
To see also
-
Firewall 7/30/2025
pfSense 2.6 - Backup and restore configuration
-
Firewall 8/6/2025
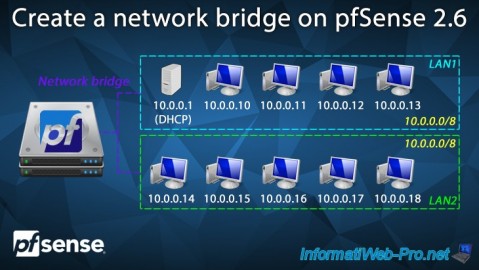
pfSense 2.6 - Create a network bridge
-
Firewall 7/2/2025
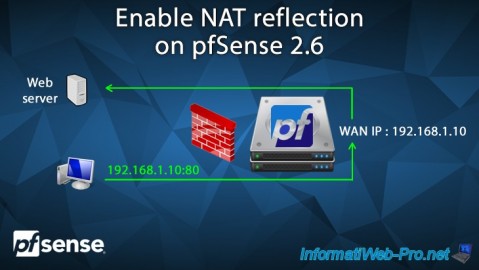
pfSense 2.6 - Enable NAT reflection
-
Firewall 5/15/2025
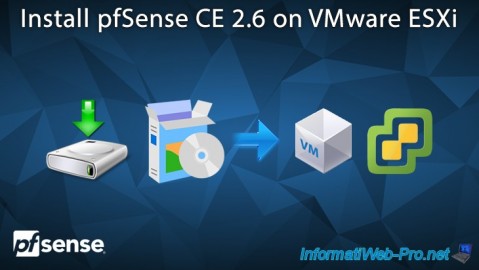
pfSense 2.6 - Installation on VMware ESXi
You must be logged in to post a comment