Configure high availability (HA) on pfSense 2.6
- Firewall
- pfSense
- 24 August 2025 at 08:29 UTC
-

- 3/5

6. Add CARP virtual IP (VIP) addresses shared by the 2 pfSense machines
So that clients do not notice the unavailability of a pfSense machine in the event of a problem with one of them, they will have to use the virtual IP addresses that will be shared by your pfSense machines.
It is therefore necessary to create a CARP virtual IP (VIP) address for each logical interface (WAN, LAN, etc.) of pfSense to which a client PC can access.
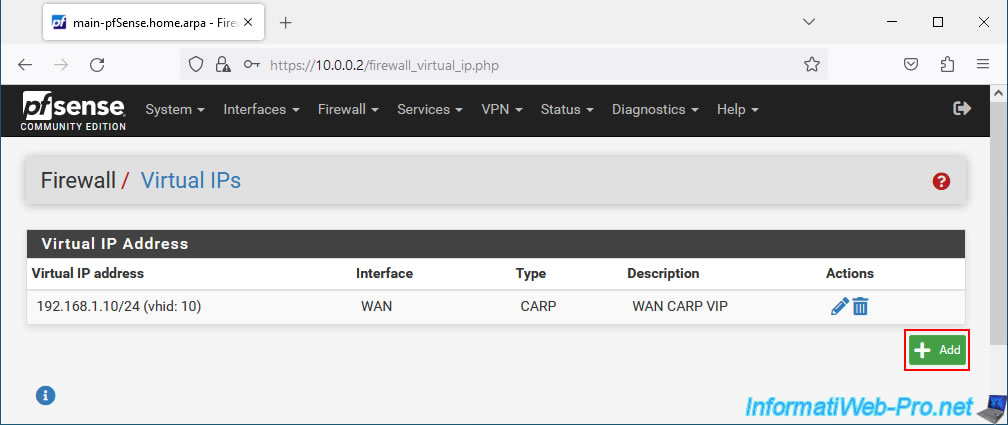
6.1. Add a CARP virtual IP (VIP) address for the WAN interface of the 2 pfSense machines
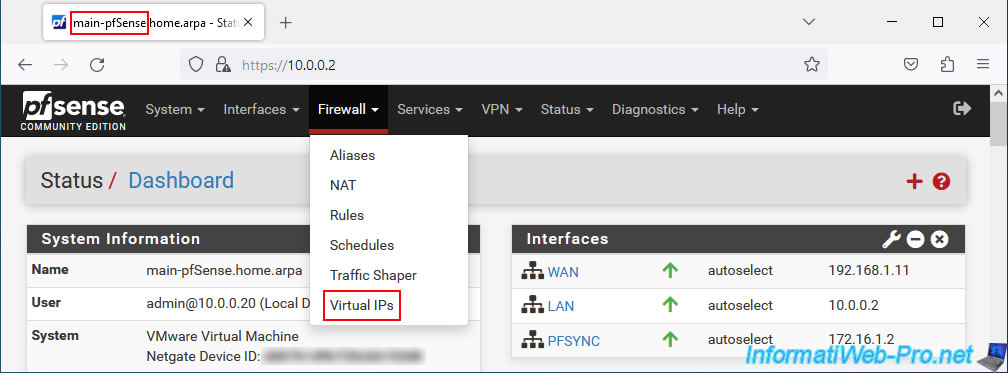
On the 1st pfSense machine (which is therefore the one acting as master), go to: Firewall -> Virtual IPs.
Important : the configuration must only be carried out on the 1st pfSense machine (master), because this configuration will be automatically replicated to the 2nd pfSense machine (slave).
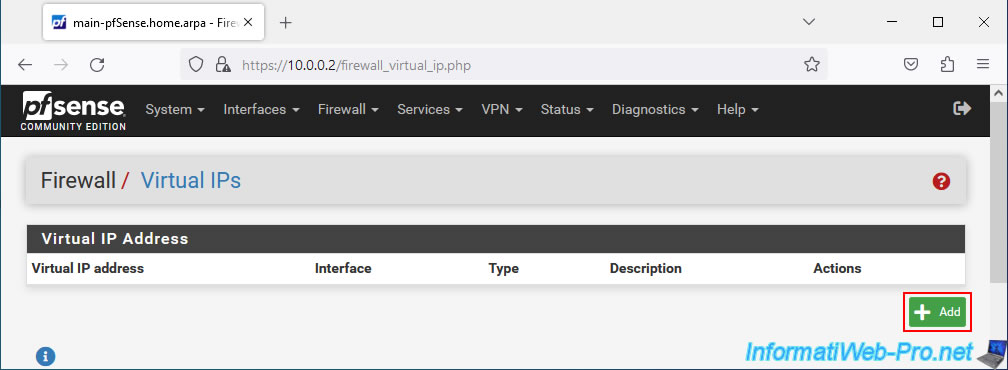
On the "Firewall / Virtual IPs" page that appears, click on: Add.
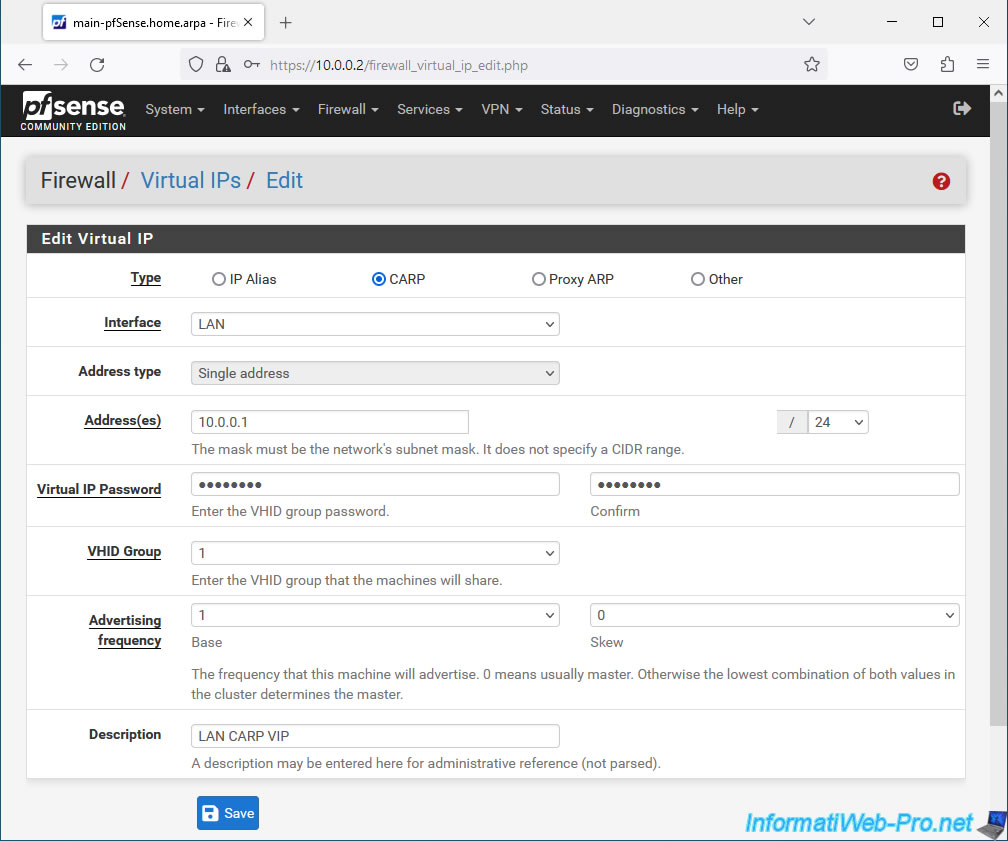
In the "Edit Virtual IP" section, configure the virtual WAN IP address settings like this:
- Type: select the "CARP" option which allows you to use a virtual IP address in the case of setting up high availability (HA) with pfSense.
- Interface: WAN. To create a virtual IP address which will be shared by the WAN interface of your 2 pfSense machines.
- Address type: the "Single address" option will be automatically selected and grayed out.
- Address(es): indicate the virtual IP address that your 2 pfSense machines will have to share for their WAN interface, as well as the associated subnet.
The IP address must therefore be part of the same subnetwork as that used by the WAN interface of your 2 pfSense machines. - Virtual IP Password: to secure CARP heartbeat traffic, both pfSense machines must use the same password for this CARP virtual IP address.
- VHID Group: allows the 2 pfSense machines to know that they are coordinating control of the same IP address. This value must therefore be unique on a network (layer 2). Additionally, when dealing with a virtual IPv4 address, it is common to indicate the last number of the IP address (in this case: 10) as the group identifier (VHID Group).
Additionally, this value also influences the MAC address that will be used for this virtual IP address. Because a CARP virtual IP address also has a virtual MAC address which will be shared by the 2 pfSense machines. - Advertising frequency: frequency at which the master pfSense machine will send the CARP pulsation signal.
- Base: delay between 2 pulses. By default, the value "1" is used.
- Skew: 1/256th of a second added to the base value above.
Most of the time, the master pfSense machine will have a value of 0 or 1. The 2nd machine will have a value of around 100 or more.
Again, leave the default value.
- Description: provide a description for reference.
In this case: WAN CARP VIP.
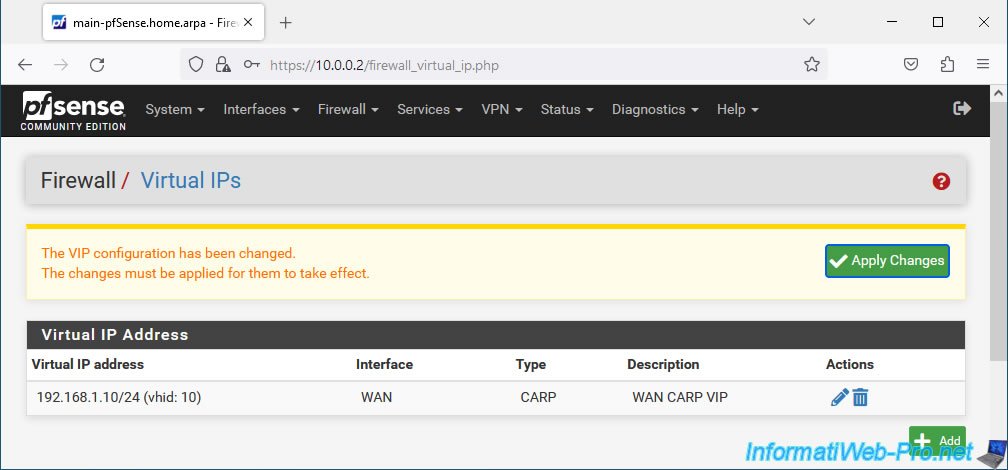
Then, click Save.
Source : Virtual IP Addresses | pfSense Documentation.

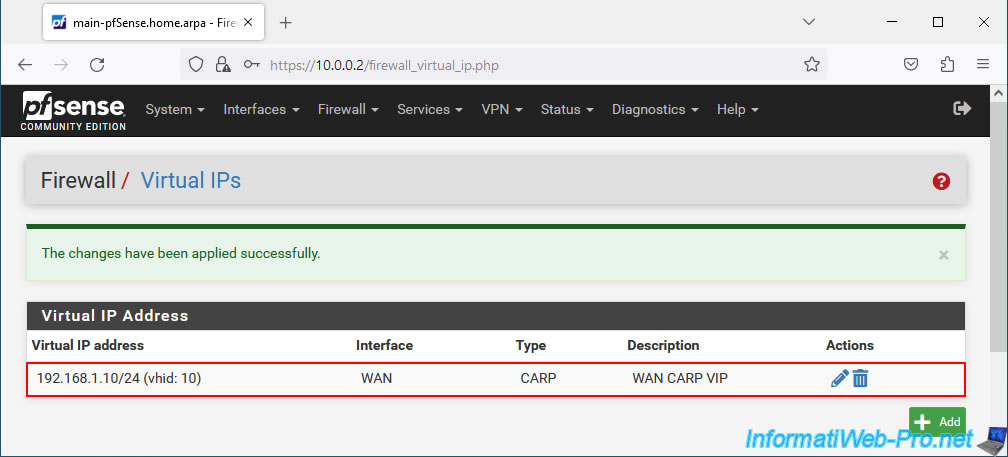
Click: Apply Changes.
Plain Text
The VIP configuration has been changed.
The changes must be applied for them to take effect.
The CARP virtual IP (VIP) address for the WAN interface has been created.
6.2. Add a CARP virtual IP (VIP) address for the LAN interface of the 2 pfSense machines
Do the same for the LAN interface of your 2 pfSense machines.
To do this, click again on: Add.
This time, configure the settings like this:
- Type: CARP.
- Interface: LAN.
- Address type: the "Single address" option will be automatically selected and grayed out.
- Address(es): indicate the CARP virtual IP address that your 2 pfSense machines will have to share for the LAN interface.
Again, ensure that this virtual IP address and its associated subnet match the subnet used on the pfSense LAN. - Virtual IP Password: specify a password to secure CARP heartbeat traffic.
- VHID Group: indicate an identifier different from the virtual WAN IP address created previously.
In our case, we indicate "1", because this corresponds to the last number of the virtual IP address defined in the previous field (Address(es)). - Advertising frequency: leave the default values, as before.
- Description: indicate for example "LAN CARP VIP".
Then, click Save.
The CARP virtual IP (VIP) address for the LAN interface has been created.

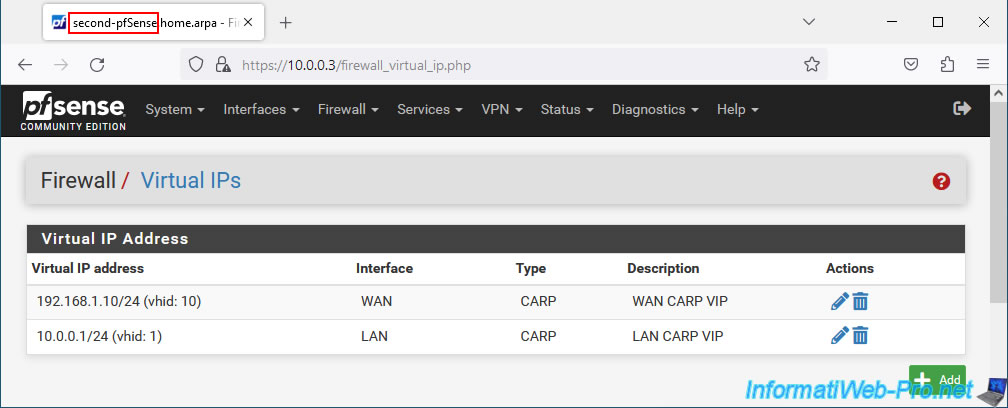
On your 2nd pfSense machine, go to "Firewall -> Virtual IPs" and you will see that the CARP virtual IP (VIP) addresses you just configured on the 1st pfSense machine are already there.
Indeed, the synchronization automatically replicated this configuration from the 1st pfSense machine to the 2nd pfSense machine.
Important : synchronization is only done in 1 direction. From the master machine to the slave machine.
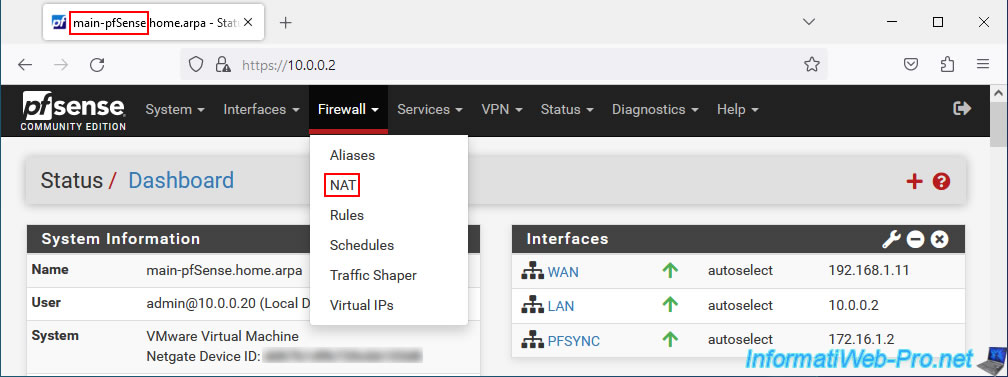
7. Configure Outbound NAT to Use CARP Virtual WAN IP (VIP) Address
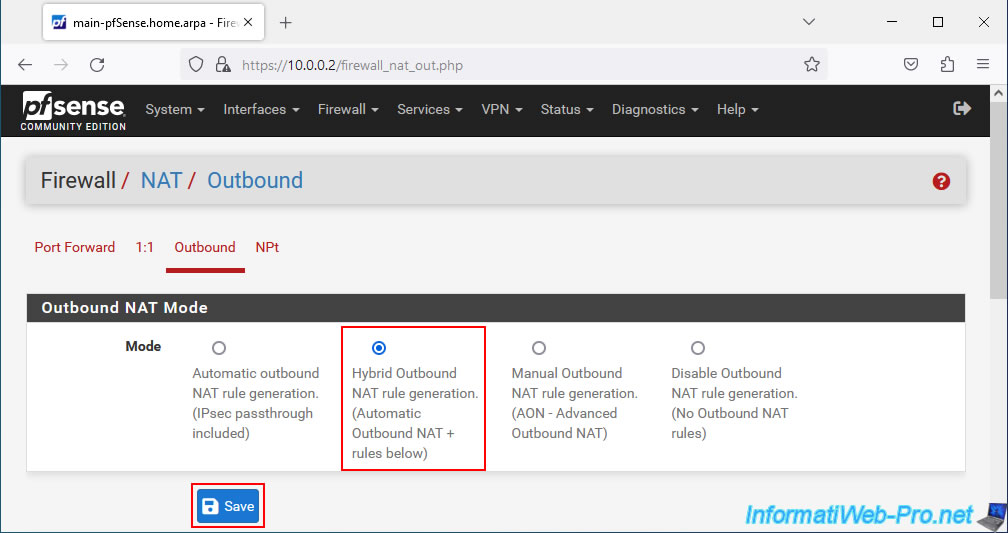
7.1. Configure outbound NAT in hybrid mode
For outgoing network traffic (coming from PCs on the LAN to the Internet via the WAN interface) to use the CARP virtual IP (VIP) address defined for the WAN interface, you must configure network address translation (NAT) by going to: Firewall -> NAT.
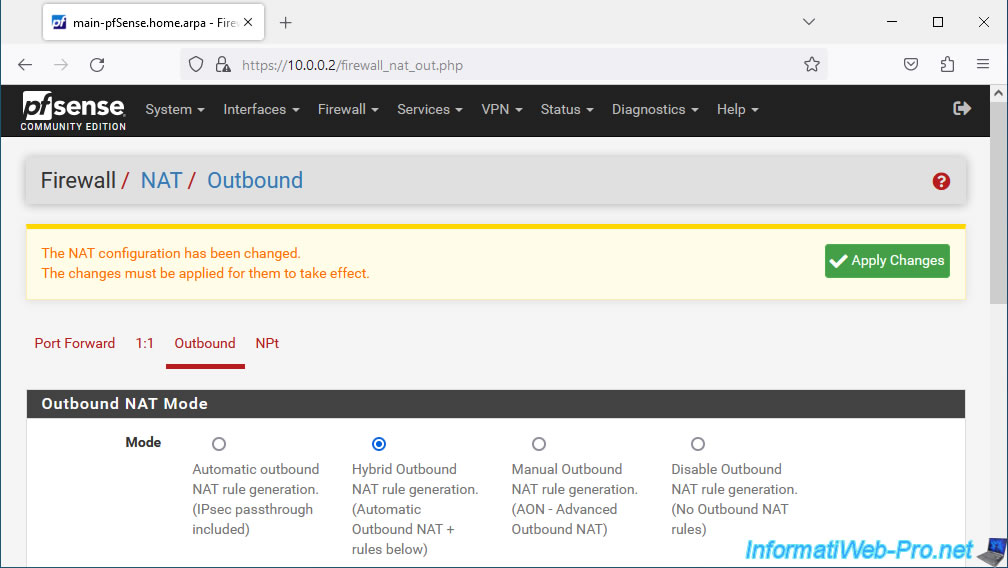
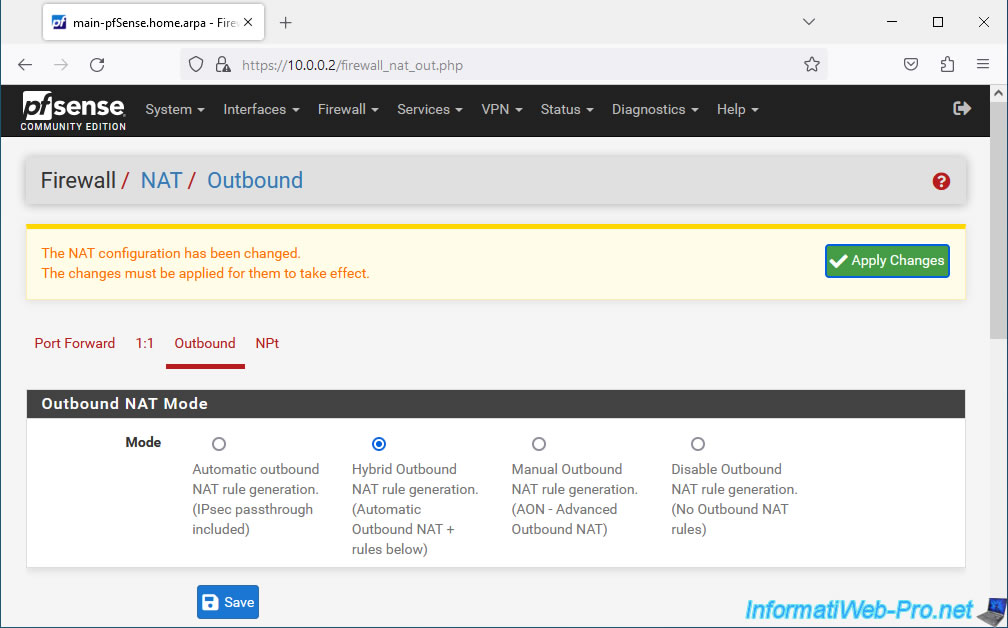
Go to the "Outbound" tab, select "Hybrid Outbound NAT rule generation..." and click Save.
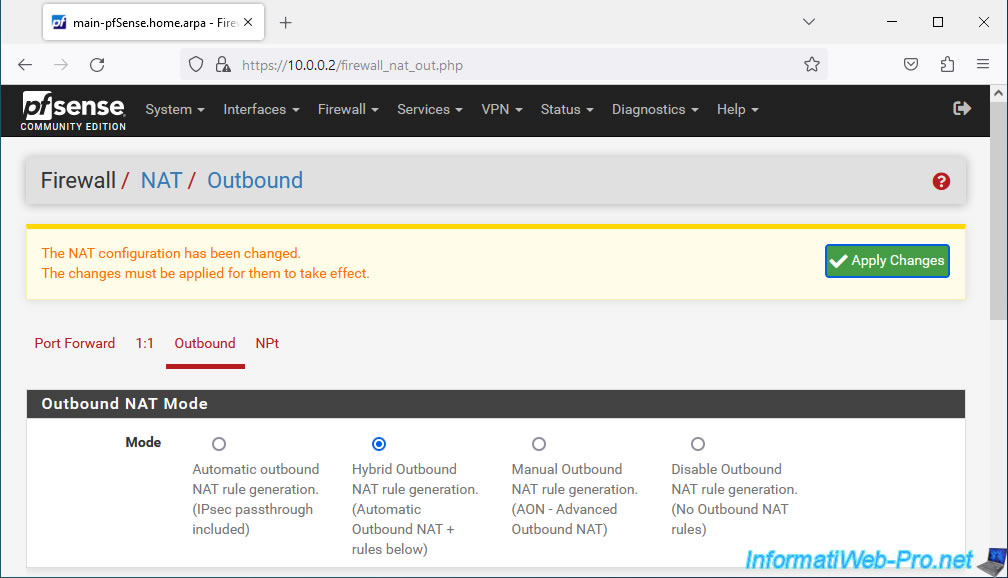
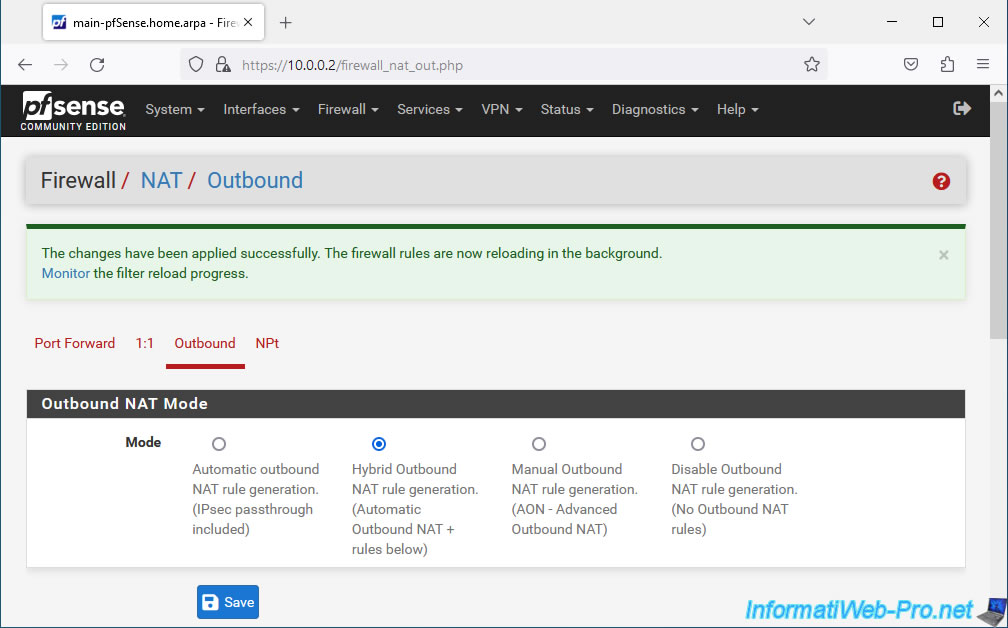
Click: Apply Changes.
Plain Text
The NAT configuration has been changed.
The changes must be applied for them to take effect.
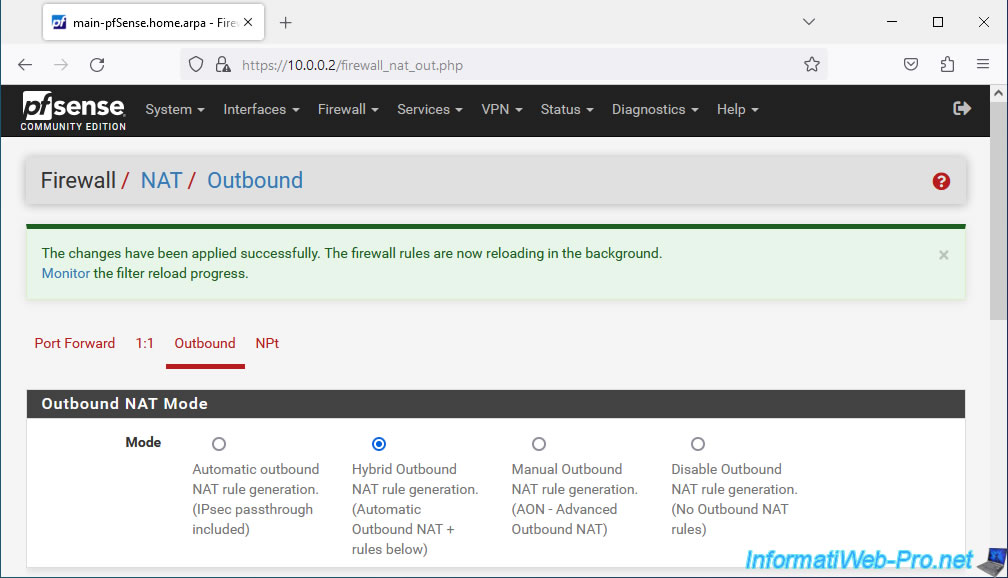
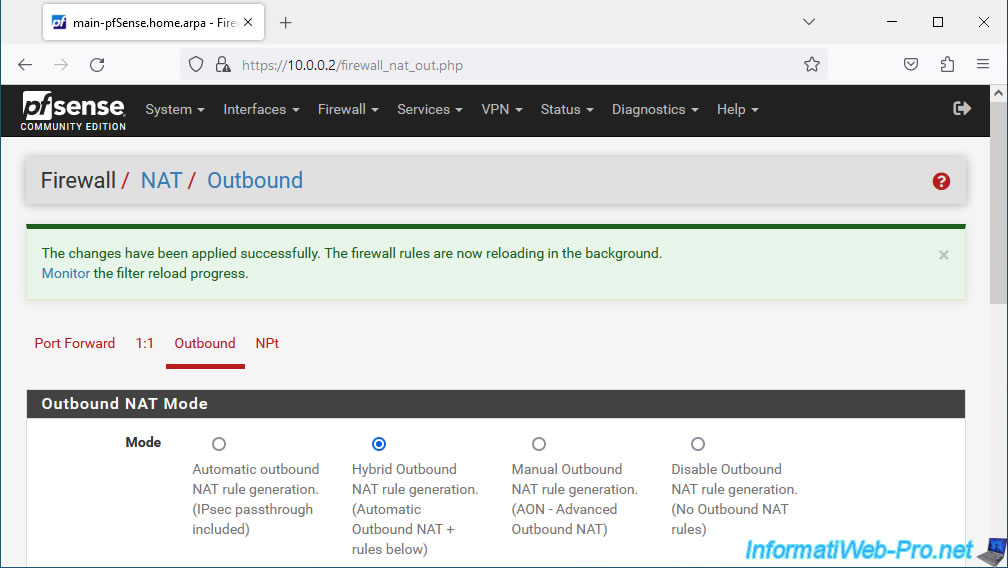
The outgoing NAT mode has been changed.
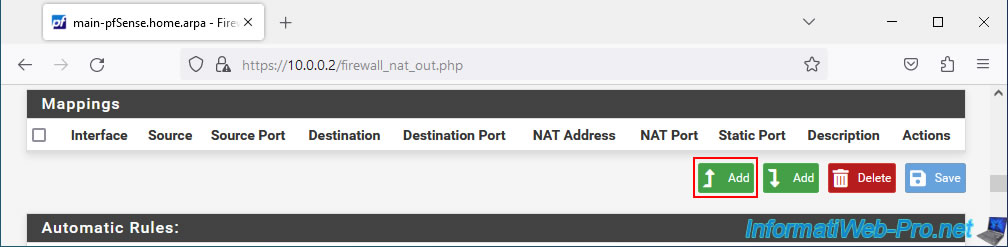
7.2. Add a mapping for outbound NAT
Now that hybrid outbound NAT mode is enabled, you can add mappings manually that will be used in addition to the outbound NAT rules automatically generated by pfSense.
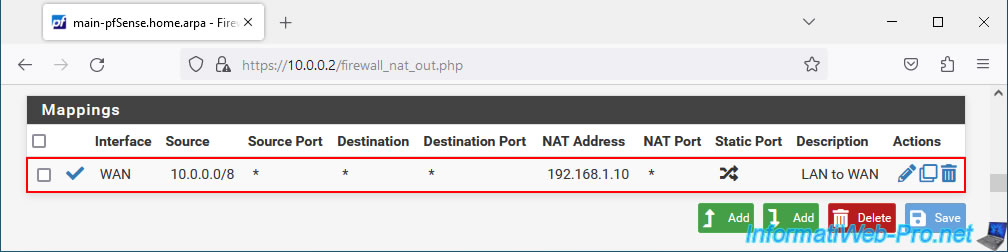
To do this, in the "Mappings" section, click on: Add.
In the "Edit Advanced Outbound NAT Entry" section, configure these settings:
- Interface: WAN. Since this is a NAT mapping for outgoing traffic (going to the Internet, therefore via the pfSense WAN interface).
- Address Family: IPv4. In our case we only cover IPv4.
- Protocol: any. This mapping will be used regardless of the protocol (TCP, UDP, ...) used.
- Source: select "Network" and provide the network ID and associated subnet mask of the pfSense LAN network.
In our case, the pfSense LAN interface uses the network ID "10.0.0.0" and the subnet mask "/8".
Note: If you have other internal networks, such as a DMZ with Internet access, then create a new mapping for each of these internal networks. - Destination: Any. All destinations (which will typically be on the Internet since network traffic will exit over the WAN interface).

In the "Translation" section, select the previously created CARP virtual (VIP) address for the WAN interface.
If you used the same name as in this tutorial, this address is named "WAN CARP VIP".
In the "Misc" section, provide "LAN to WAN" as the description.
Then, click Save.
![]()
Click: Apply Changes.
The changes have been applied.
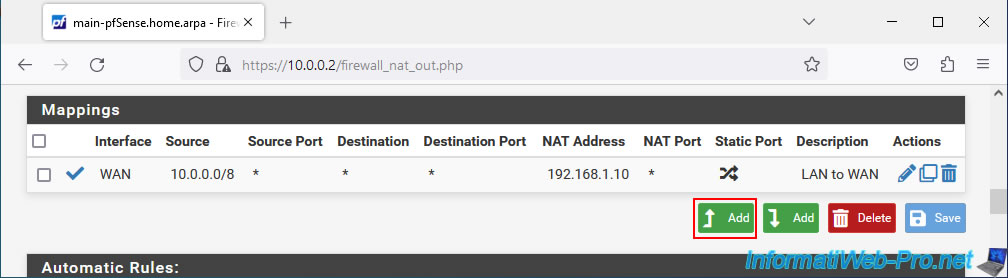
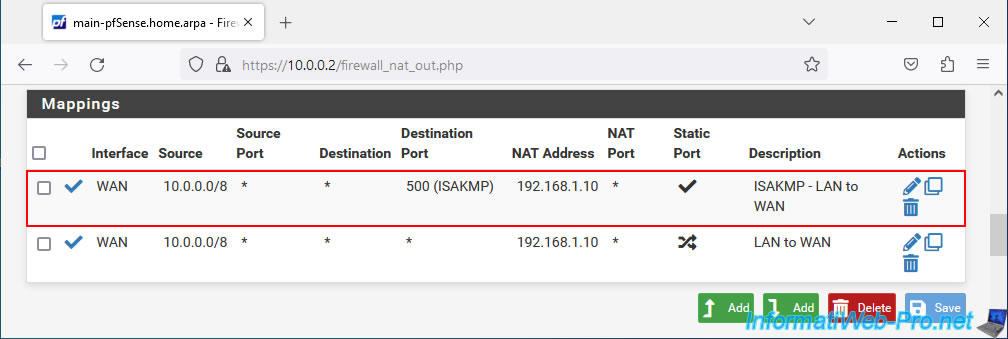
In the "Mappings" section, you will see that the "LAN to WAN" mapping has been created.
Note: if you have other local networks accessing the Internet via pfSense, add new mappings here specifying the interface and subnet used.
7.3. Add mapping for IPsec passthrough (optional)
If client PCs on the LAN are likely to connect to external VPN servers using IPsec that do not support NAT-T, you will need to add a NAT mapping under pfSense.
Otherwise, you can skip this step of the tutorial.
To add this mapping, click again: Add.
Configure this mapping like this:
- Interface: WAN.
- Address Family: IPv4.
- Protocol: any.
- Source: select "Network" and re-enter the subnet used on the pfSense LAN network in your case.
- Destination: select "Any", but specify port number "500" (which corresponds to ISAKMP / IKE or in other words, IPsec).
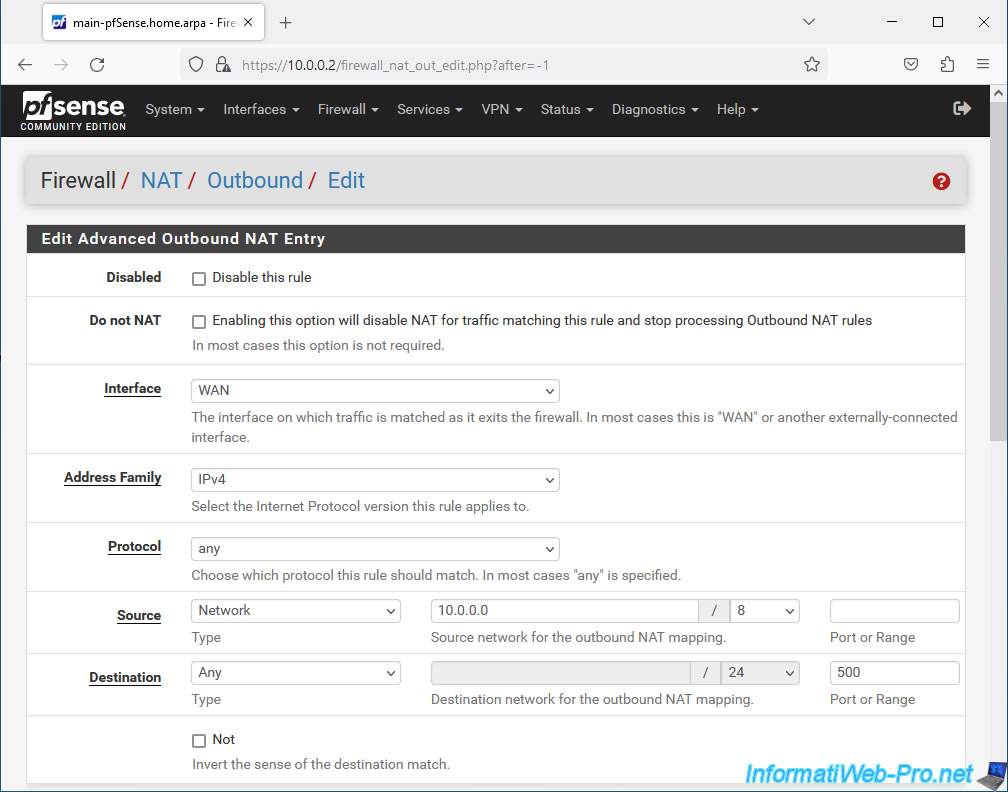
In the "Translation" section:
- Address: re-select the CARP virtual IP address "WAN CARP VIP".
- Port or Range: check the "Static Port" box to prevent pfSense from rewriting the source port used.
Indeed, by default, pfSense rewrites the source port for outgoing traffic. However, in the case of port 500 used for IPsec, rewriting the source port will be problematic in most cases.
So the pfSense documentation says to check this "Static Port" box specifically when you want to use IPsec. - Description: specify "ISAKMP - LAN to WAN".
Then, click Save.
Source : Outbound NAT | pfSense Documentation.
![]()
Click: Apply Changes.
The changes have been saved.
Your mapping for IPsec has been created.
Share this tutorial
To see also
-
Firewall 9/3/2025
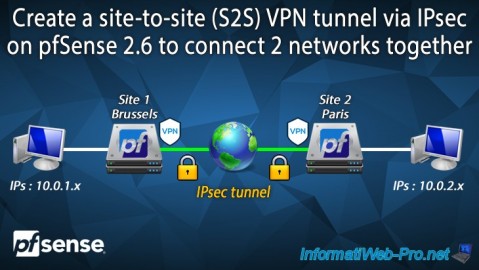
pfSense 2.6 - Create a site-to-site (S2S) VPN tunnel via IPsec
-
Firewall 5/9/2025
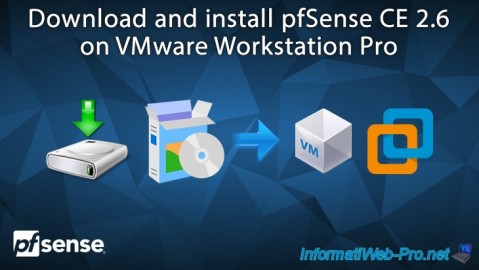
pfSense 2.6 - Download and installation on VMware Workstation
-
Firewall 8/16/2025
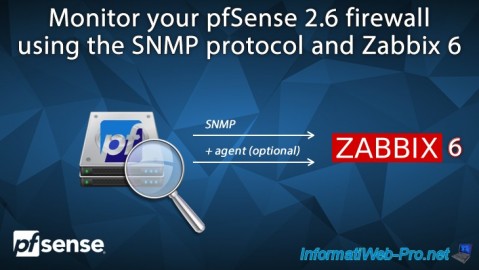
pfSense 2.6 - Monitoring via SNMP and Zabbix 6
-
Firewall 6/13/2025
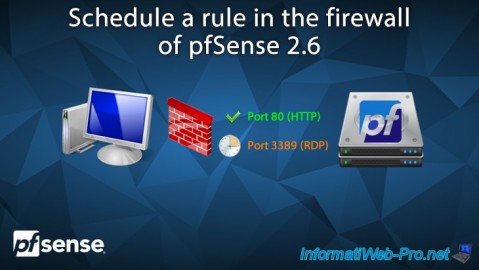
pfSense 2.6 - Schedule a rule in the firewall
No comment