- VMware
- 12 November 2025 at 08:50 UTC
-

- 1/2

Previously, we explained how to virtualize VMware ESXi 6.5 or 6.7 on VMware Workstation Pro and create a nested virtual machine with Windows 7 as the guest OS.
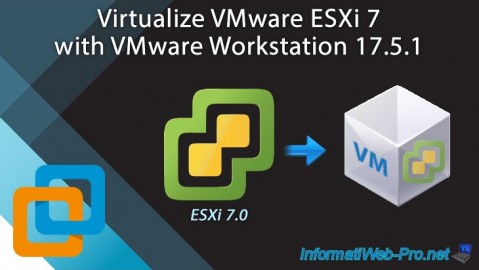
This time, we'll show you how to virtualize VMware ESXi 7.0u3 under VMware Workstation Pro v17.5.1 and create a nested virtual machine with Windows 8.1 x64 as the guest OS.
As you'll see, the disk selected during installation is no longer partitioned in the same way, and the VMware Tools installer included with VMware ESXi 7 no longer works if Windows 7 is not up to date.
Hence, this new tutorial shows you the new procedure adapted for VMware ESXi 7.0u3.
This tutorial was created with VMware ESXi 7.0u3 and VMware Workstation Pro 17.5.1.
Tutorial also tested without any problems or slowdowns with versions 16.0 and 17.0 of VMware Workstation Pro.
- System requirements
- Create a VMware ESXi 7 virtual machine on VMware Workstation Pro v17.5.1
- Install VMware ESXi 7 in a VM on VMware Workstation Pro v17.5.1
- Disk space reserved by the new ESX-OSData partition of VMware ESXi 7
- Create a nested virtual machine on your virtual VMware ESXi 7 hypervisor
1. System requirements
To virtualize VMware ESXi 7 on VMware Workstation Pro, you must use a recent version of VMware Workstation Pro.
In our case, we used version 17.5.1 of VMware Workstation Pro. As you can see below.

2. Create a VMware ESXi 7 virtual machine on VMware Workstation Pro v17.5.1
To create a "VMware ESXi 7" virtual machine on VMware Workstation Pro v17.5.1, go to the menu: File -> New Virtual Machine.

In the "New Virtual Machine Wizard" that appears, select "Typical (recommended)" and click "Next".

Select the "Install disc image file (iso)" option and select the VMware ESXi 7 ISO available on the official VMware website.

Enter a name for this virtual machine in which you will install VMware ESXi 7.
In our case, we named it "VMware ESXi 7.0U3n." This corresponds to the exact version being virtualized.

Warning : as you can see, VMware Workstation Pro 17.5.1 recommends using a virtual hard drive of at least 142 GB to virtualize VMware ESXi 7.
While the recommended size for VMware ESXi 6.x was only 40 GB.
Important : as you will see later in this tutorial, starting with VMware ESXi 7, a new "ESX-OSData" partition with the "VMFS-L" file system (also displayed as "VMFSL" in the VMware ESXi 7 web interface) will be created on the disk selected during the VMware ESXi 7 installation.
This partition is typically around 120 GB in size, and can be as large as 138 GB, according to the VMware Knowledge Base.
In summary, you need to add 140 GB to the size you want to use for the default datastore "datastore1" that the VMware ESXi installer will create on the selected disk during installation.
In our case, we specified a size of 260 GB for this virtual hard disk.
This will give us a datastore named "datastore1" with a capacity of approximately 260 GB - 140 GB = 120 GB.
As usual with virtualized hypervisors on VMware, select the "Store virtual disk as a single file" option to store this VM's virtual hard disk as a single VMDK file.
This theoretically provides better performance than splitting a hard disk into multiple VMDK files.
Sources :
- ESXi Hardware Requirements - VMware Docs
- VMFSL partition taking 50% of disk space | VMware vSphere - Broadcom

At the end of the "New Virtual Machine Wizard", click the "Customize Hardware" button to configure the remaining settings.

Allocate at least 8 GB of RAM for this virtual machine where you will install VMware ESXi 7.
Note that VMware ESXi 7.0 requires at least 4 GB, or even 8 GB in production (see source cited above).

For your VM's virtual processor, allocate at least one processor with two cores (or two processors with one core each, as VMware Workstation Pro indicates by default when you try to virtualize VMware ESXi 7).
Next, make sure the "Virtualize Intel VT-x/EPT or AMD-V/RVI" box is checked so that processor virtualization is available in this virtual machine.
Indeed, VMware ESXi 7.0 requires:
- at least one processor with two cores.
- processor virtualization (Intel VT-x/AMD-V) must be available and enabled.
Again, these prerequisites are indicated in the source cited previously.

For the virtual CD/DVD drive of this VM, the ISO file to install VMware ESXi 7 is already indicated since you selected it at the beginning of the VM creation wizard.

To ensure that the nested virtual machines you create on this virtual hypervisor are virtually connected to your physical network, select "Bridged" mode for this VM's network adapter.
Then, click "Close" (at the bottom of the window).

Finally, click on "Finish".

3. Install VMware ESXi 7 in a VM on VMware Workstation Pro v17.5.1
Your virtual machine will automatically start after closing the "New Virtual Machine Wizard" and the "Loading ESXi installer" screen will appear.
Press Enter or wait 5 seconds for the installer to start automatically.

The VMware ESXi 7 installer loads the necessary files.

The VMware ESXi 7 installer continues to load.

The VMware ESXi 7 installer will then appear.
Press Enter.
Plain Text
Welcome to the VMware ESXi 7.0.3 Installation.

VMware ESXi 7.0.3 installs on most systems but only VMware's Compatibility Guide are supported.

As you can see, the VMware ESXi 7 installer recognizes our VMware virtual hard disk with a capacity of 260 GB.
Plain Text
VMware, VMware Virtual S (mpx.vmhba0:C0:T0:L) - Capacity 260.00 GiB
If you need help installing VMware ESXi, refer to our tutorial: VMware ESXi 7.0 / 6.7 - Install VMware ESXi and create your first VM.

Once VMware ESXi 7 was installed in our virtual machine running VMware Workstation, we set a static IP address for it.
Click the "I Finished Installing" button at the bottom of the window to hide the yellow banner.

As you can see, VMware ESXi 7.0.3 is installed in VMware Workstation.
Hence the manufacturer and model displayed by VMware ESXi: "VMware, Inc. VMware20.1".
Share this tutorial
To see also
-
VMware 2/24/2016
VMware Workstation - Remotely access to a VM over VNC
-

VMware 3/25/2013
VMware Workstation / Player - Install Windows 95
-
VMware 1/31/2020
VMware Workstation 10 - Import Windows XP Mode of Microsoft
-
VMware 1/31/2020
VMware Workstation 11 / 10 - Virtualize Windows XP to make it fluid
You must be logged in to post a comment