- VMware
- 08 May 2024 at 13:32 UTC
-

- 1/3

VMware ESXi is a hypervisor created by VMware allowing you to virtualize machines, servers, ... and which is obviously used in particular in the professional world.
In this tutorial, you will see how to download and install this VMware ESXi hypervisor, but also how to create your 1st virtual machine.
Tutorial updated for ESXi 7.0 on 05/08/2024 at 3:32 p.m.
- Download VMware ESXi from VMware official site
- Install VMware ESXi 7.0 / 6.7
- Set a static IP address on your VMware ESXi hypervisor
- Register VMware ESXi
- Storage on VMware ESXi 6.7
- Storage since VMware ESXi 7 and new ESX-OSData partition volume type VMFS-L
- Add iso files to the VMware ESXi datastore
- Create a virtual machine
- Start your virtual machine
- Install VMware Tools (drivers)
- Files making up the virtual machine
1. Download VMware ESXi from VMware official site
Previously, VMware ESXi could be used for free for life with limited features, but also installed with a 60-day trial period to benefit from full functionality during that time.
To benefit from the free version with no time limit, you needed a free serial number which you could obtain on the VMware website.
Important : following Broadcom's acquisition of VMware, VMware ESXi is now available for download on Broadcom's website instead of VMware's.
Therefore, to download the VMware ESXi ISO, please refer to our tutorial: Download VMware ESXi for free from the Broadcom support site.
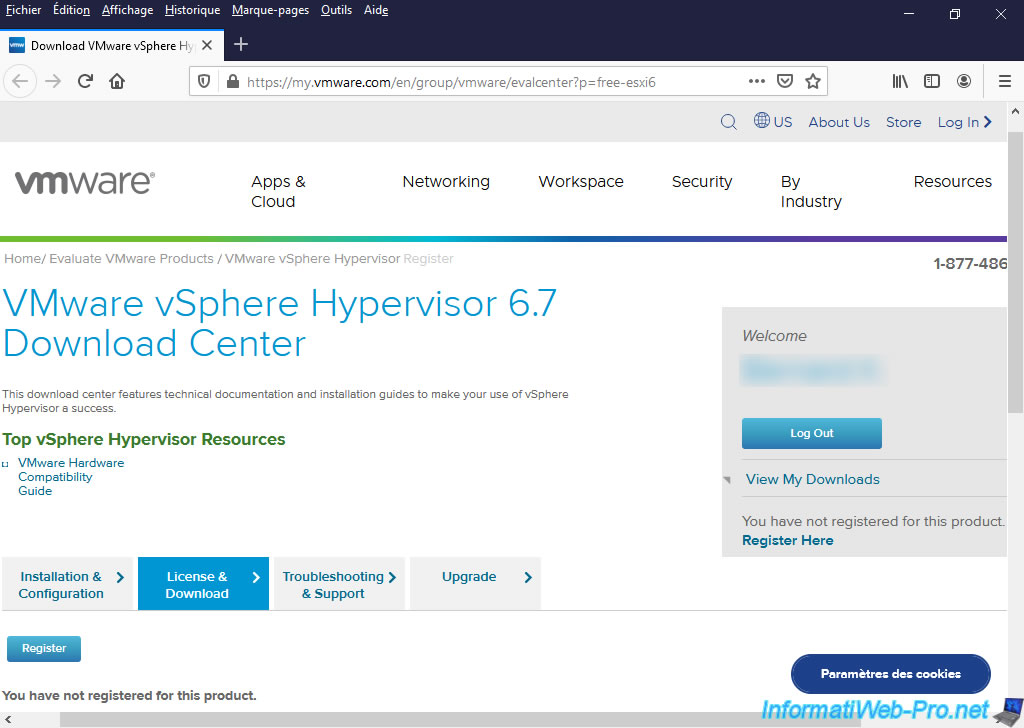
To do this, you first had to create a free account on the VMware site and log into it.
Then, go to the "VMware vSphere Hypervisor 6.7" download page and go to the "License & Download" tab.
The 1st time, VMware will let you know that you have not registered for this product.
Click on the "Register" button.
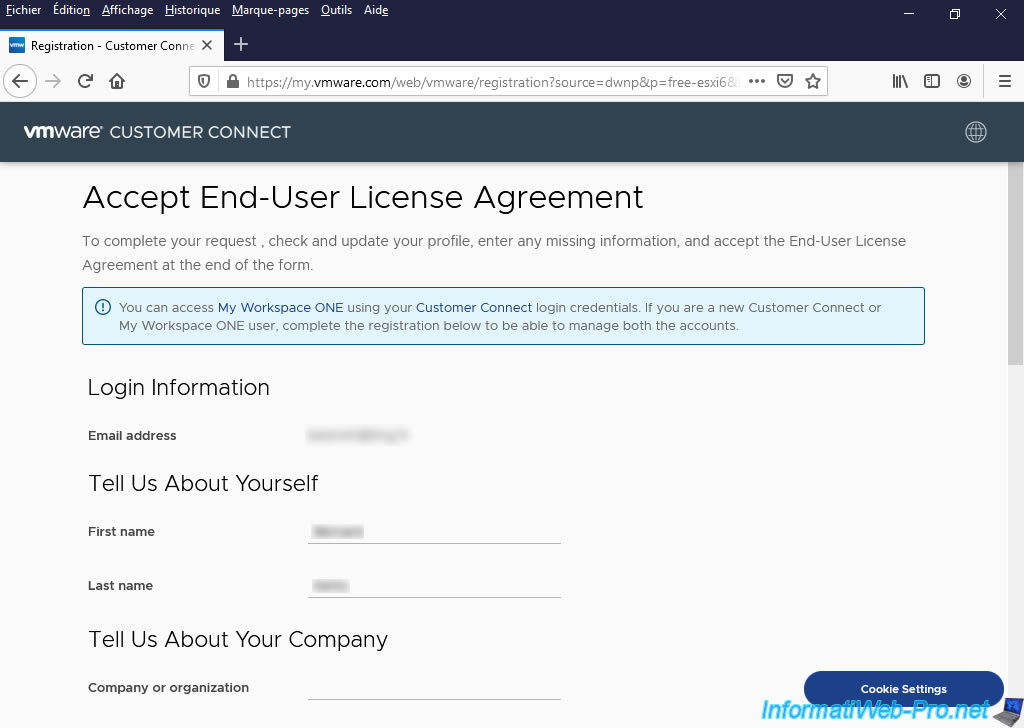
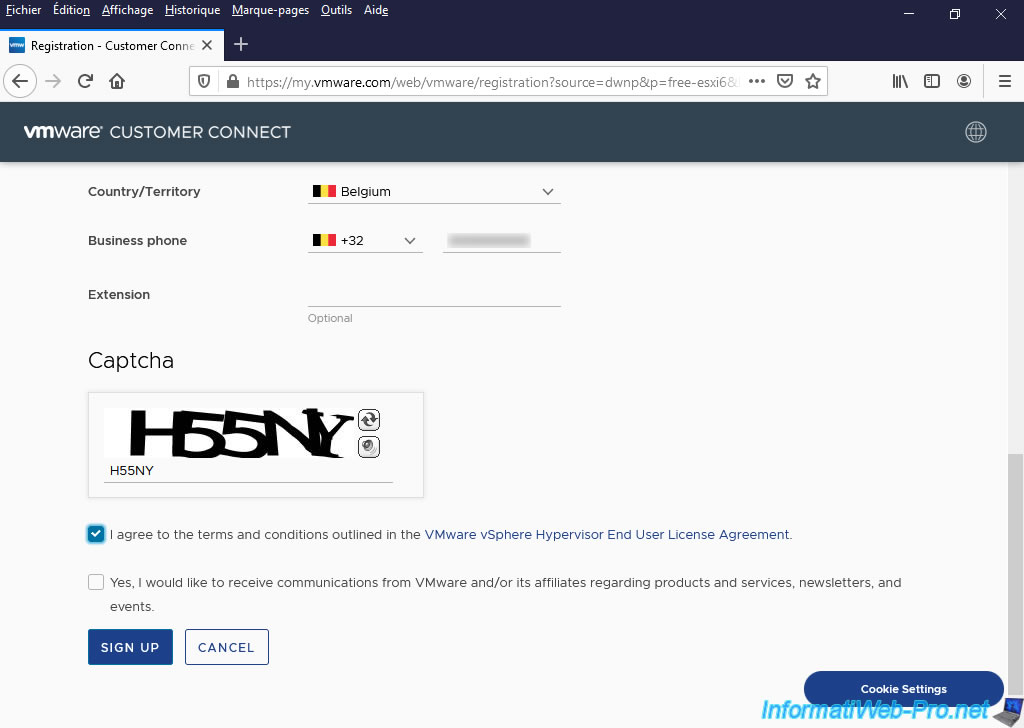
Accept the proposed license agreement.
Once you register for this product "VMware vSphere Hypervisor", VMware will only show you several downloads, including the VMware ESXi ISO file.
In our case: VMware vSphere Hypervisor 6.7 Update 3 - Binaries - VMware vSphere Hypervisor (ESXi ISO) image (Includes VMware Tools).
Warning : as explained previously, the free version of VMware ESXi no longer exists and URLs ending with "free-esxiX" no longer exist.
Broadcom automatically redirects them to the paid VMware vSphere page (and which includes the VMware ESXi hypervisor, part of the paid VMware vSphere package).
However, the evaluation version of VMware ESXi remains available.
Click on the "Manual Download" button.
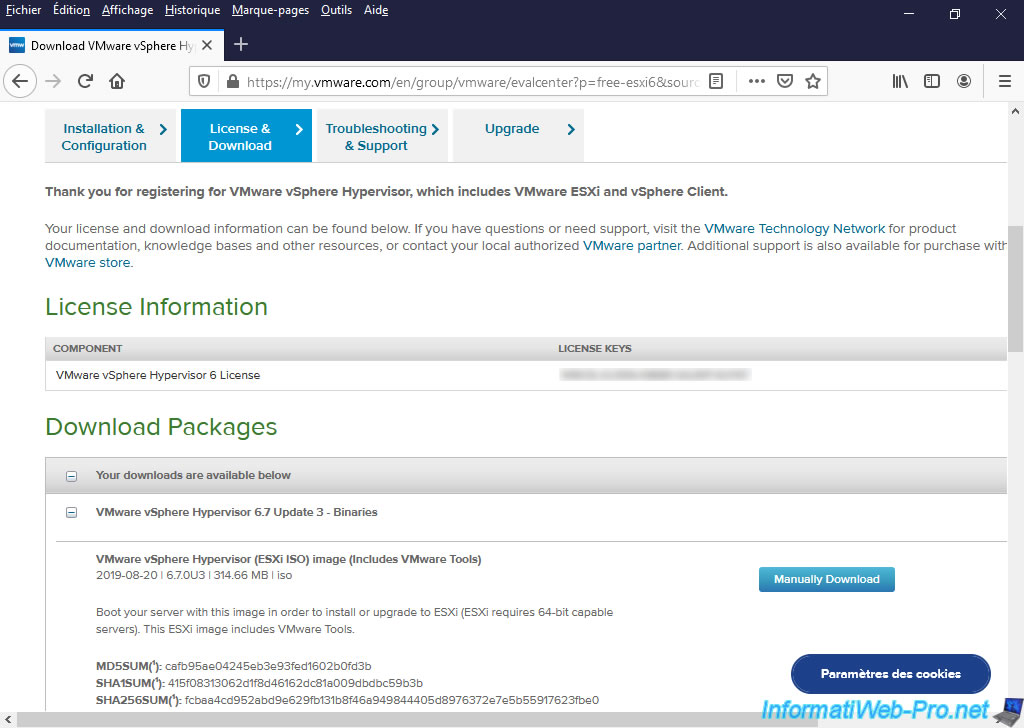
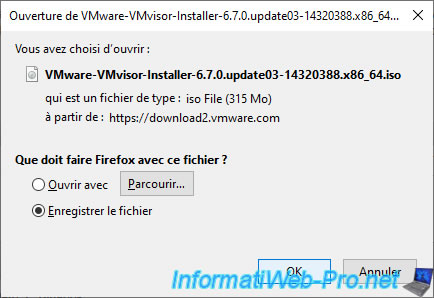
You will get a "VMware-VMisor-Installer-...iso" ISO file.
2. Install VMware ESXi 7.0 / 6.7
To install VMware ESXi on your computer or server, configure your motherboard BIOS to boot from your CD/DVD drive in UEFI mode (preferably for secure boot) or LEGACY BIOS mode (which is also supported).
If you boot from the VMware ESXi CD in LEGACY BIOS mode, you will see this boot menu : ESXi-6.7.0-20190802001-standard Boot Menu.
In this case, leave the option "ESXi-6.7.0-...-standard Installer" selected and press Enter.
.jpg)
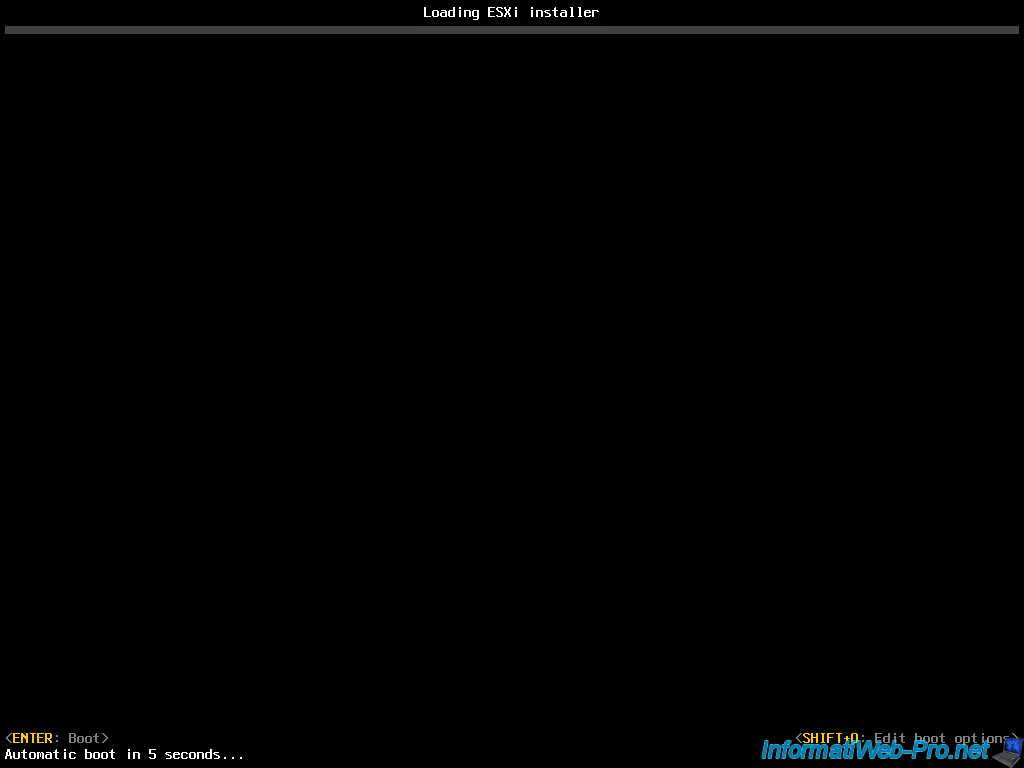
Then, you will see this "Loading ESXi installer" screen.
If you booted in UEFI mode on the VMware ESXi installation CD, you will come directly here.
Press Enter or wait 5 seconds.
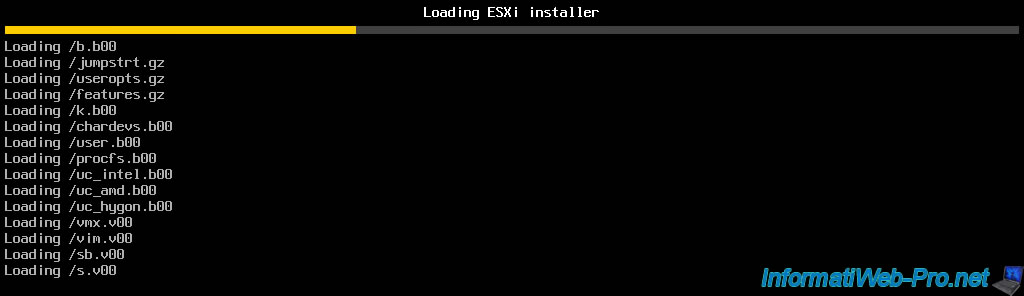
The installer will load the necessary files.
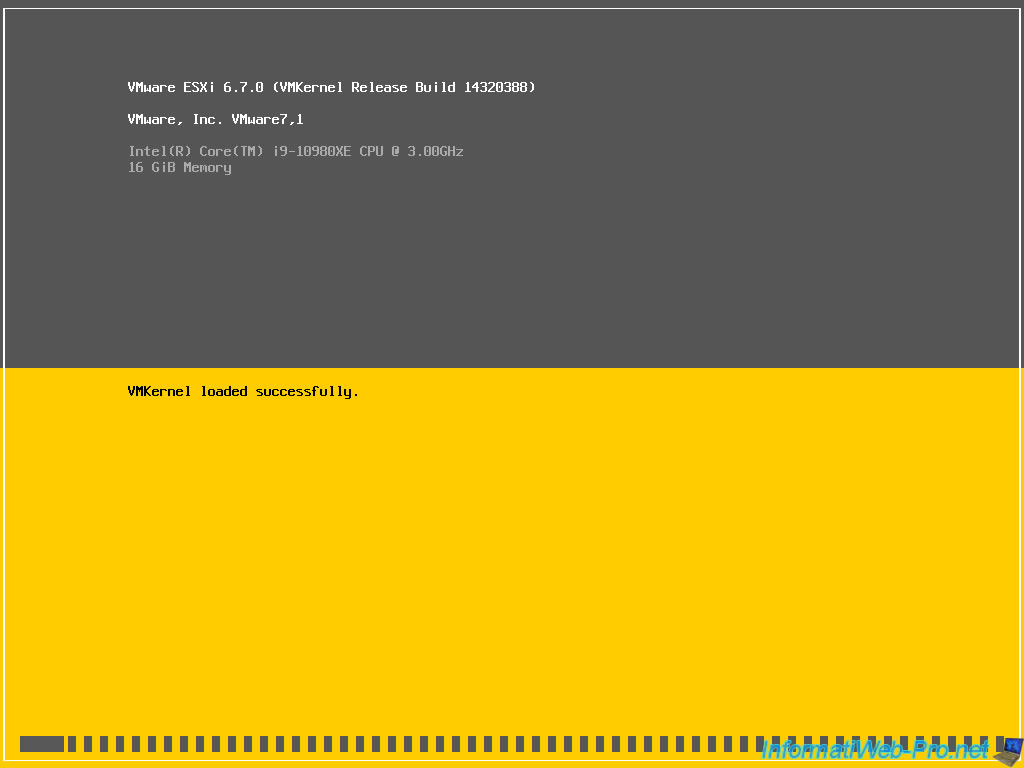
Then, you will see a gray and yellow screen like this. Wait a bit.
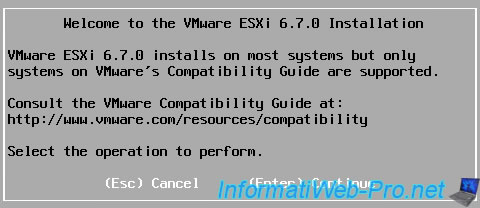
Then, the installer will appear : Welcome to the VMware ESXi 6.7.0 Installation.
Press Enter.
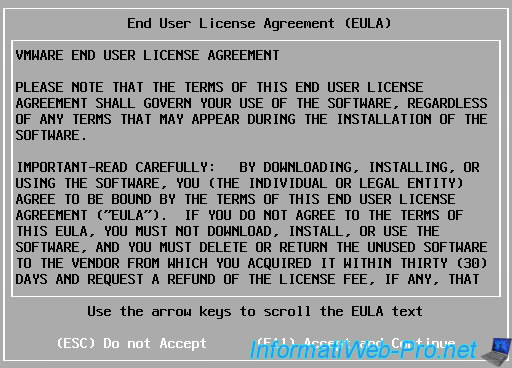
Accept the license agreement by pressing F11.
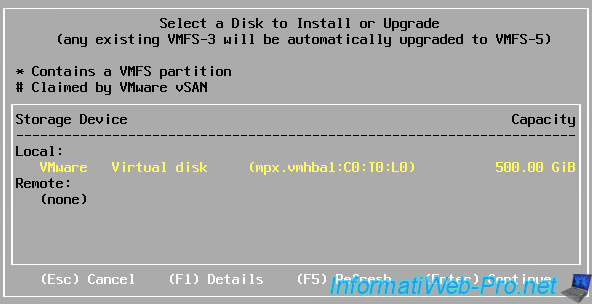
Wait while the VMware ESXi installer scans your computer / server for hard disks, SSDs, RAID volumes, ...

Select the disk where you want to install VMware ESXi and press Enter.
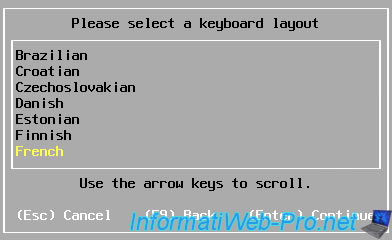
Select your keyboard language. French for "French (France)" or Belgian for "French (Belgium)".
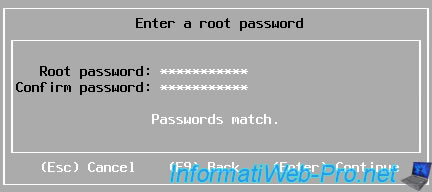
Specify a secure password for the VMware ESXi root account.
Wait while the VMware ESXi installer scans your hardware to verify that the necessary features are present (including : "VT-x / AMD-V" processor virtualization, ...).

The installer informs you that the previously selected disk will be repartitioned (and that the data on it will therefore be permanently erased).

Wait while VMware ESXi is installed.

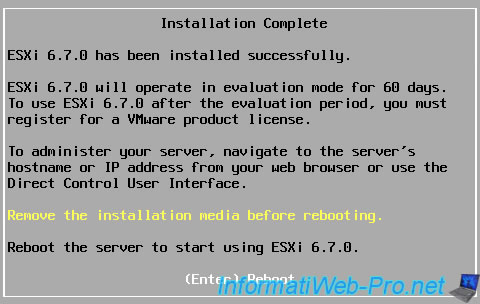
As noted at the end of the installer, VMware ESXi will run in trial mode for 60 days.
During these 60 days, you will have access to all the features offered by the paid version of VMware ESXi.
Then, you will be required to register your VMware ESXi hypervisor with a paid serial number.
To manage your server, you can :
- access the web interface of this one by logging in as root with his password defined previously
- use the "Direct Control User Interface (DCUI)" console
Remove the installation CD from your CD/DVD drive and restart your computer / server by pressing Enter.
Wait while it restarts.

3. Set a static IP address on your VMware ESXi hypervisor
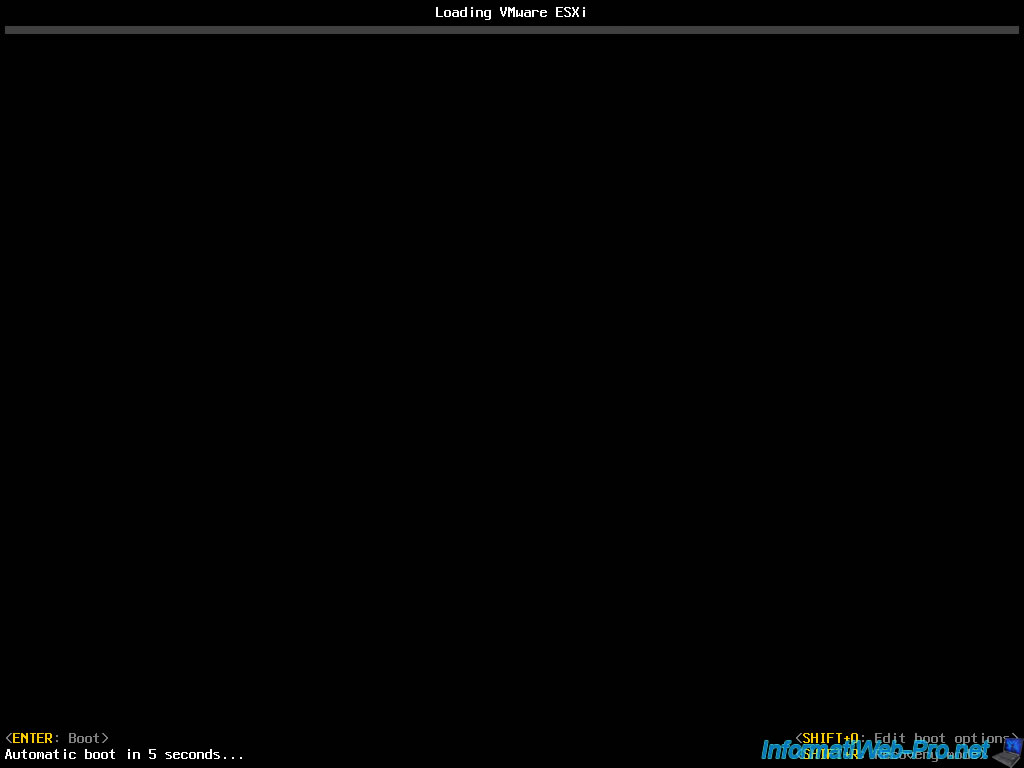
Once your computer / server has restarted, you will be taken to a "Loading VMware ESXi" screen.
Press Enter to start VMware ESXi or wait 5 seconds.
VMware ESXi will load the necessary files.

Loading of VMware ESXi will continue.

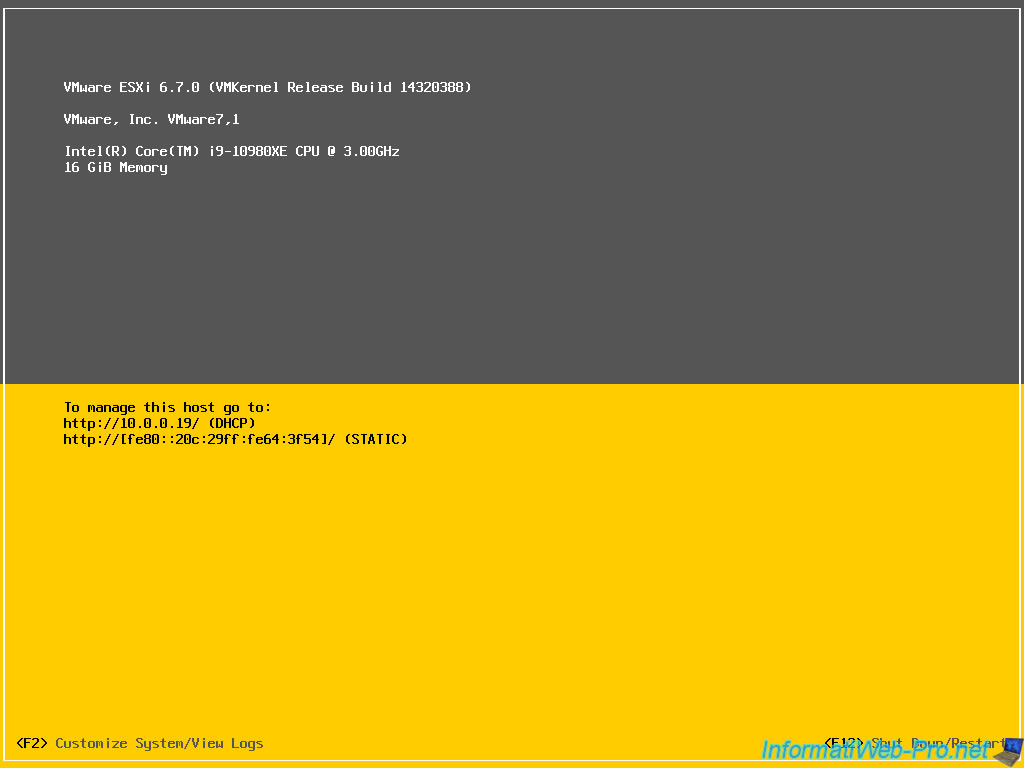
When VMware ESXi has finished booting, your server's IPv4 and IPv6 address (if applicable) will be displayed.
As you can see, the IPv4 address (in our case : 10.0.0.19) was obtained dynamically from our router's DHCP server.
However, to prevent your VMware ESXi hypervisor from changing its IP address, it's best to assign it a static IP address.
To do this, press the F2 key (Customize System/View Logs).
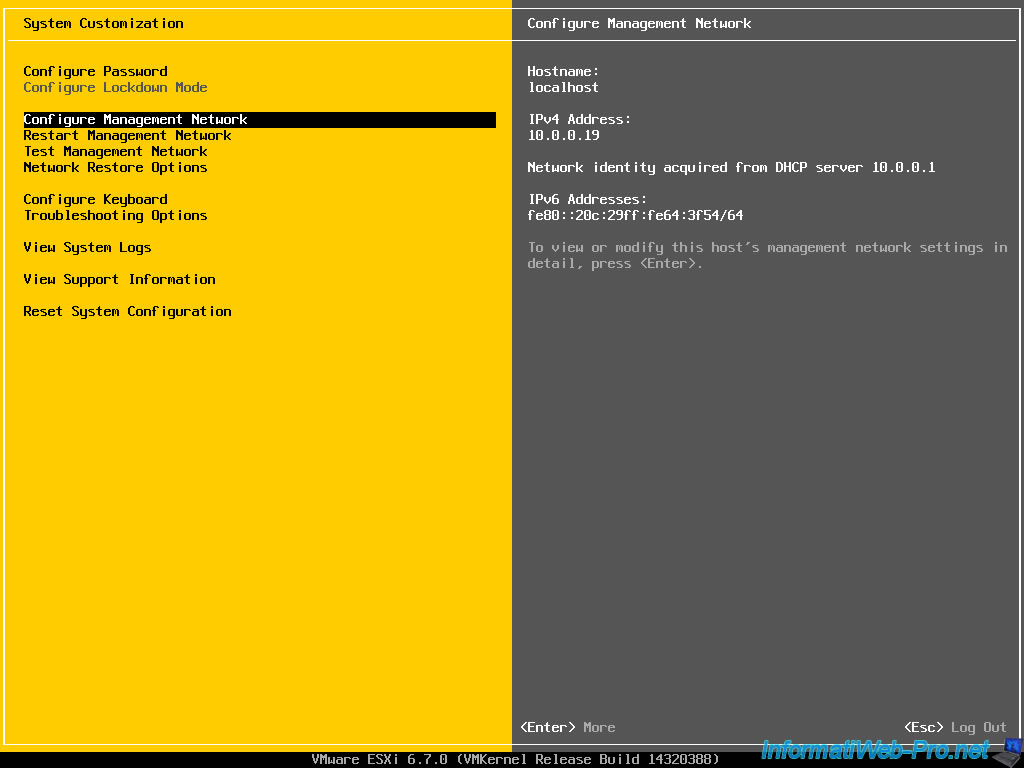
Enter the root account credentials and press Enter.

Then, go to : Configure Management Network.
Note : VMware ESXi tells you from which DHCP server the IP address of your server was obtained. (Network identity acquired from DHCP server 10.0.0.1)
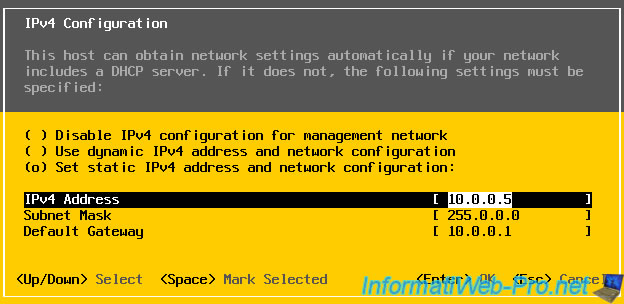
To define a static IPv4 address, go to : IPv4 Configuration.

Select the "Set static IPv4 address and network configuration" option and specify :
- IPv4 Address : the IPv4 address you want to assign to it.
Warning : this IP address must not be in the range of IP addresses distributed by your DHCP server to avoid IP address conflicts on your network. - Subnet Mask : the subnet mask corresponds to the IP address indicated above. Usually 255.255.255.0 for a Class C IP address (192.168.1.x) or 255.0.0.0 for a Class A IP address (10.x.x.x).
- Default Gateway : IP address of your gateway (or router or Box)
Then, validate by pressing Enter.
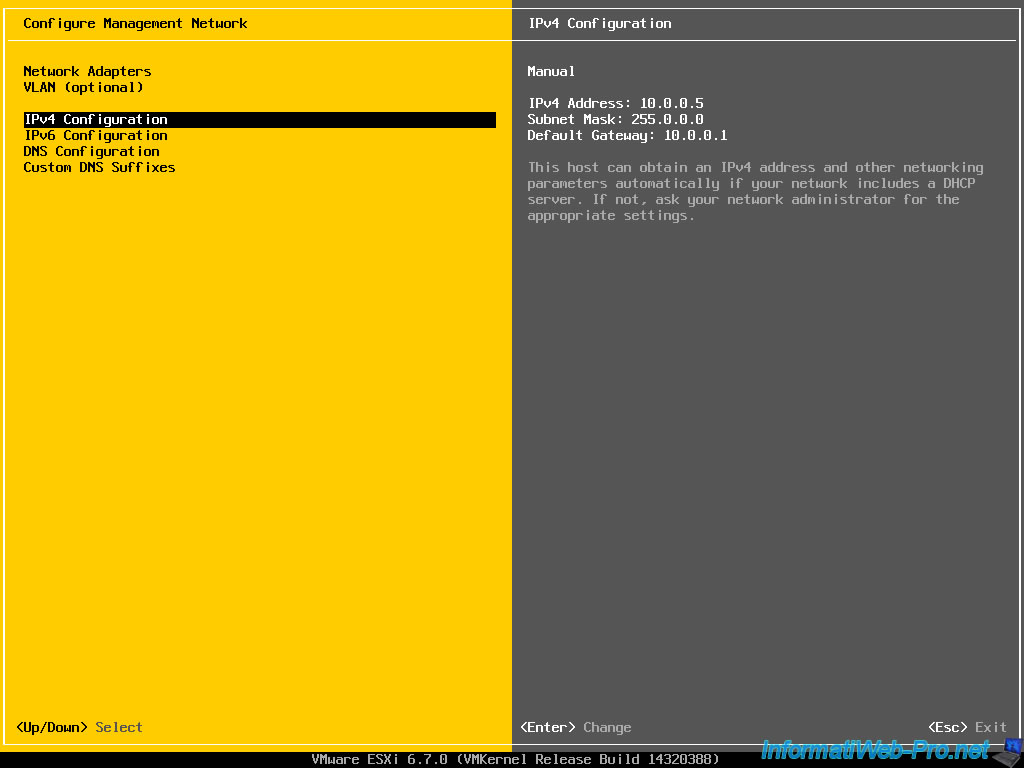
The new IPv4 configuration appears on the right. Press "Esc".
Since you have defined a static IP address for your VMware ESXi hypervisor, it's important to also define the DNS servers that it should use.
Indeed, these will no longer be automatically received via the DHCP protocol since the IP address used is static (fixed).
To define them, go to : DNS Configuration.
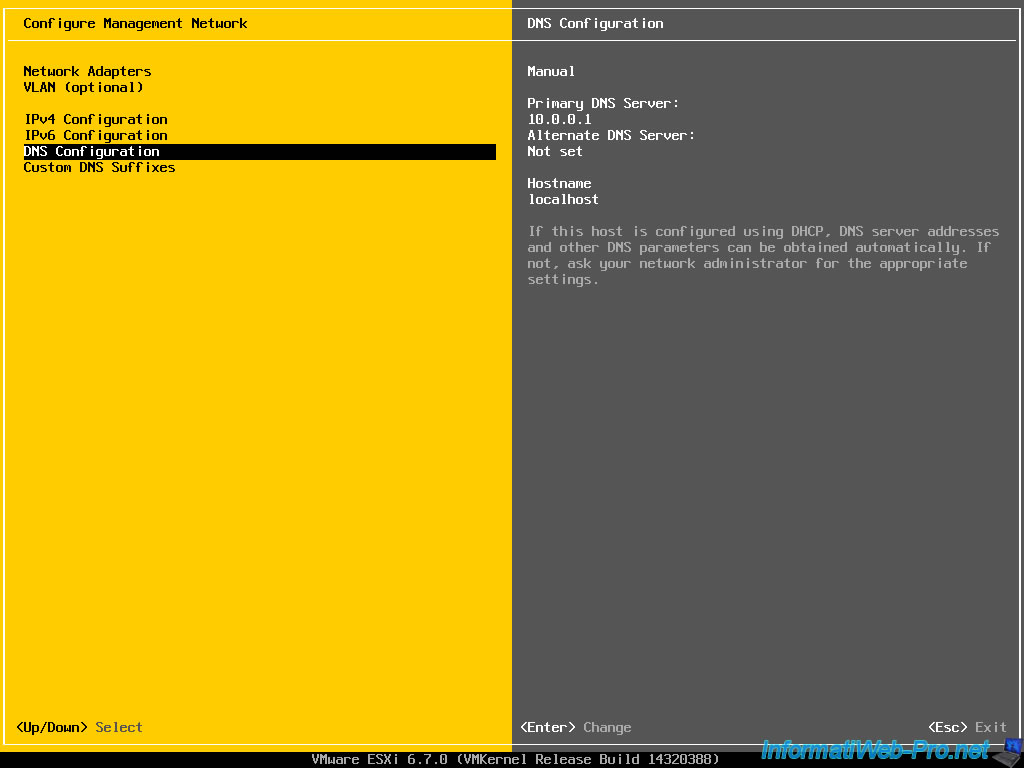
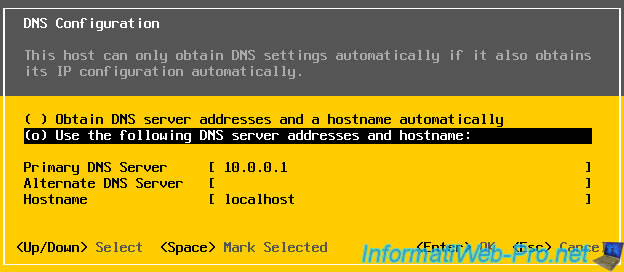
Then, select "Use the following DNS server addresses and hostname" and specify :
- Primary DNS Server : the primary DNS server to use. For example : the IP address of your router or your local DNS server (in case you have an Active Directory infrastructure in your network, for example).
- Alternate DNS Server : the secondary DNS server to use (optional).
- Hostname : the name of your VMware ESXi hypervisor. This information is especially useful when you want to use a valid SSL certificate to secure the access to your VMware ESXi server.
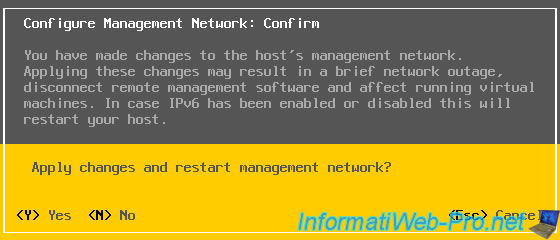
VMware ESXi will ask you to confirm the modification of the network configuration as this will create a mini disconnection, which could possibly disconnect remote management software, Remote Desktop (RDP) sessions, cause a brief network disconnection in the virtual machines currently running on your VMware ESXi hypervisor (if applicable), ...
Confirm by pressing "Y".
Press "Esc" again to return to the VMware ESXi home screen.
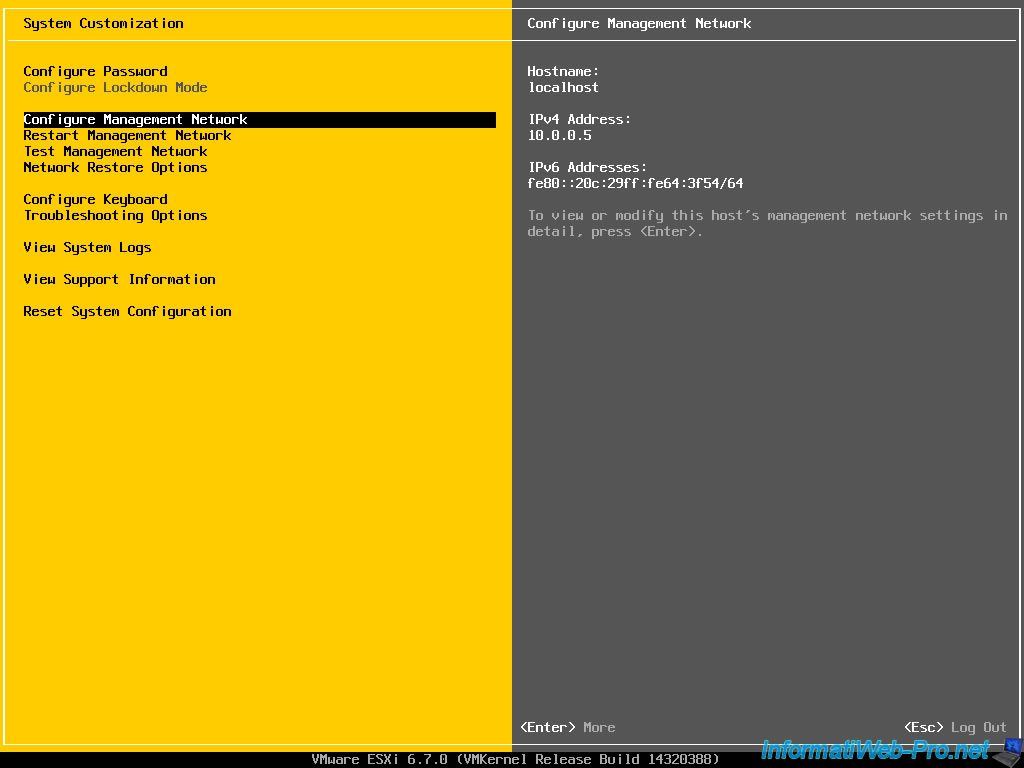
Now, VMware ESXi tells you that this is a Static IP address.

Share this tutorial
To see also
-

VMware 5/25/2022
VMware ESXi 6.0 - Install the VMware Host Client web client
-

VMware 5/27/2022
VMware ESXi 6.5 - Add a network driver in the installation ISO
-

VMware 1/27/2023
VMware ESXi 6.7 - Enable virtualization-based security (VBS)
-

VMware 12/2/2022
VMware ESXi 6.7 - Install and use the VMRC console on Linux
You must be logged in to post a comment