Enable Jumbo frame support on VMware Workstation 17 and 16
- VMware
- 16 June 2023 at 08:09 UTC
-

- 2/3

5. Enable Jumbo frames support on VMXNET 3 paravirtual network adapters on Windows
Now that your Windows 10 virtual machines are using VMXNET 3 paravirtual network adapters, you need to enable support for Jumbo frames in their settings.
To do this, right-click "Properties" on the paravirtual network adapter of your virtual machine.
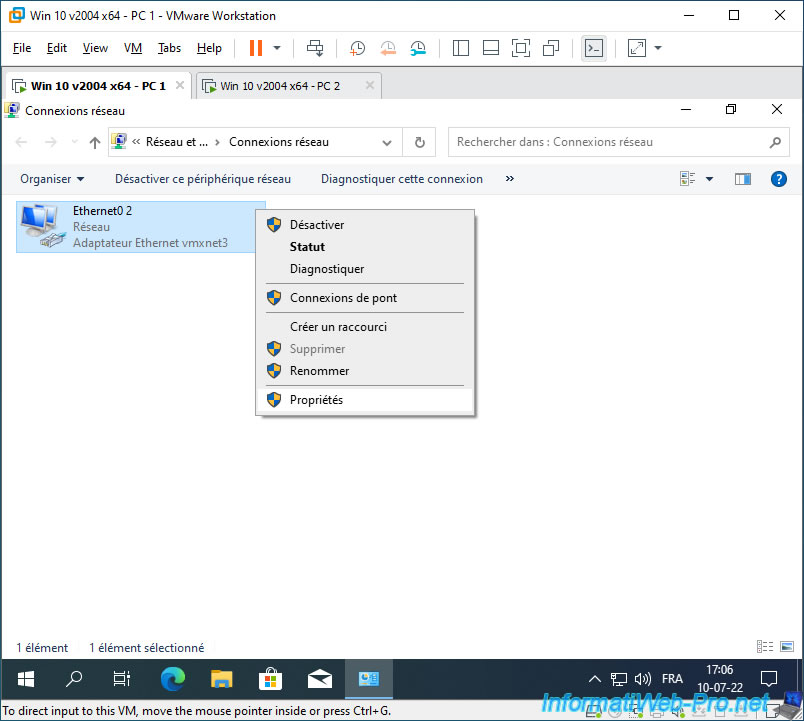
In the "Properties of Ethernet0 2" window that appears, click on : Configure.
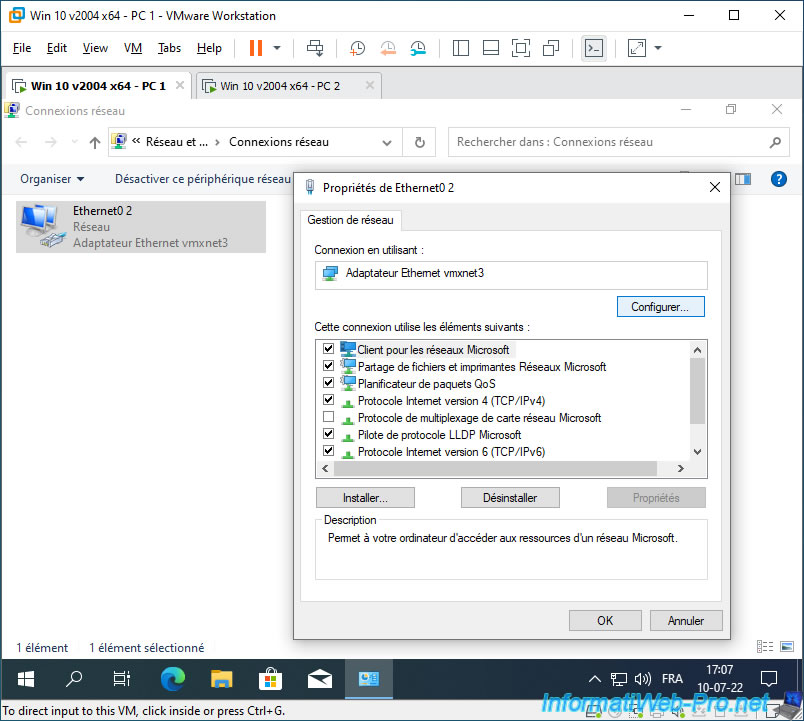
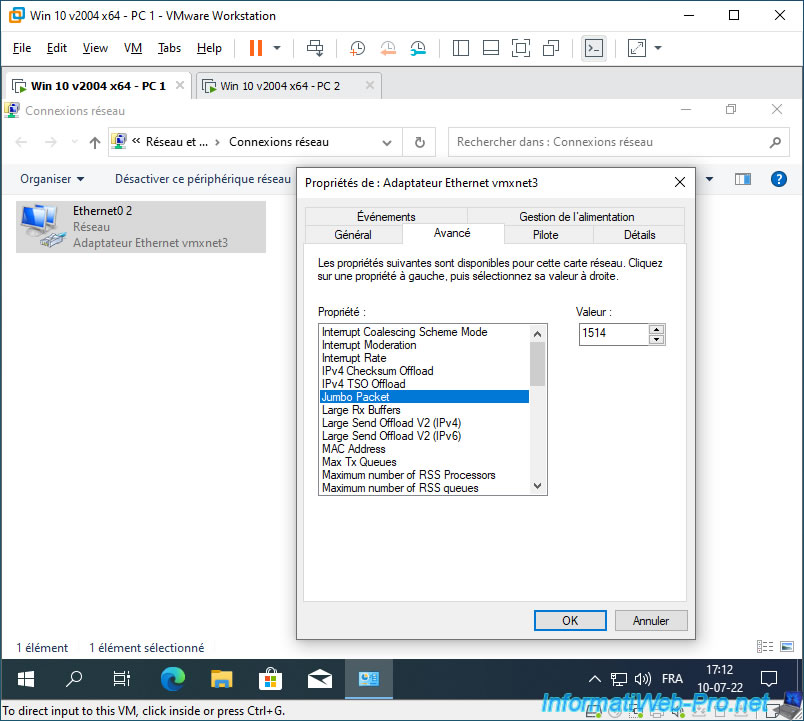
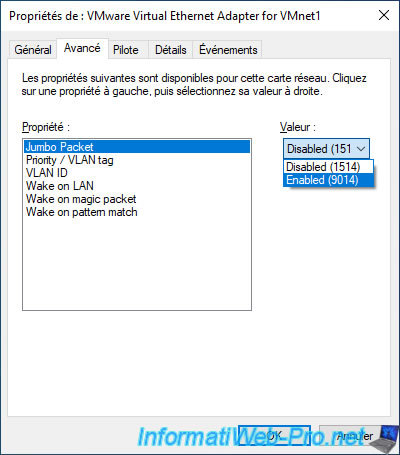
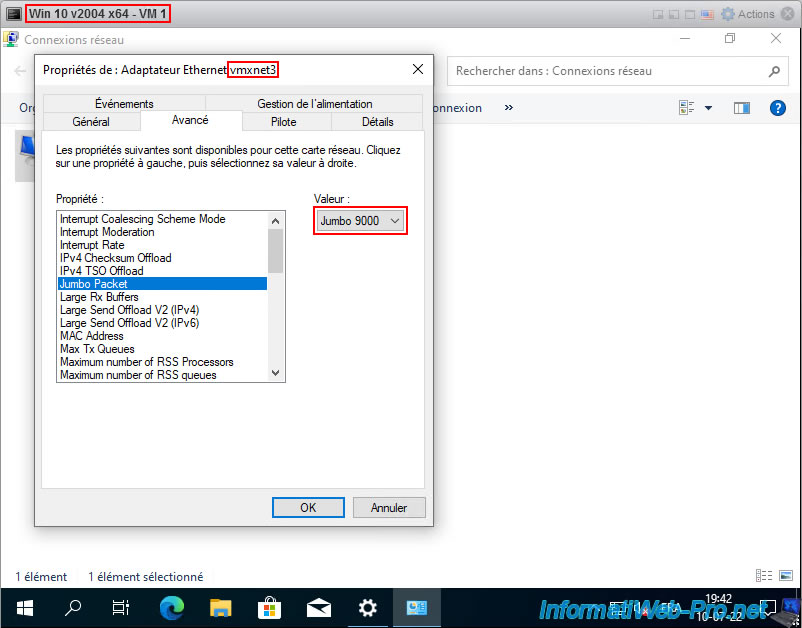
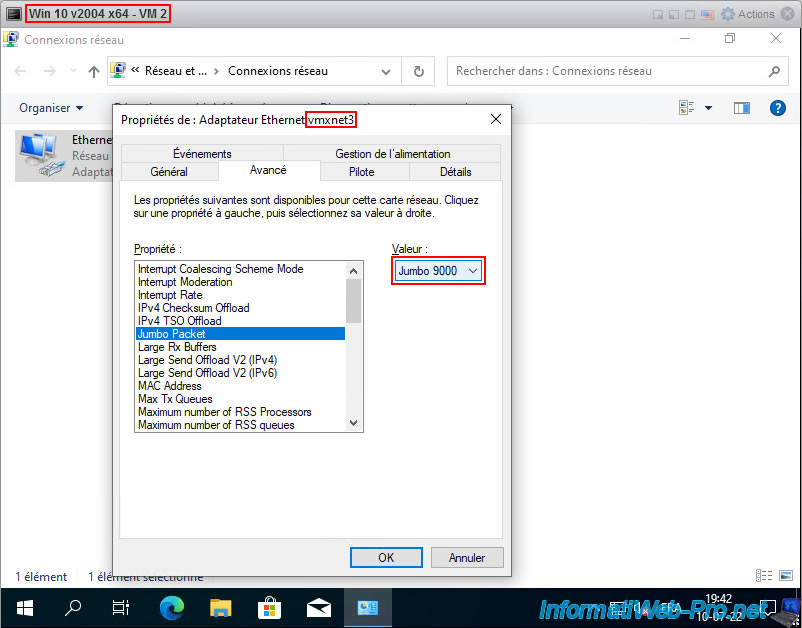
Then, in the "Properties of: vmxnet3 Ethernet adapter" window that appears, go to the "Advanced" tab and select the "Jumbo Packet" property.
As you can see, by default, the value indicated is : 1514 (meaning that support for jumbo frames is disabled for the moment).
To enable support for Jumbo frames, specify the value "9014" and click OK.
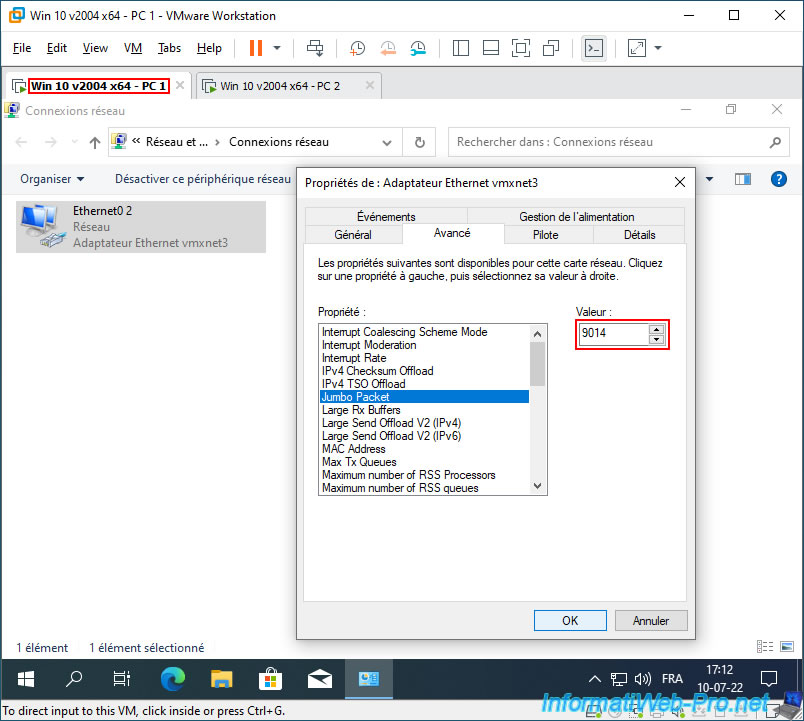
Make the same modification on the "vmxnet3" paravirtual network adapter of your 2nd virtual machine.

For information : the values to use are those offered to you when you modify one of the "VMware Network Adapter VMnetX" adapters on your host PC.
As you can see, it's necessary to indicate "1514" to disable the support of Jumbo frames and "9014" to enable the support of Jumbo frames.
6. Network test to verify that Jumbo frame support is correctly enabled
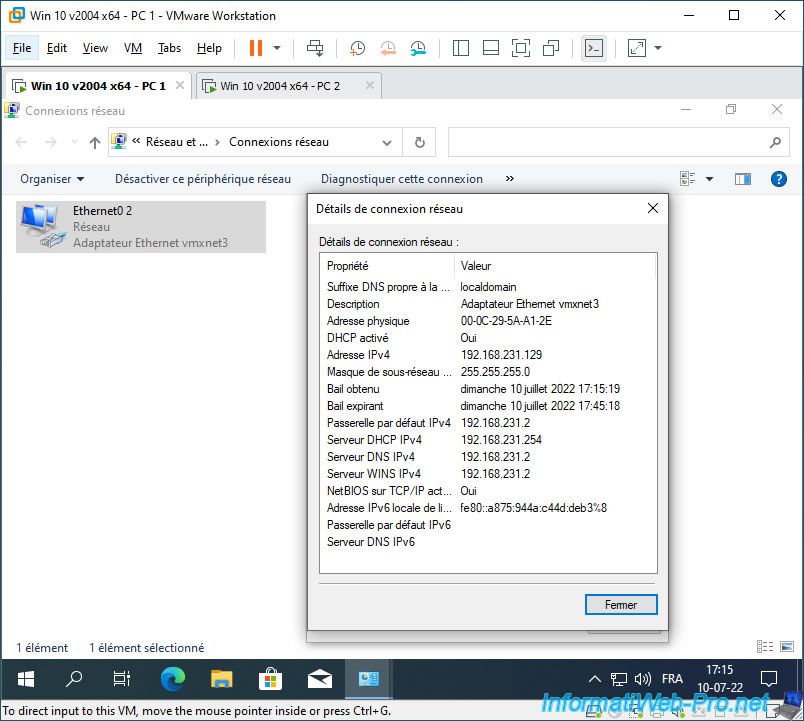
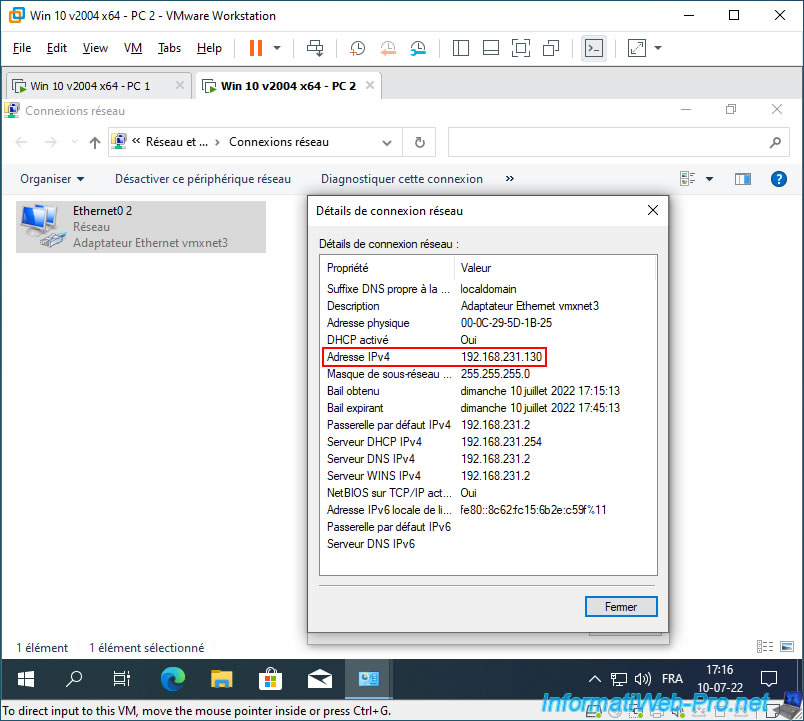
Since support for Jumbo Frames has been enabled on the "VMnet1" (Host-only) and "VMnet8" (NAT) virtual networks, we have configured our virtual machines to use "NAT" (VMnet8) mode.
This explains the IP addressing used in this case.
Our VM 1 has the IP address "192.168.231.129".
Our VM 2 has the IP address "192.168.231.130".
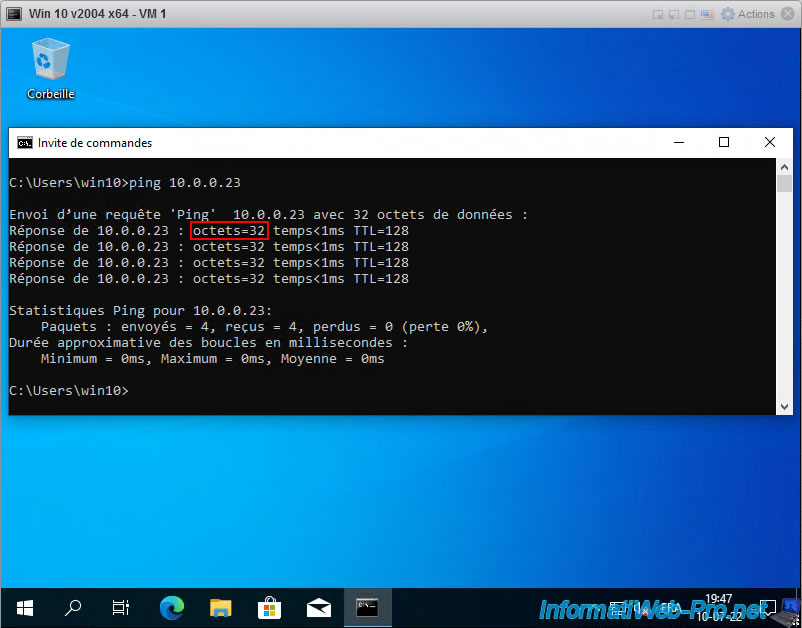
To start, test the network connectivity between your 2 virtual machines by performing a simple ping where the specified IP address is that of the remote virtual machine (VM 2 in our case).
Batch
ping 192.168.231.130
If the network test is successful, you will get this :
Plain Text
Pinging 192.168.231.130 with 32 bytes of data:
Reply from 192.168.231.130: bytes=32 time<1ms TTL=128
Reply from 192.168.231.130: bytes=32 time<1ms TTL=128
Reply from 192.168.231.130: bytes=32 time<1ms TTL=128
Reply from 192.168.231.130: bytes=32 time<1ms TTL=128

Ping statistics for 192.168.231.130:
    Packets: Sent = 4, Received = 4, Lost = 0 (0% loss),
Approximate round trip times in milli-seconds:
    Minimum = 0ms, Maximum = 0ms, Average = 0ms
If not, verify that your VMs are using a private (home) network or that ping (ICMP) is allowed for inbound traffic to the destination VM.

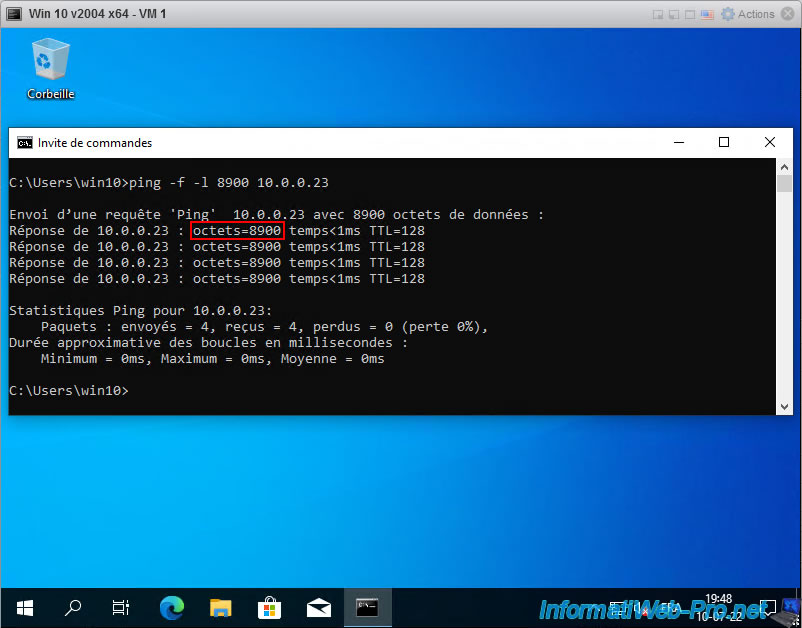
If the previous network test is successful, you can verify that the Jumbo frames are passing correctly through the VMware Workstation Pro virtual network by attempting to send 8900 bytes of data per packet to your destination virtual machine (VM 2 in our case).
To do this, use the command below :
- -f : indicates that sent packets can't be fragmented (cut) into small packets.
This ensures that packets of 8900 bytes will be sent correctly from end to end and that support for Jumbo frames is therefore correctly configured. - -l 8900 : specifies to send packets with 8900 bytes of data inside.
Warning : you can't send 9000 bytes of data in a single network packet, because a network packet also contains headers (such as : source IP address, destination IP address, ...).
This means that the packet sent would therefore necessarily have a size greater than 9000 bytes. Which is not supported.
Batch
ping -f -l 8900 192.168.231.130
If the VMware virtual network adapters of your host PC and those of your virtual machines are configured correctly to allow Jumbo frames, you will get a result like this :
Plain Text
Pinging 192.168.231.130 with 8900 bytes of data :
Reply from 192.168.231.130: bytes=8900 time<1ms TTL=128
Reply from 192.168.231.130: bytes=8900 time<1ms TTL=128
Reply from 192.168.231.130: bytes=8900 time<1ms TTL=128
Reply from 192.168.231.130: bytes=8900 time<1ms TTL=128

Ping statistics for 10.0.0.23:
    Packets: Sent = 4, Received = 4, Lost = 0 (0% loss),
Approximate round trip times in milli-seconds:
    Minimum = 0ms, Maximum = 0ms, Average = 0ms

If something goes wrong, you might get different errors.
If the "ping" command displays the error below, it means that support for Jumbo frames is not enabled on the virtual network adapter of the source virtual machine (VM 1 in our case).
Plain Text
Packet needs to be fragmented but DF set.
If the "ping" command displays the error below, it means that support for Jumbo frames is not enabled on the virtual network adapter of the destination virtual machine (VM 2 in our case).
Plain Text
Request timed out.
7. Jumbo frame support with VMware ESXi hypervisor as VM (VM traffic)
Note that when using VMware ESXi 6.7.0 hypervisor with VMware Workstation Pro 16, a VMXNET 3 paravirtual NIC is used by default.
Since Jumbo frames are supported on VMware ESXi 6.7.0, VMware Workstation Pro and the VMXNET 3 paravirtual network card, you will therefore be able to use Jumbo frames between your virtualized VMware ESXi 6.7.0 hypervisors if you wish.
This part of the tutorial is simply there to prove that it's possible and that it works without problems.
To learn more about the use of jumbo frames under VMware ESXi 6.7.0, refer to our tutorial : VMware ESXi 6.7 - Enable Jumbo frame support.
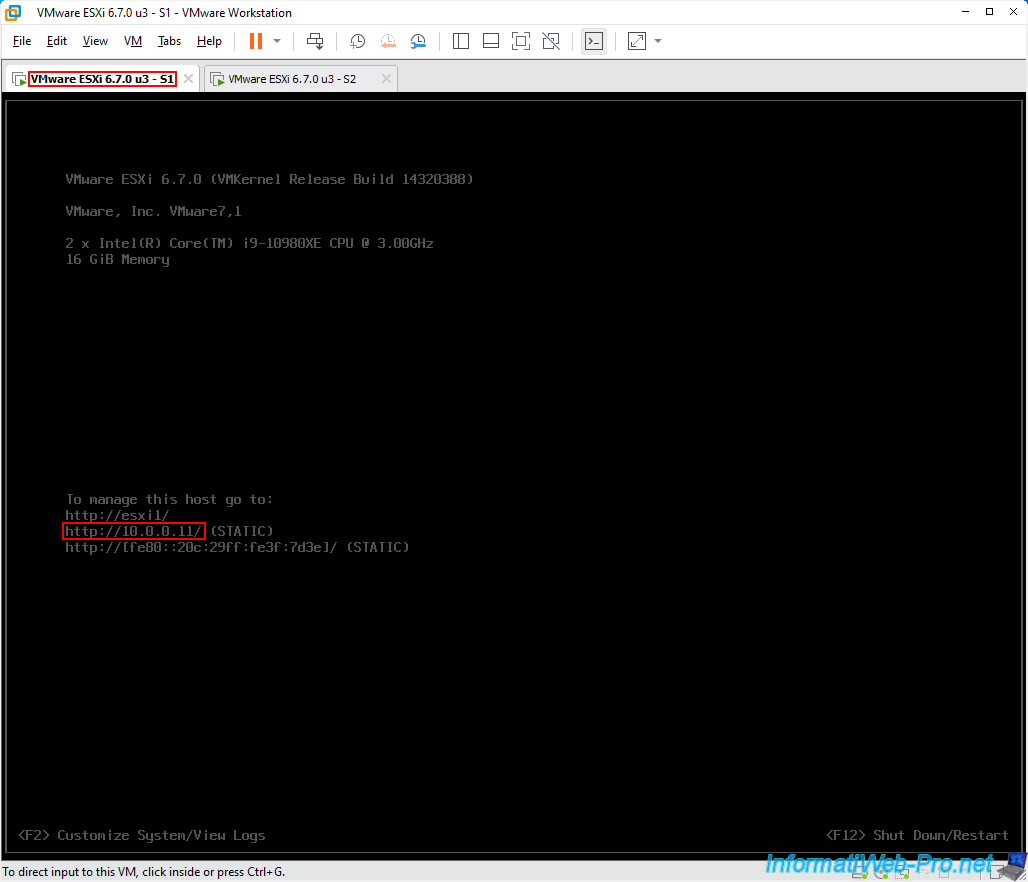
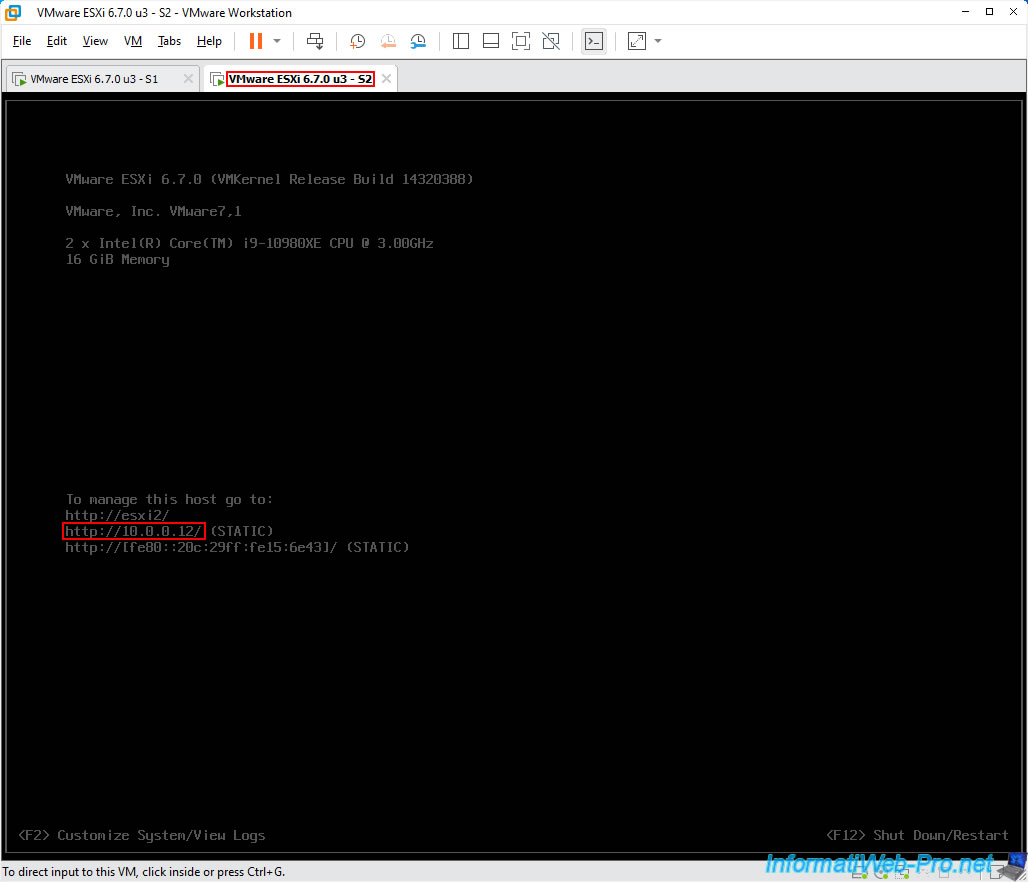
In our case, we created 2 virtual machines with VMware ESXi 6.7.0 u3 in each virtual machine running on VMware Workstation Pro.
As you can see, these 2 virtual machines have the following IP addresses :
- VMware ESXi 6.7.0 u3 - S1 : 10.0.0.11
- VMware ESXi 6.7.0 u3 - S2 : 10.0.0.12
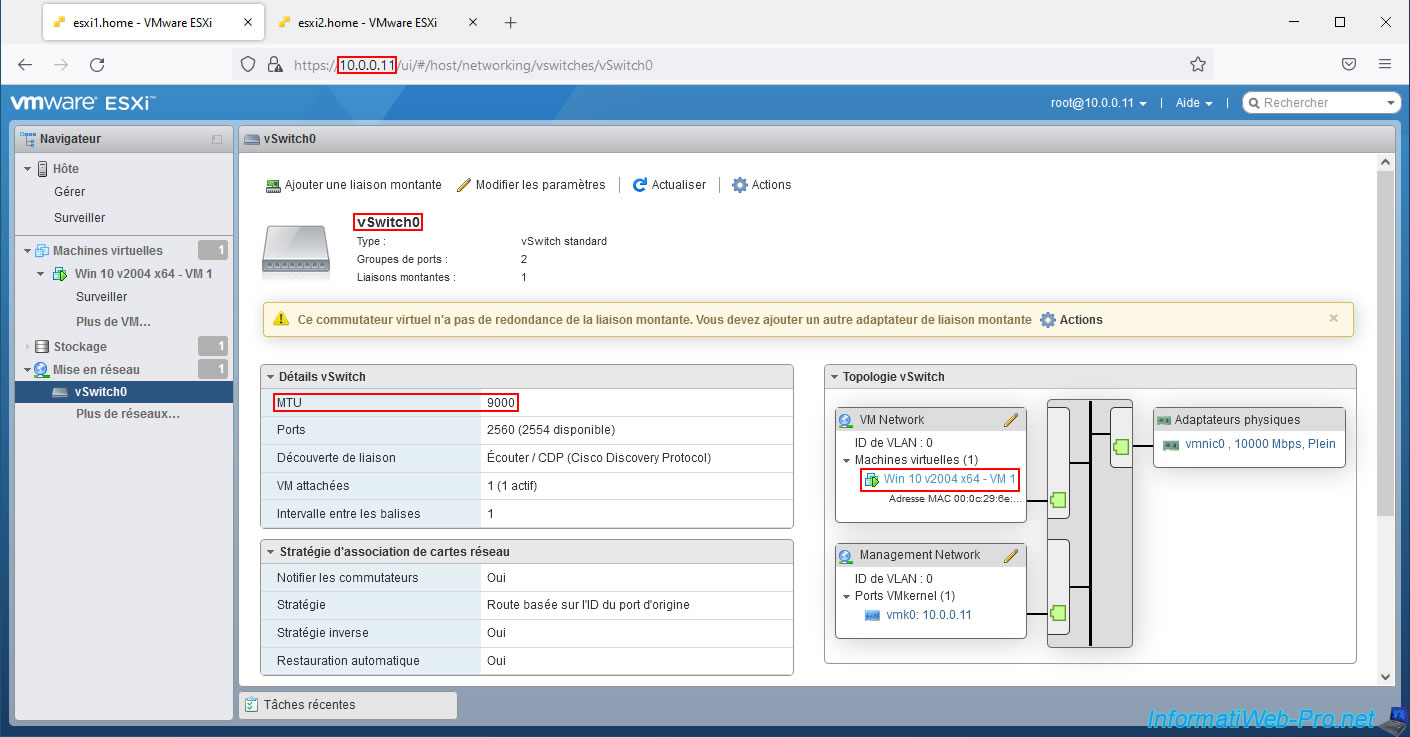
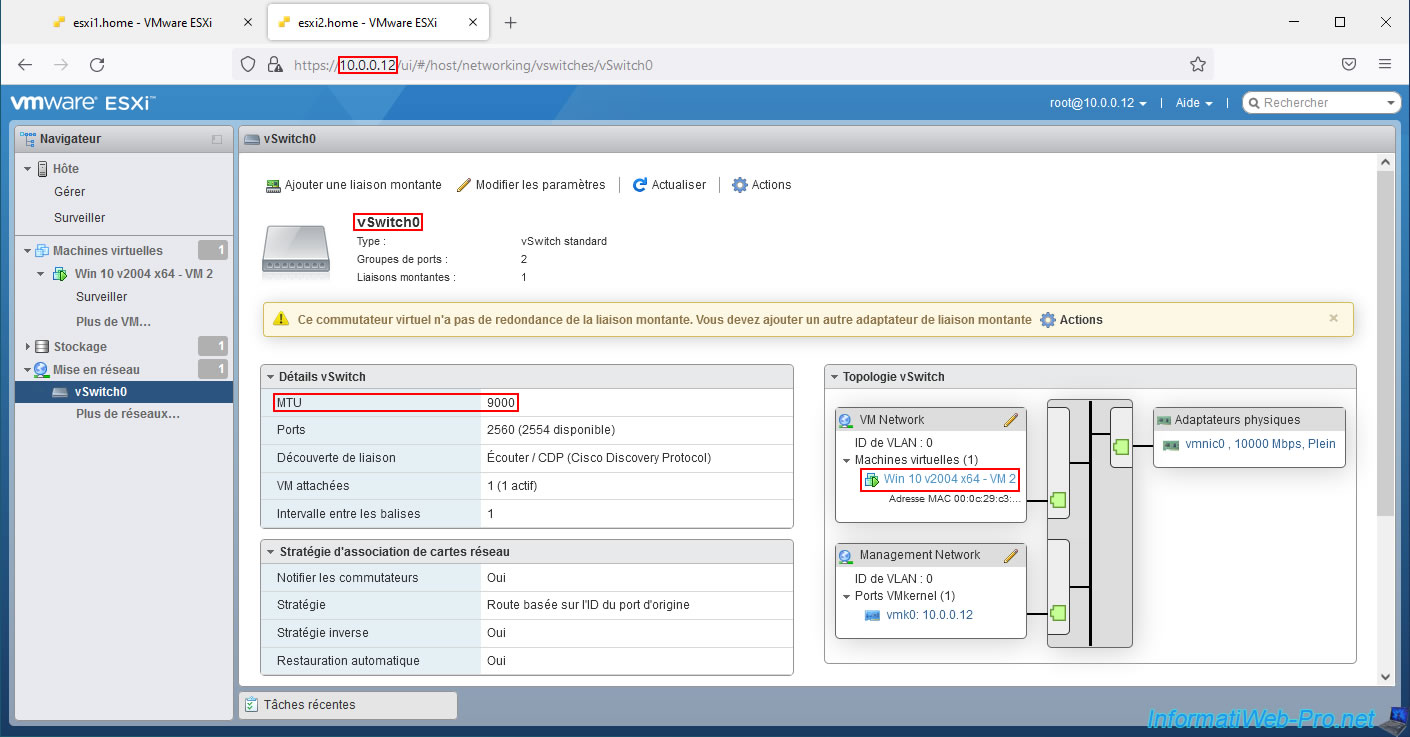
Configure the "vSwitch0" virtual switch of each of your hypervisors to use an MTU of 9000 bytes (= Jumbo frames support enabled).
As you can see, we created a "Windows 10 v2004 x64" virtual machine on each of these VMware ESXi hypervisors.
As before, we configured our Windows 10 v2004 x64 virtual machines to use a "VMXNET3" paravirtual network adapter and we enabled support for Jumbo frames on them.
As expected, the classic network test via the ping command works without problems.
Batch
ping 10.0.0.23
And Jumbo frames are sent correctly through the virtual network of VMware Workstation Pro and that of our virtualized VMware ESXi hypervisors.
Batch
ping -f -l 8900 10.0.0.23
Share this tutorial
To see also
-

VMware 3/16/2013
VMware Workstation - Boot a VM on the BIOS / EFI firmware
-

VMware 2/7/2020
VMware Workstation 15 - Installation on Linux
-

VMware 12/24/2021
VMware Workstation 15 - Slice the virtual hard disk of a VM
-

VMware 12/10/2021
VMware Workstation 15.5 - Convert a Virtual PC virtual machine to a VMware VM
No comment