- VMware
- 17 April 2020 at 13:28 UTC
-


When you create a virtual machine with VMware Workstation, its execution is isolated from the host system.
However, everything you install and store in it will be stored in one or more vmdk files that represent the virtual hard disk of this virtual machine.
Since everything is stored in clear in these vmdk files, it's thus possible to read the contents of the hard disk of this virtual machine. For this, it's enough to map it from the settings of the virtual machine (Settings -> select the virtual hard disk to map -> Map). And of course you don't need the password of a user account in the guest OS.
To avoid this problem, VMware allows you to fully encrypt your virtual machine (its configuration and associated virtual hard disks).
From this moment, it will no longer be possible to map the virtual hard disk of this virtual machine on the host computer and you will need the password to use it.
1. Virtual machine encryption
Normally, vmdk files are readable by any program compatible with that format, and your virtual machine's configuration file is also accessible in plain text.
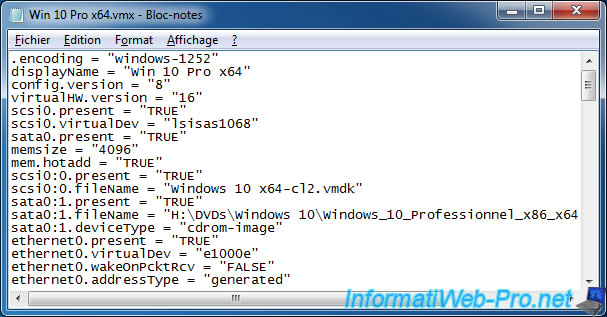
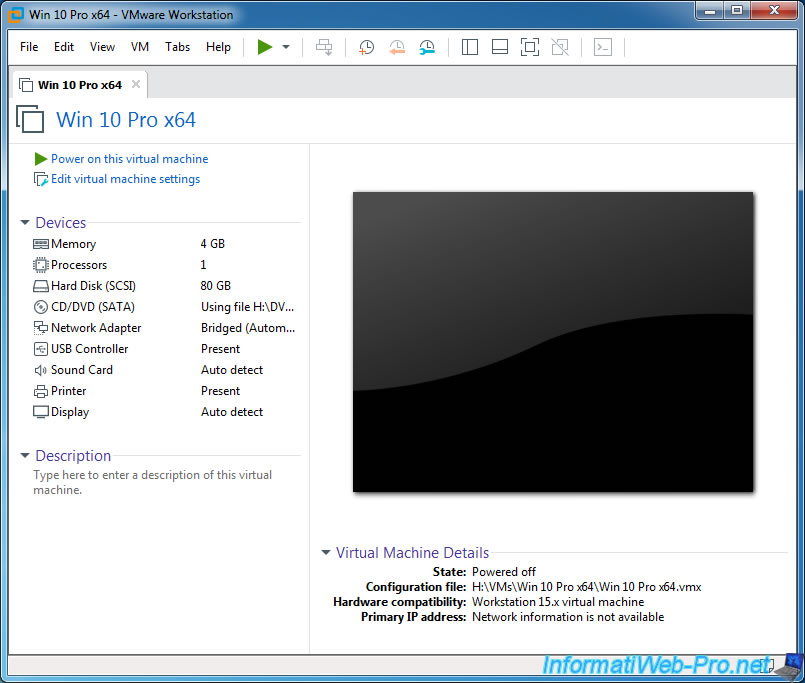
In VMware Workstation, when you select your virtual machine, you can do what you want with it at this time.
To encrypt your virtual machine, click "Edit virtual machine settings", then in the "Options" tab, select : Access Control.
Then, click Encrypt.
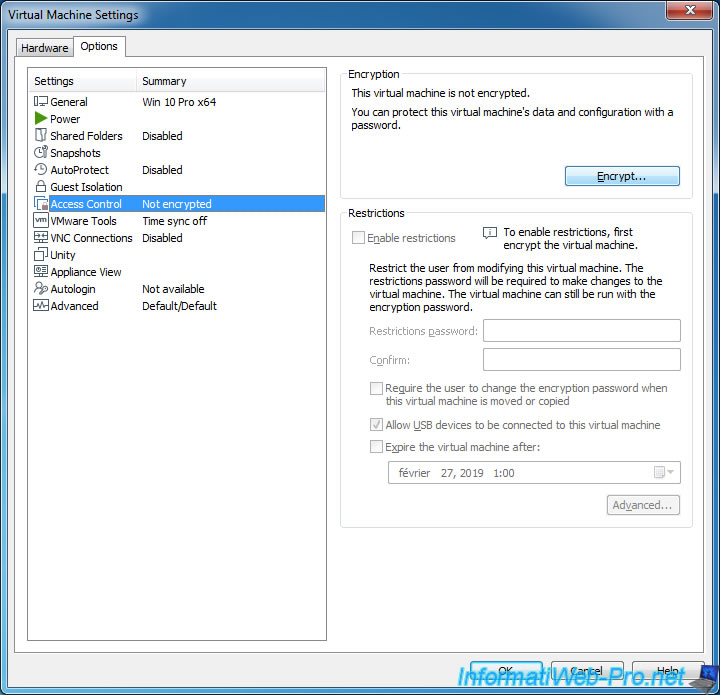
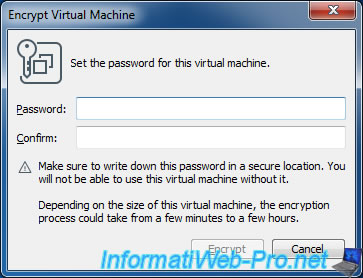
Specify a password to encrypt this virtual machine.
Important : there is NO WAY to RECOVER this PASSWORD if you have lost it, because your data are encrypted with this password and it isn't a simple protection by password.
This means that without this password, it will be impossible to recover the data stored in the virtual hard disk(s) of this virtual machine. And data recovery software will not help you in this case.
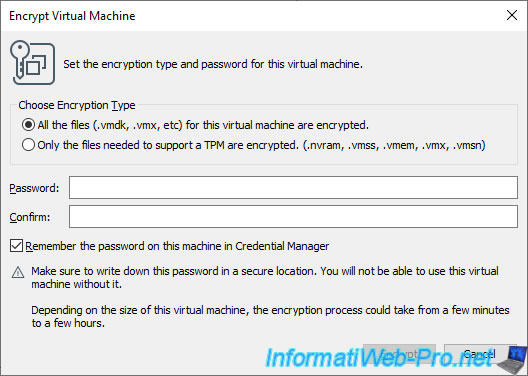
Since version 17 of VMware Workstation Pro, you have the possibility to encrypt:
- All the files (.vmdk, .vmx, etc) for this virtual machine are encrypted : fully encrypt the virtual machine, including its virtual hard disk.
Which can take a long time depending on the amount of data present in the virtual hard disk and reduce the performance of the virtual machine. - Only the files needed to support a TPM are encrypted. (.nvram, .vmss, .vmem, .vmx, .vmsn) : allows to encrypt only the current state of the VM's BIOS / firmware (.nvram), its suspended state file (.vmss), the file saves its memory (.vmem) when the VM is powered on, its configuration file (.vmx) and its started state (.vmsn) when you use snapshots.
Which is much faster and very convenient when you want to quickly virtualize Windows 11 without losing performance for storage.
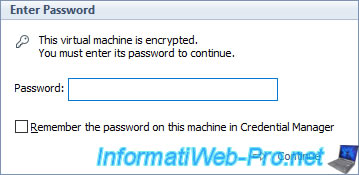
You can also choose to save this password to your computer in the Credential Manager by checking the box "Remember the password on this machine in Credential Manager".
Which is very convenient when you virtualize Windows 11 and you don't want to type the password every time you want to use your virtual machine.
Nevertheless, it is important to write it down somewhere so that you can continue to use this virtual machine in the event that you reinstall Windows or launch this virtual machine from another computer.
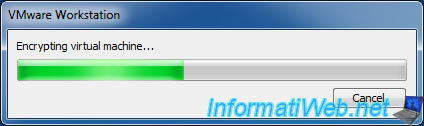
Wait while encrypting your virtual machine (its configuration, virtual hard disks, ...).
Note : this process can take a long time depending on the size of your virtual machine and mainly depending on the actual size of the virtual hard disks associated with it.
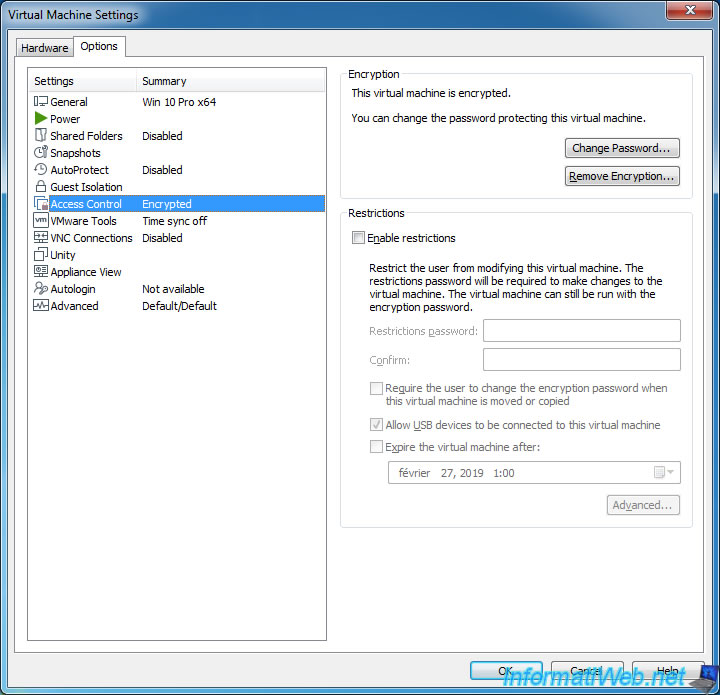
Once the encryption process is complete, you will see : This virtual machine is encrypted.
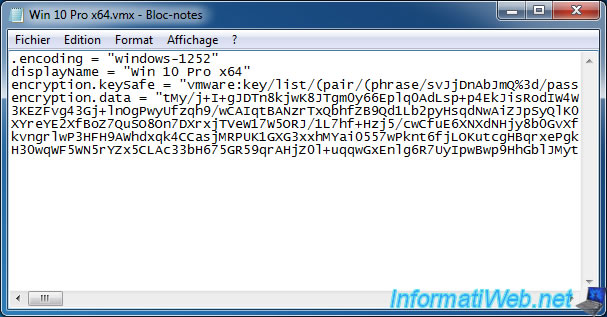
From now, the configuration file of your virtual machine will no longer be readable from external programs, such as Notepad for example.
Indeed, all you will see will be :
- the encoding used to read and write to this file
- the name of your virtual machine (to be able to display it in VMware Workstation)
- a key used by VMware Workstation for encrypting/decrypting data of your virtual machine
- the configuration data of your virtual machine in encrypted format
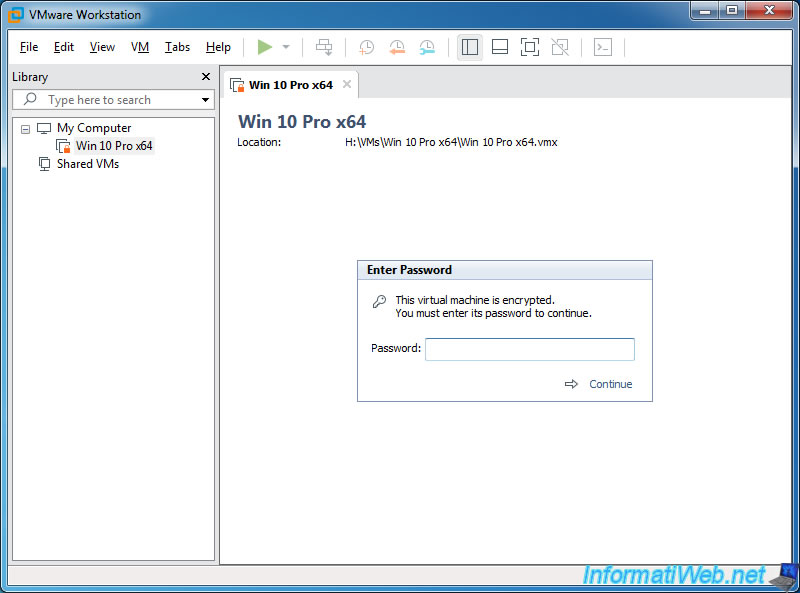
If you close VMware Workstation (or your virtual machine's tab) and select it again, you will be prompted for a password.
Except since version 17 of VMware Workstation if you had checked the "Remember the password on this machine in Credential Manager" box previously.
Since version 17, when VMware Workstation Pro asks you for the password used to encrypt this virtual machine, you will each time be able to check the "Remember the password on this machine in Credential Manager" box to avoid having to retype it each time you open this virtual machine.
Which is handy when virtualizing Windows 11 since configuration encryption is mandatory.
Warning : remember to write down this password somewhere so you don't forget it, because even if you save it on this computer so you don't have to retype it each time, you will need it again if you reinstall Windows or open this virtual machine from another computer.
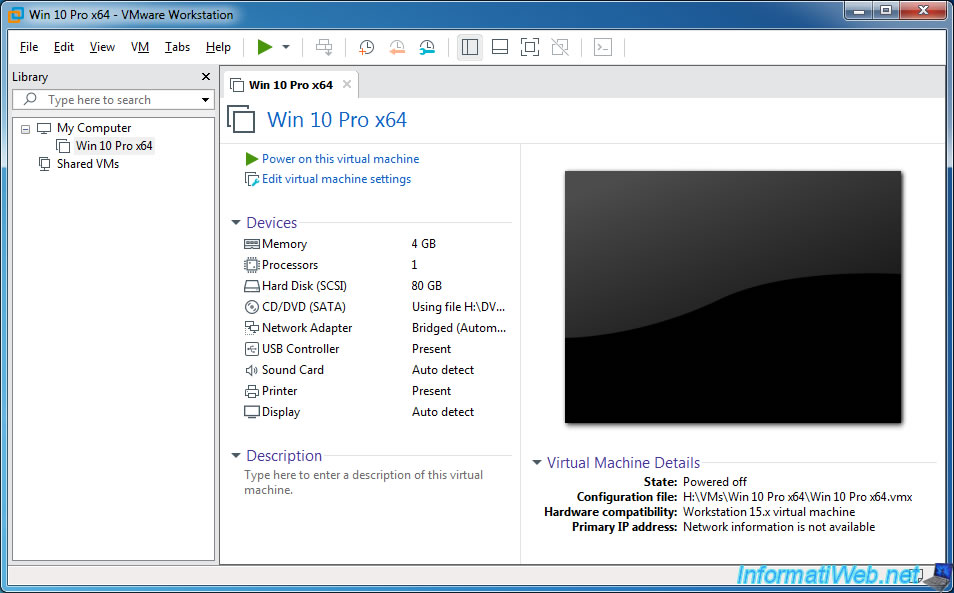
Once you have entered the correct password, the virtual machine will be usable like any other virtual machine.
The only difference is that performance can be slightly altered due to encryption/decryption of data on the fly.
Indeed, although everything will be readable in the guest OS, all changes made in it will be encrypted on the fly in the virtual hard disk of your virtual machine.
2. Restrict access to virtual machine settings
From the moment the virtual machine (as well as its configuration) is encrypted, you will have the possibility to restrict access to the settings of the virtual machine.
You can therefore allow a user to use a virtual machine by giving him the password to use it, but while blocking access to the settings of it with a second password.
As indicated on the "VMware Workstation 16 Pro Release Notes" page of the VMware site, the restrictions that you could set on virtual machines are no longer available since version 16 of VMware Workstation.
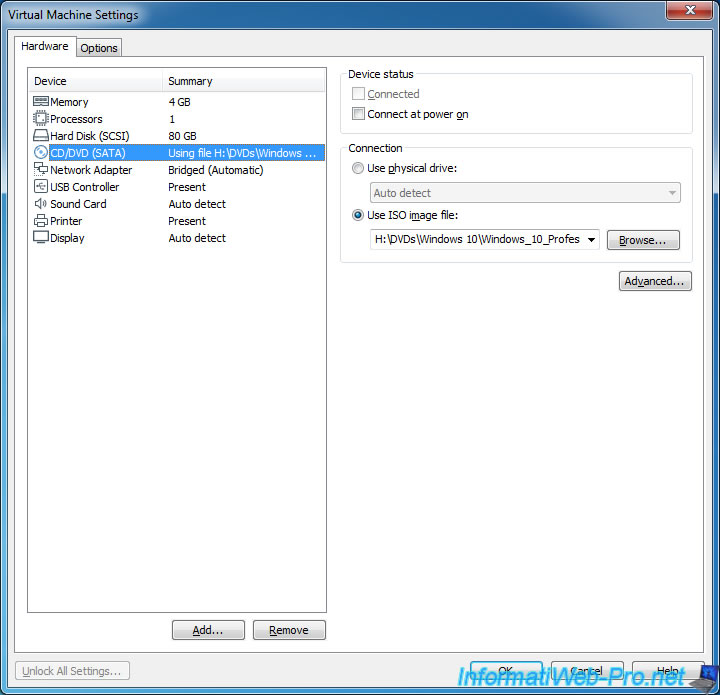
You can also allow or not hot-plug USB devices to this virtual machine to prevent, for example, spreading viruses and it retrieves data from the virtual machine to store them directly on its USB key.
You can also automatically expire the virtual machine on a specific date if you wish.
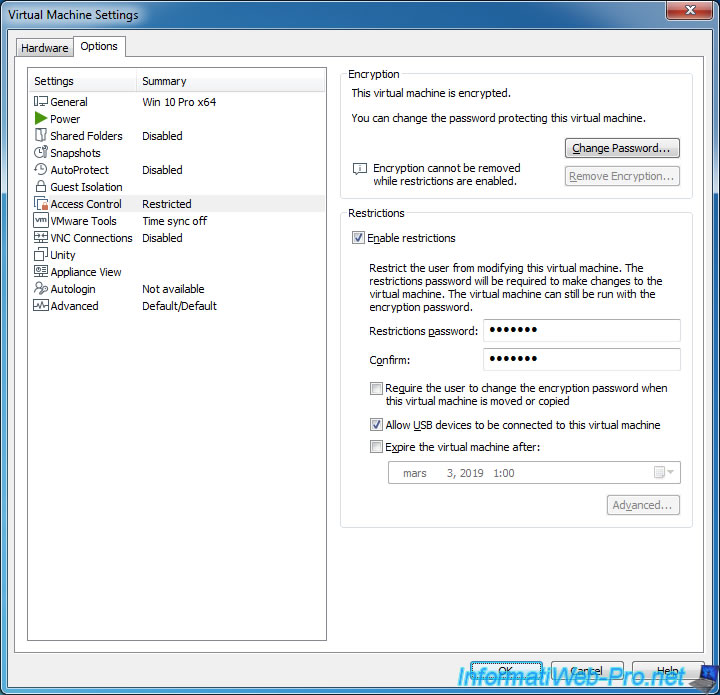
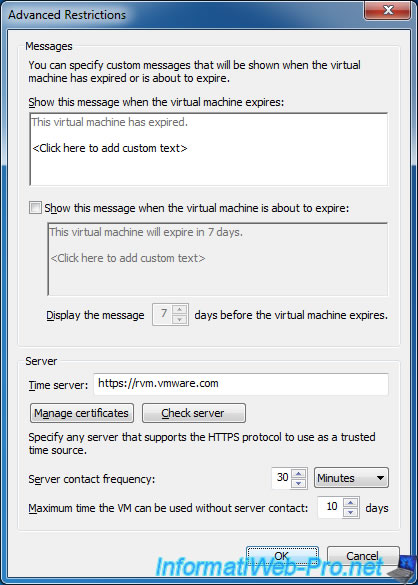
If you click the "Advanced" button at the bottom right, you can also specify the message to display when the virtual machine has expired and specify which time server to contact to find out when the virtual machine will be expired.
By default, VMware Workstation will use the VMware Time Server : https://rvm.vmware.com
Once you have activated the restrictions, close the window and return to the settings of your virtual machine.
As you can see, the settings are no longer editable and an "Enter the restrictions password to access all settings" message appeared at the bottom.
Click on this button : Unlock All Settings.
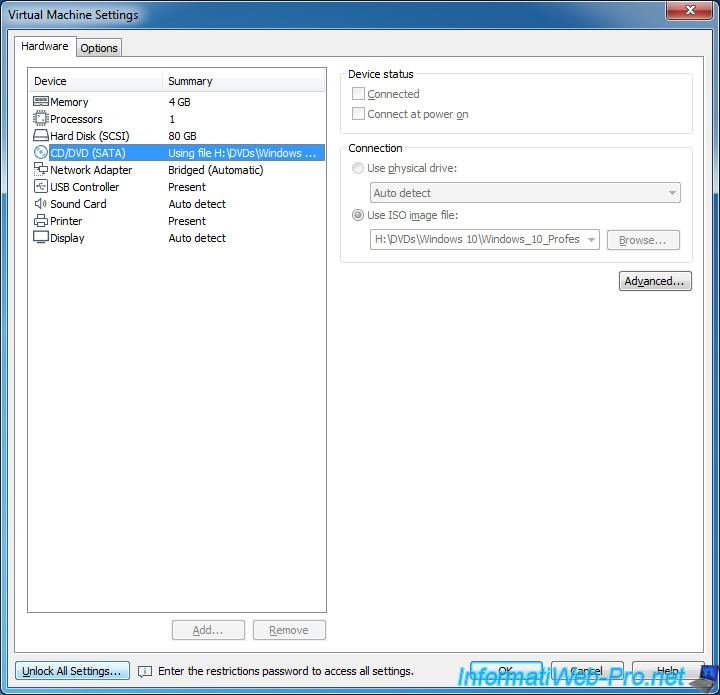
Specify the password for the restrictions.
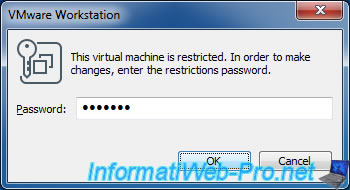
And you can change the settings of your virtual machine.
Share this tutorial
To see also
-

VMware 3/16/2013
VMware Workstation - Boot a VM on the BIOS / EFI firmware
-

VMware 2/7/2020
VMware Workstation 15 - Installation on Linux
-

VMware 12/24/2021
VMware Workstation 15 - Slice the virtual hard disk of a VM
-

VMware 12/10/2021
VMware Workstation 15.5 - Convert a Virtual PC virtual machine to a VMware VM
You must be logged in to post a comment