- VMware
- 16 October 2020 at 14:26 UTC
-


Previously, when you installed Windows 7 SP1 as a guest OS, you could install VMware Tools without problem.
However, since VMware Workstation 16, some warnings and an error occur if the guest OS is not up to date.
- Warnings displayed when installing VMware Tools on Windows 7
- Installation of prerequisites
- Install VMware Tools on Windows 7
1. Warnings displayed when installing VMware Tools on Windows 7
To begin, warnings will be displayed regarding the installation :
- VSock Virtual Machine Communication Interface Sockets driver
- Host Guest Shared Folders driver
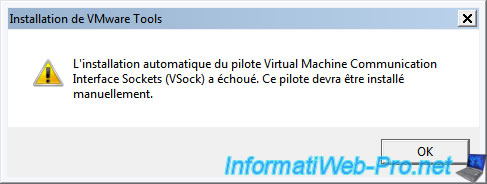
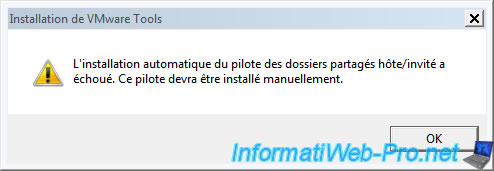
Then, you will get a "Windows can't verify the publisher of this driver software" error.
This is because VMware has updated the certificates used to sign these drivers using the SHA-2 encryption algorithm. Except that this algorithm is not supported by default by Windows 7.

2. Installation of prerequisites
To find out about the prerequisites required for installing the VMware Tools of VMware Workstation 16 on Windows 7, simply consult the informations regarding VMware Tools 11.1.5.
As you can check on the VMware site, you will see that this new version of VMware Tools requires Windows 7 SP1 with the KB4474419 update.
To get started, install Windows 7 SP1 if you haven't already.
Otherwise, download the service pack 1 of Windows 7 from the Microsoft Update catalog and install it in the virtual machine.

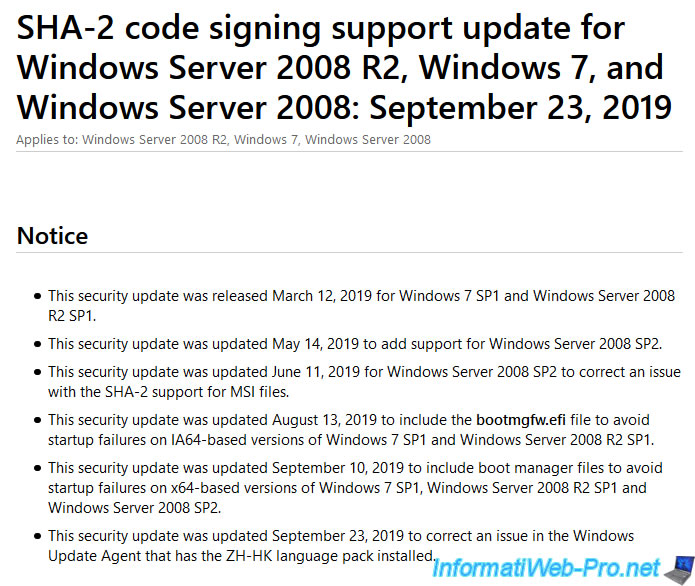
If you click on the "KB4474419" link referenced on the VMware site, you will arrive on a page : SHA-2 code signing support update ...
As you can see, this update will add support for the SHA-2 algorithm for code signing.
This will allow Windows 7 to be able to correctly check the signature of the various drivers that will be installed by VMware Tools in your virtual machine.
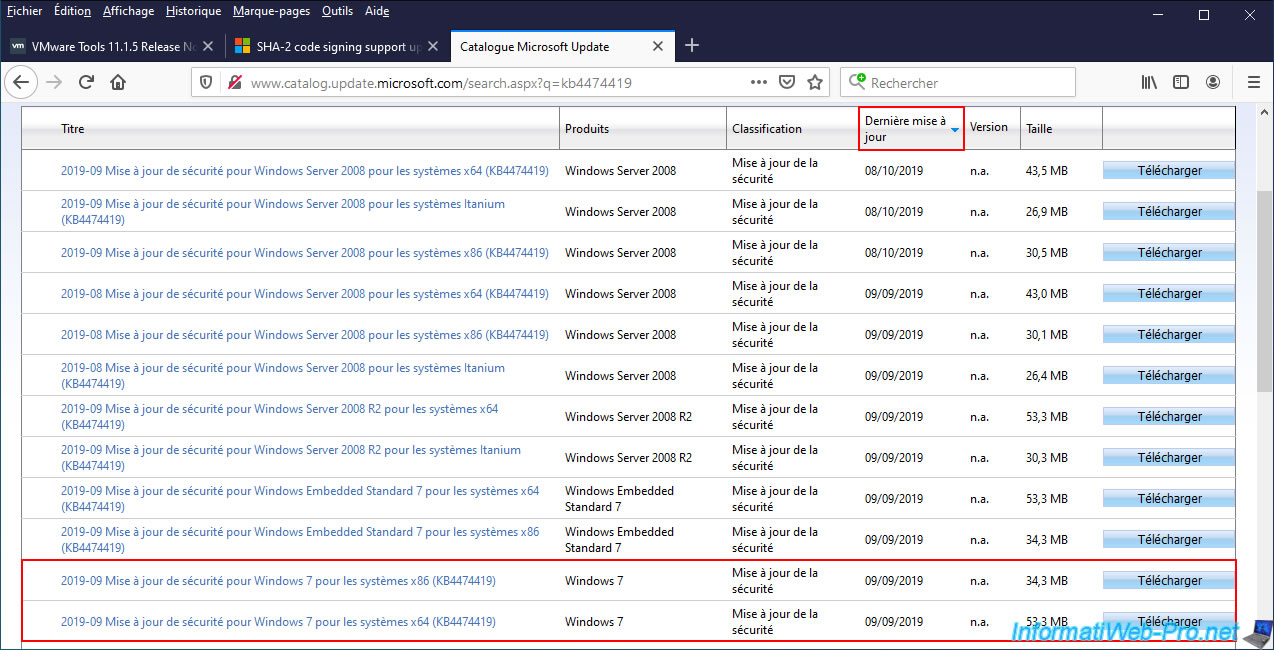
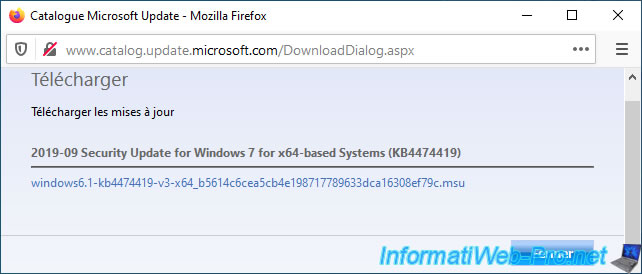
To download this update, you can use Windows Update or download it manually from the Microsoft Update Catalog by clicking on this link : KB4474419.
On the site that appears, sort the list by date of the last update to find the most recent version of this Windows update and download the one adapted to the architecture of Windows 7 that you have installed :
- Windows 7 x86 : Windows 7 in 32-bit
- Windows 7 x64 : Windows 7 in 64-bit
Once you click on the "Download" button, you will have a small window like this with a download link.
Just click on it to download this update.
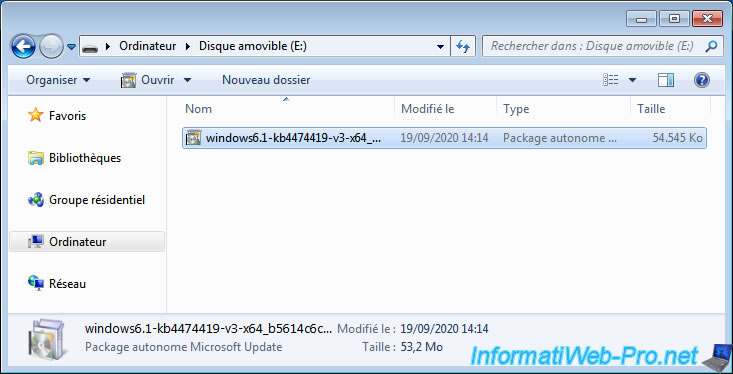
To transfer this update to the virtual machine, you have several options :
- download it directly from the virtual machine
- store it on an USB key and plug it virtually into your virtual machine from the VMware Workstation interface.
Indeed, drag/drop and VMware Workstation shared folders don't work for the moment since VMware Tools are not installed in your virtual machine.
Launch the downloaded file and a window will appear telling you : Security Update for Windows (KB4474419).

Wait while this Windows update is installed.
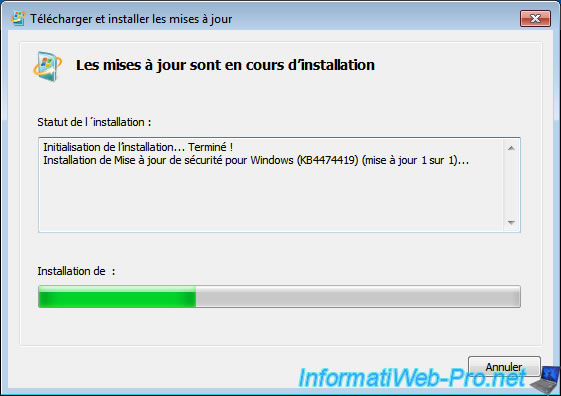
Restart the virtual machine after its installation is complete.
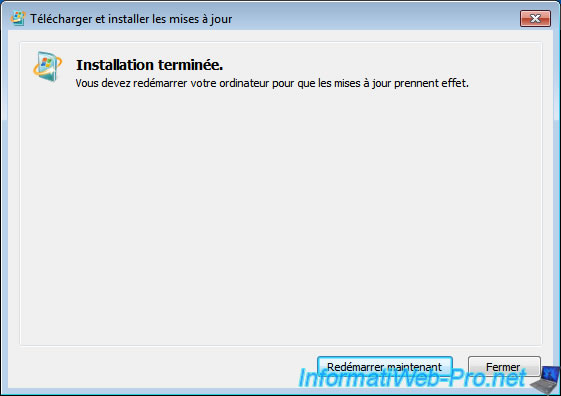
The "Configuring Windows updates" message appears while restarting the virtual machine.

3. Install VMware Tools on Windows 7
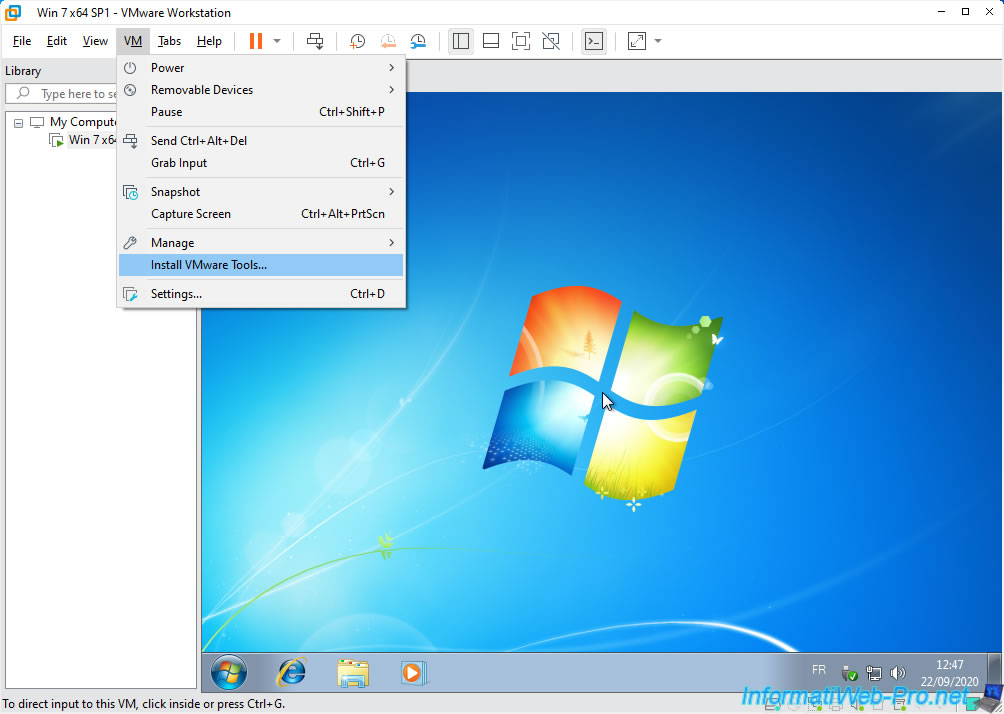
Now, you can install VMware Tools by clicking on : VM -> Install VMware Tools.
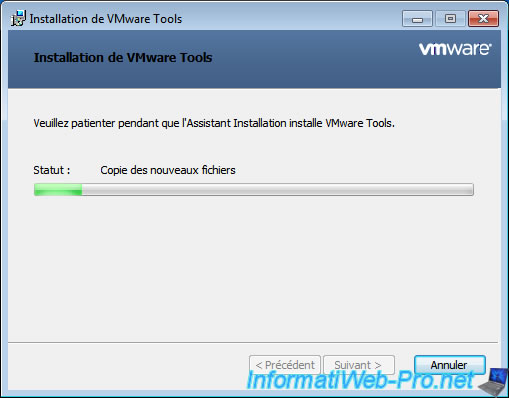
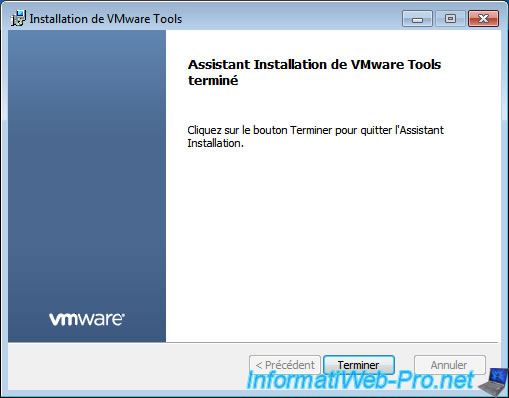
Wait while the VMware Tools install.
As expected, the installation completes without any warning and without any error.
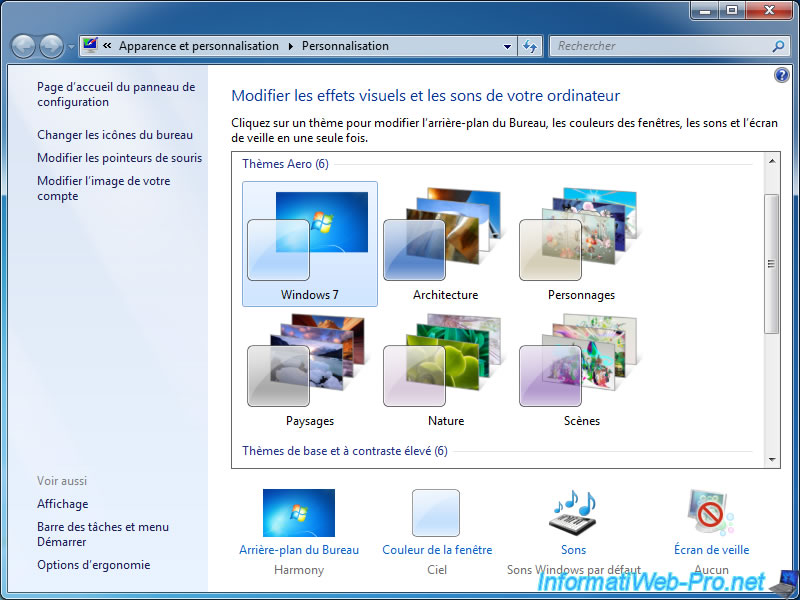
Once the virtual machine has restarted, don't forget to activate Windows 7 aero, by right-clicking "Personalize" on the desktop, then clicking on the "Windows 7" Aero theme.
Share this tutorial
To see also
-

VMware 3/16/2013
VMware Workstation - Boot a VM on the BIOS / EFI firmware
-

VMware 2/7/2020
VMware Workstation 15 - Installation on Linux
-

VMware 12/24/2021
VMware Workstation 15 - Slice the virtual hard disk of a VM
-

VMware 12/10/2021
VMware Workstation 15.5 - Convert a Virtual PC virtual machine to a VMware VM
You must be logged in to post a comment